
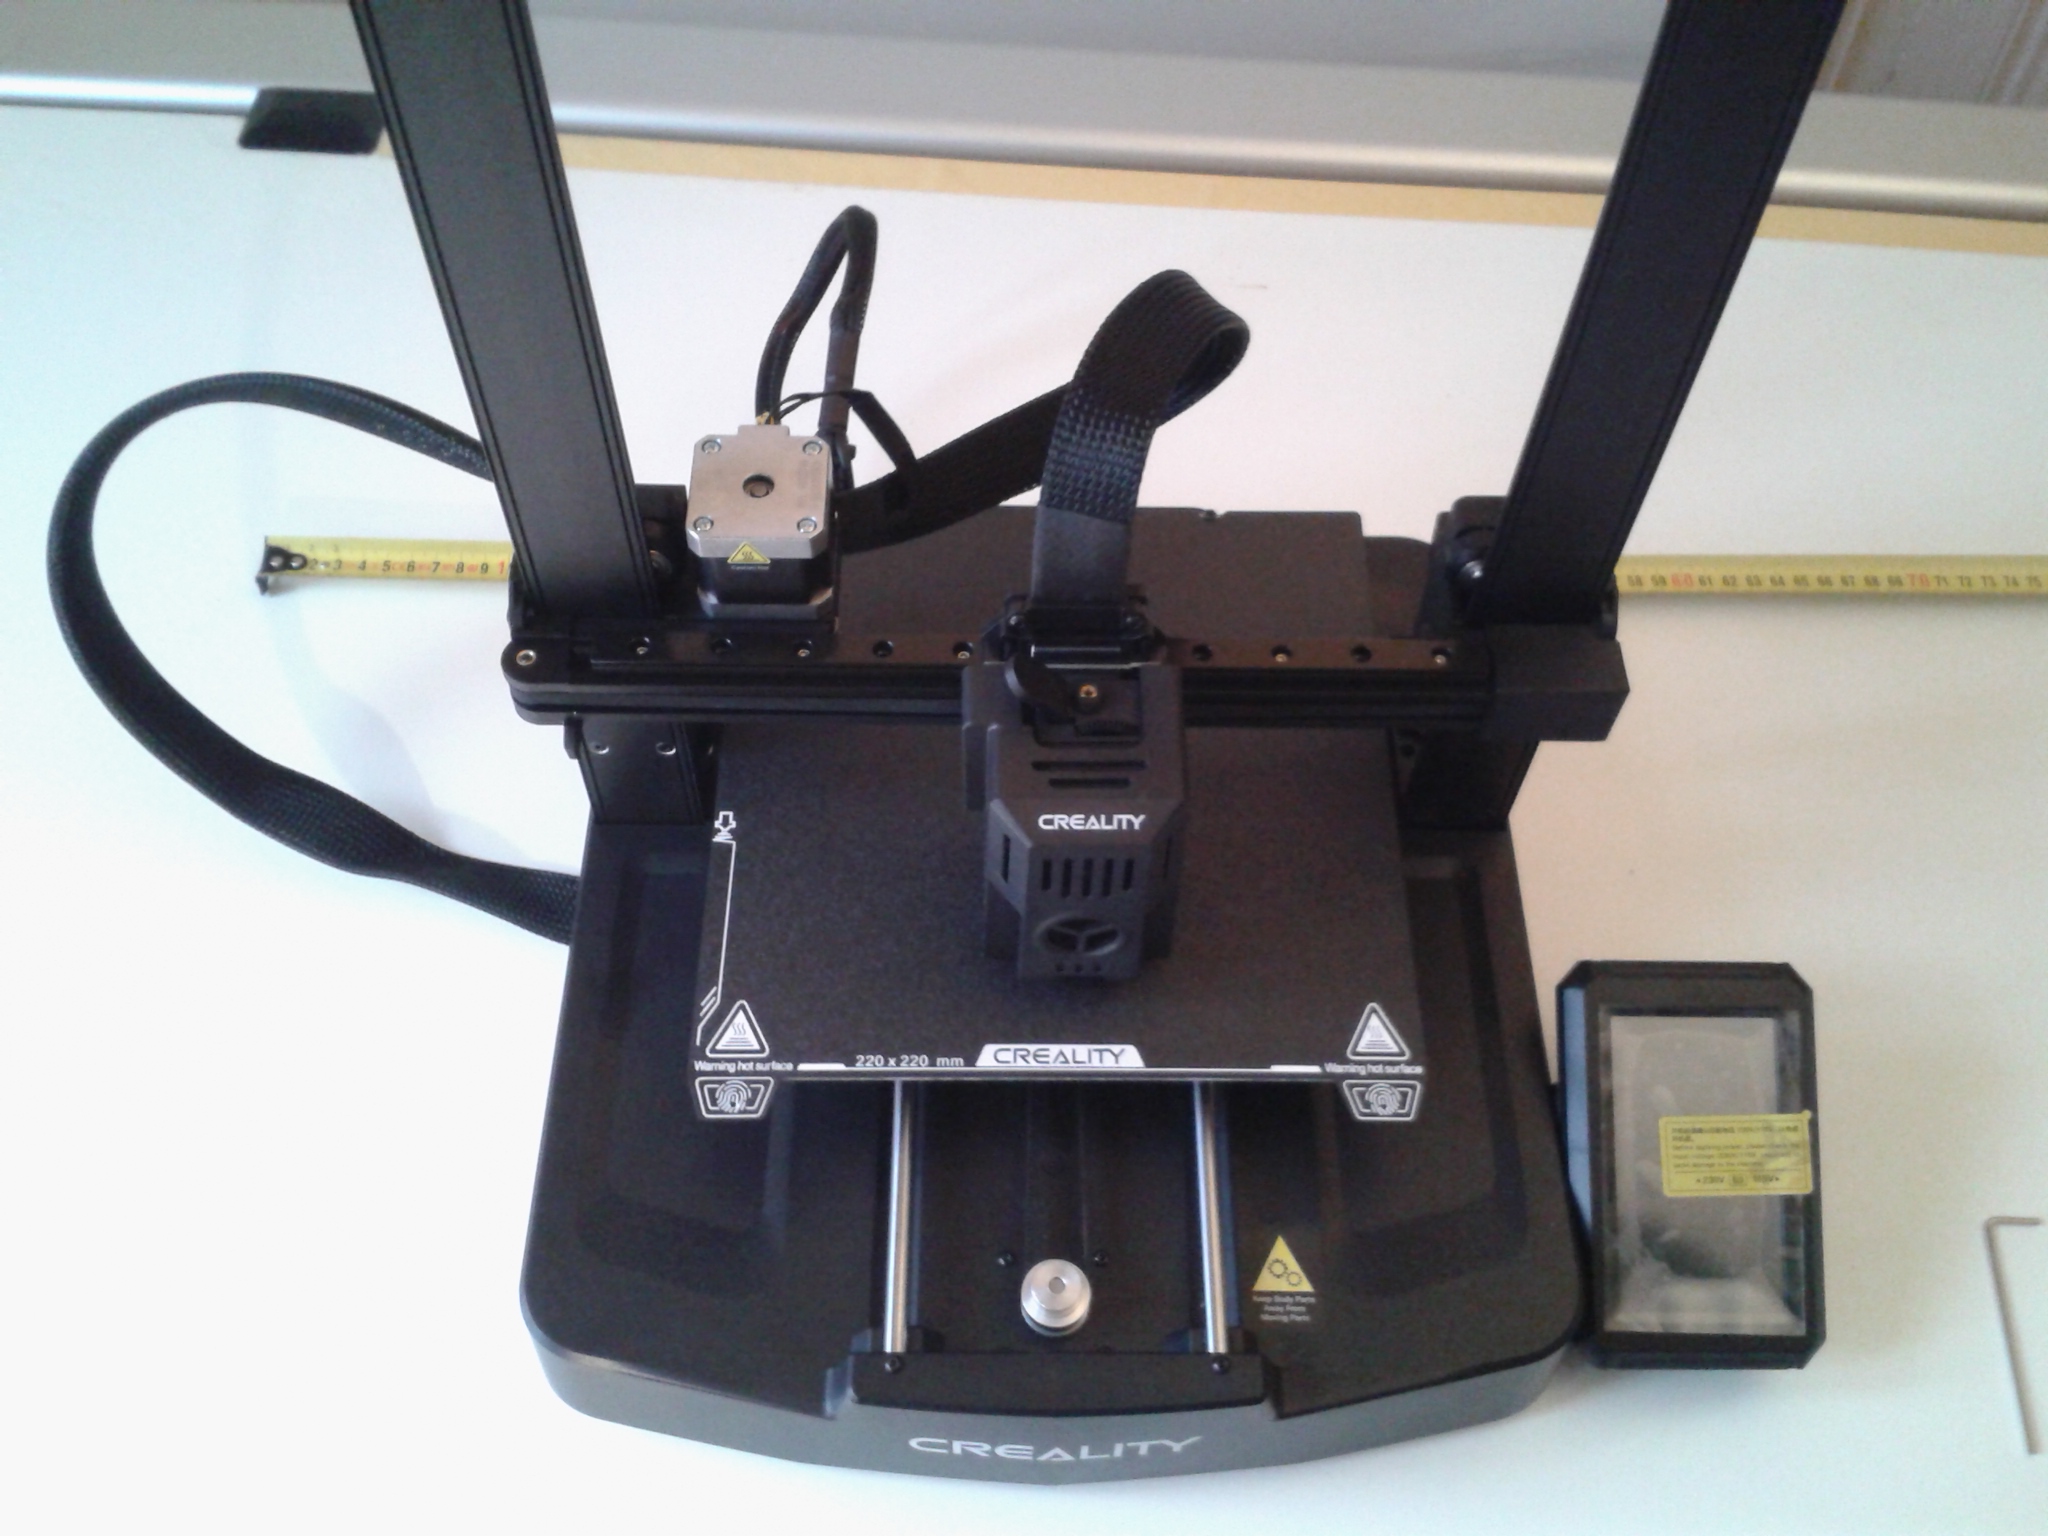
J’ai le plaisir de recevoir une Creality Ender-3 V3 KE pour en faire un test complet. Cette “Ender-3 V3 KE” est structurellement très proche de la “Ender-3 V3 SE” et permet d’obtenir de plus grandes vitesses d’impression, tout en conservant une bonne qualité et de profiter d’un contrôle à distance via Wi-Fi.
Comme à mon habitude, cet article de test synthétise mon sujet de découverte de la Creality Ender-3 V3 KE sur le forum, que je vous invite à parcourir pour plus de détails et de photos.
Fiche technique de la Creality Ender-3 V3 KE
Pour soutenir ces vitesses d’impressions qui pourraient atteindre de pointes de 500 mm/s, permise par le “Nebula Pad“, quelques éléments de la “Ender-3 V3 SE” ont été changés par des plus performants ou plus robustes.
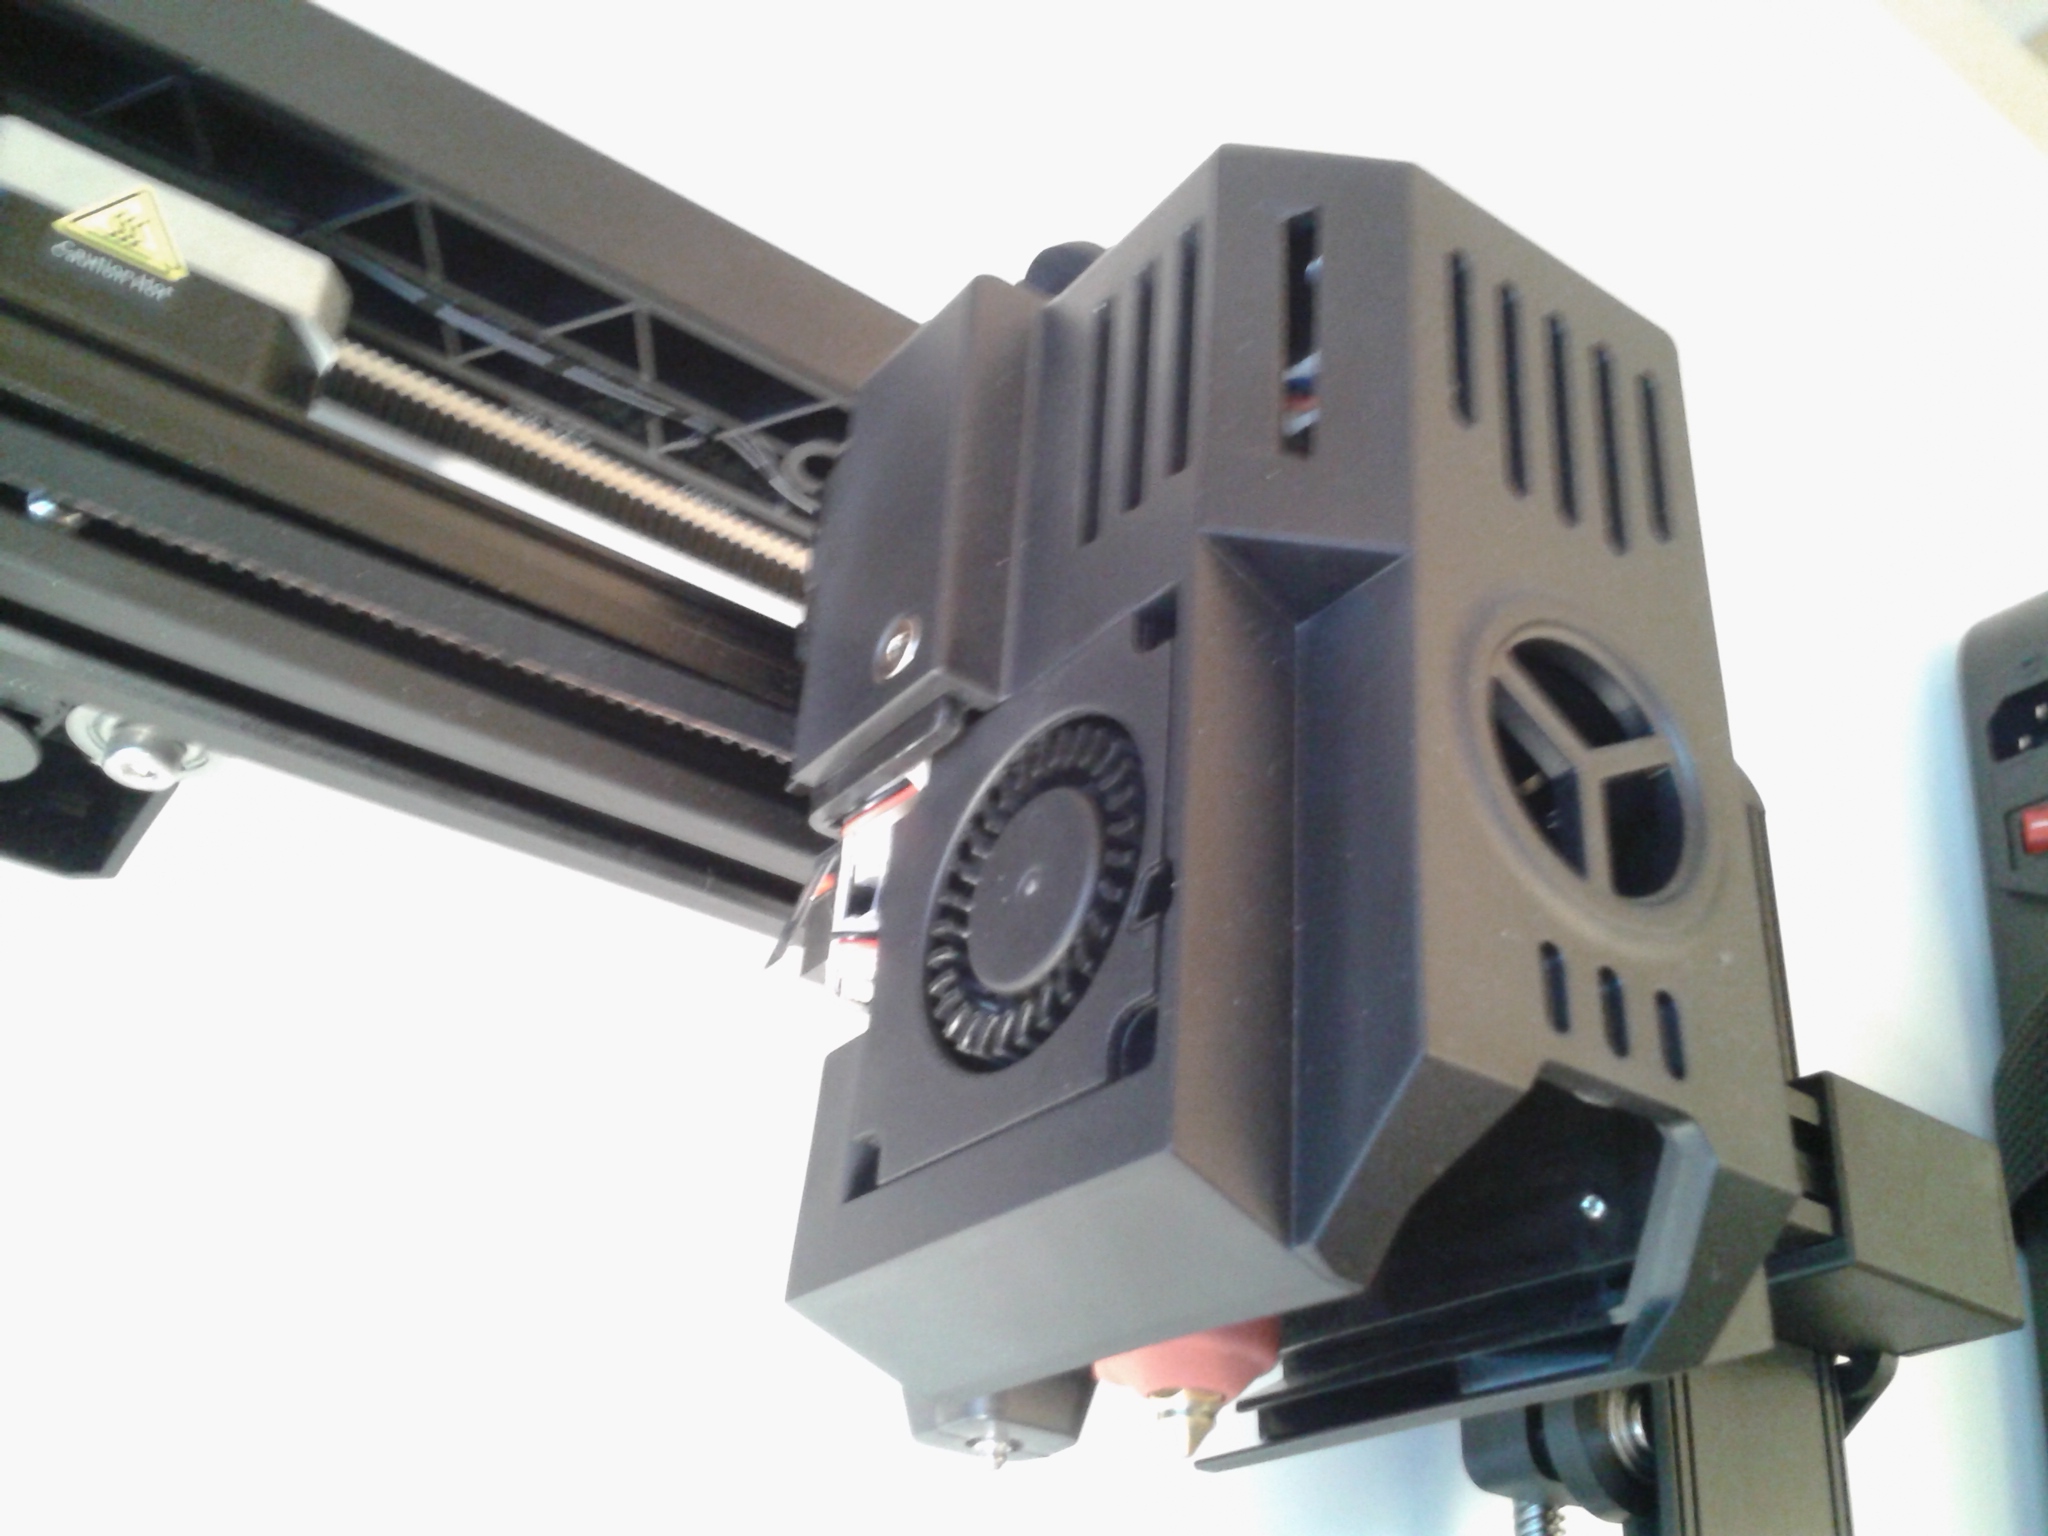
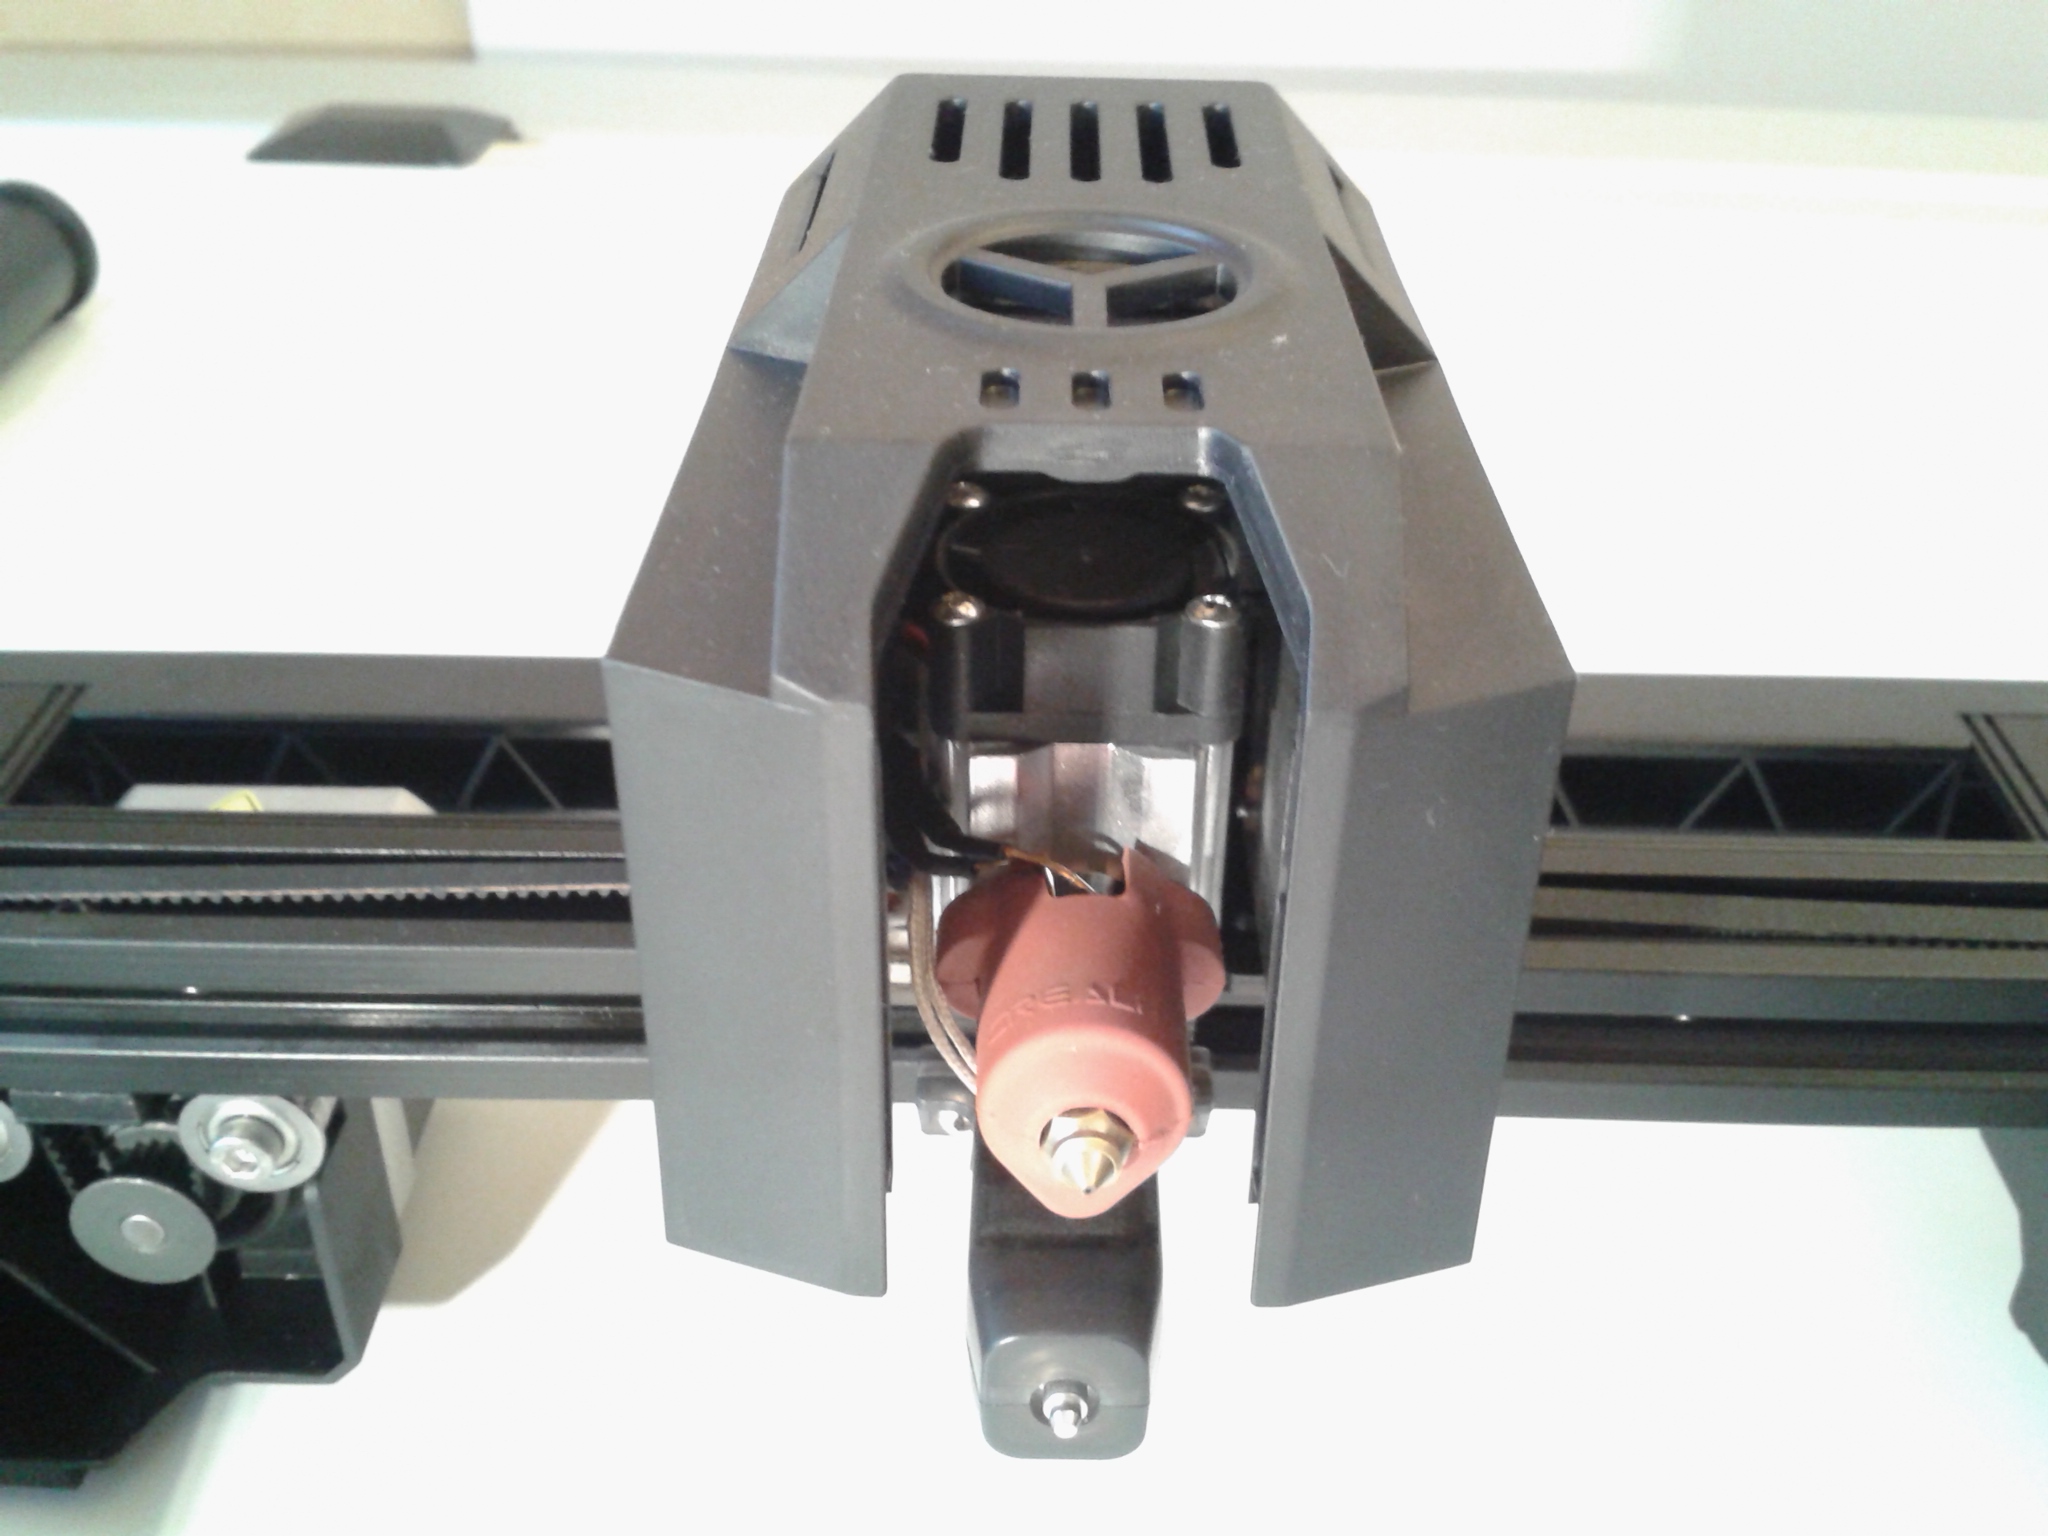
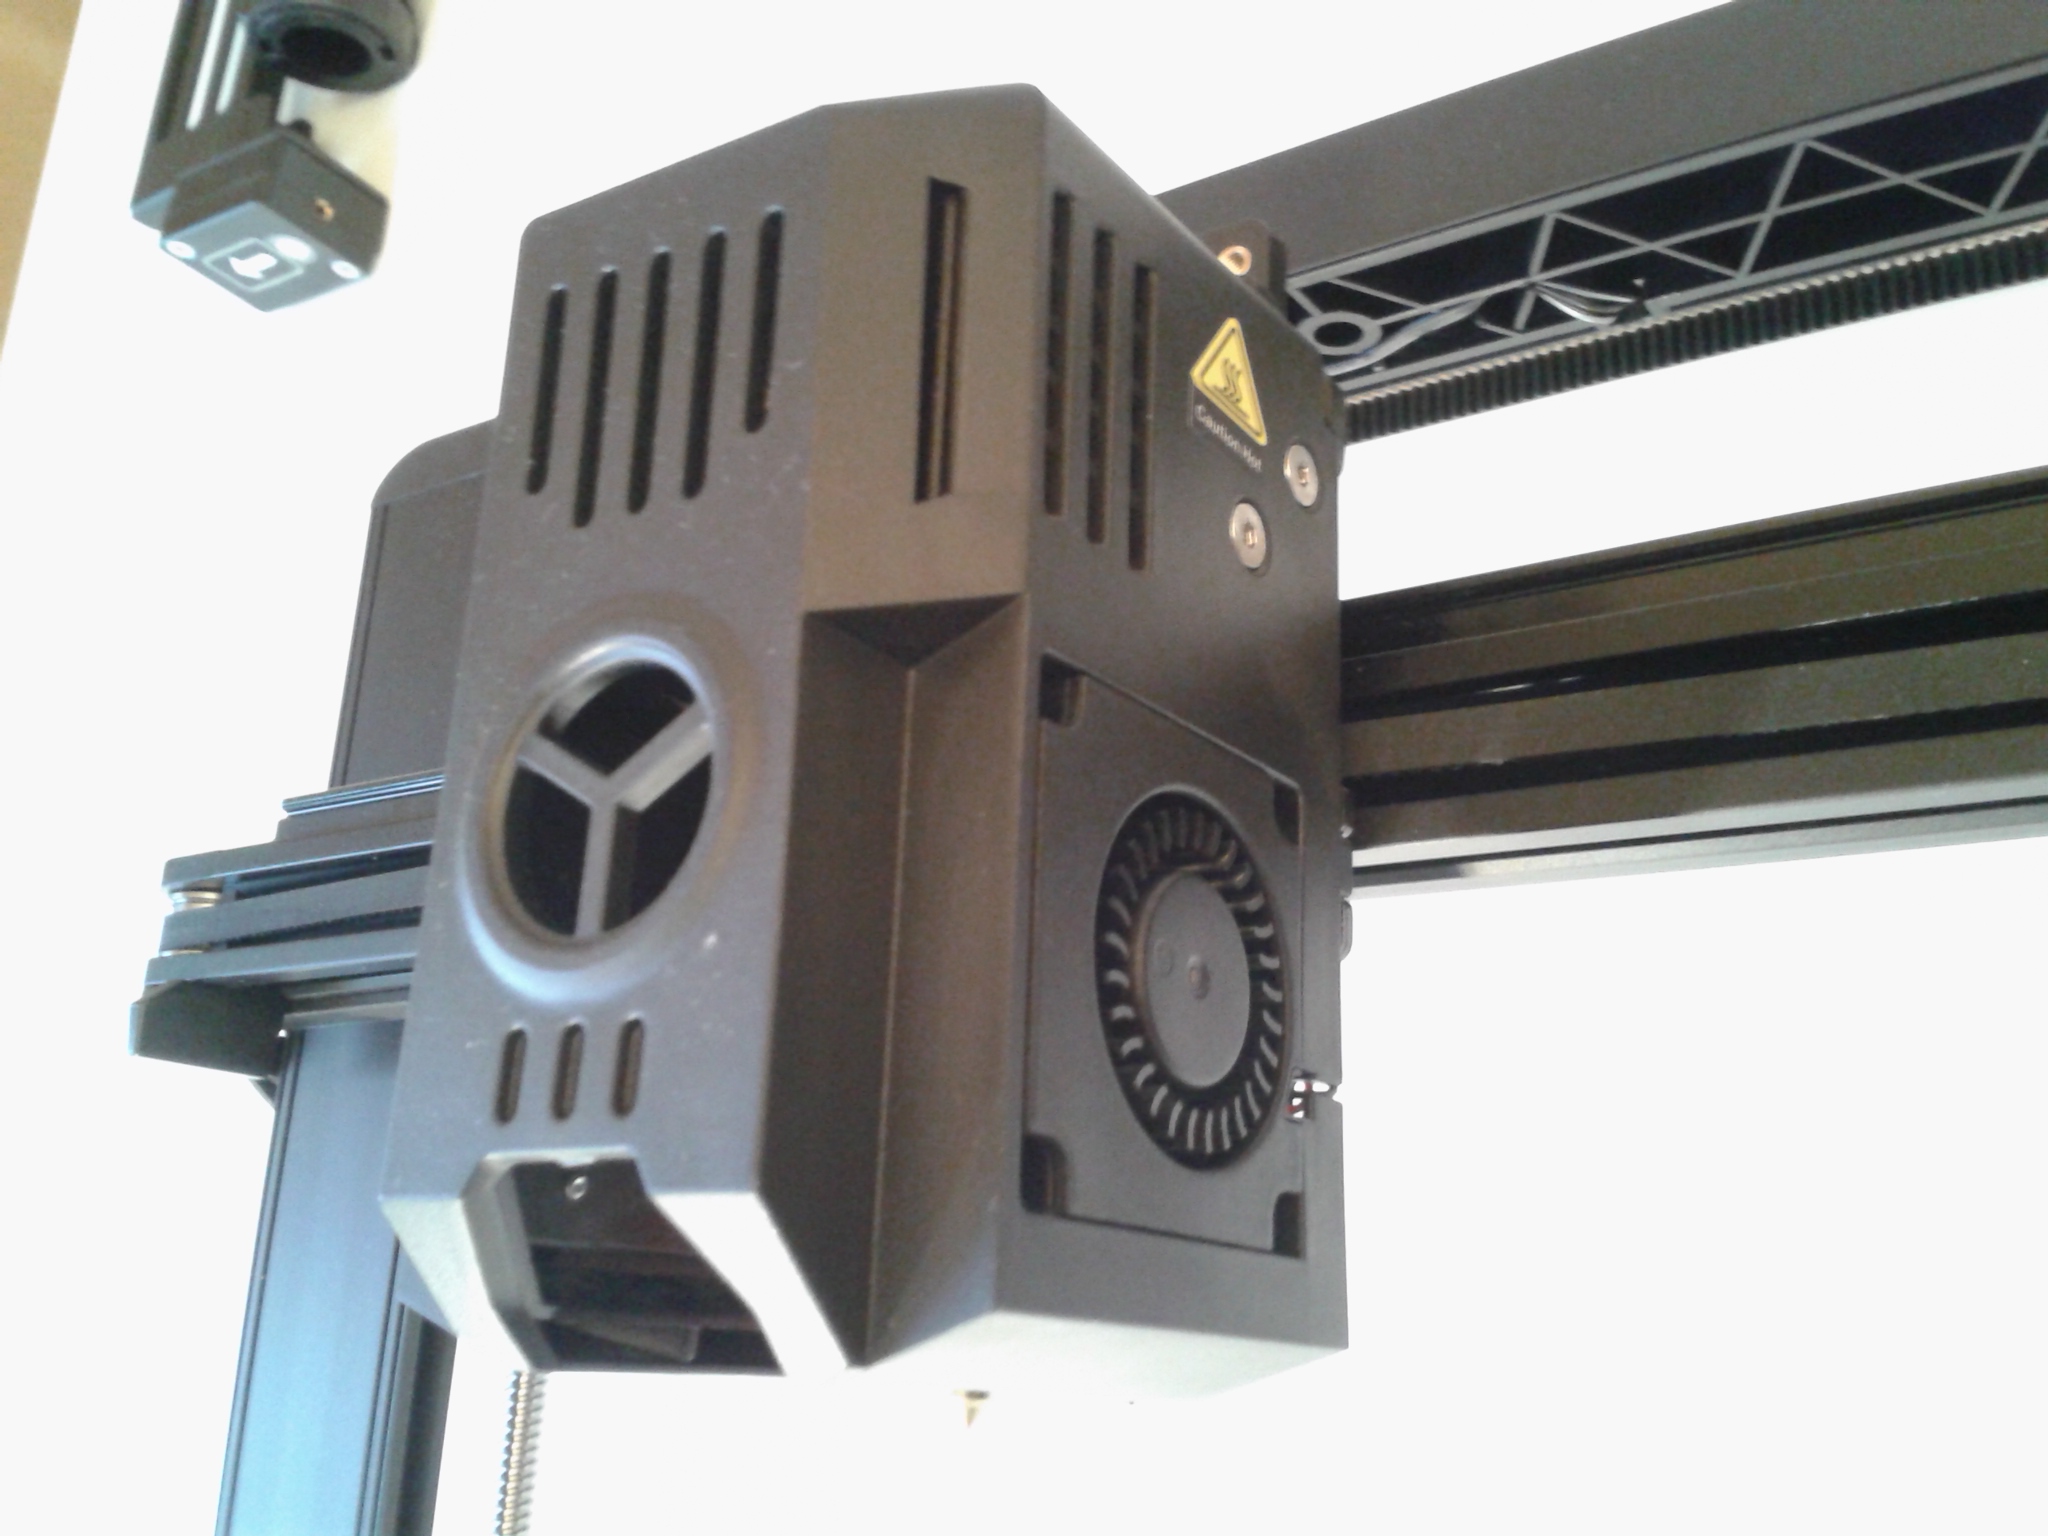
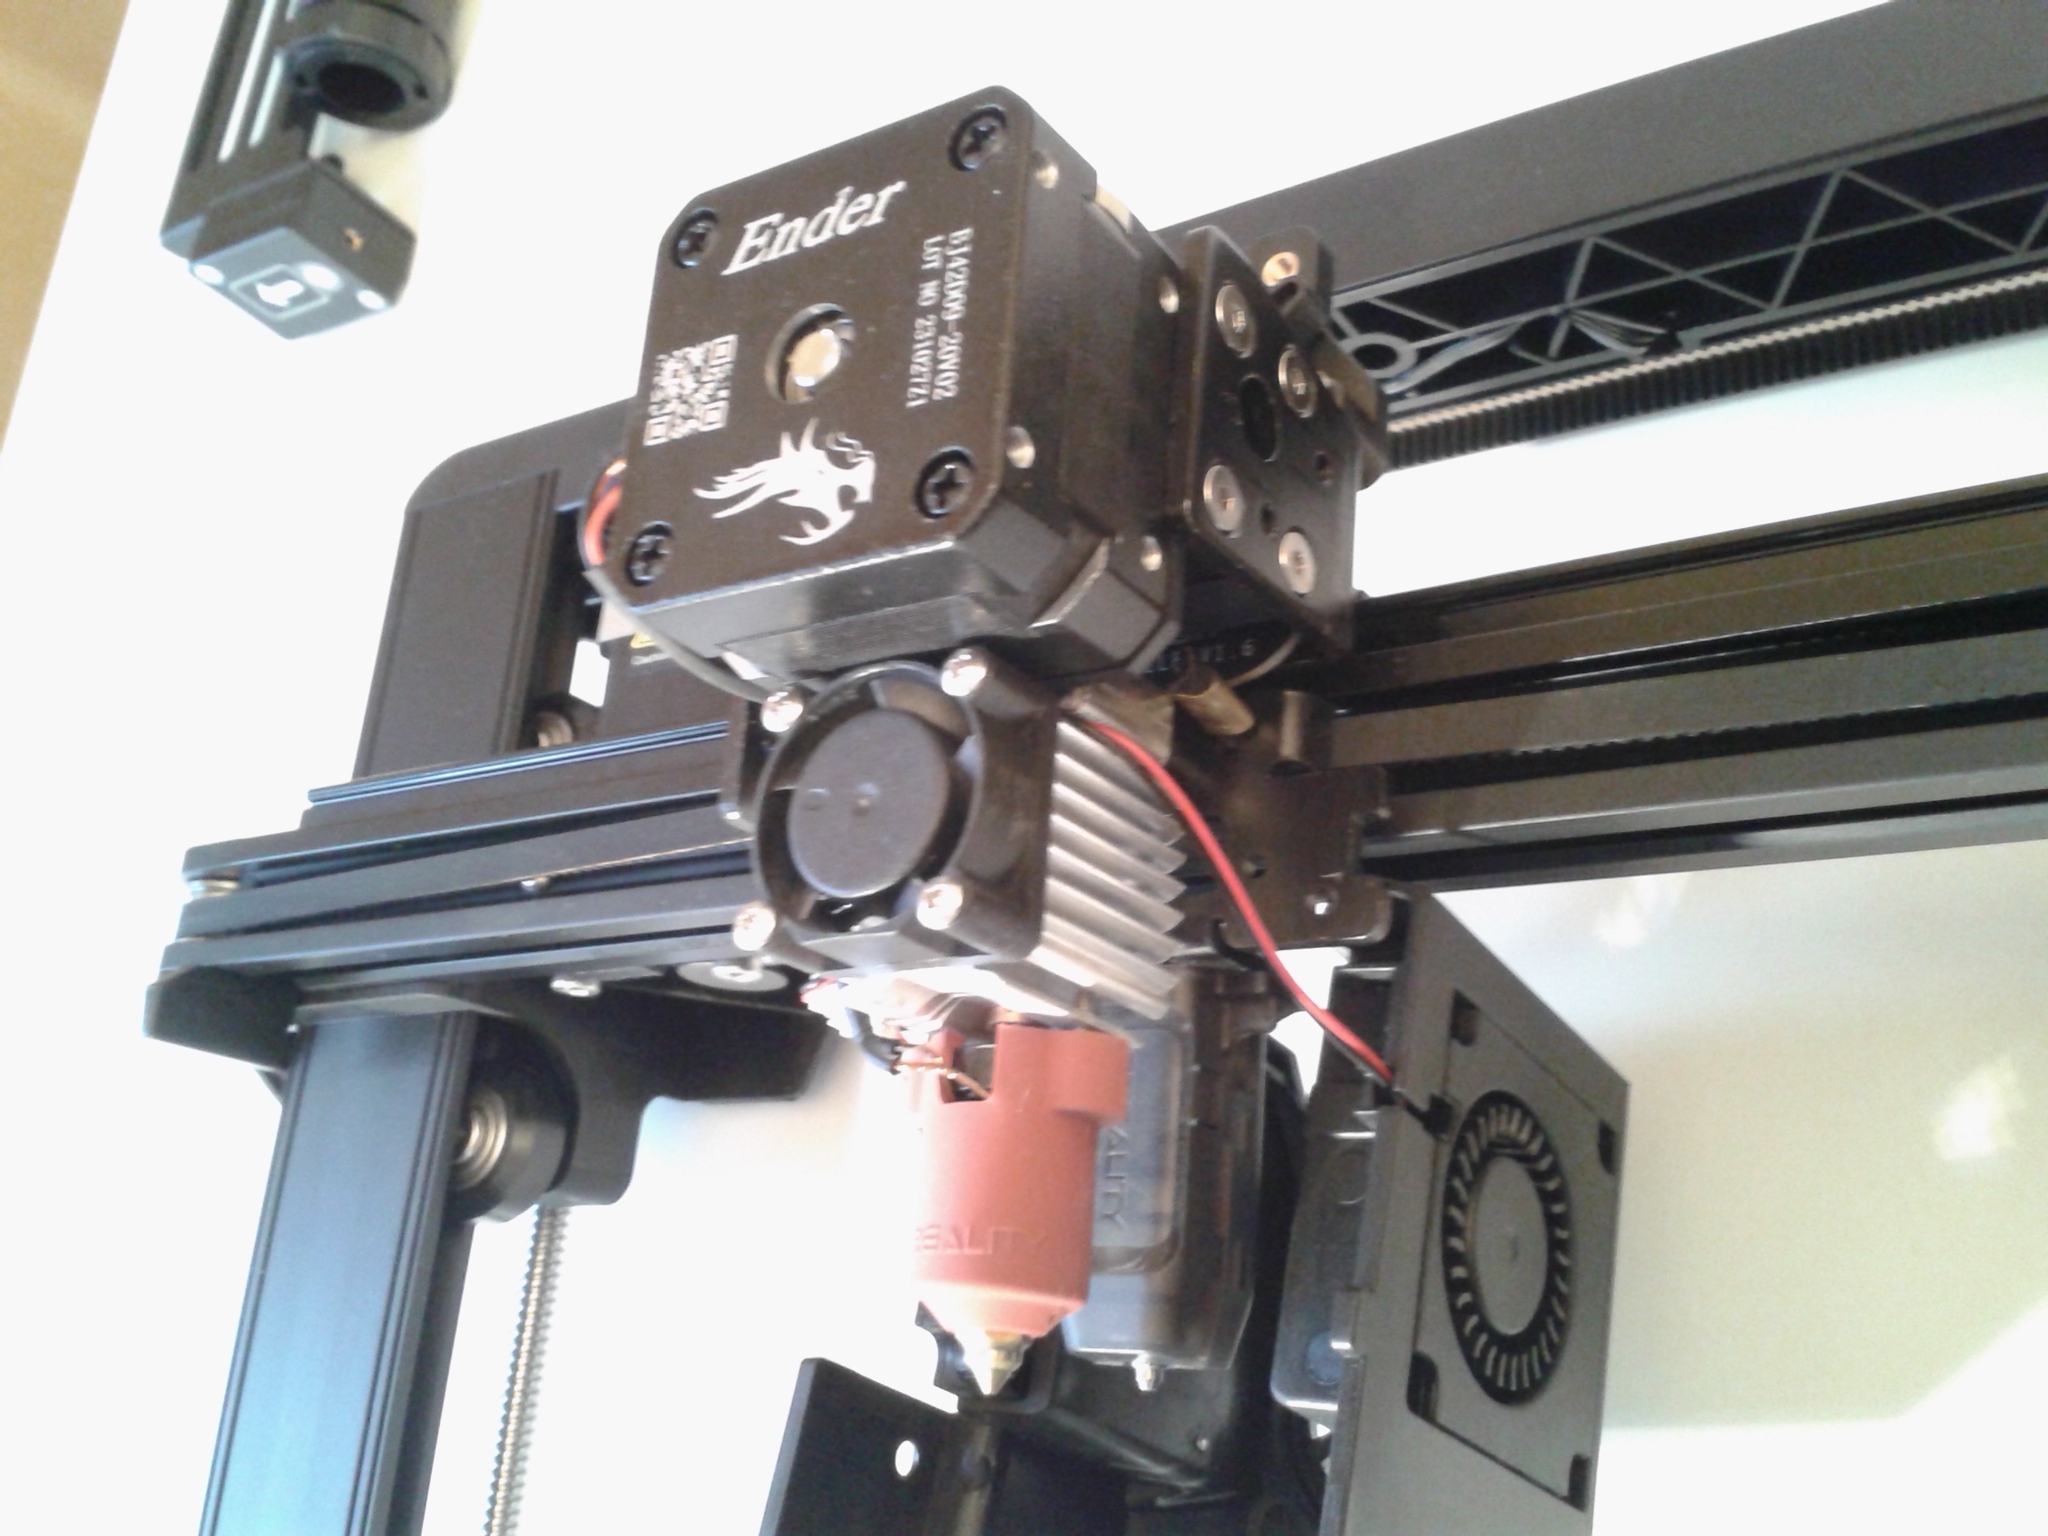
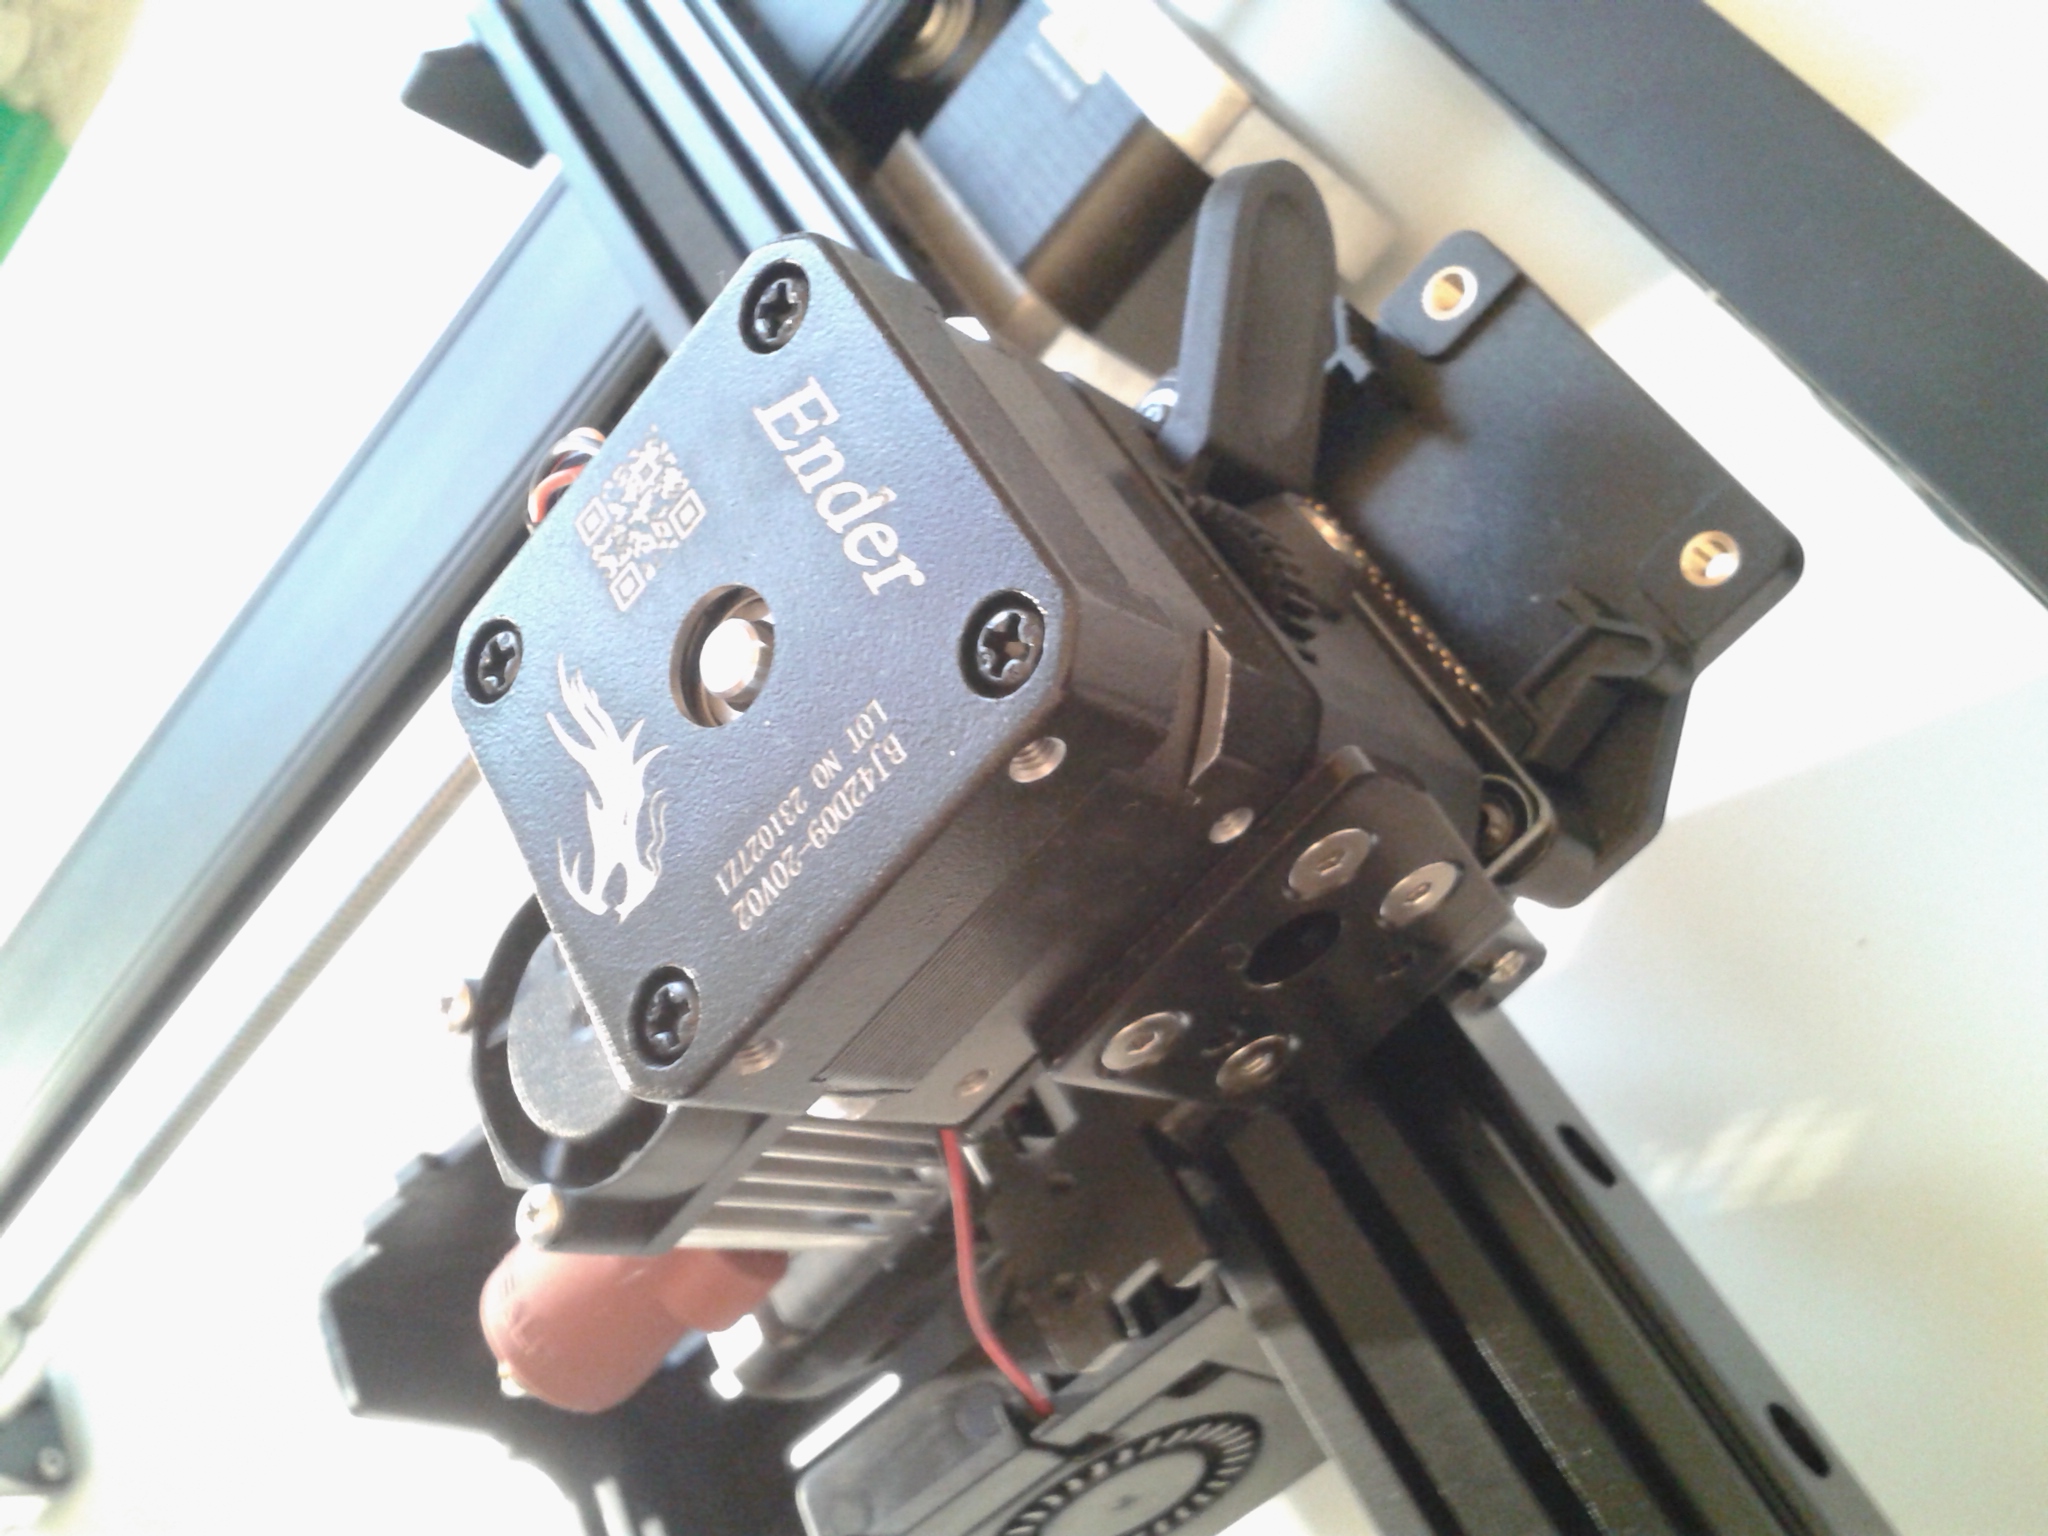
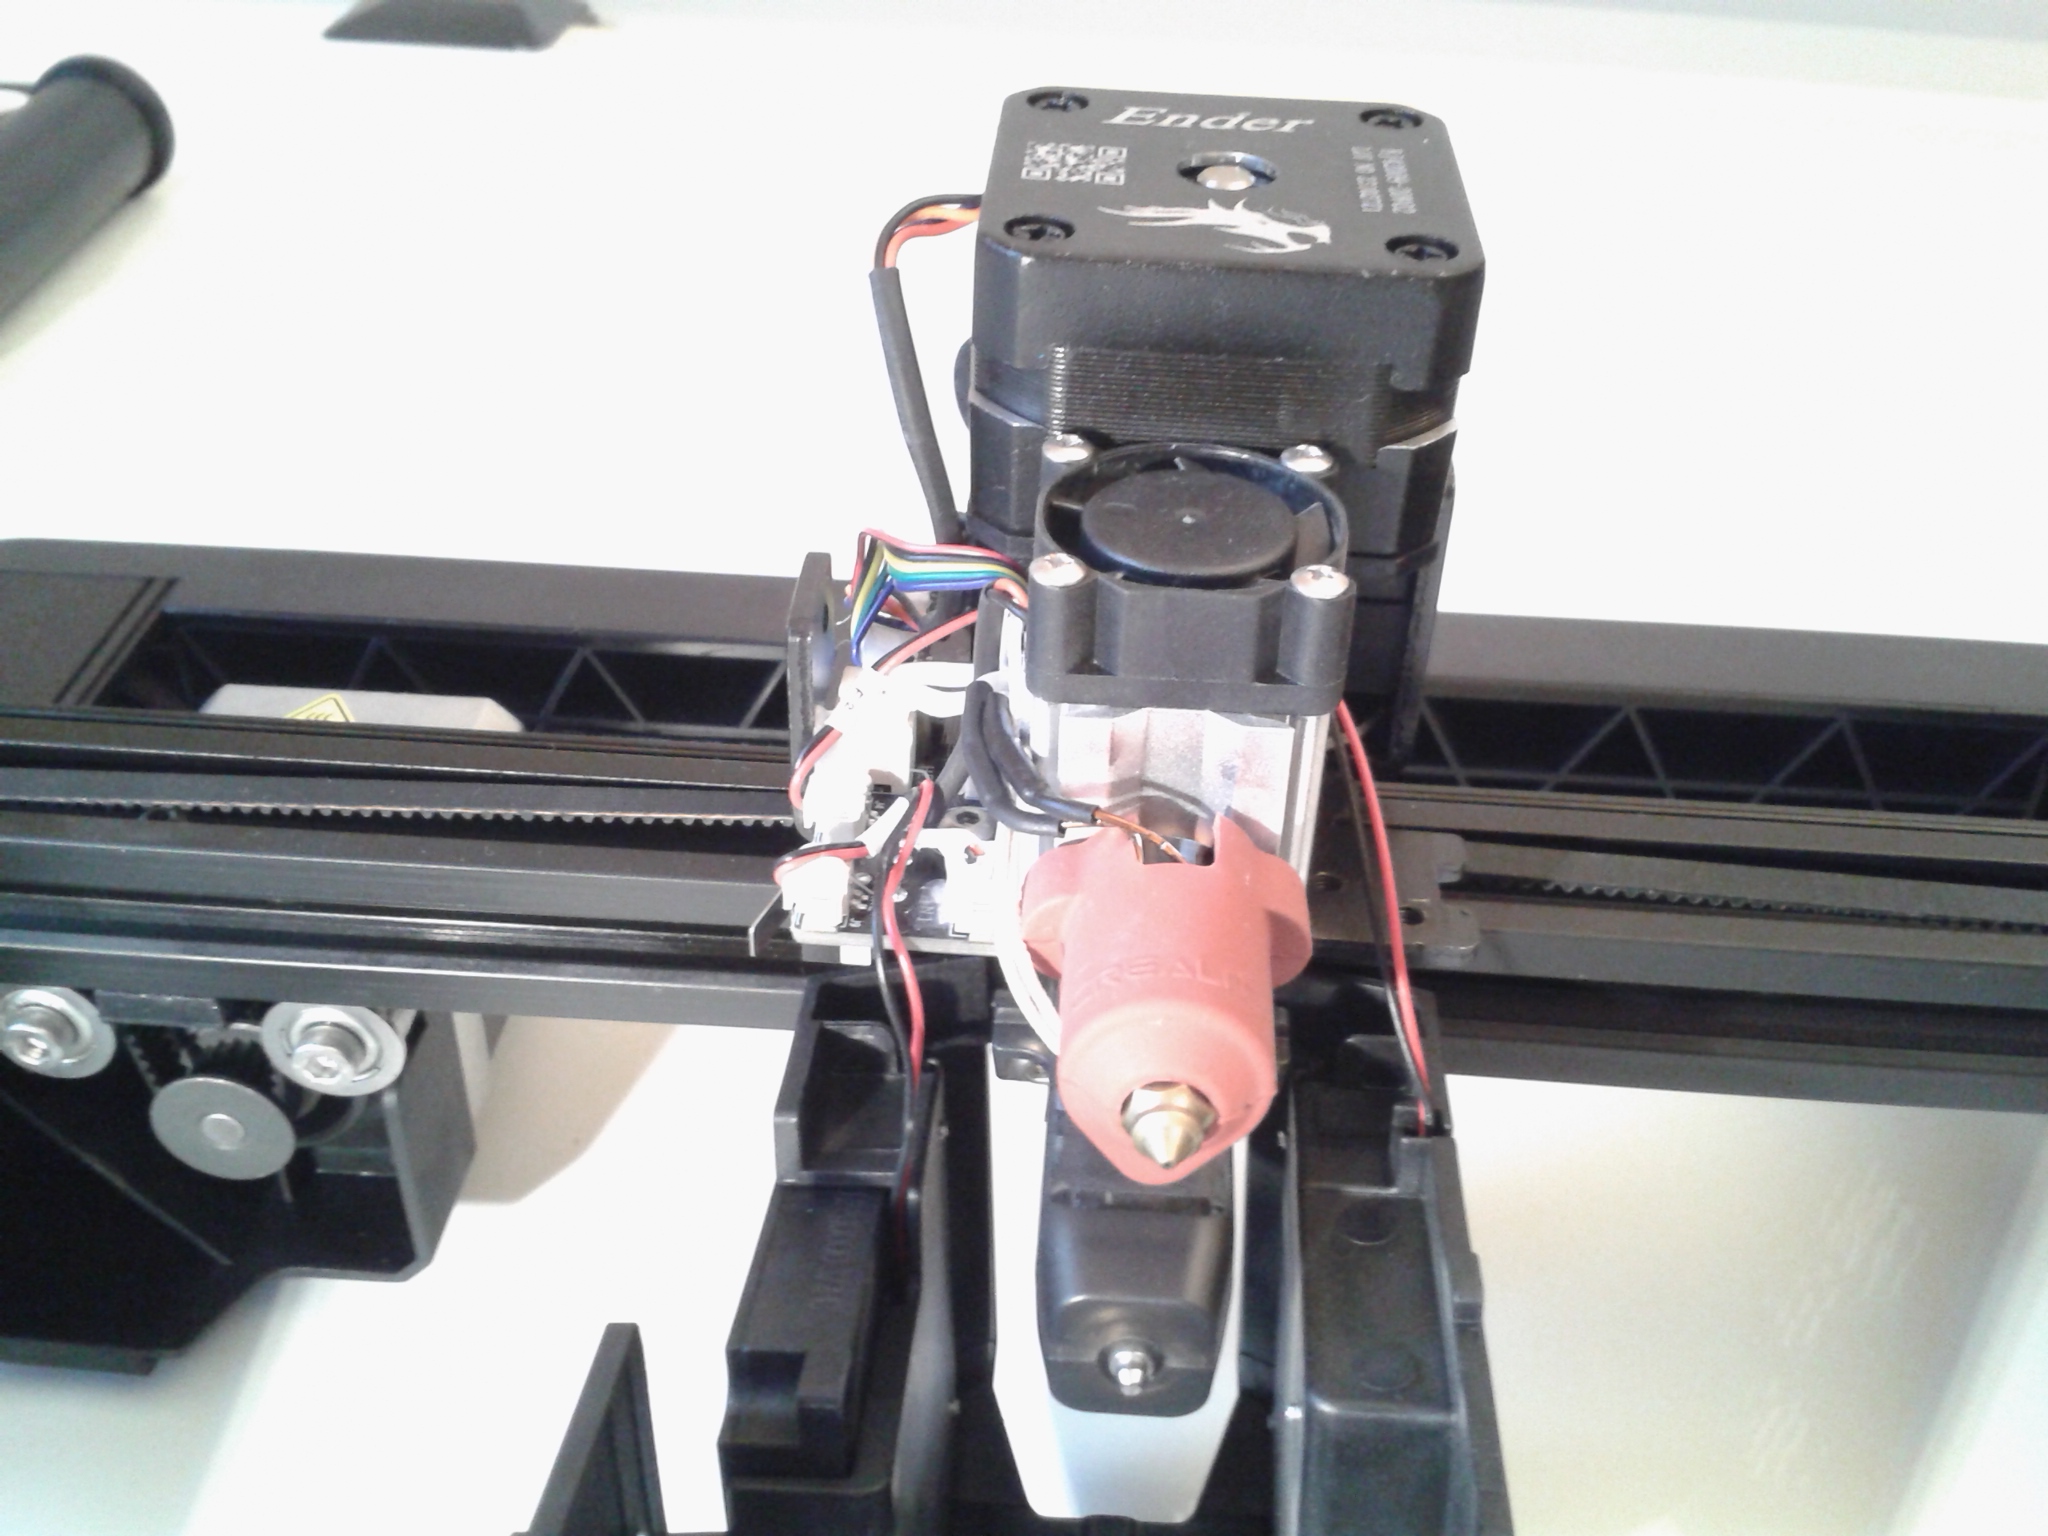
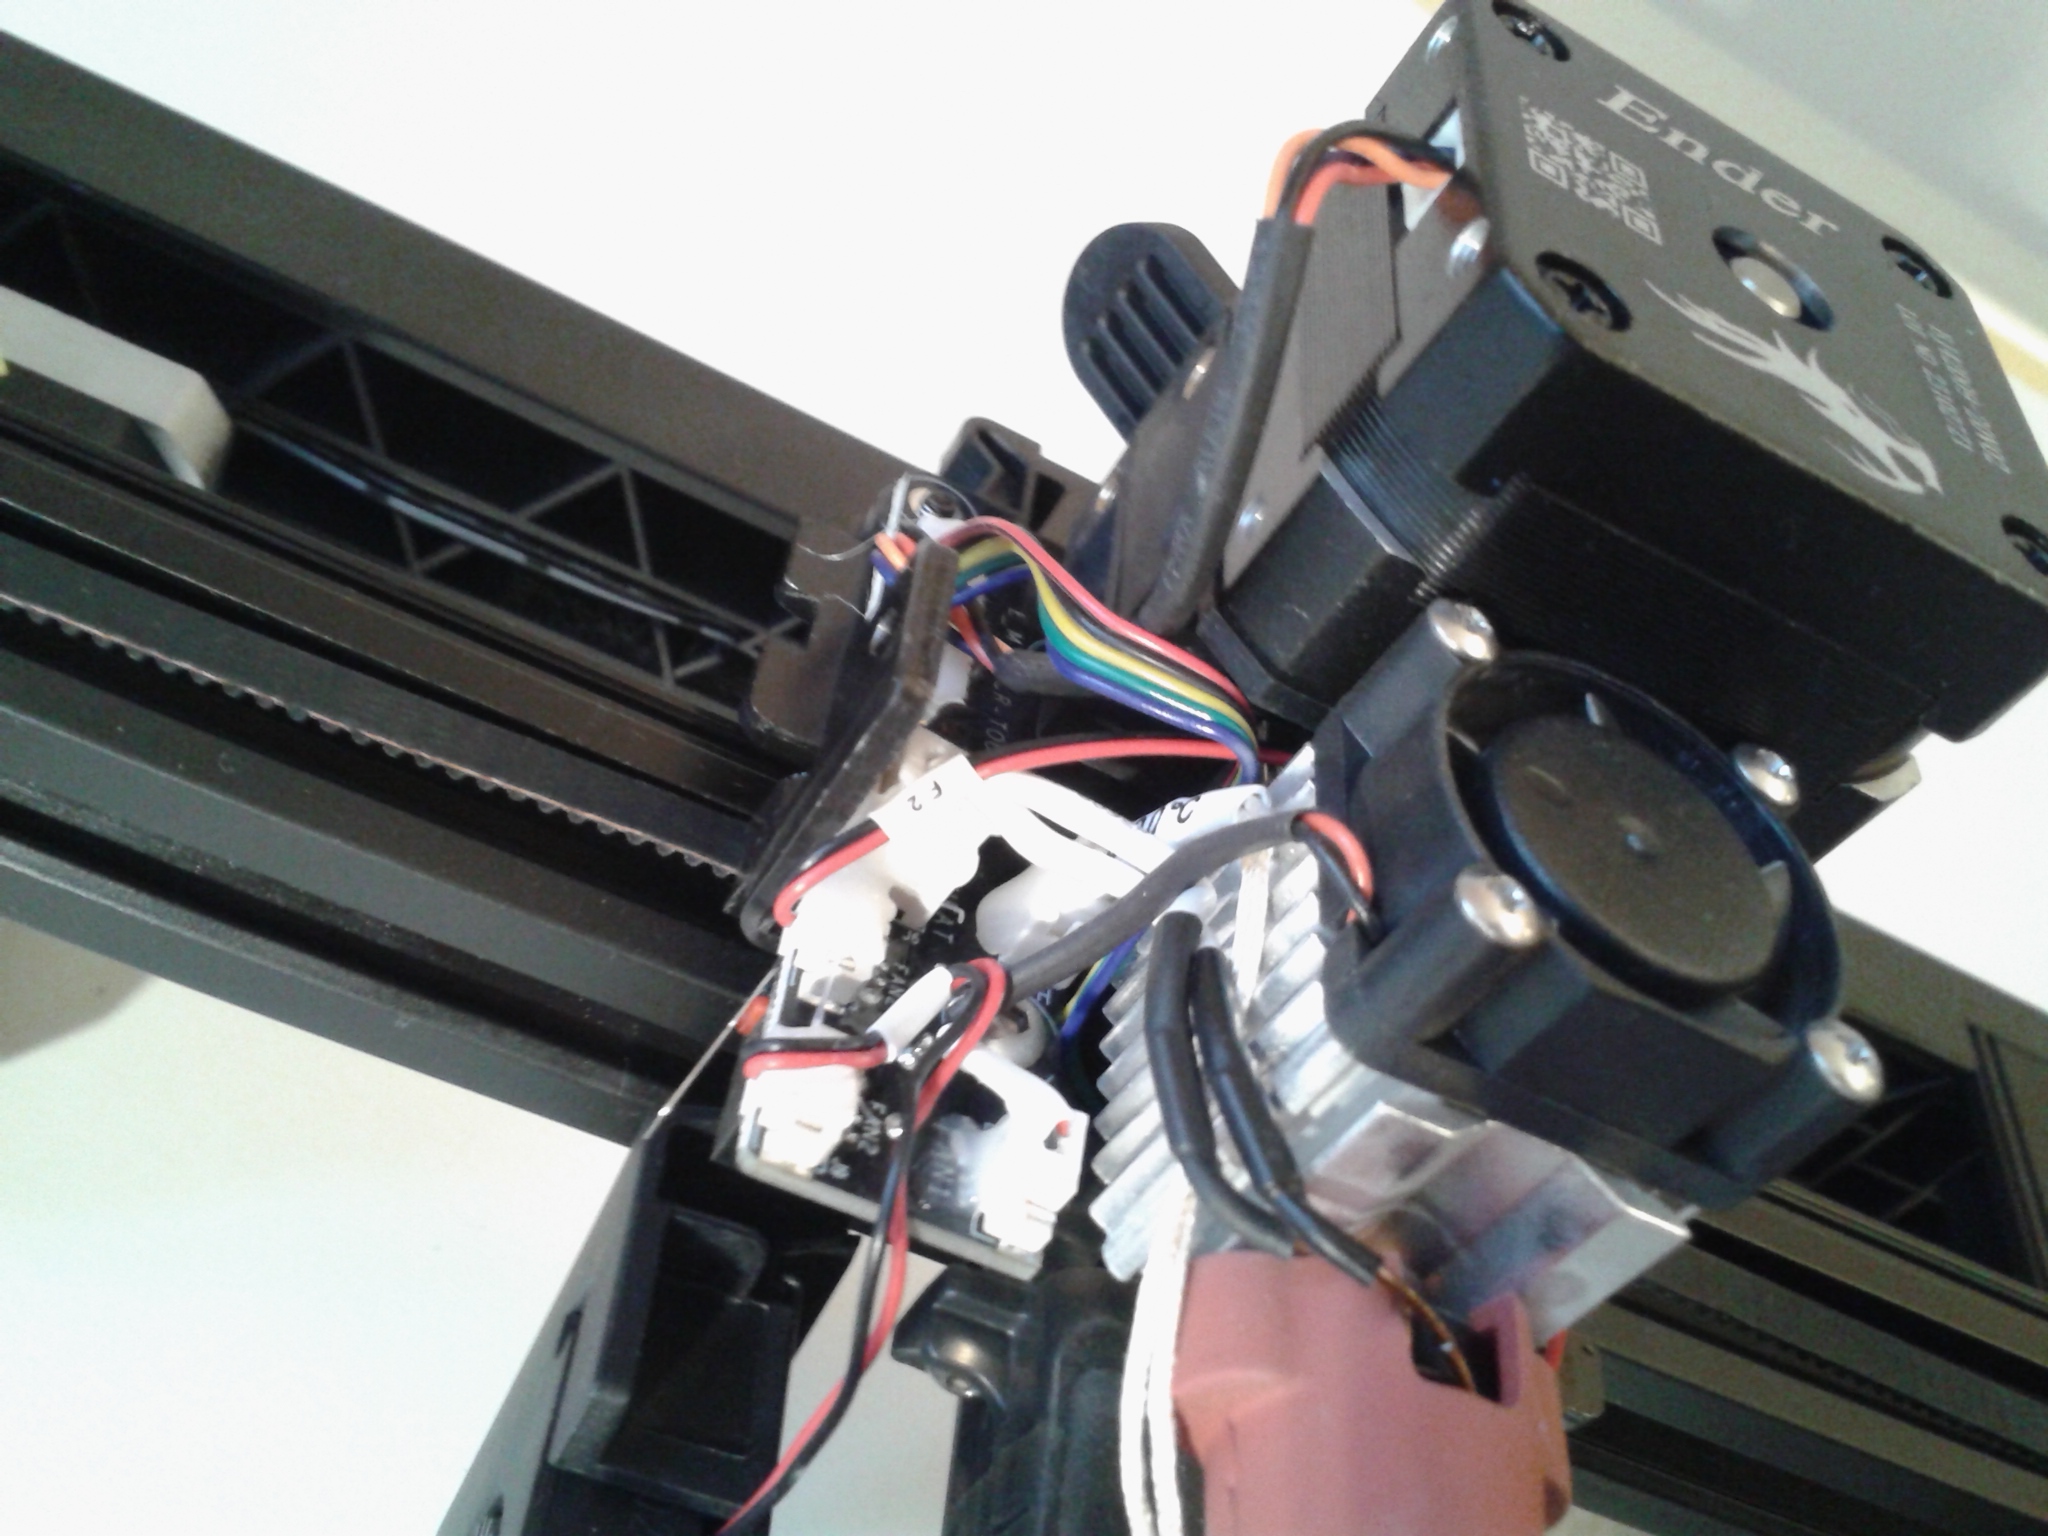
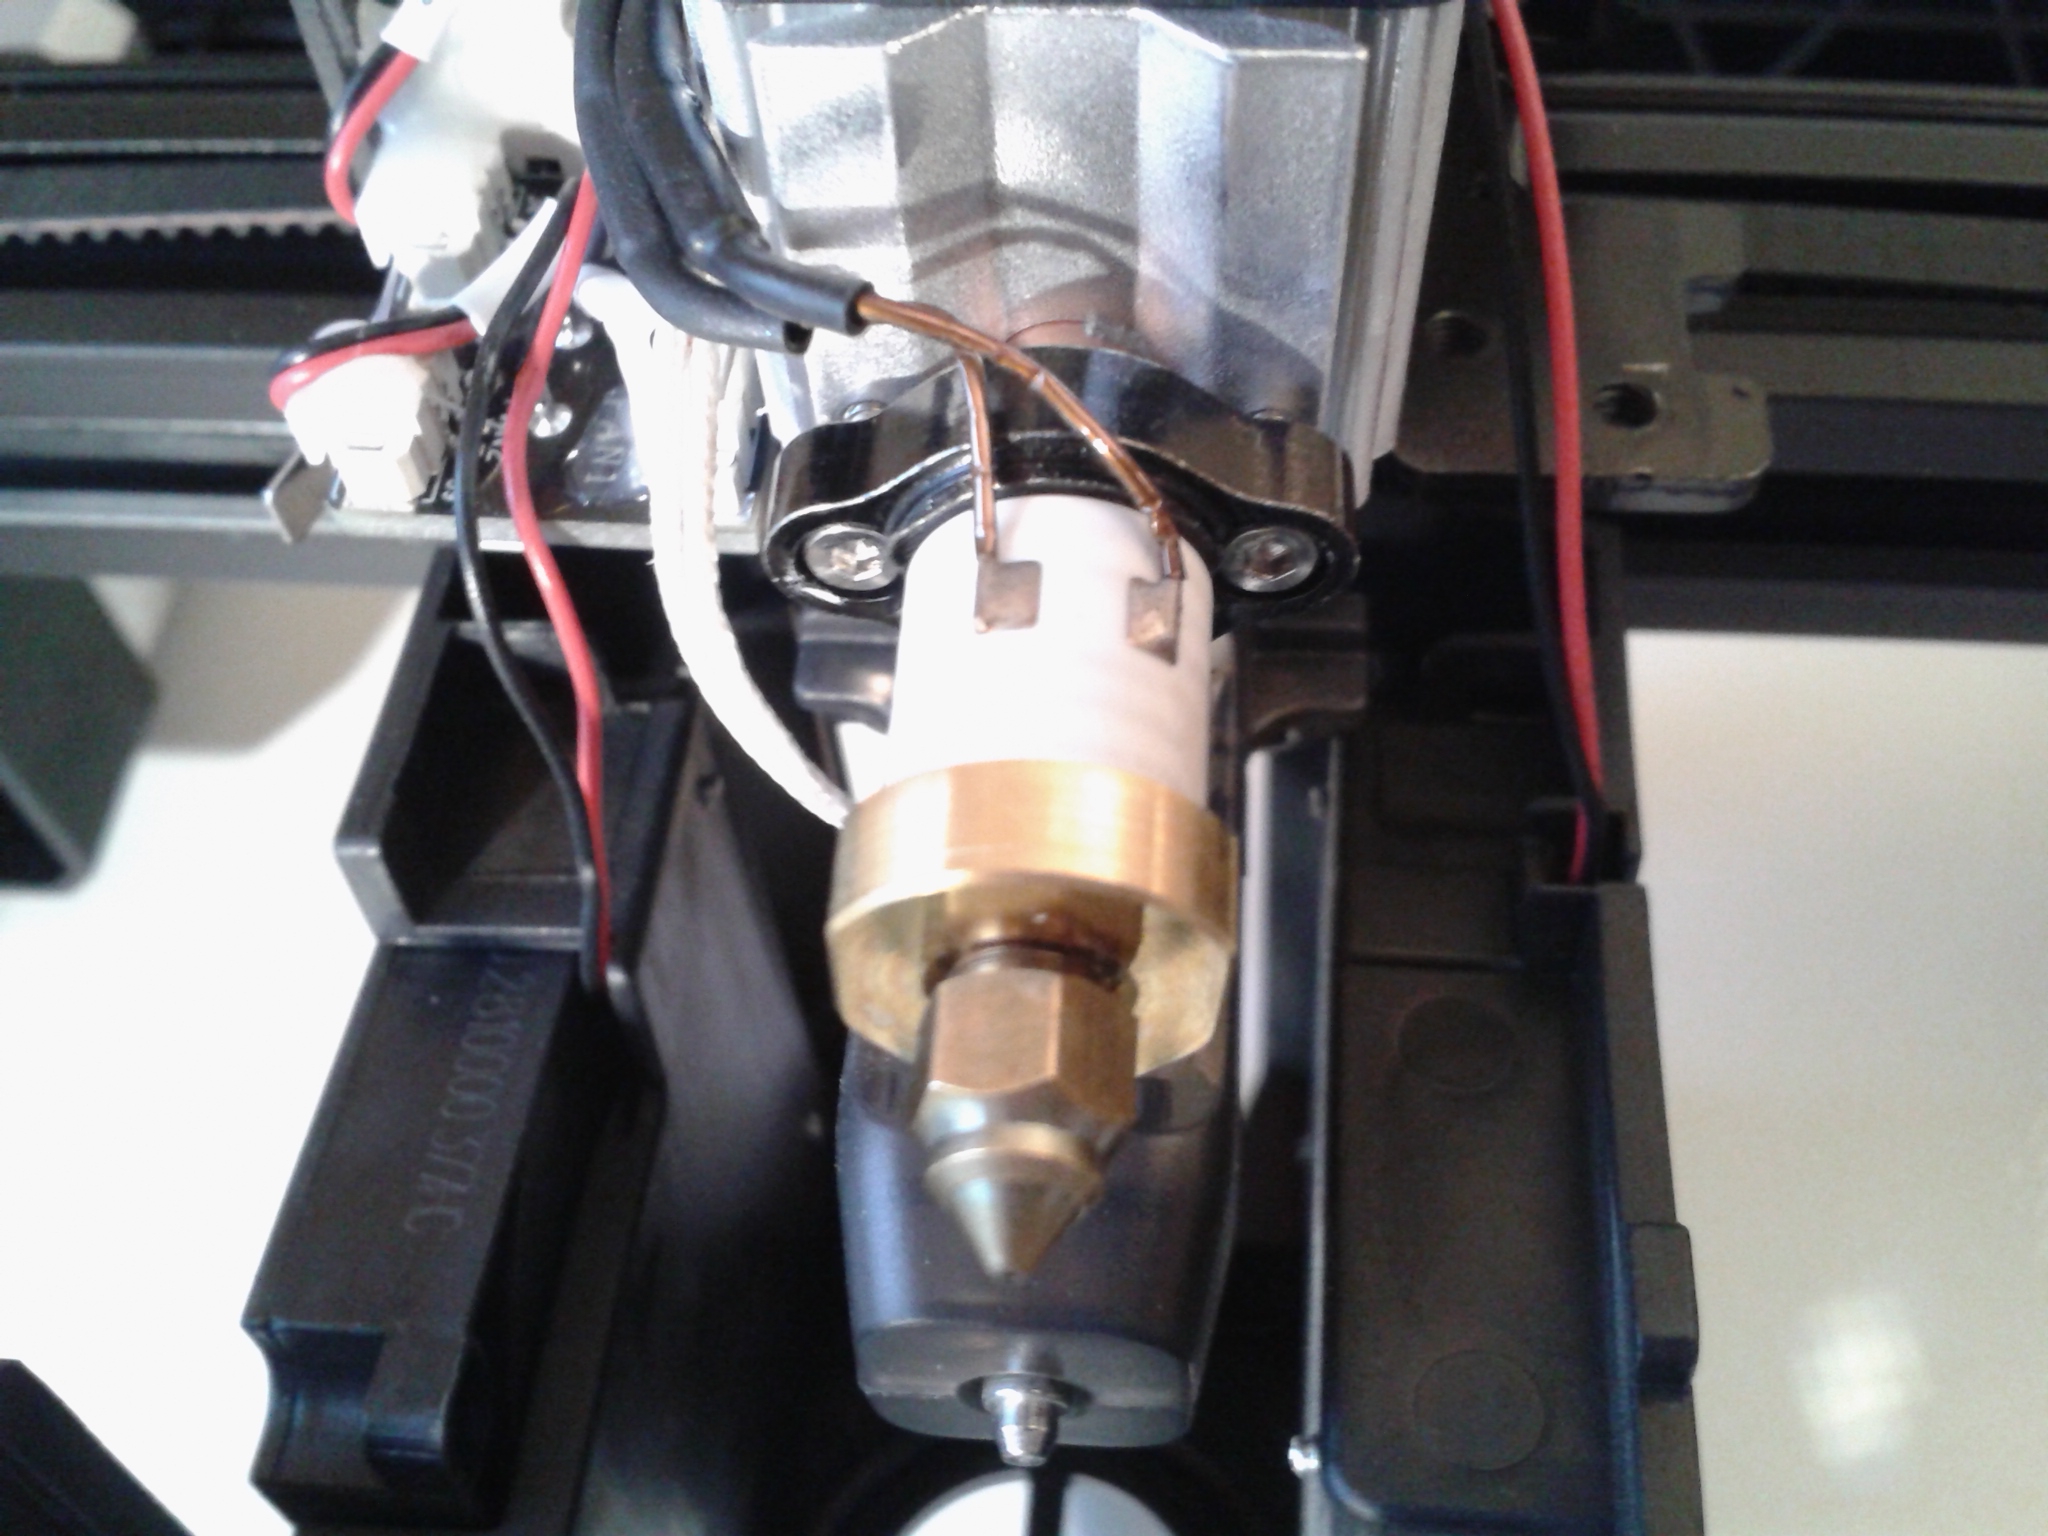
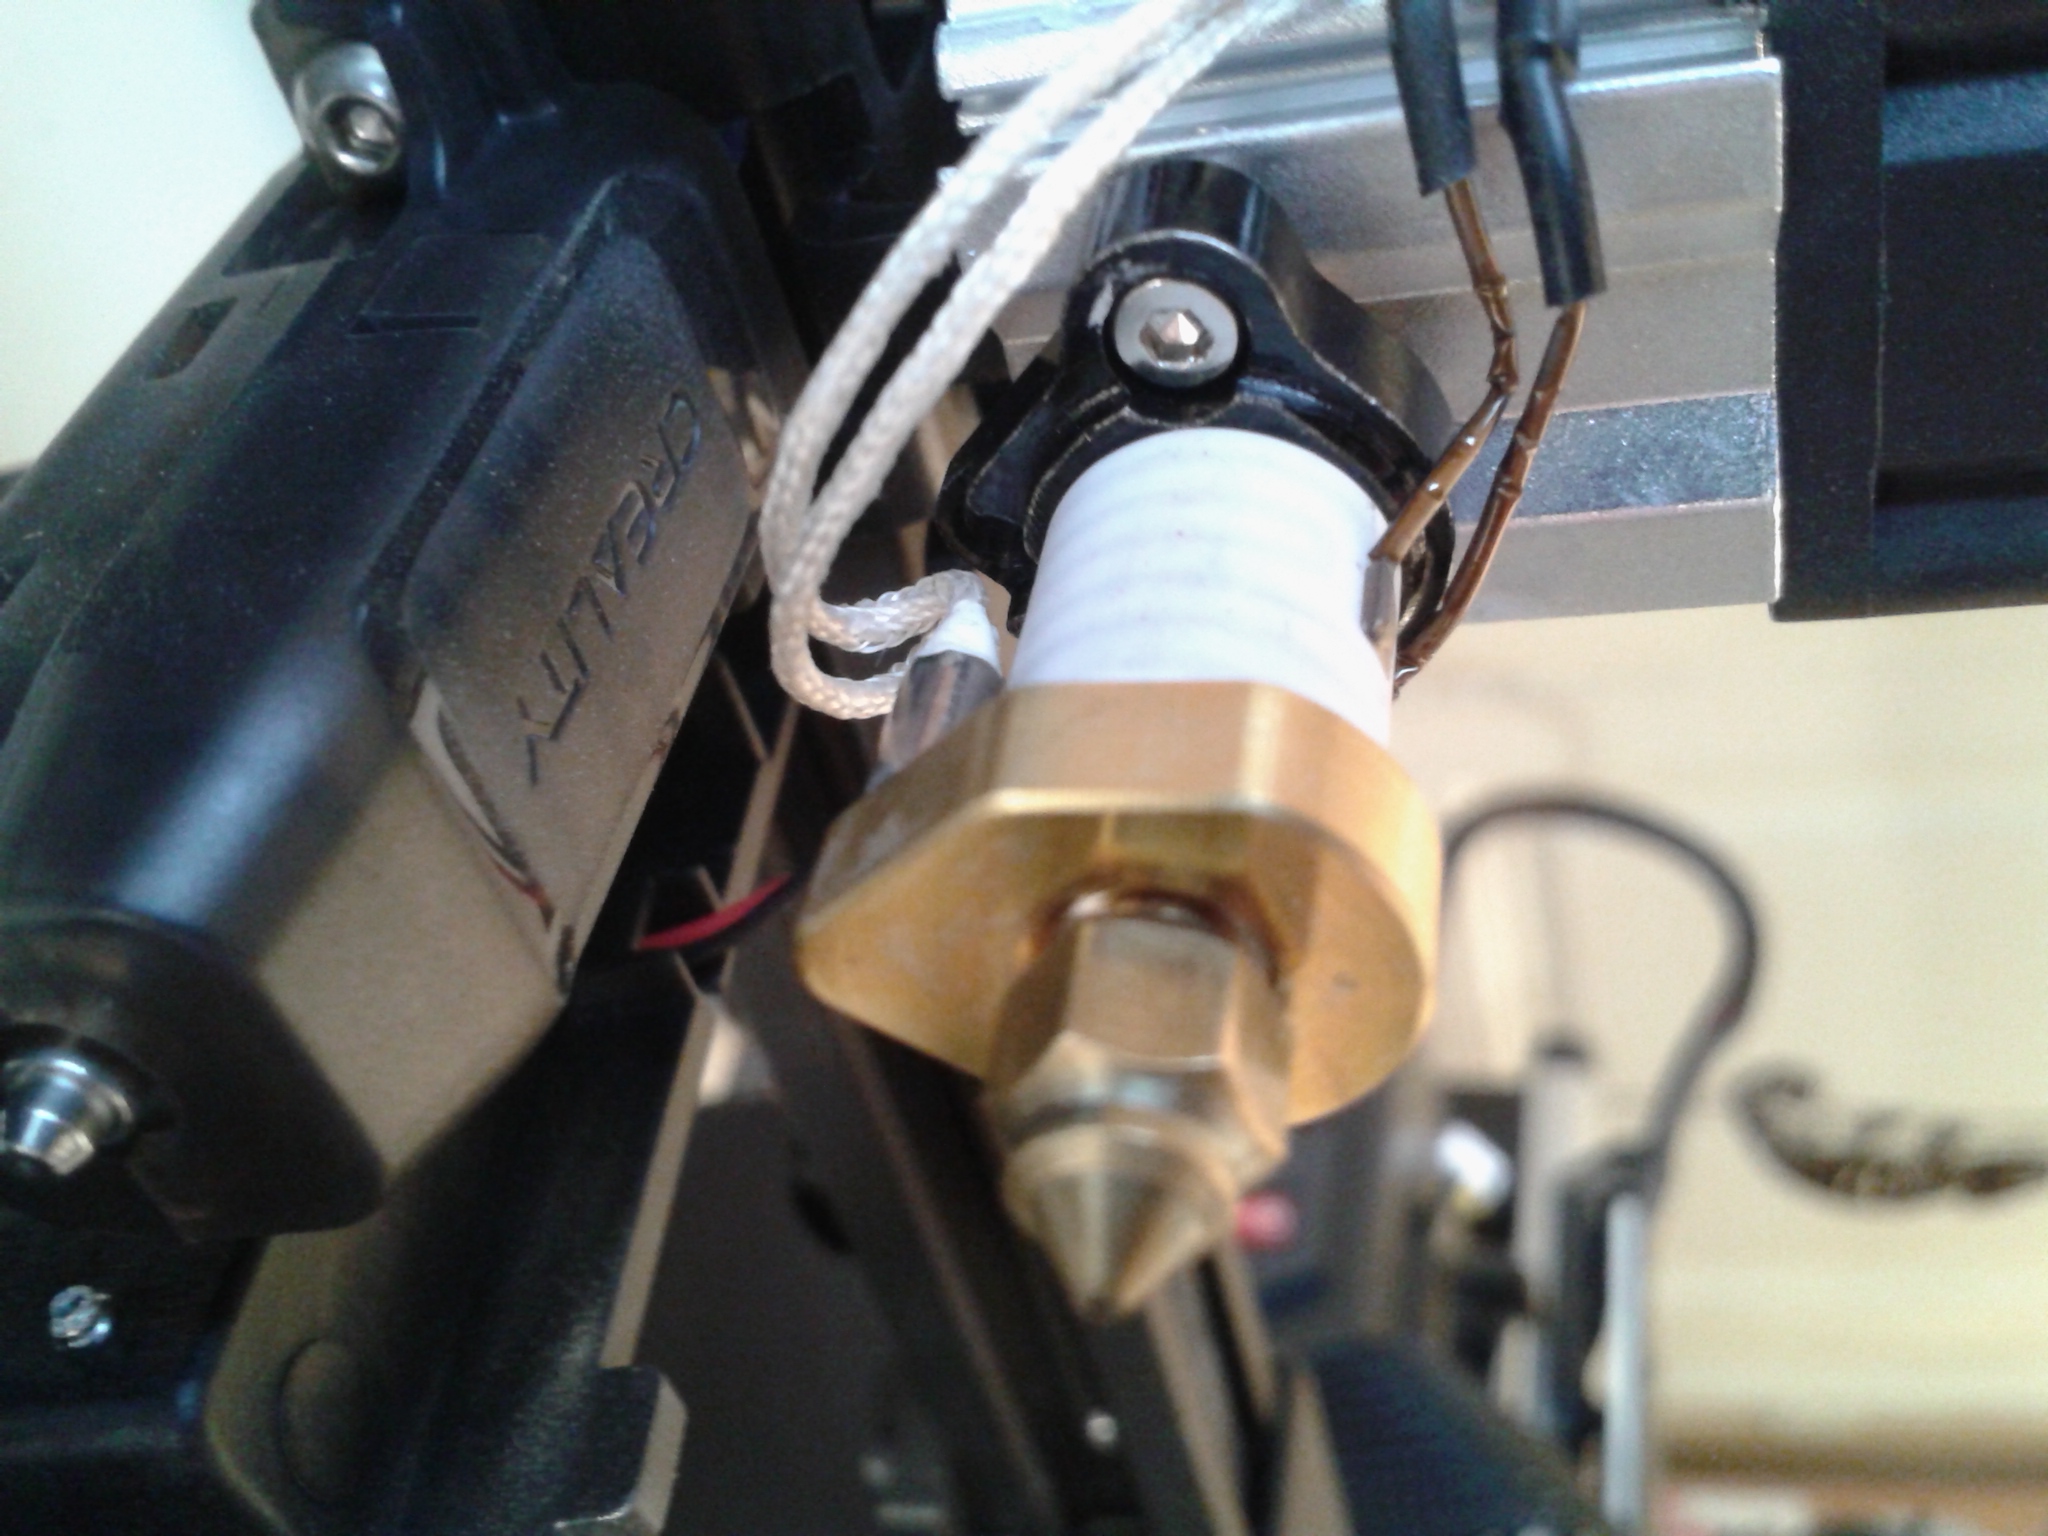
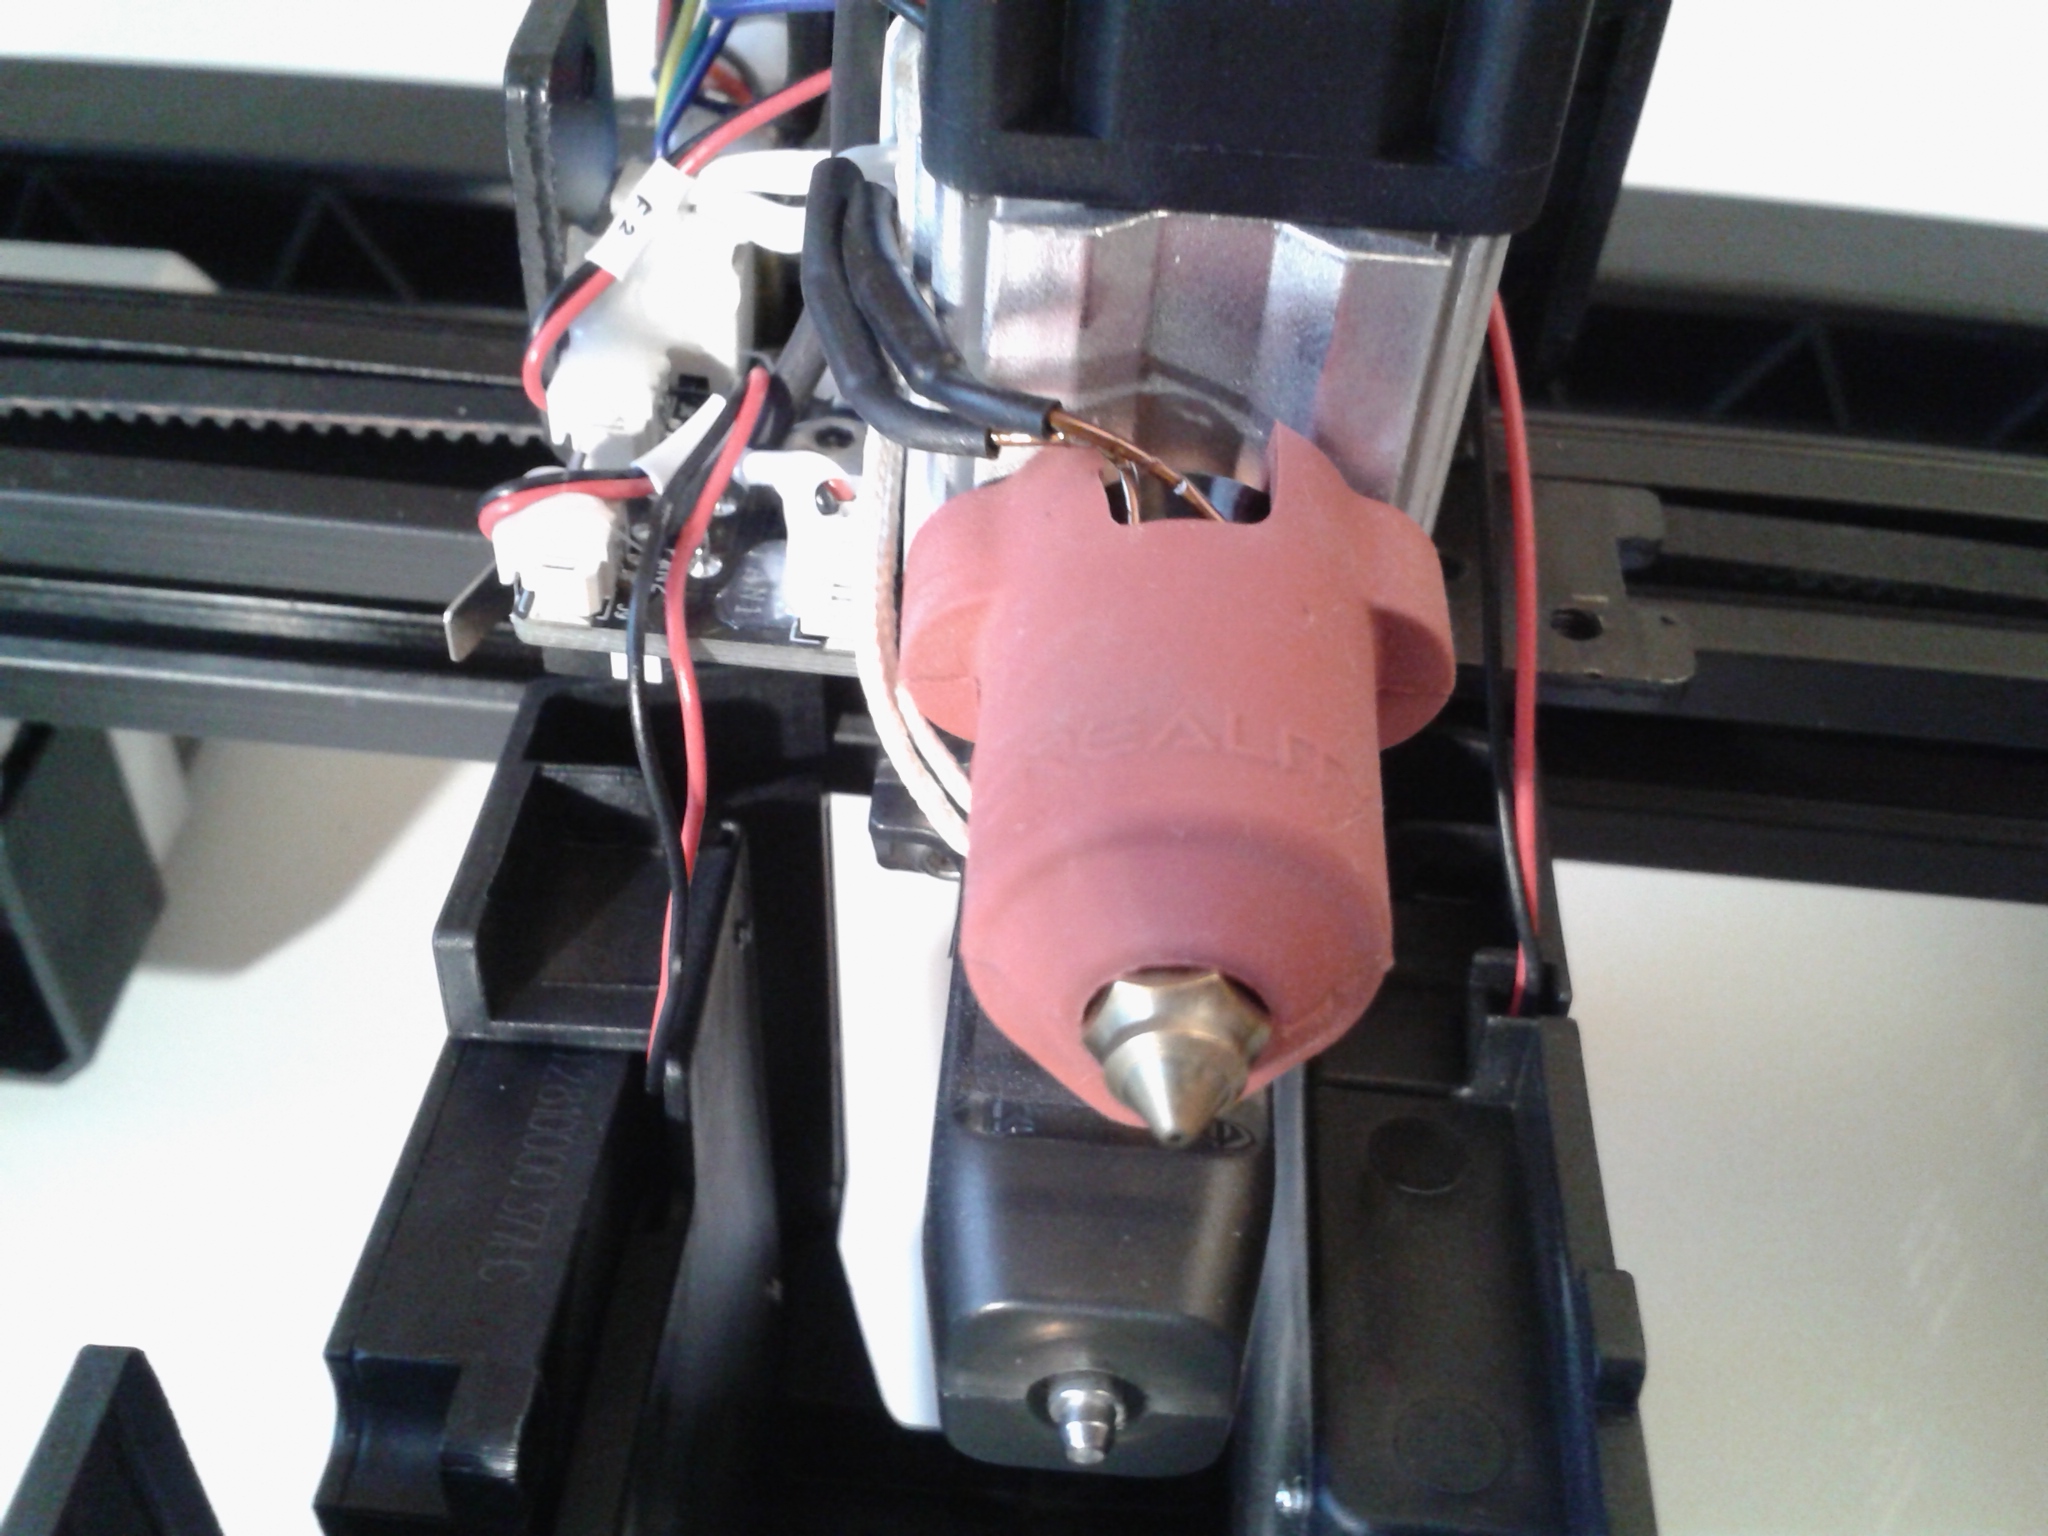
- Une tête d’impression ayant :
- Un corps de chauffe en céramique de 60W plus puissant,
- Un heatbreak bimétallique (alliages de cuivre et de titane) permettant d’arriver à des températures de 300°C (sur la “Ender-3 V3 SE” la limite des 260°C provient de la présence d’un tube PTFE traversant le heatbreak car un PTFE se déforme et se dégrade rapidement au-delà des 260°C. Quand il y en a un, il est recommandé, pour ne pas avoir à le changer trop souvent, de ne pas dépasser les 245°C car au-delà de cette température, le tube PTFE commence à se déformer et se dégrader),
- Un second ventilateur turbine pour le refroidissement des couches en cours d’impression.
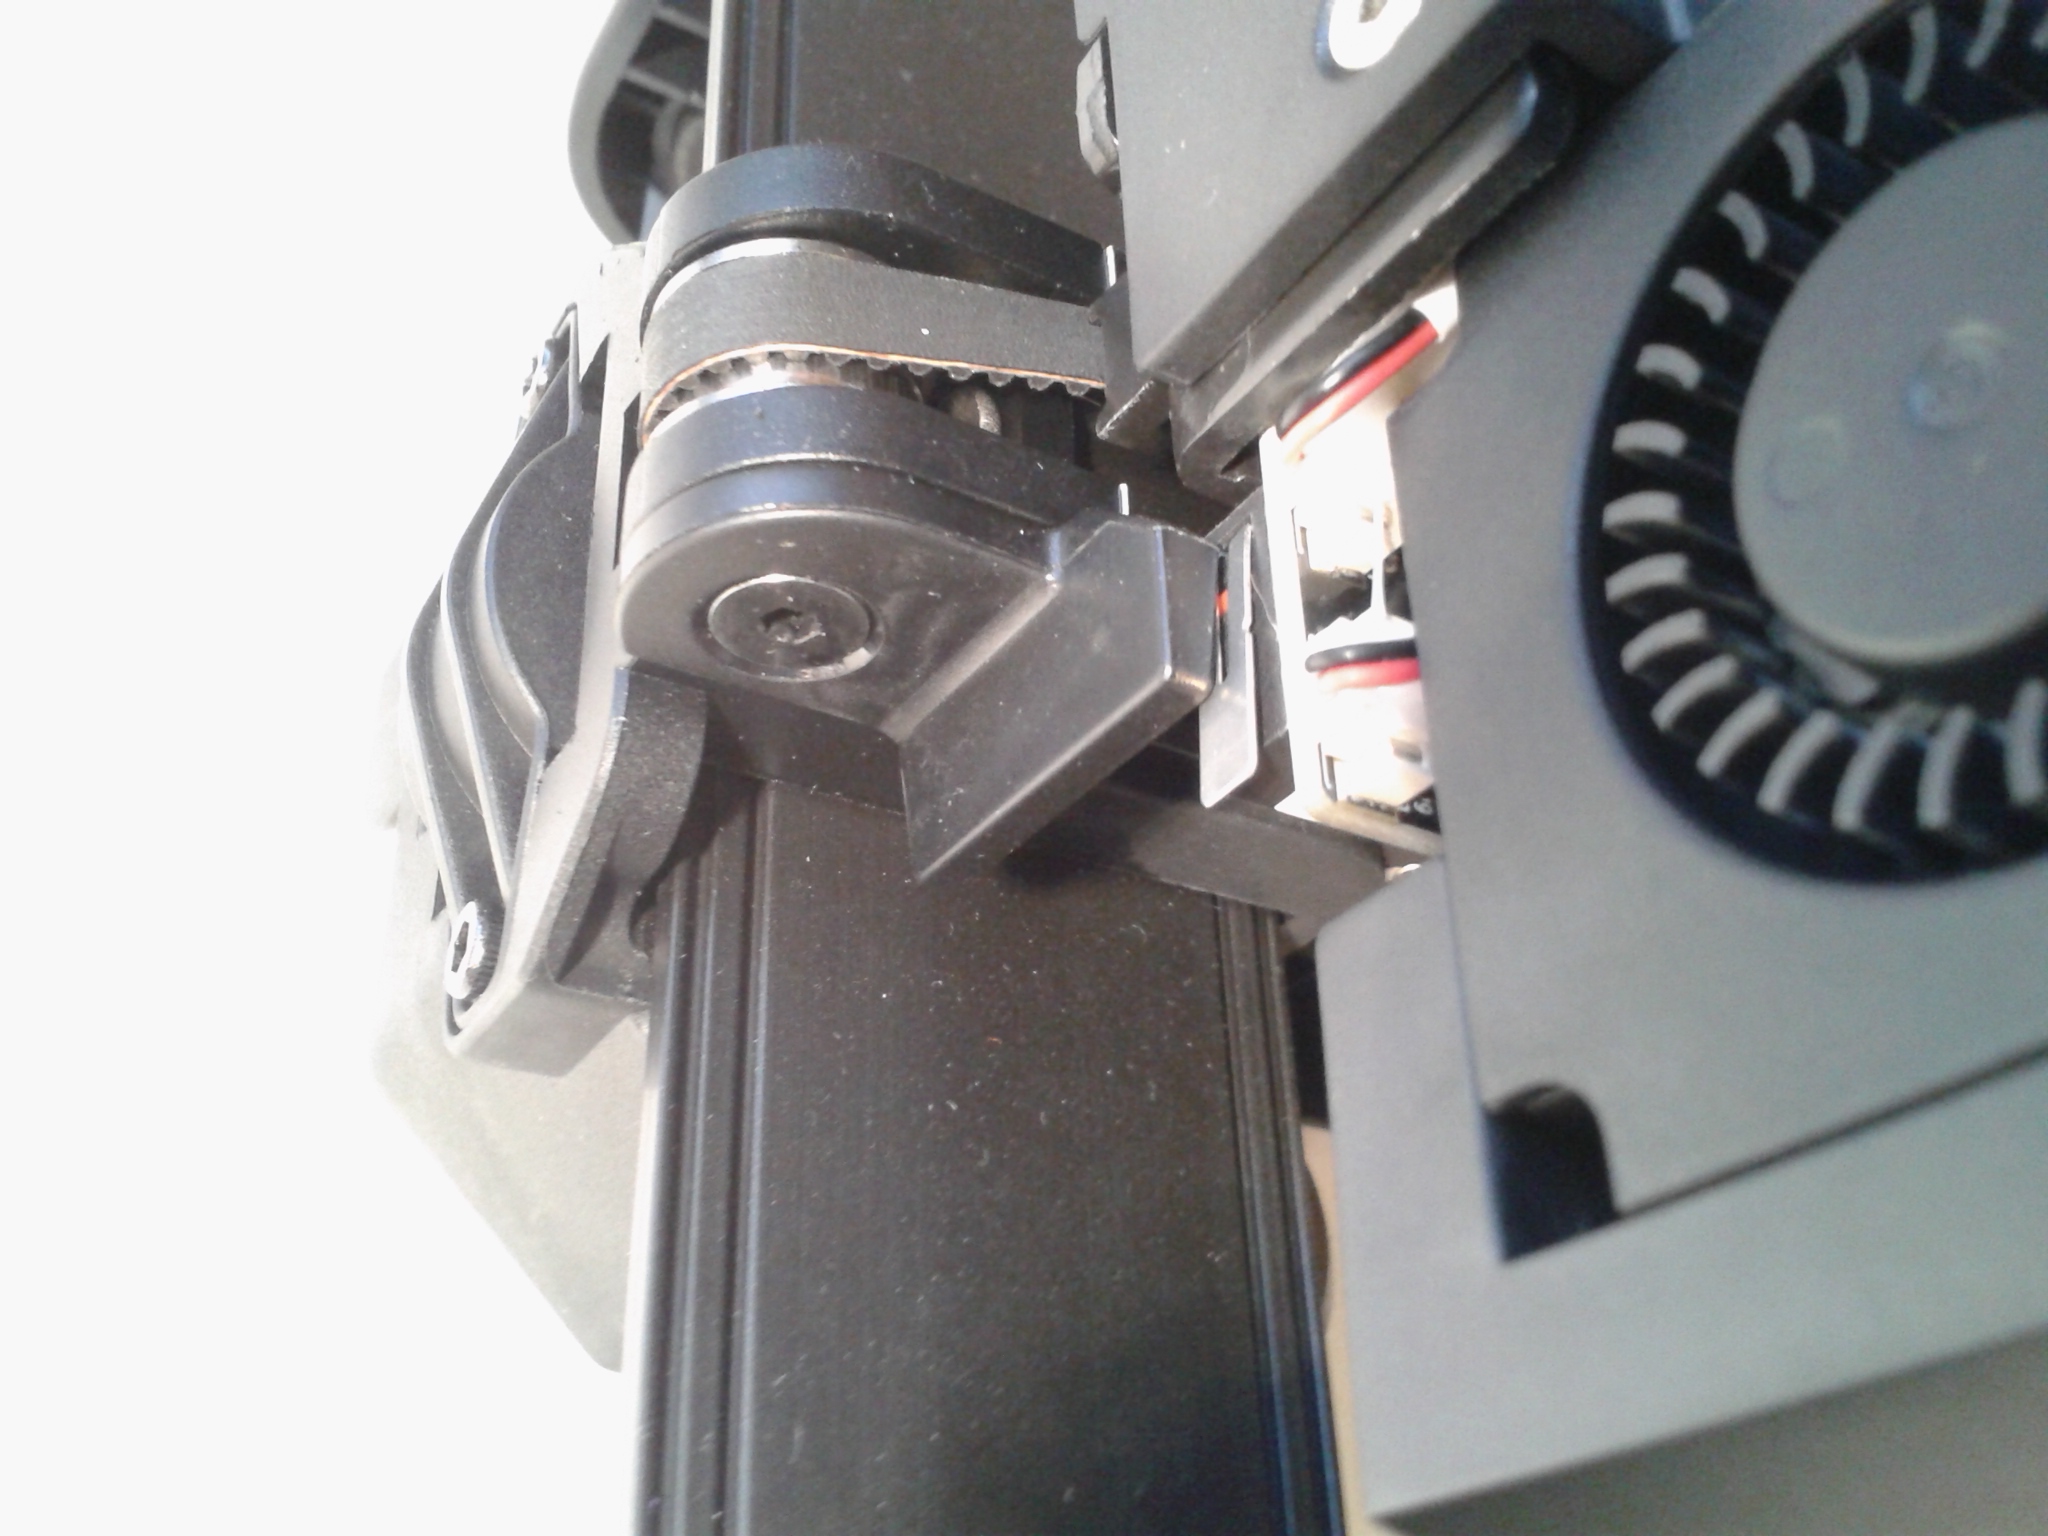
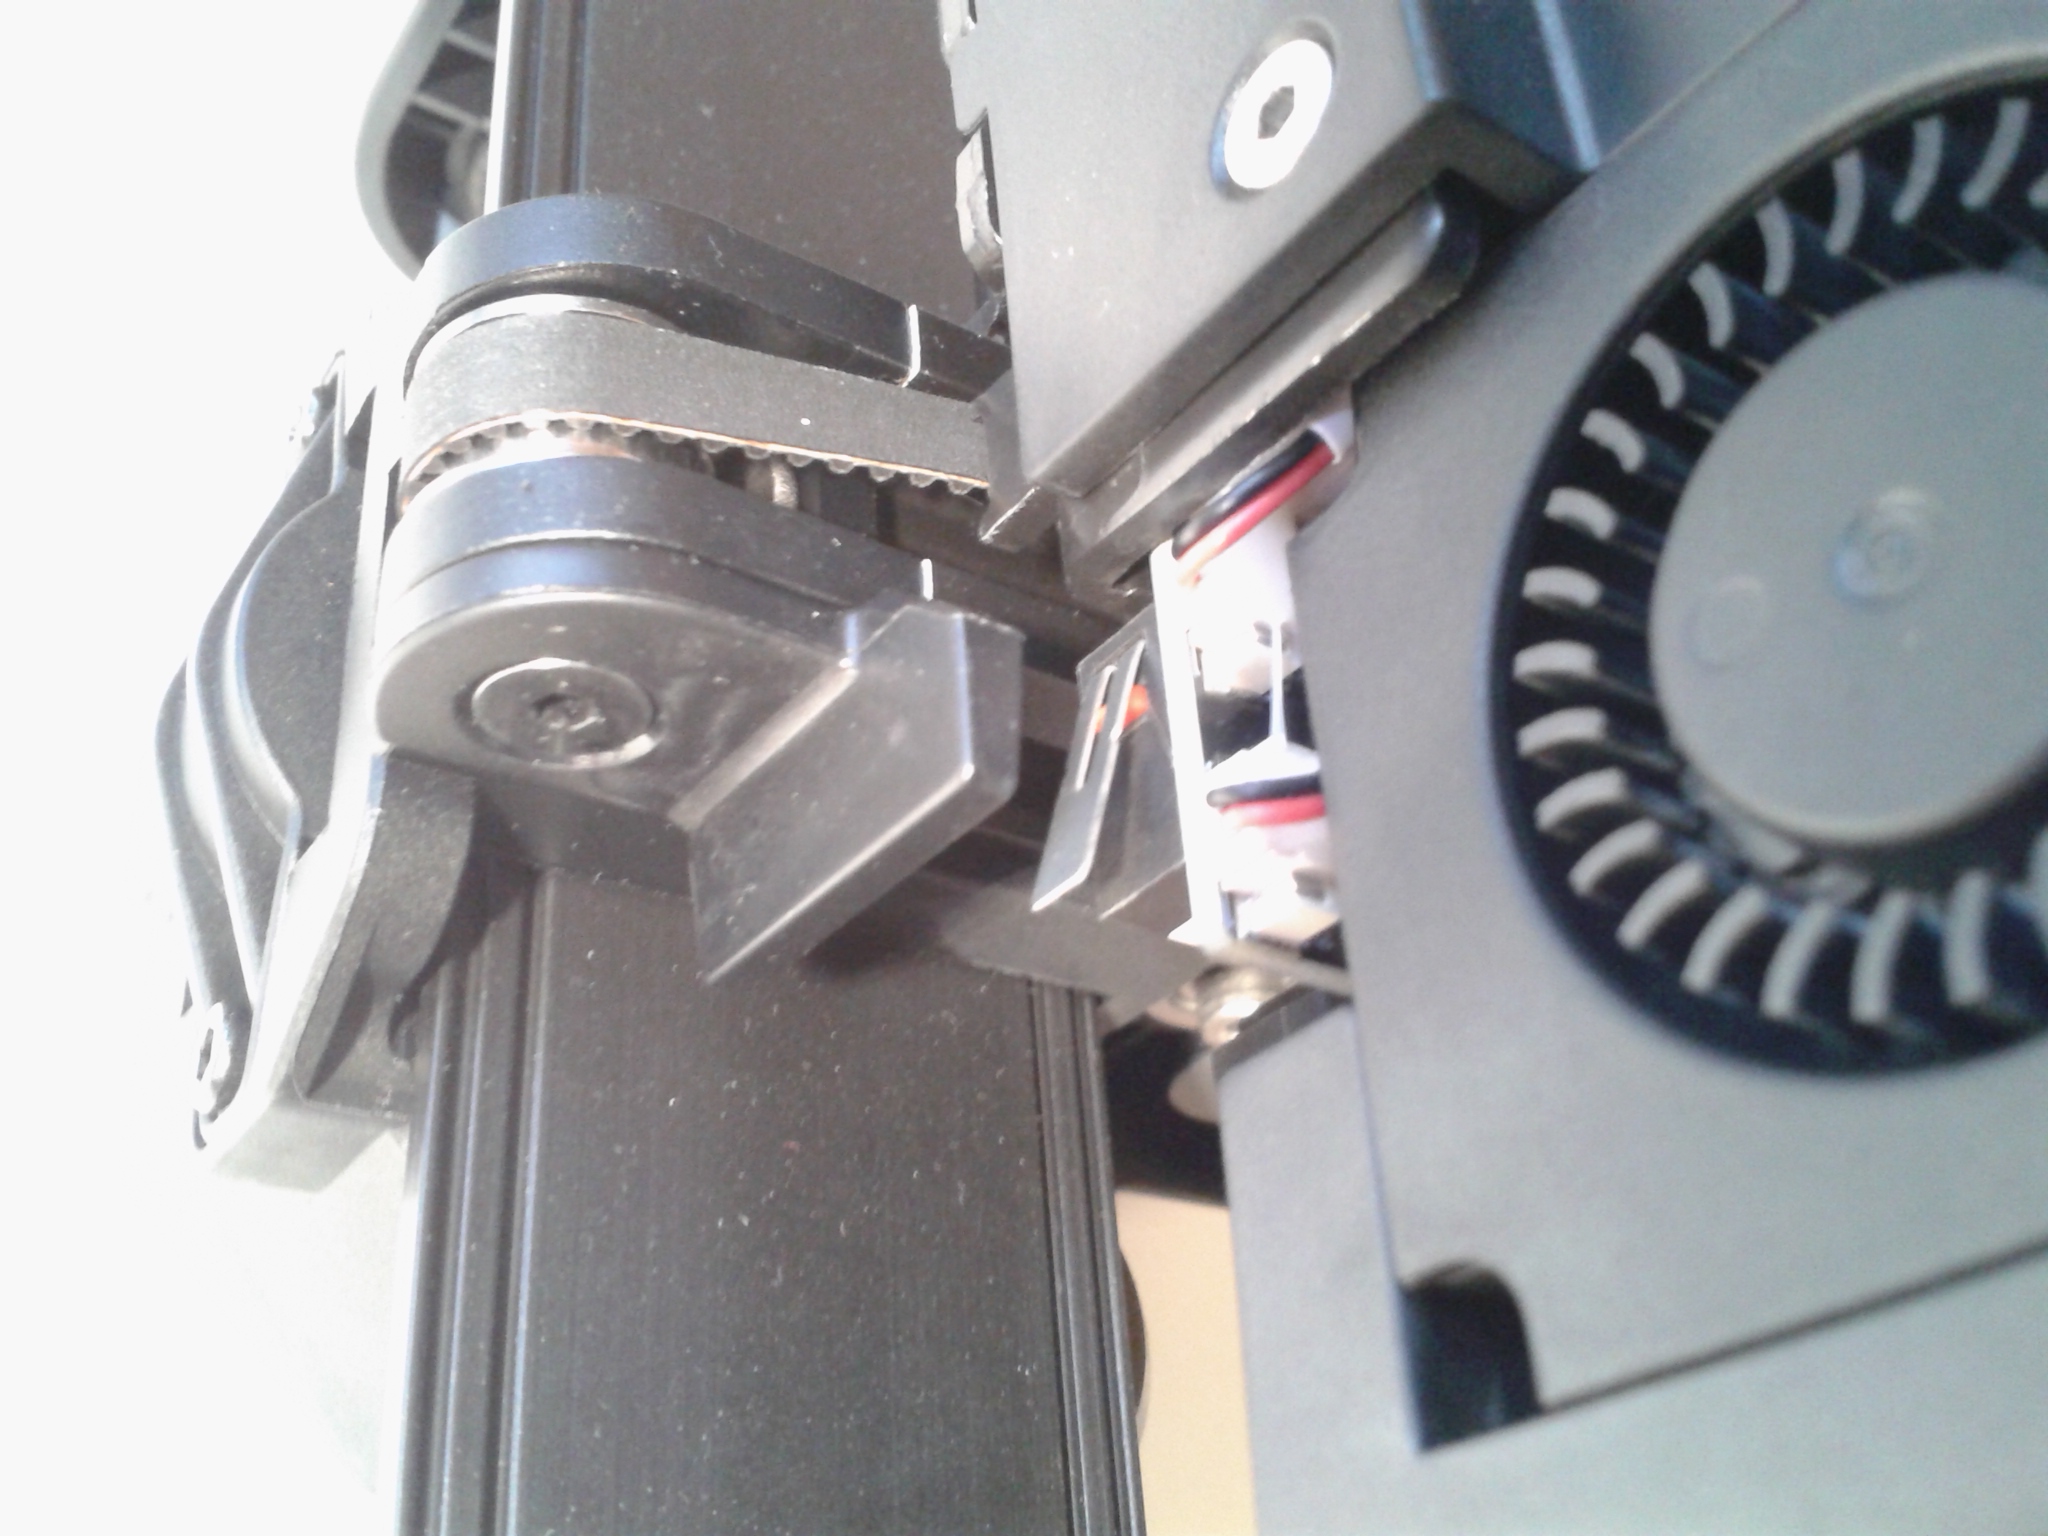
- Un rail linéaire pour l’axe X qui devrait à l’usage être plus robuste et stable que les roues/galets sur l’axe X de la V3 SE mais qui fait perdre 1 cm de hauteur au volume d’impression.
- Une poulie dentée, d’entrainement de la courroie de l’axe Y, ayant un plus gros diamètre pour augmenter les vitesses de déplacement sur cet axe.
- Un écran “Nebula Pad” qui fonctionne sous “Creality OS”. Il utilise un firmware Klipper adapté par Creality. On a déjà pu voir l’écran NebulaPad sur la récente CR-10 SE (test) et c’est lui qui permet la connectivité Wi-Fi.
Creality a rendu public, mi-janvier 2024, le dépôt GitHub du code source du firmware de la Ender-3 V3 KE, avec un firmware v1.1.0.12 qui permet d’avoir un accès root au système, après acceptation d’une clause de non-responsabilité de Creality si on utilise ce mode.
Creality a aussi rendu public un dépôt GitHub “Ender-3 V3 KE Annex” où l’on peut trouver de quoi installer Mainsail et/ou Fluidd qui sont des interfaces de Klipper pour les utilisateurs expérimentés.
On retrouve comme sur la “Ender-3 V3 SE” :
- Un extrudeur “Sprite” Direct Drive a double engrenage,
- Un capteur CR-Touch pour le nivellement automatique du plateau d’impression,
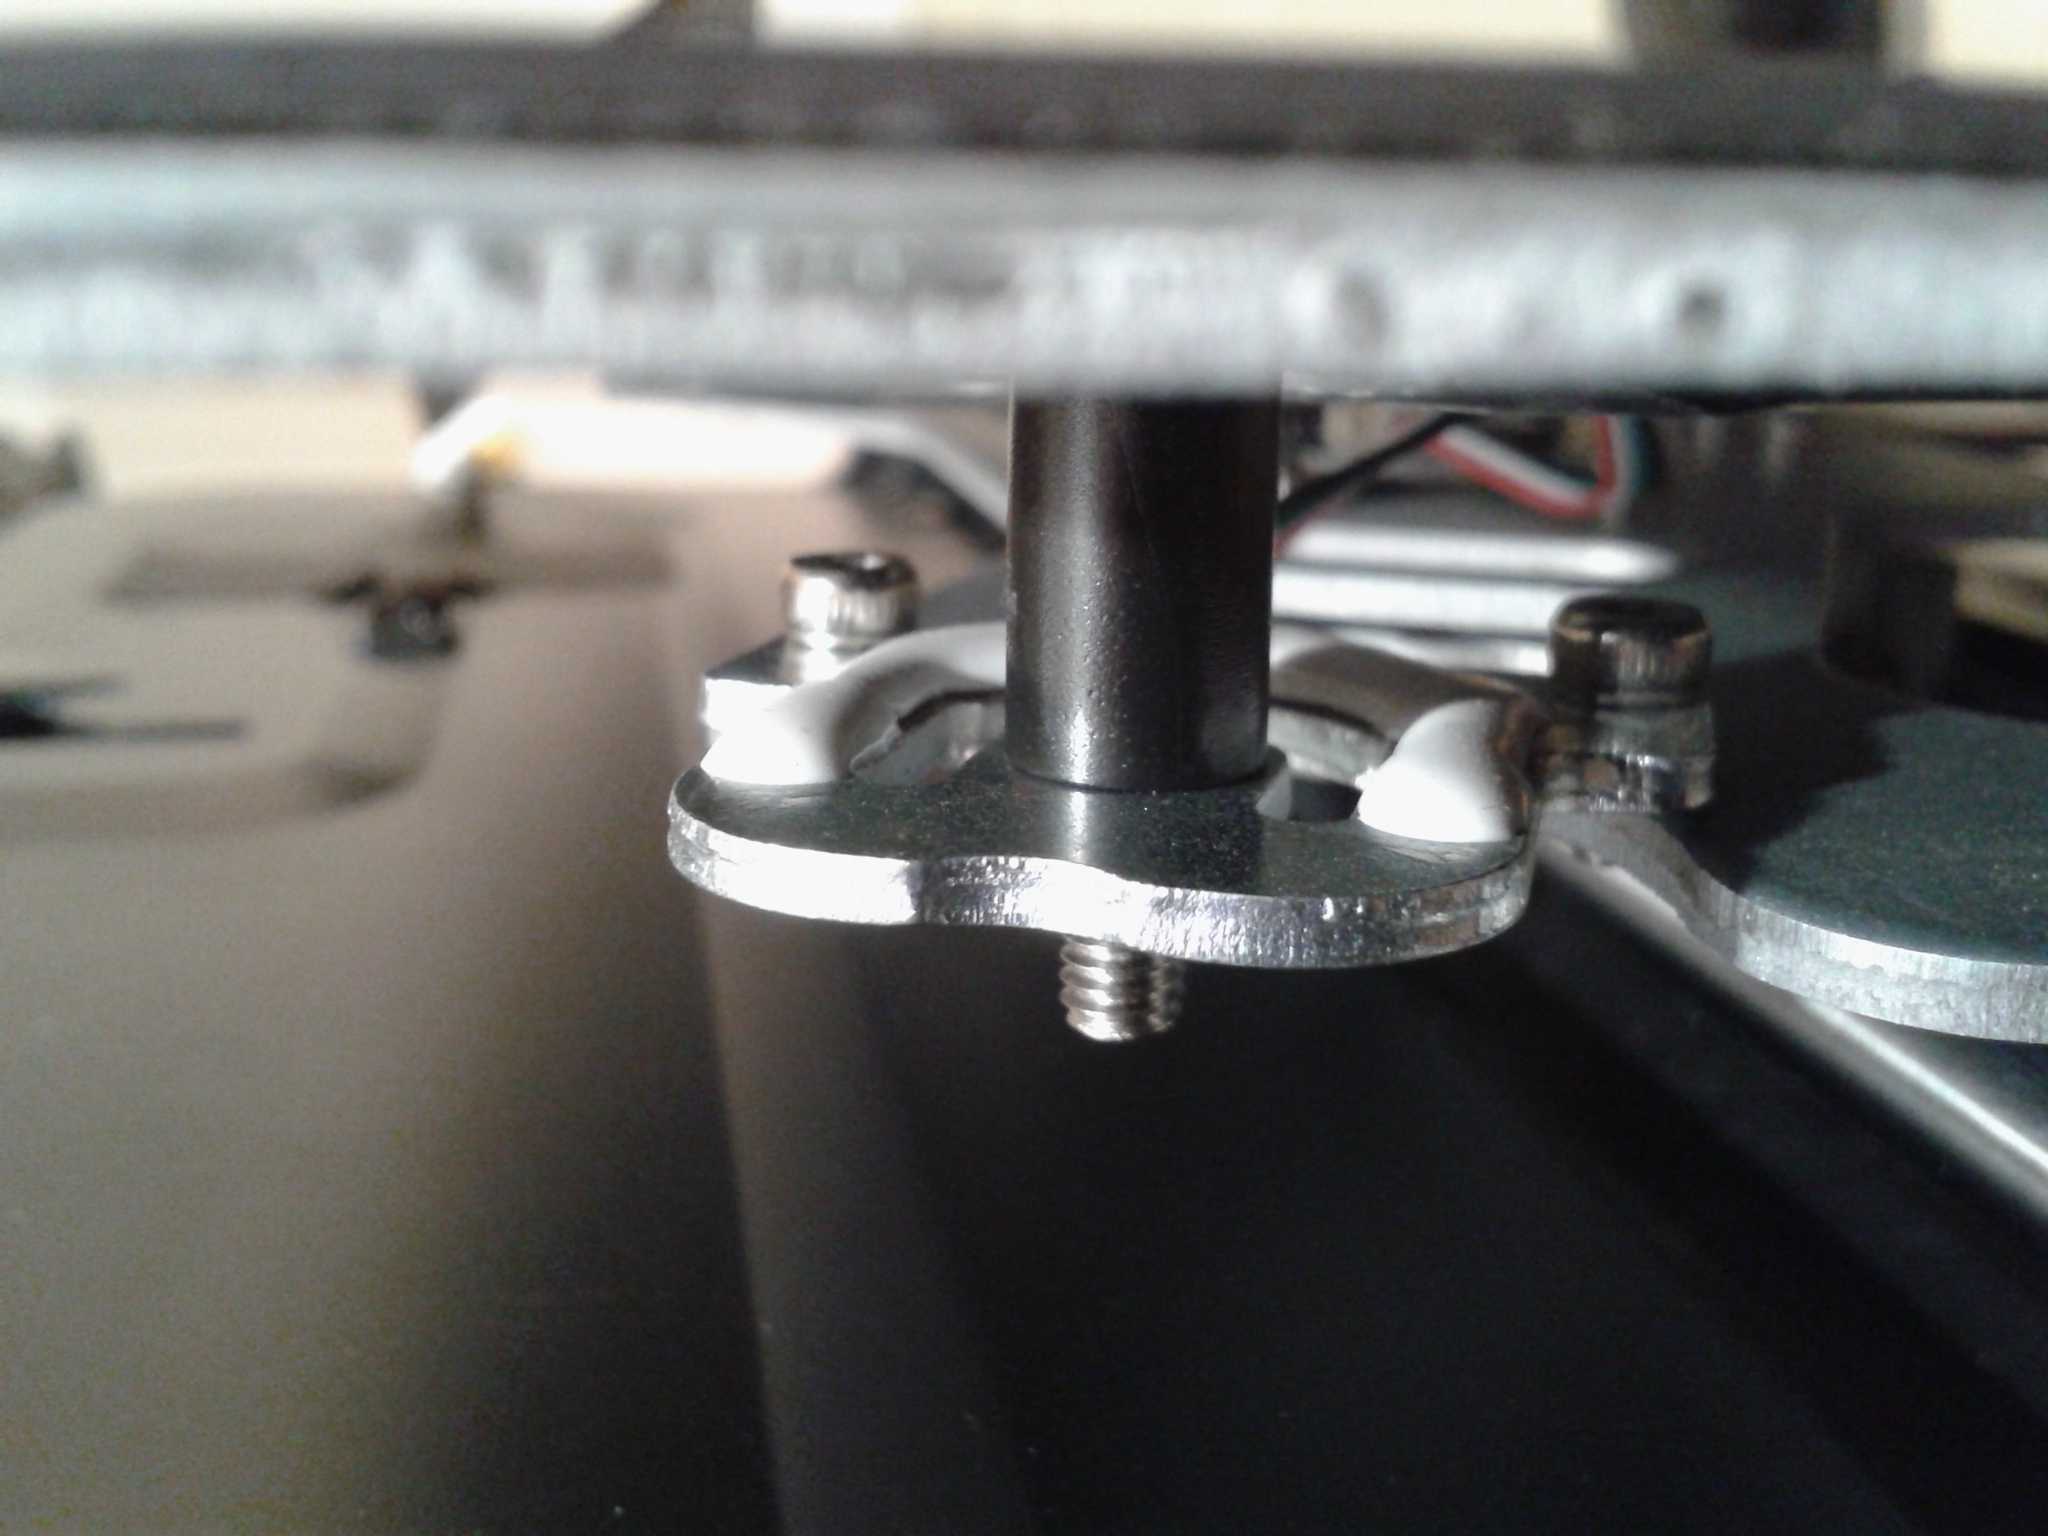
- Un capteur à jauge de contrainte, sur le coin avant gauche du plateau, pour déterminer le “Z-Offset” nommé “Z-axis compensation” dans les menus de l’écran de contrôle (il s’agit de la hauteur de compensation du décalage entre le point de déclenchement du palpeur du CR-Touch et la sortie du nez de la buse et son ajustement automatique, doit permettre de parfaitement écraser la couche initiale sur le plateau d’impression pour garantir une bonne qualité et adhérence de cette couche),
- Le plateau n’a pas de molette d’ajustement à chaque coin.
Il n’y a pas d’écrous excentriques à ajuster pour l’axe X, Y ou Z sur cette Ender-3 V3 Klipper Edition.
Tout cela permet une prise en main facile pour un débutant en impression 3D, sans limiter par la suite les fonctionnalités avancées et les évolutions (upgrades) offertes par Klipper.
| Technologie | FDM |
| Volume d’impression | 220 x 220 x 240 mm (LxPxH) |
| Buse d’origine | En laiton (même buse que la K1 Max) |
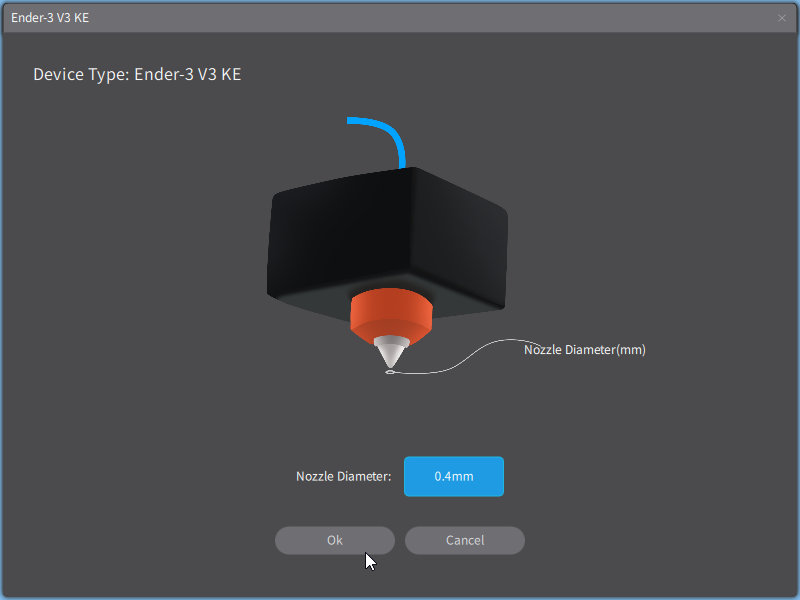
| Diamètre de la buse d’origine | 0.4 mm |
| Température maximale de la buse | 300°C |
| Système de tension des courroies | Vis d’ajustement |
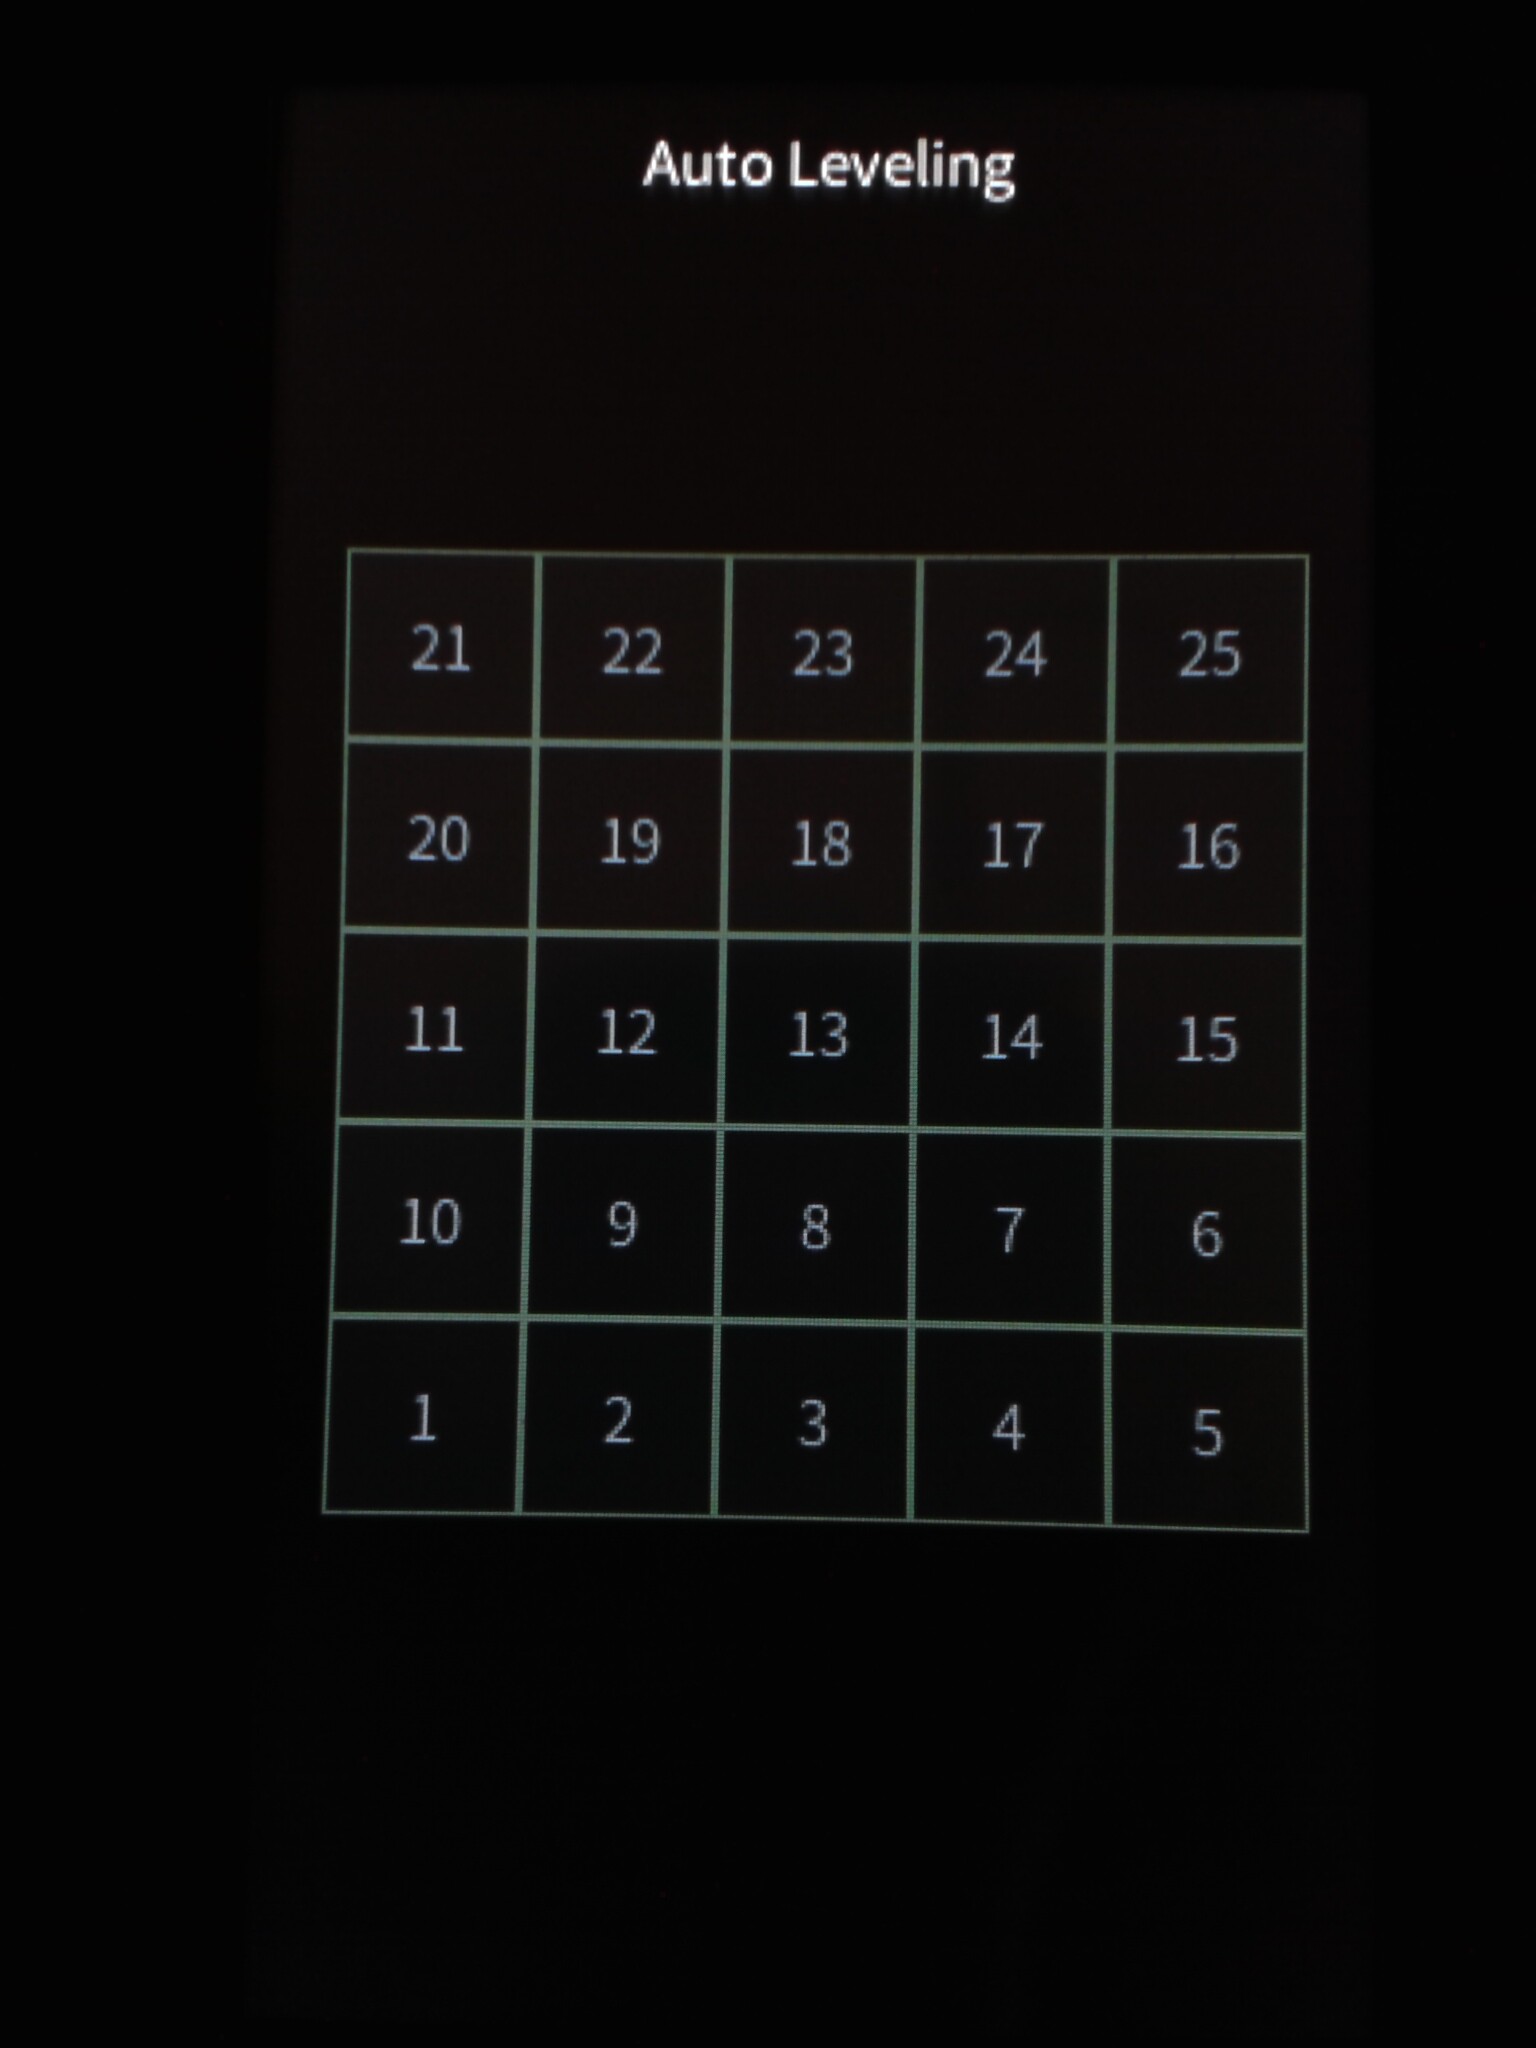
| Nivellement du plateau | Automatique grâce au CR Touch en 5×5=25 points, Capteur de contrainte pour le Z Offset, Pas de molettes d’ajustement du plateau |
| Précision d’impression | ± 0.1 mm |
| Axe X | Rail linéaire avec un chariot coulissant à roulements à billes |
| Axe Y | En acier, porté par une paire de tiges lisses de 8 mm de diamètre |
| Axe Z | Deux tiges filetées, Synchronisation par courroie (déjà en place), Un seul moteur Z (déjà en place et couplé) |
| Hauteur de couche | De 0.1 à 0.35 mm (recommandée avec une buse de 0.4 mm) |
| Surface de construction | Plateau chauffant, avec une plaque flexible + base magnétique |
| Plateau chauffant | Température maximale de 100°C |
| Surface plateau d’impression | 23,5 x 23,5 (+1) cm (L x P, surface utilisable 22 x 22 cm) |
| Type de surface d’impression | Plaque flexible avec un revêtement texturé “PEI” sur une seule face |
| Vitesse maximale d’impression | (un trait de) “500 mm/s” Pour espérer arriver à ses pointes de vitesse, en plus d’ajuster le débit volumétrique maximum et les vitesses d’un profil matériaux sous Creality Print, il vous faudra un filament dit “haute vitesse” comme du “Hyper PLA Creality“ |
| Vitesse typique d’impression | 300 mm/s |
| Accélération maximale | 8000 mm/s² |
| Nombre d’extrudeur(s) | 1 |
| Extrudeur | Direct Drive “Sprite” à double engrenage |
| Type de carte-mère | Processeur 32 bits avec contrôleurs de moteur pas à pas silencieux |
| Firmware | Creality OS (Klipper) |
| Poids net | 7.8 kg |
| Poids brut du colis | 9.9 kg |
| Matériaux supportés | PLA, PETG, ABS, TPU (95A) et ASA Mais comme elle n’a pas d’enceinte fermée, il vous faudra un caisson pour l’ABS et l’ASA (exemple) |
| Diamètre des filaments | 1.75 mm |
| Capteur de fin de filament | Oui, par défaut |
| Capteur de vibrations | En option, à connecter sur un port USB Type-C à l’arrière de l’écran Nebula Pad |
| Caméra | En option, “Nebula Camera” à connecter sur l’un des deux ports USB Type-A sur le côté droit de l’écran “Nebula Pad” (A vérifier, mais il me semble que, la détection de problèmes d’impression via caméra, nécessite un compte Creality Cloud Premium) |
| Connectivité | – 2 ports USB Type A et 1 port USB type C sur l’écran Nebula Pad – Wi-Fi |
| Ecran de contrôle | 4.3 pouces tactile “Nebula Pad“ |
| Possibilité de reprise sur coupure de courant | Oui |
| Puissance nominale | 350W |
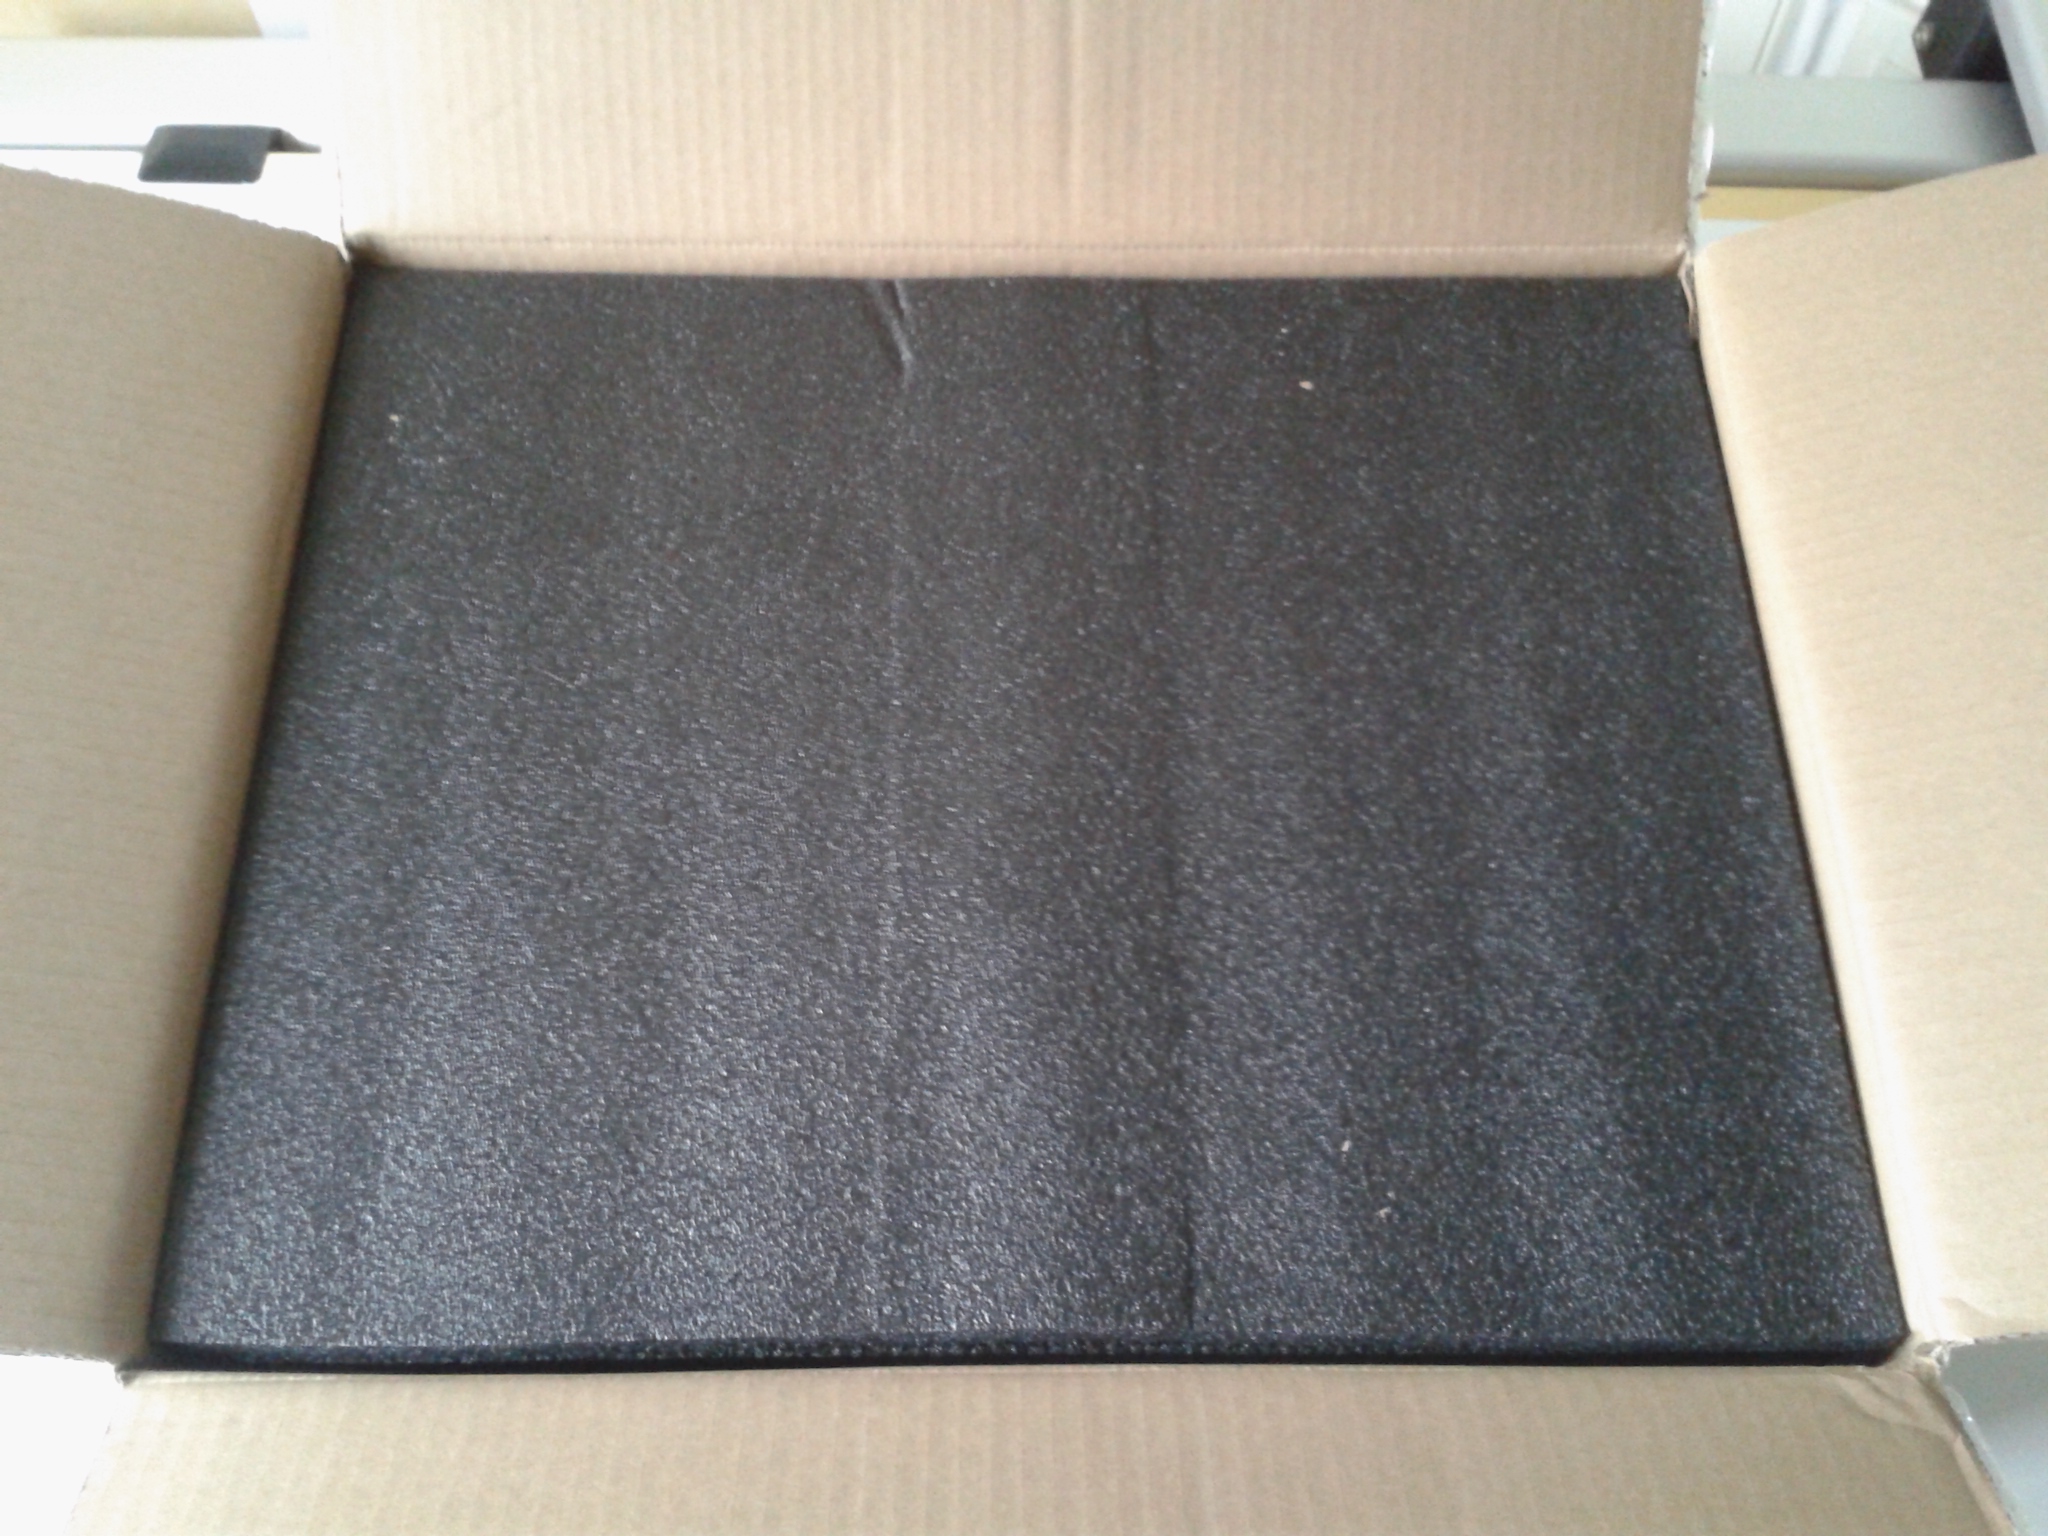
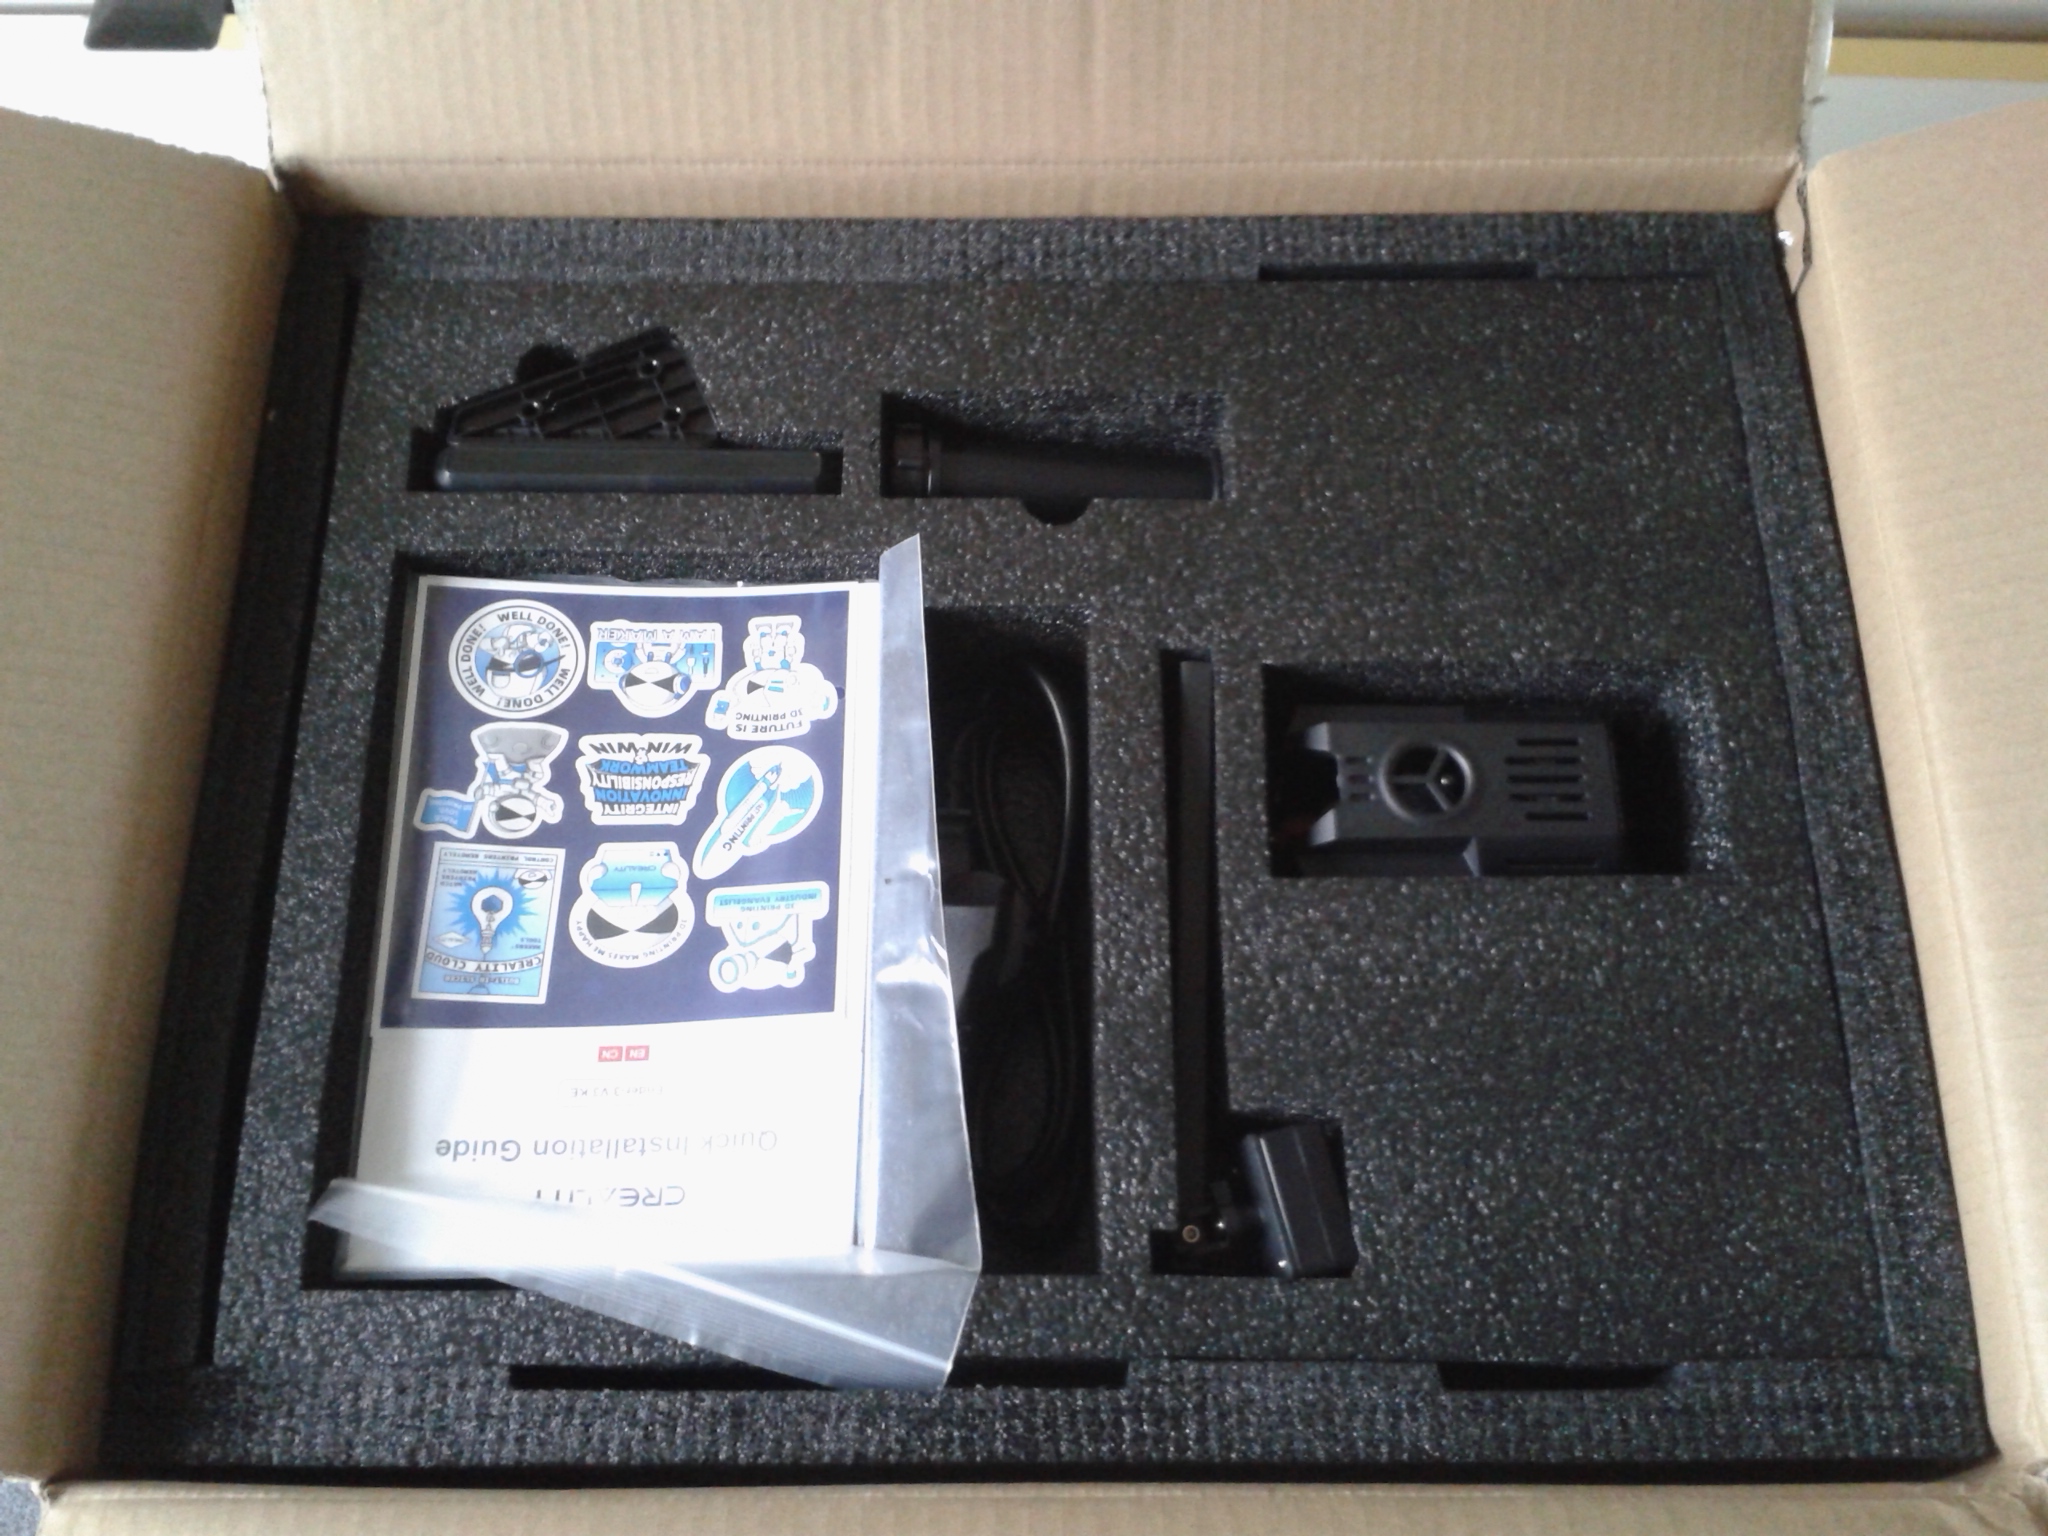
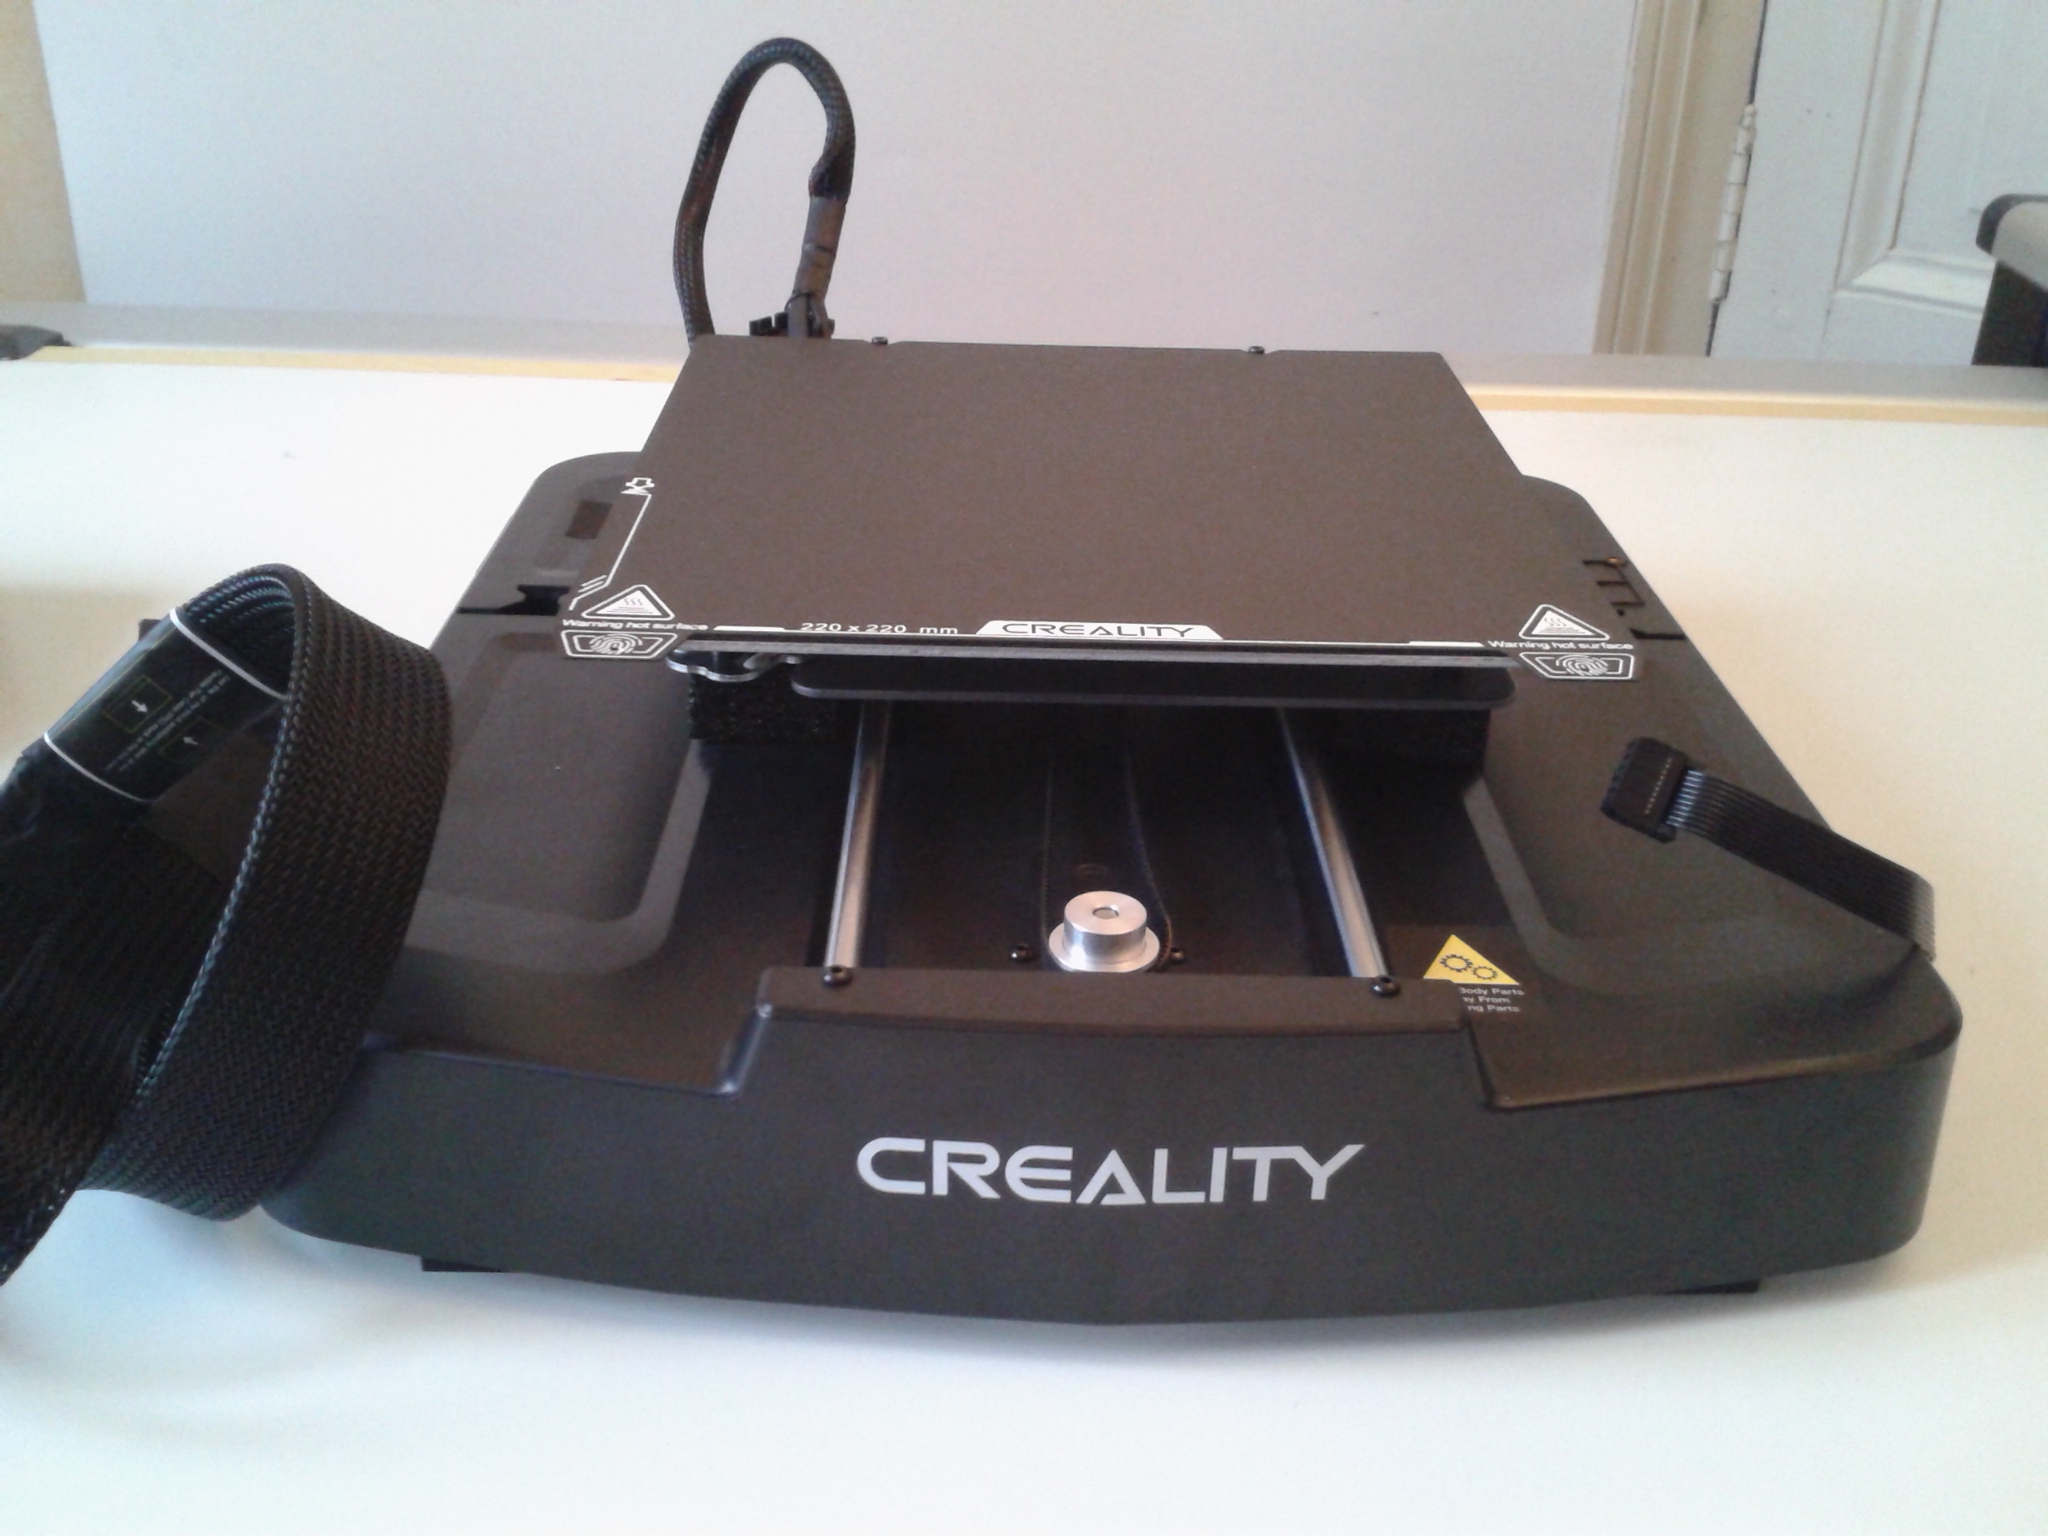
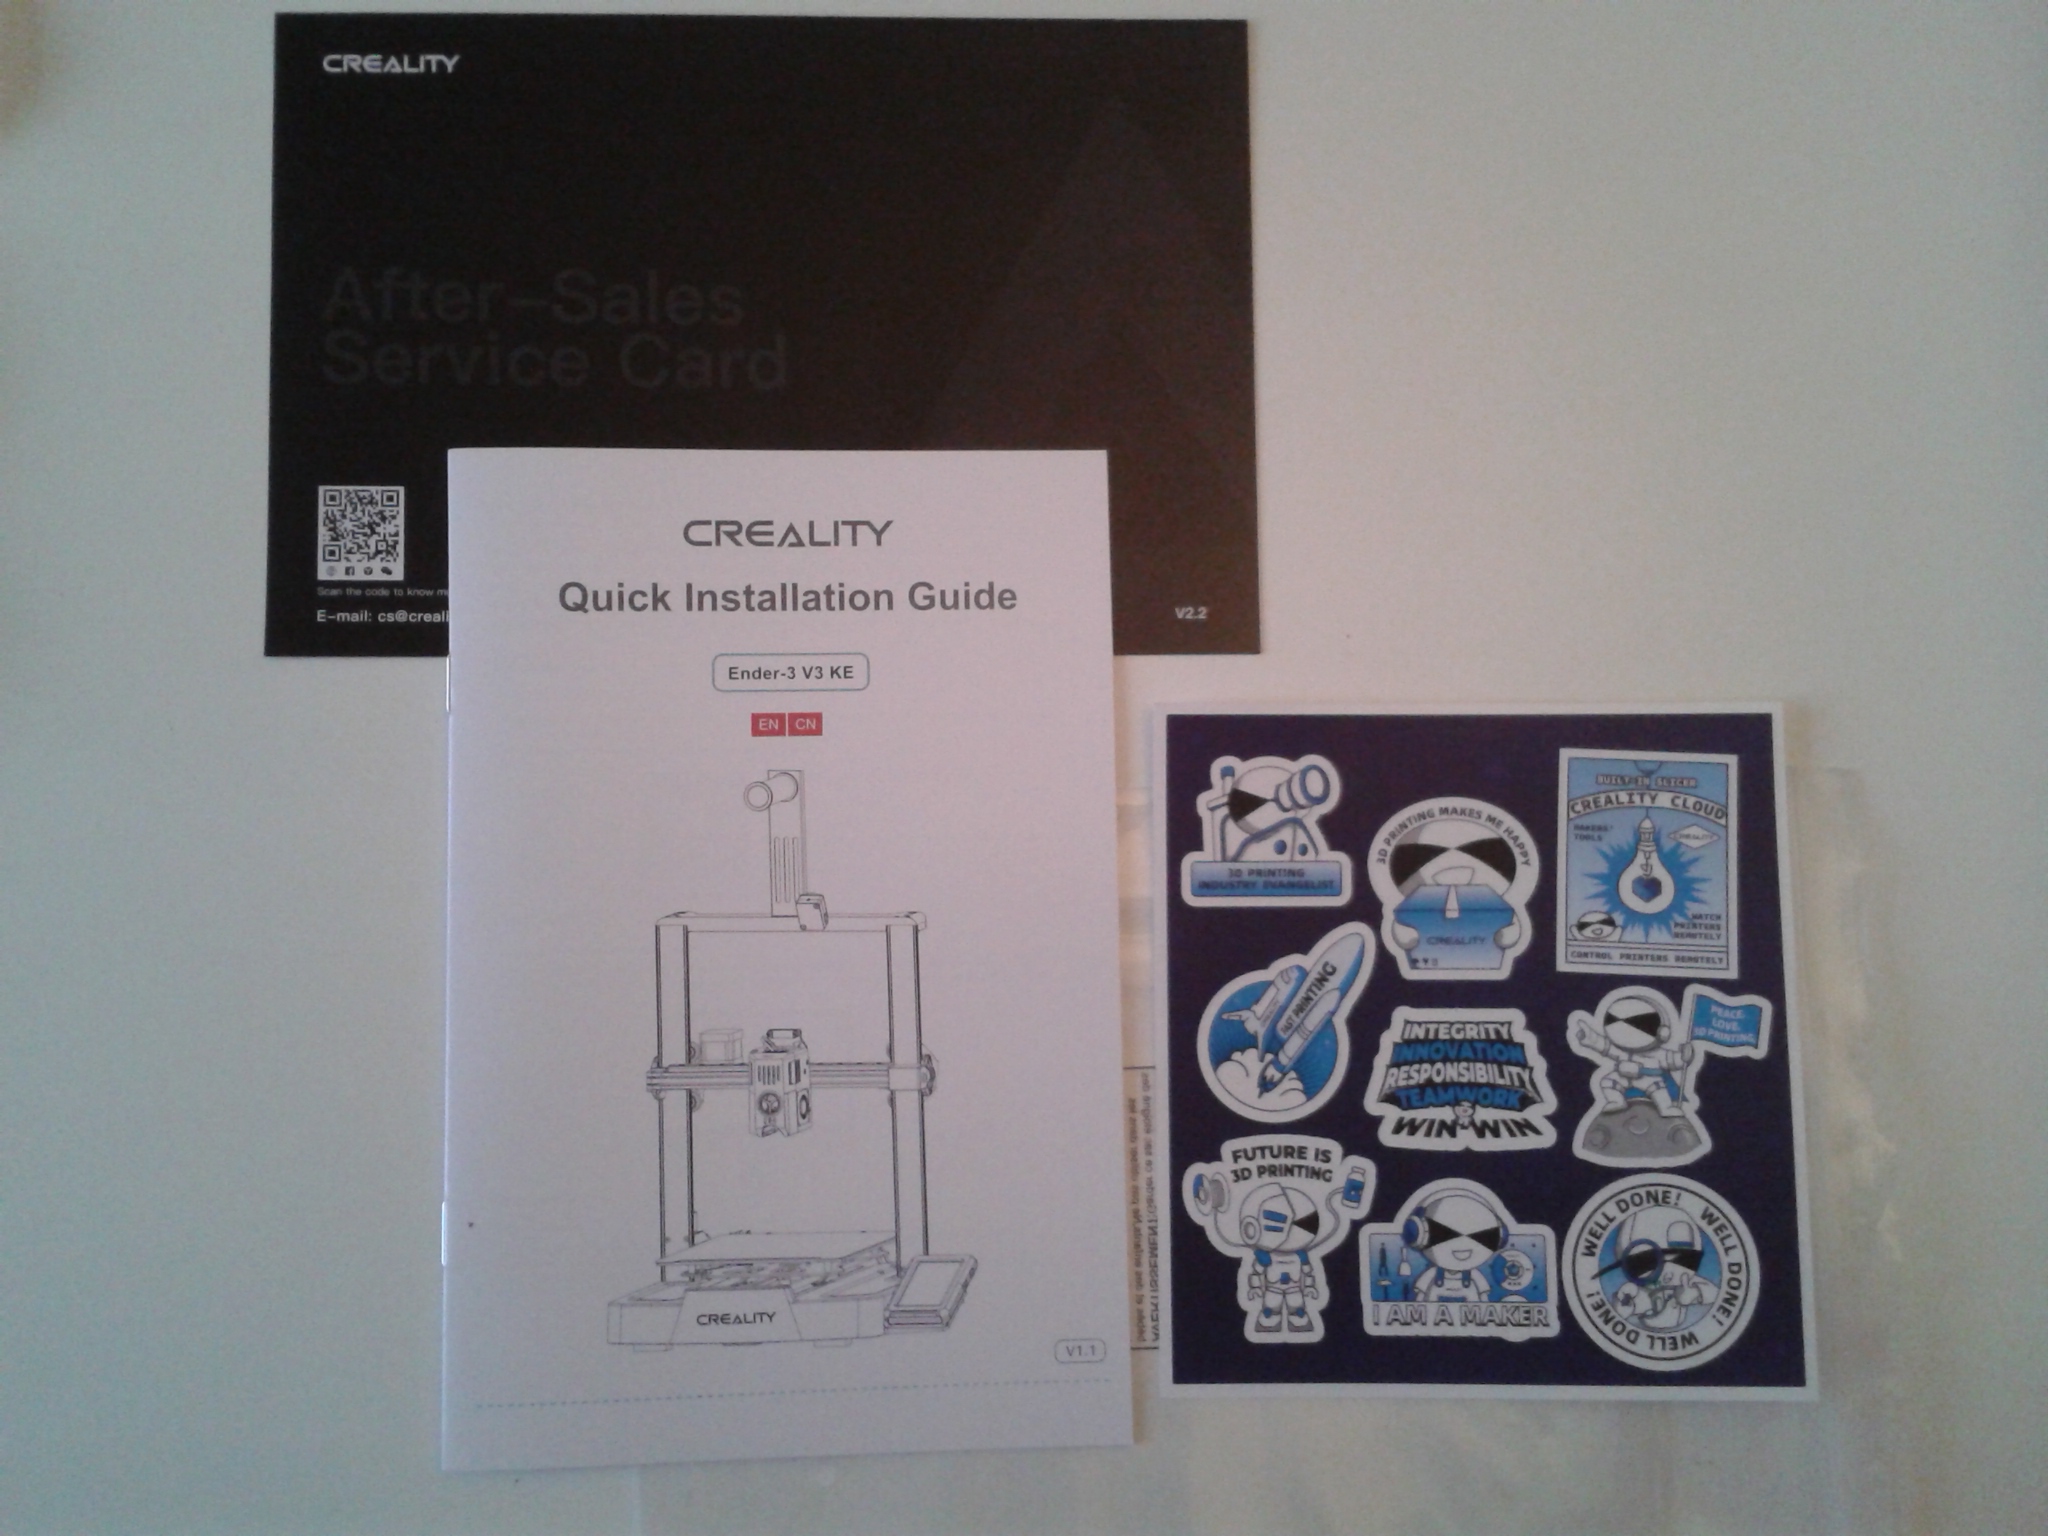
Déballage (unboxing) de la Creality Ender-3 V3 KE
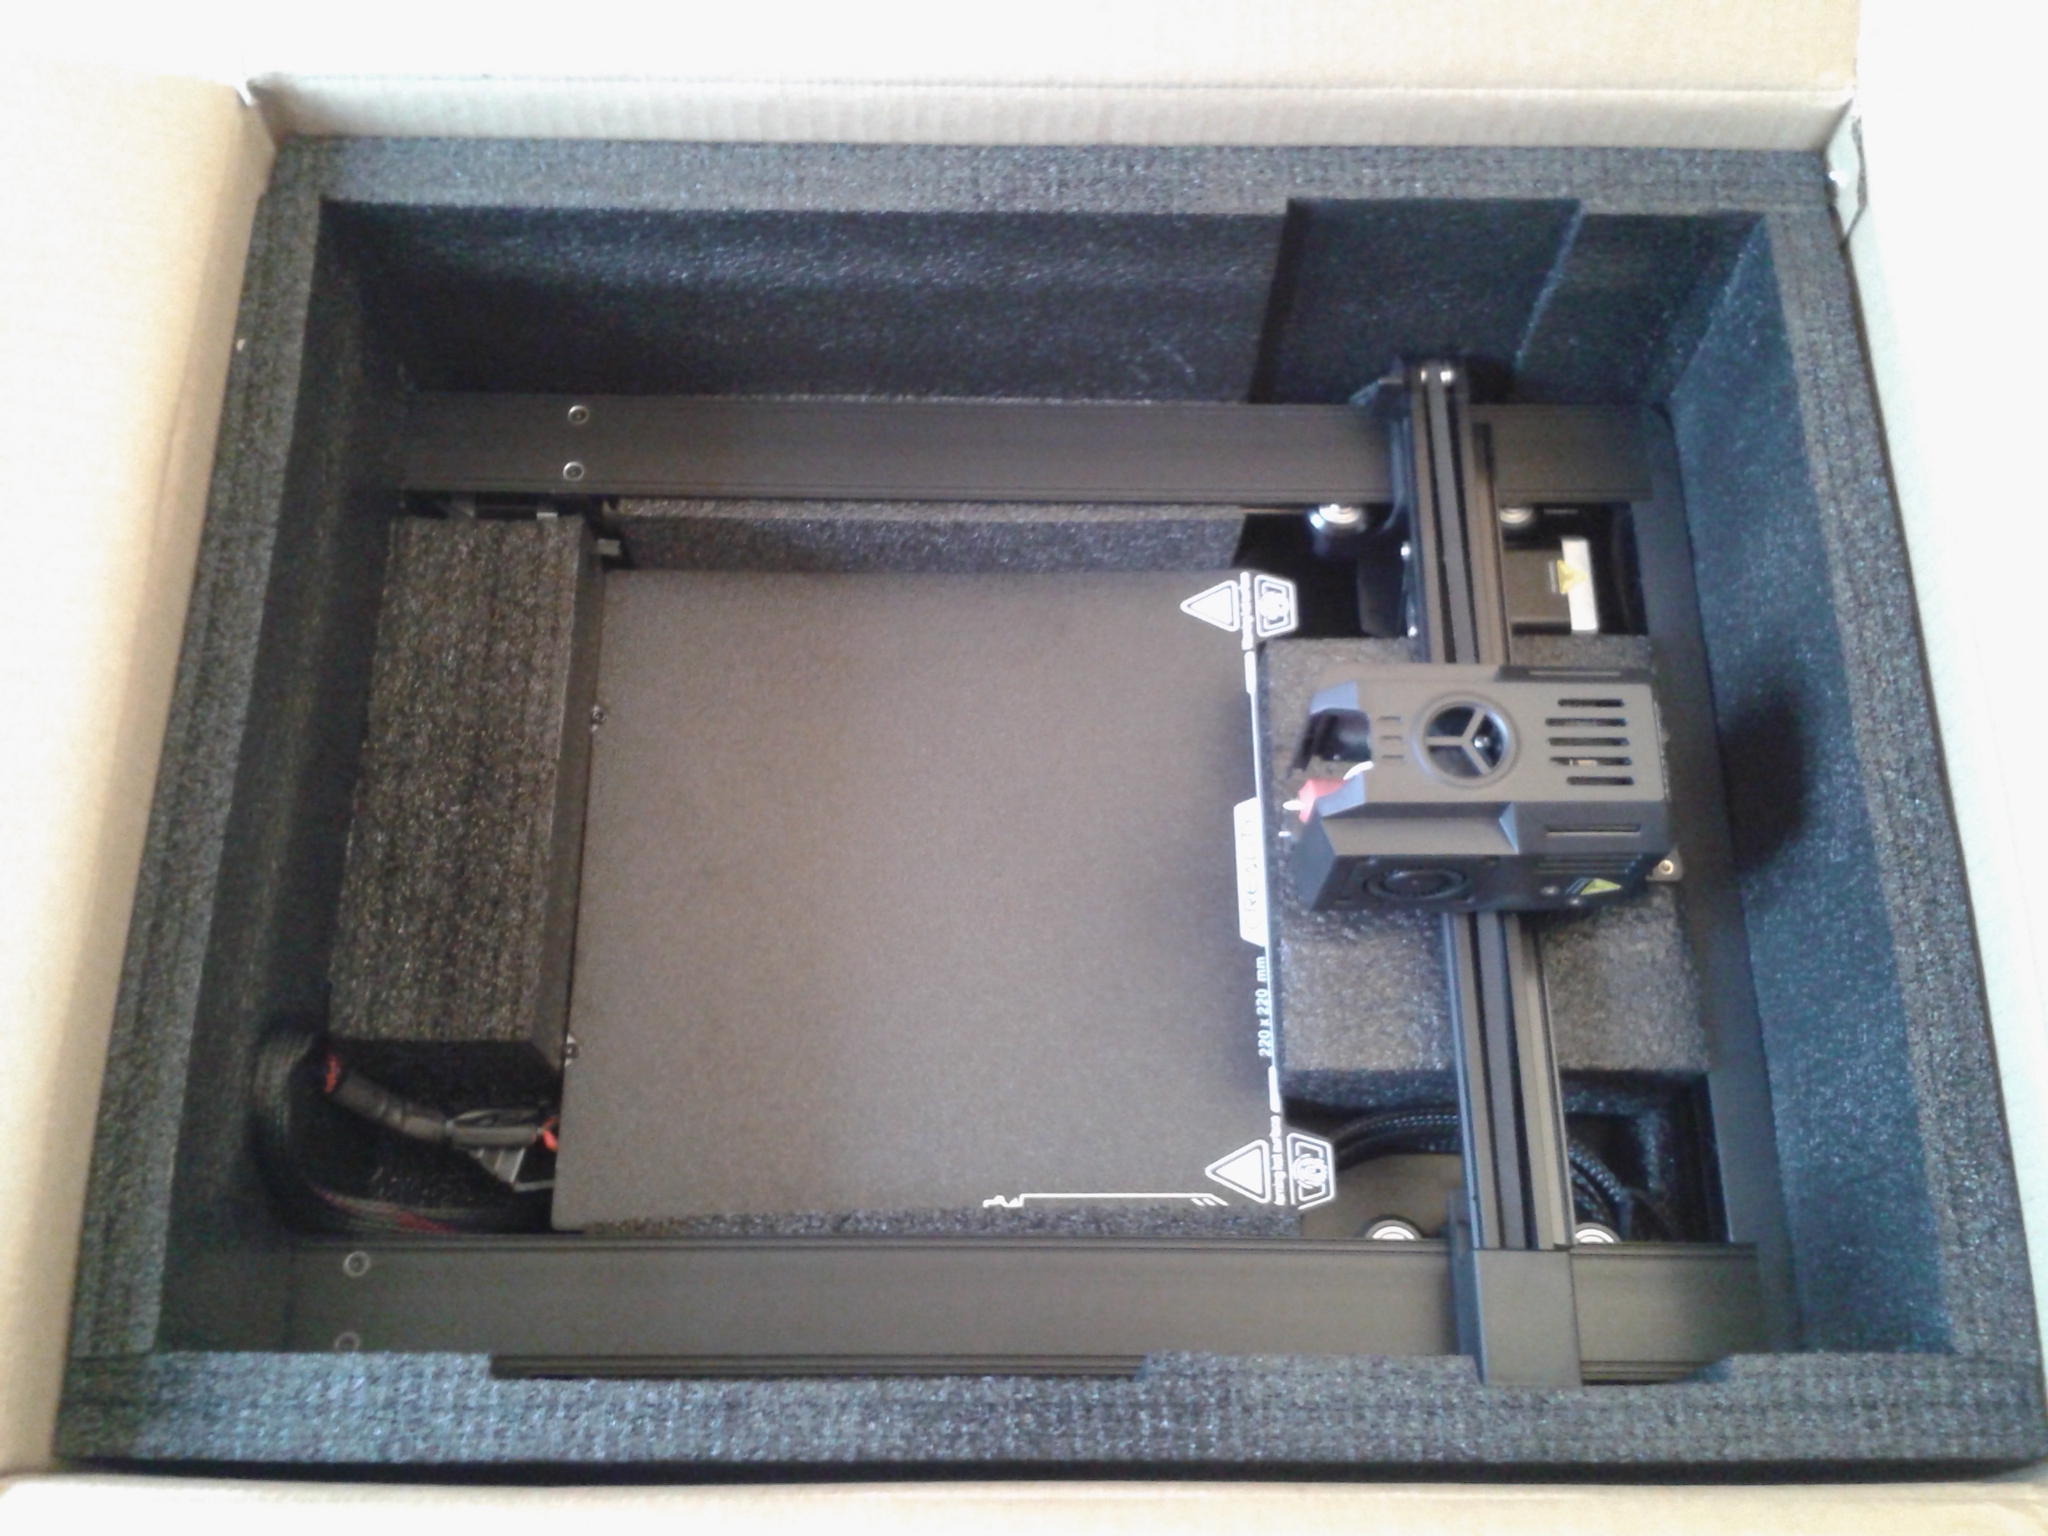
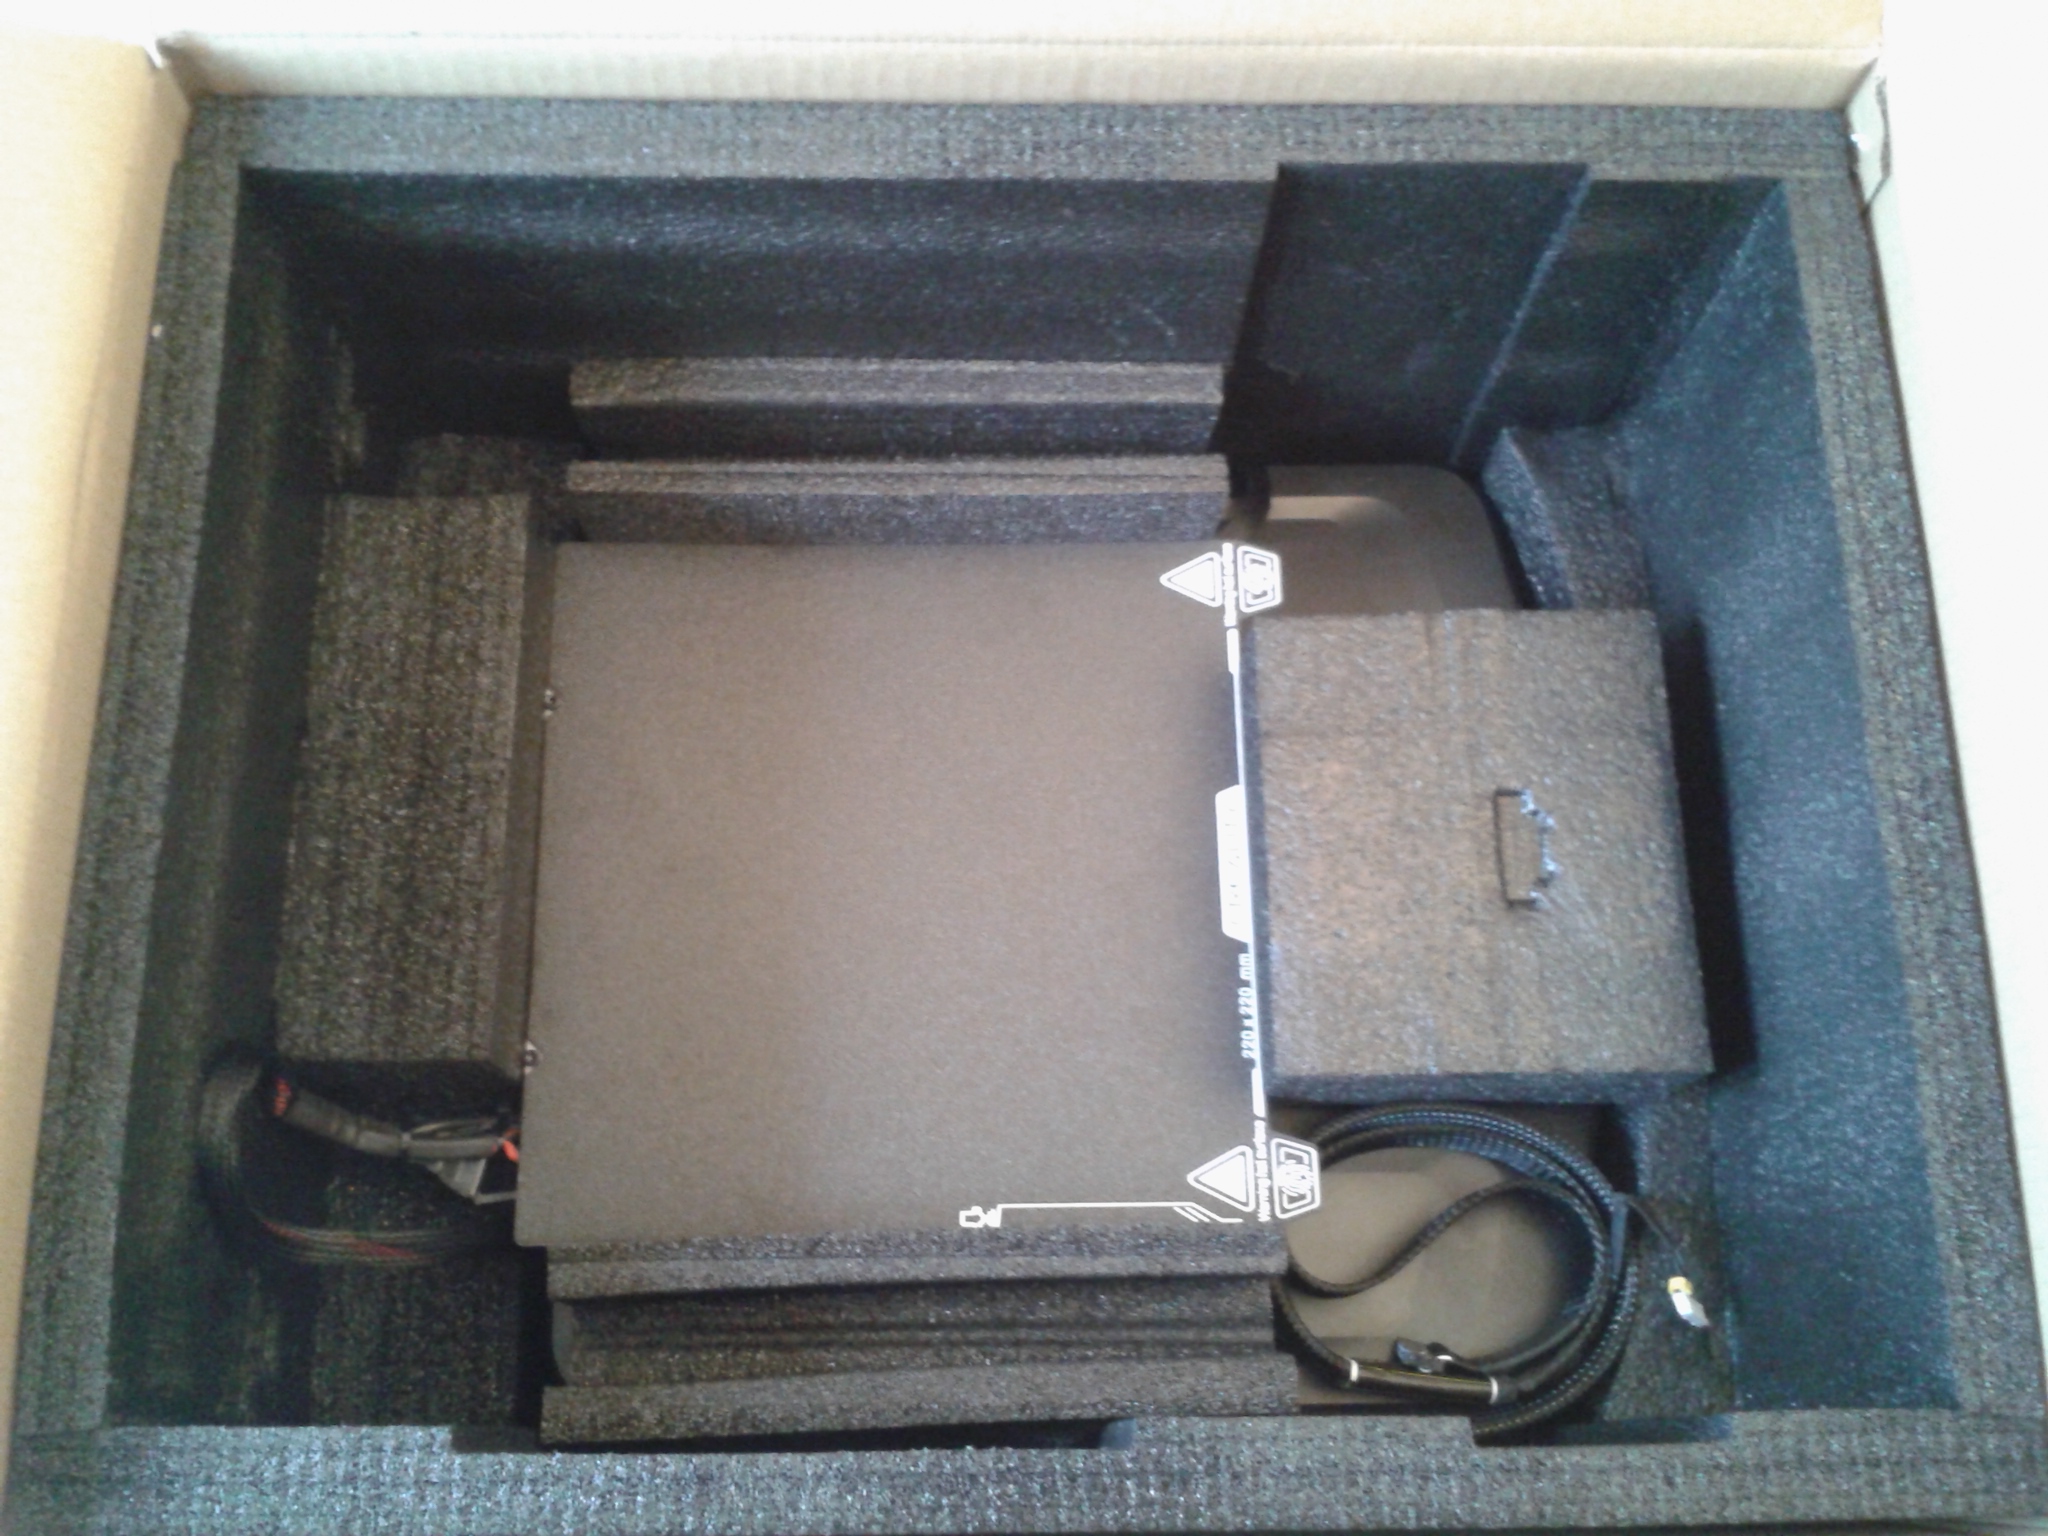
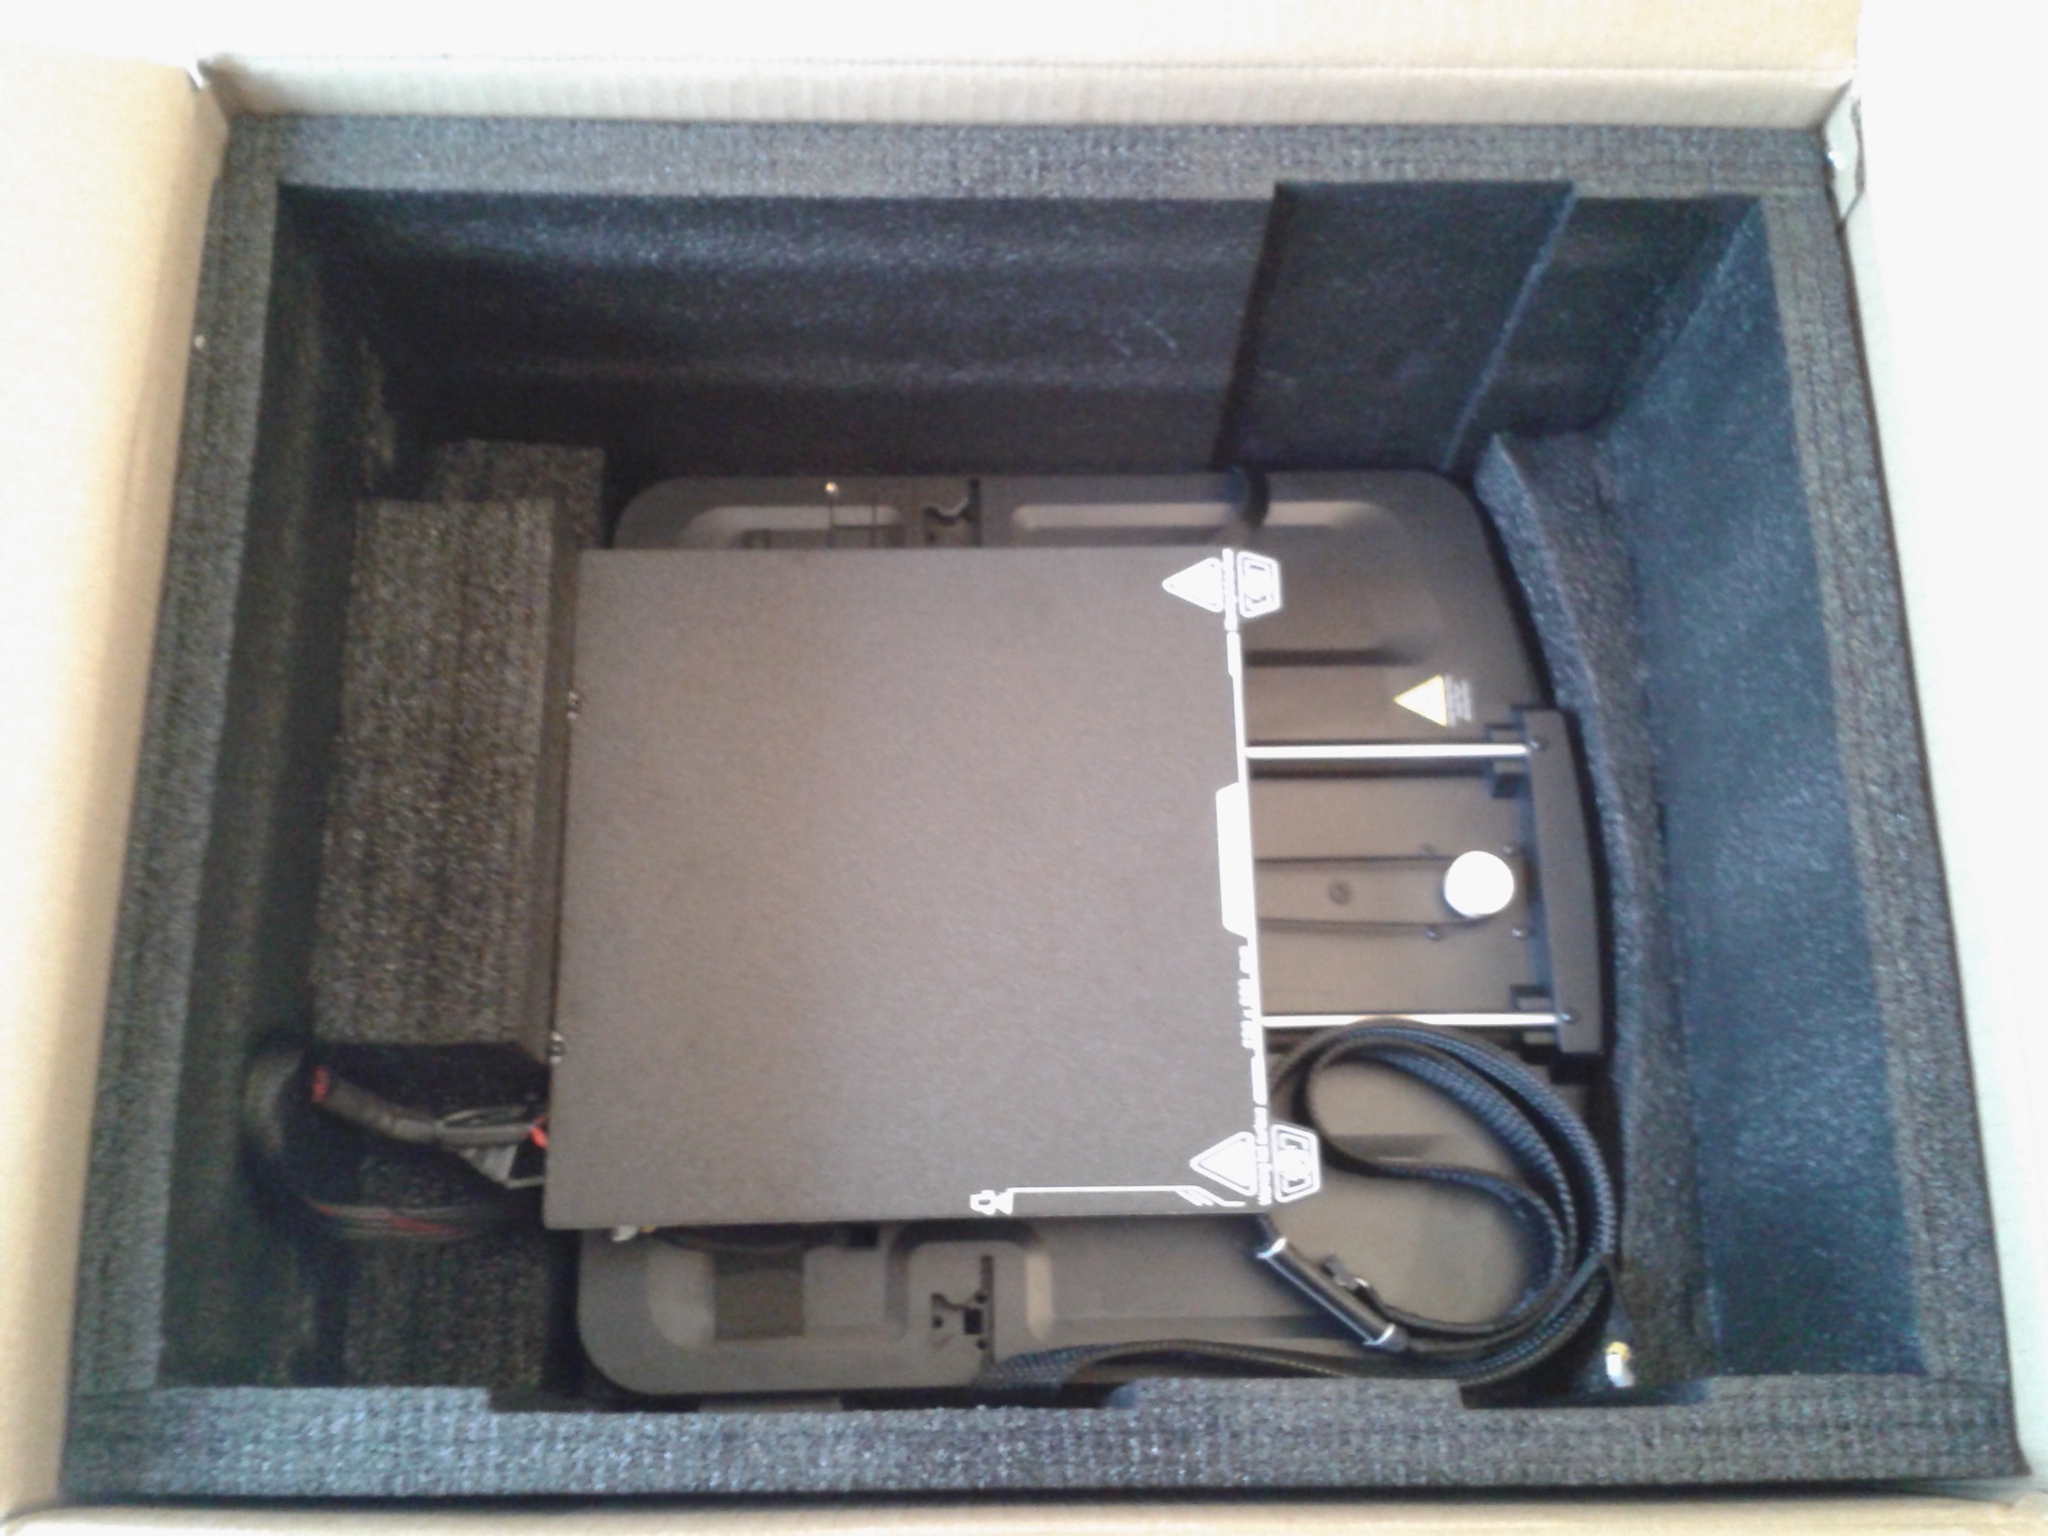
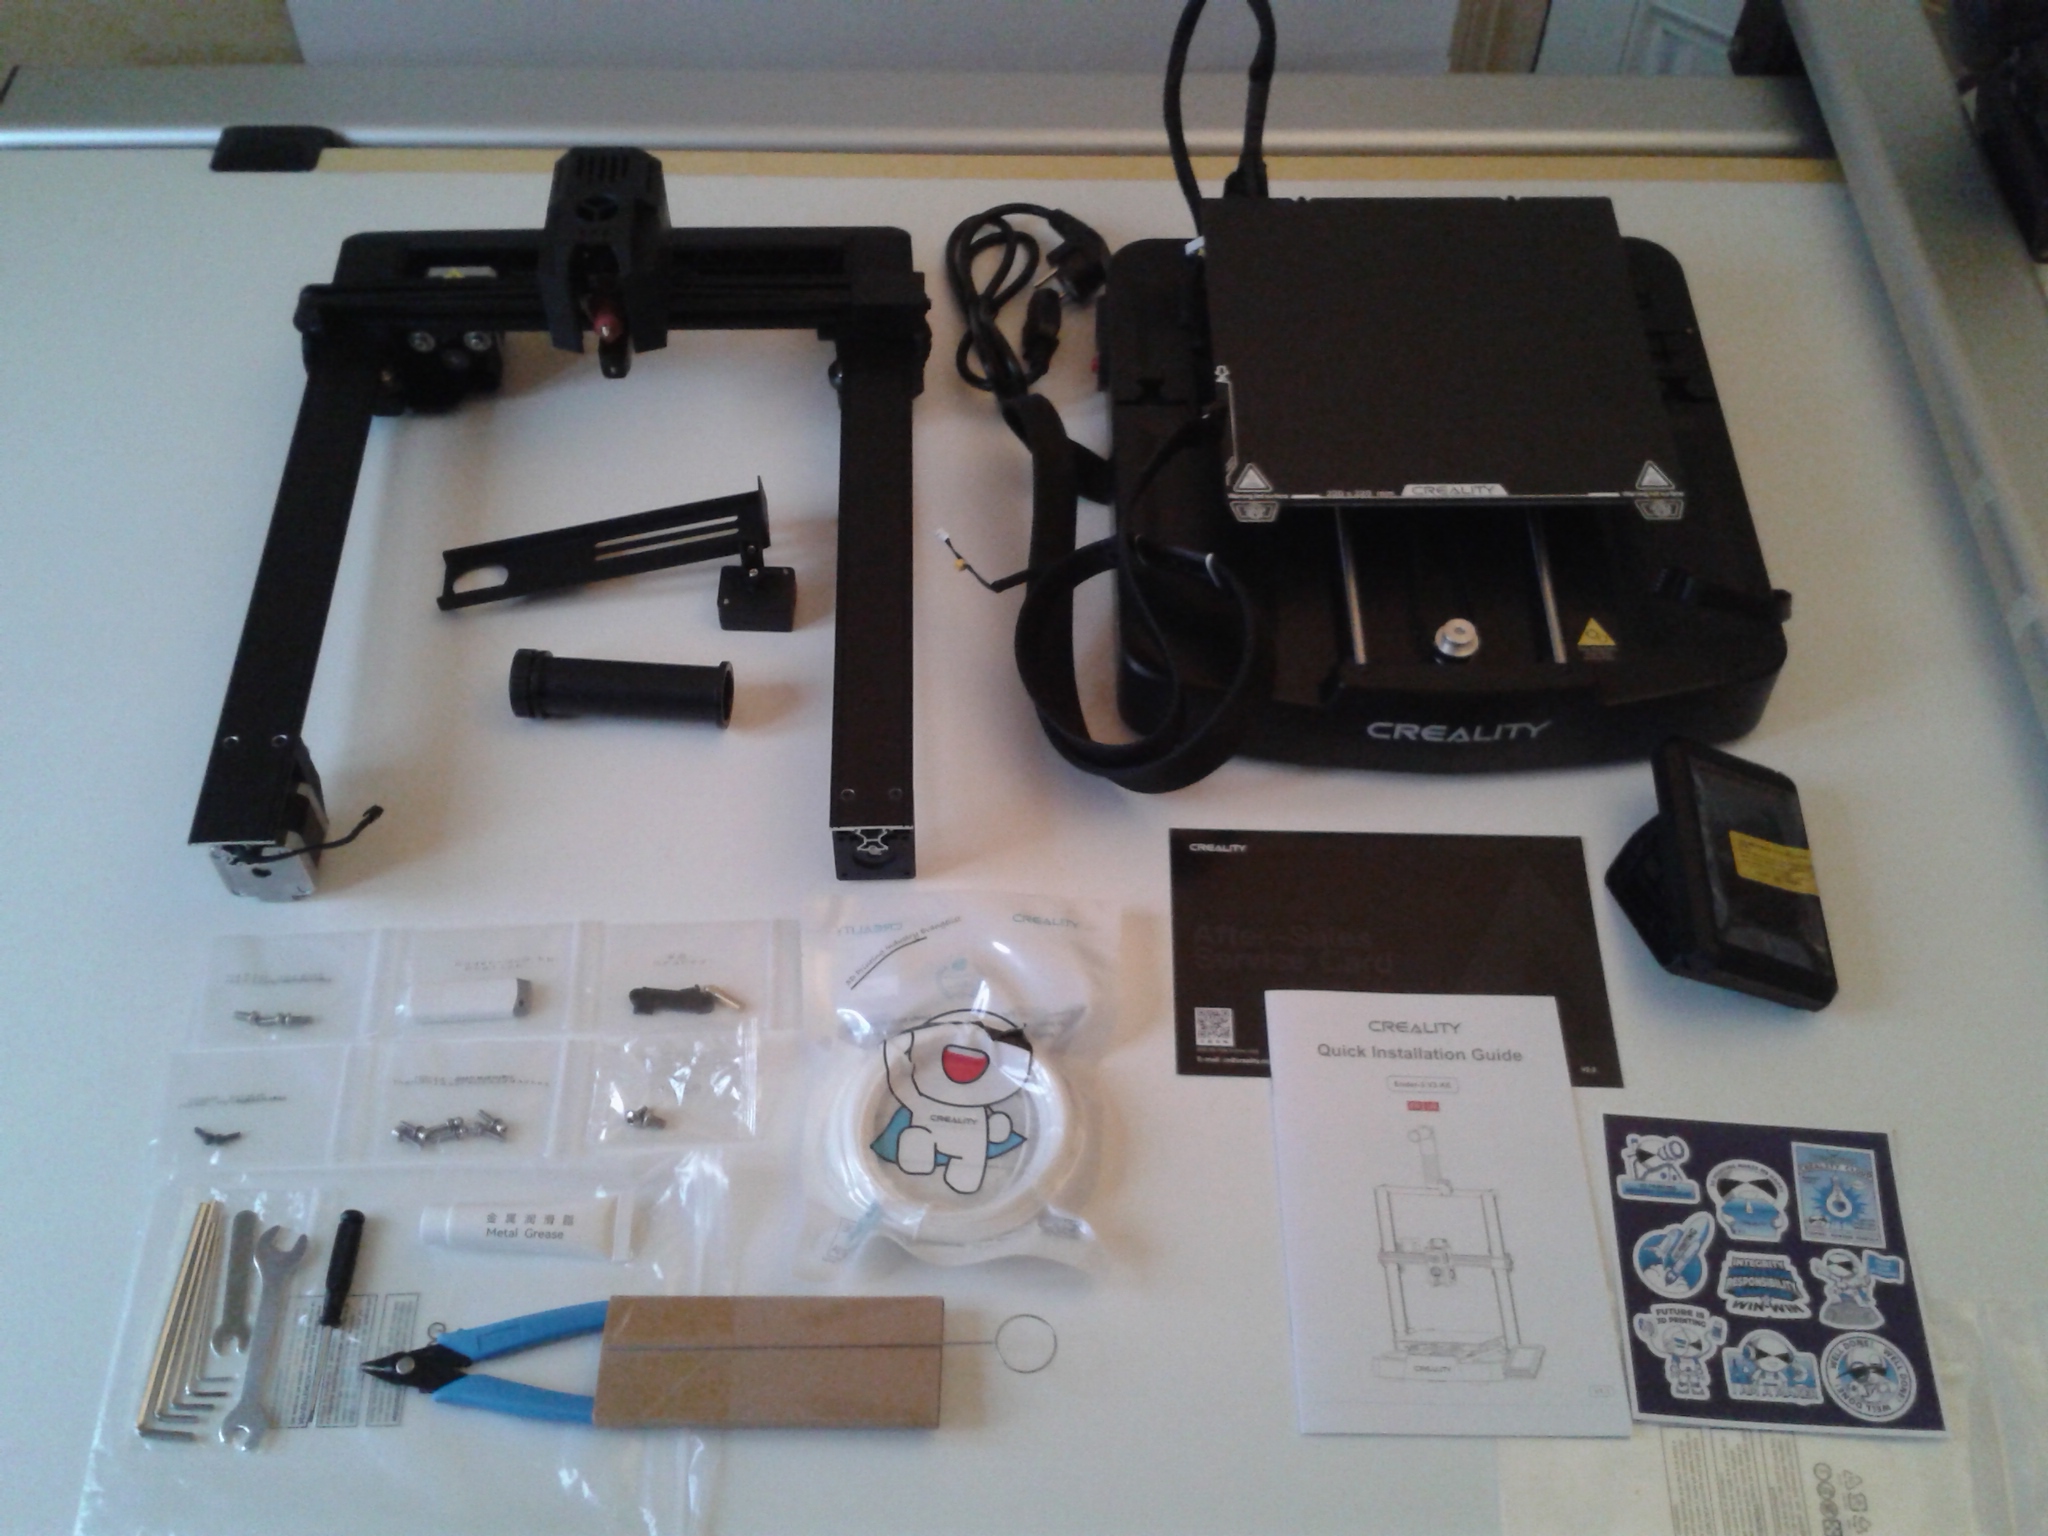
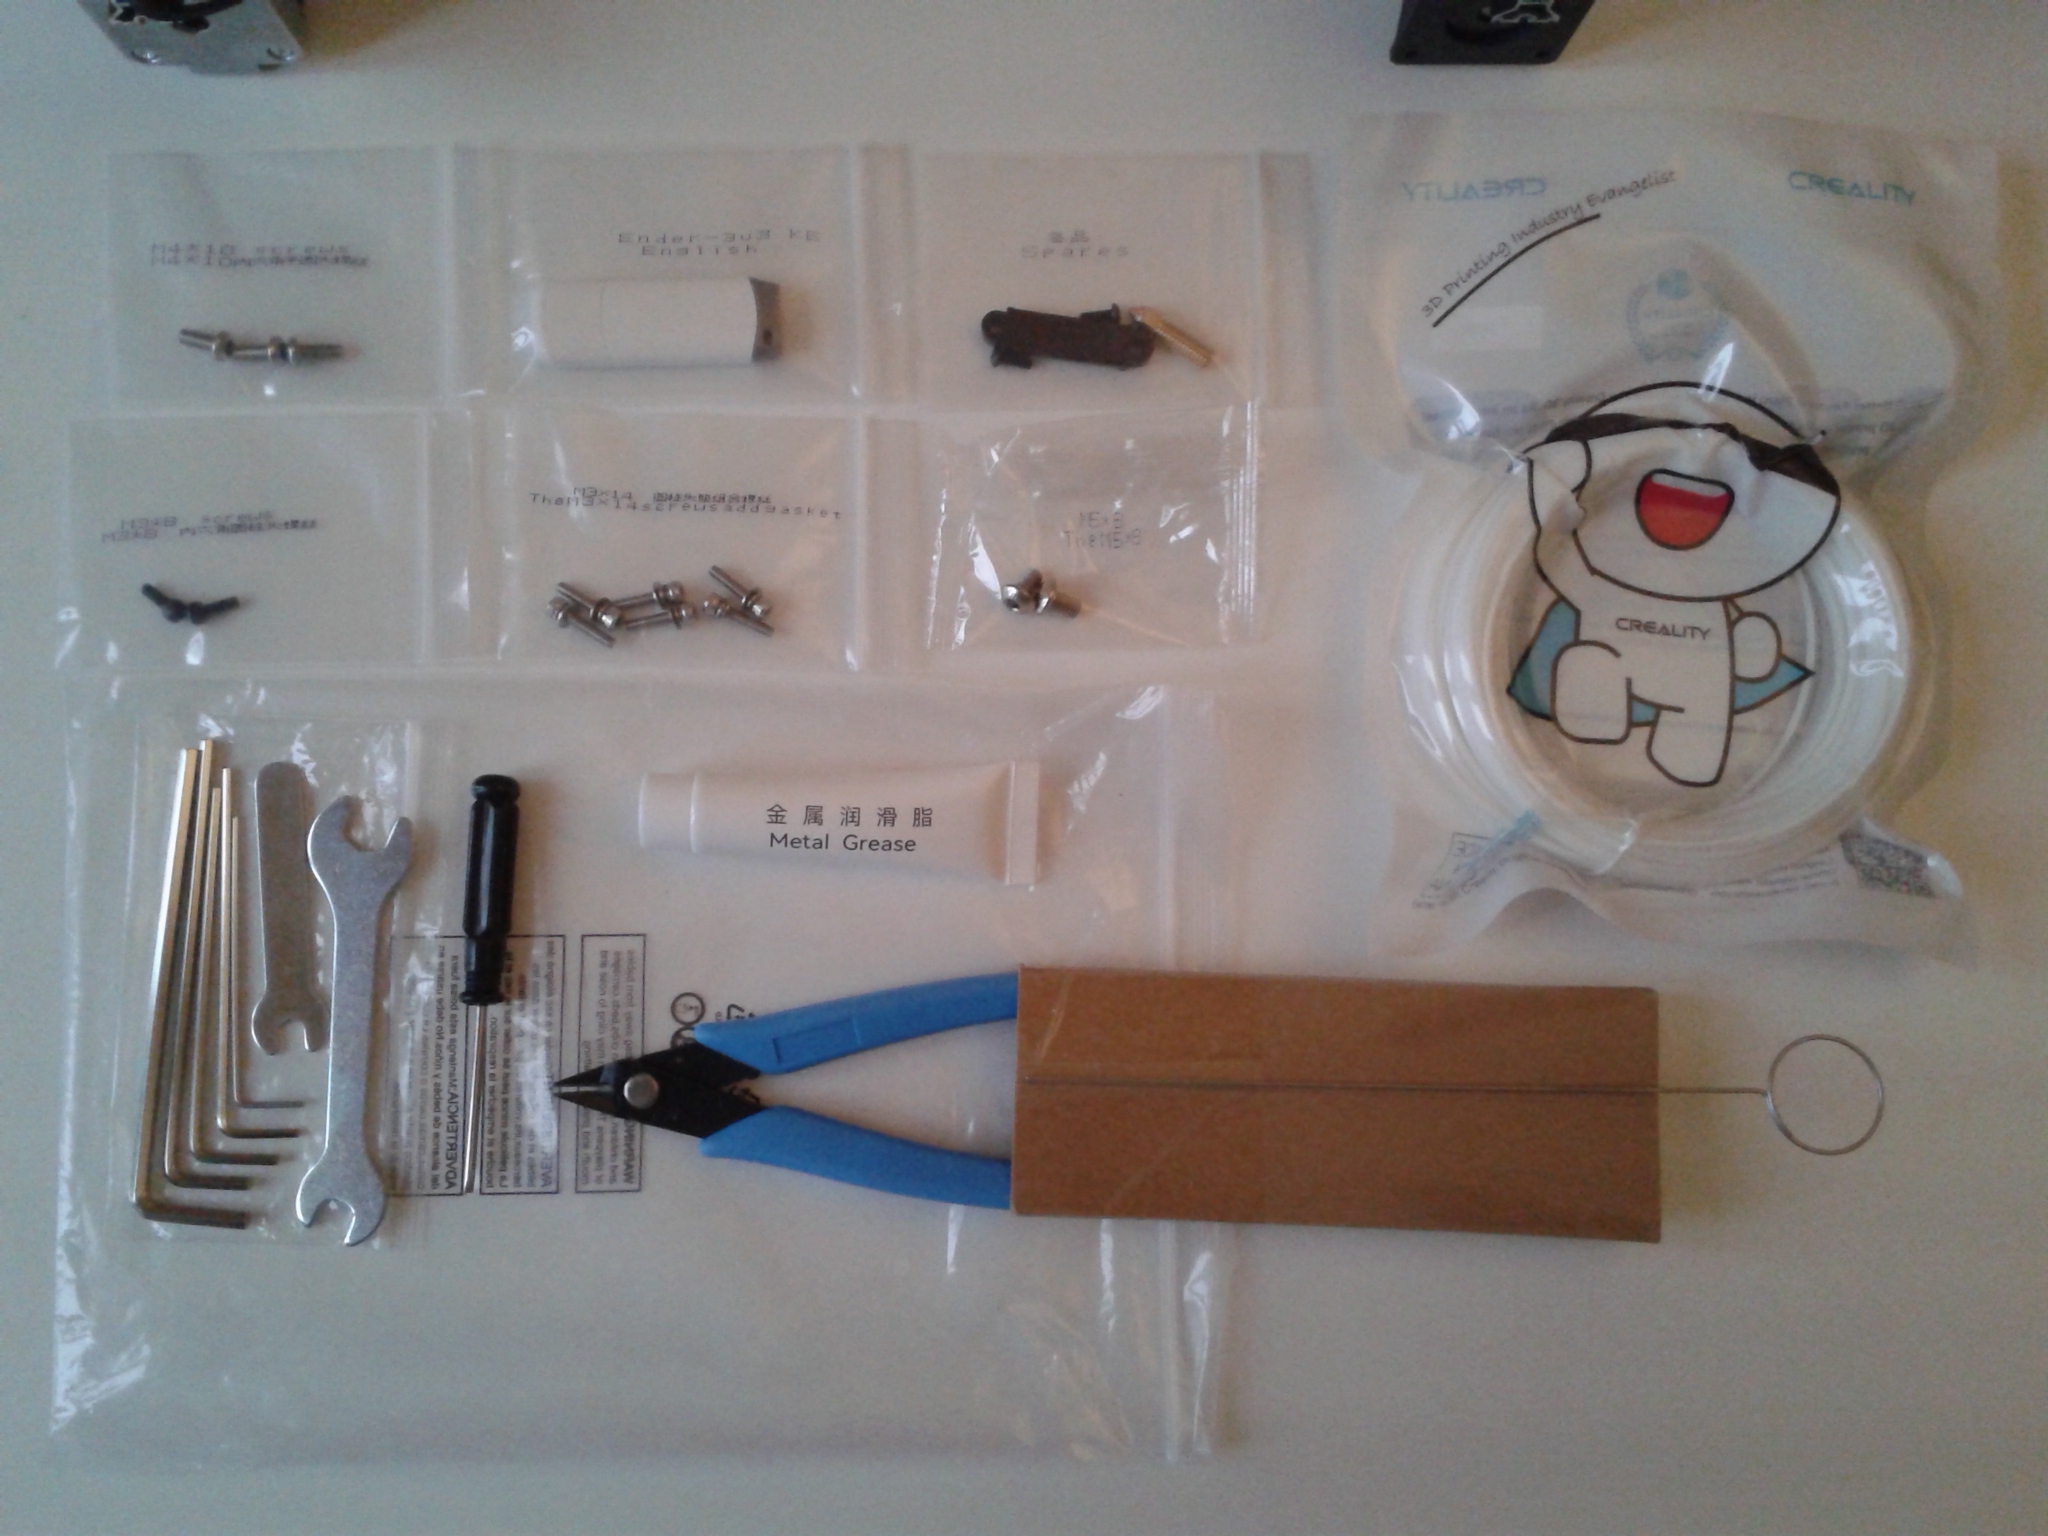
Bien protégé dans un carton robuste et calé dans des plaques de mousse découpées sur-mesure, on retrouve la base, le portique, l’écran, le porte bobine avec le capteur de fin de filament et les divers manuels et fournitures.
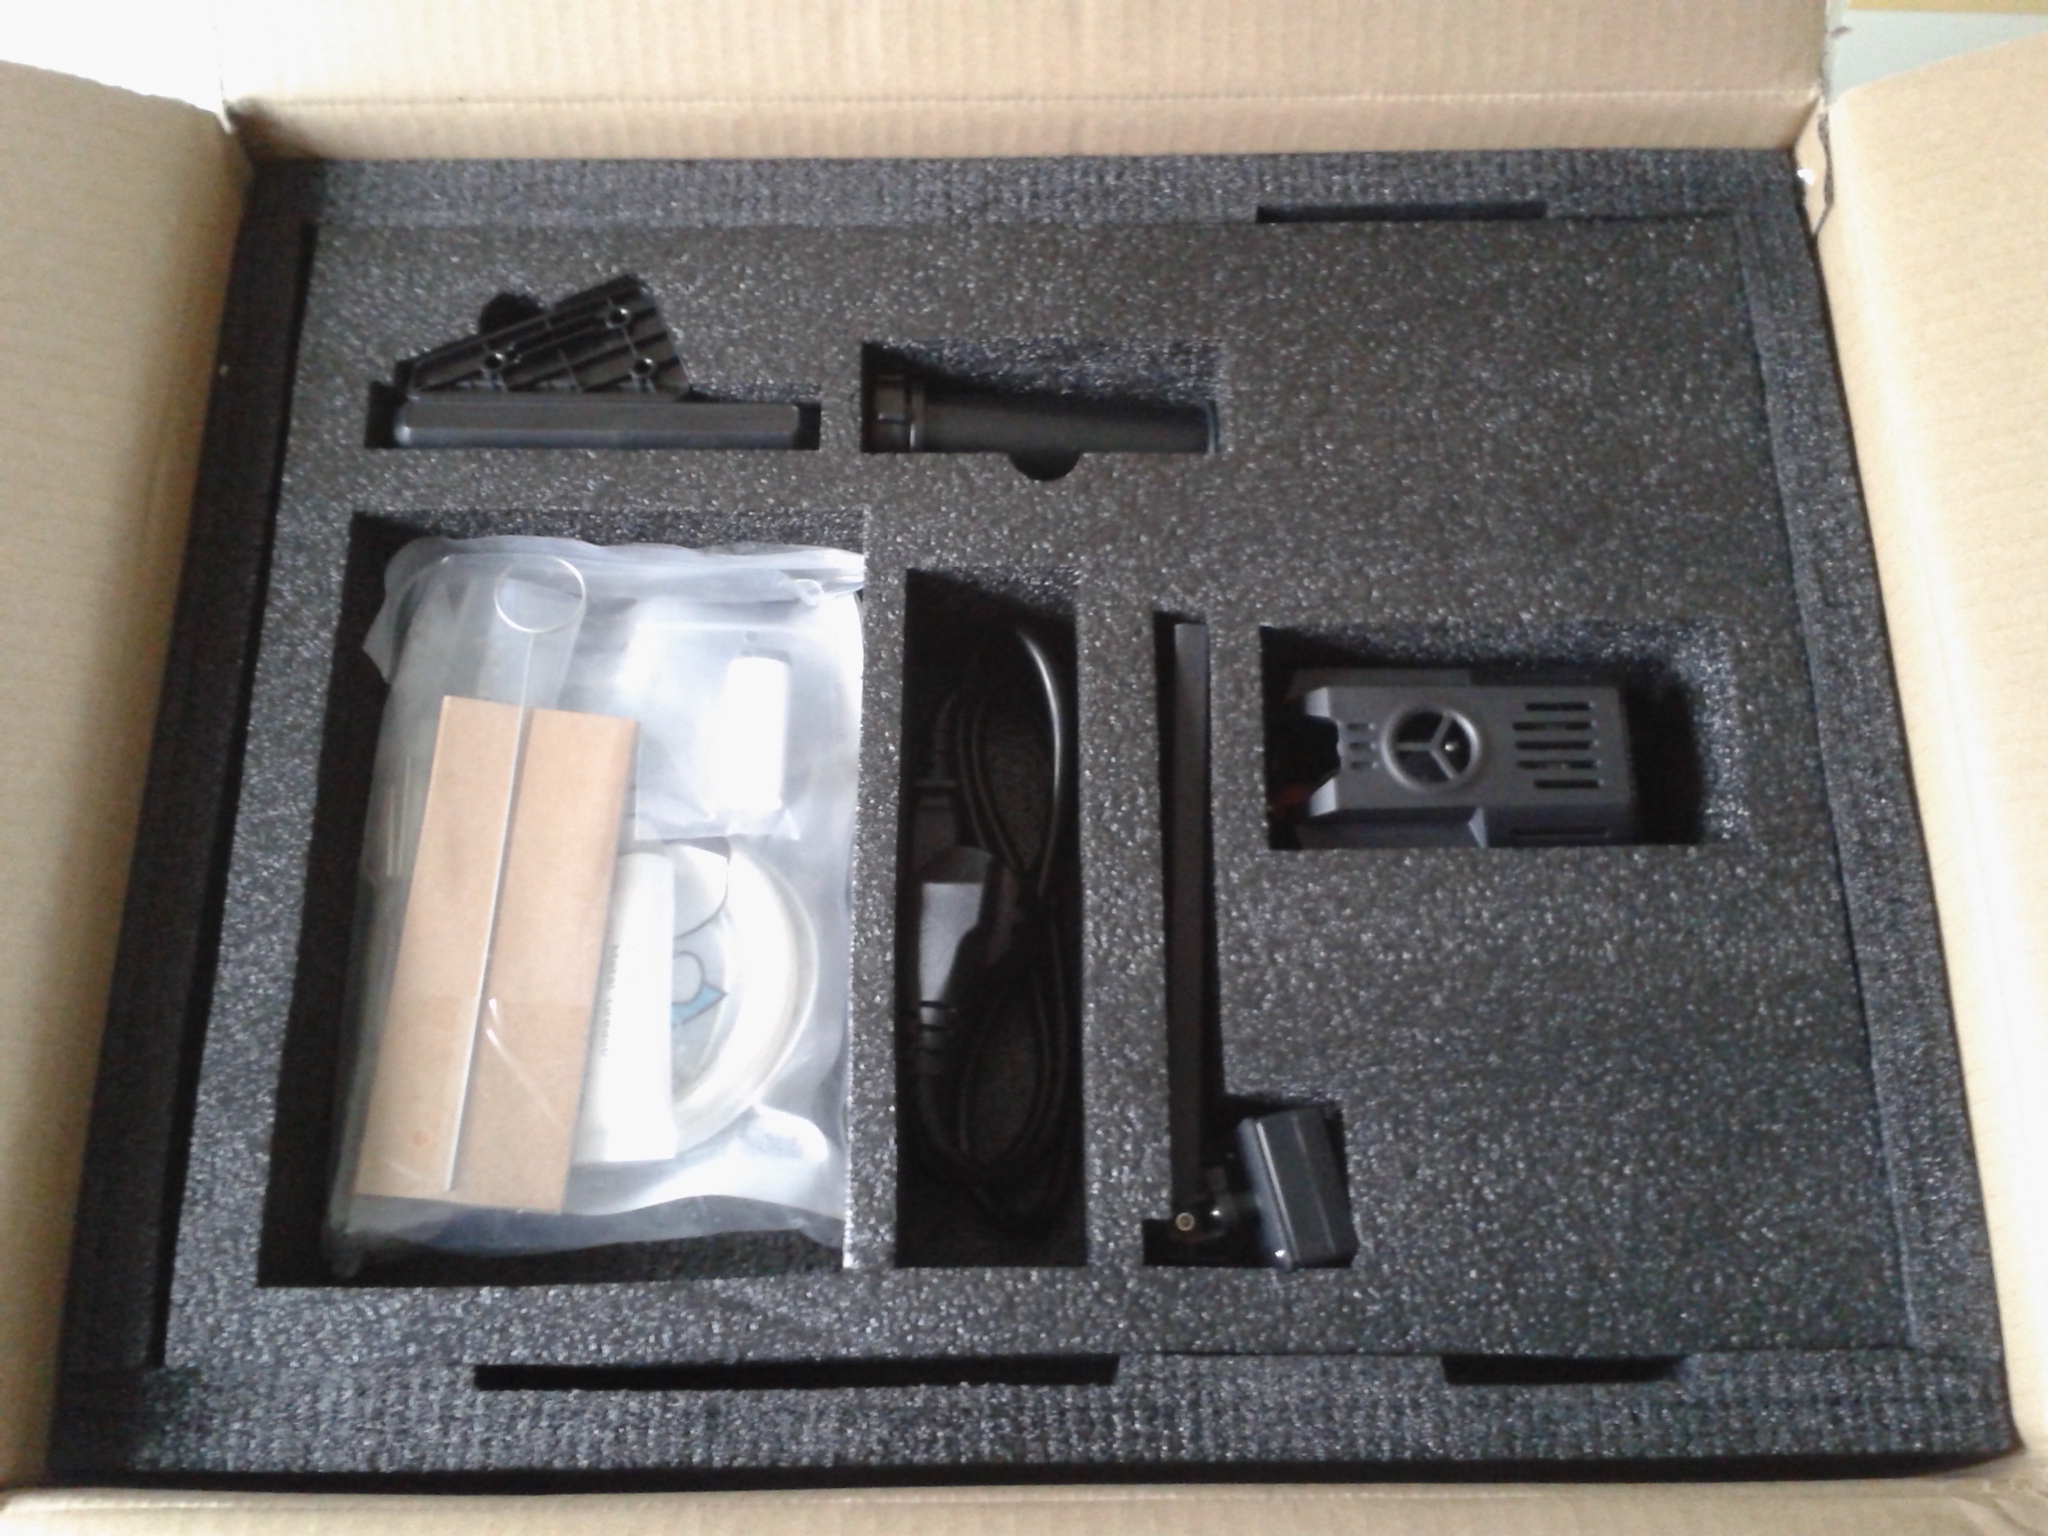
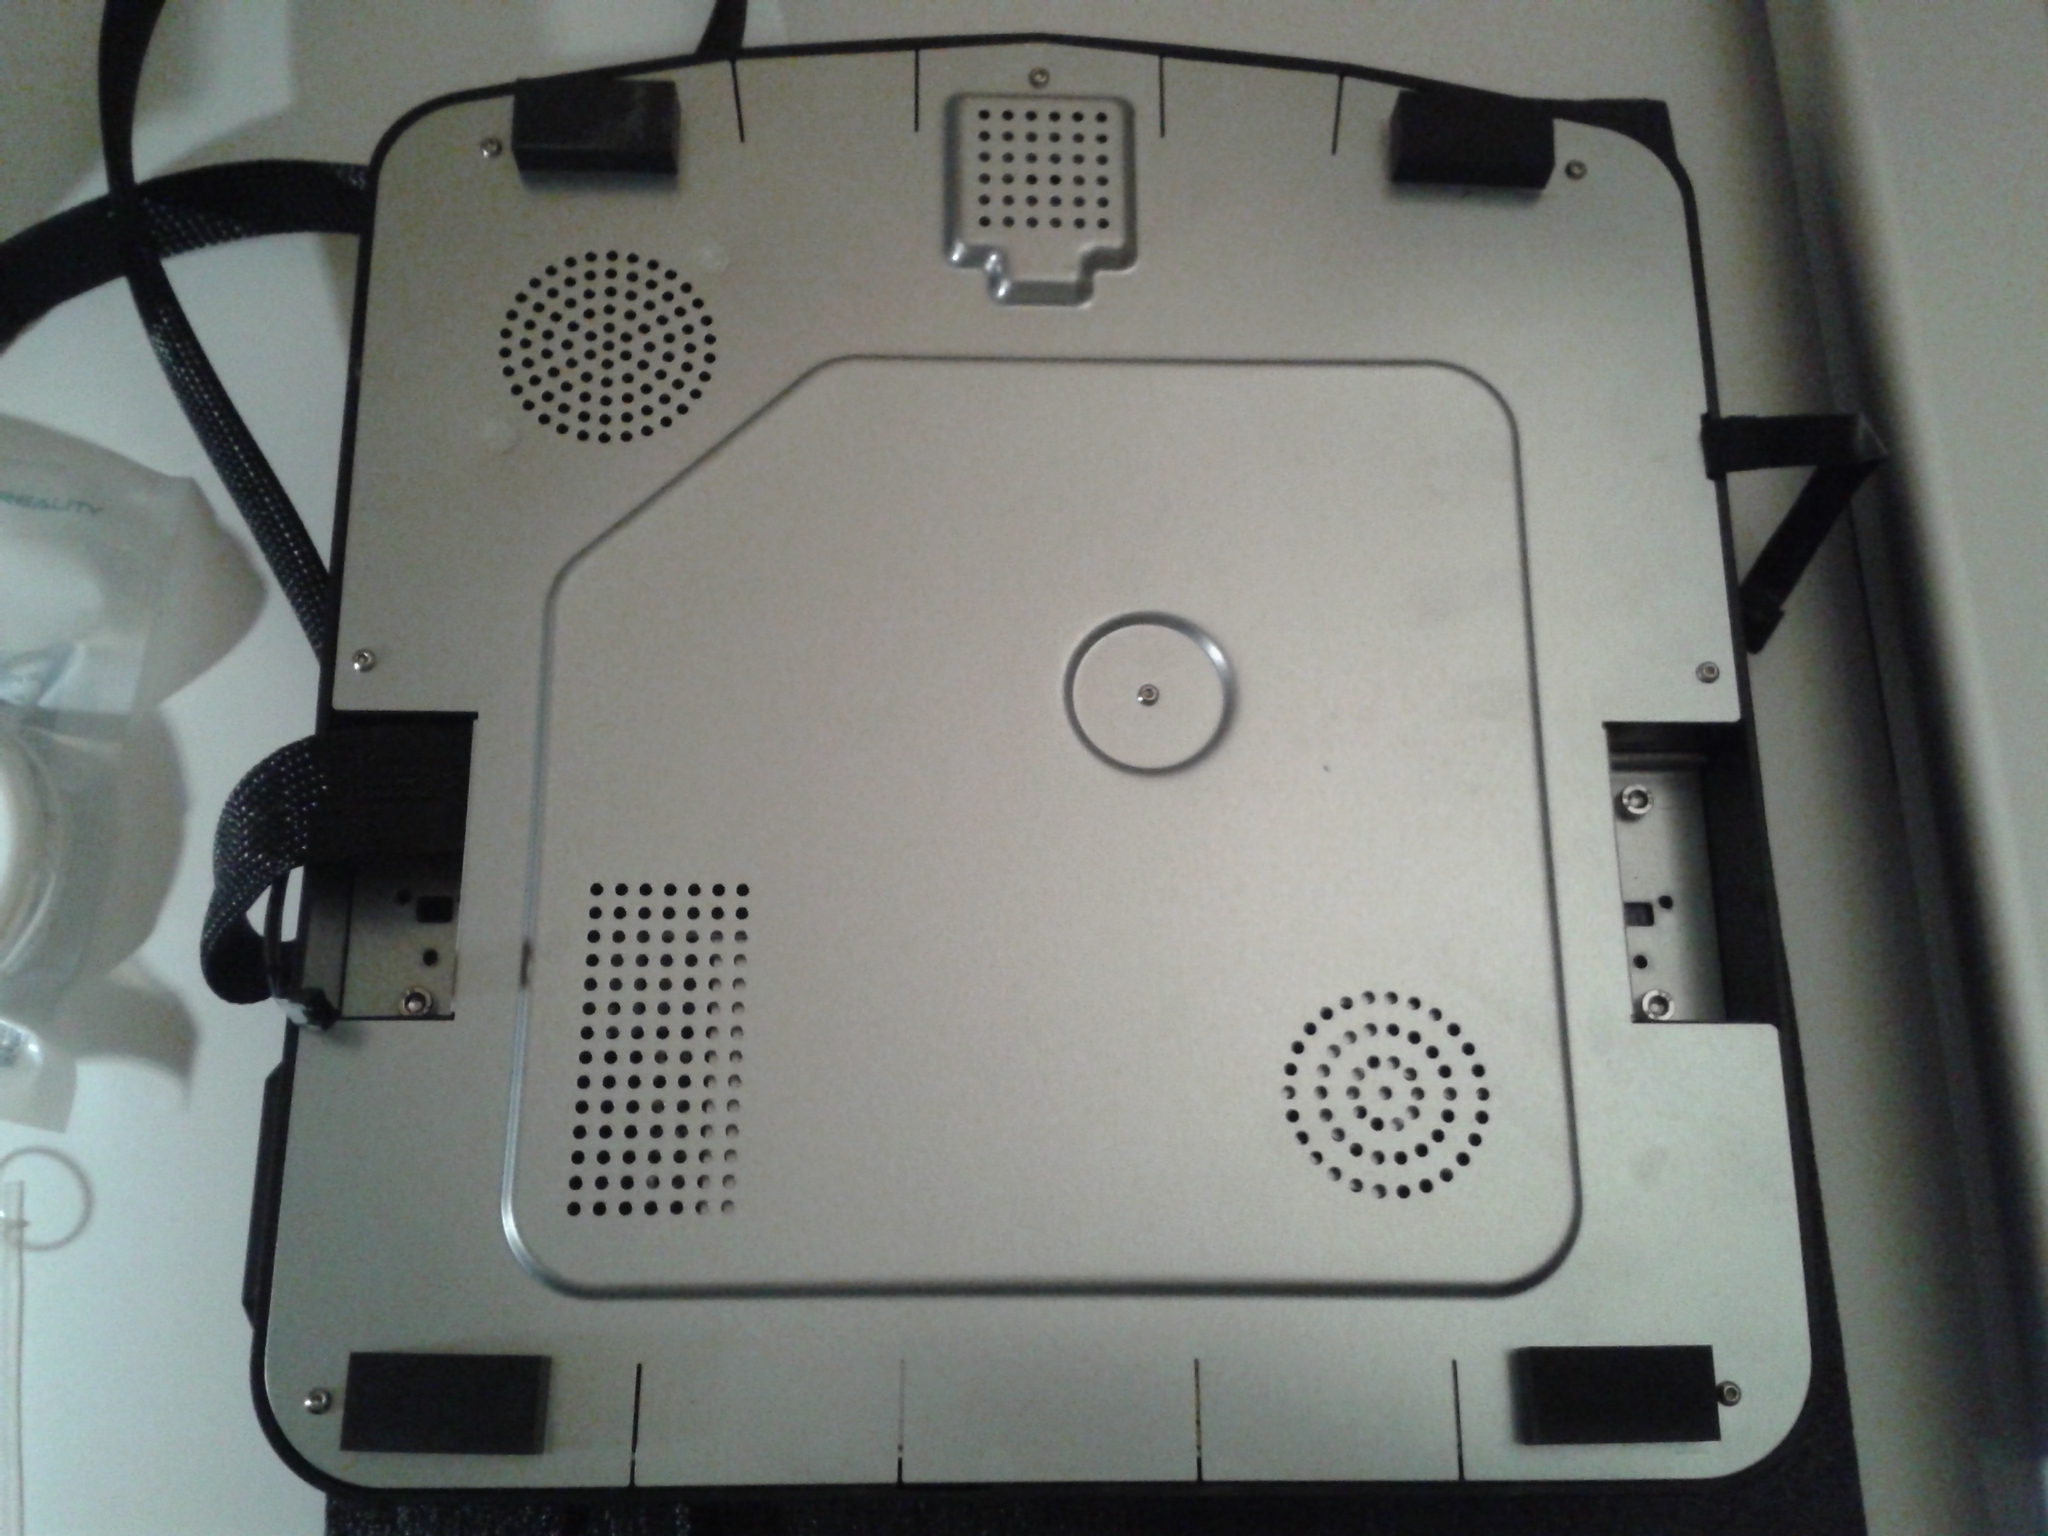
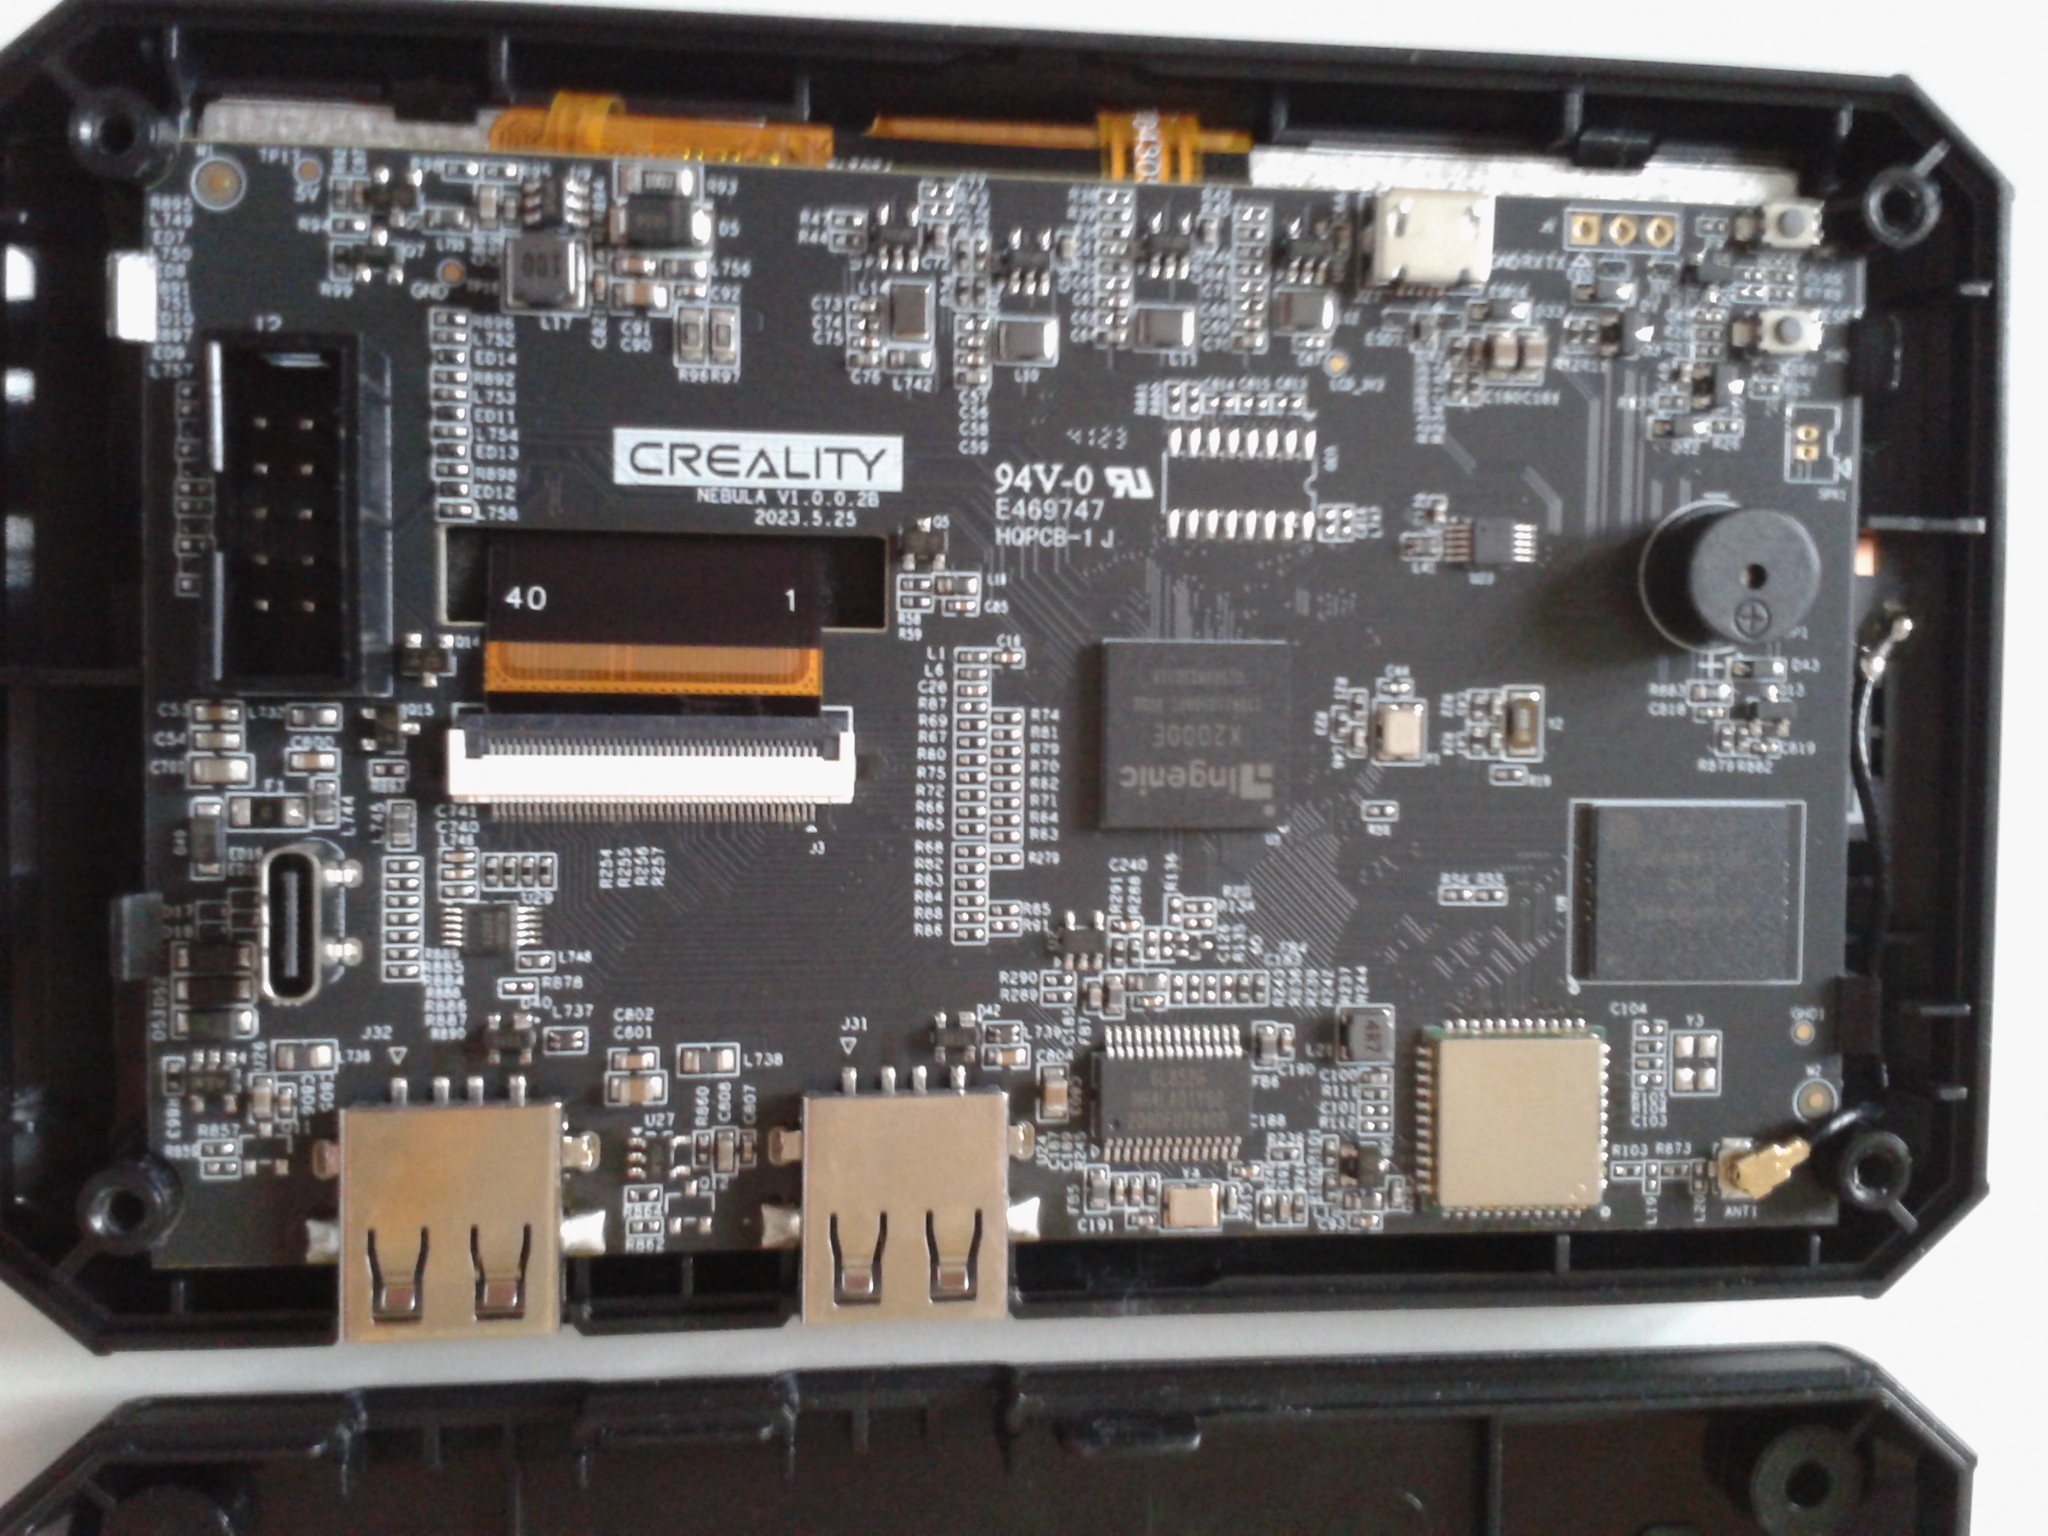
Electronique de la Creality Ender-3 V3 KE
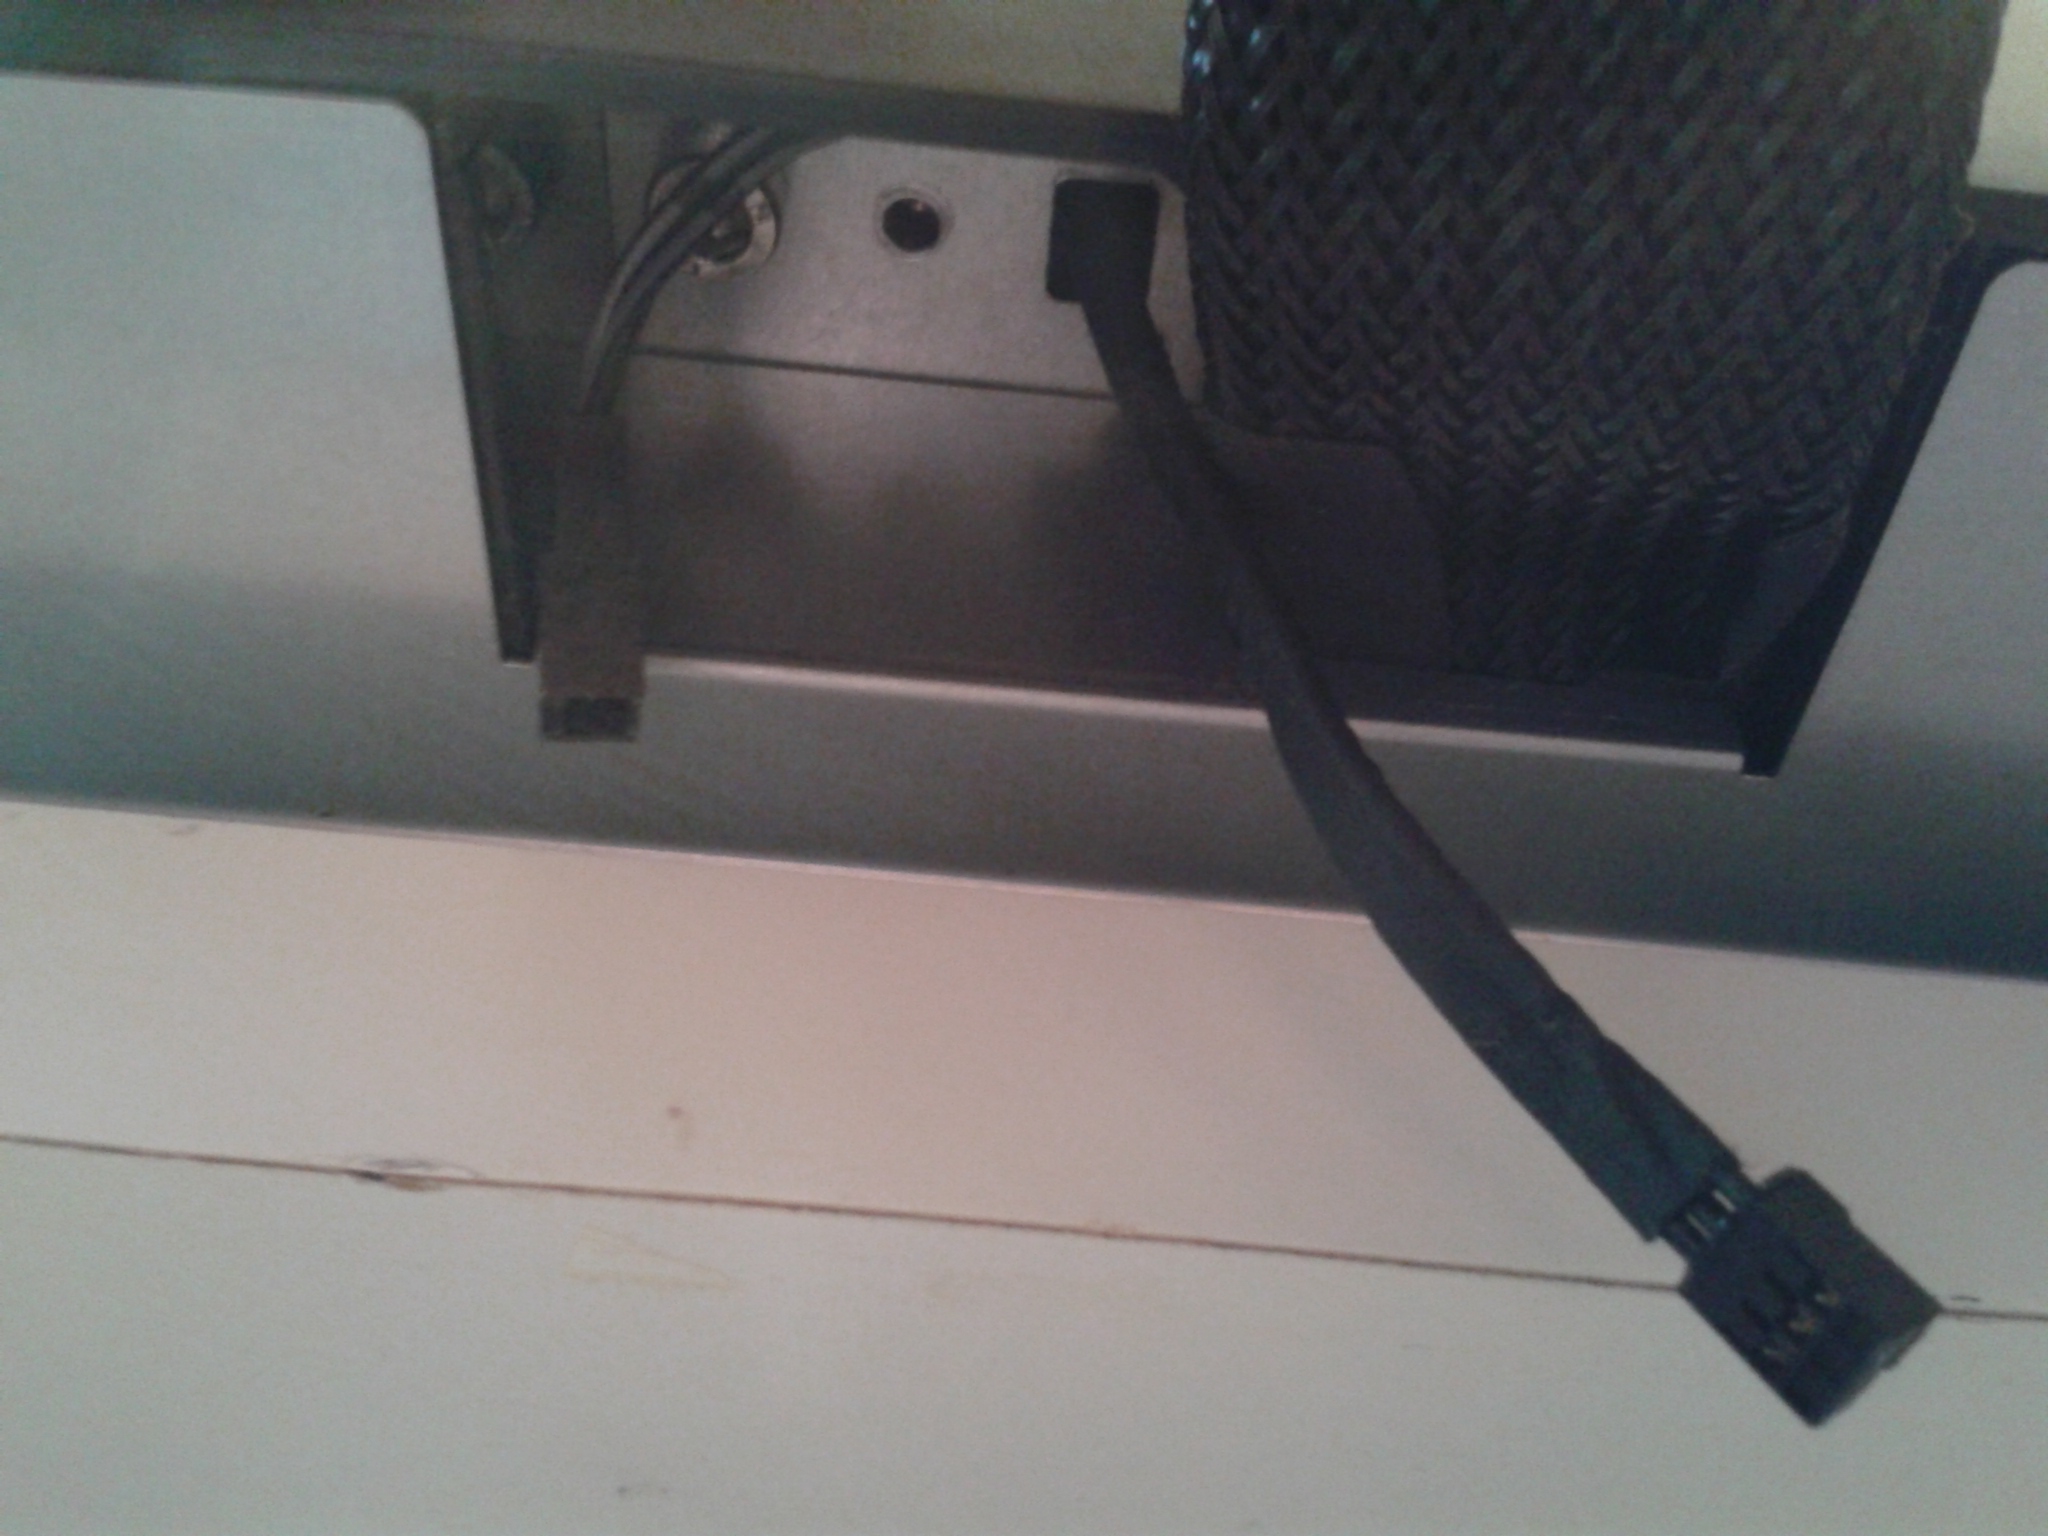
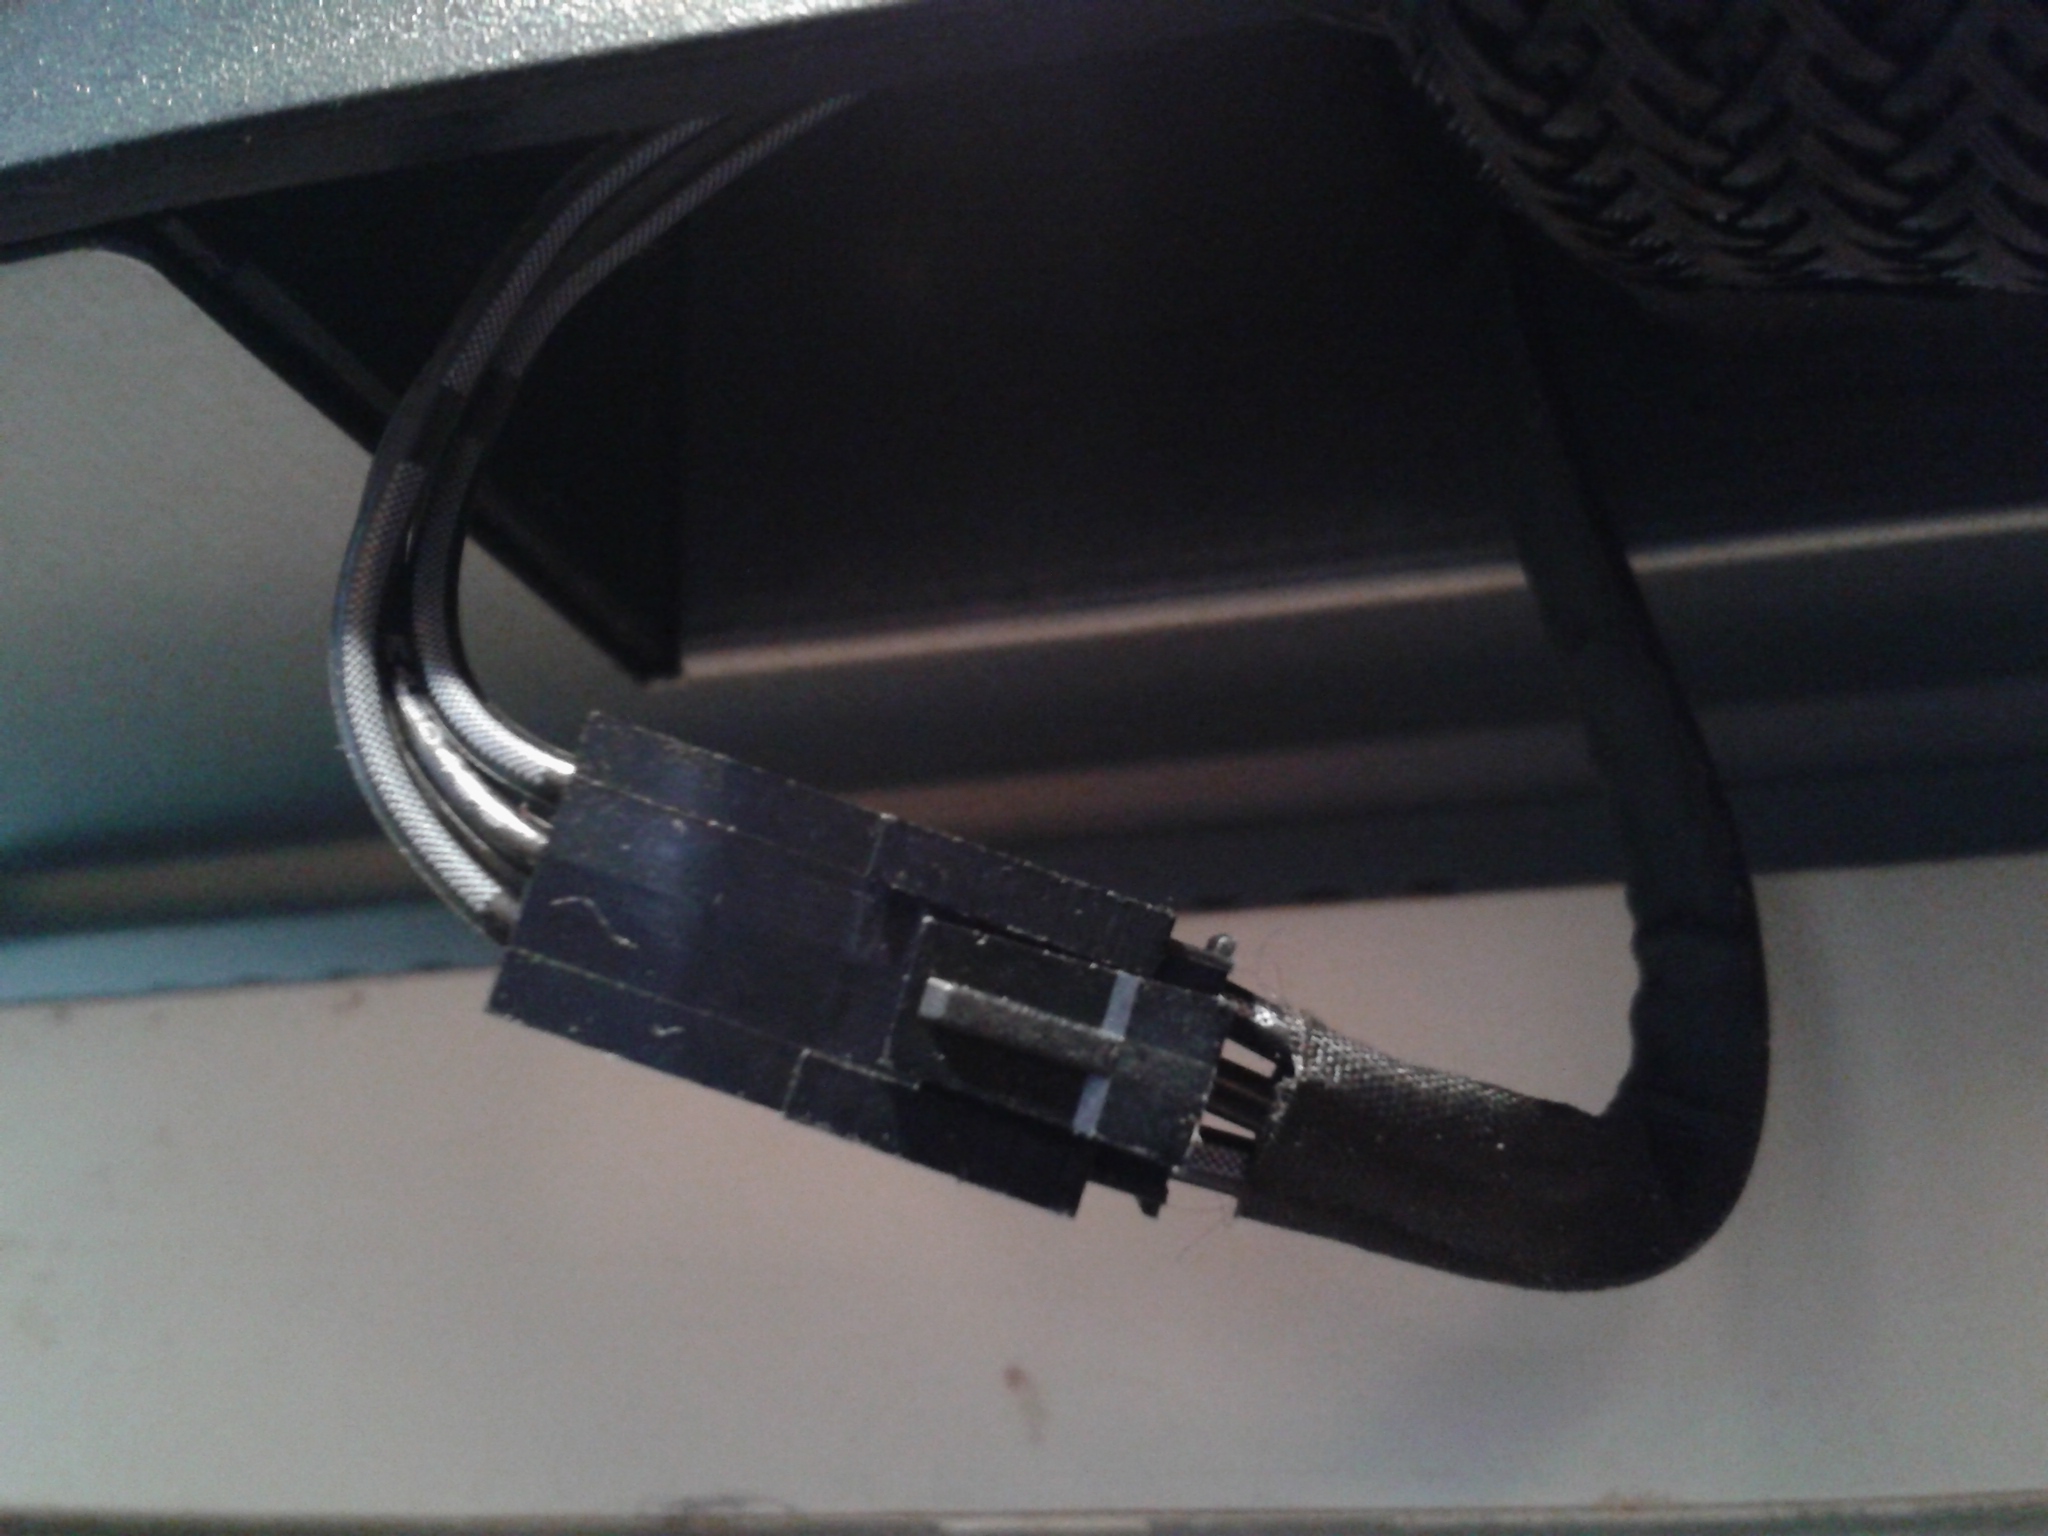
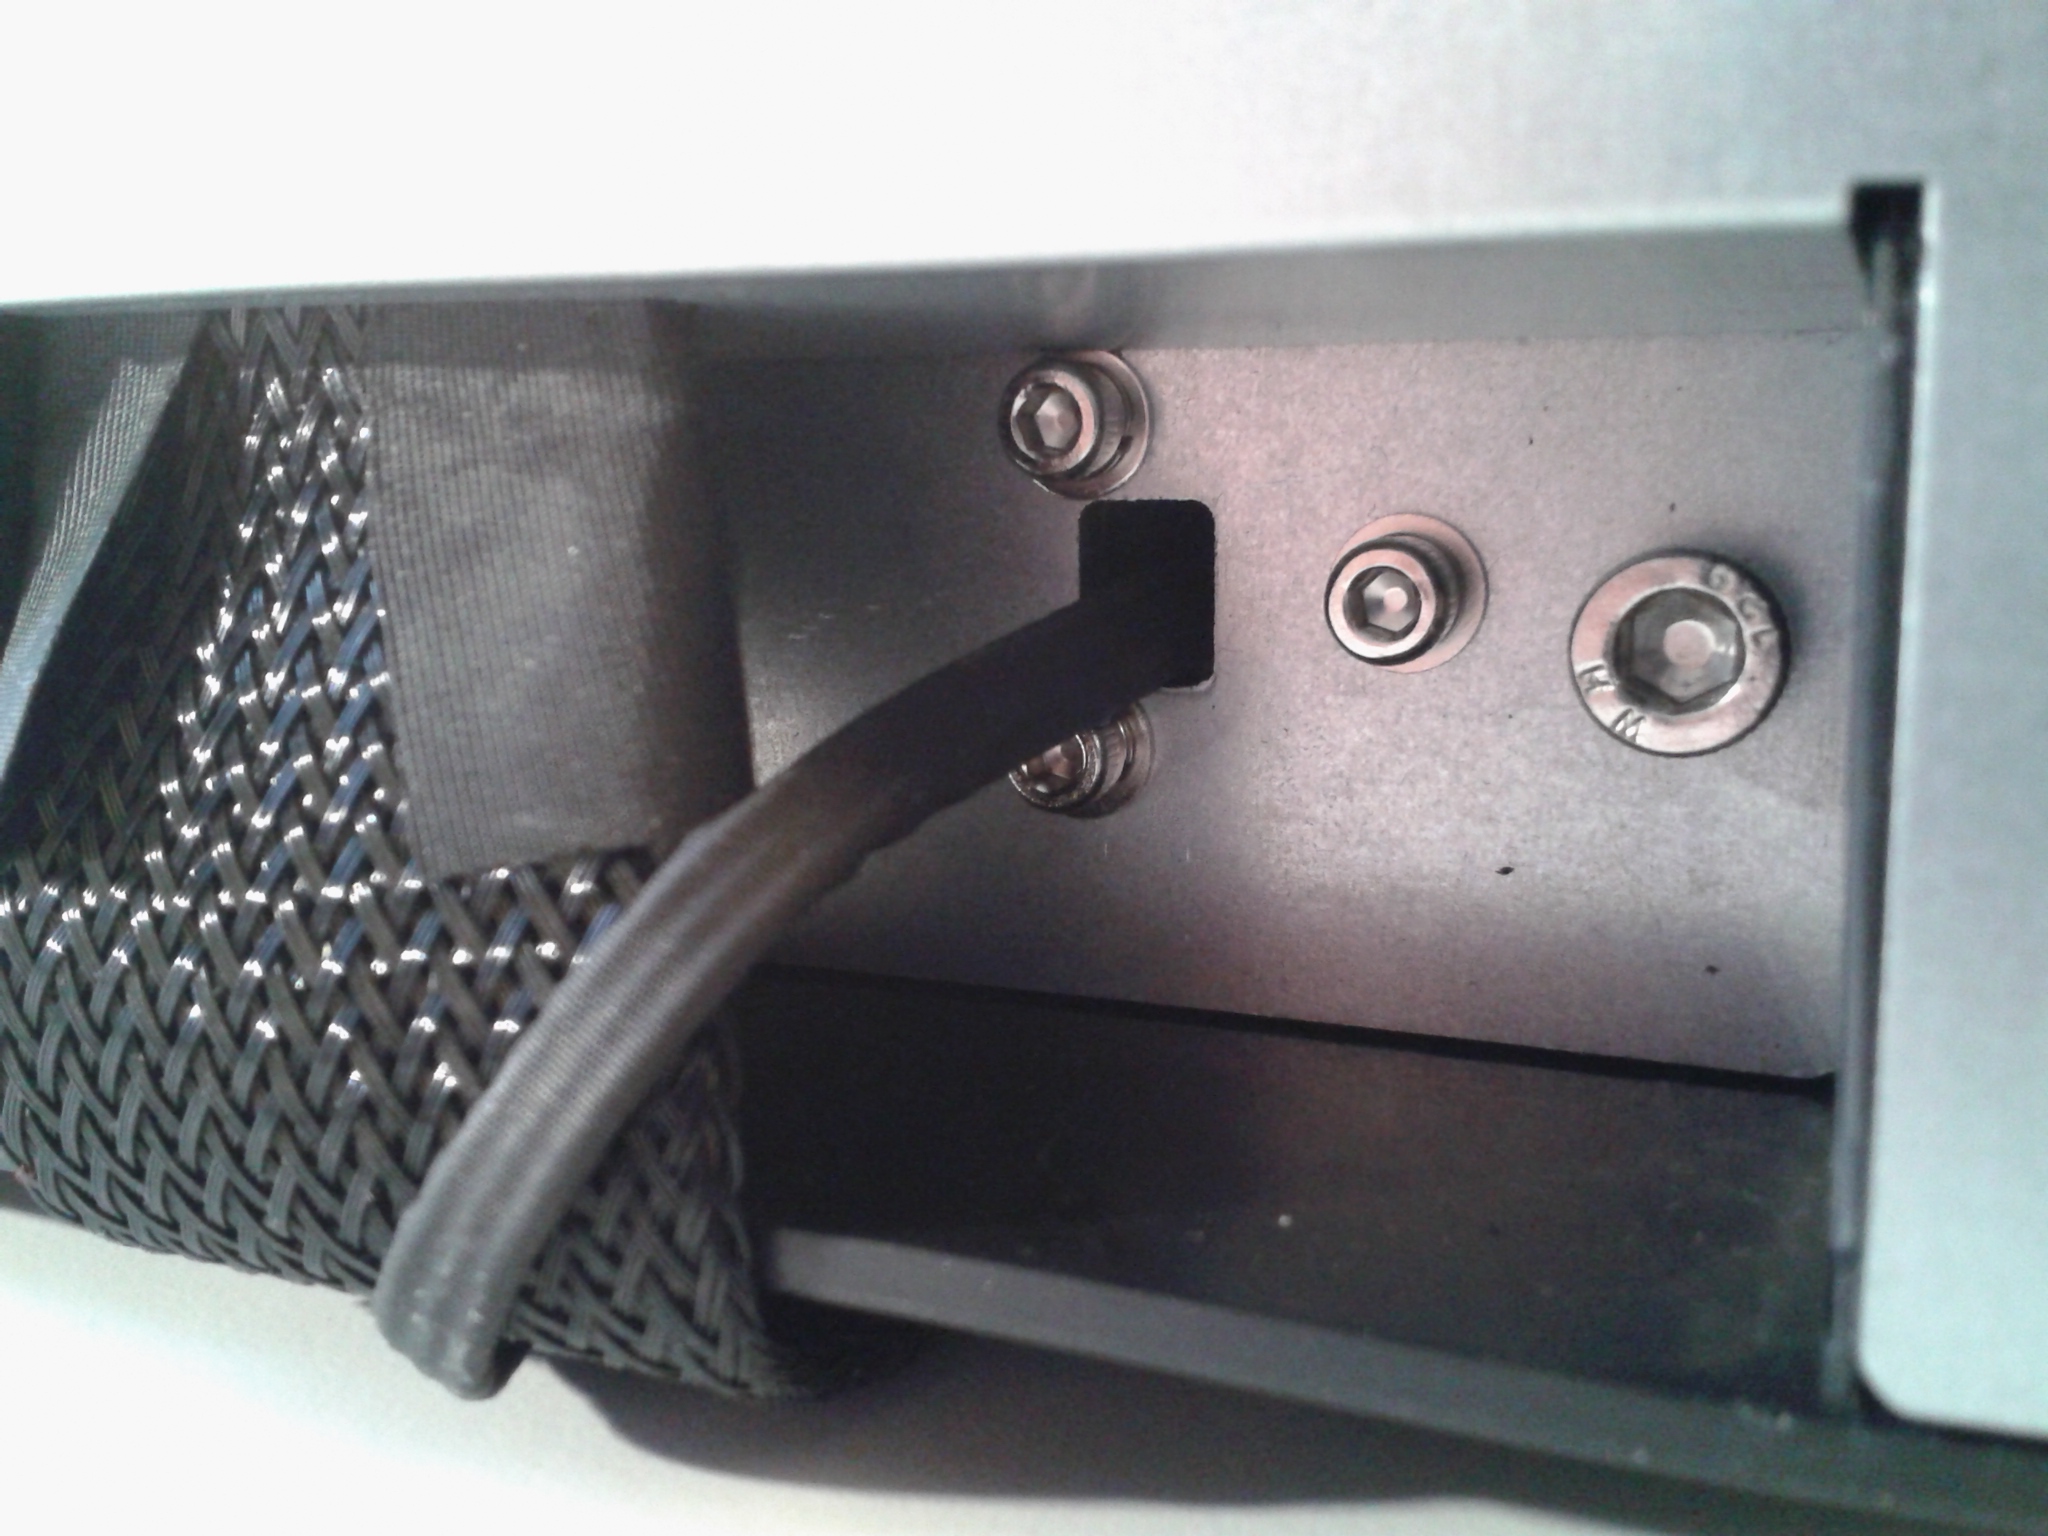
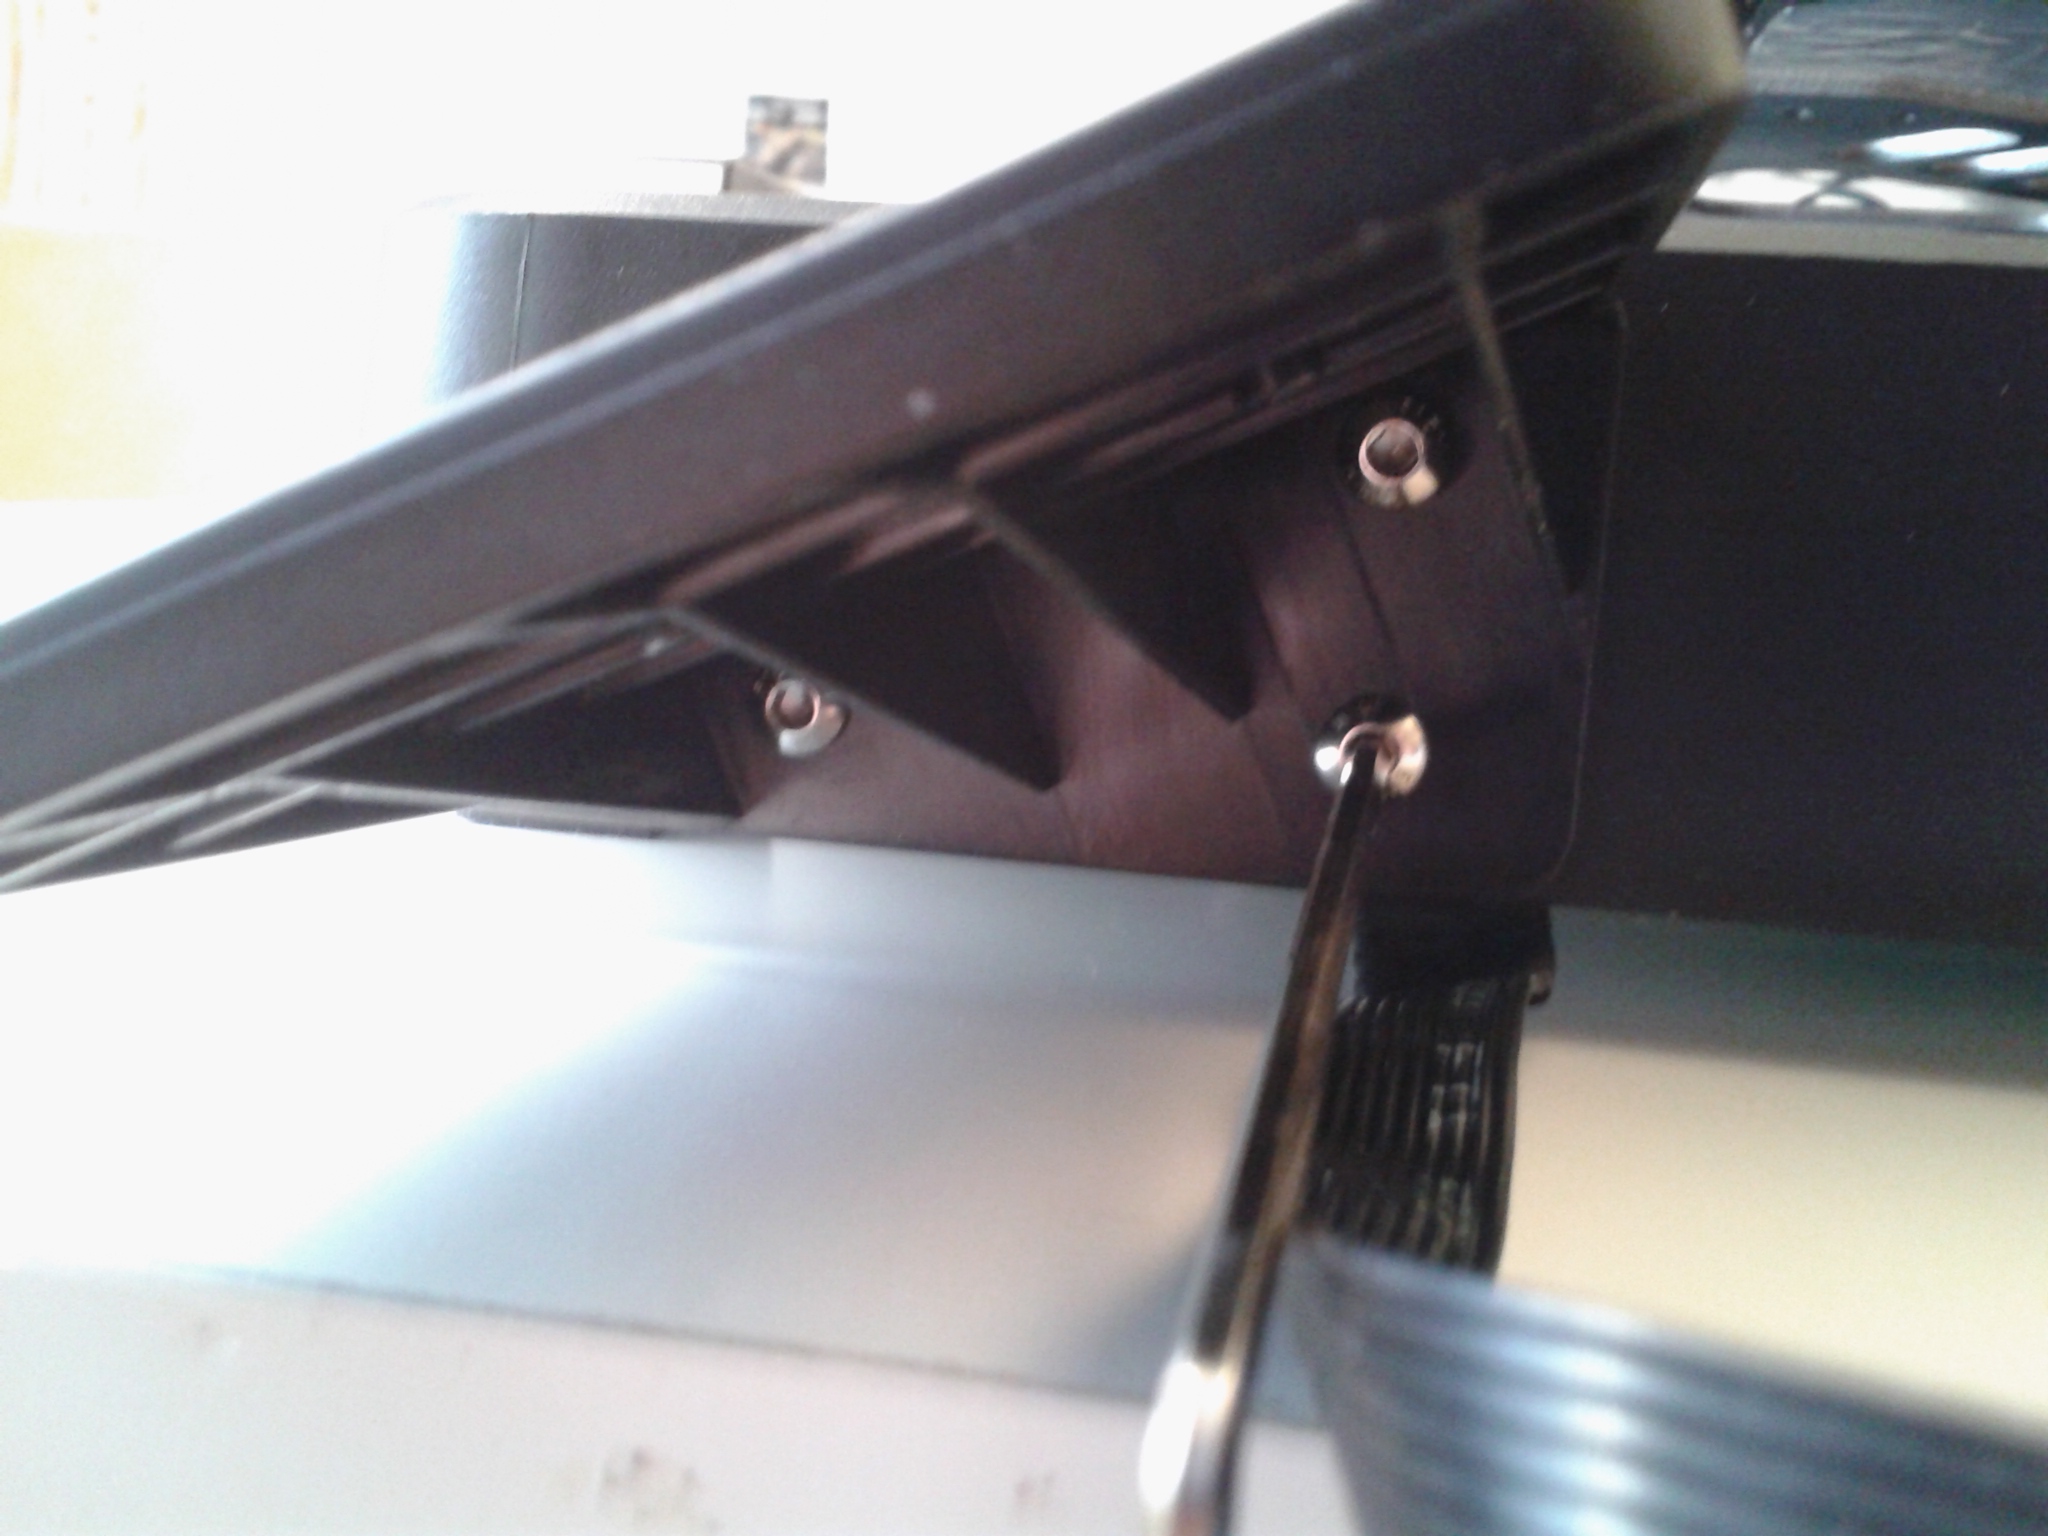
Dans le châssis
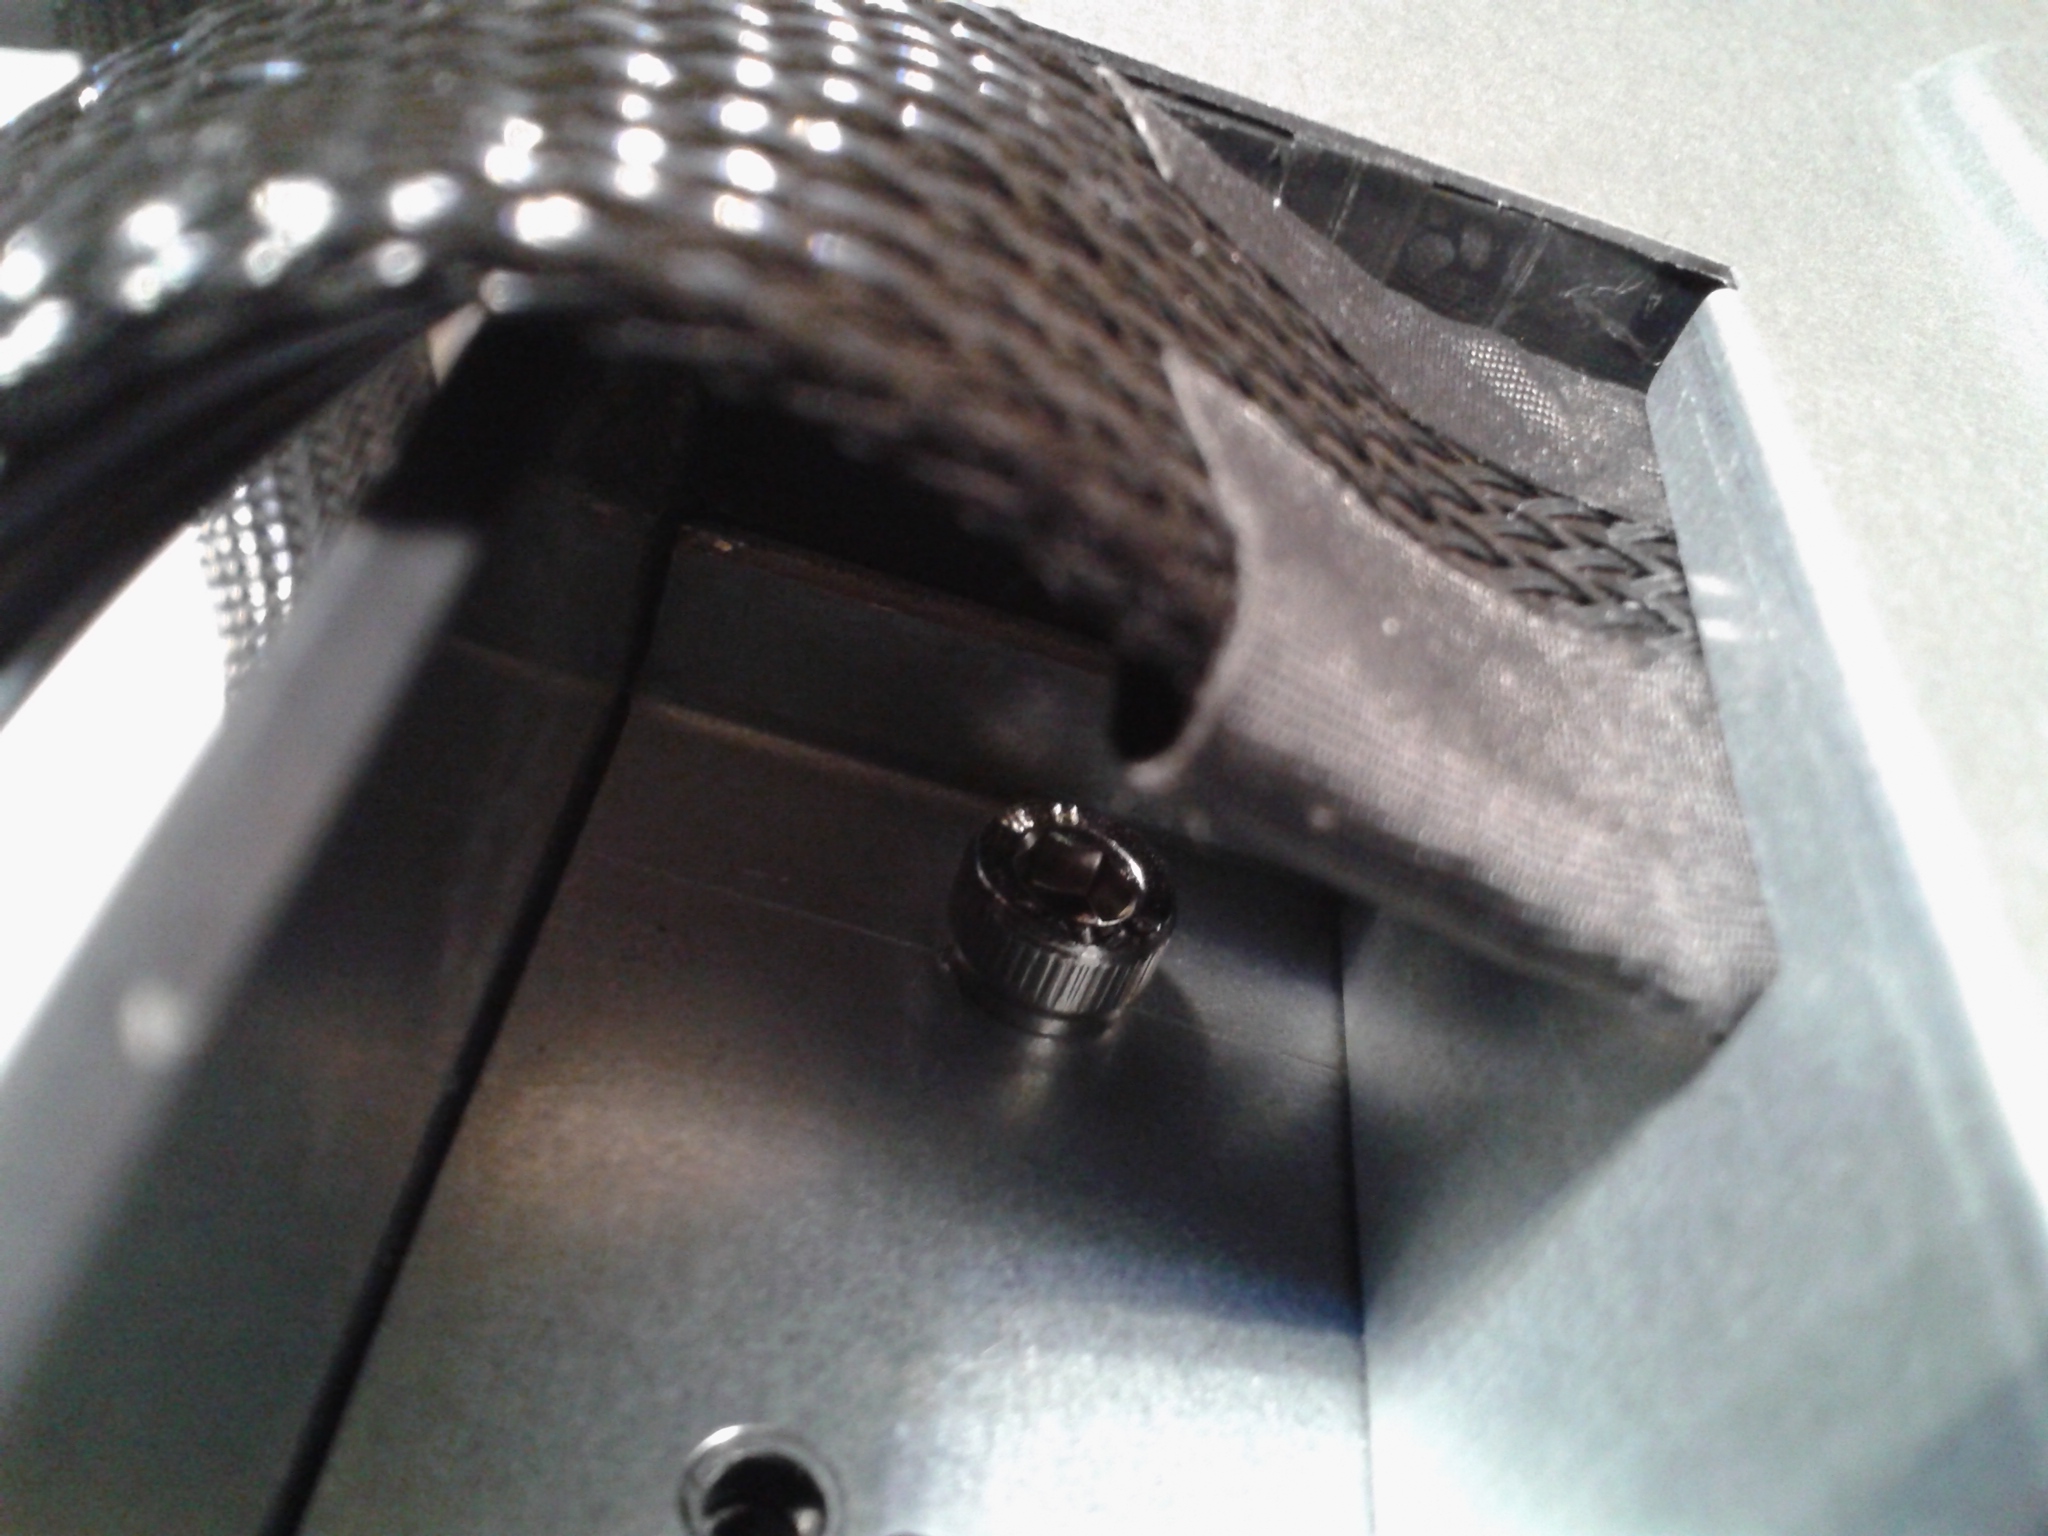
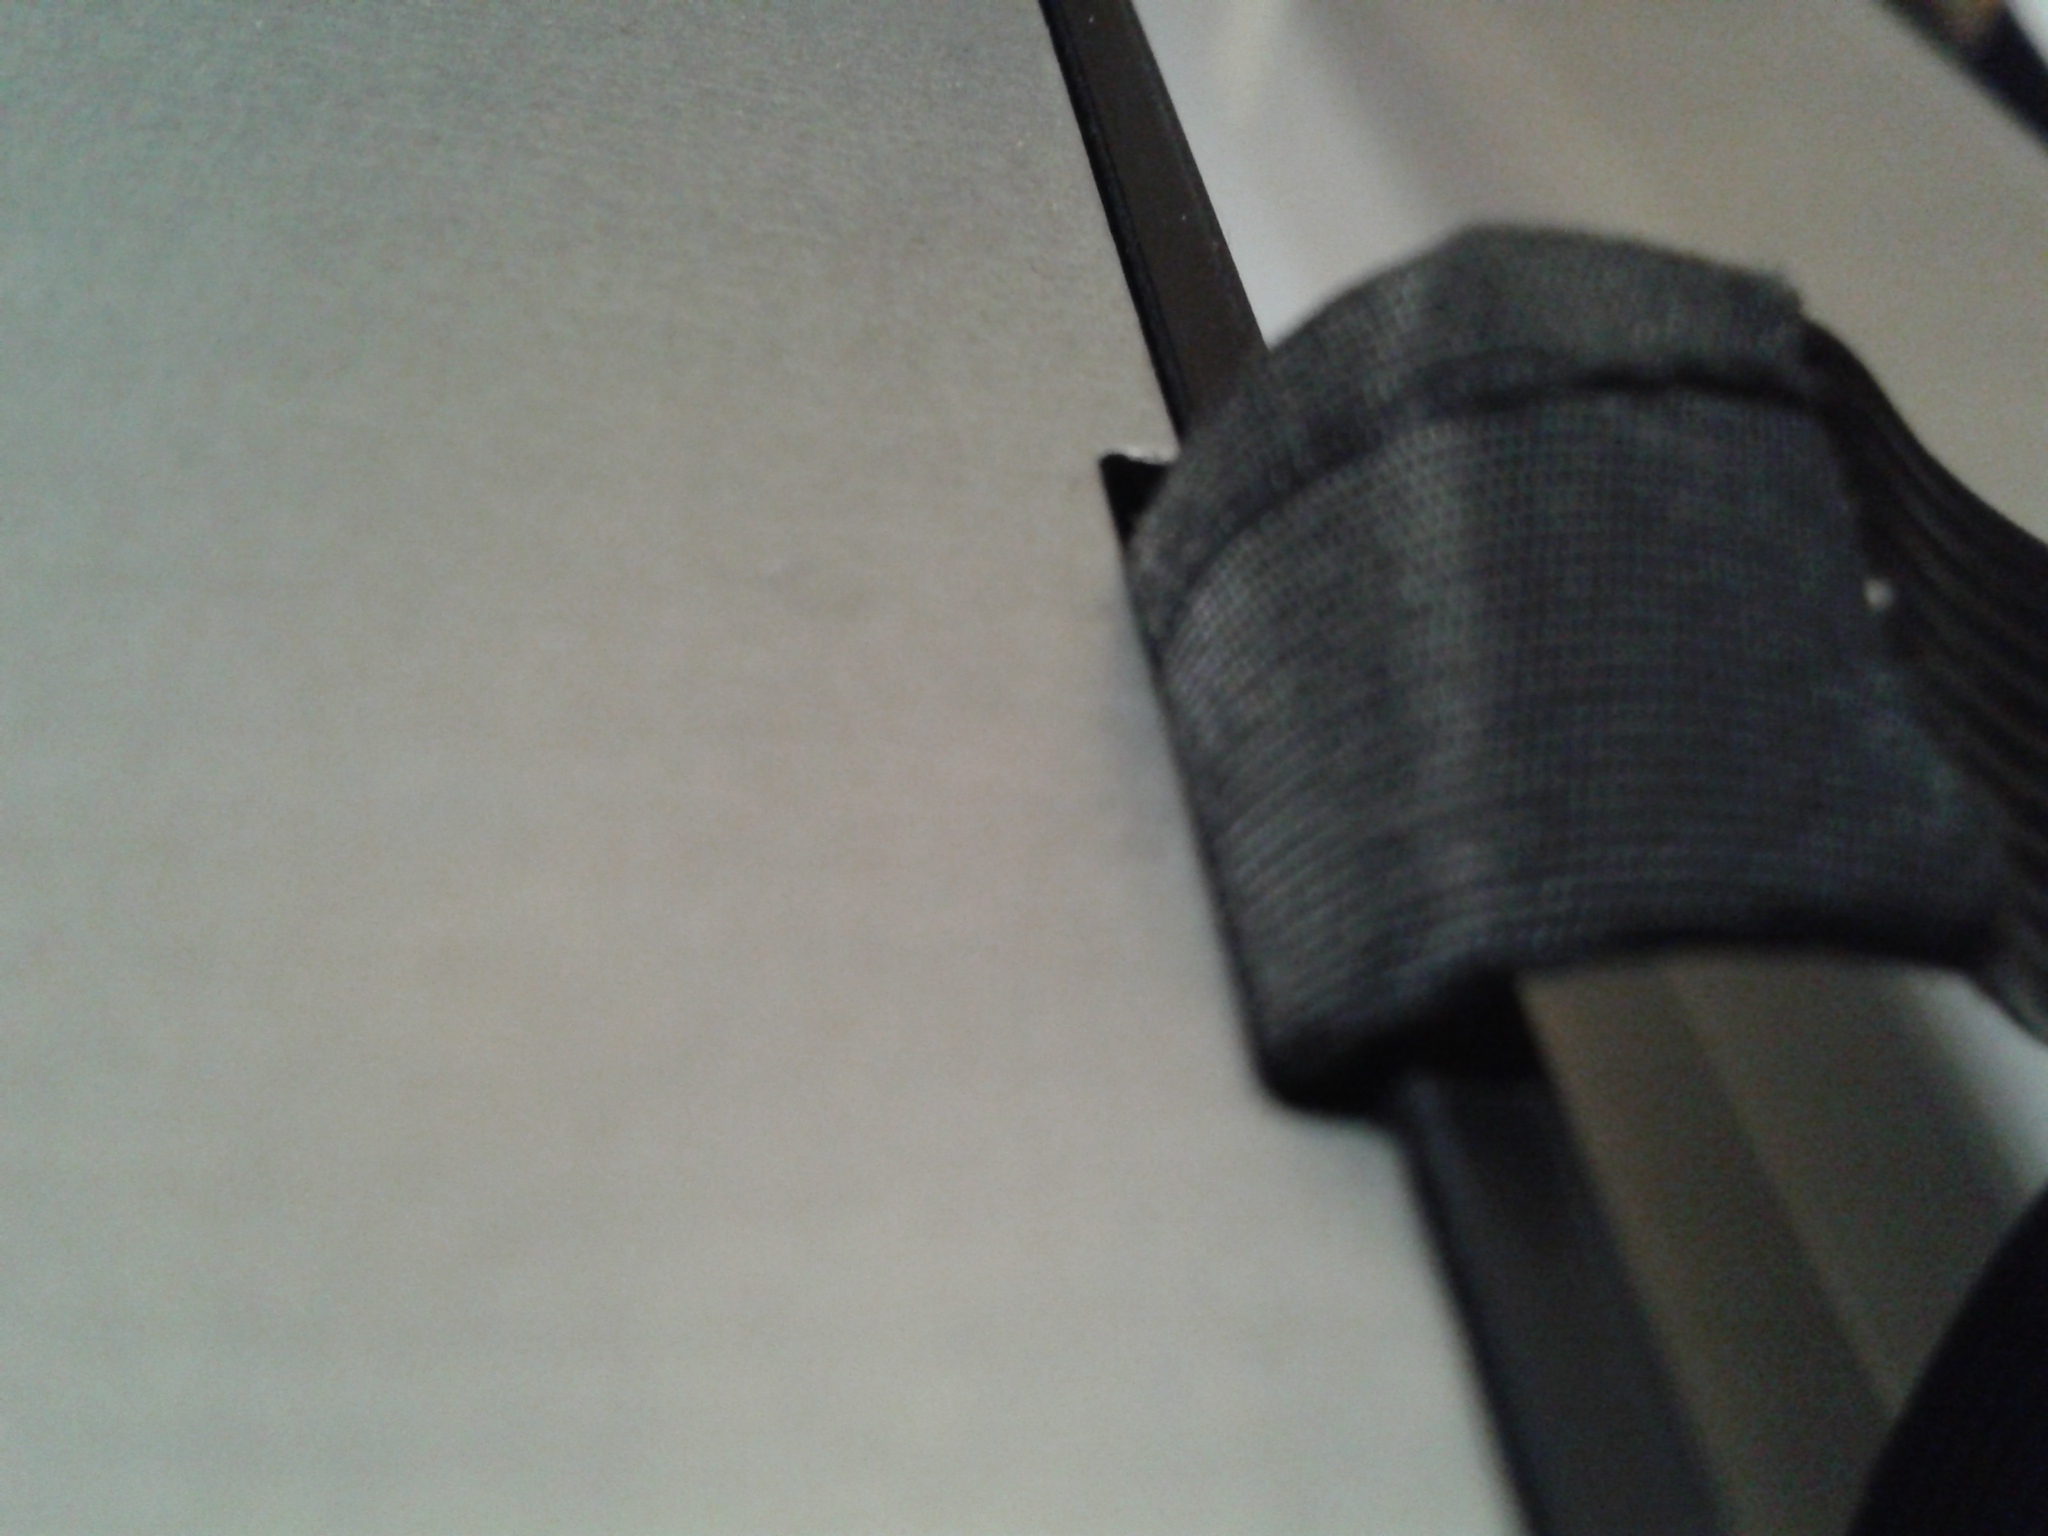
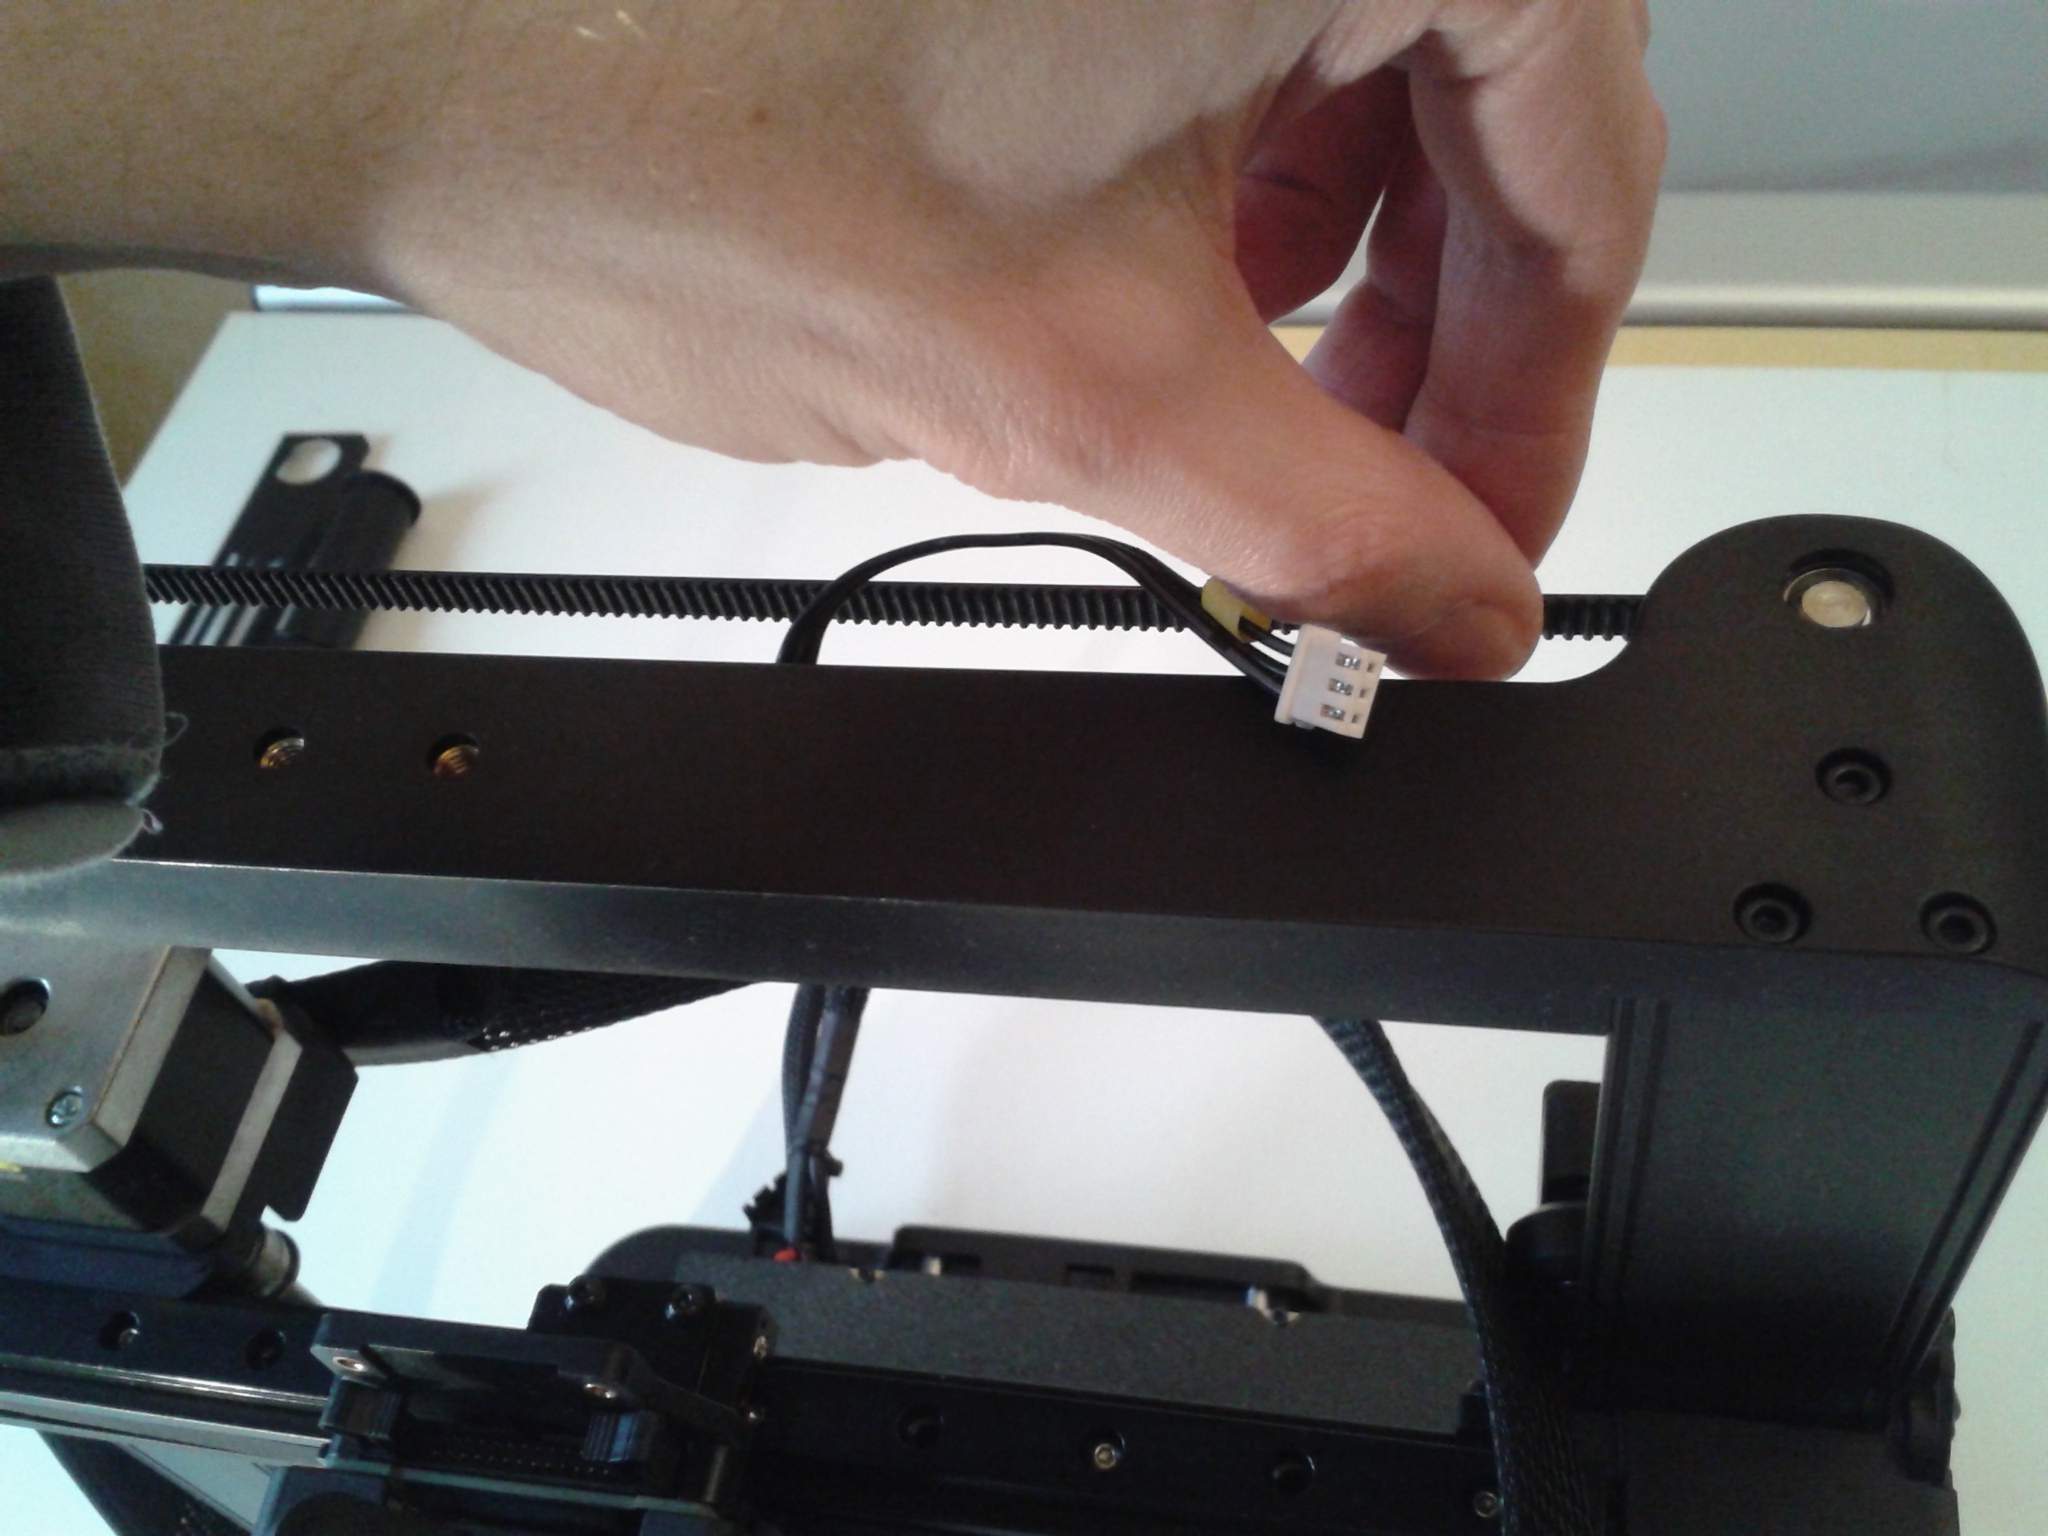
Si vous ouvrez le châssis, bien faire attention aux faisceaux de câbles car les bords de la plaque métallique sont très tranchants et pourraient les endommager.
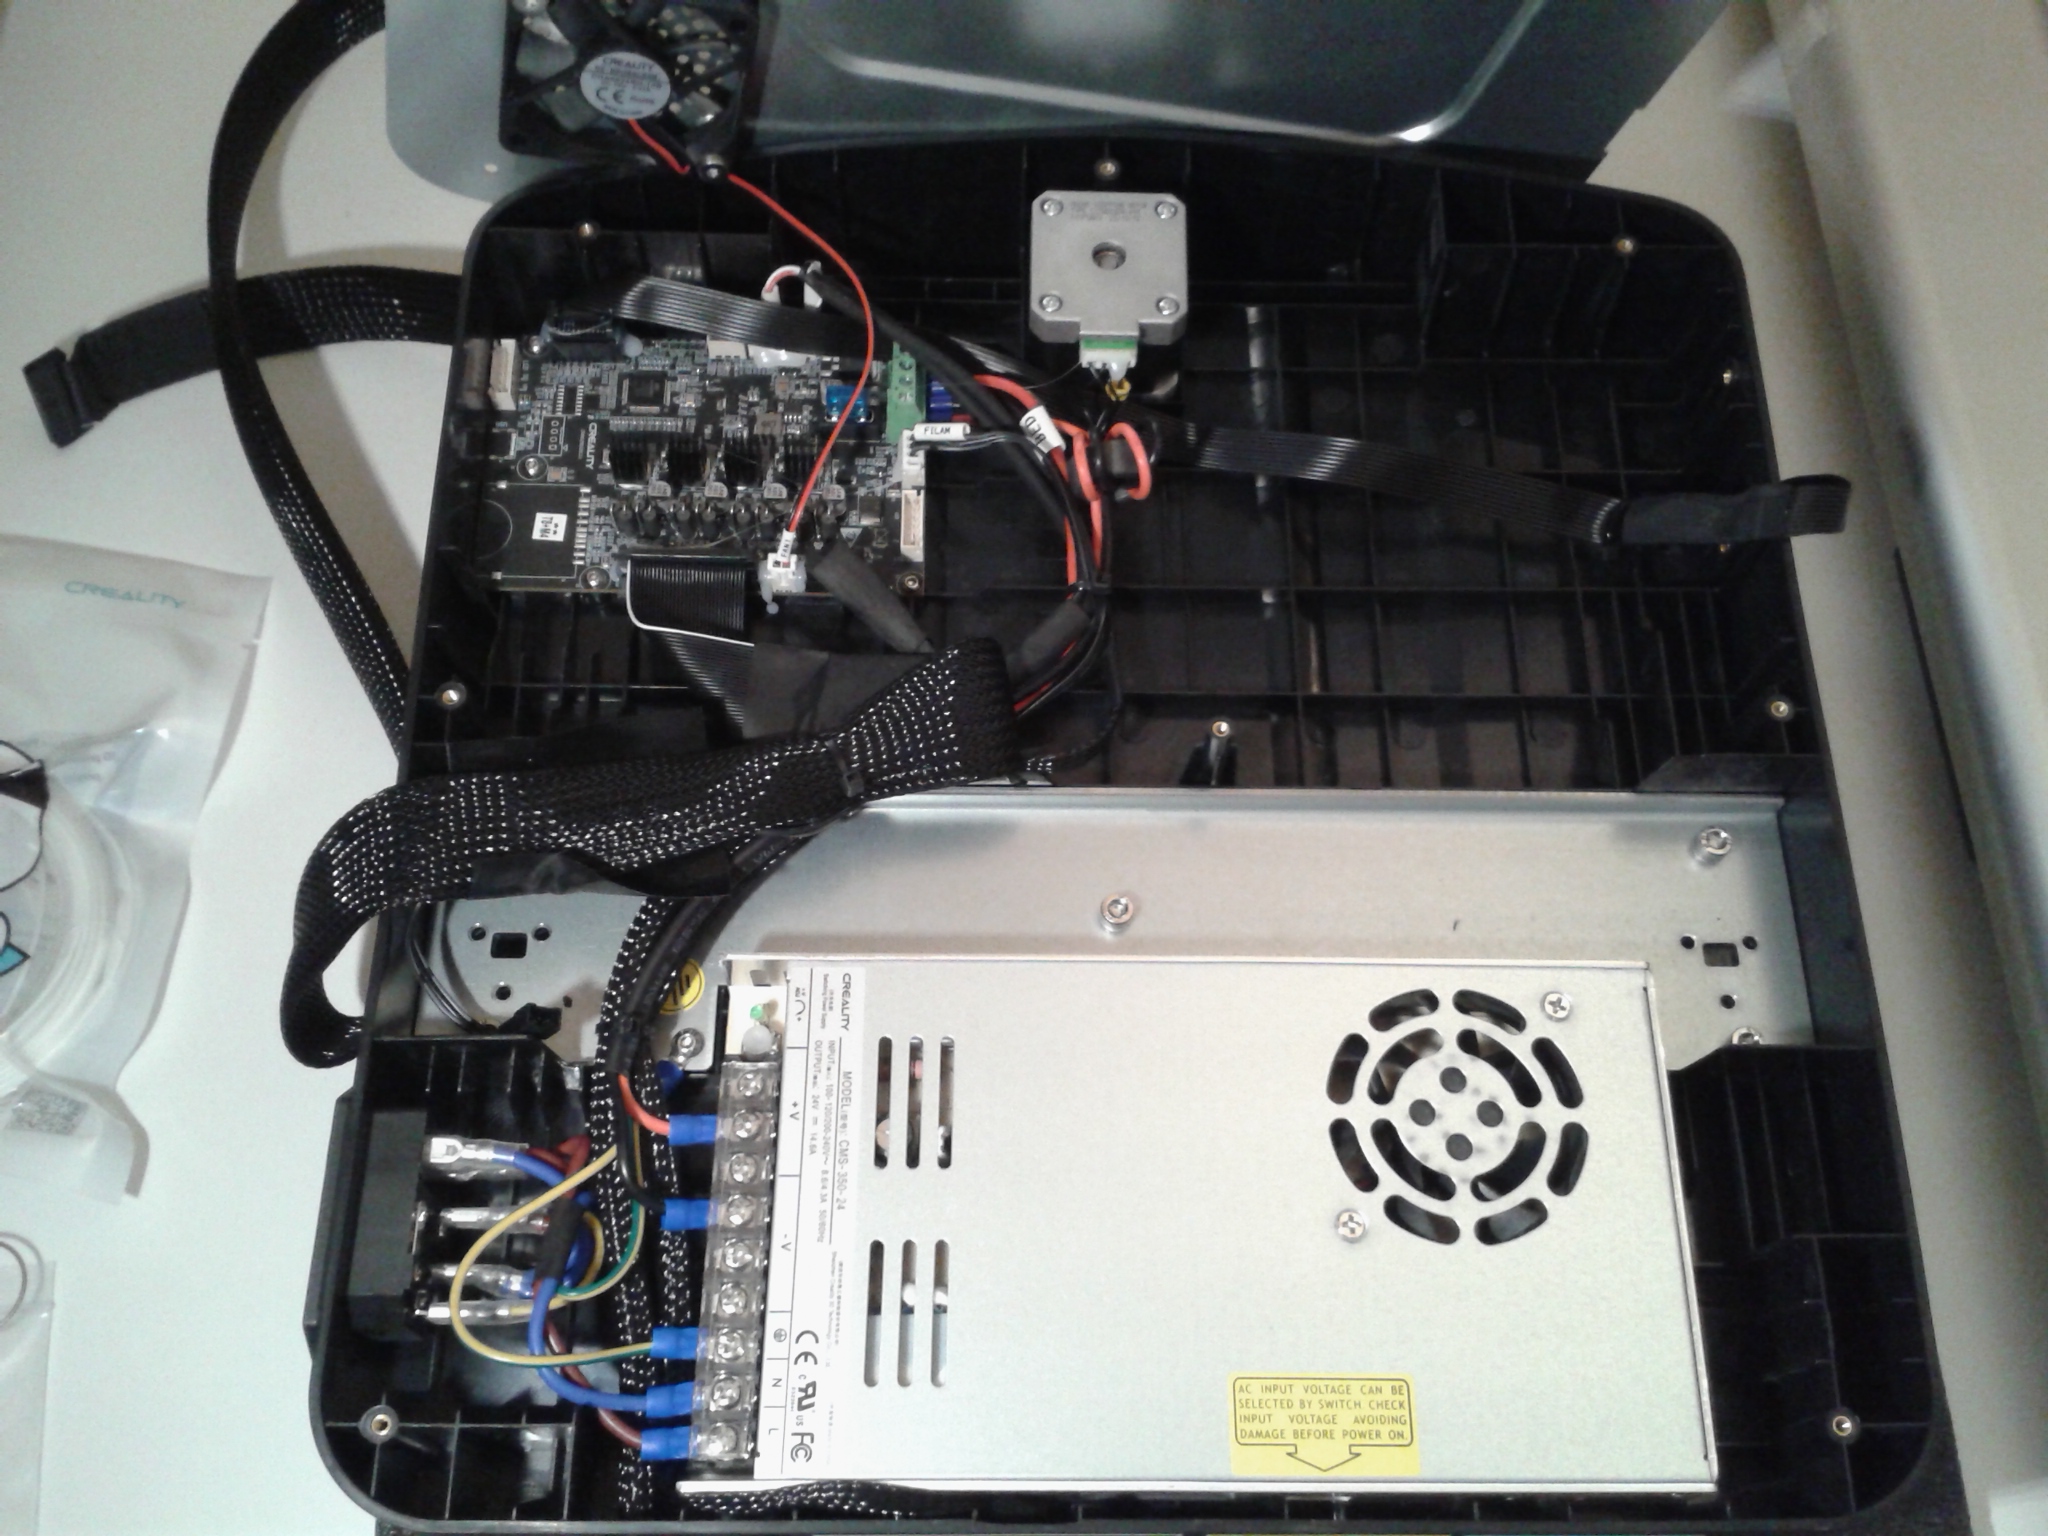
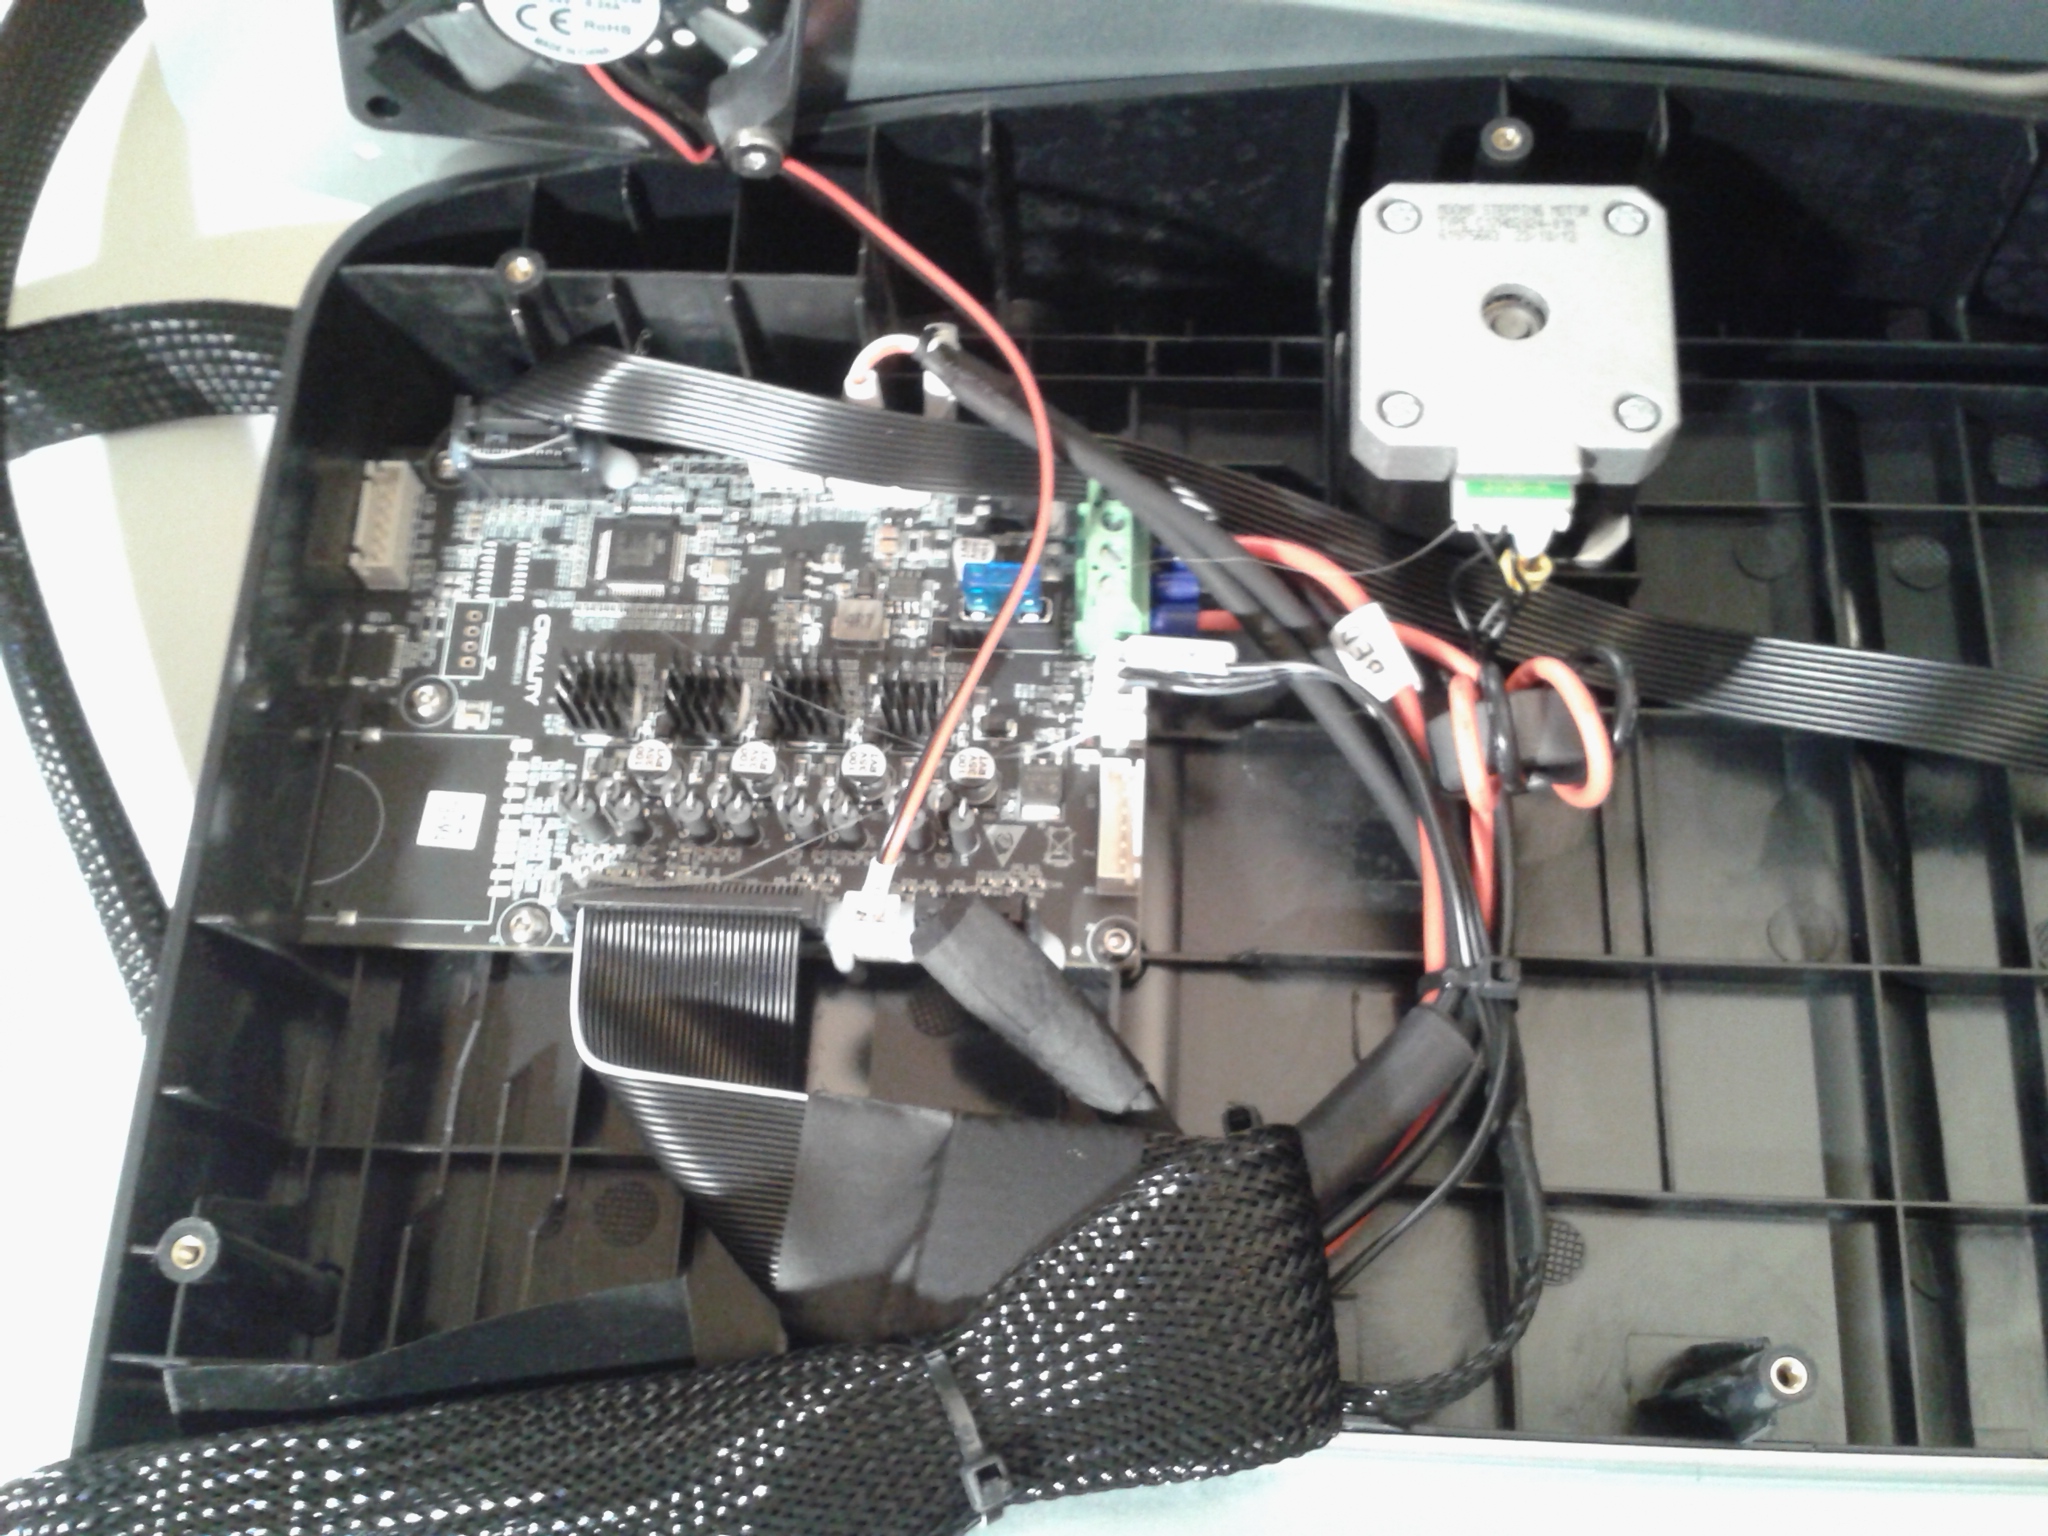
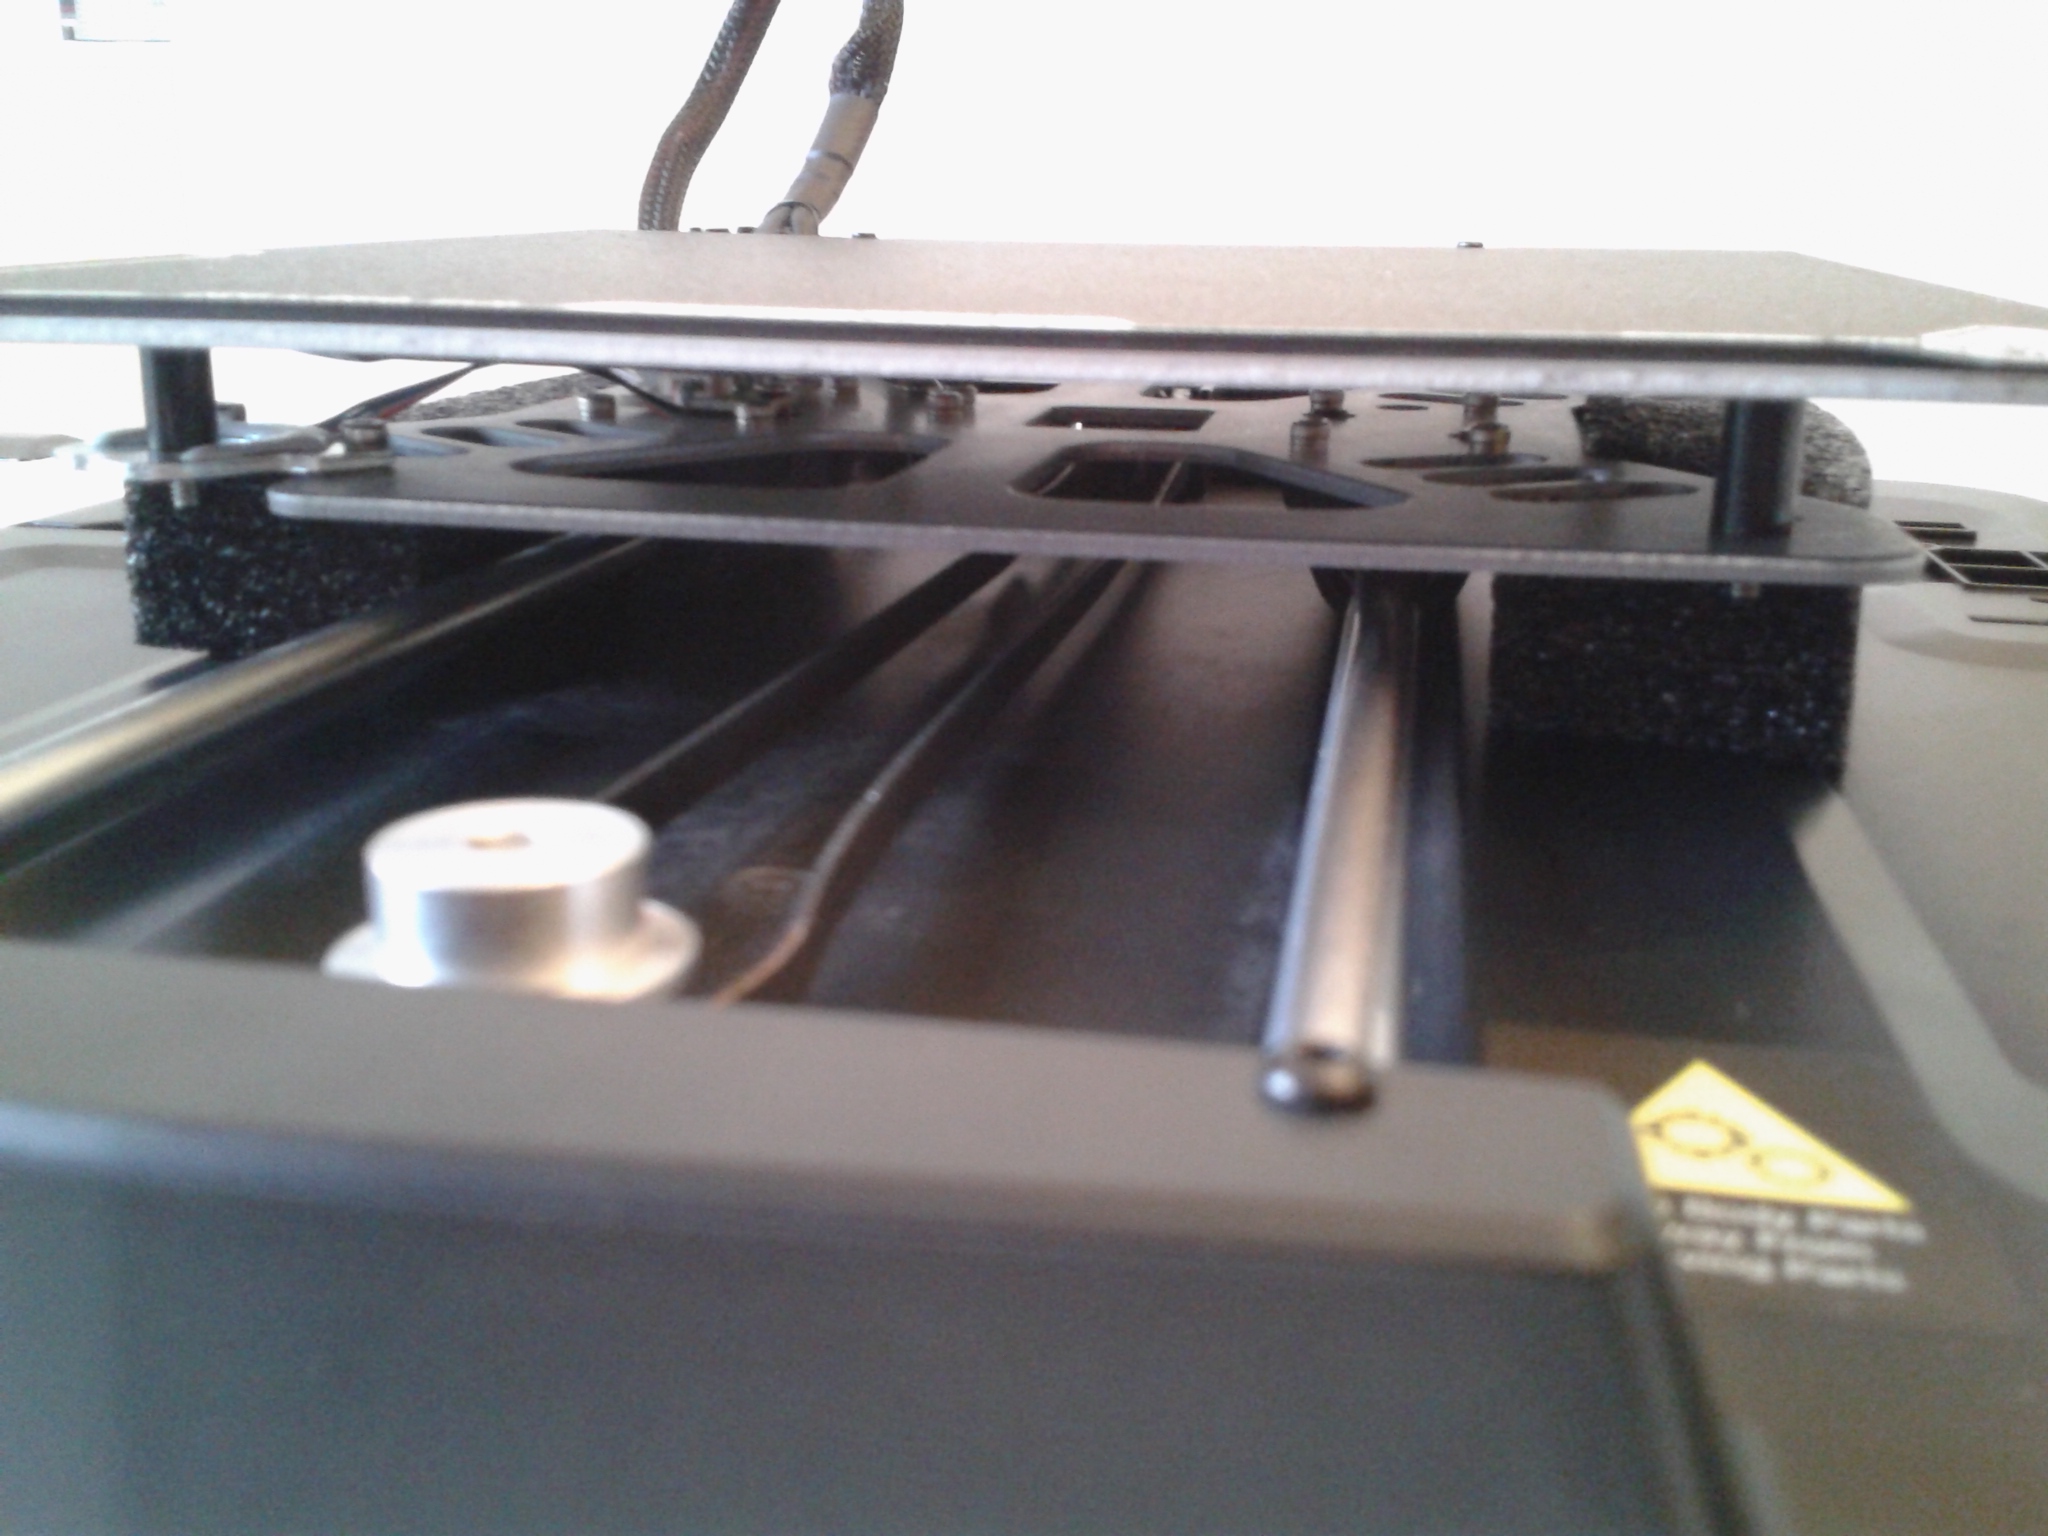
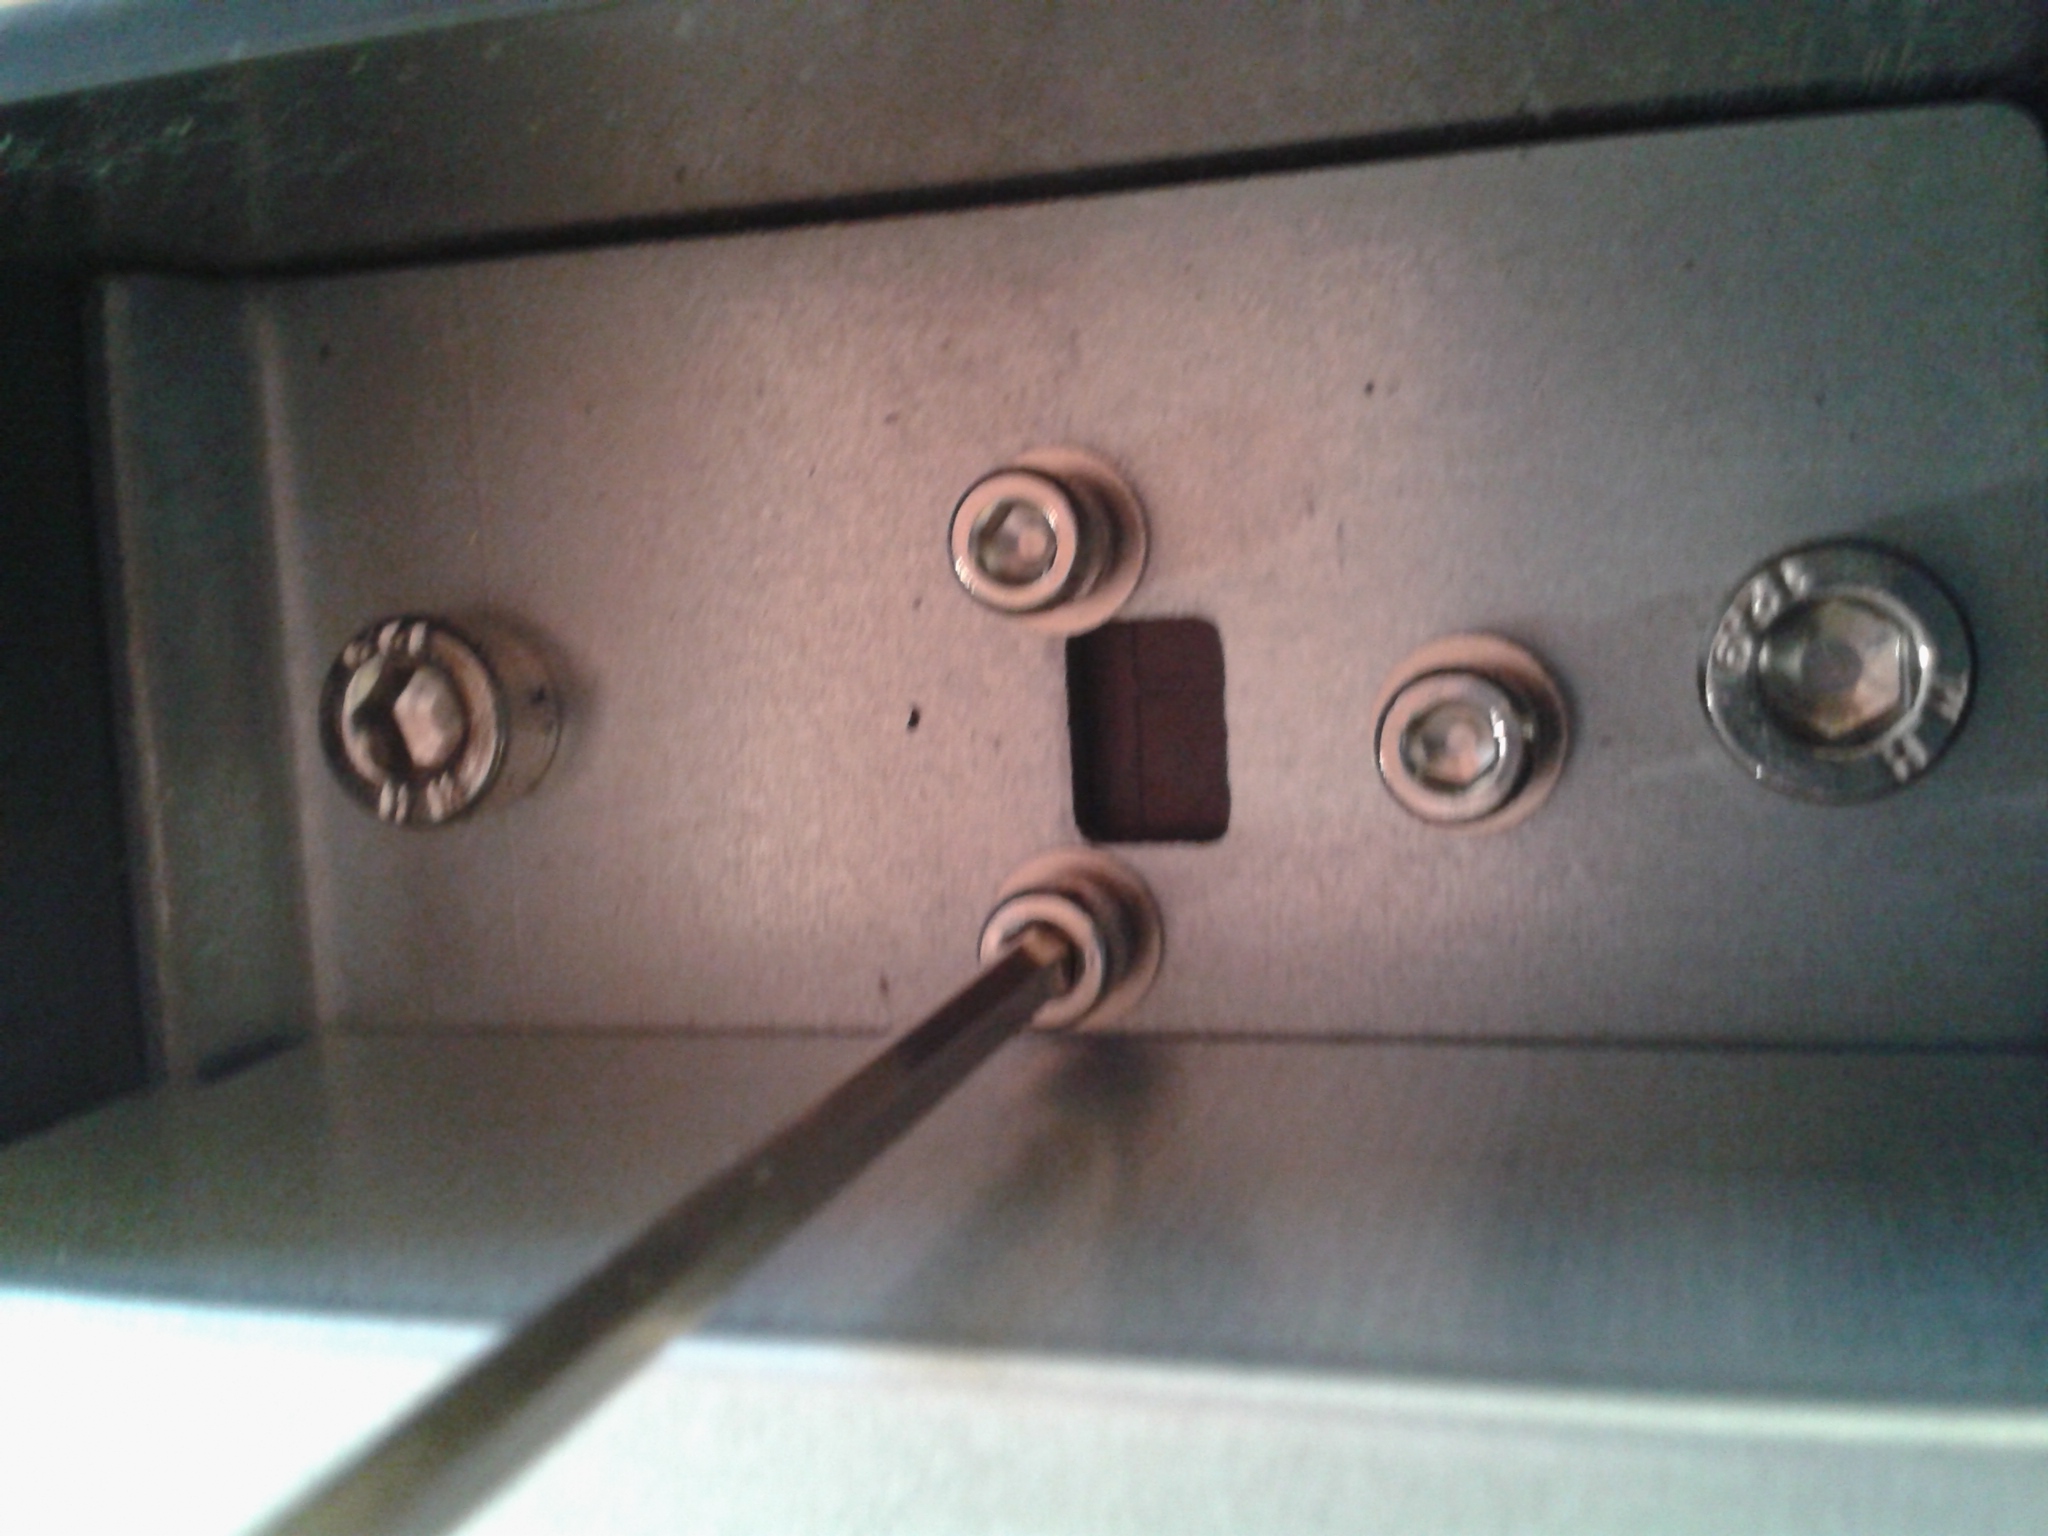
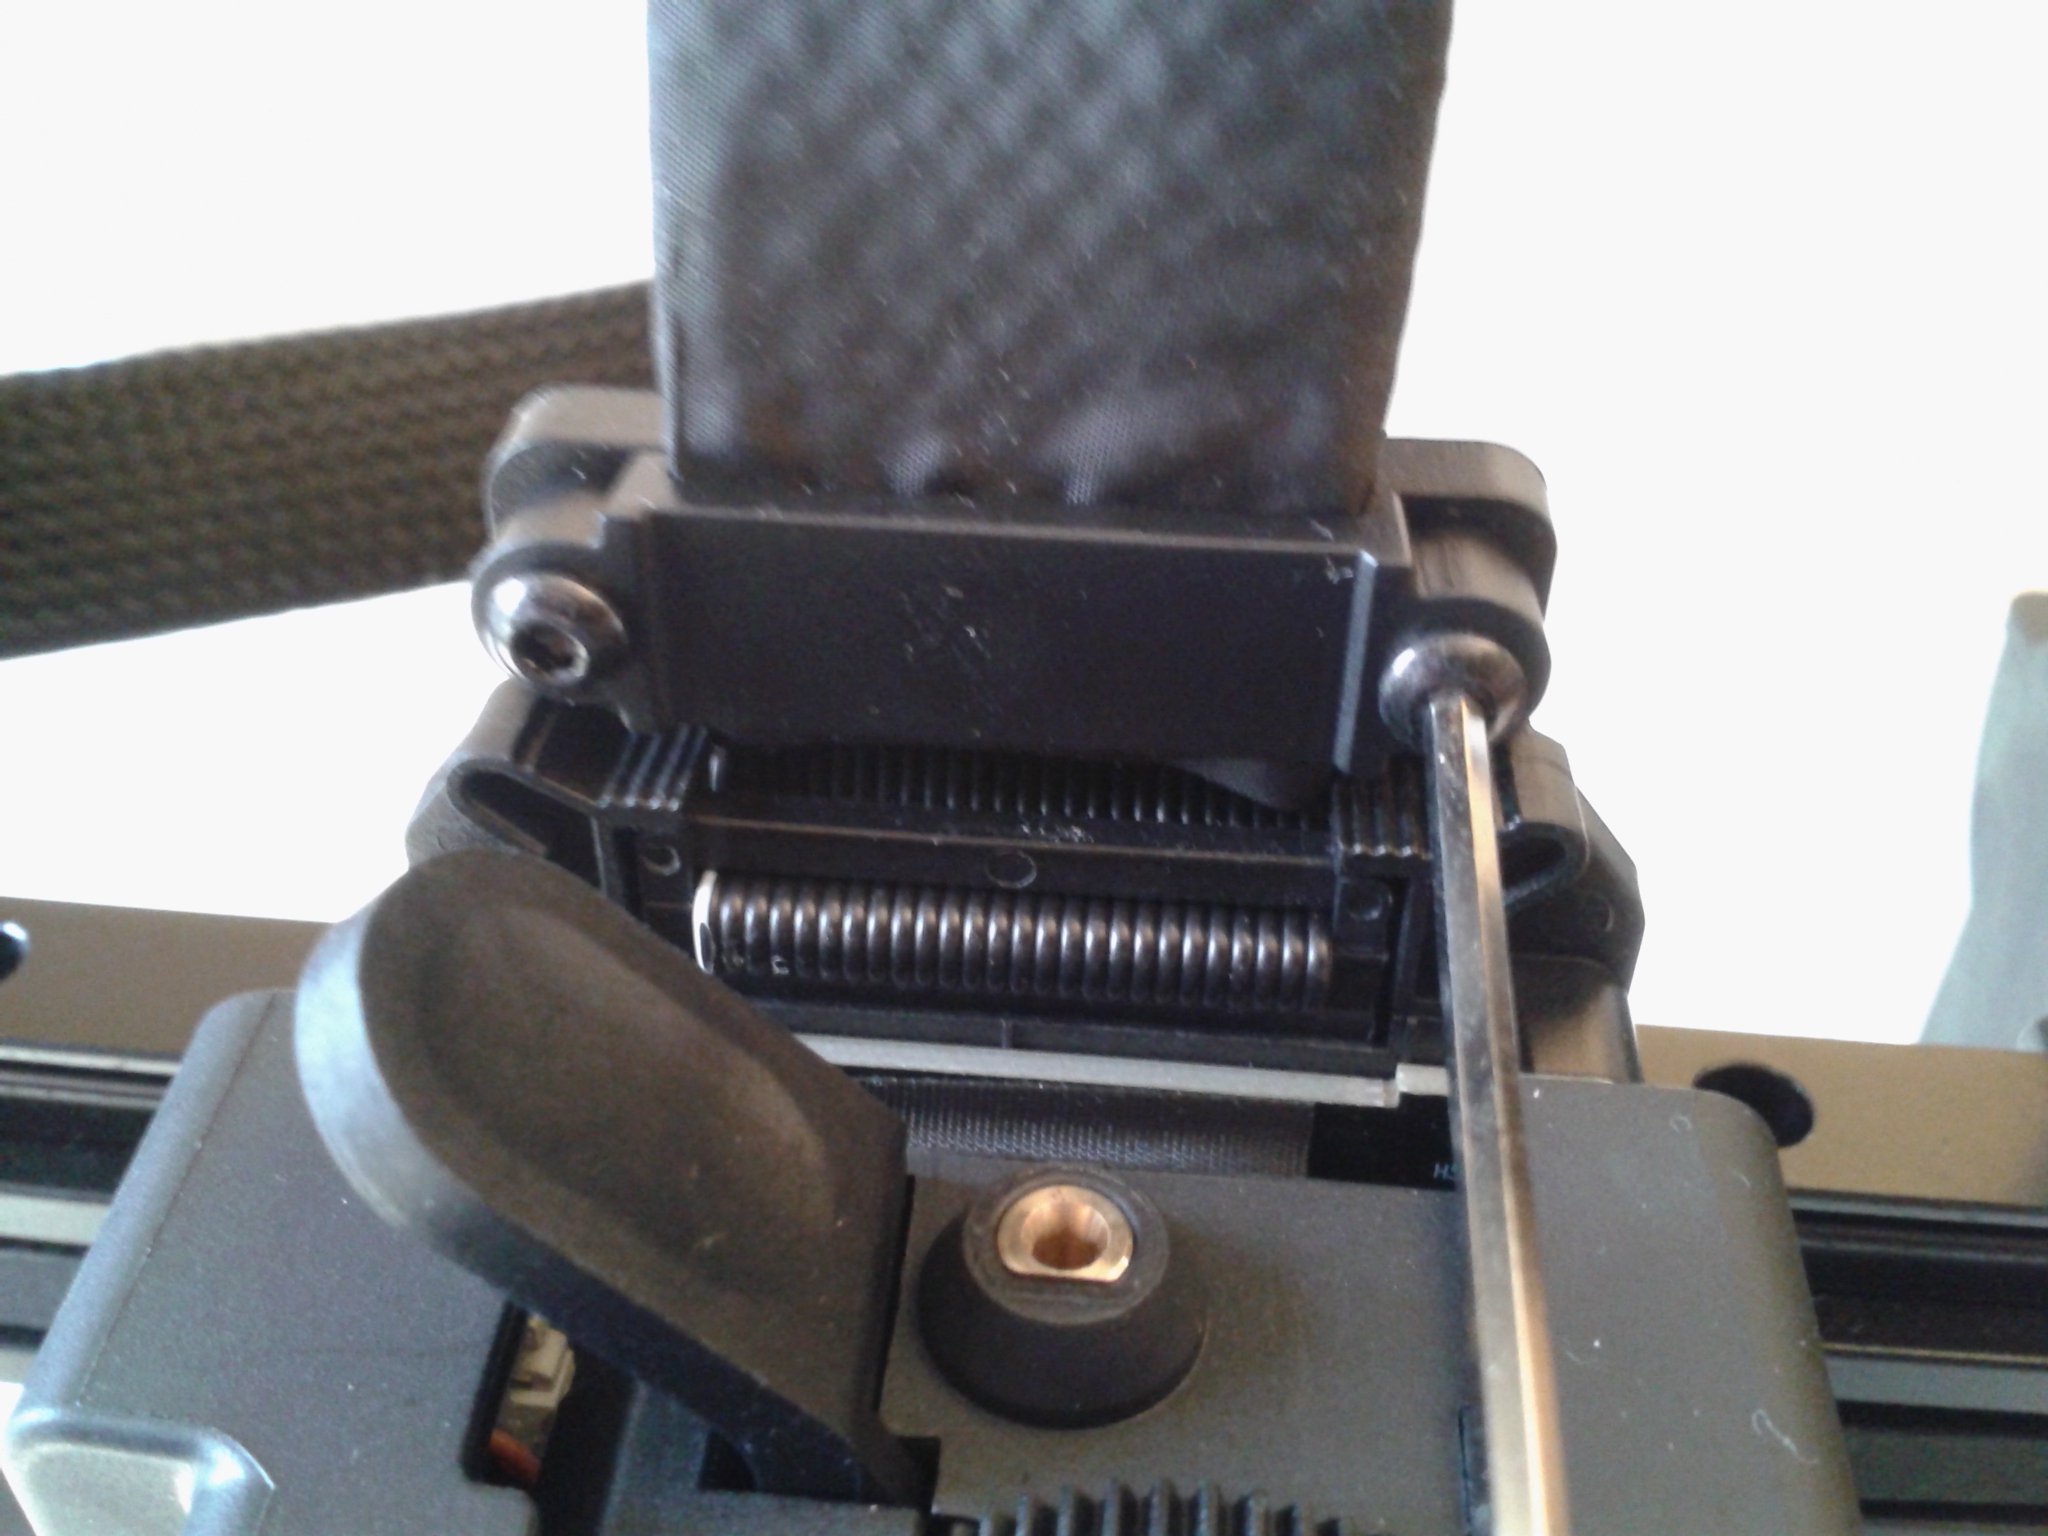
Sur la machine que j’ai reçue, j’ai eu besoin de retendre la courroie de l’axe Y (probablement détendue pour le transport) et de resserrer les vis à tête fraisée (empreinte hexagonale) du plateau.
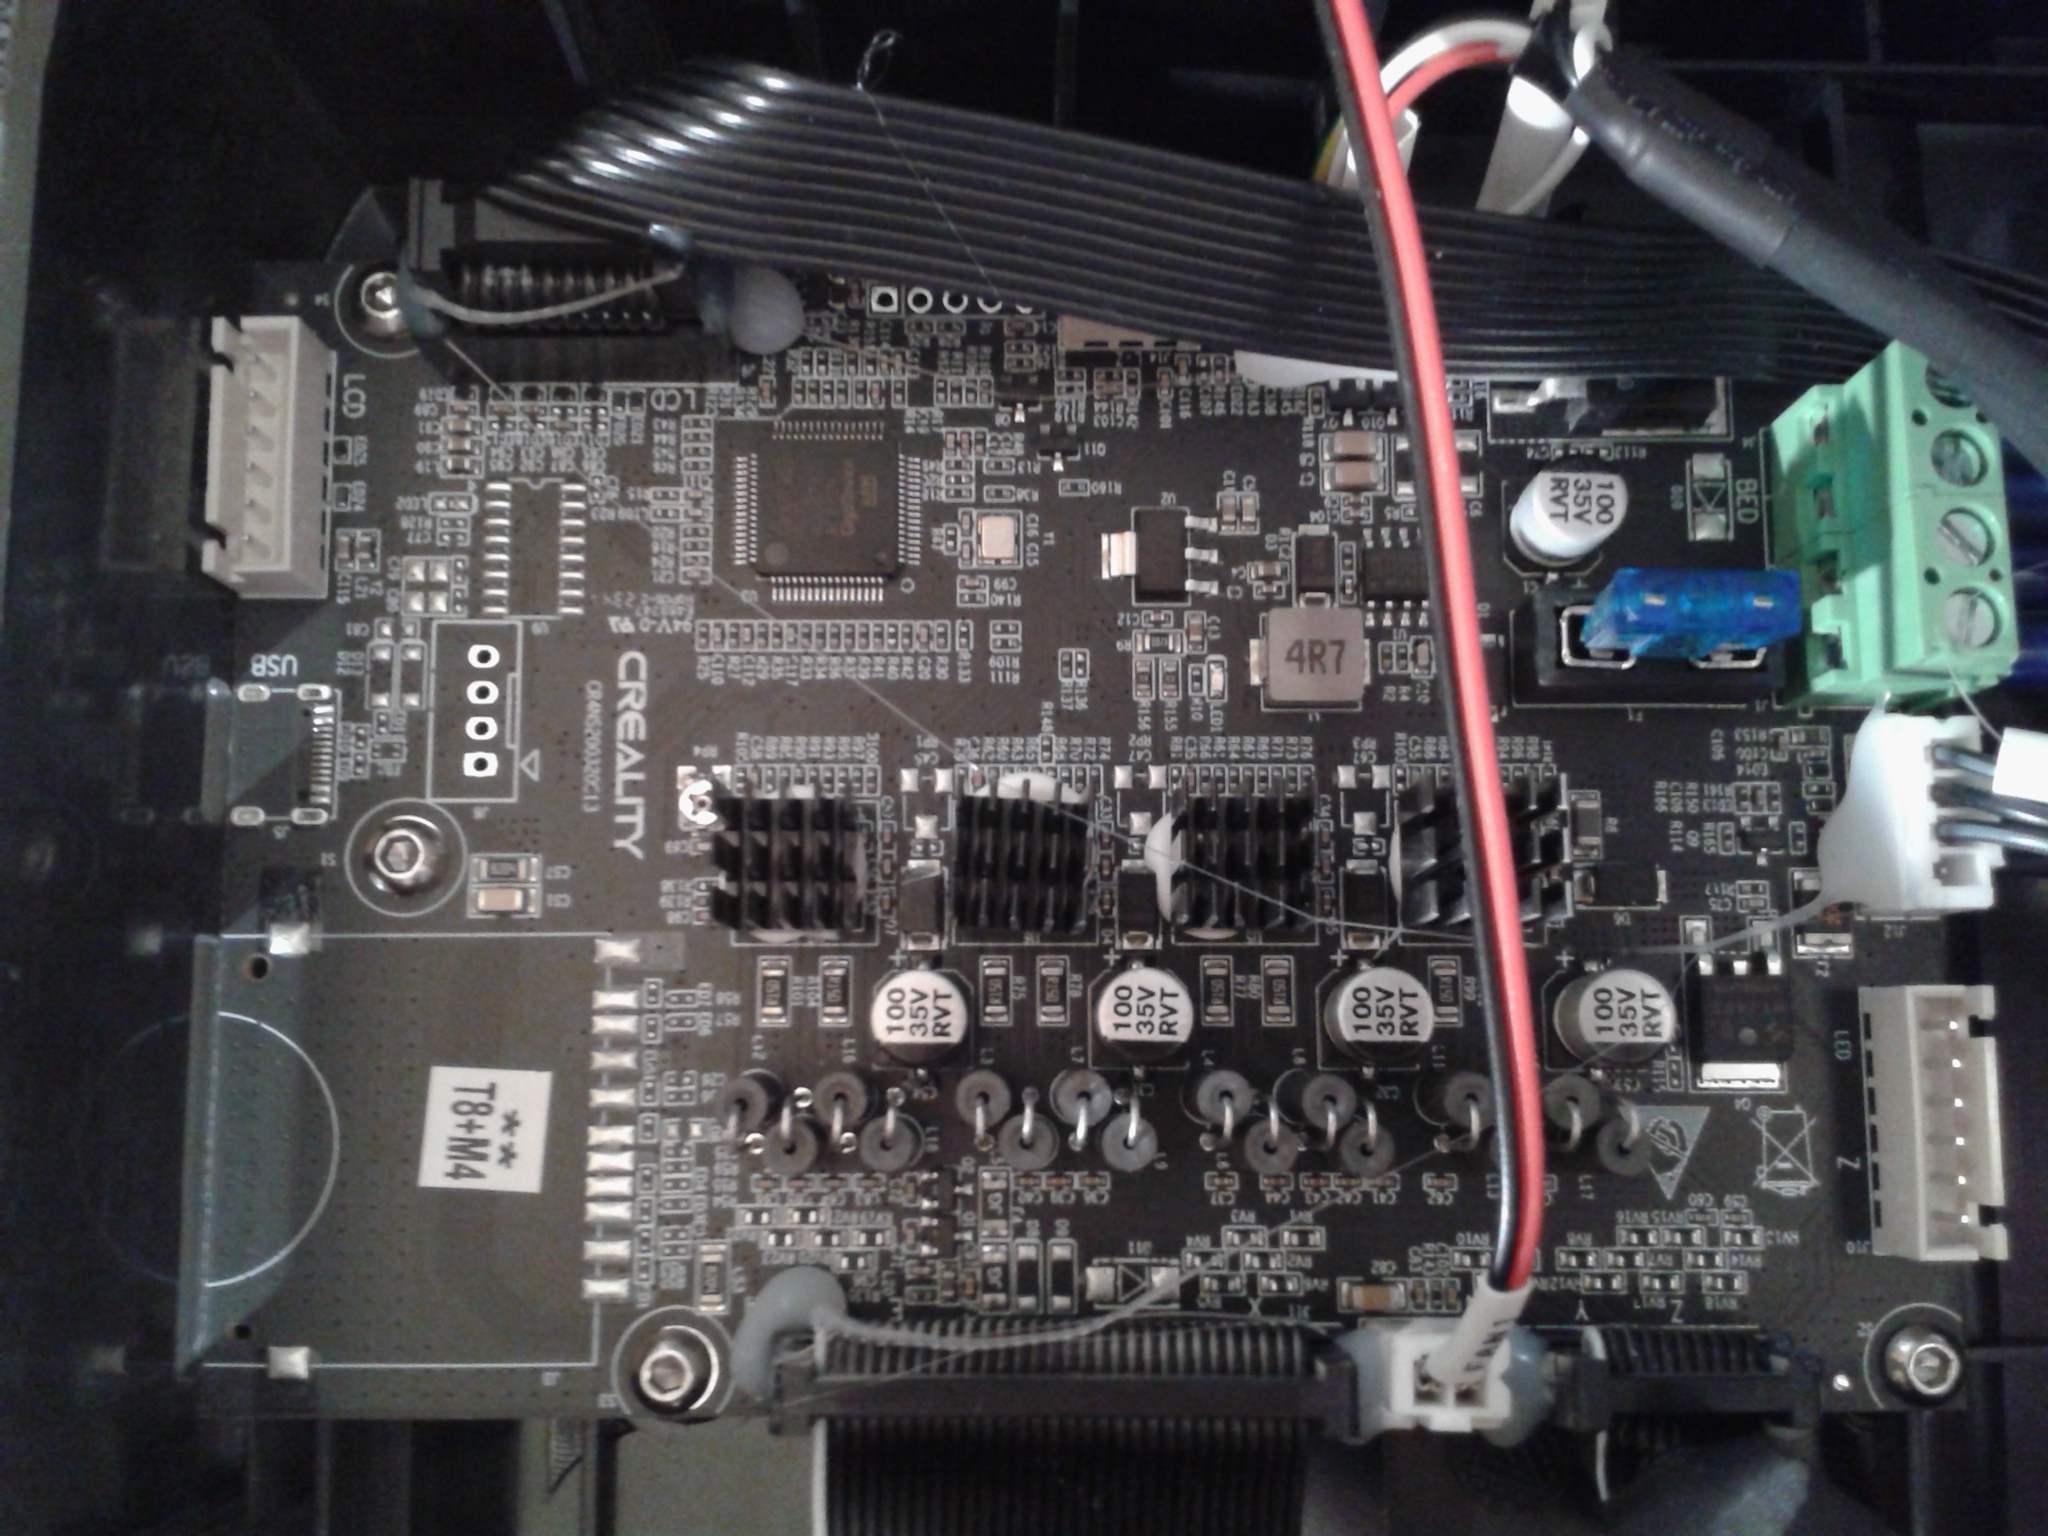
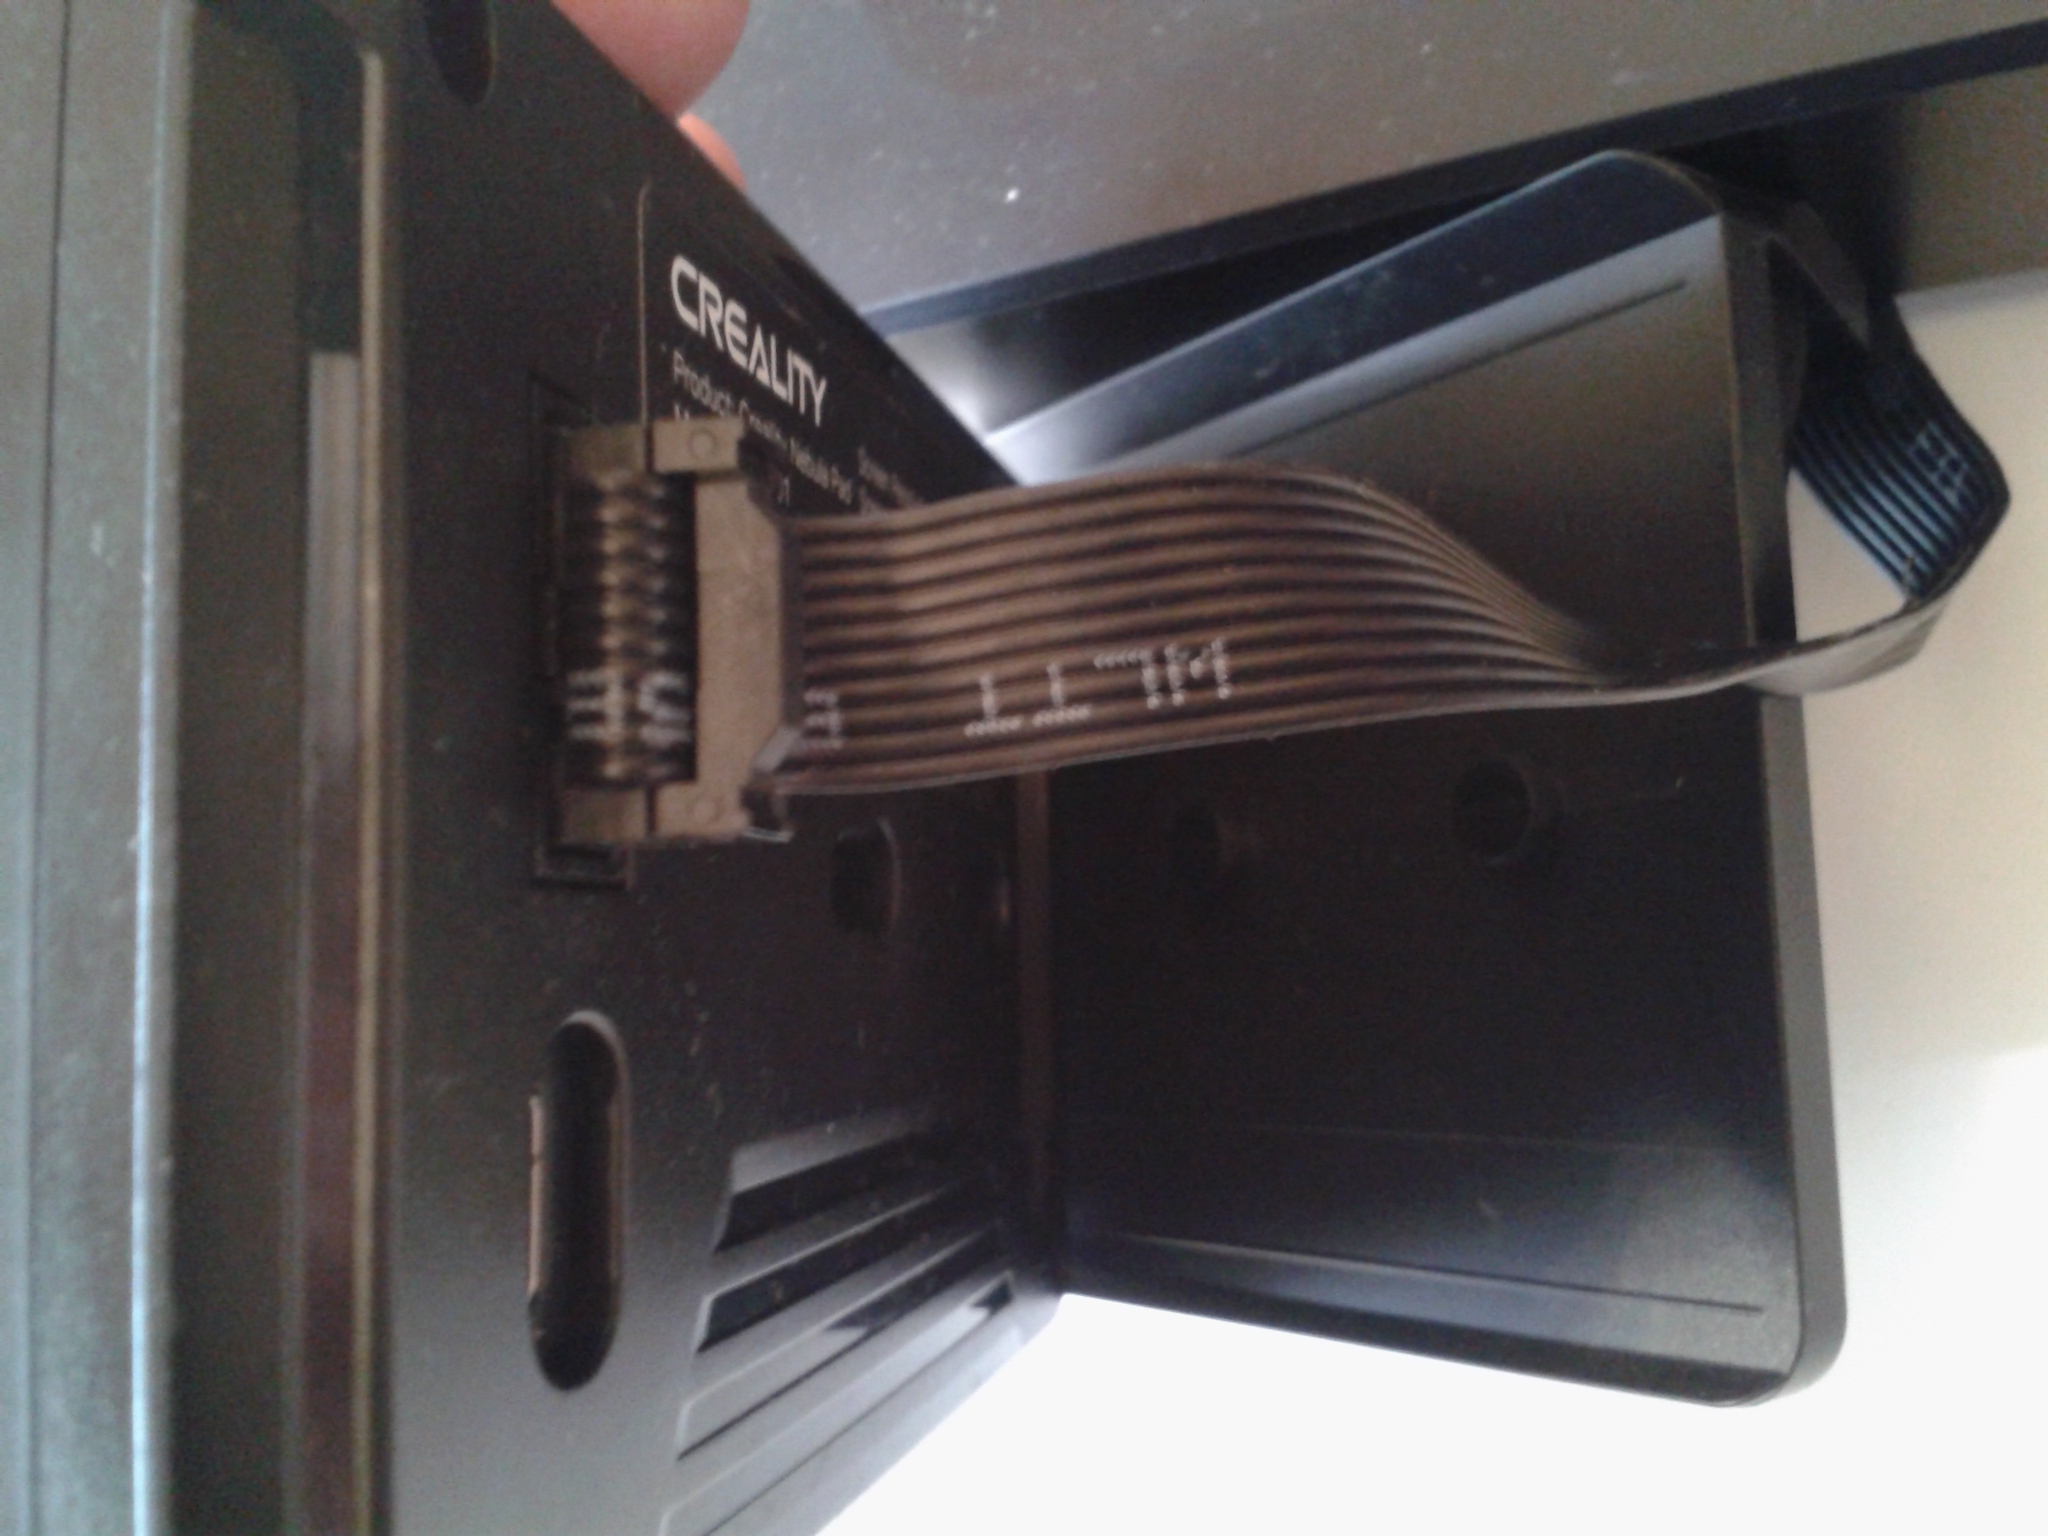
On peut remarquer que le lecteur de cartes SD et le port USB ne sont pas connectés sur la carte mère. Ils n’ont pas d’utilité ici du fait de l’écran Nebula Pad qui sera l’interface principale d’utilisation.
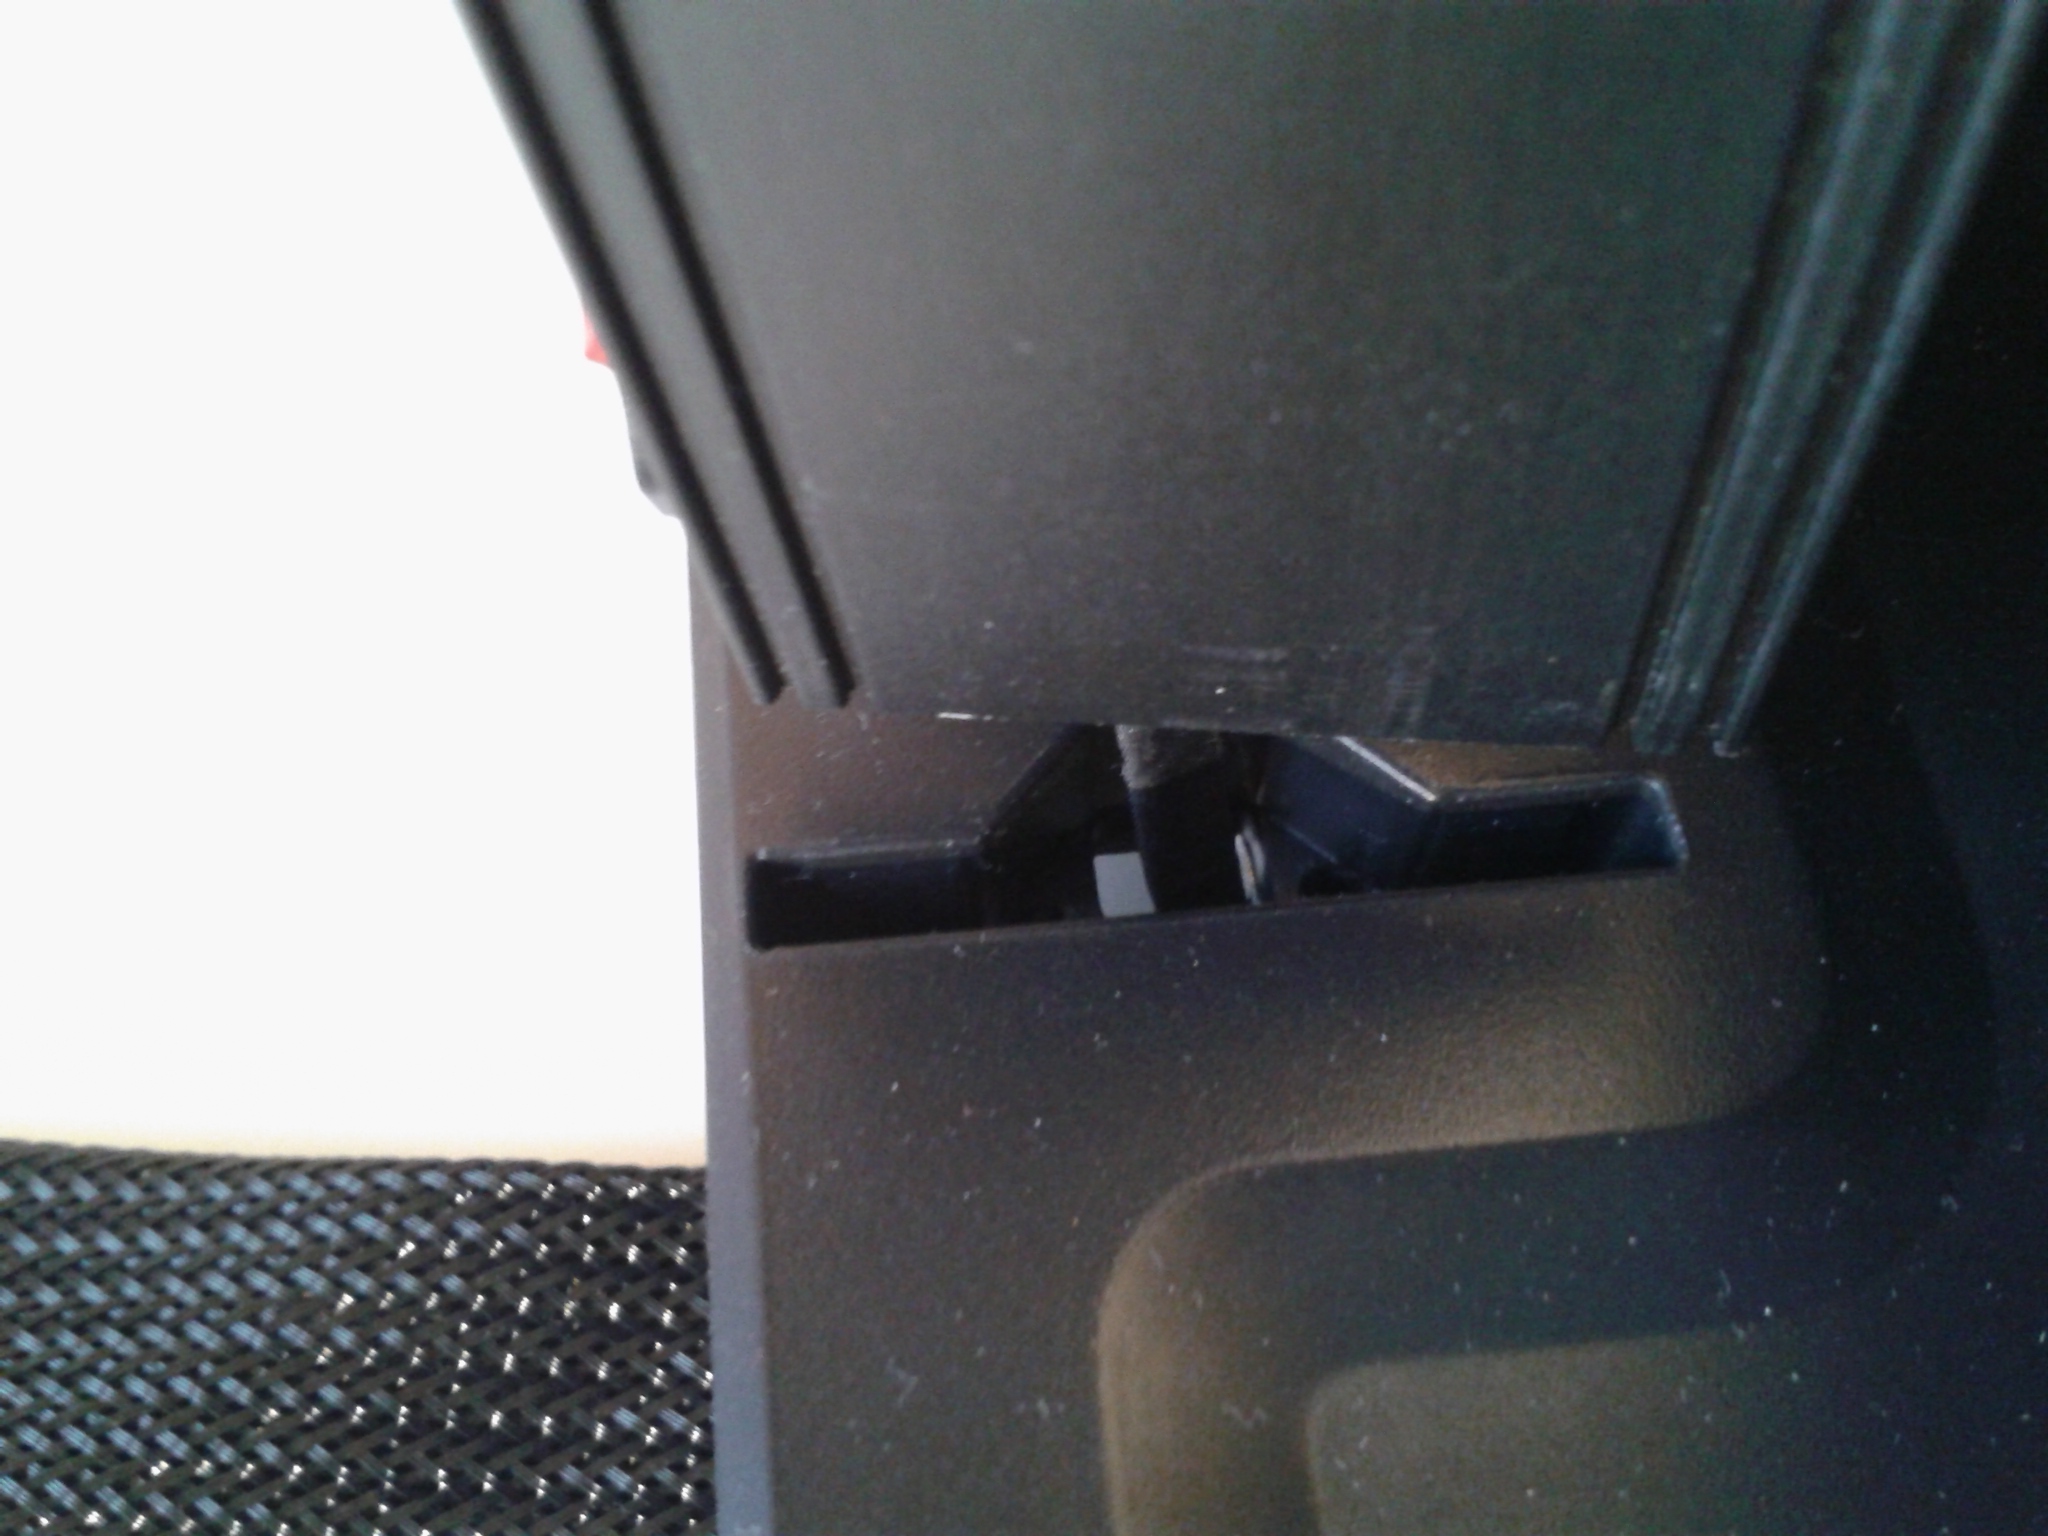
En dernière photo ci-dessus, on peut voir, comme sur la Ender-3 V3 SE, le capteur de jauge de contrainte, sous le coin avant gauche du plateau.
Dans l’écran Nebula Pad
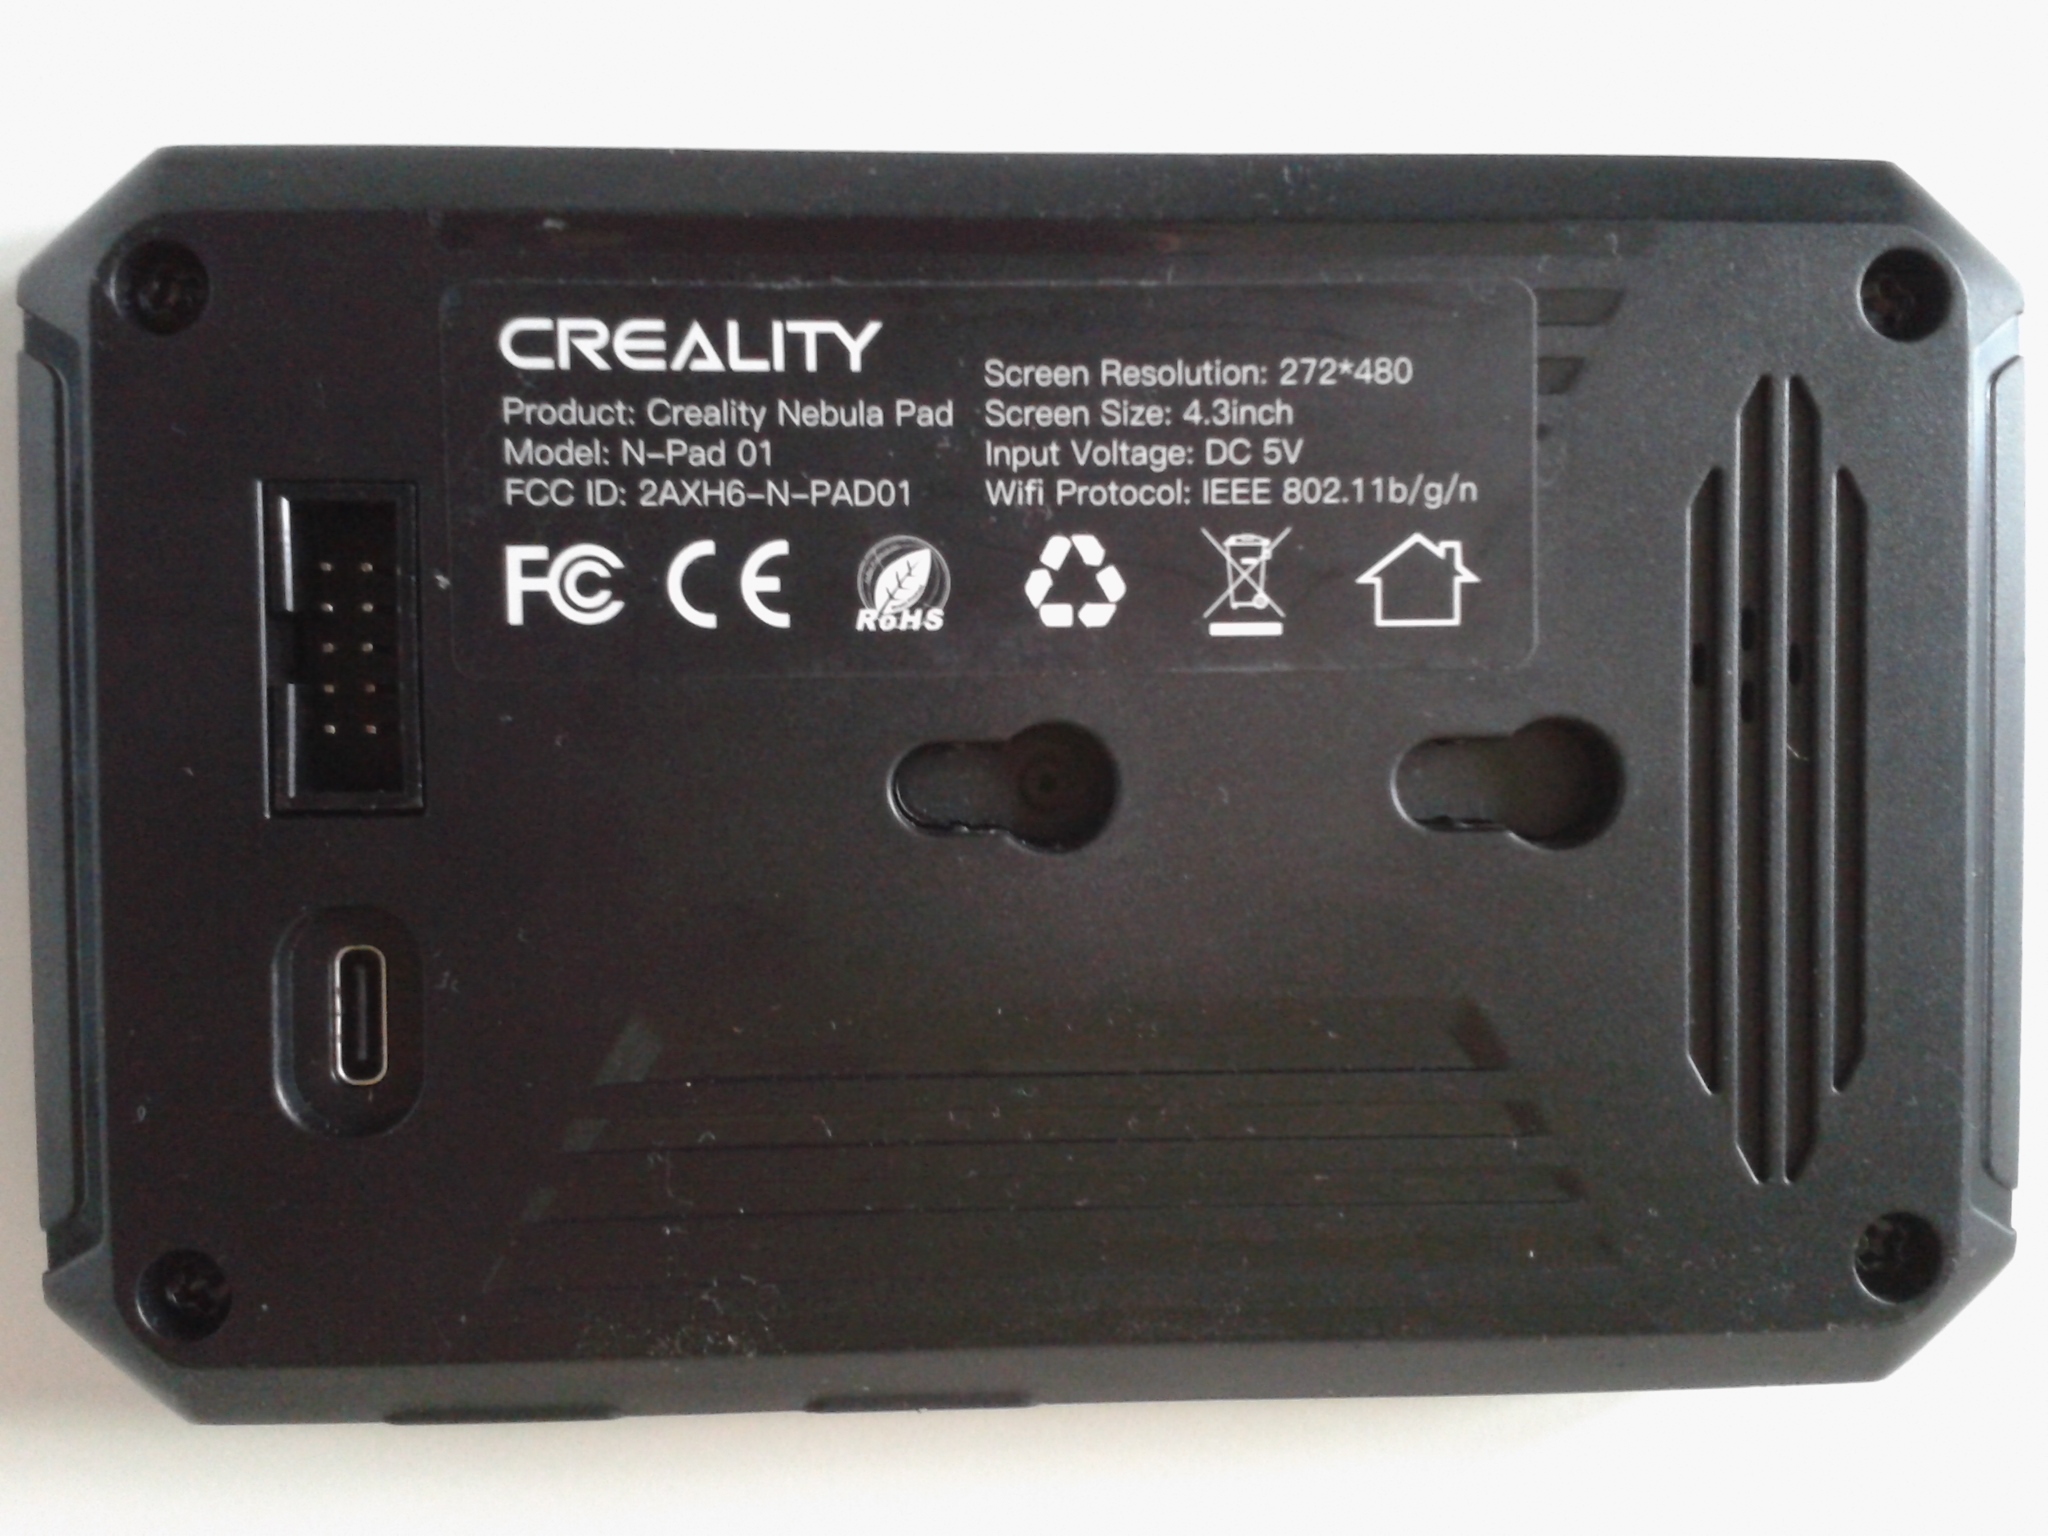
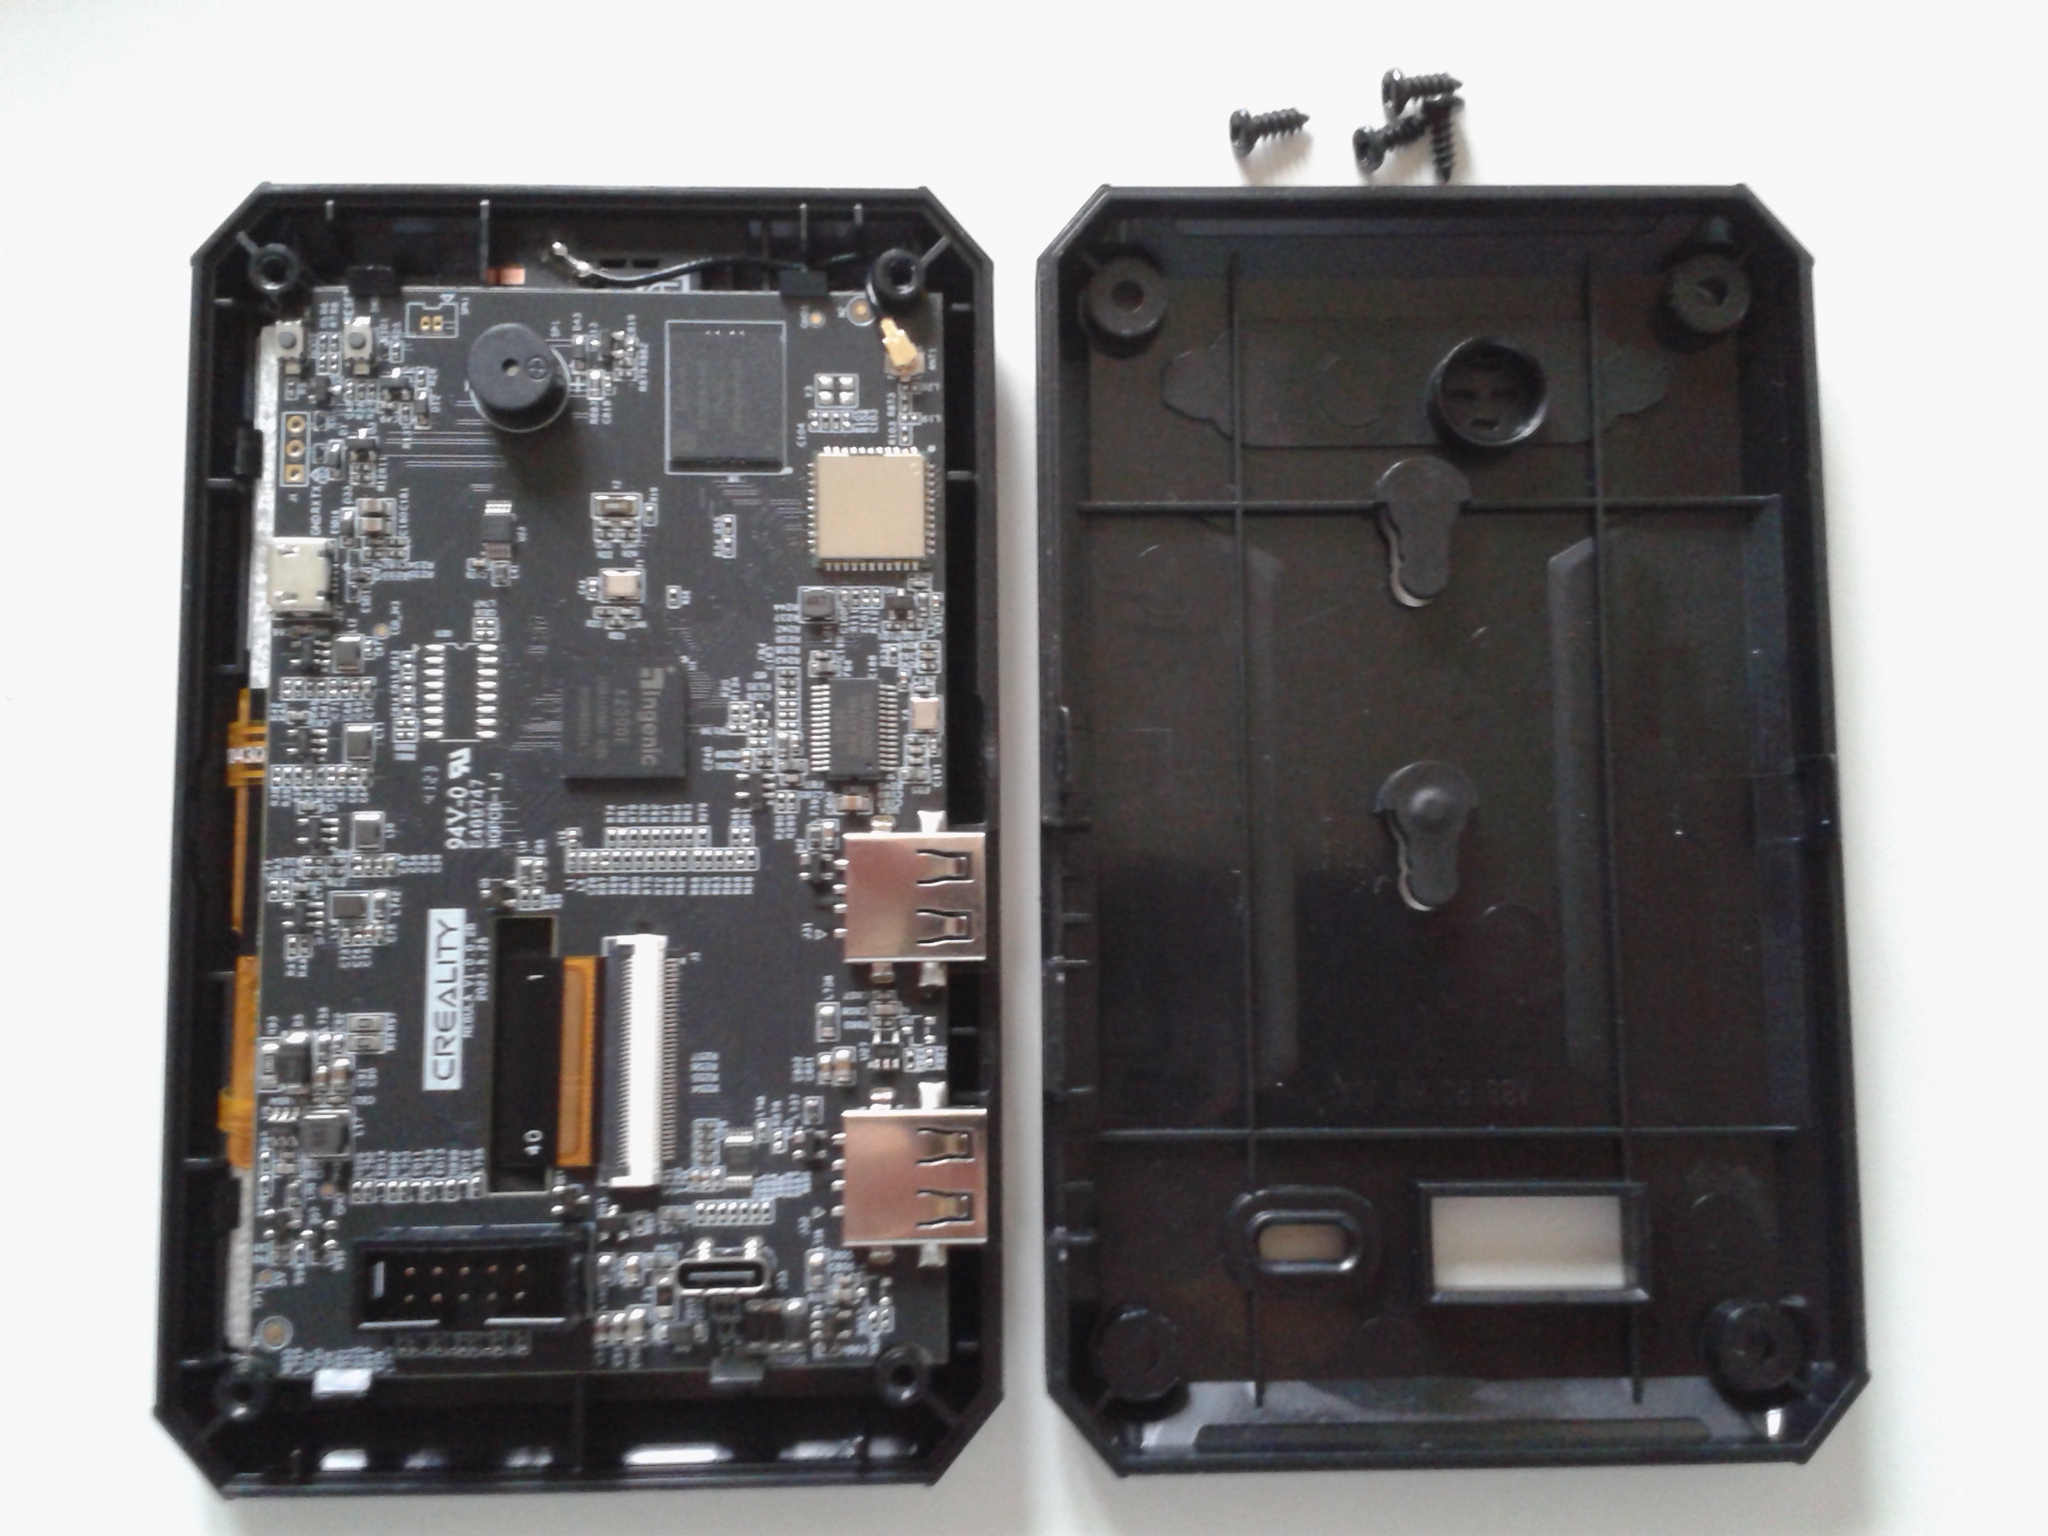
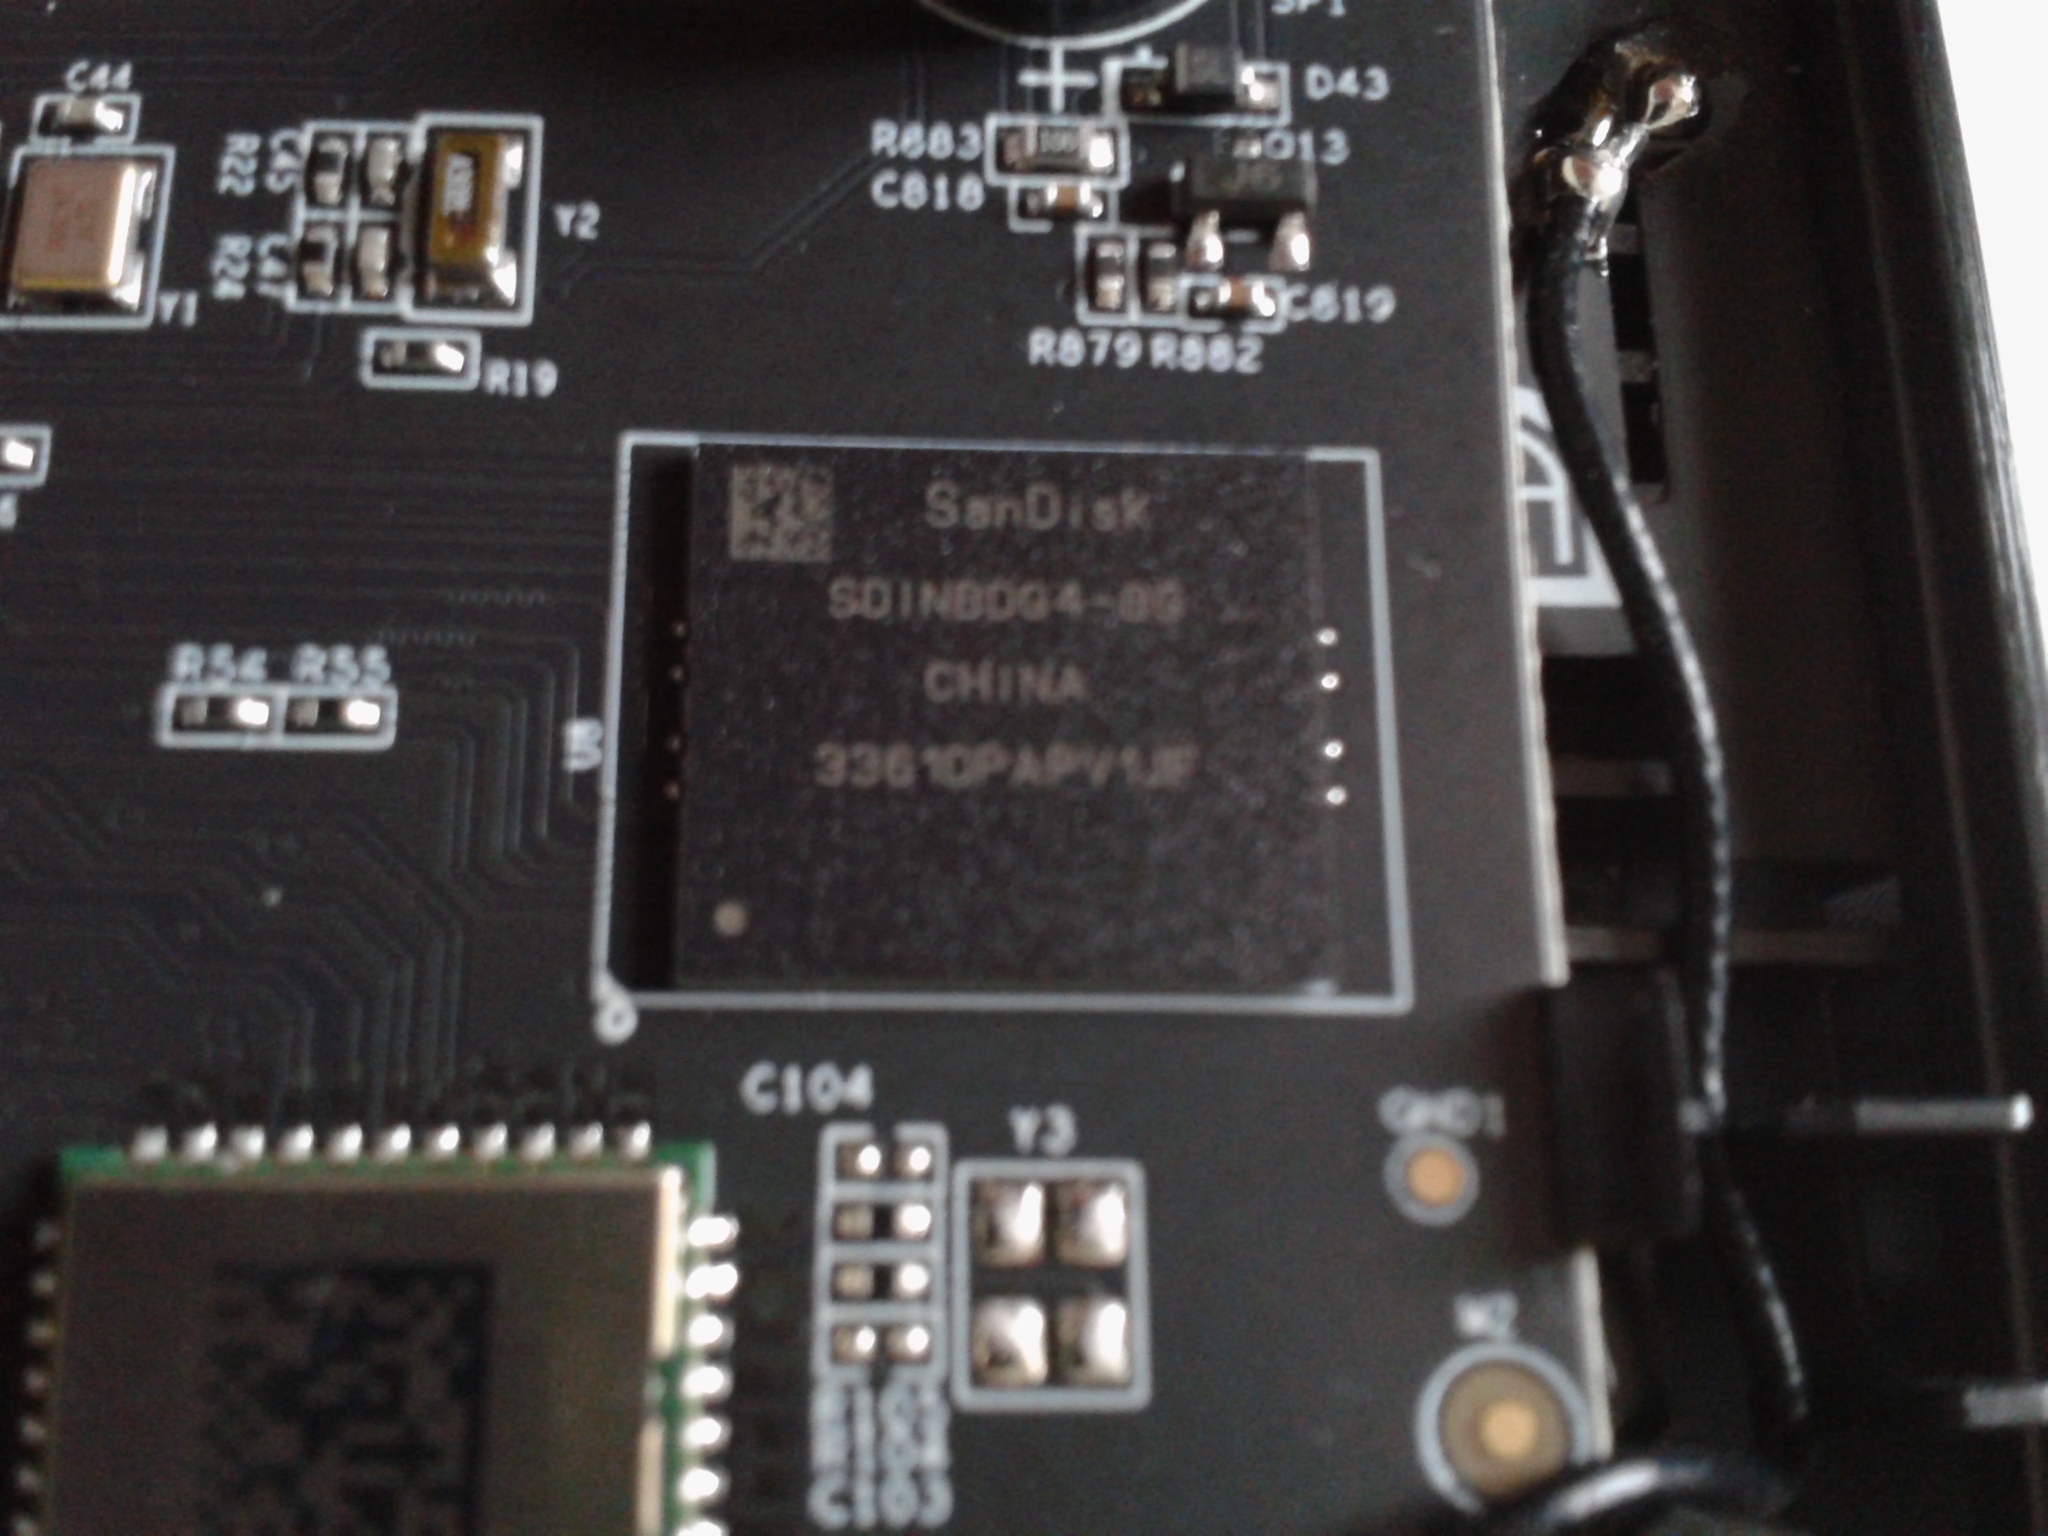
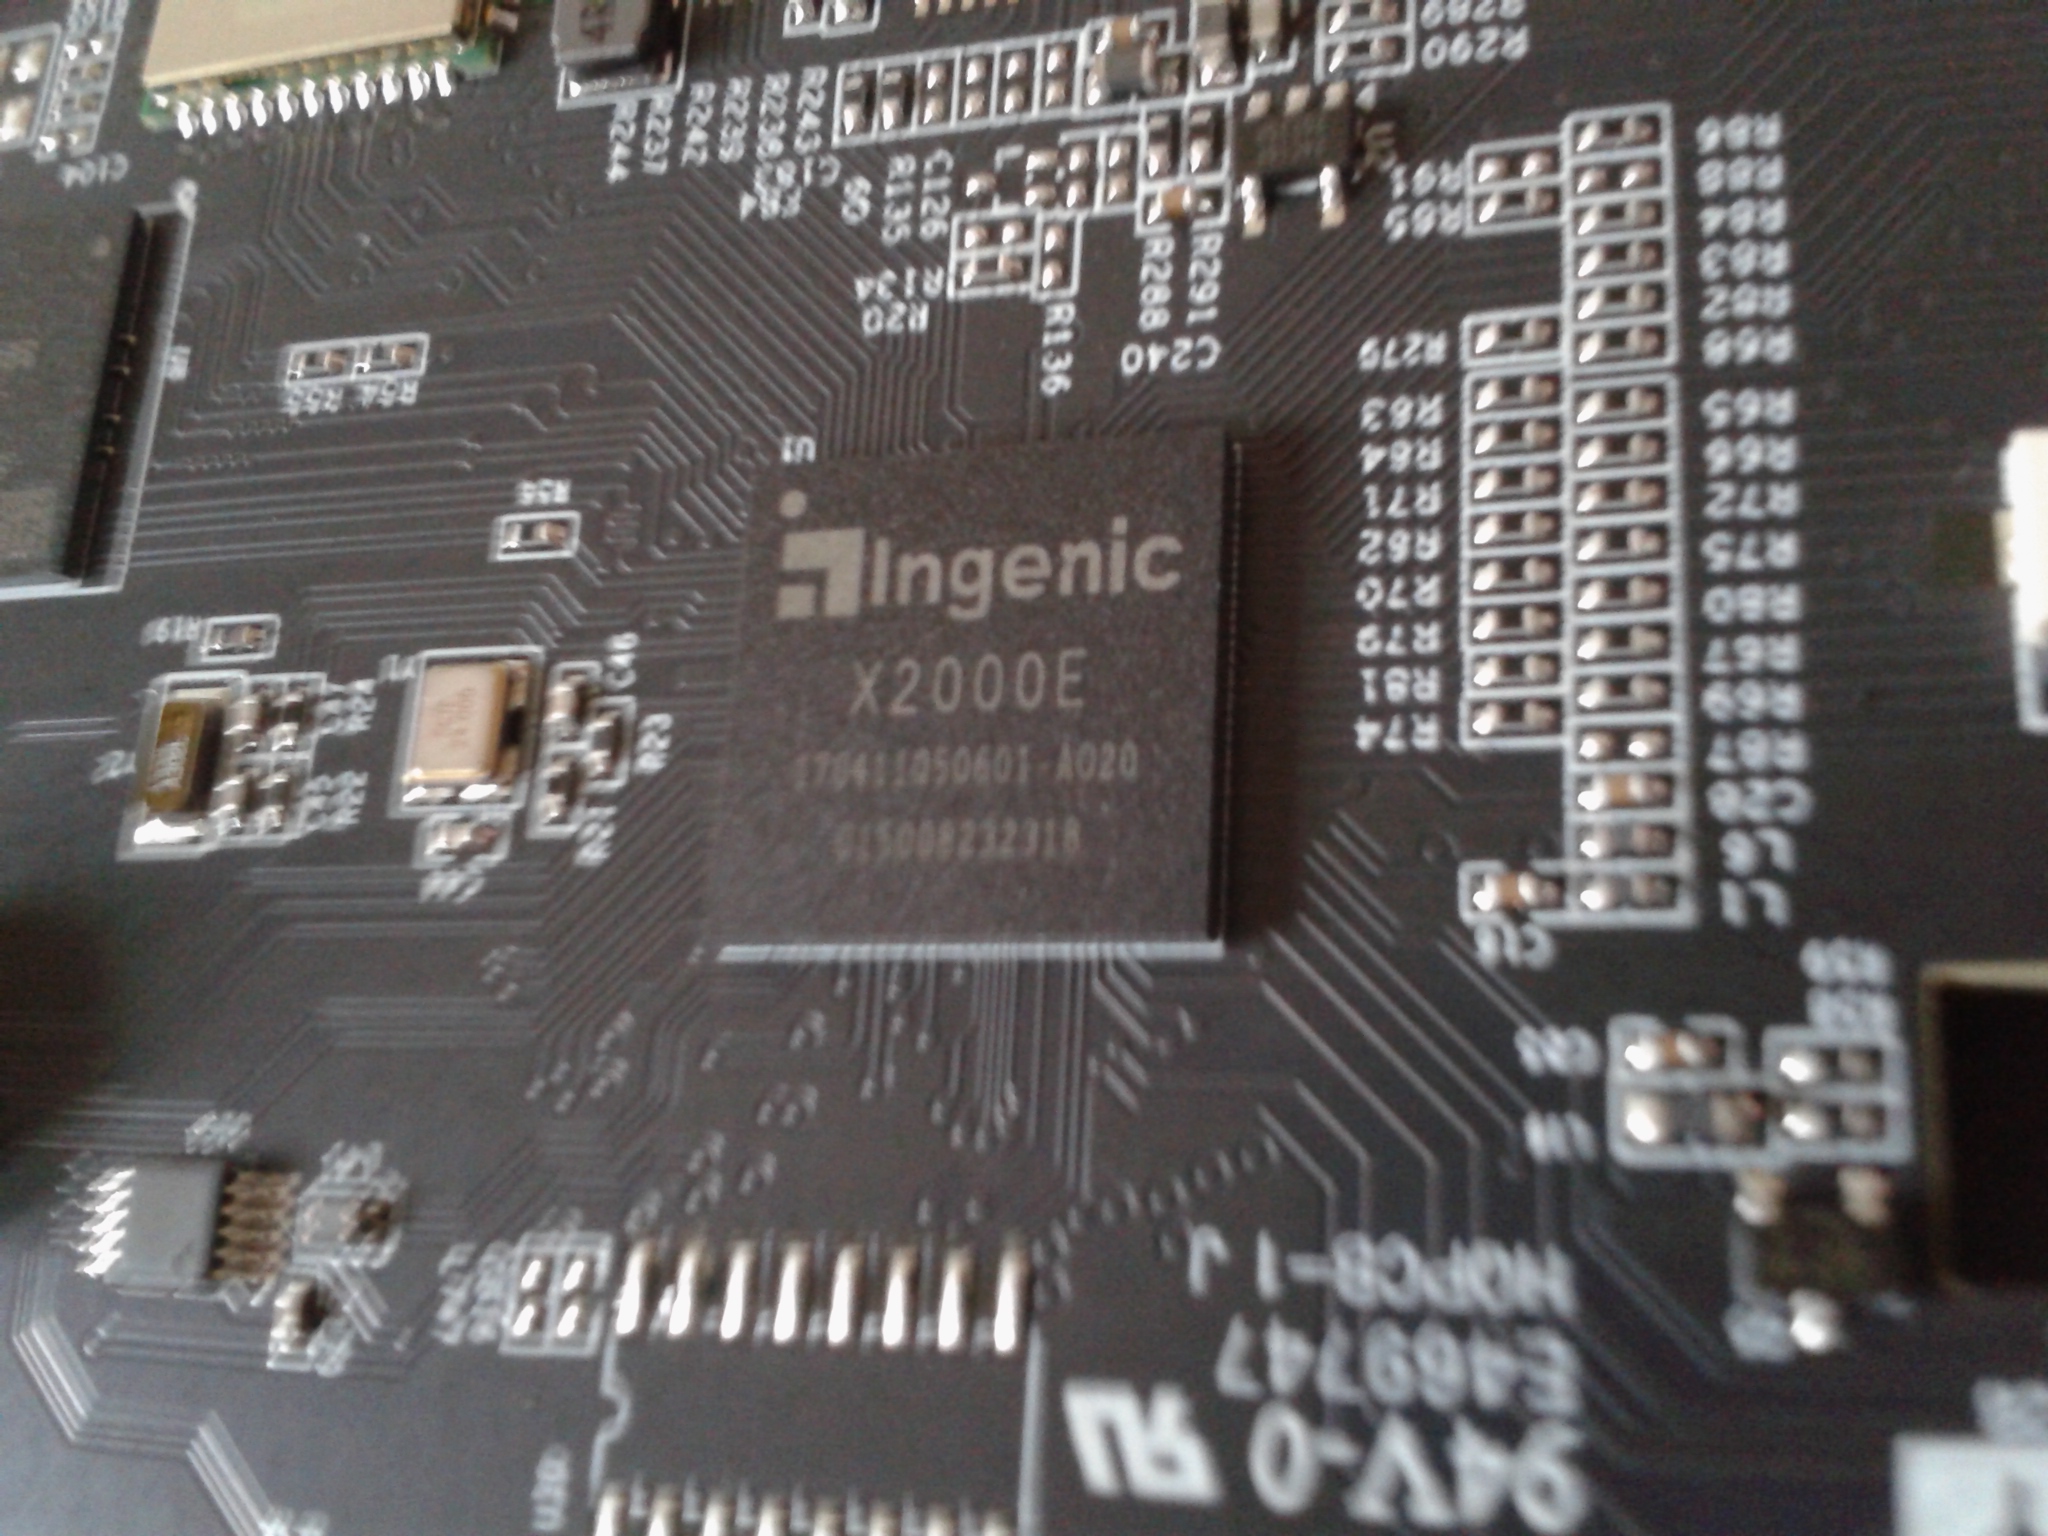
C’est l’écran baptisé Nebula Pad qui héberge Creality OS est qui est l’unité de calcul et d’interface principal du firmware Klipper. Sa diagonale mesure 4.3 pouces et dispose d’une mémoire interne eMMC de 8 Go et d’une puce pour connecter l’imprimante sur un réseau sans-fil WiFi.
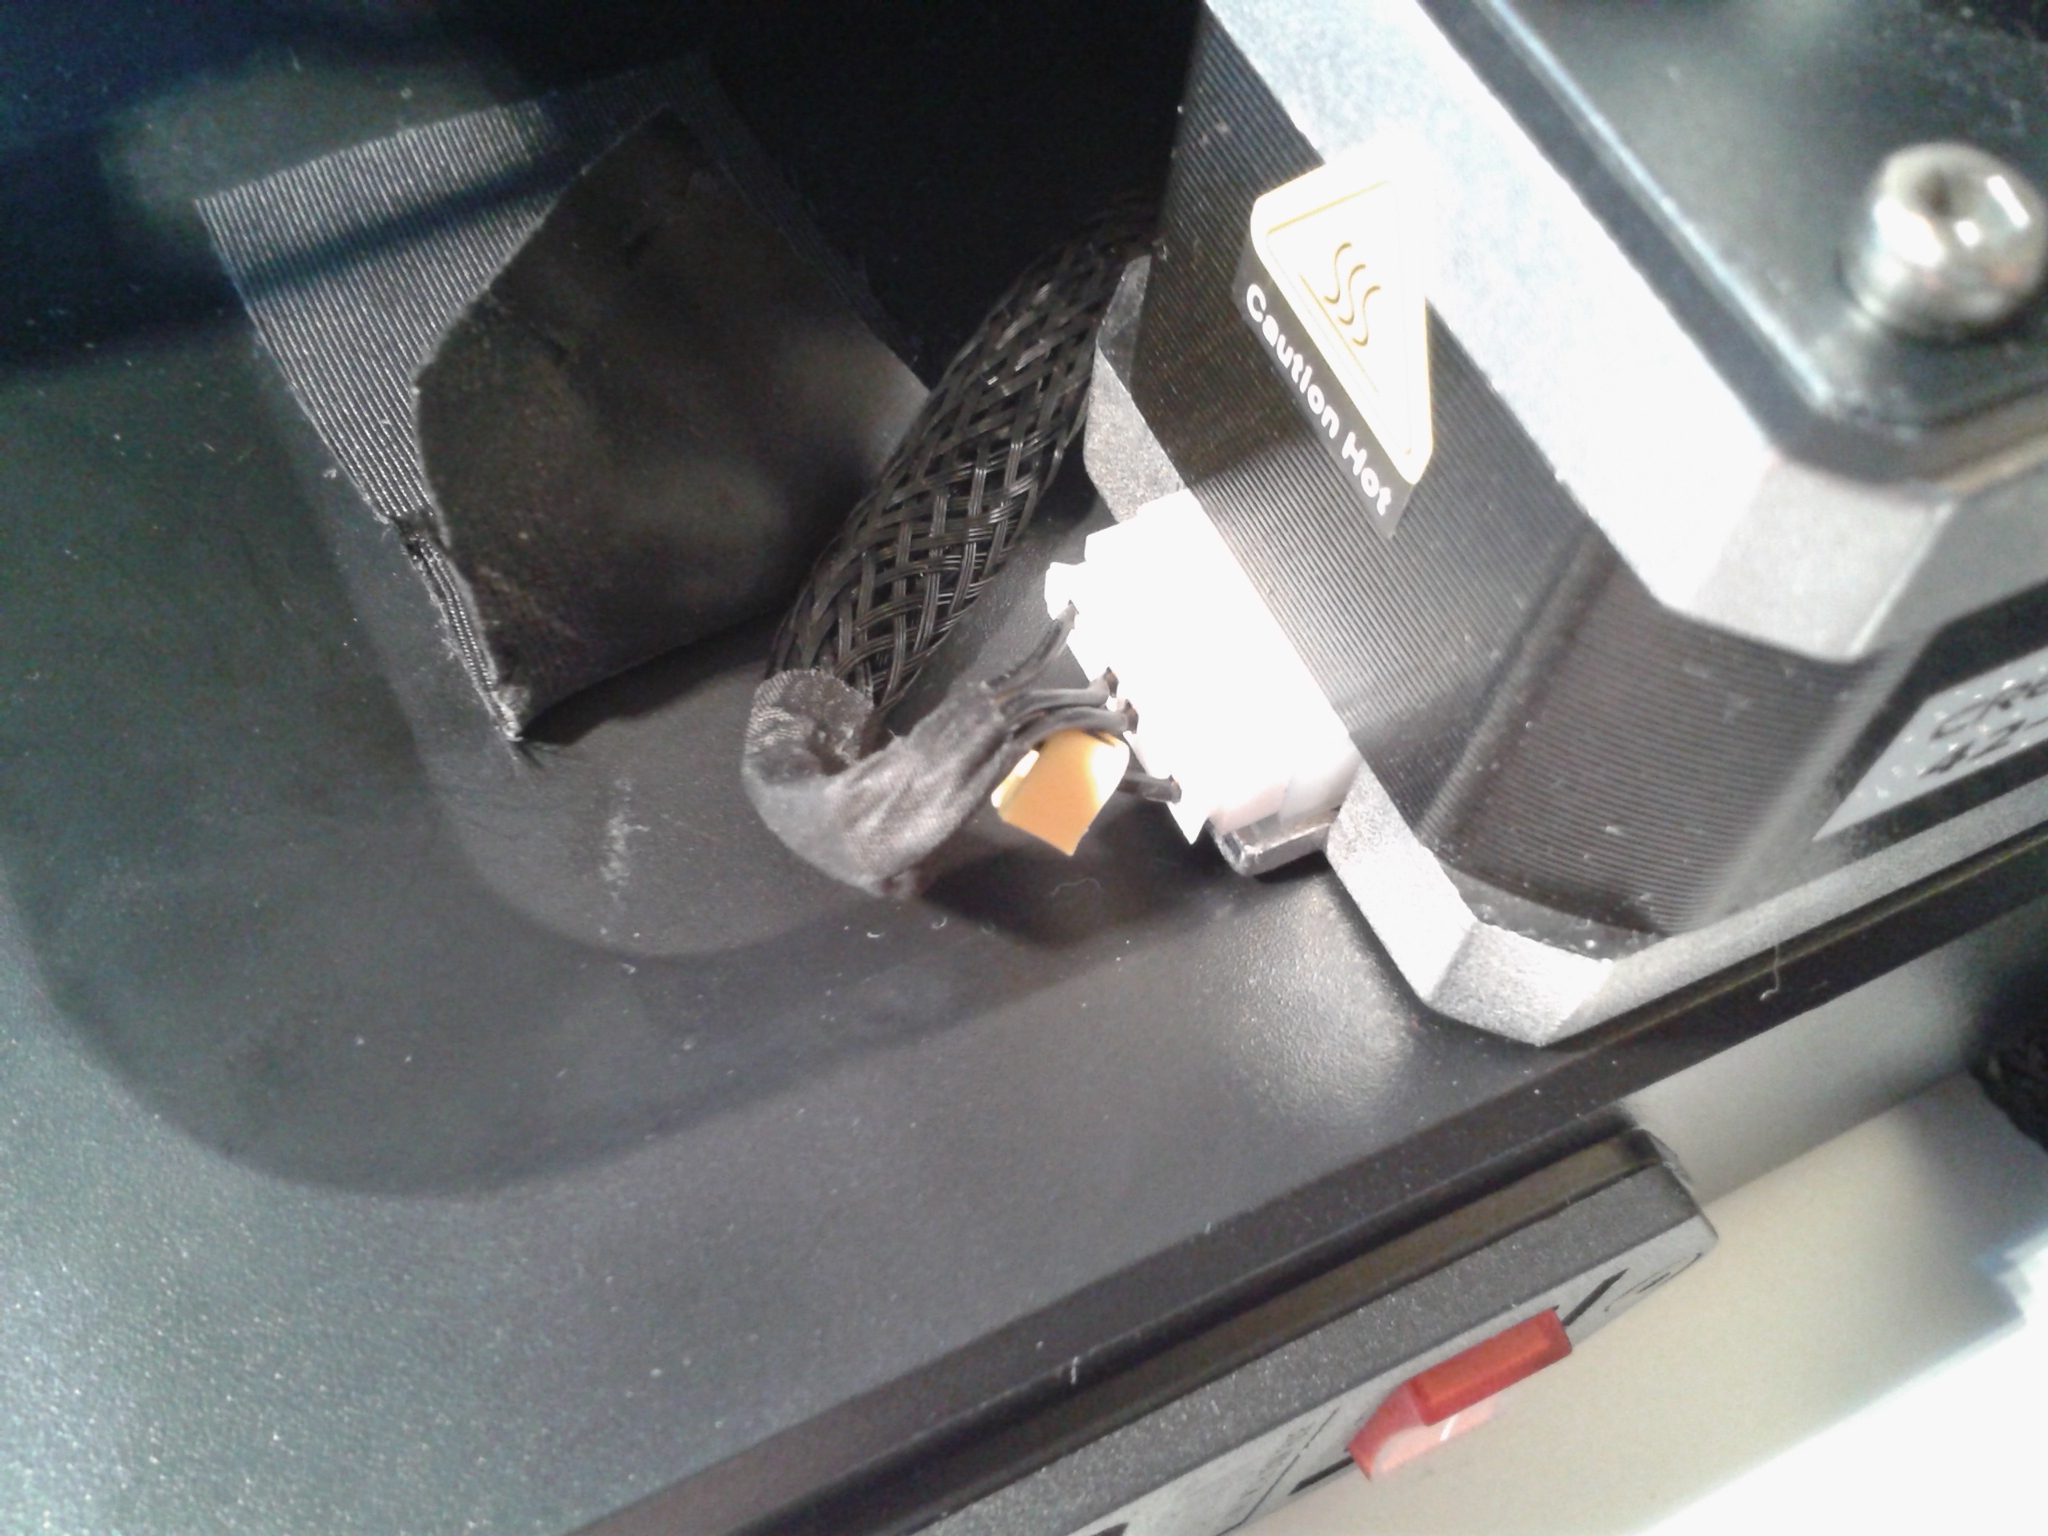
Sur la tête d’impression
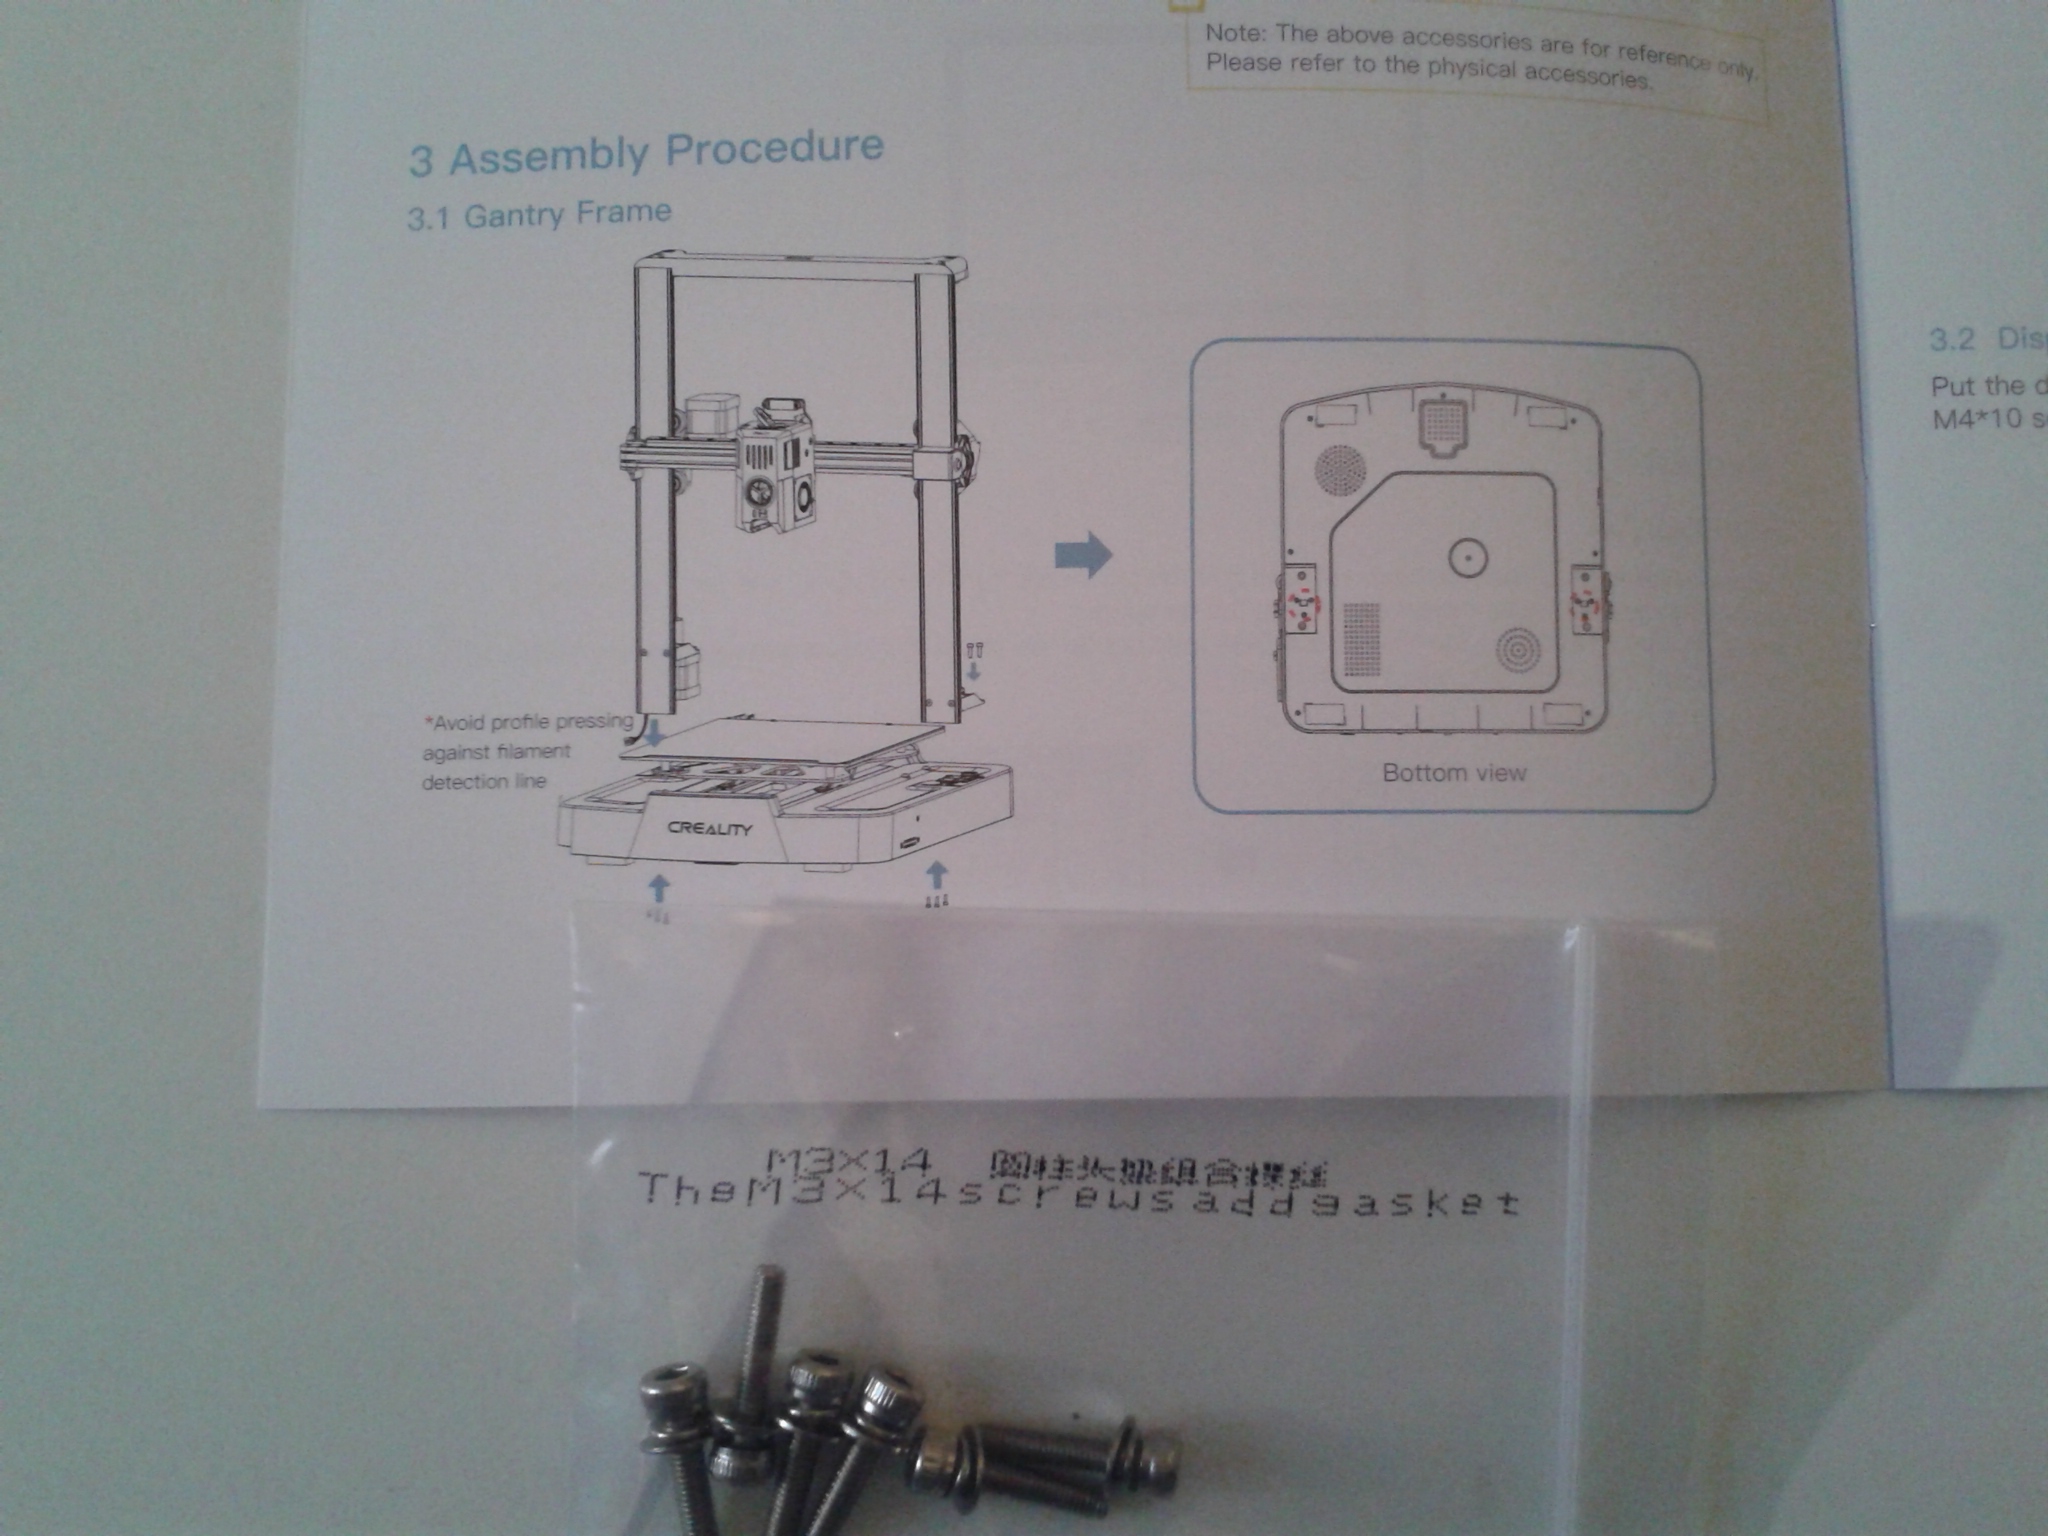
Montage Creality Ender-3 V3 KE
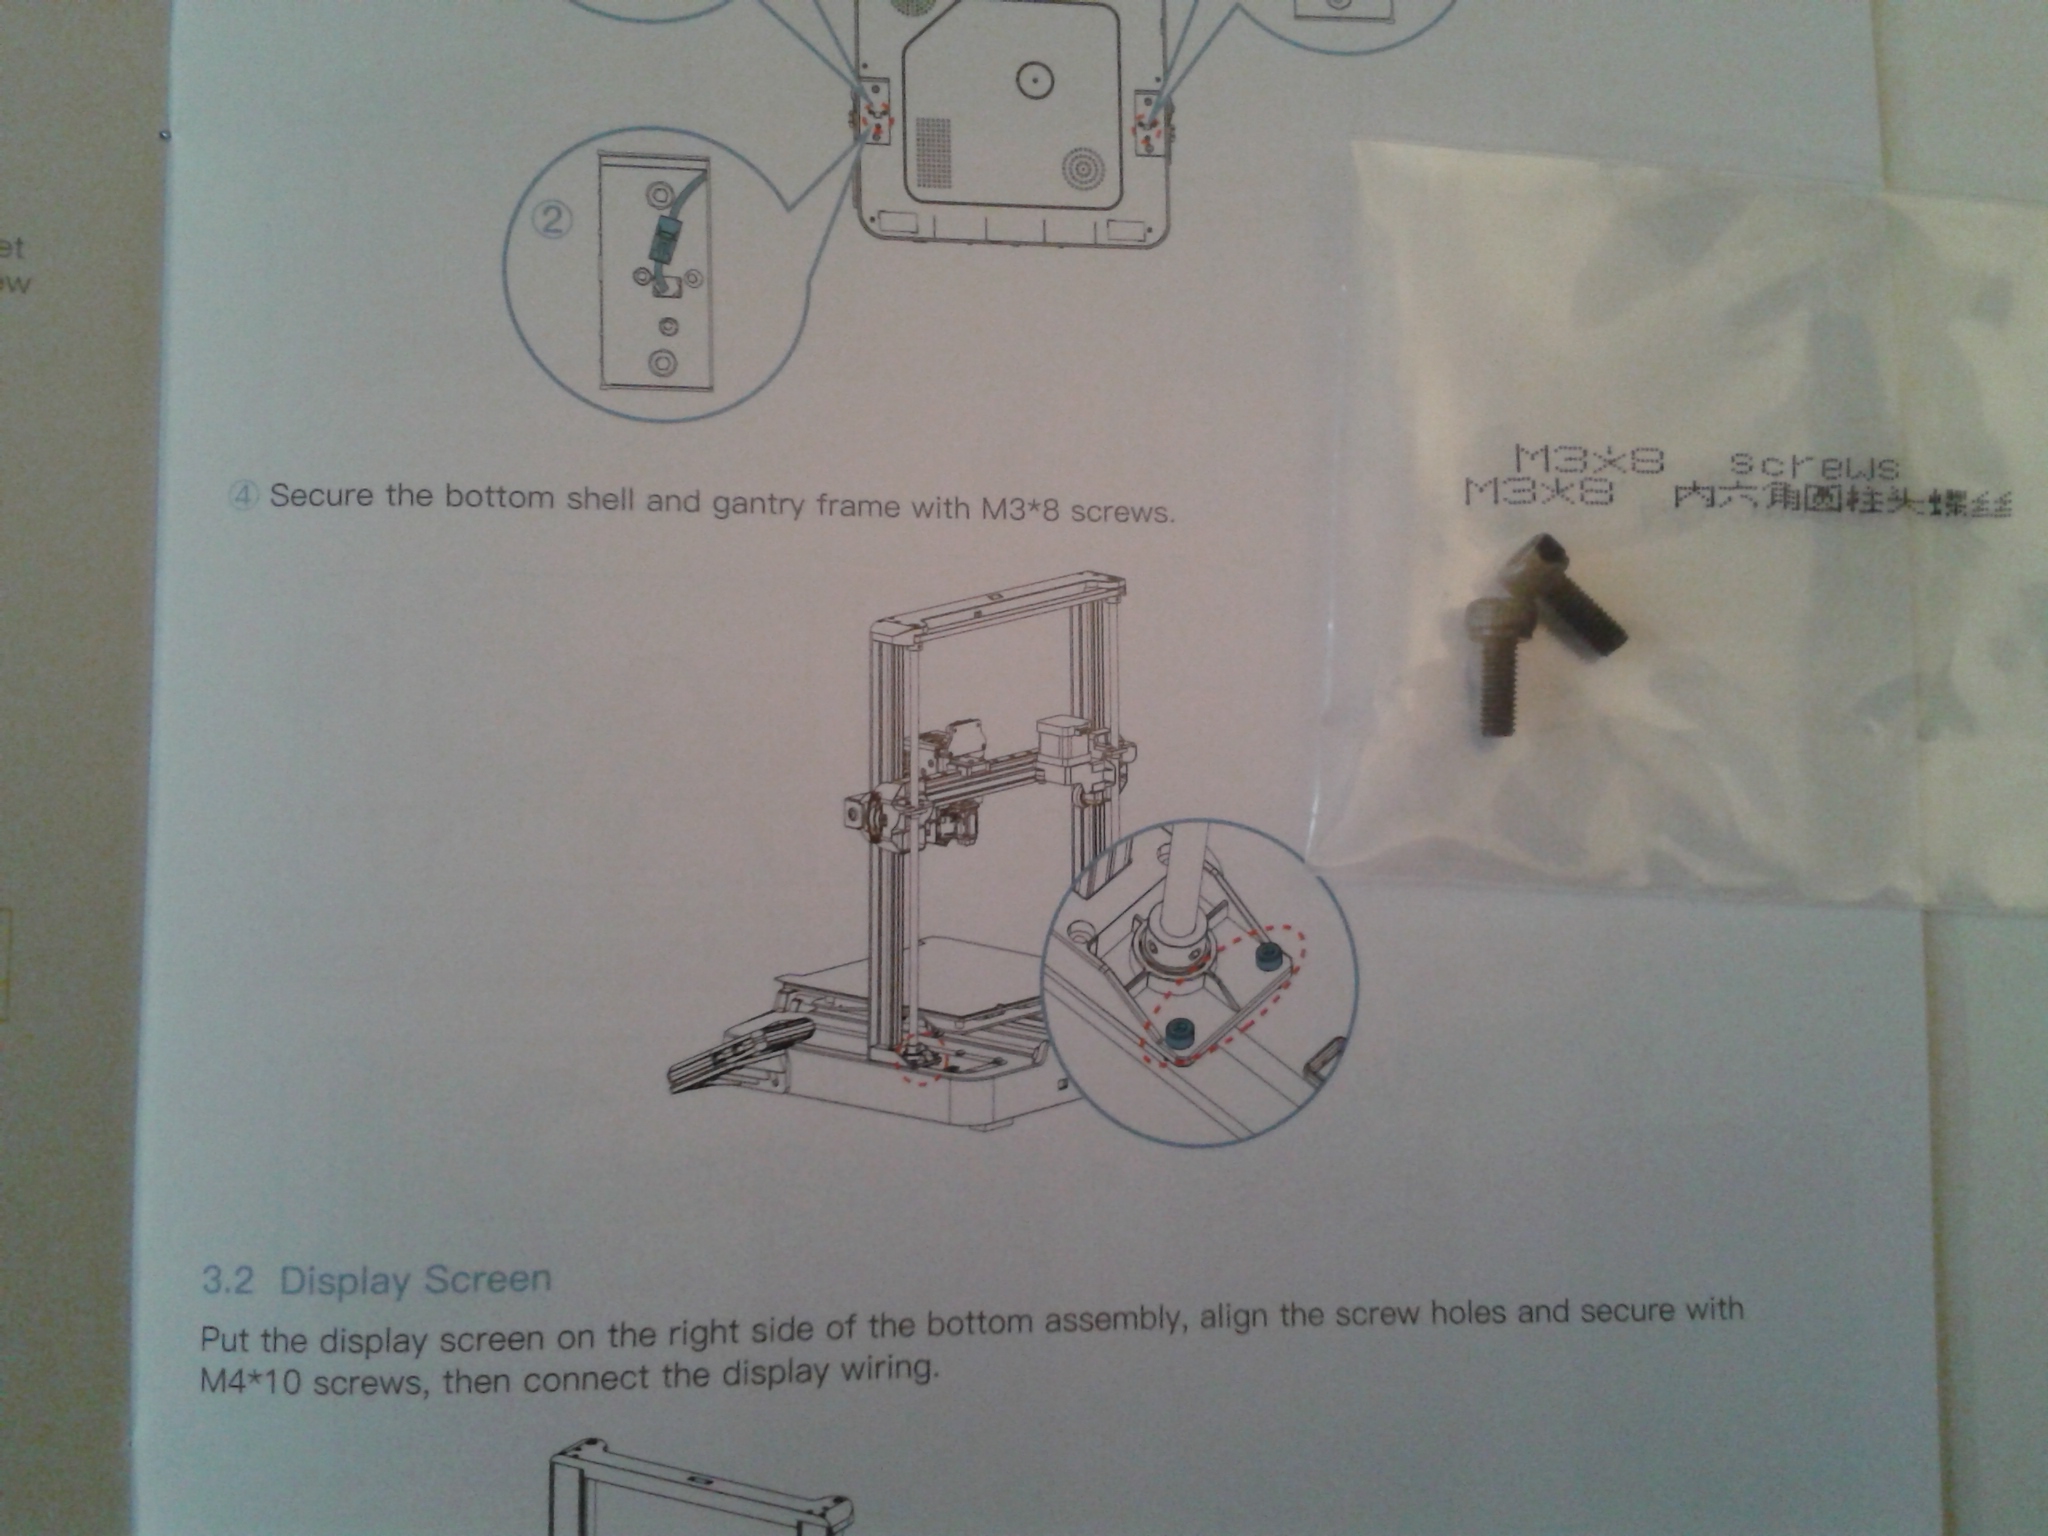
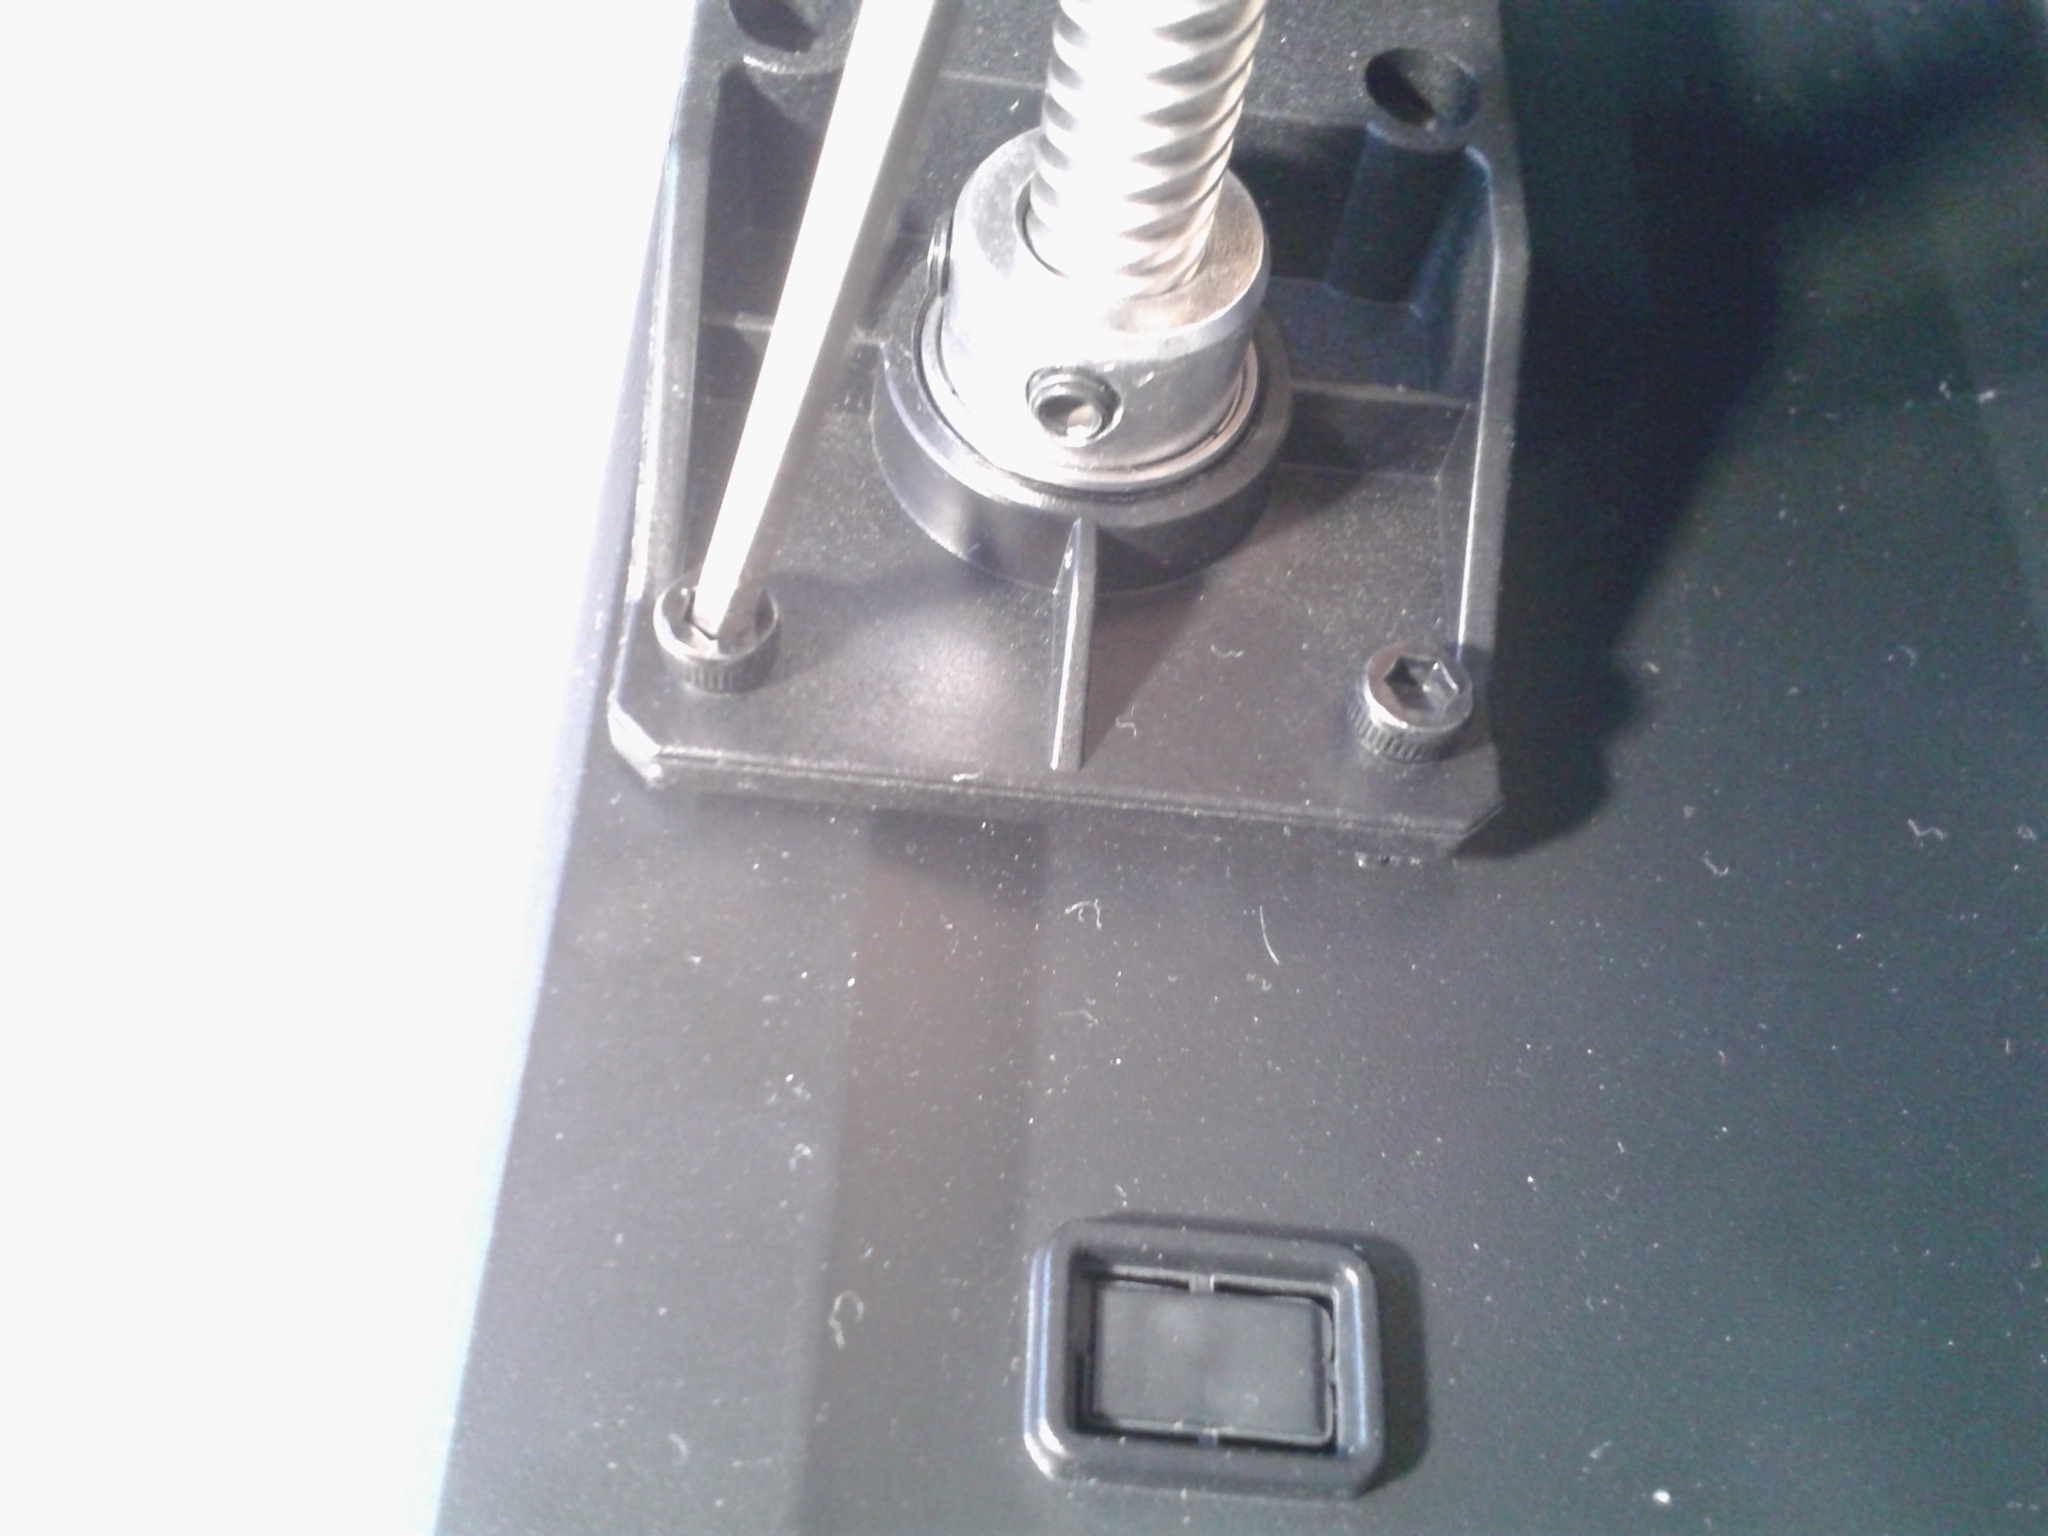
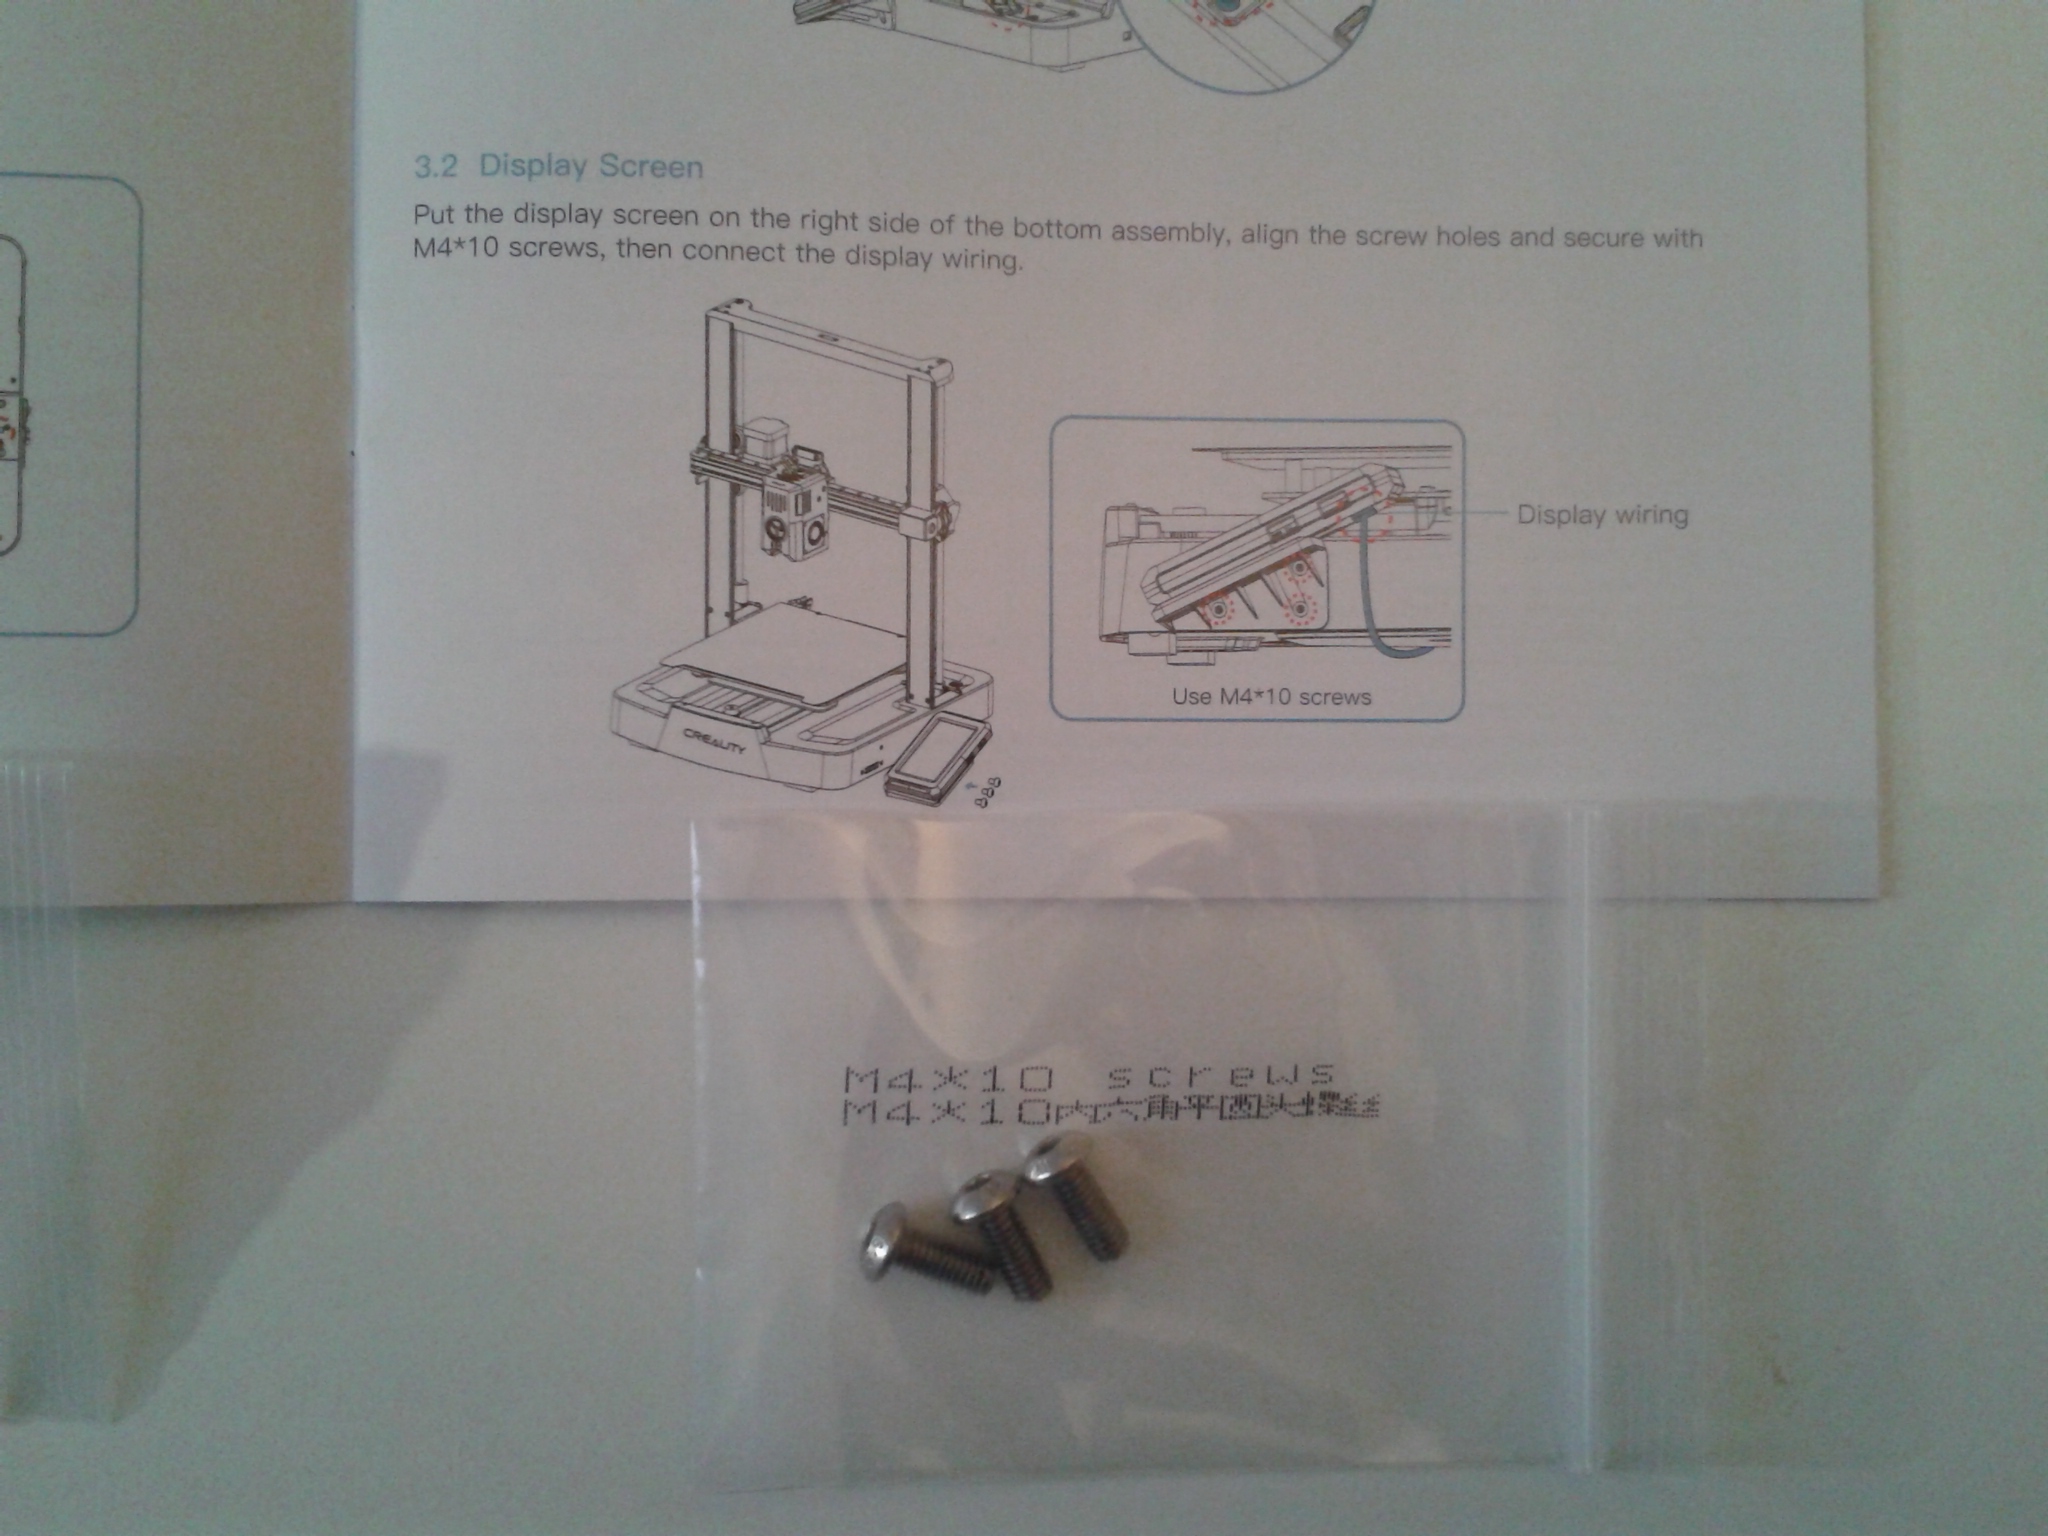
La machine est déjà grandement pré-assemblée en sortie de carton. Le montage restant se fait donc relativement rapidement car il s’agit de mettre en place et fixer :
- Le portique,
- Le porte-bobine,
- L’écran,
- Connecter les éléments.
Un petit livret illustré au format papier en anglais et en chinois aide à réaliser ces opérations. Sur la clé USB fournie, on retrouve le manuel PDF de mise en fonction en plusieurs langues dont le français. Une vidéo d’assemblage complète les aides pour nous guider dans ses étapes.
Je ne vais donc pas plus rentrer dans les détails et juste mettre quelques photos prises lors de l’assemblage de la Creality Ender-3 V3 KE.


Mise en route de la Ender-3 V3 KE
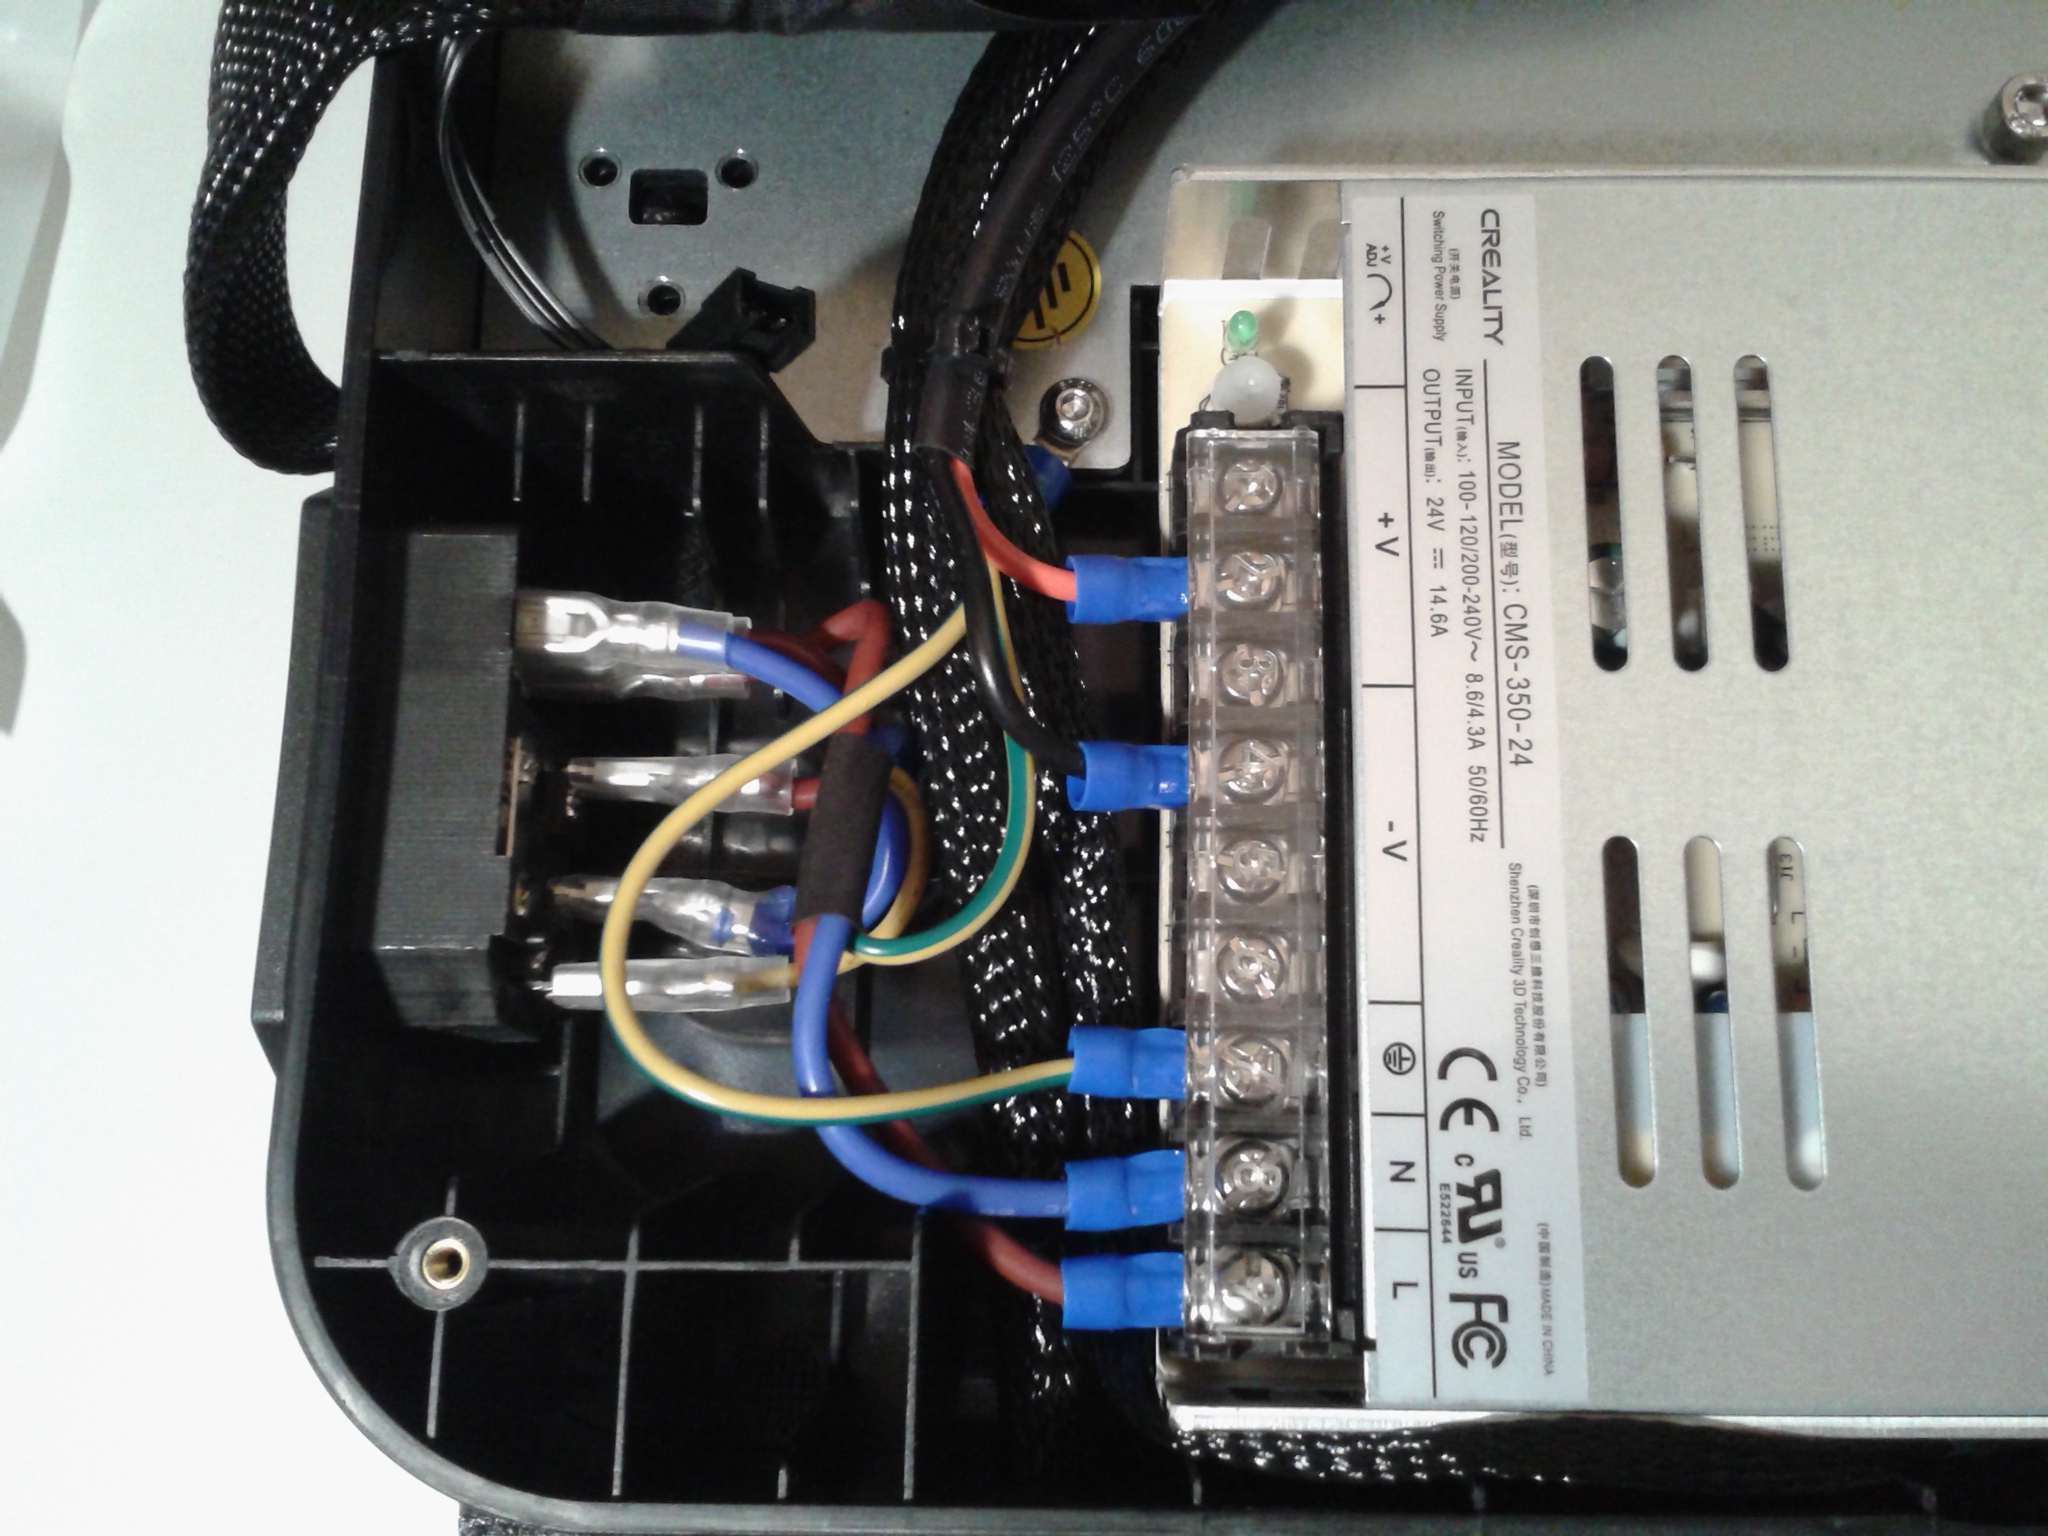
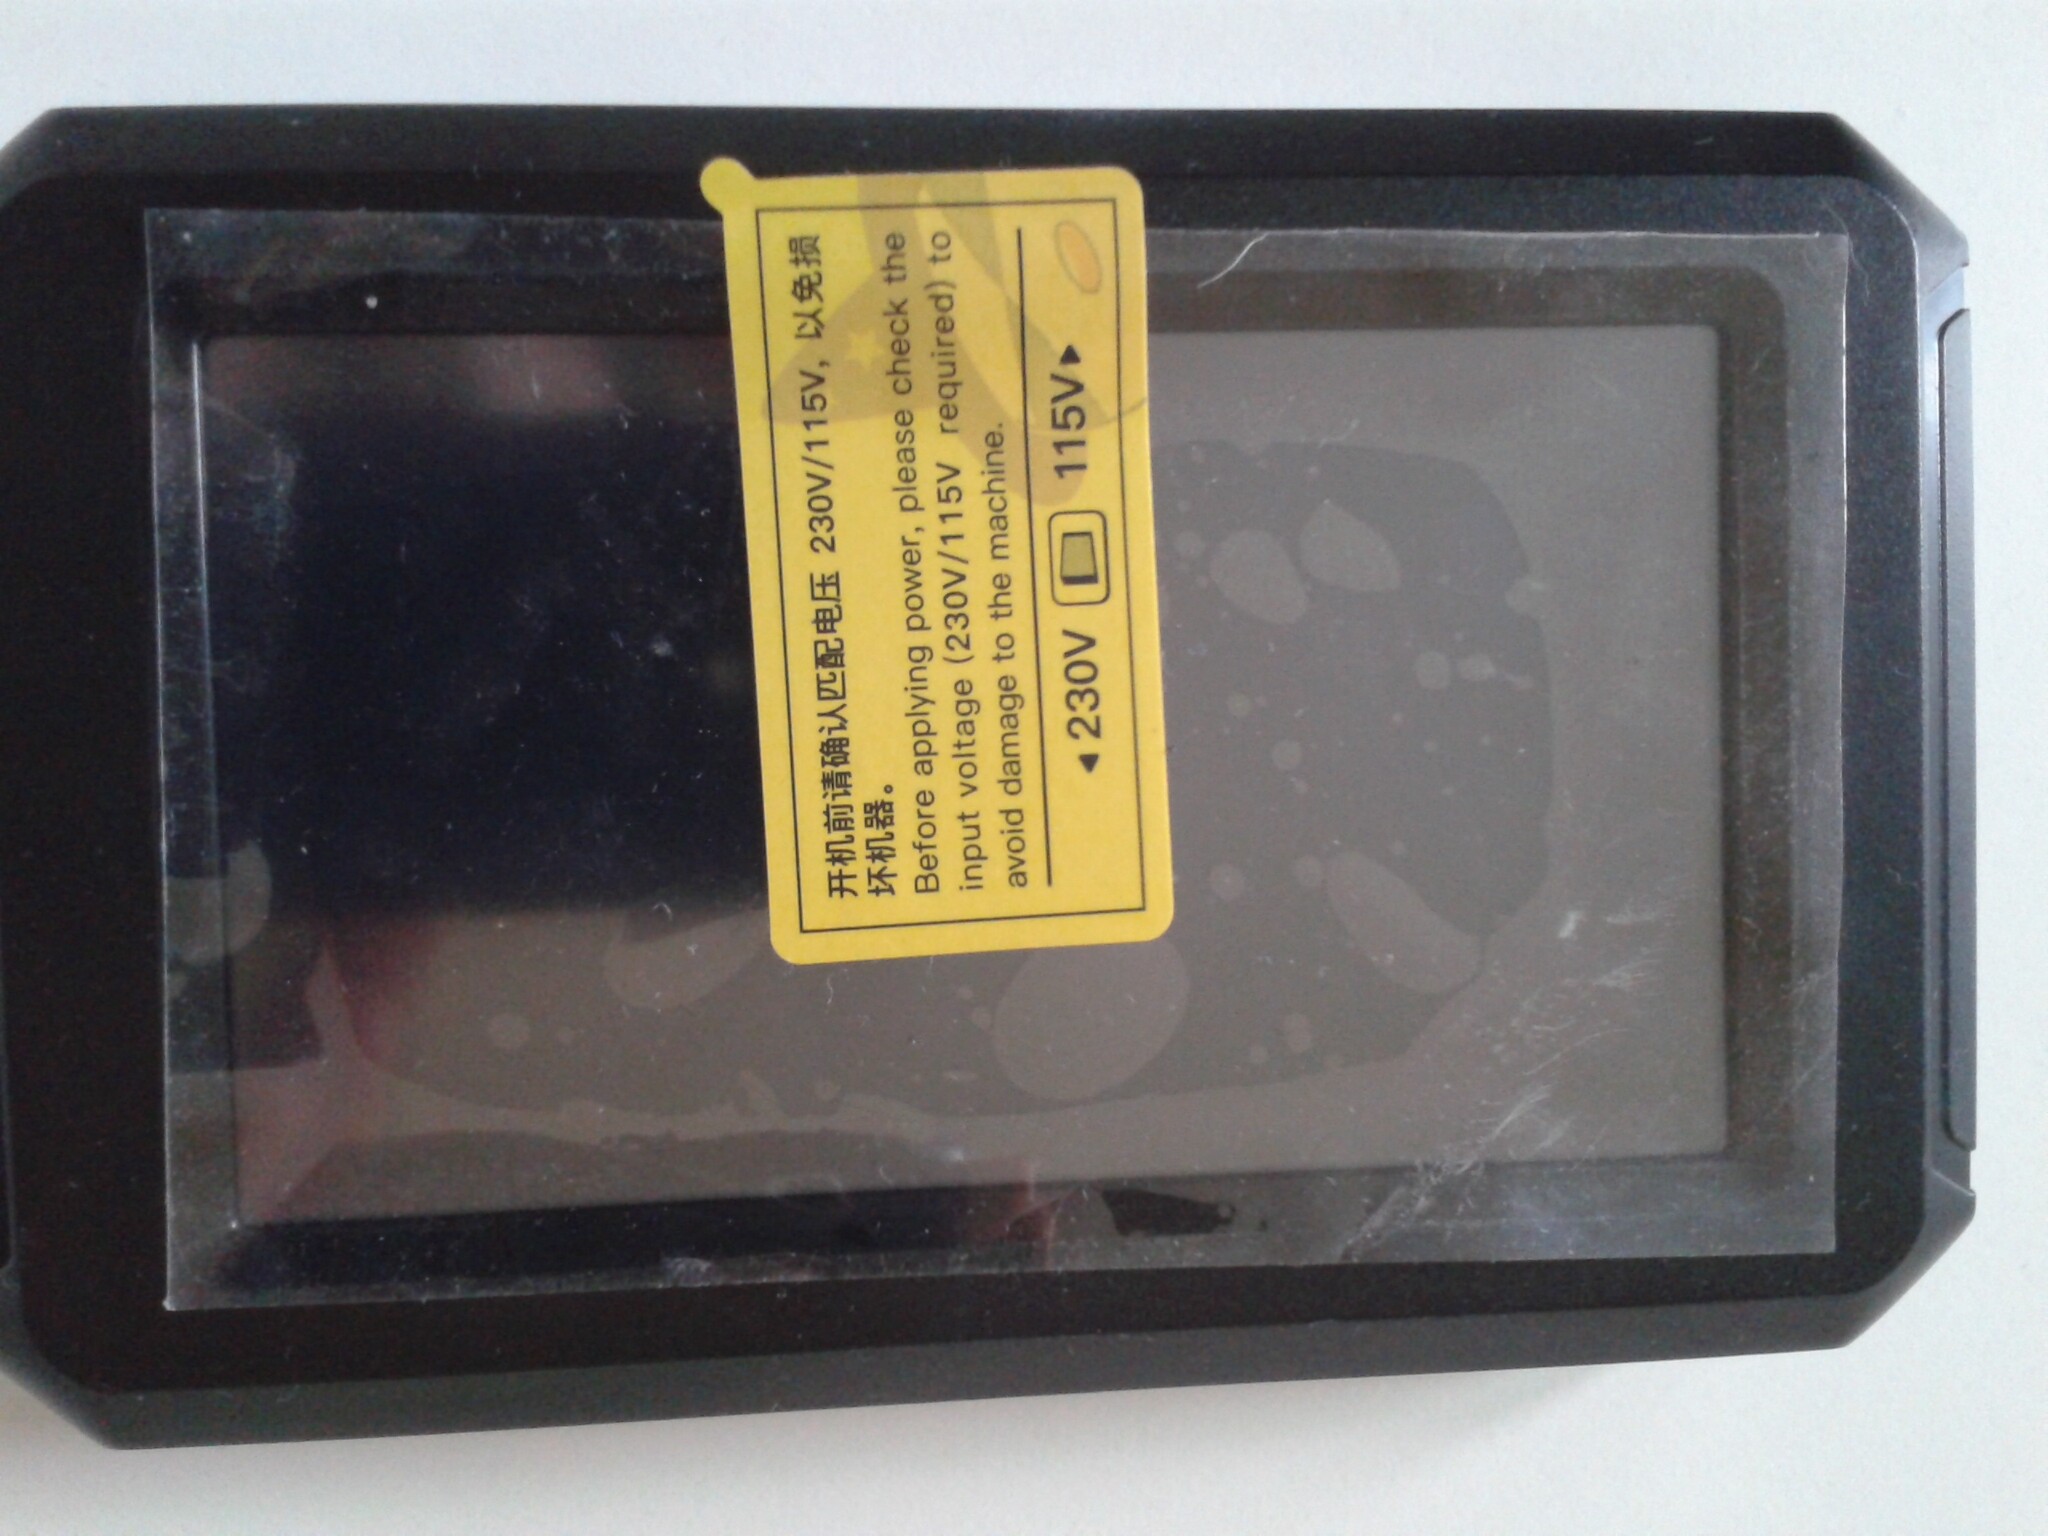
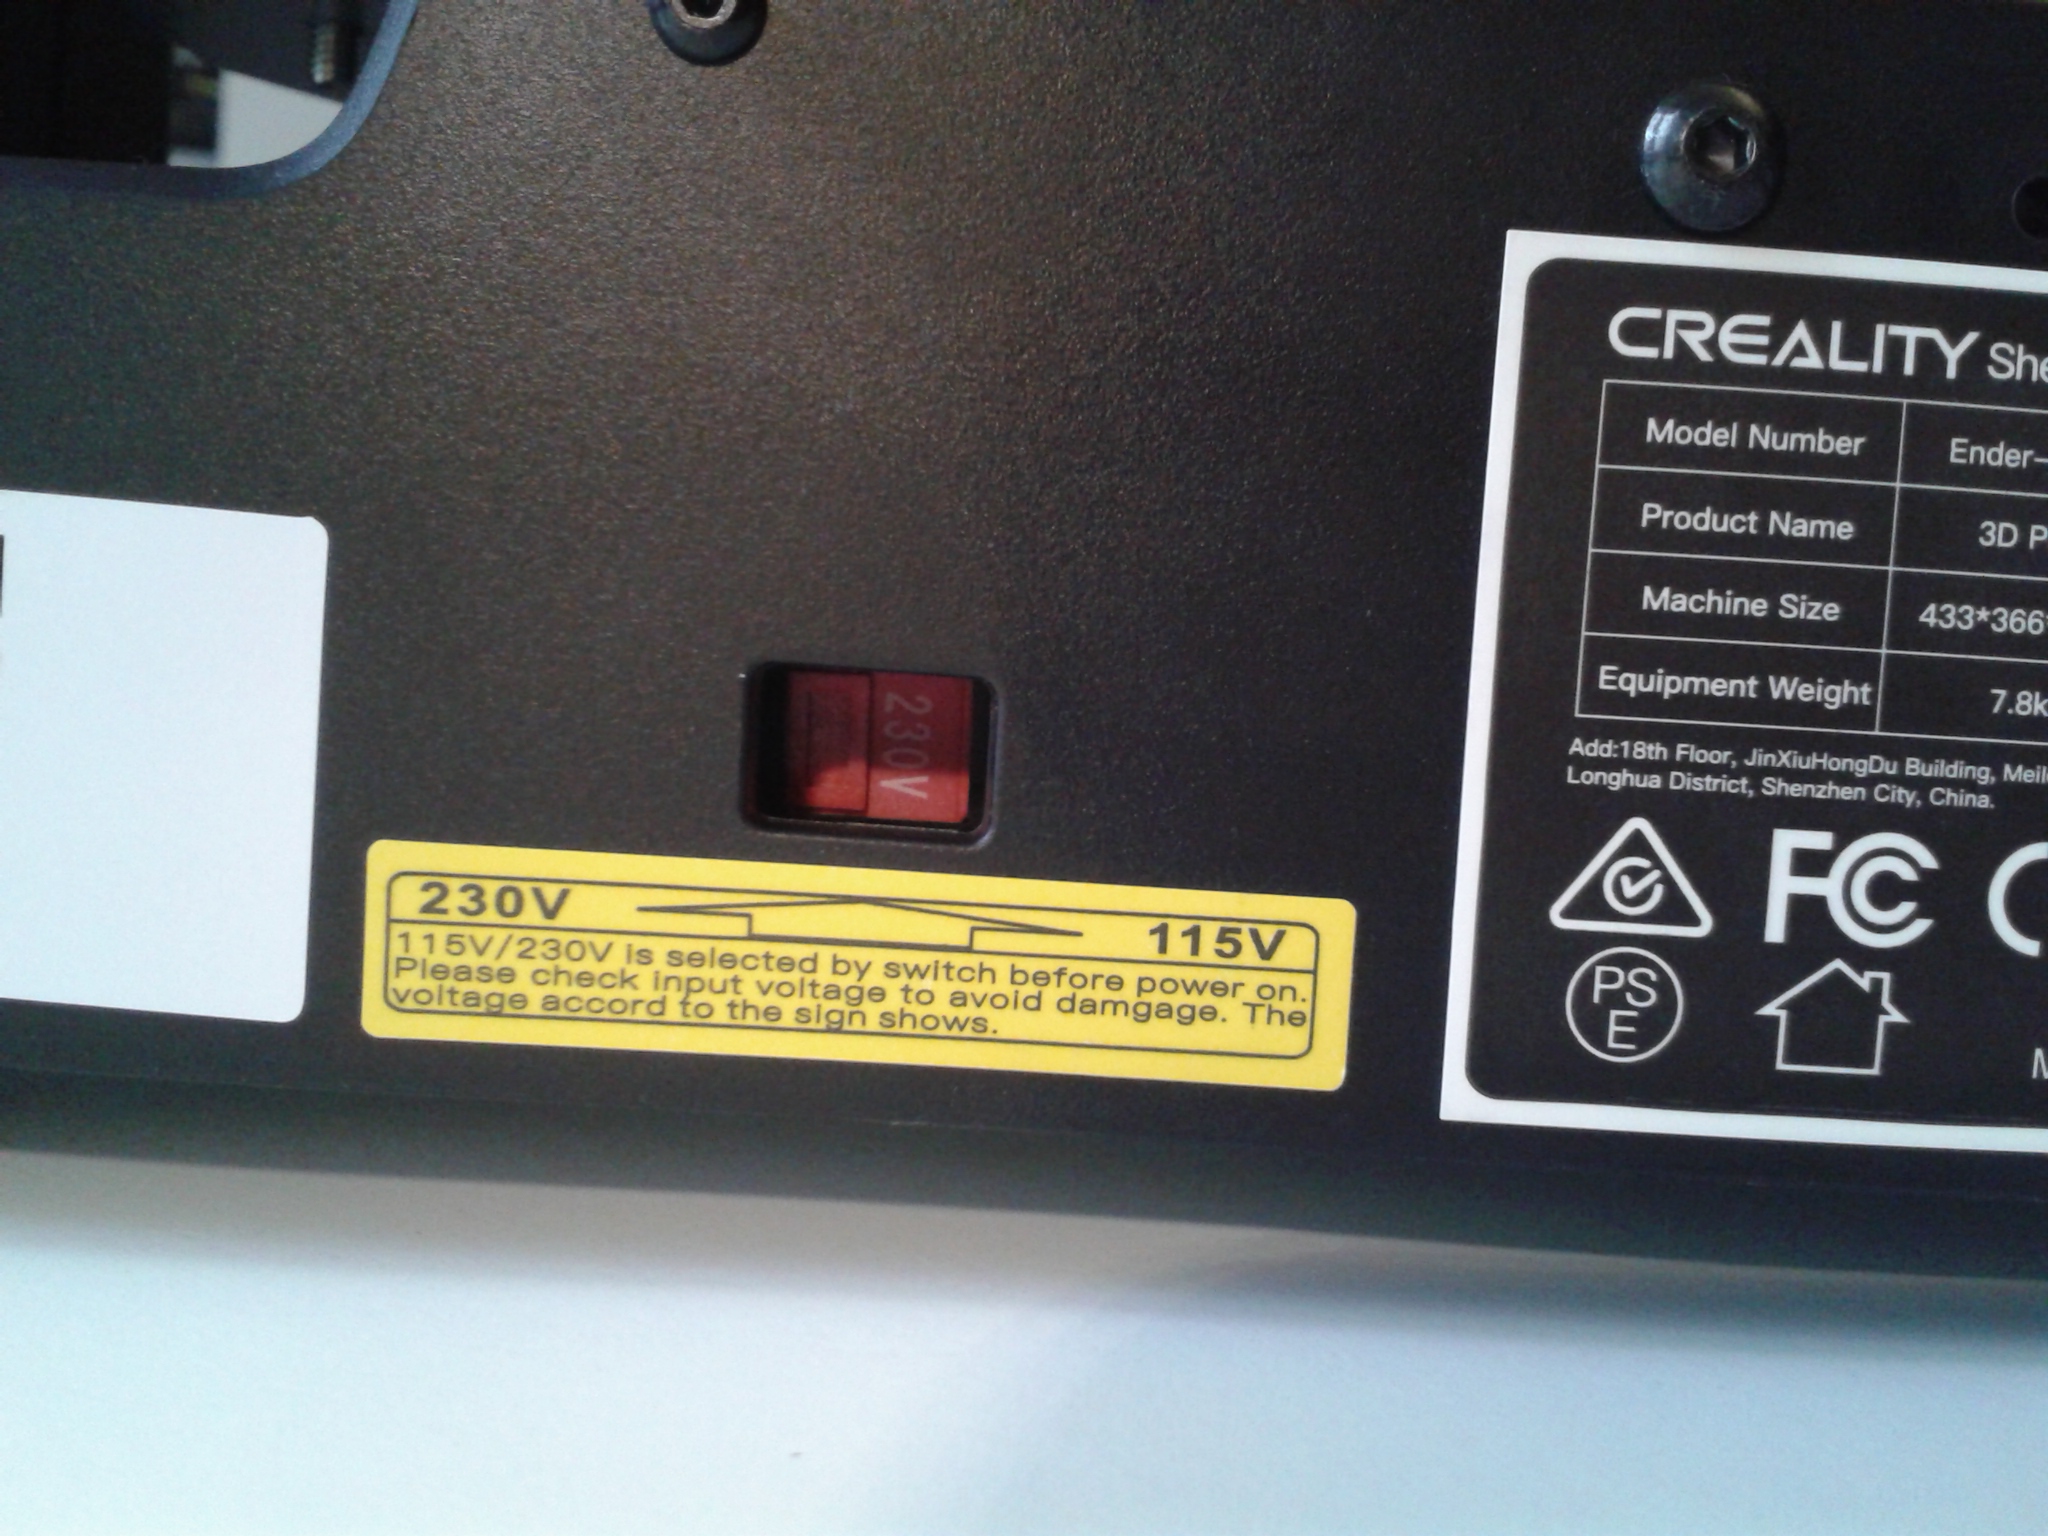
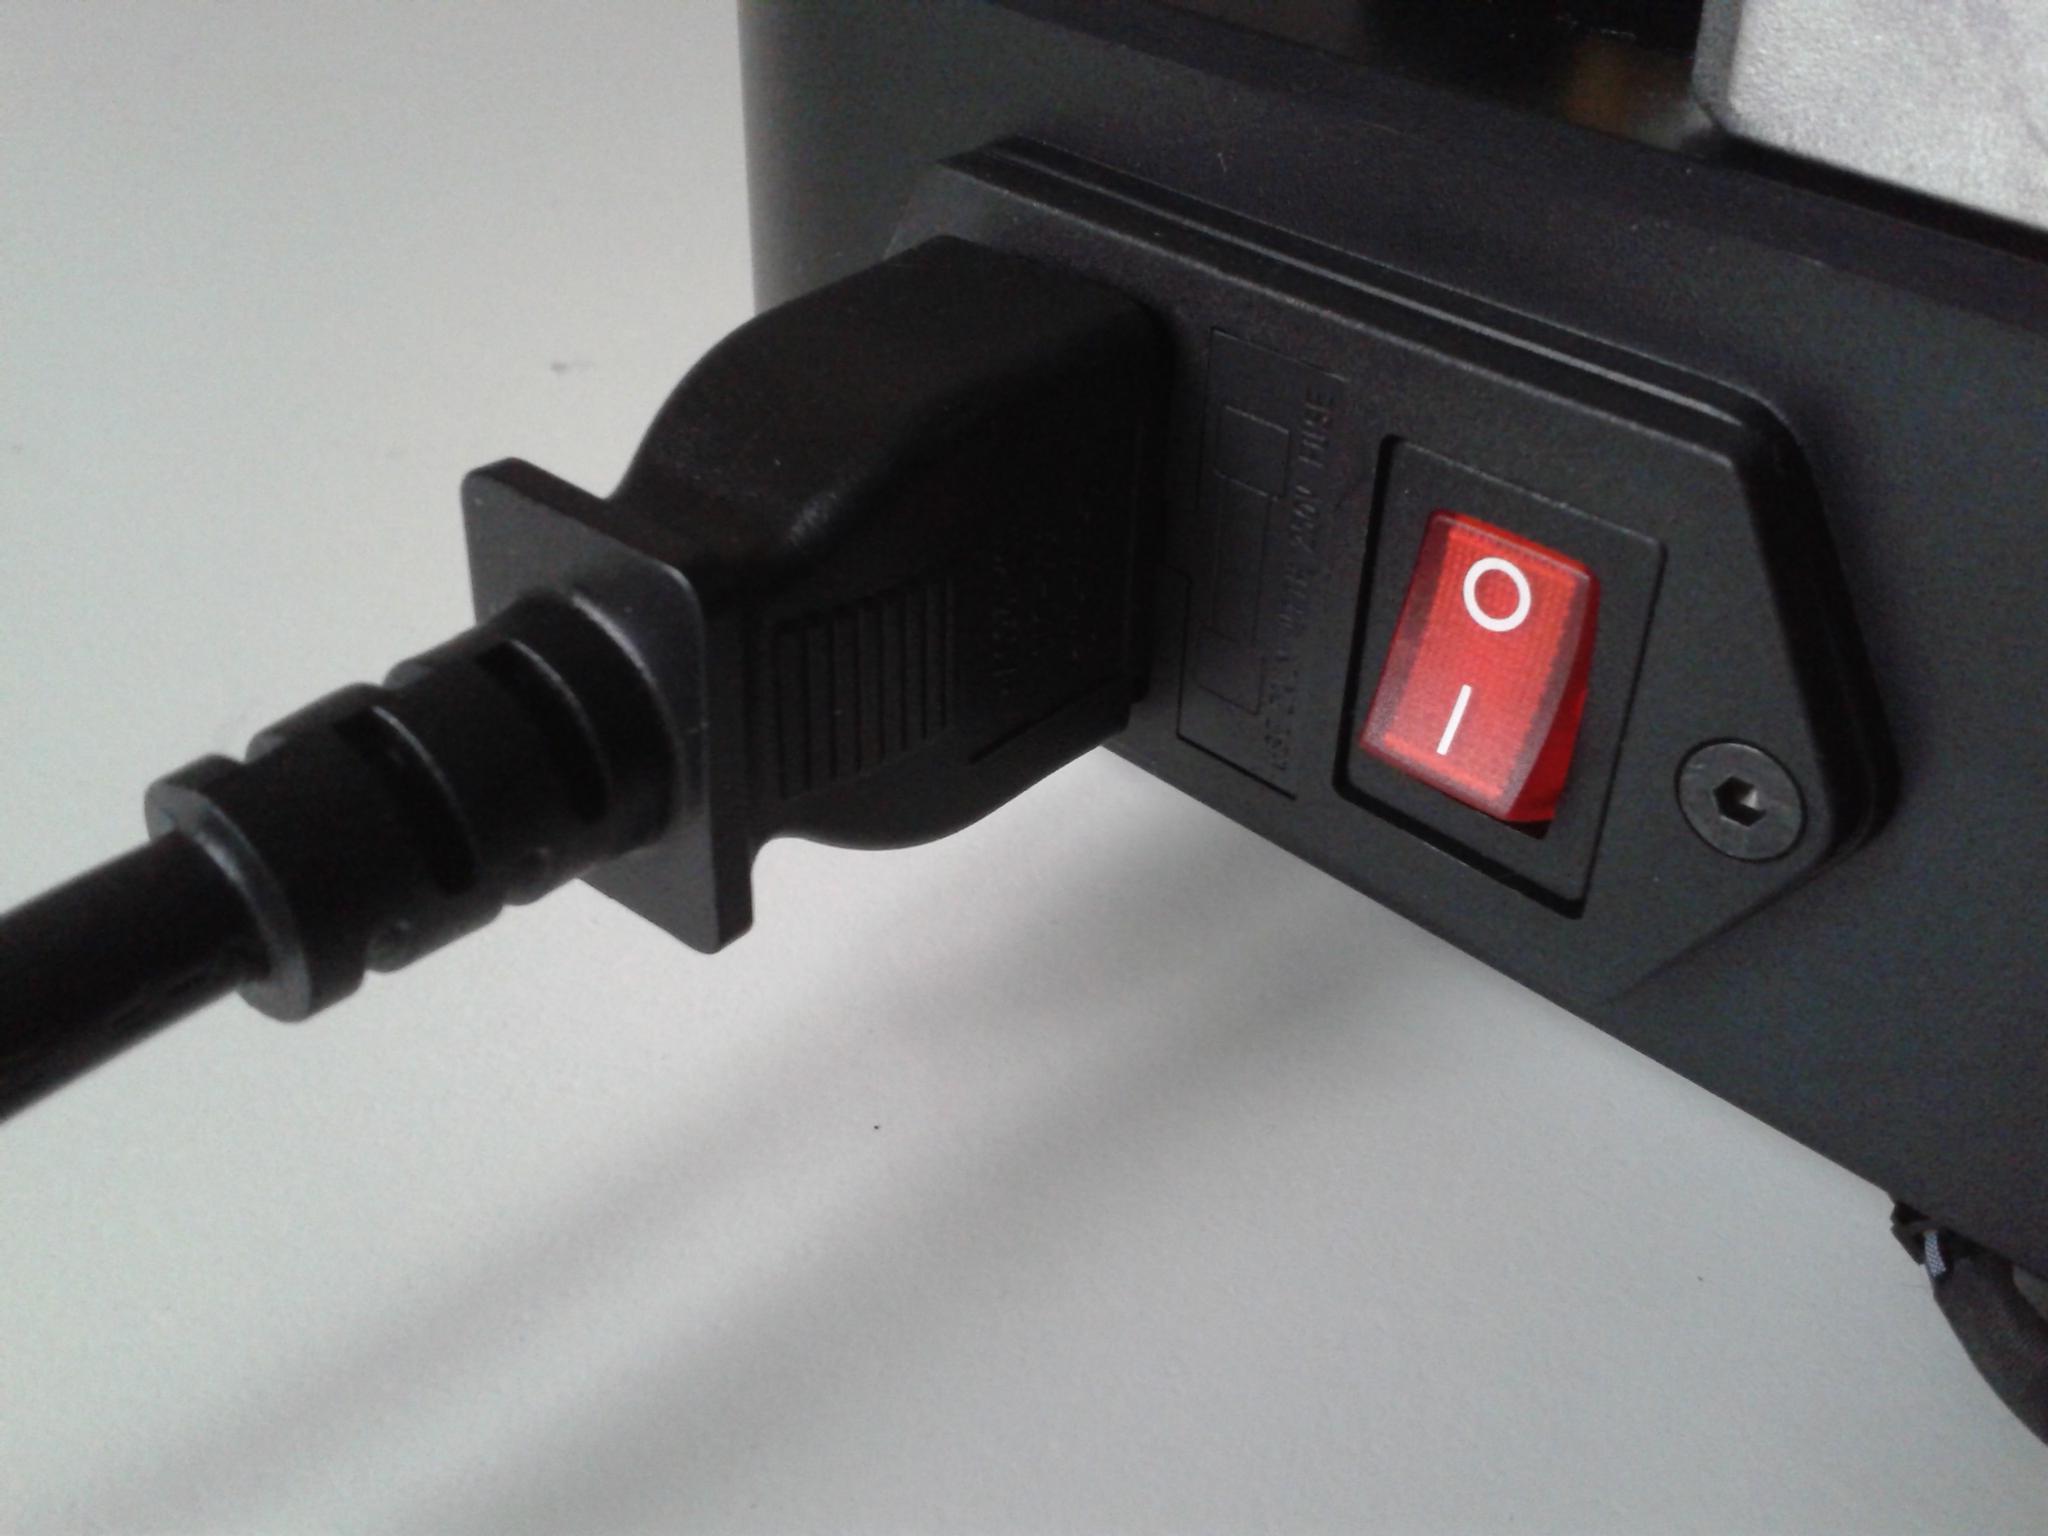
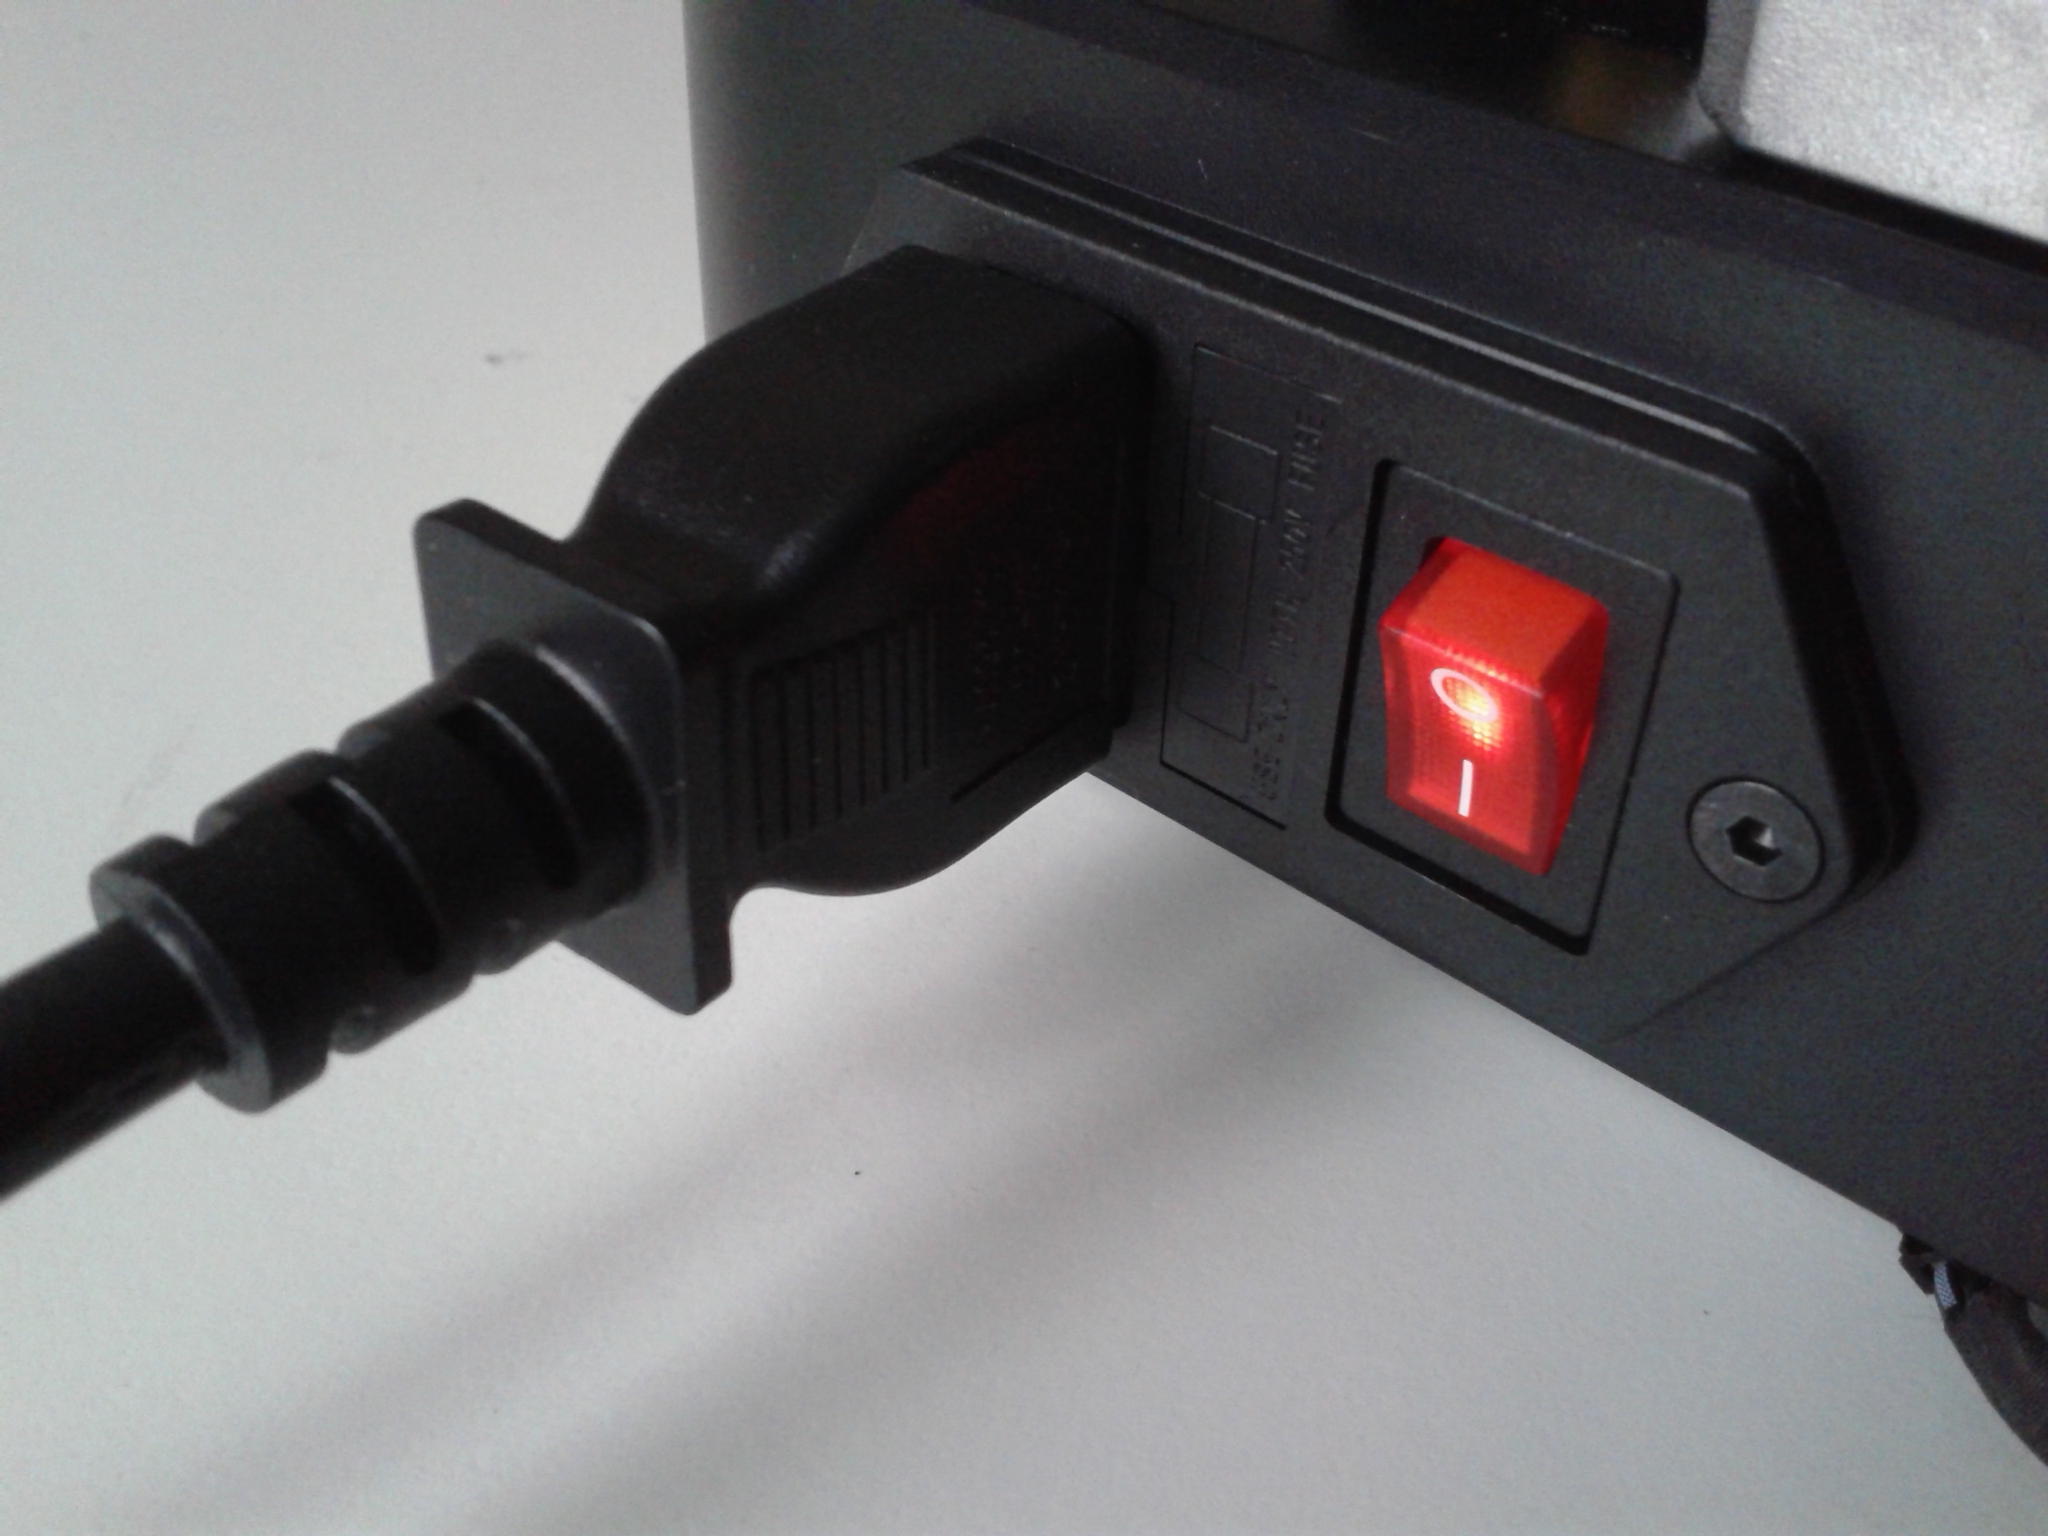
Bien vérifier la position du sélecteur de tension du bloc d’alimentation avant de connecter la prise électrique et d’allumer la machine.
Après que le CR-Touch se soit initialisé (sortie et rentrée du palpeur, sa LED -témoin de fonctionnement- passe de la couleur rouge à mauve) et le temps de chargement d’une dizaine de secondes visible sur l’écran.
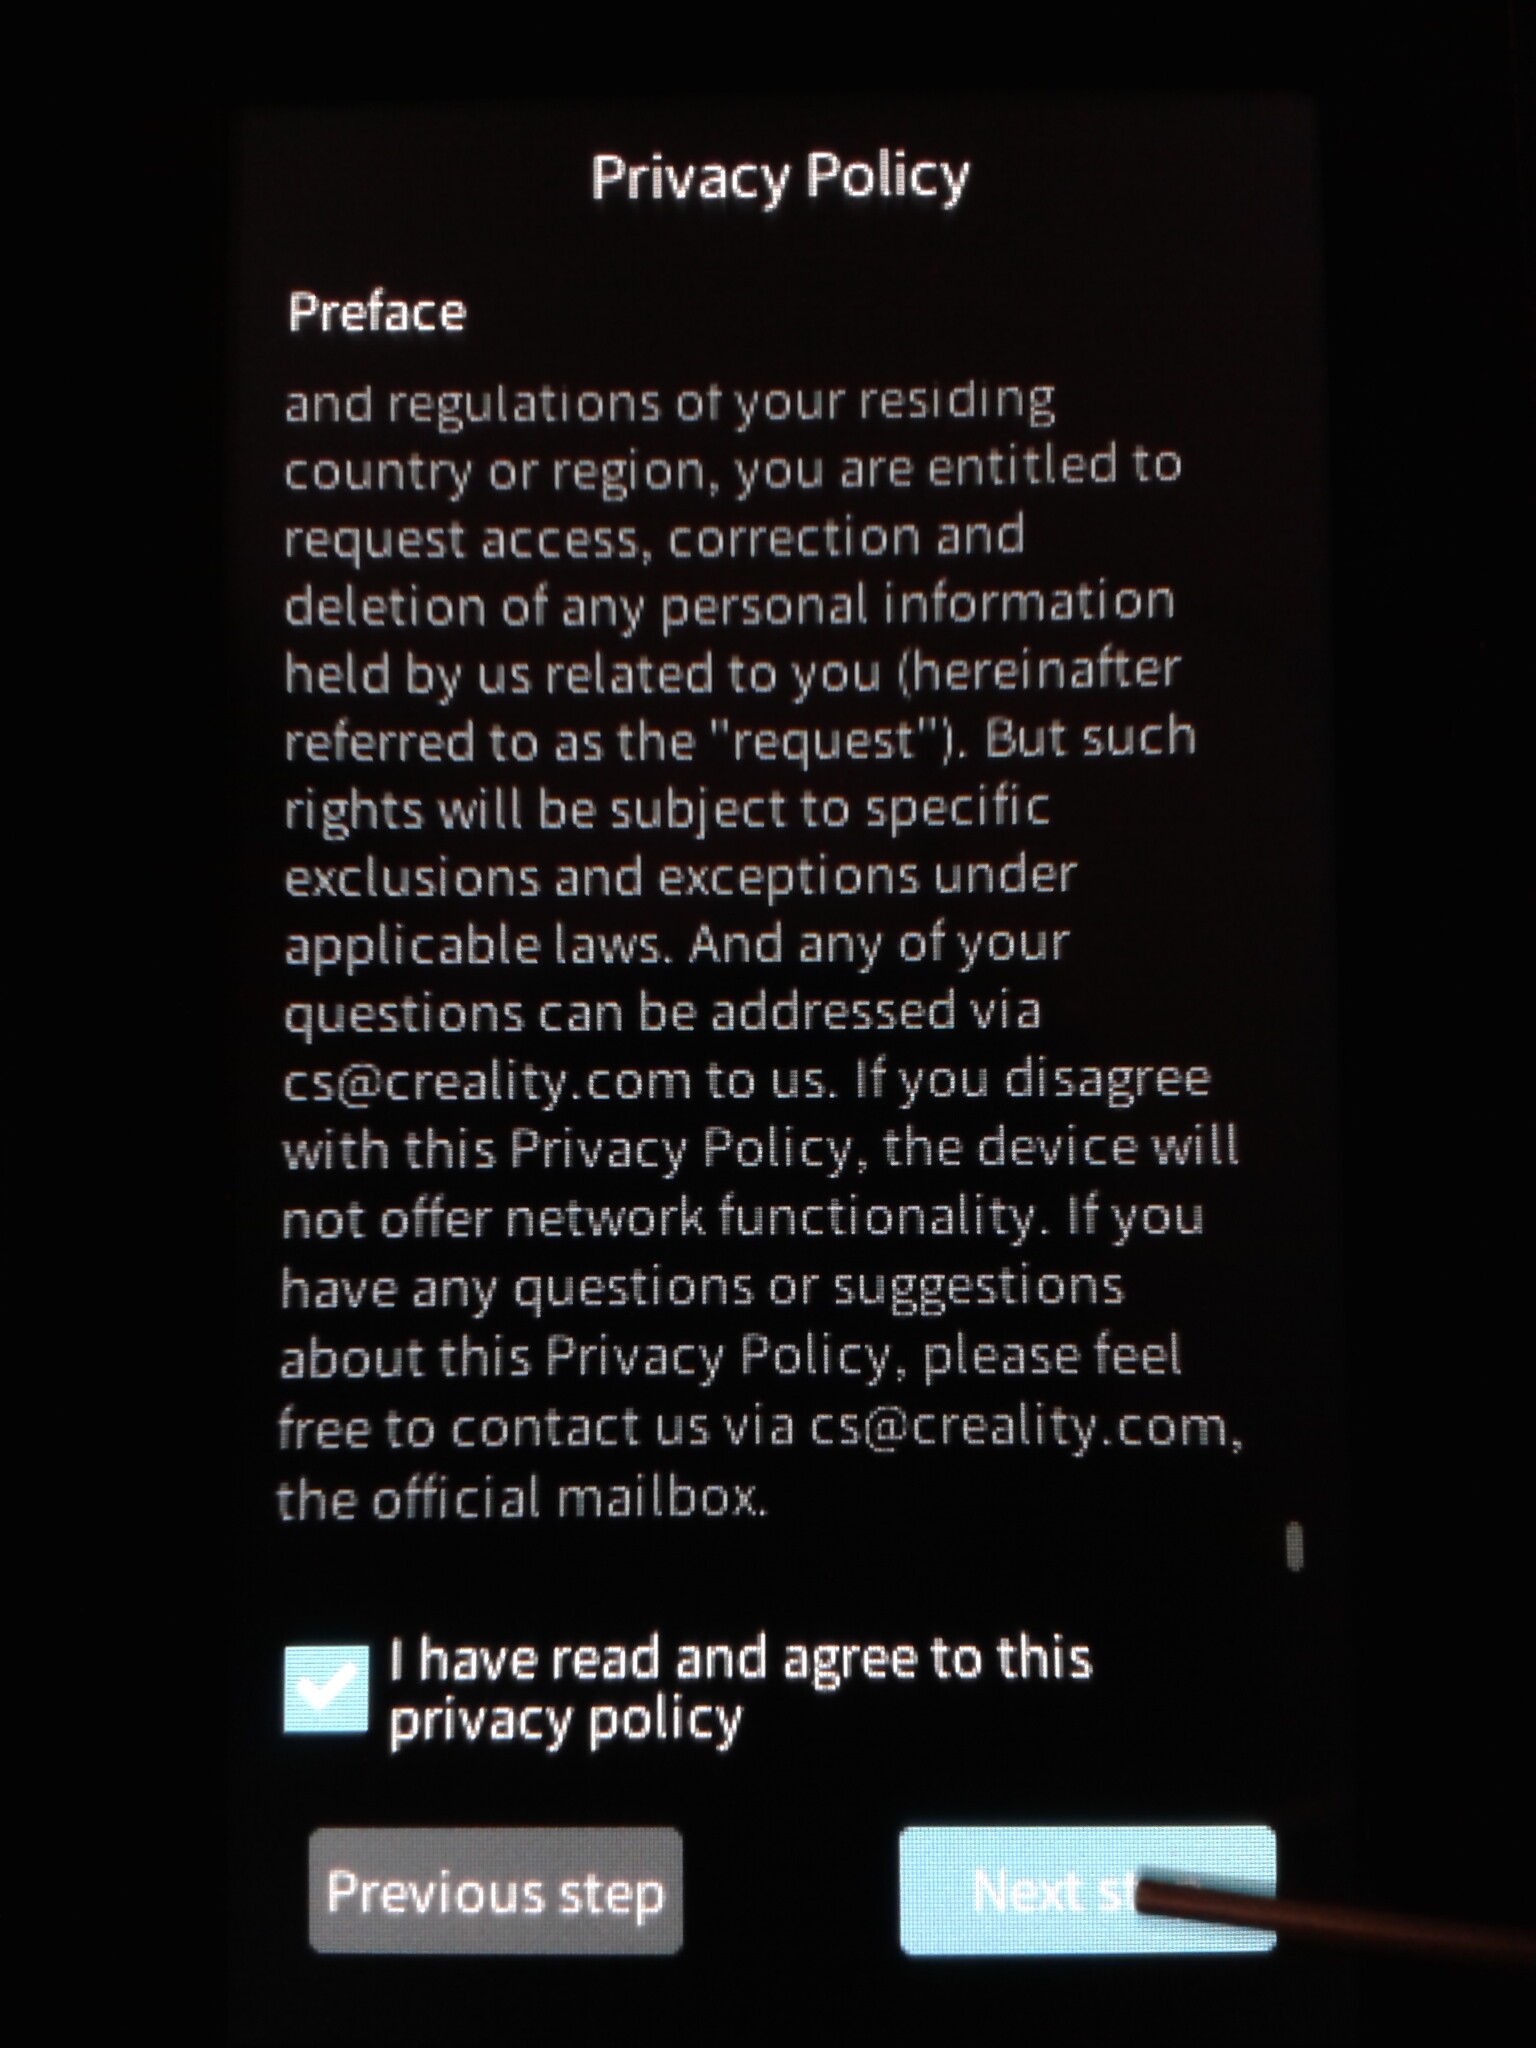
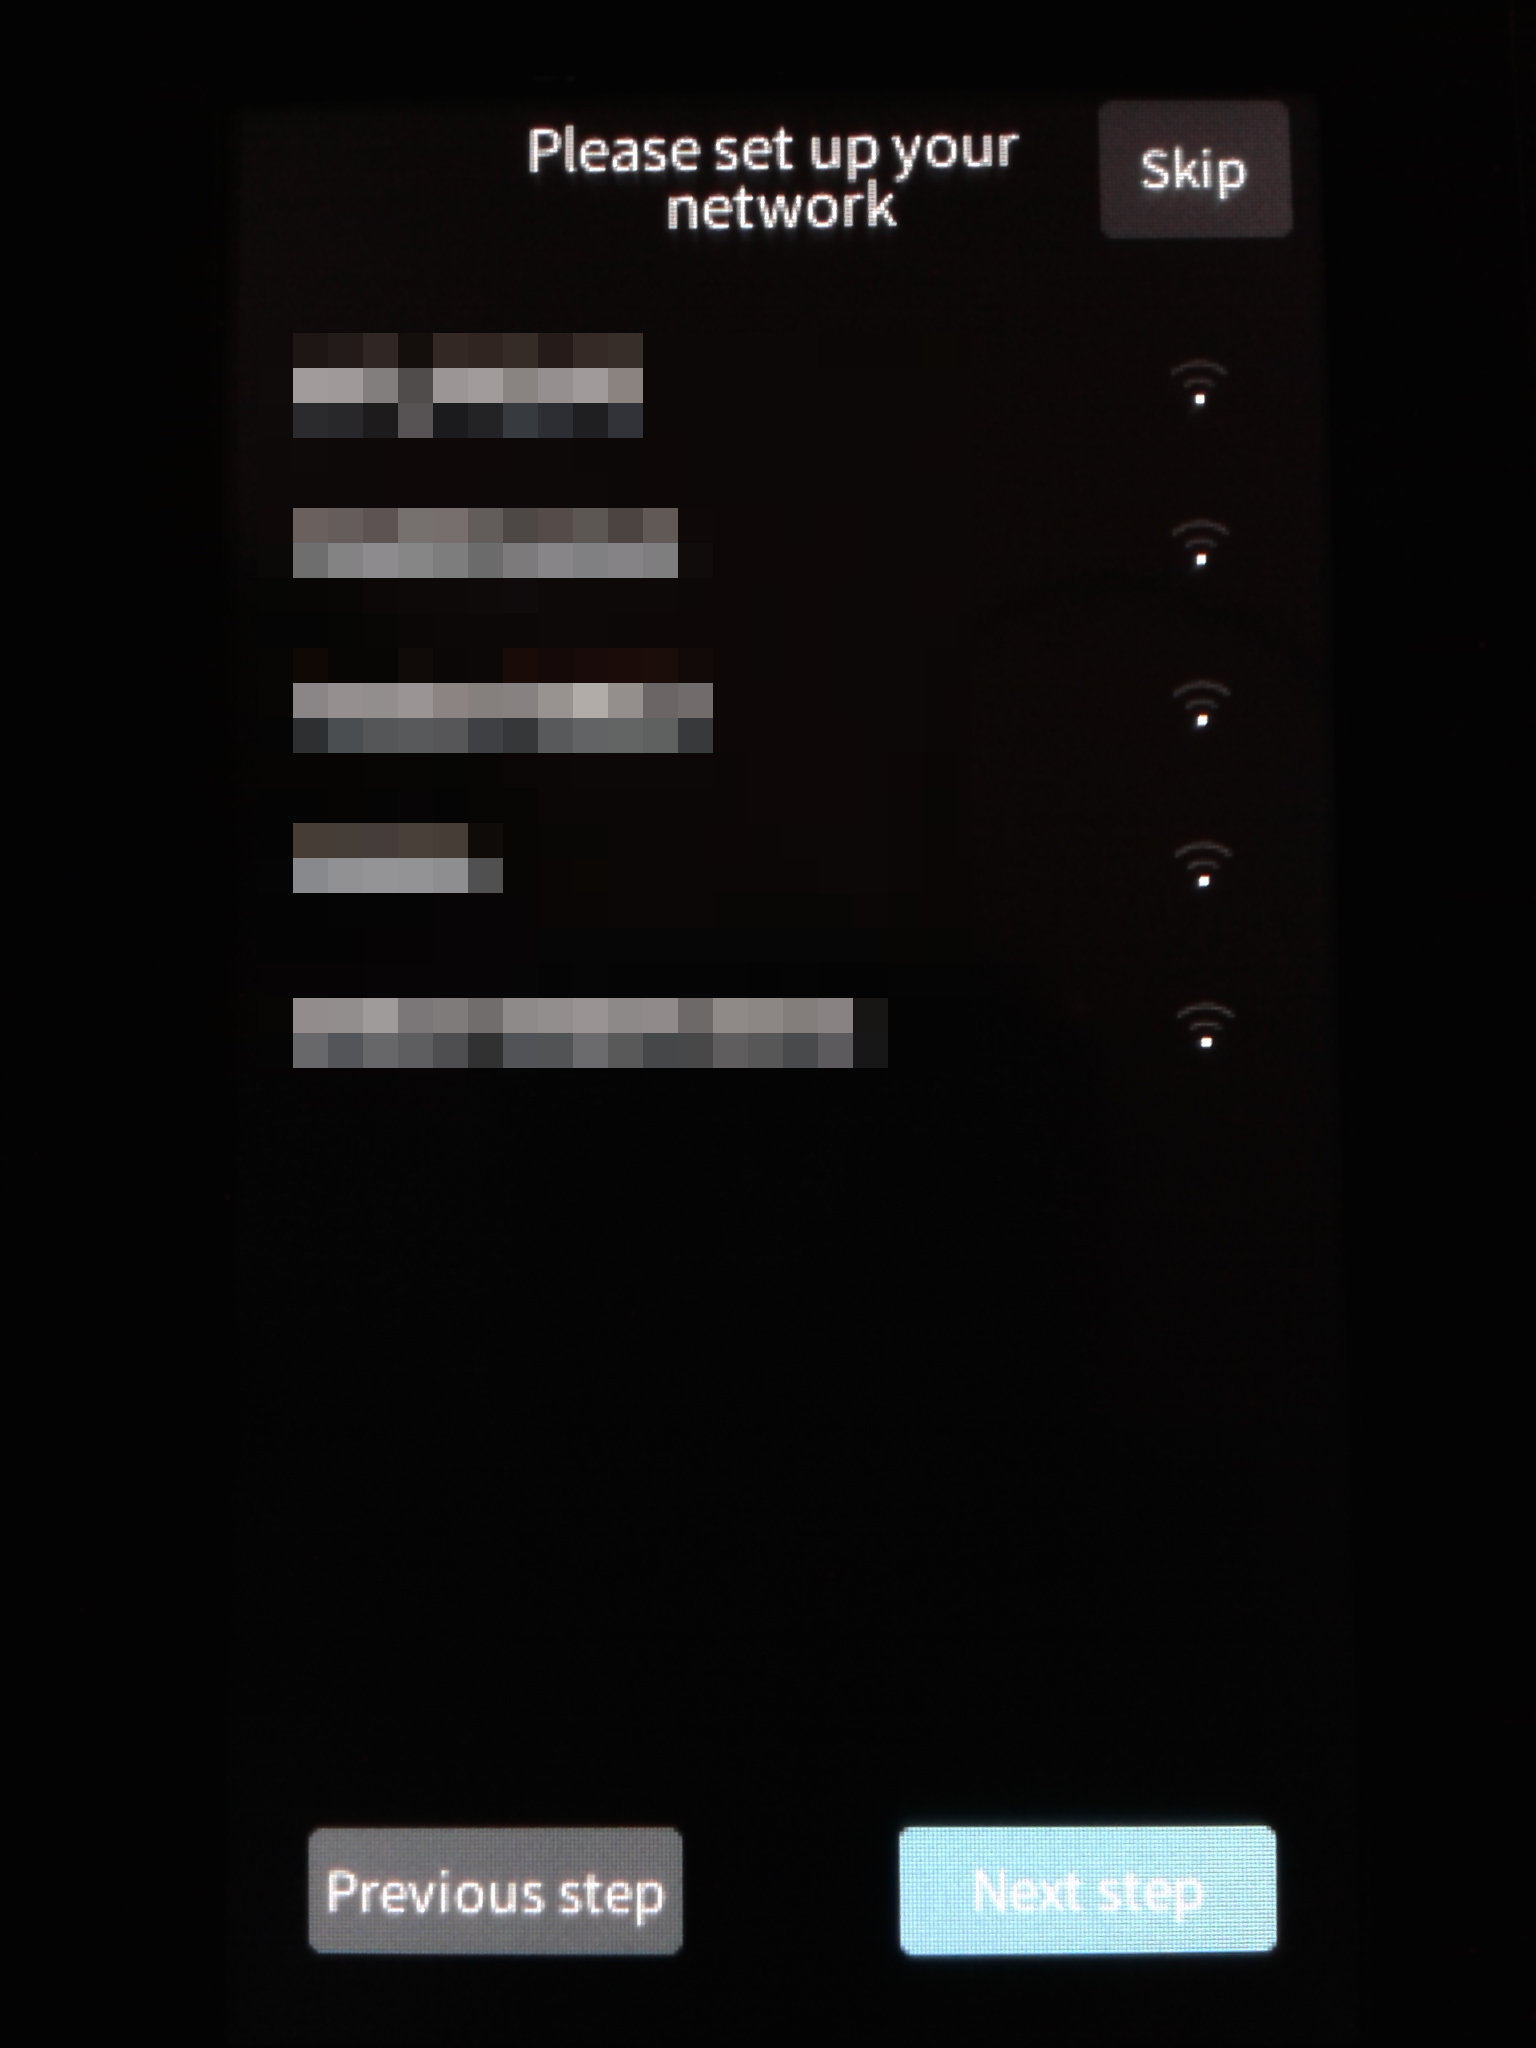
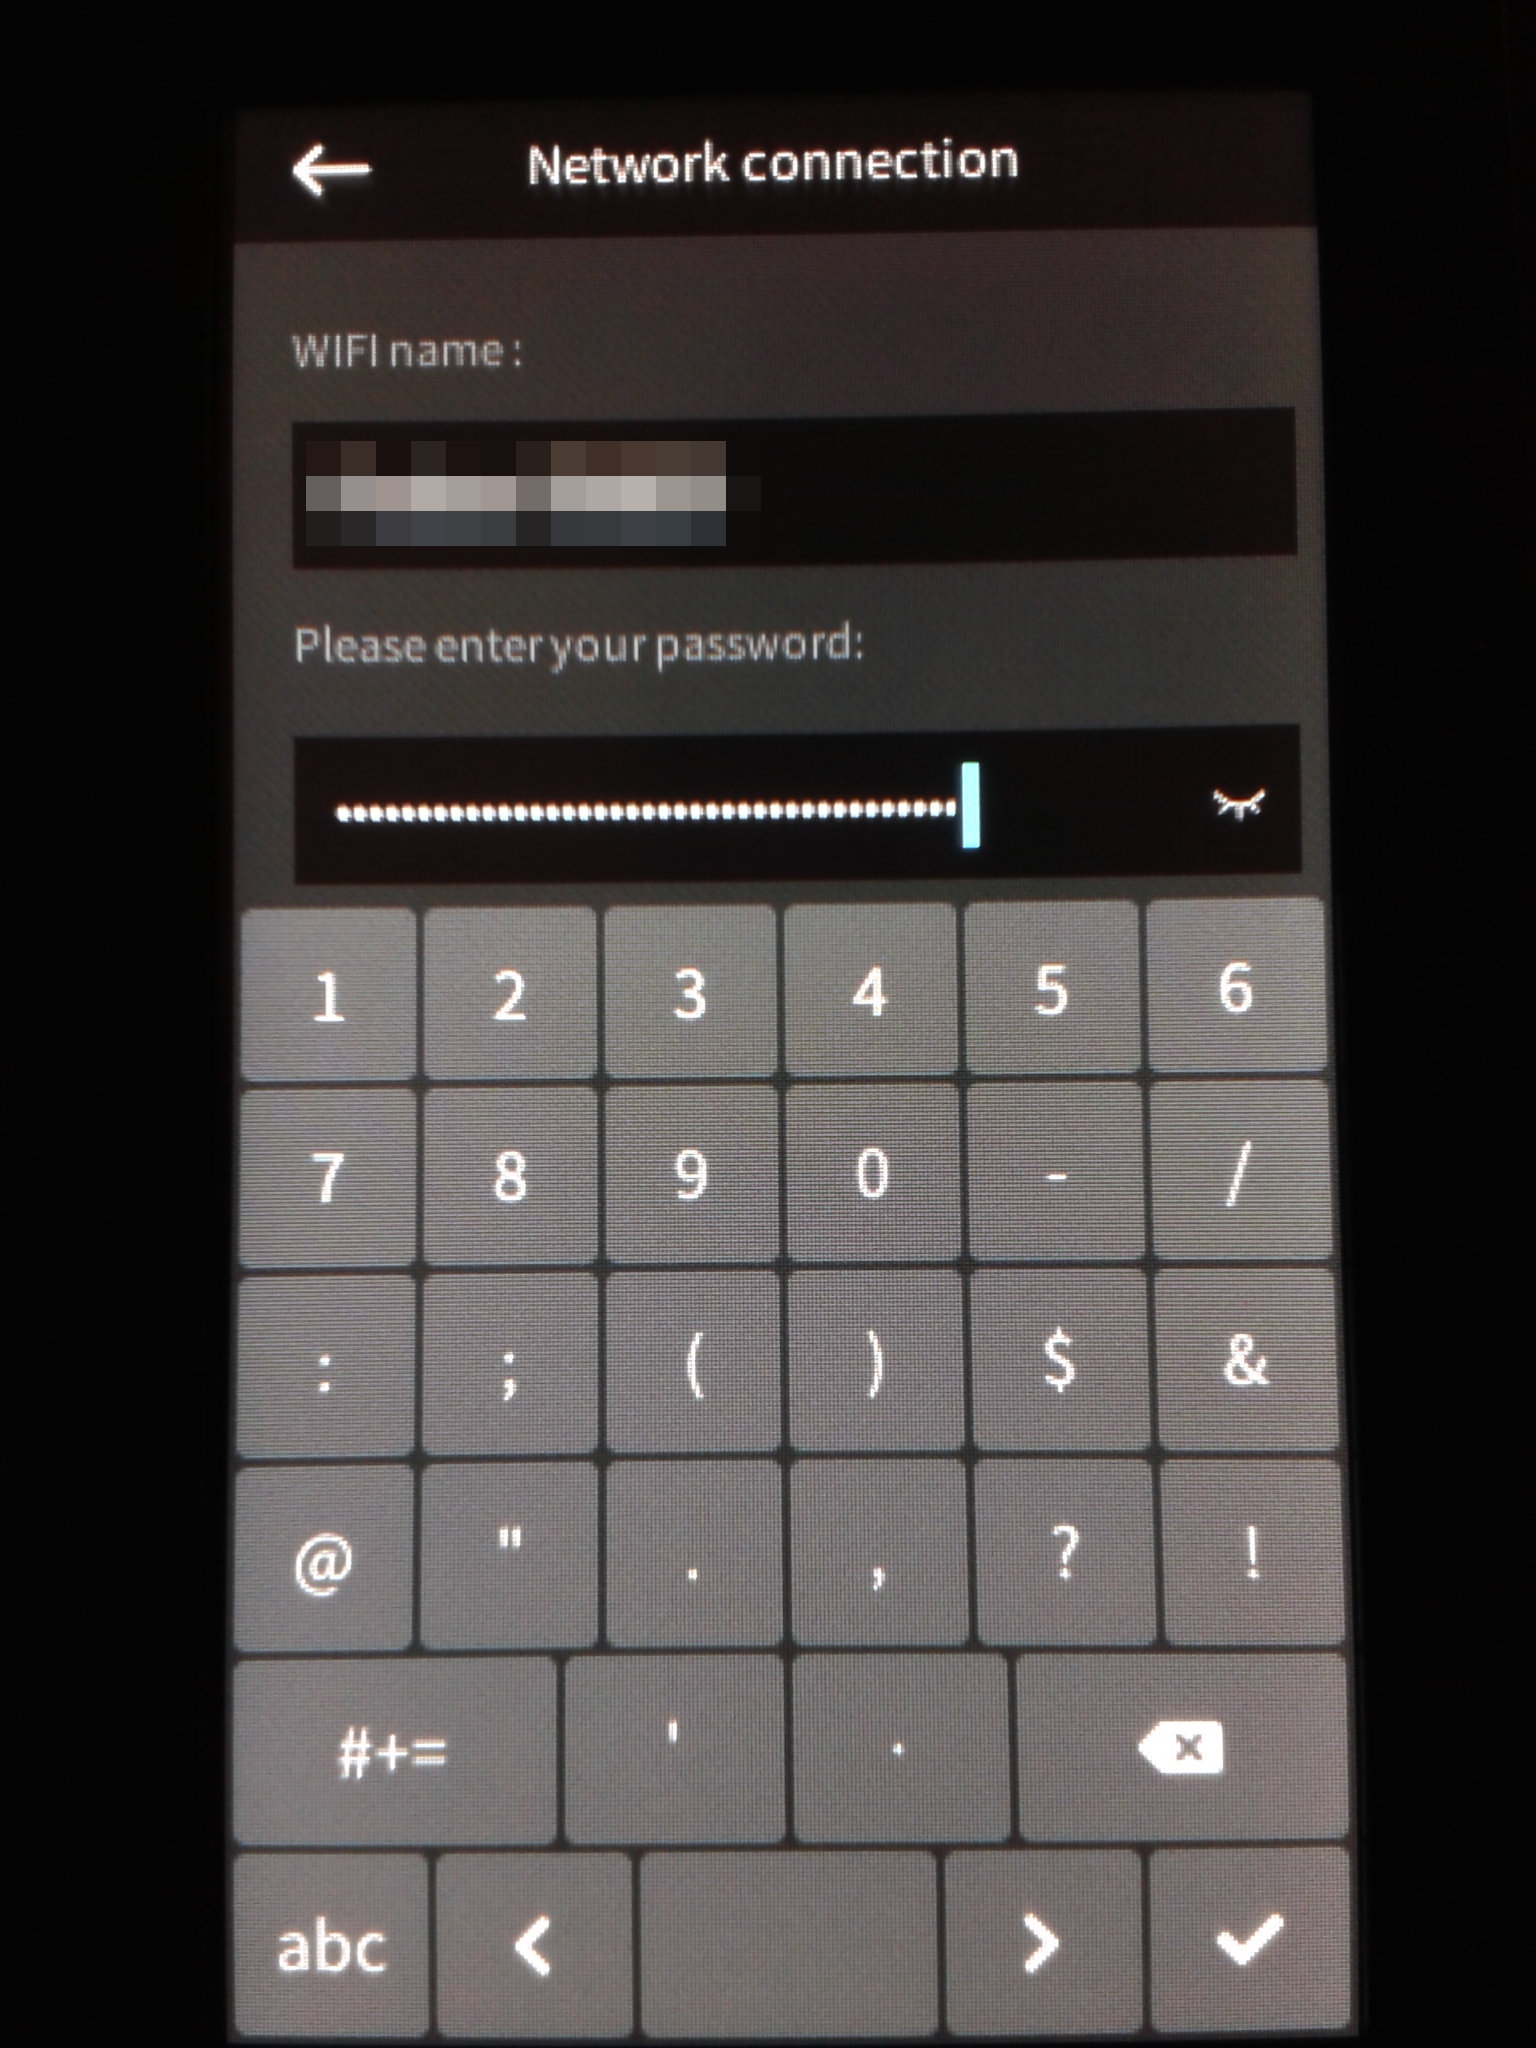
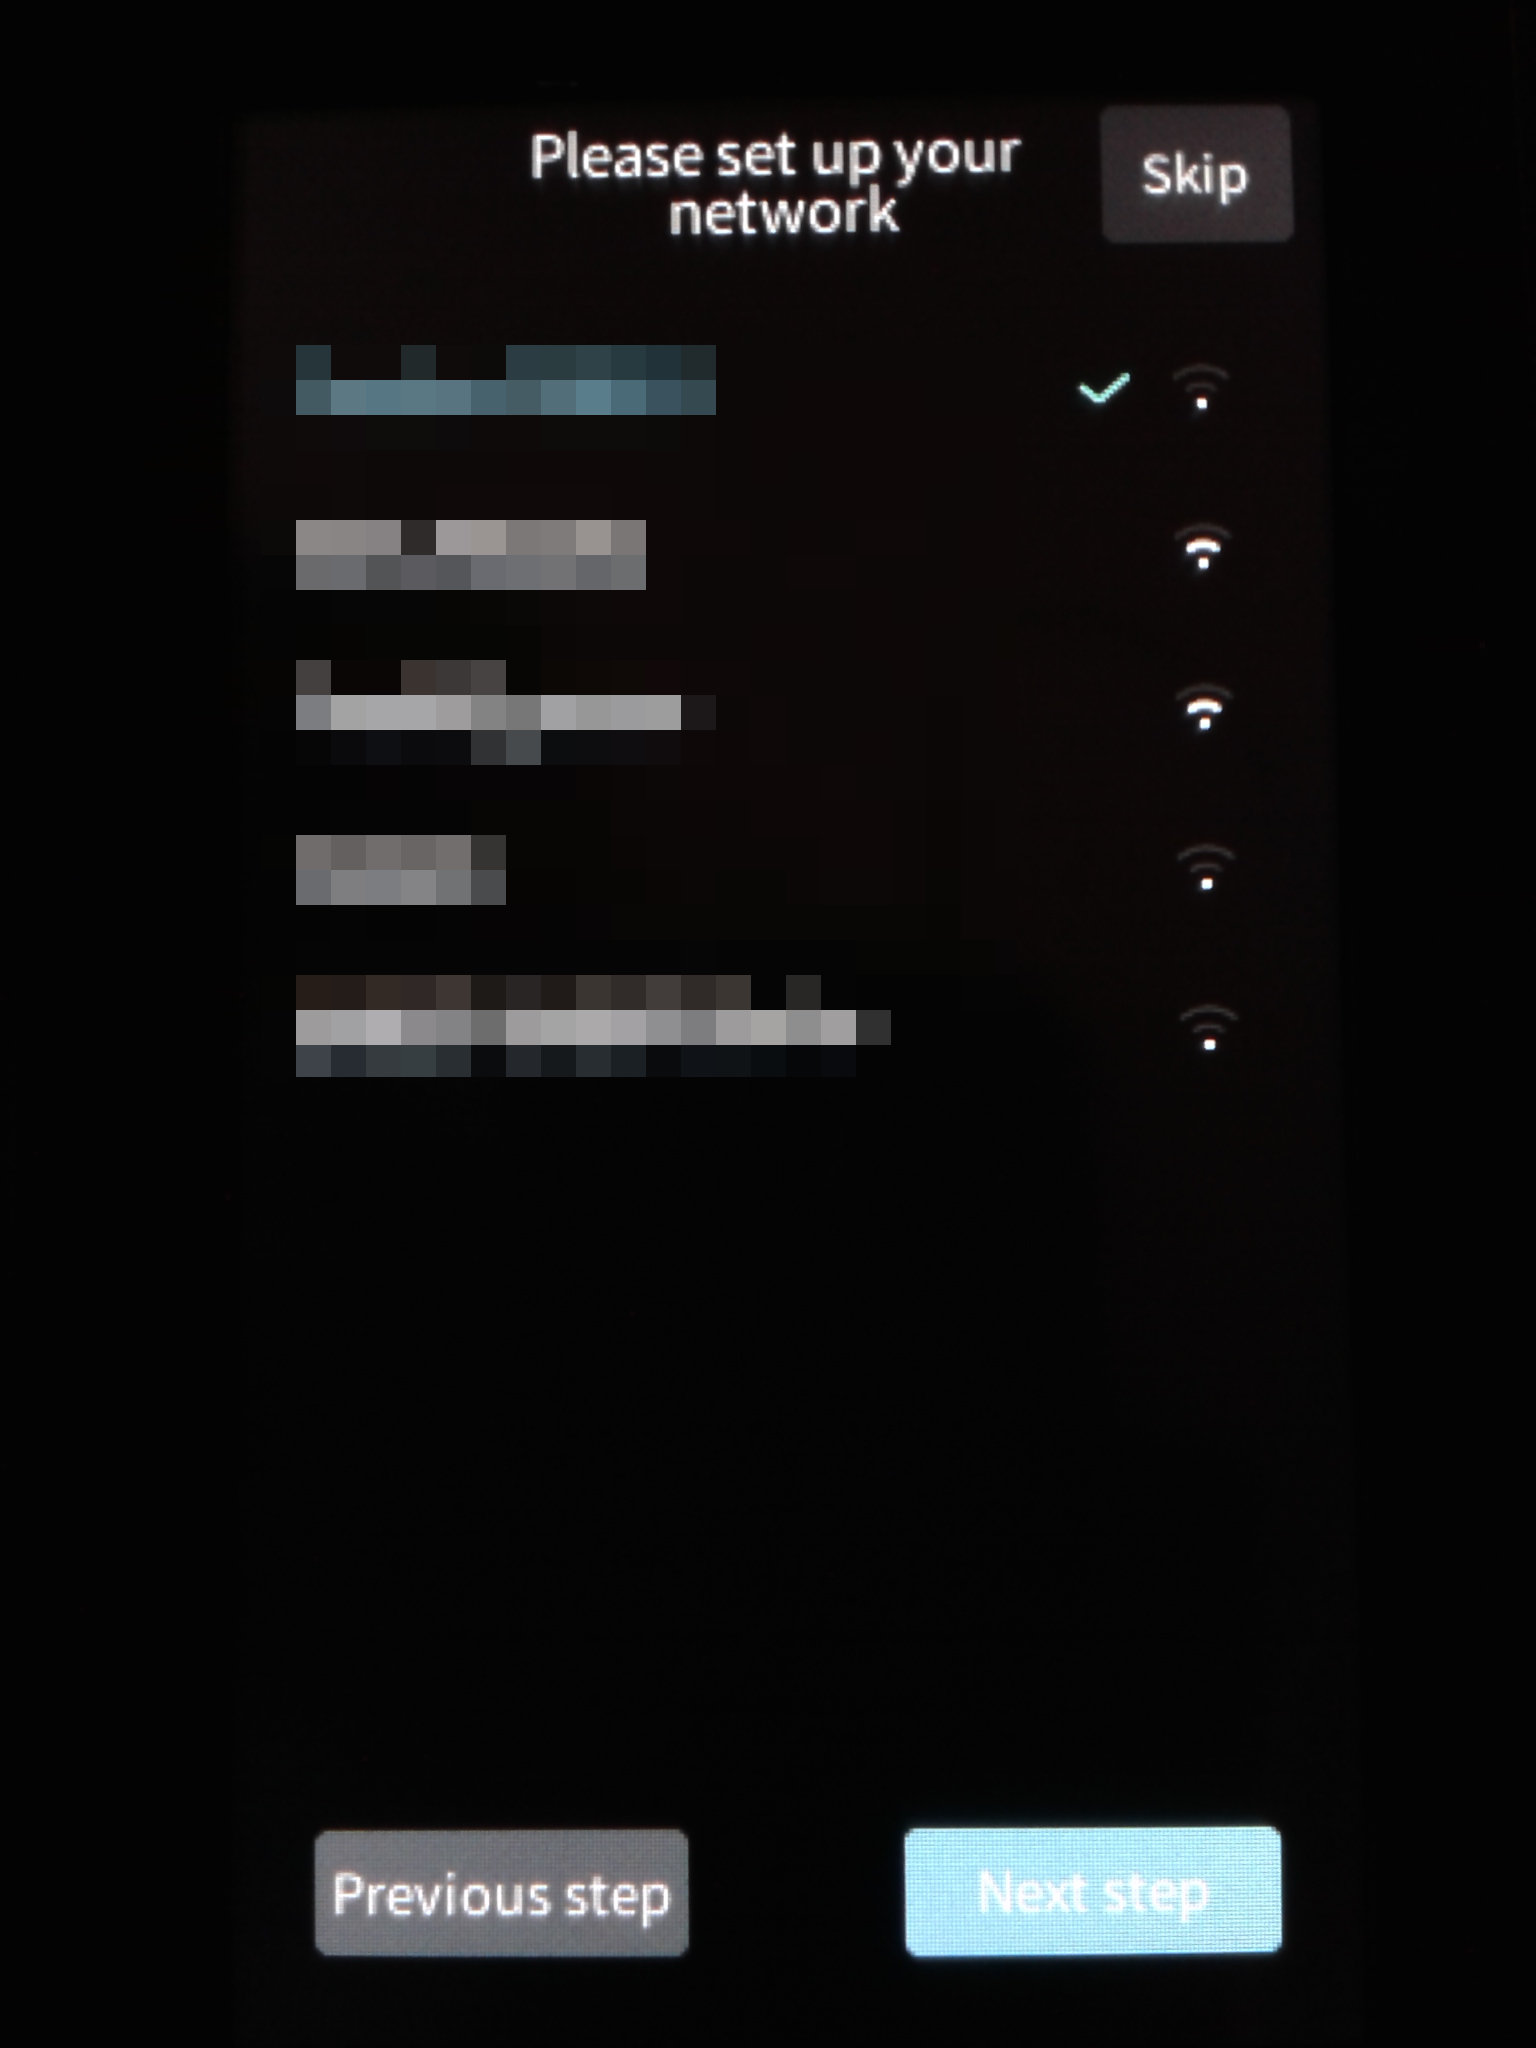
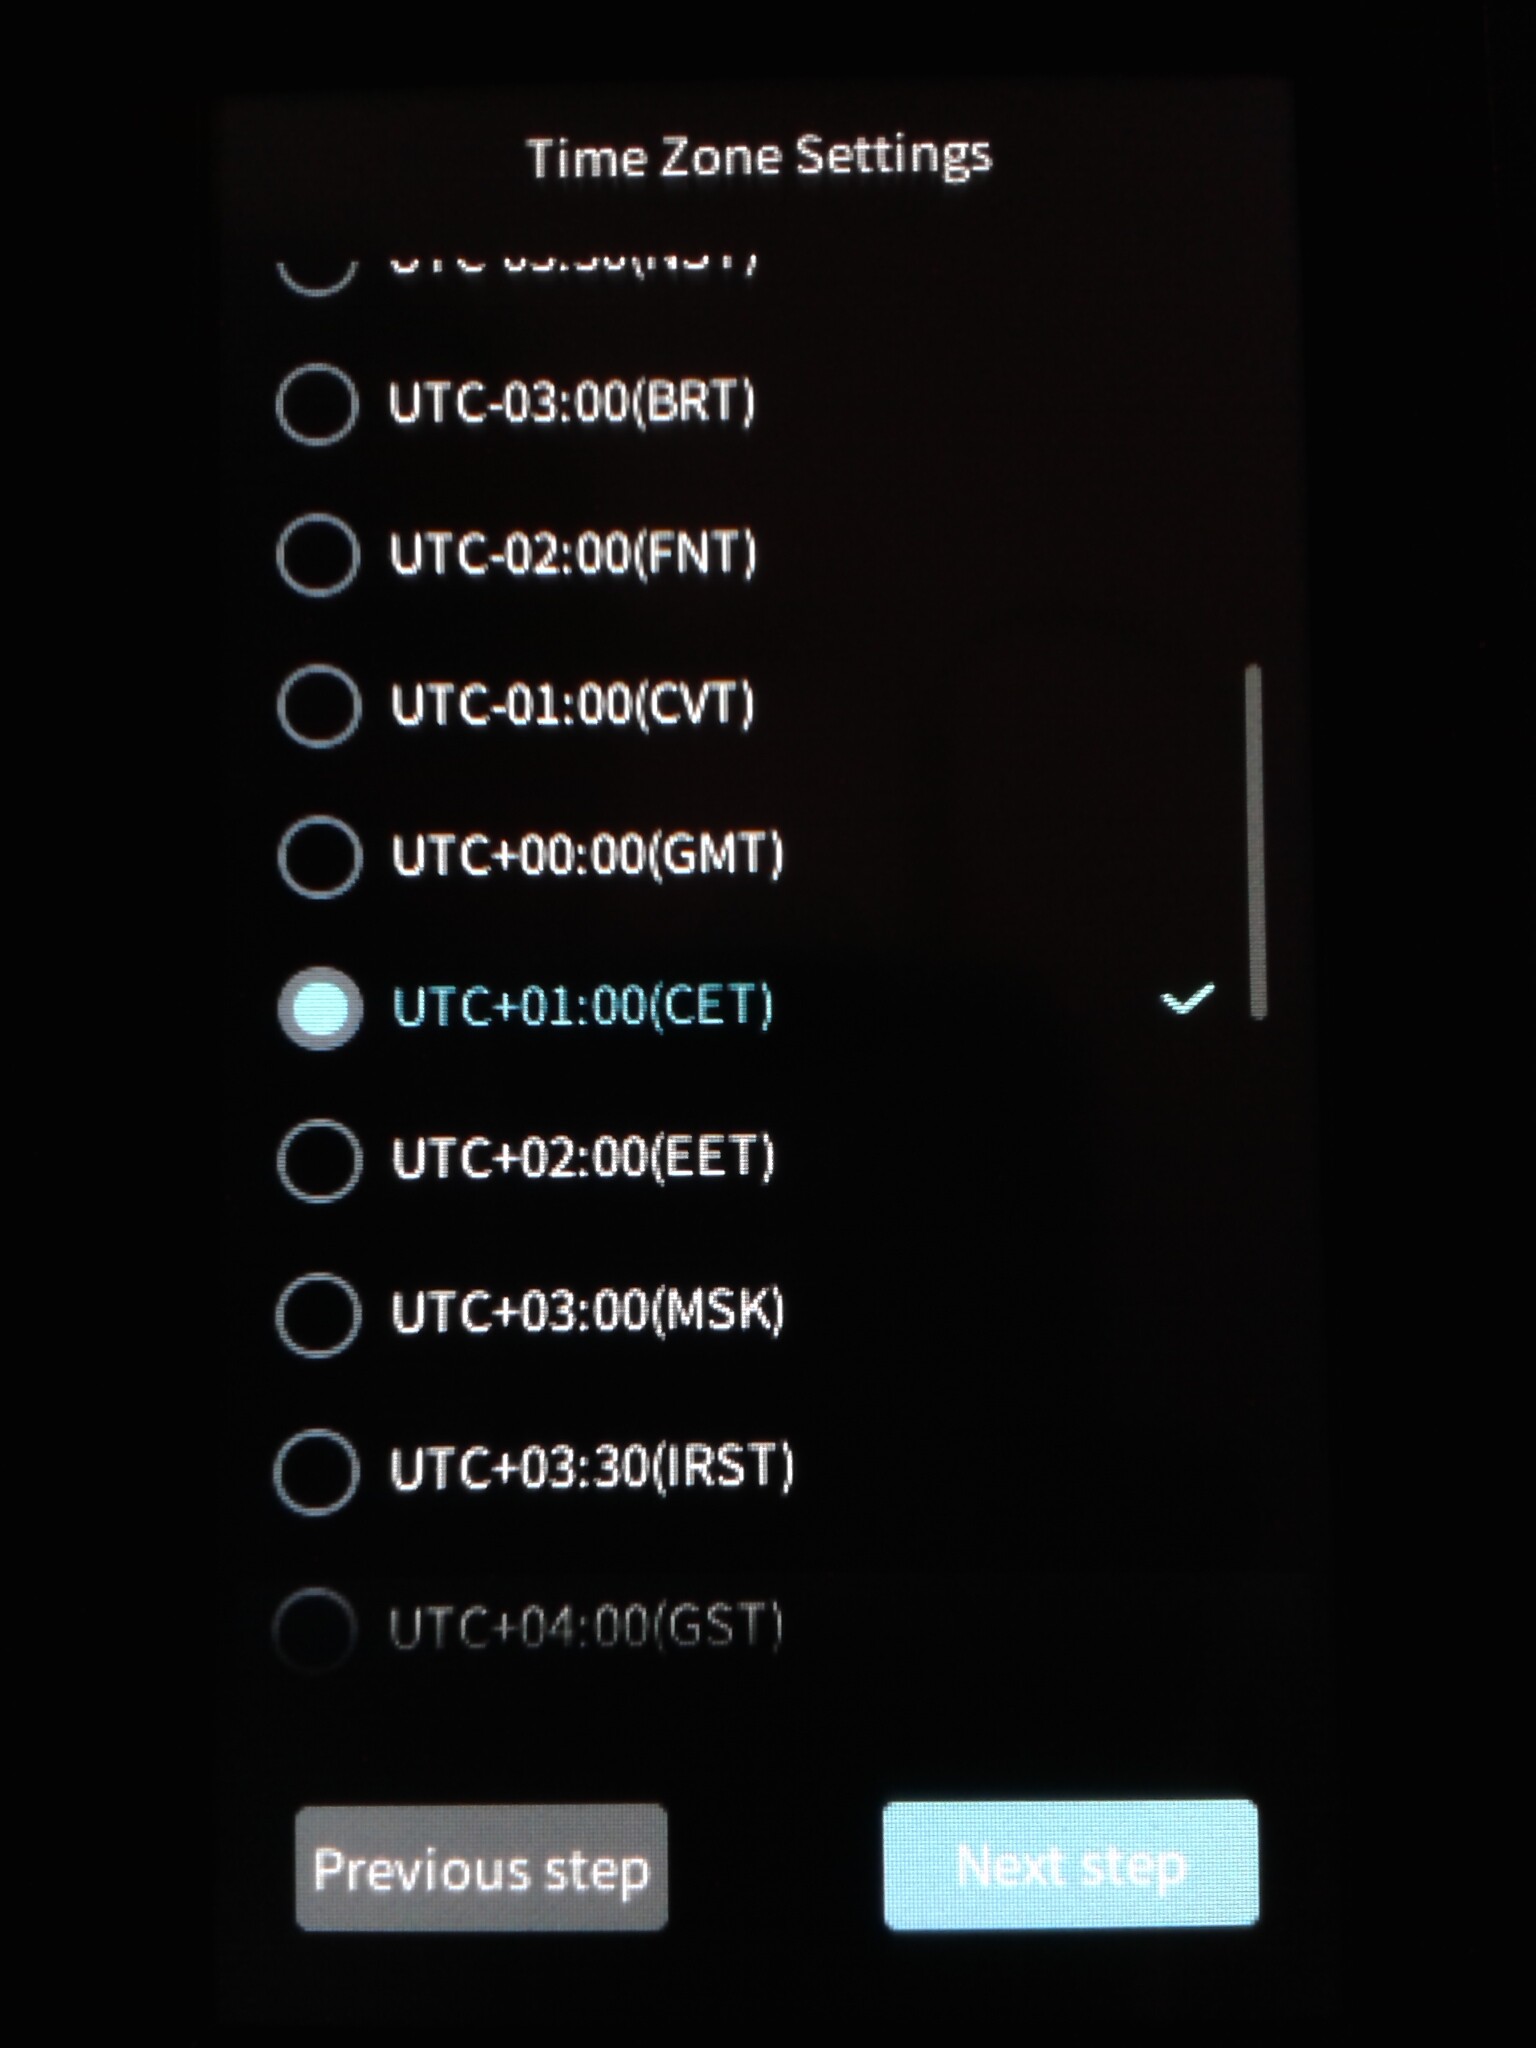
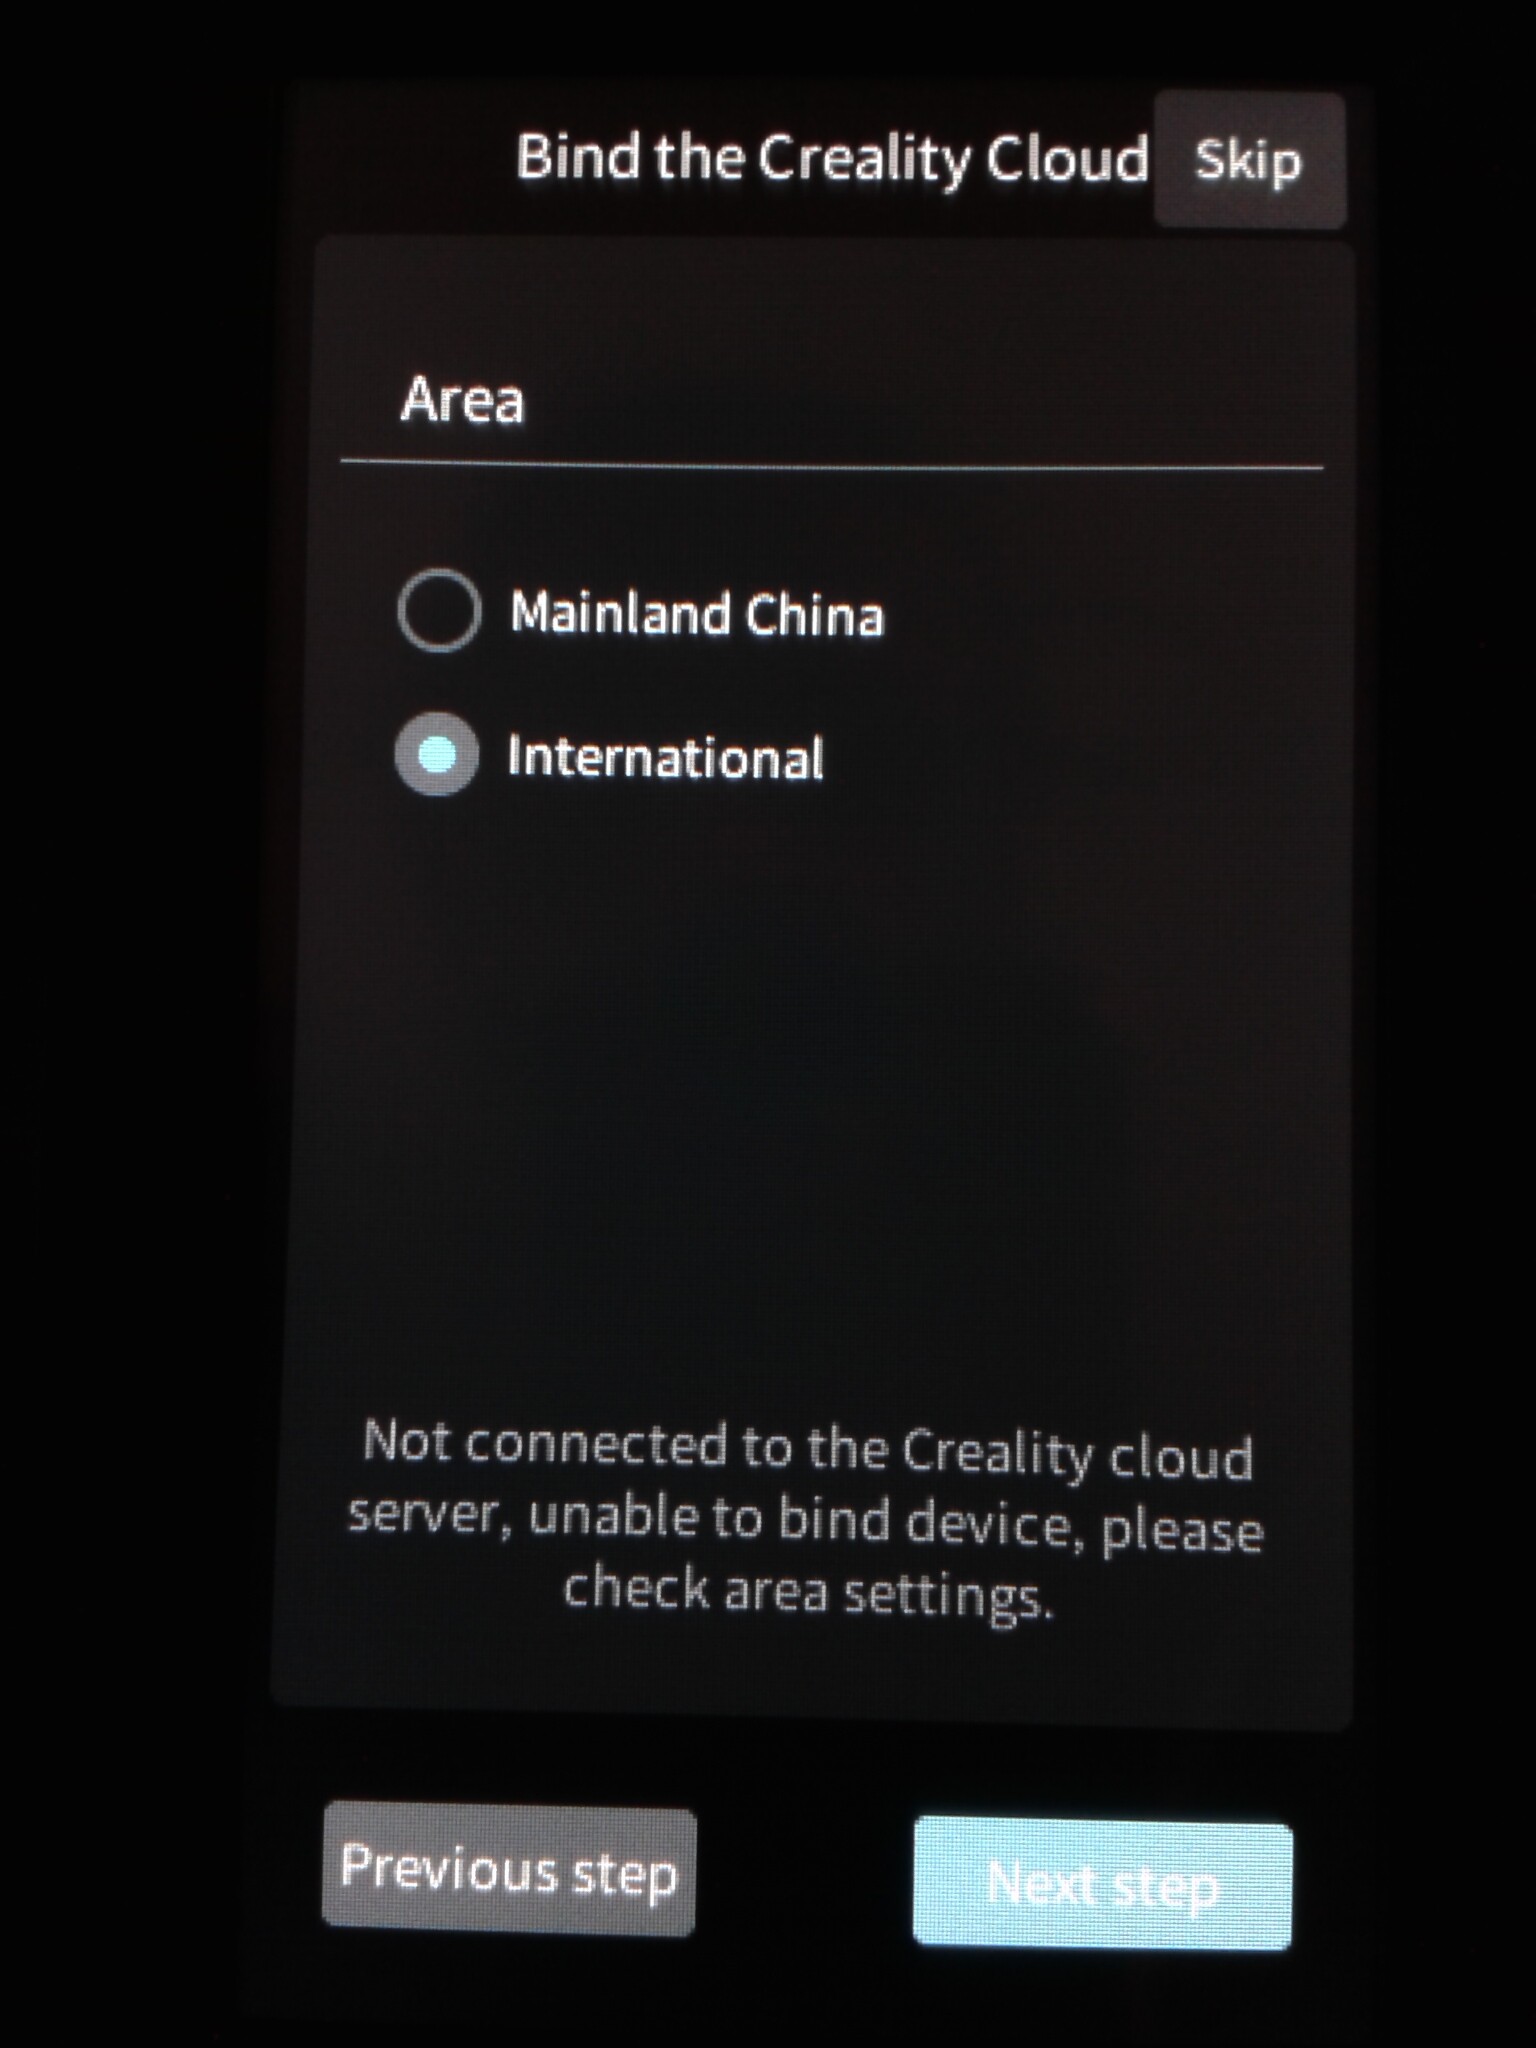
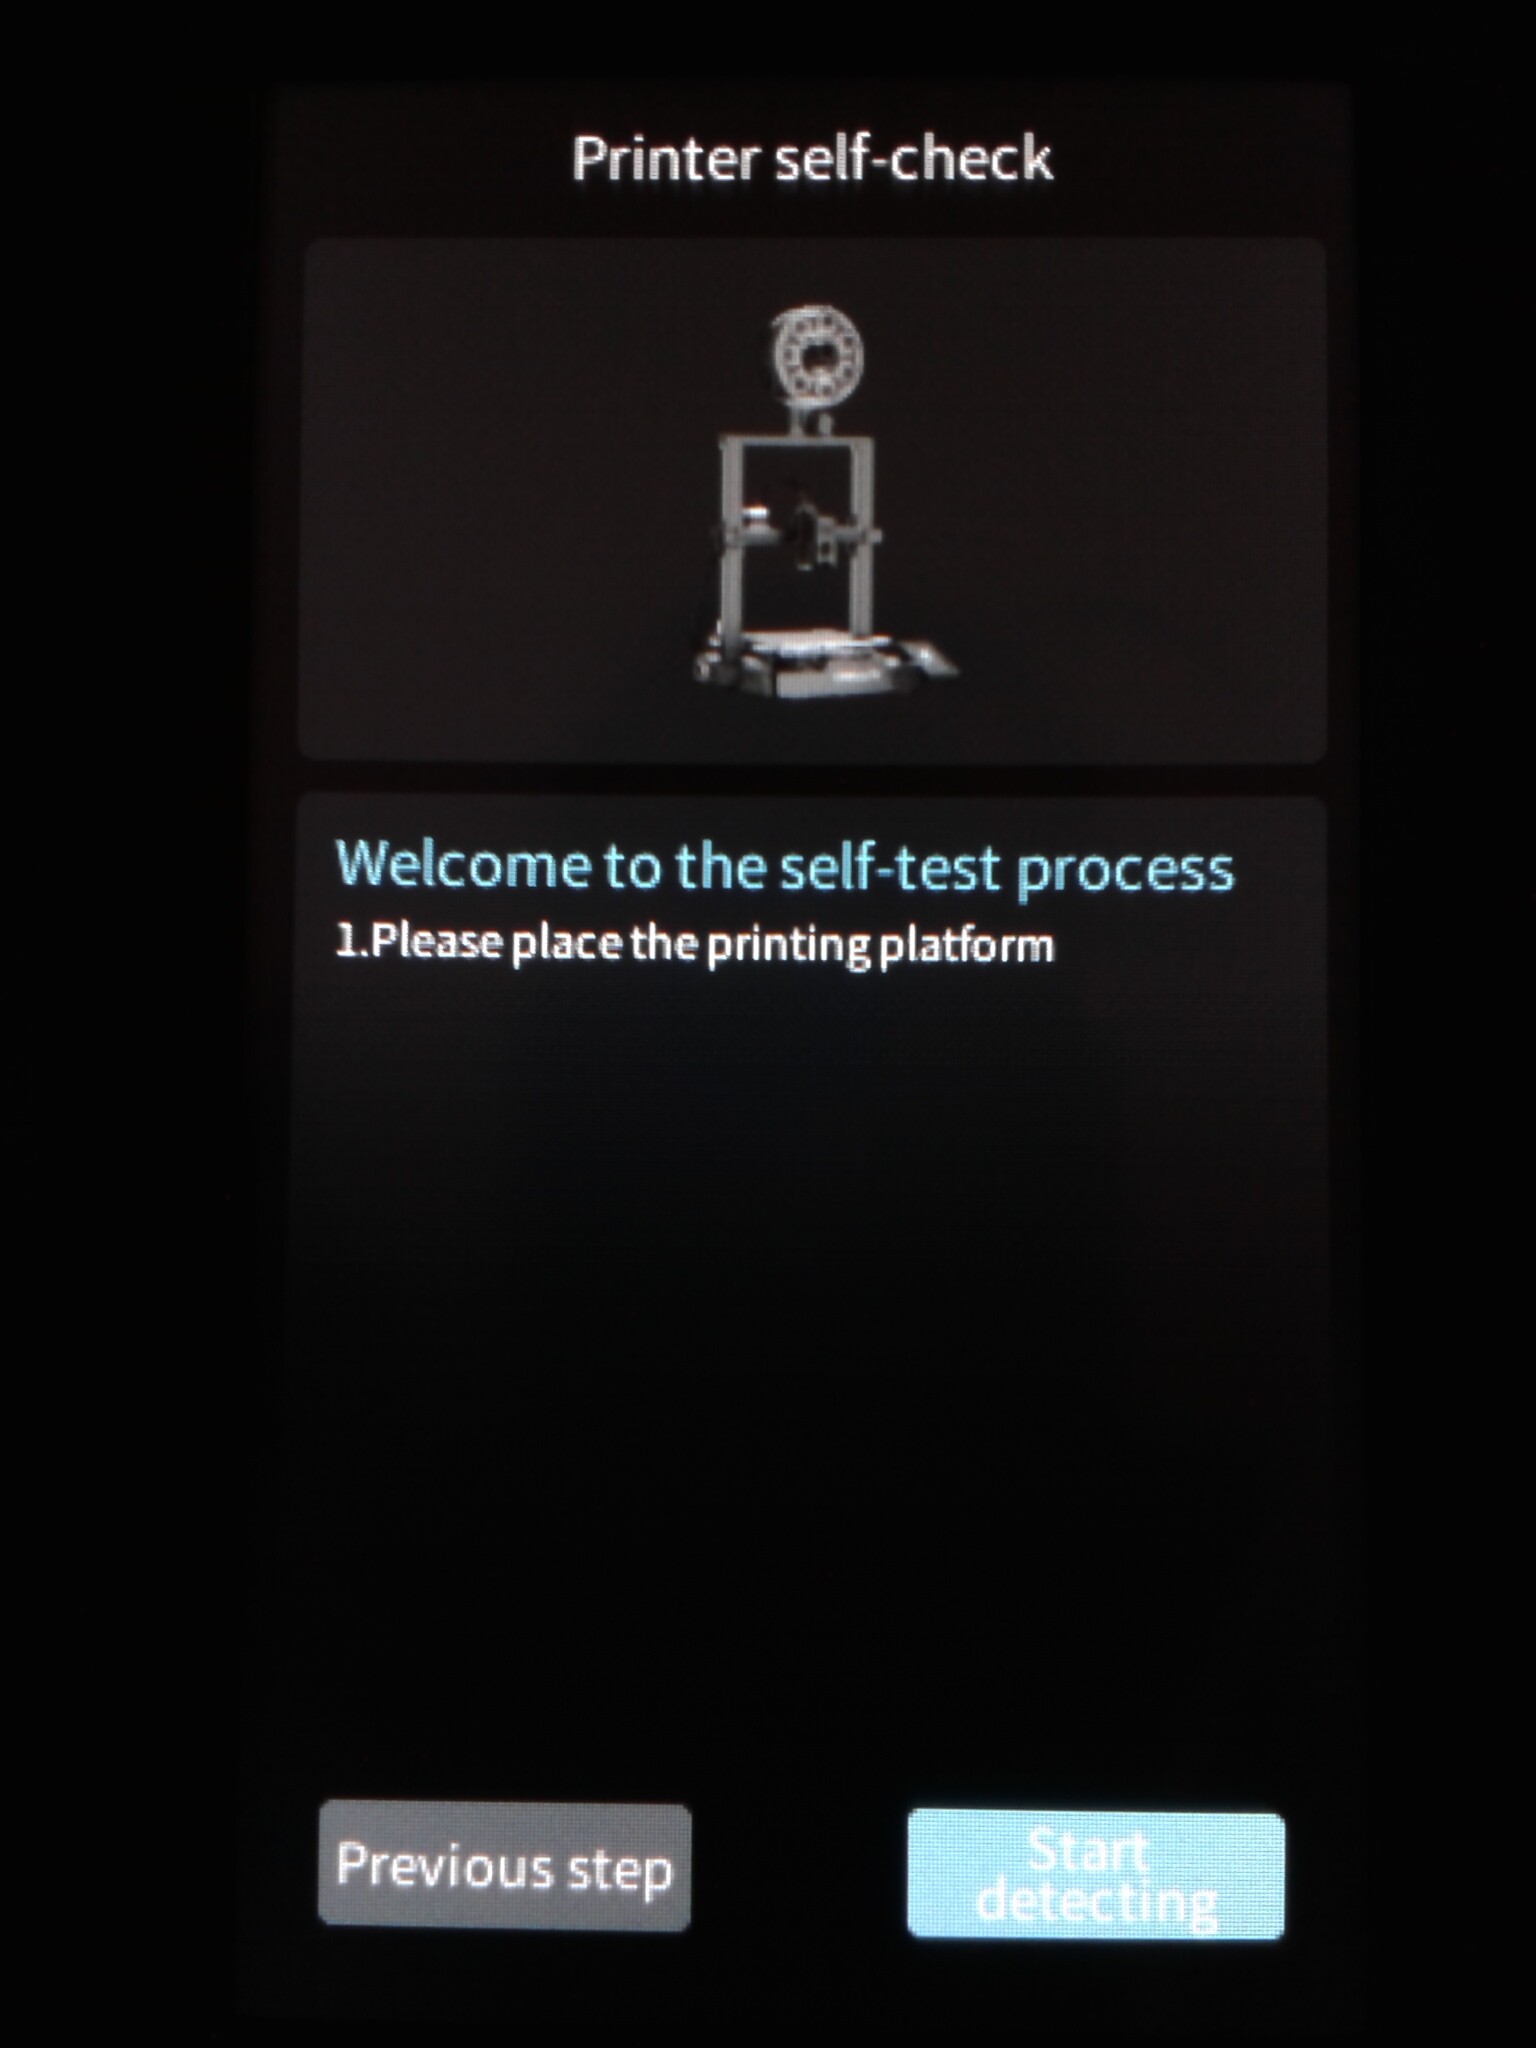
Lors du premier démarrage, on arrive au menu de choix de langue. J’ai sélectionné “English” car j’y suis habitué et pour éviter les traductions hasardeuses. Puis, l’acceptation des conditions d’utilisation, choix d’un réseau Wi-Fi, du fuseau horaire et du serveur Creality Cloud a utiliser (“International”).


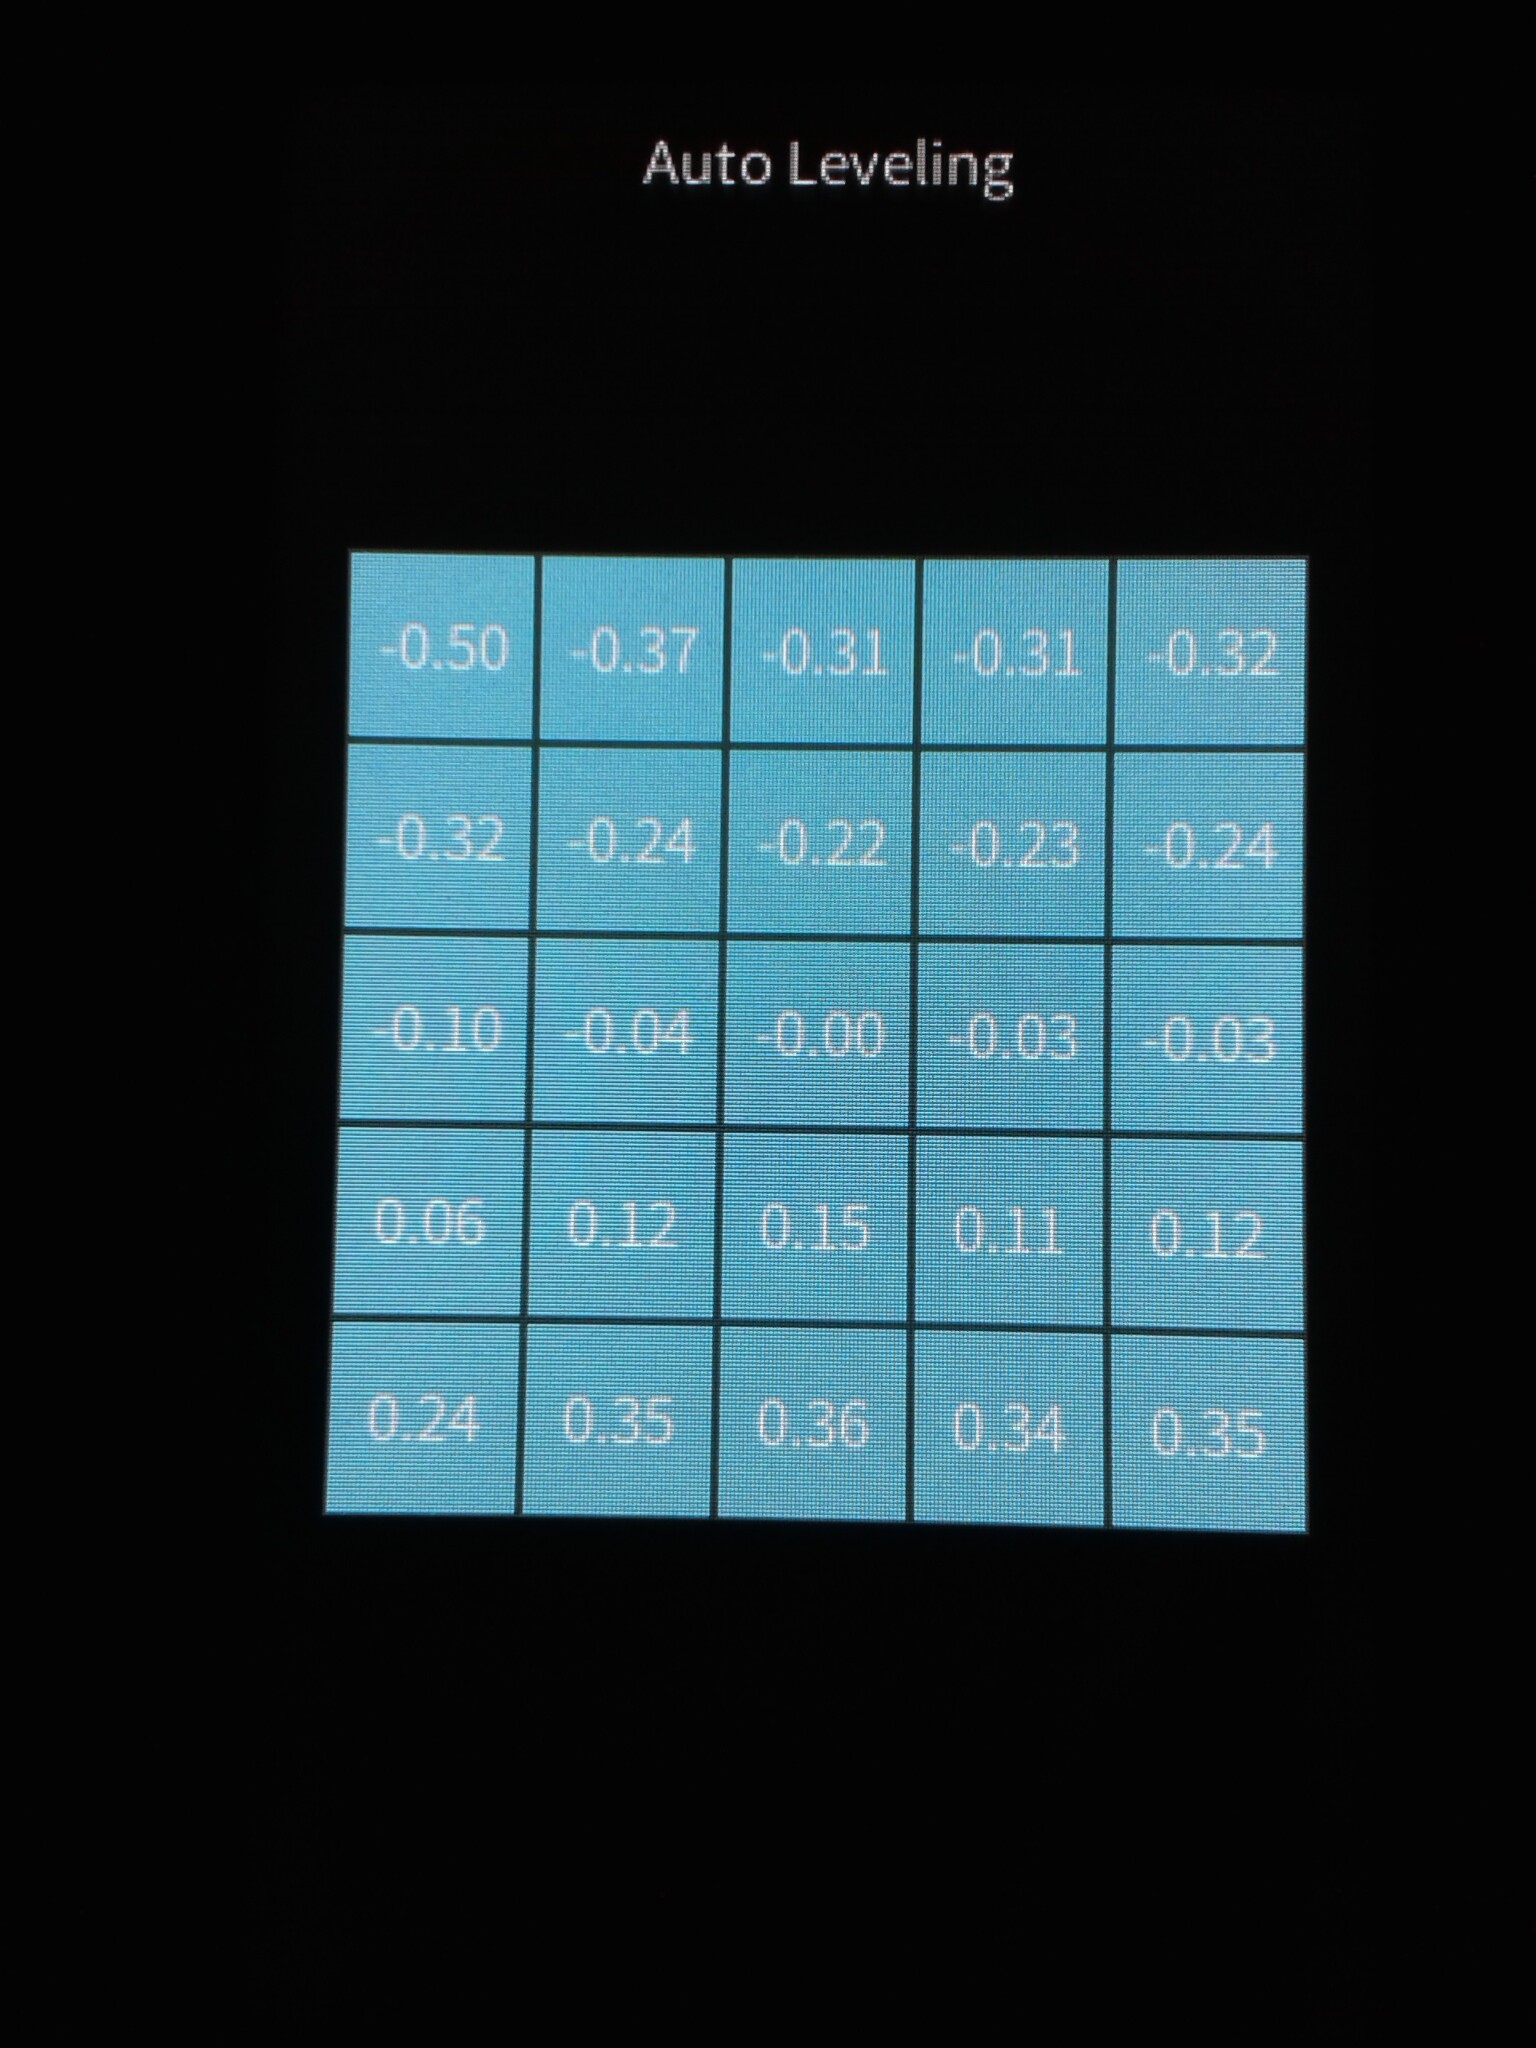
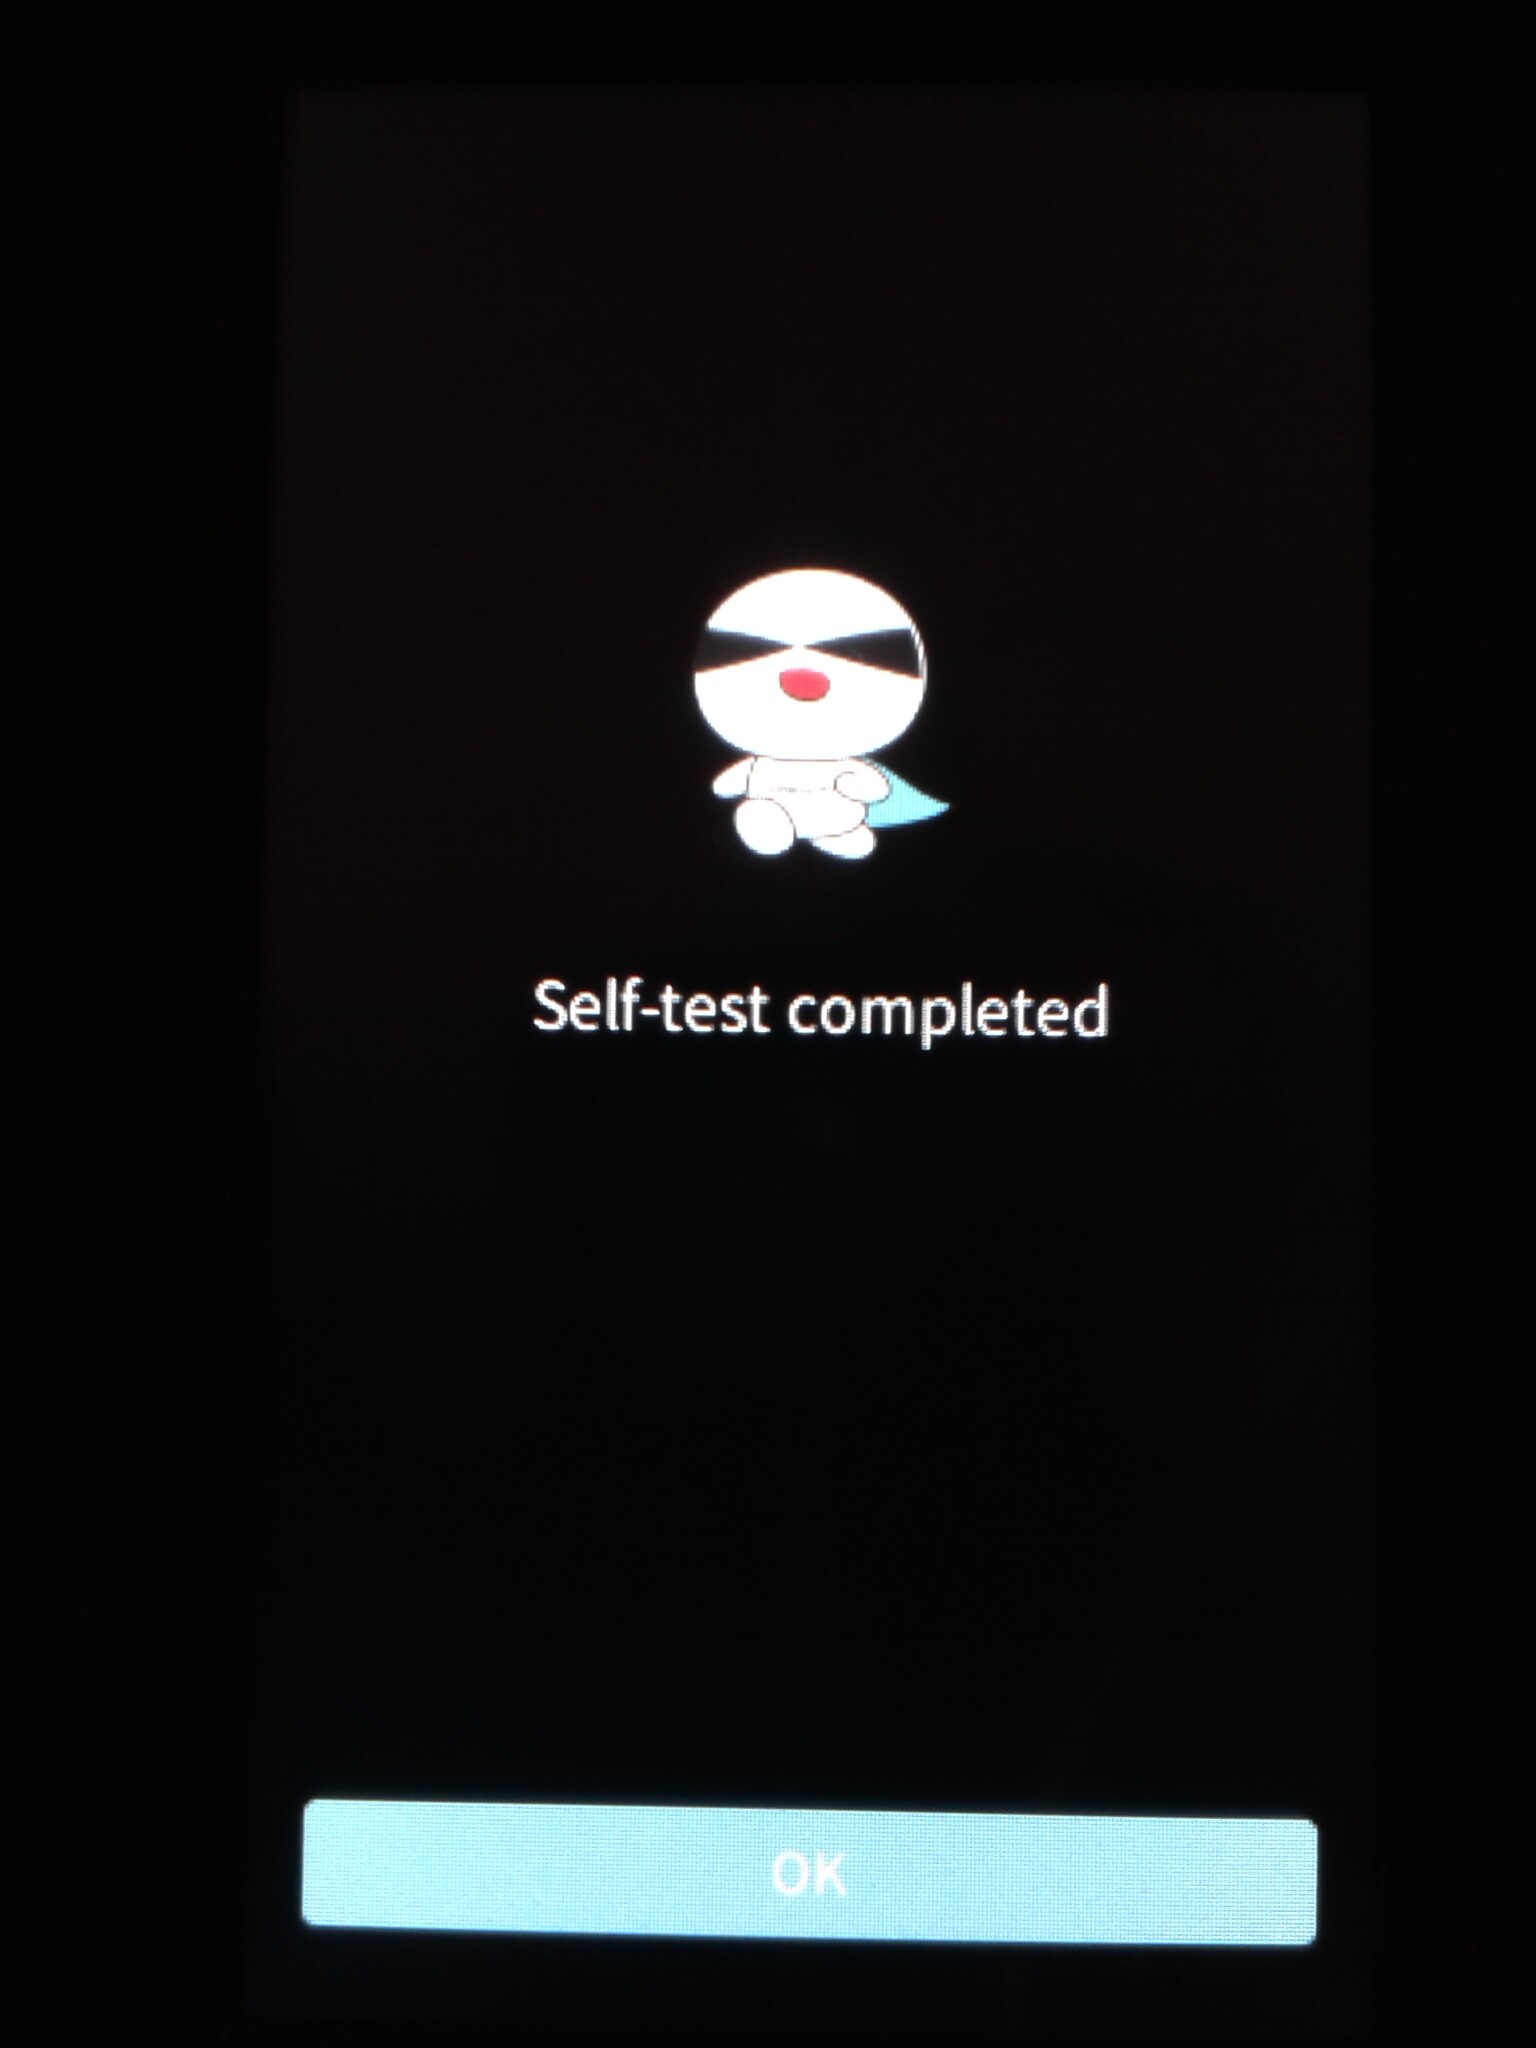
Vient ensuite l’auto-test qui comprend l’ajustement automatique du Z-Offset et le leveling / palpage du plateau.
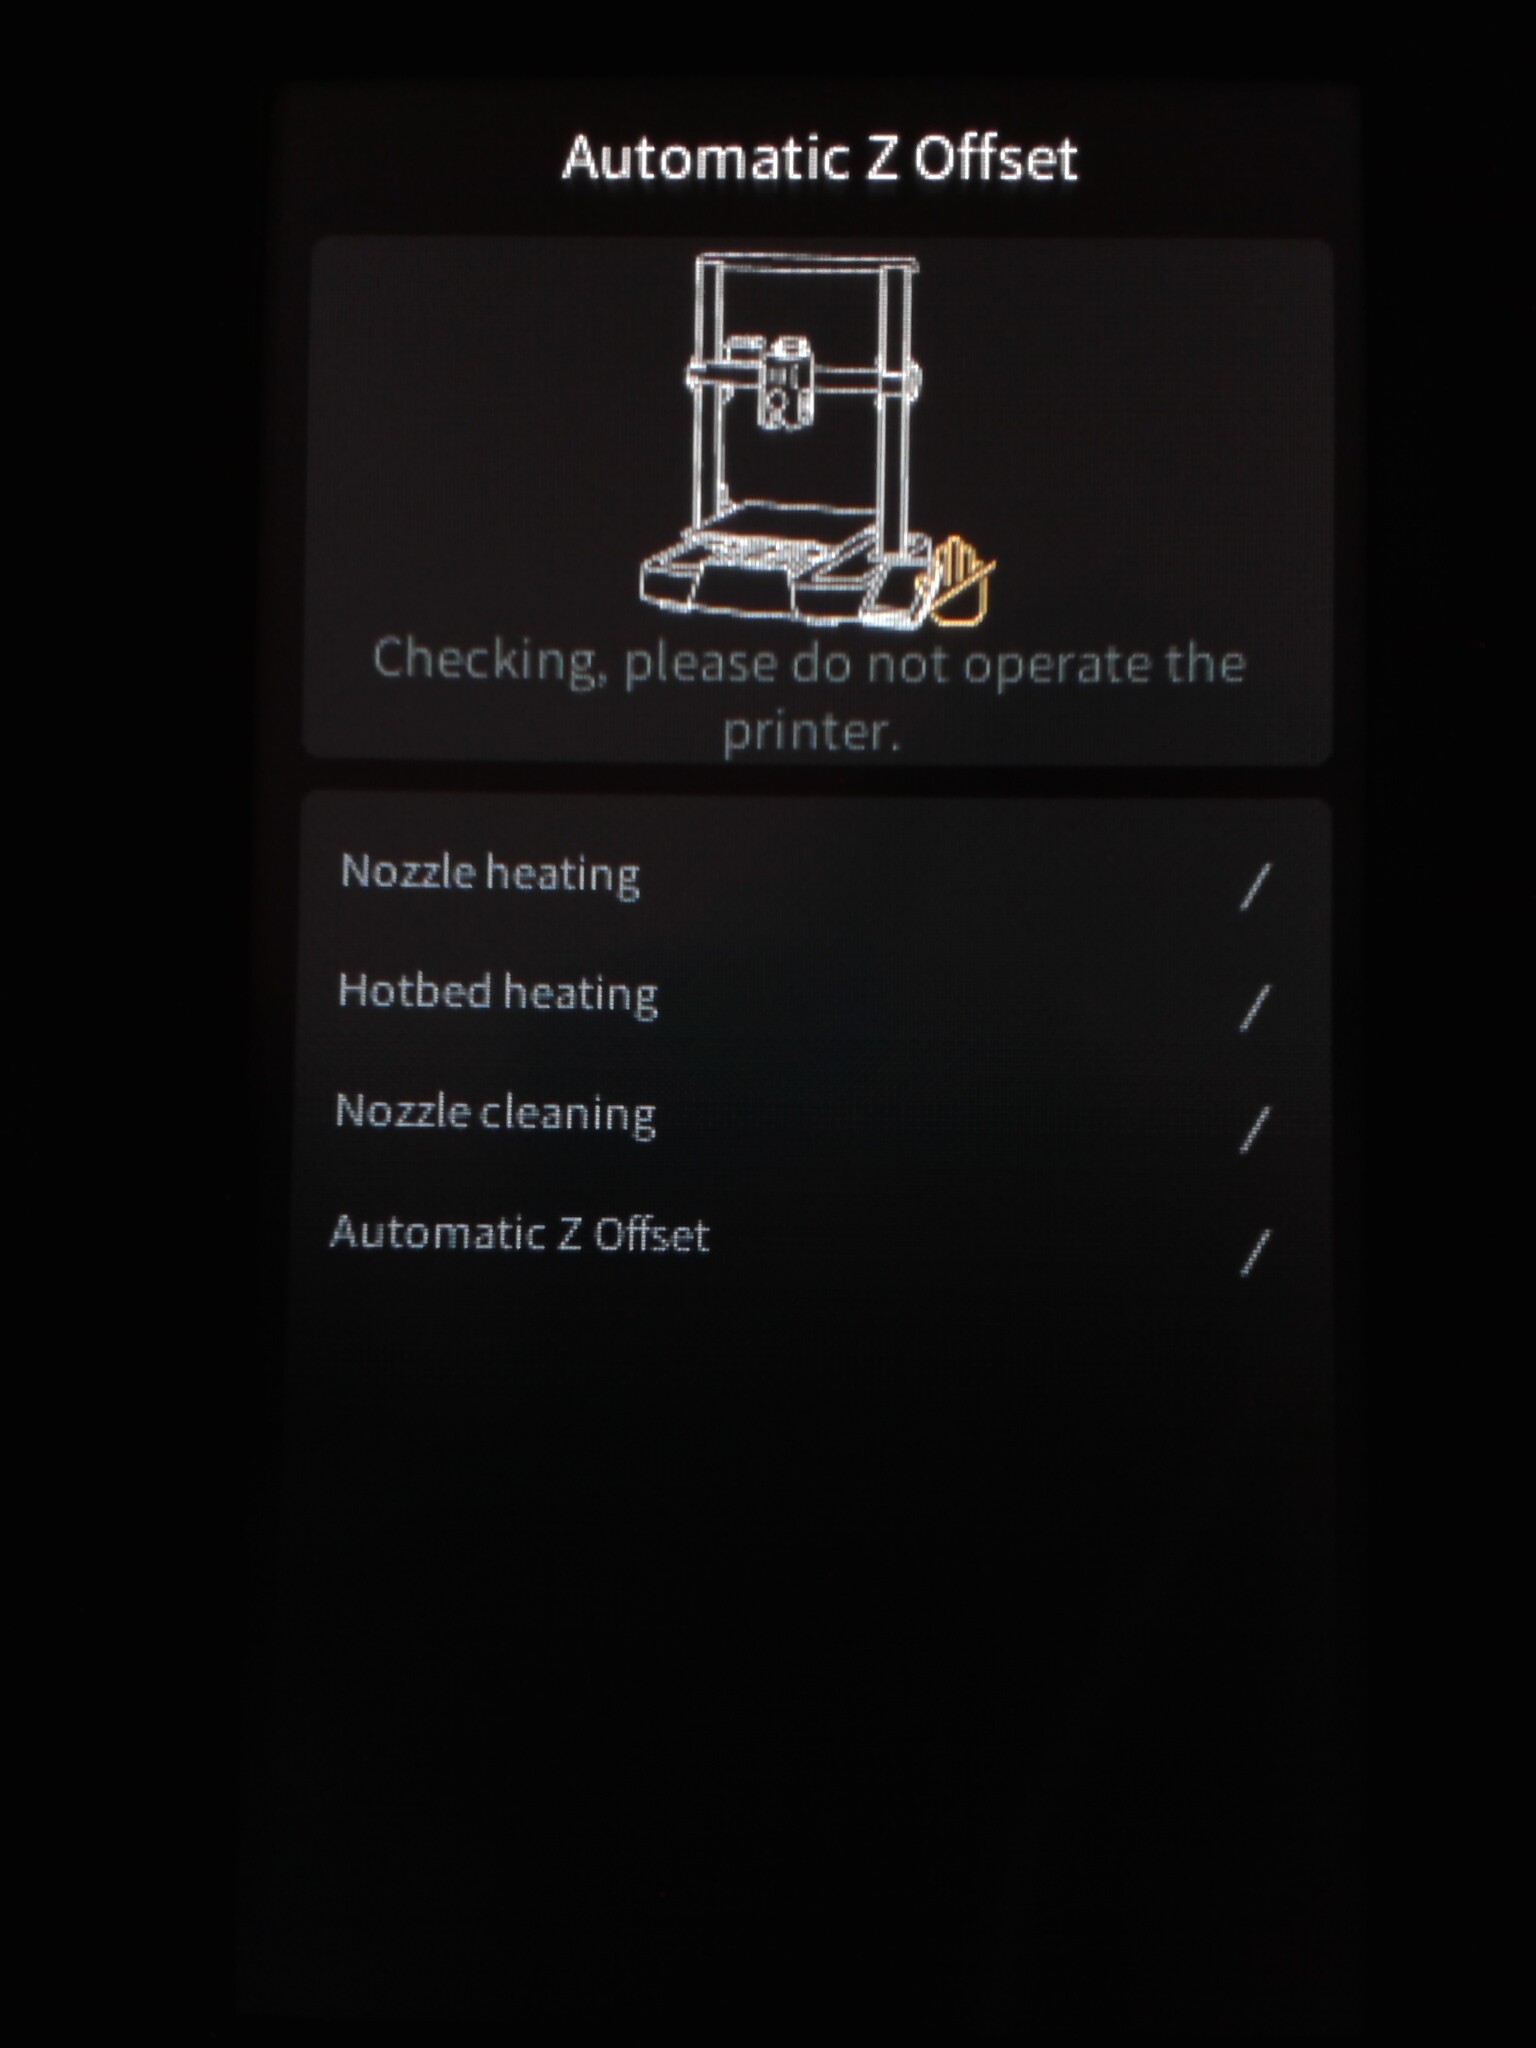
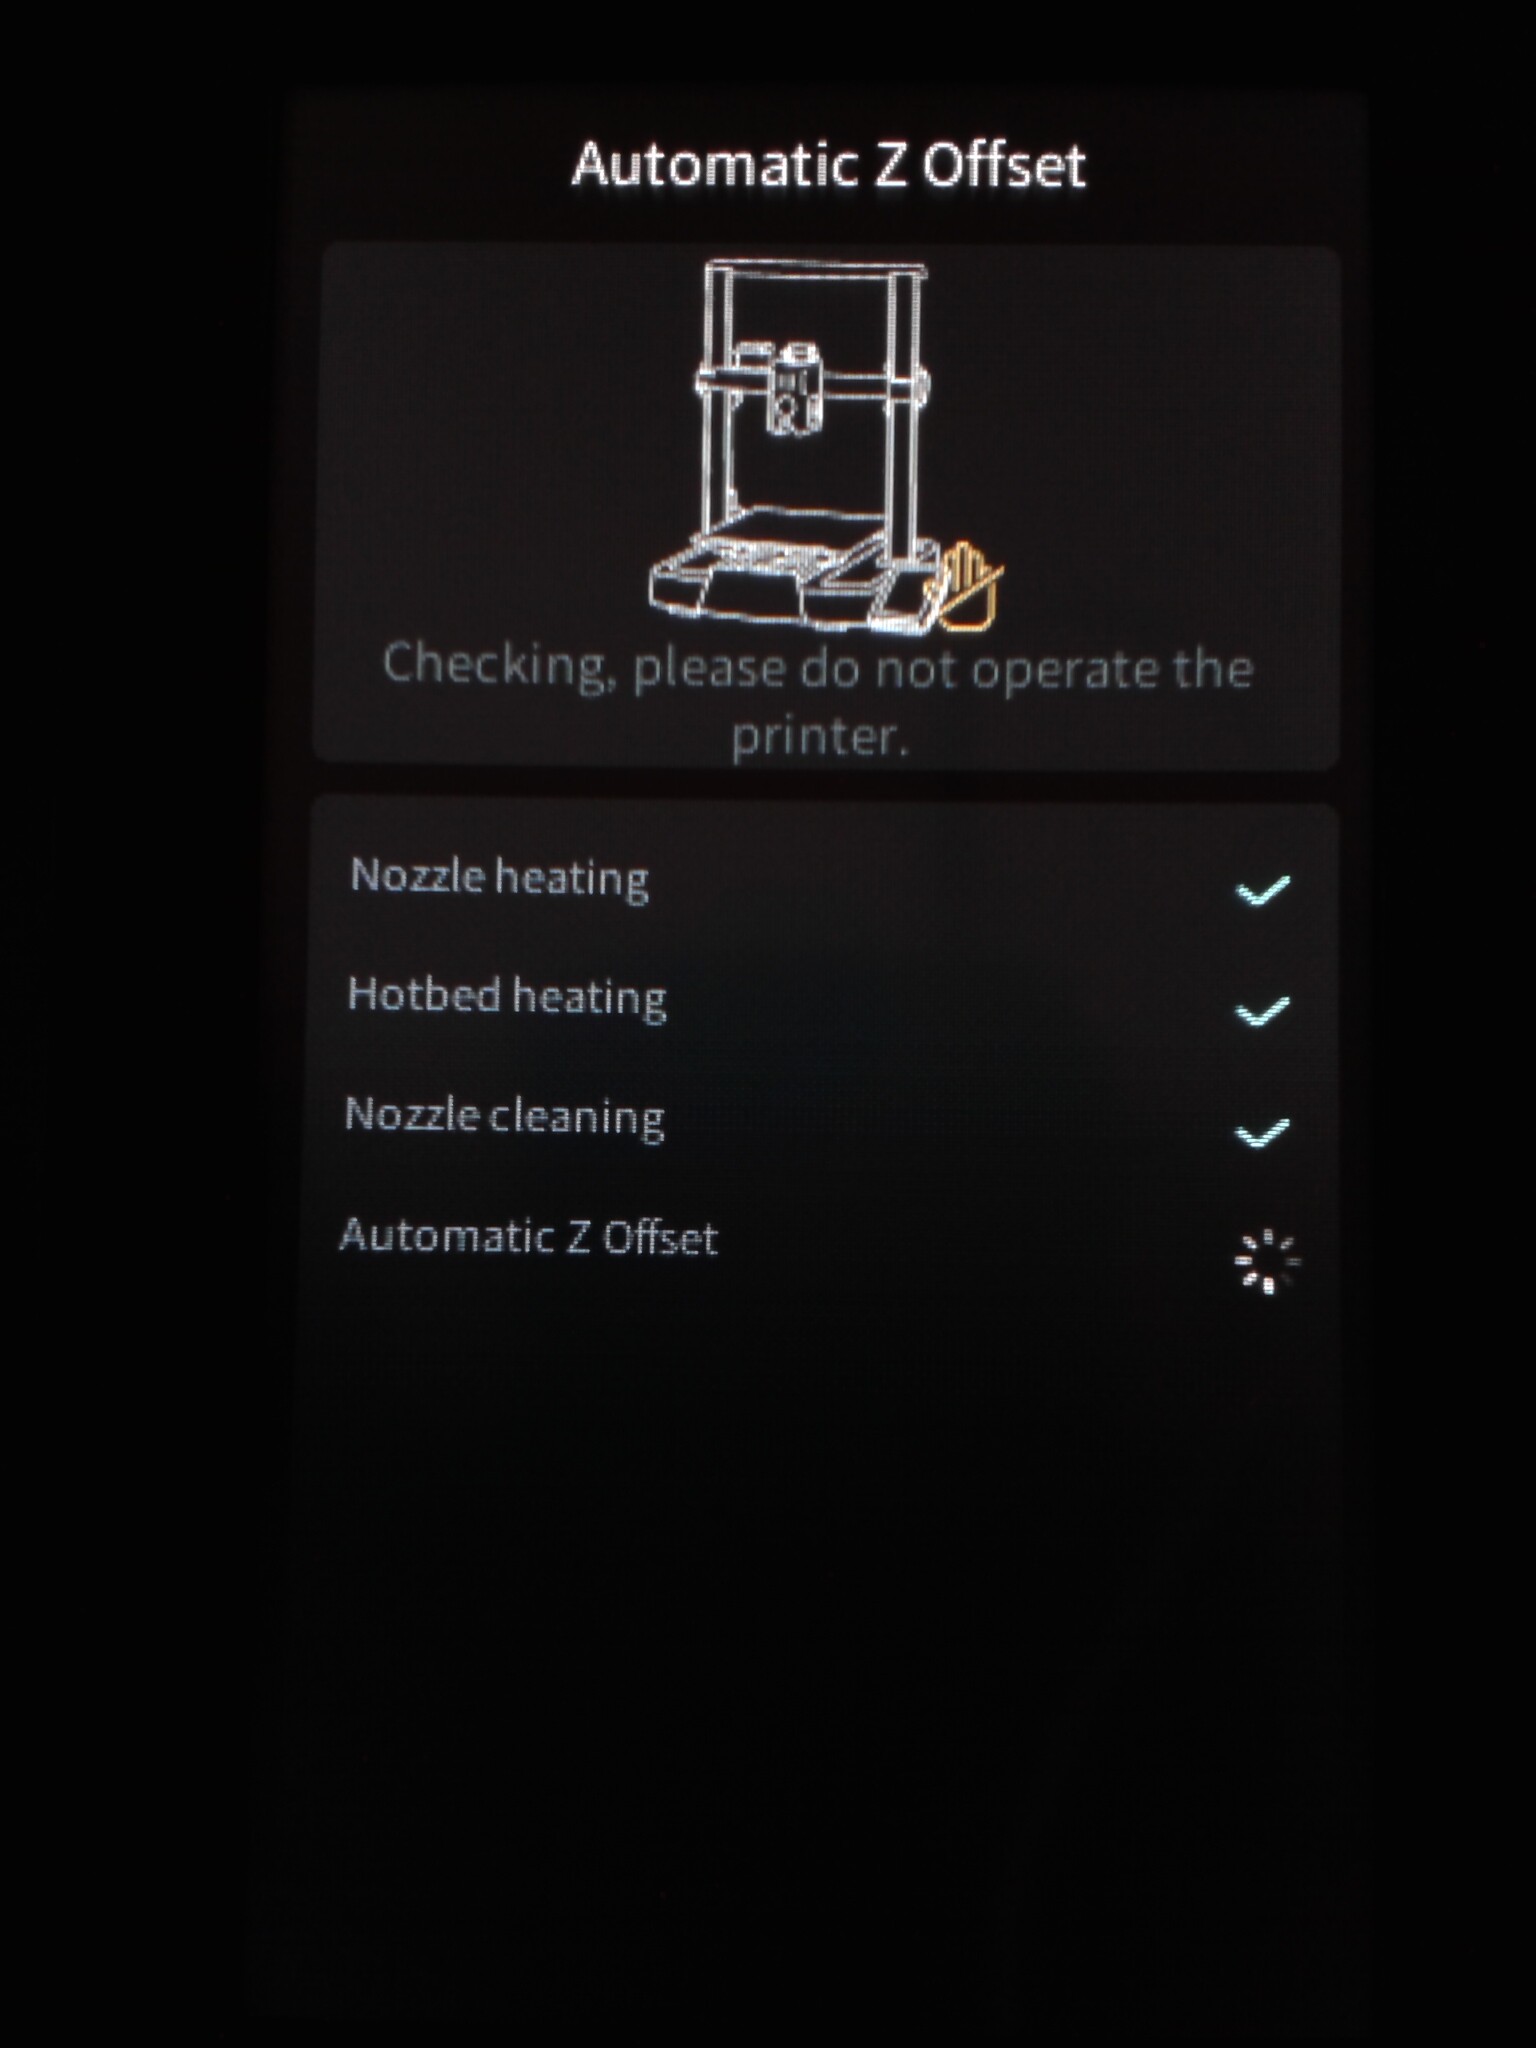
Bien remarquer ici qu’il n’y a pas de test de résonance, le capteur d’accélération n’étant disponible qu’en option.
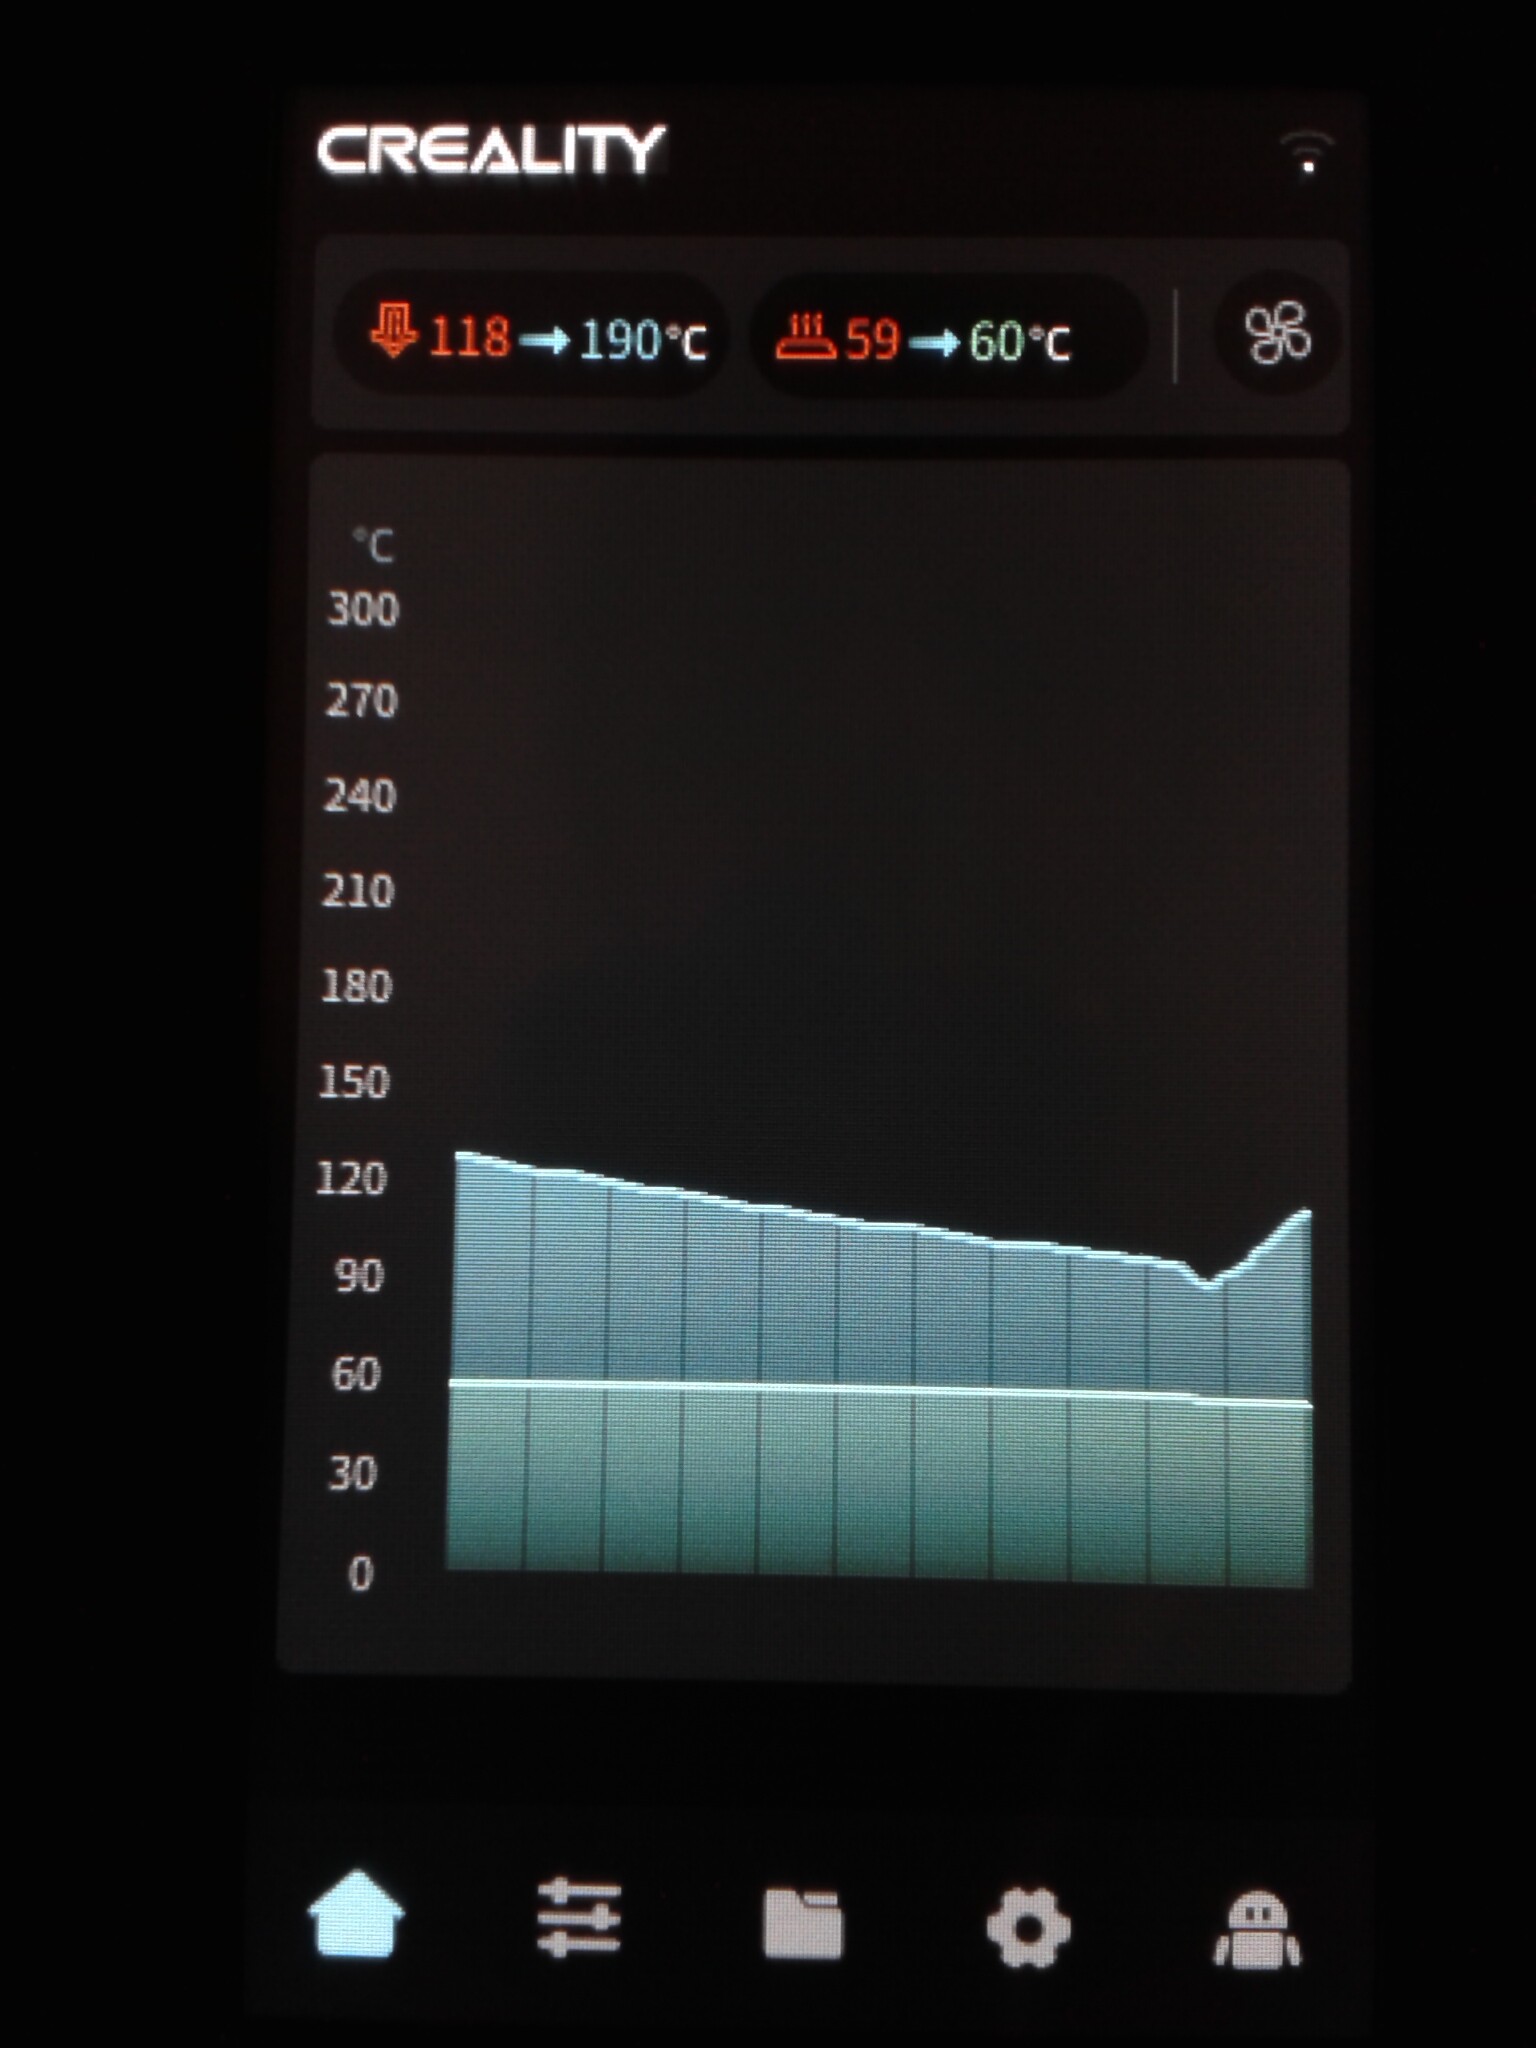
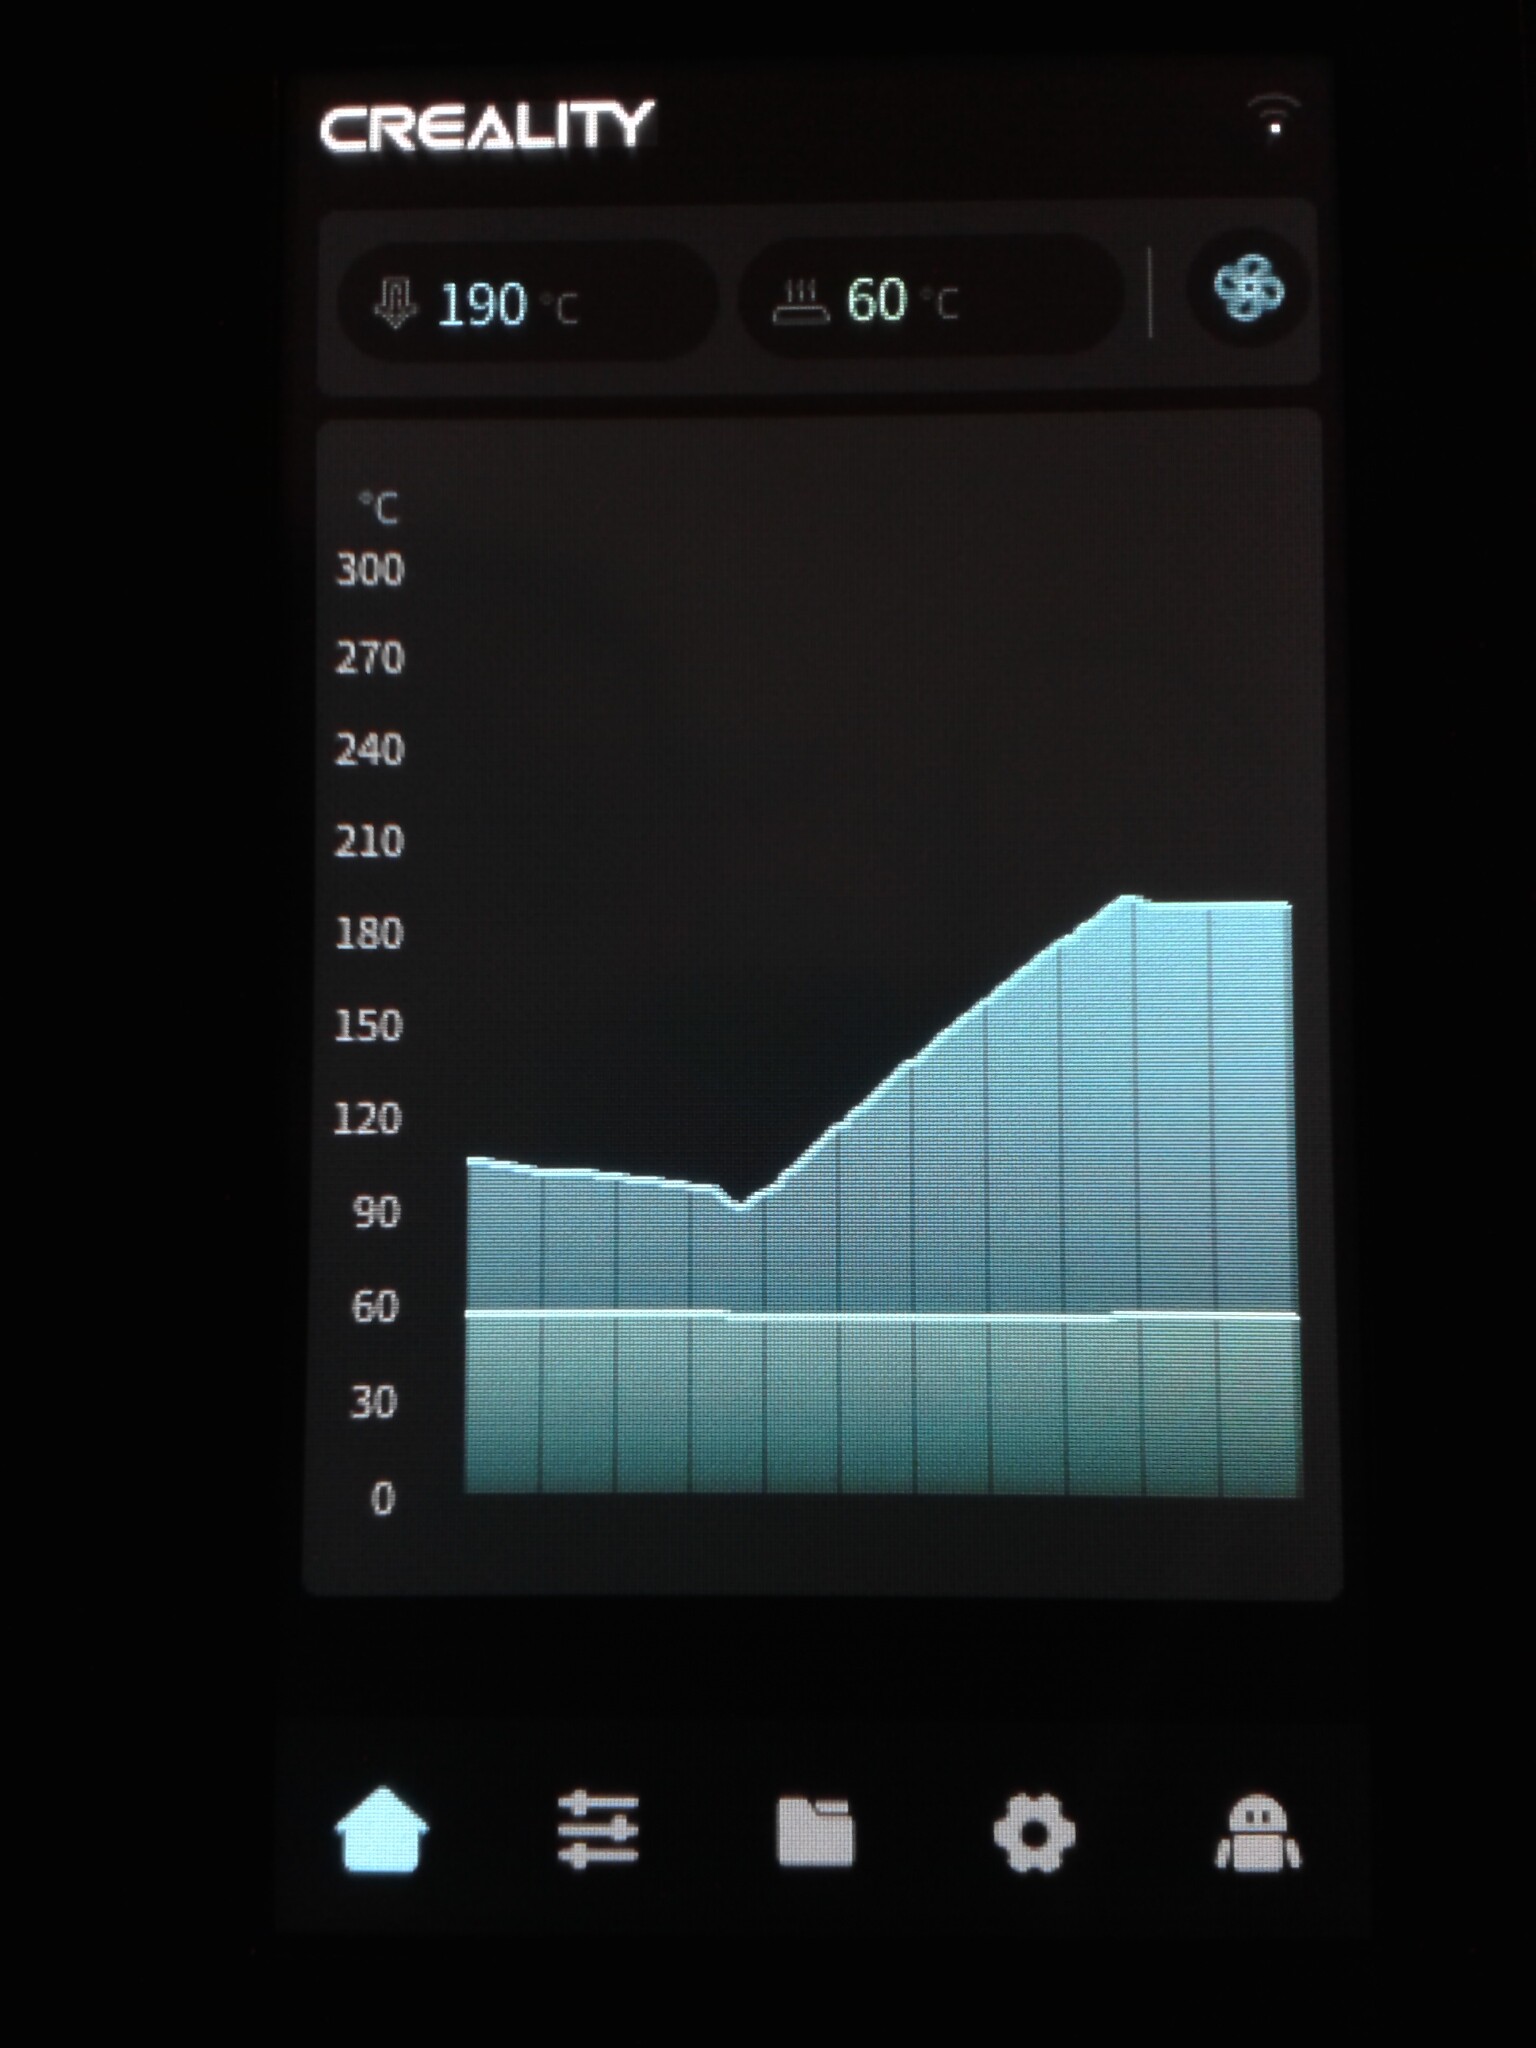
J’ai préféré mettre la buse en chauffe avec une température cible de 190°C, dans l’idée de manuellement charger le filament plutôt que de passer par le menu de chargement de filament proposé par CrealityOS.
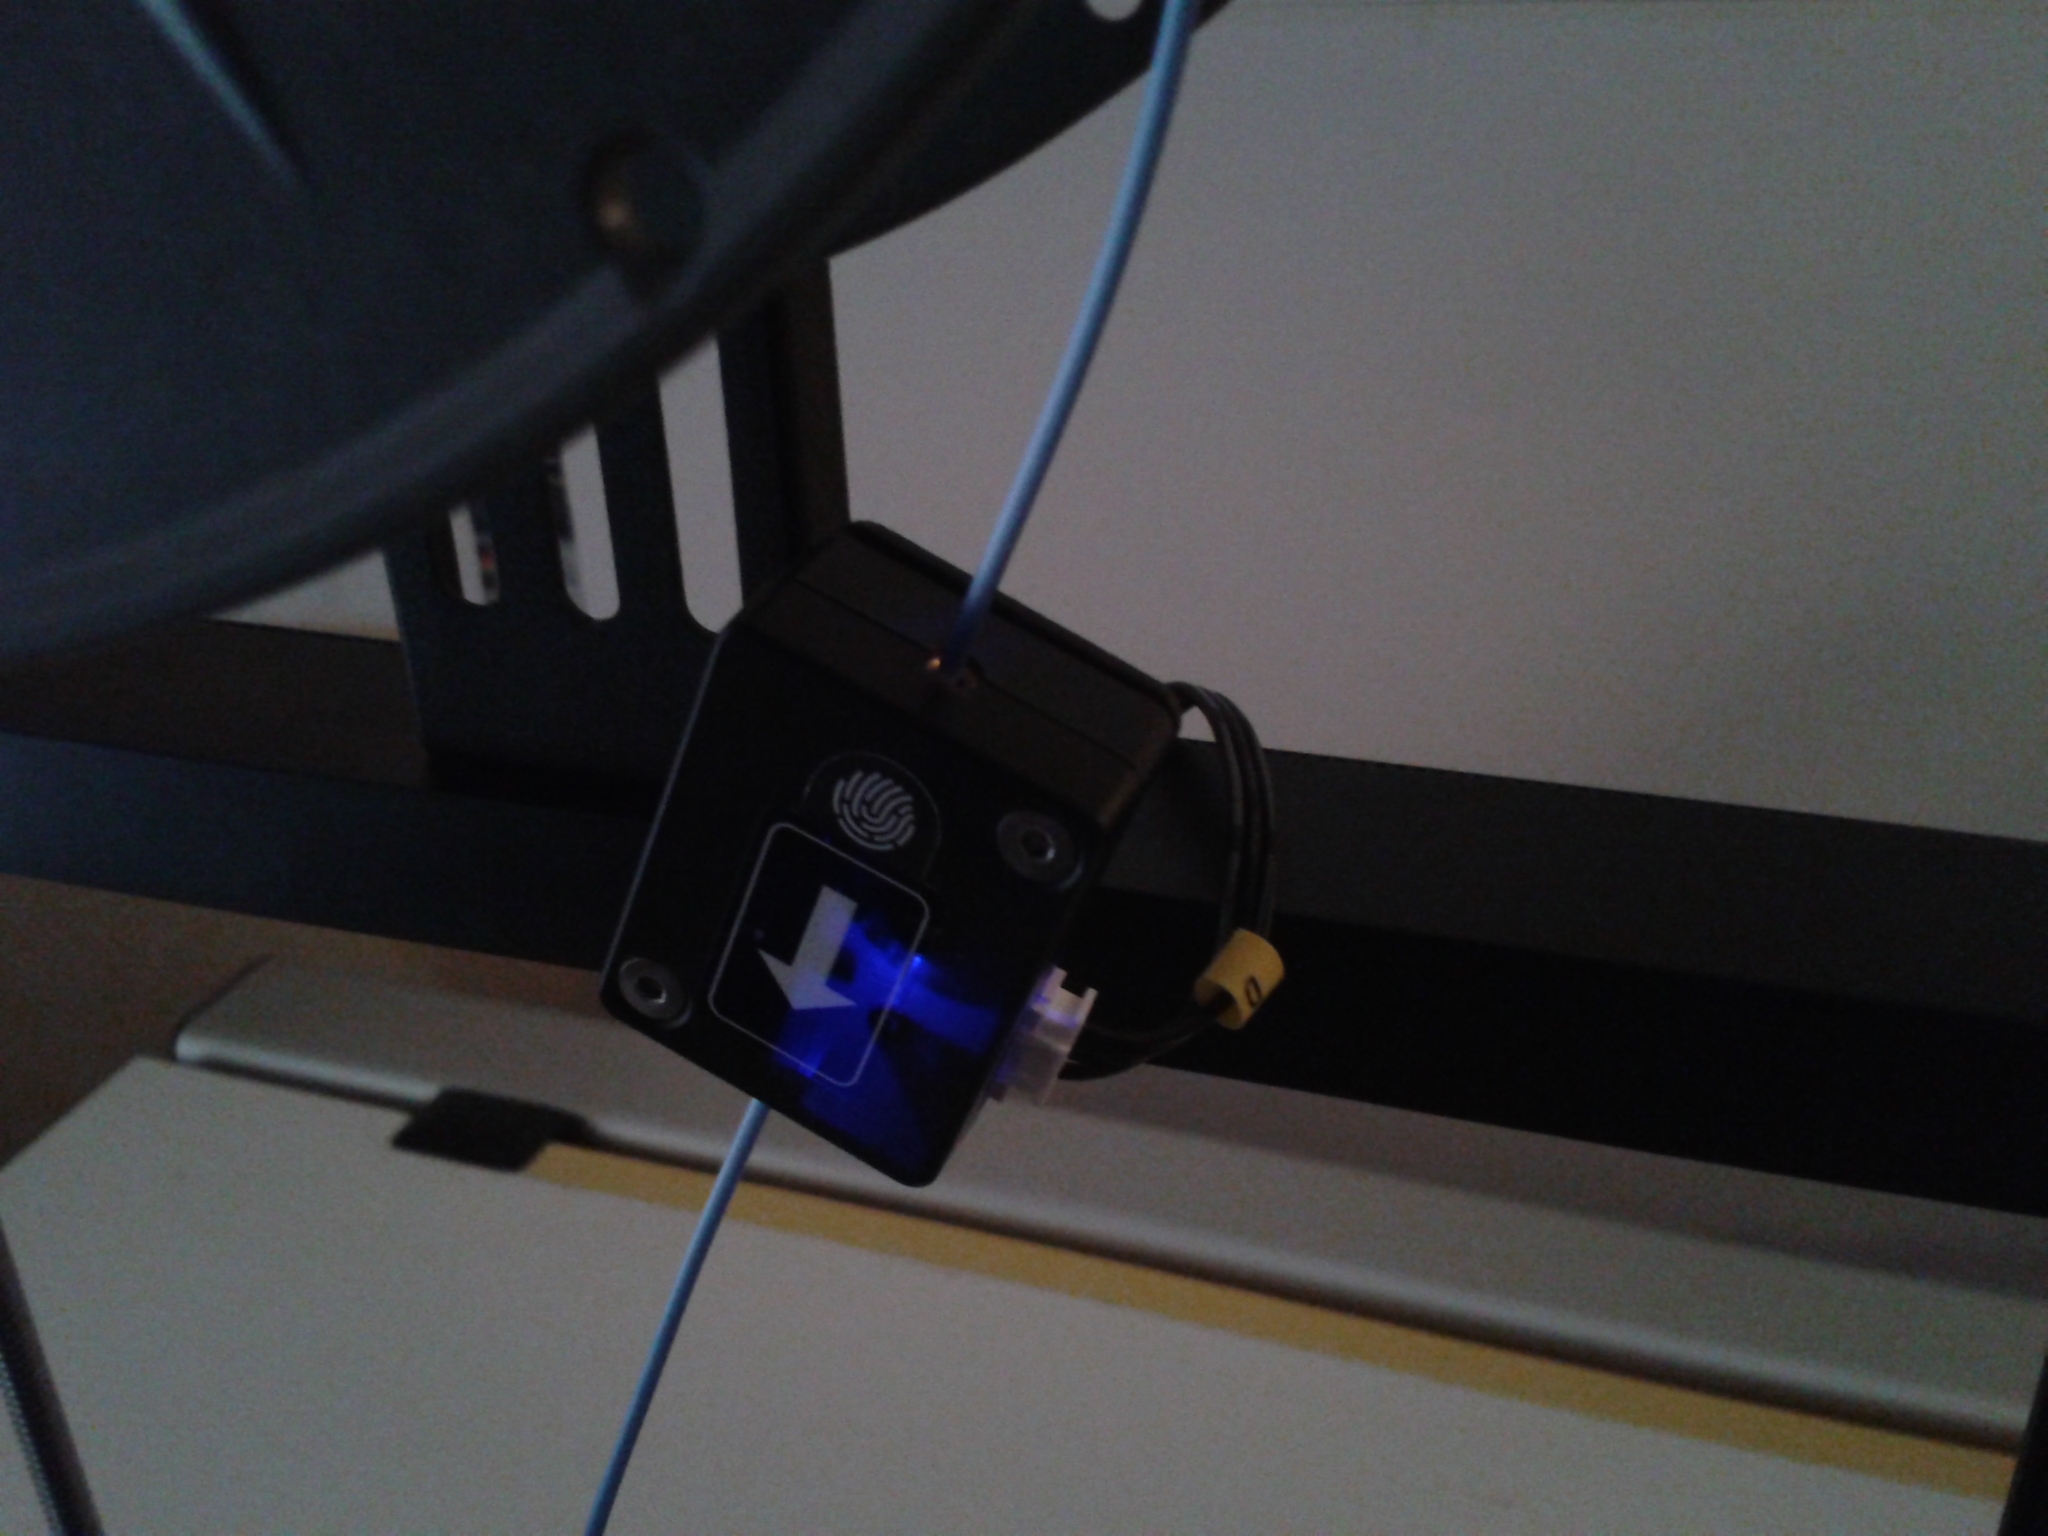
Ne pas oublier de passer le filament dans le capteur de fin de filament qui, quand le filament y est inséré, a une LED témoin de couleur bleue qui s’allume.
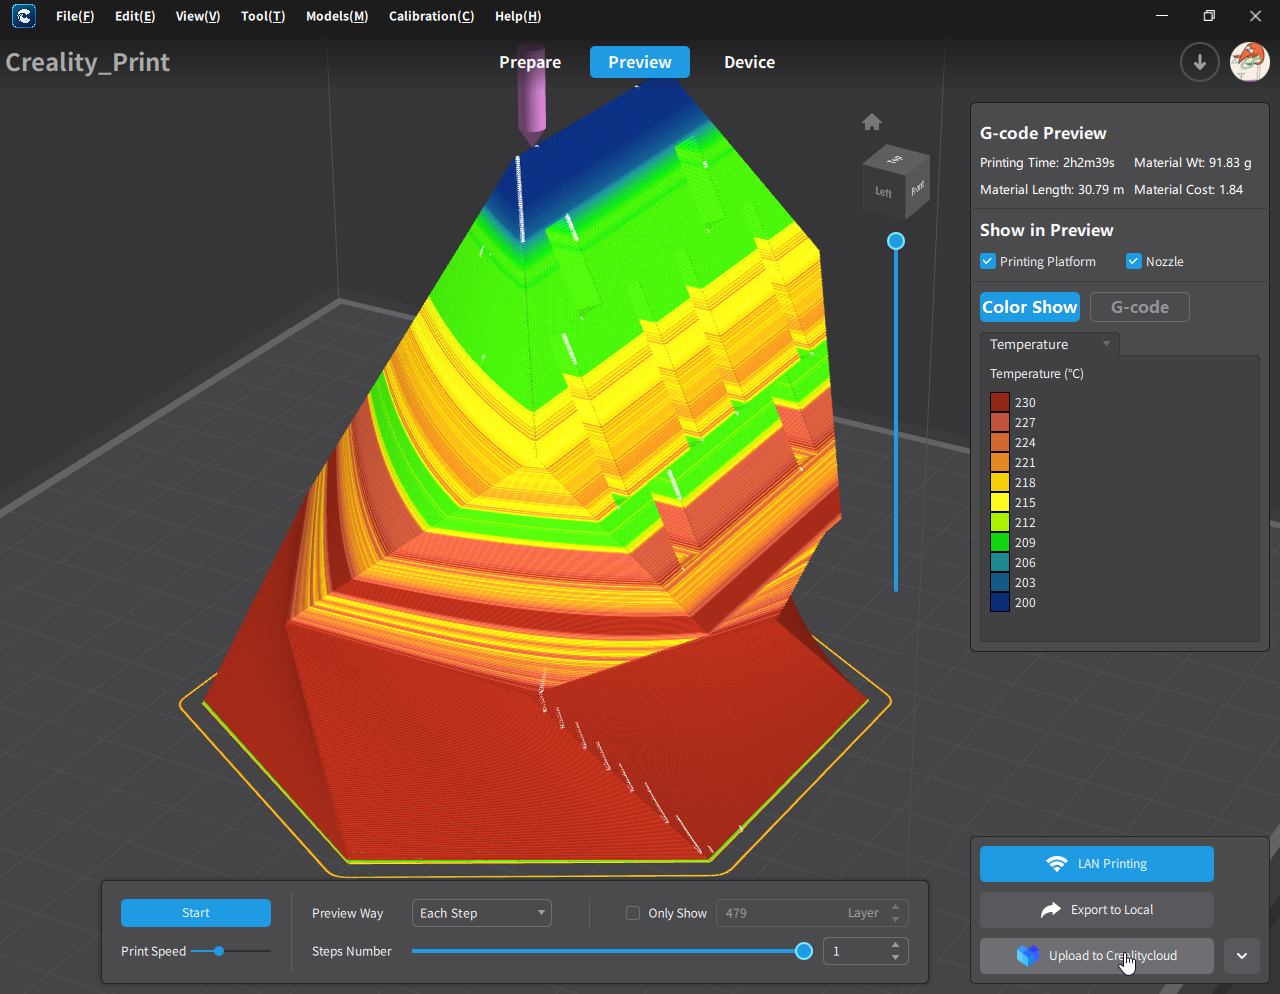
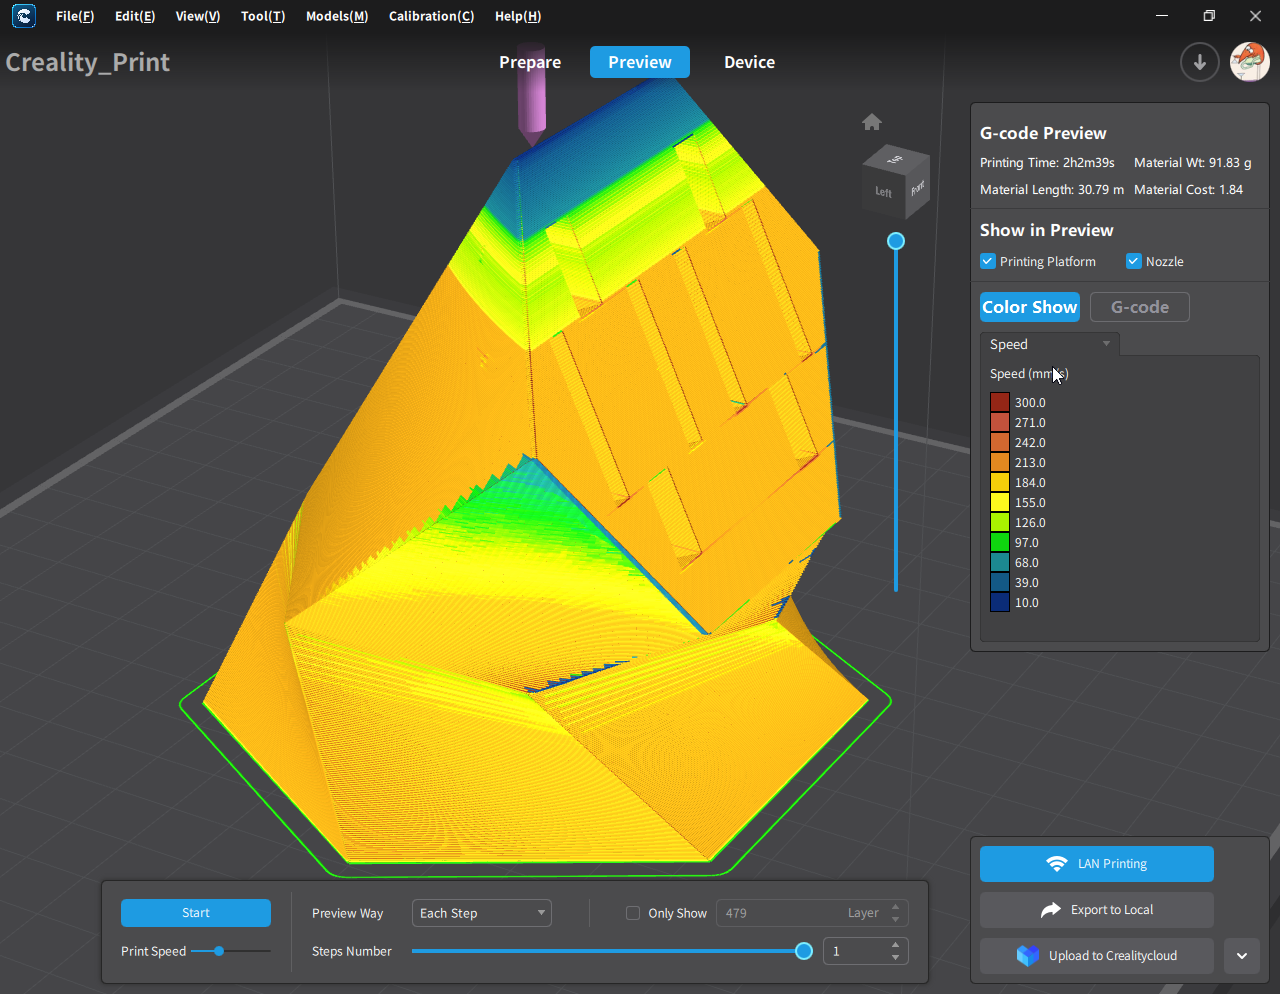
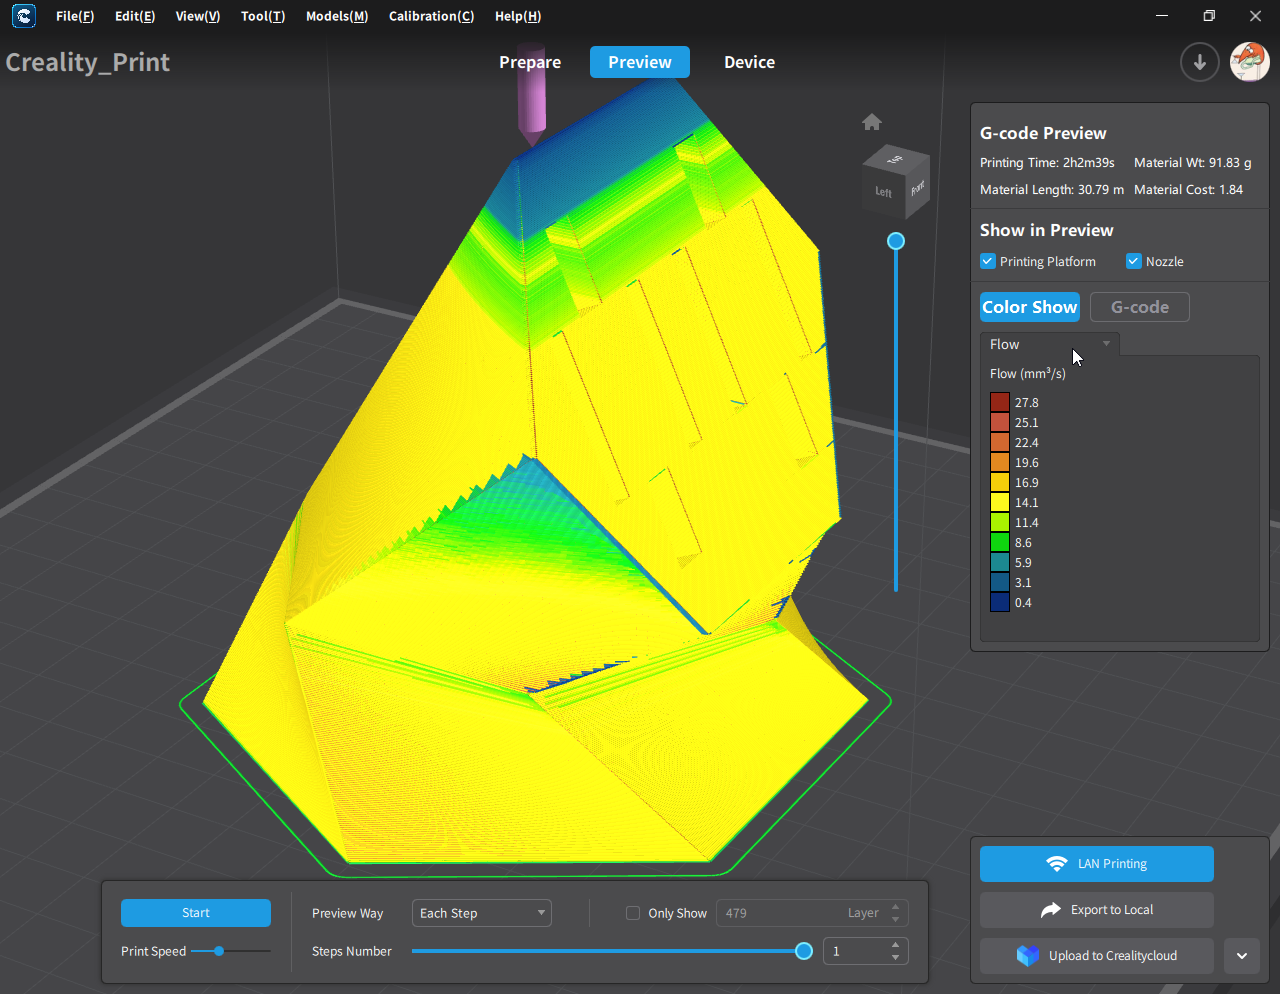
Logiciel de tranchage ou “slicer” Creality Print
Sur la clé USB fournie, on trouve la version 4.3.8 pour Windows de Creality Print, le slicer du constructeur.

Je ne vais pas détailler ici ce que j’ai déjà dit de “Creality Print” lors de mon test de la “Ender-3 V3 SE” que je vous invite à lire si ce n’est pas déjà fait. 😉
Cette version 4.3.8 de décembre 2023 est la dernière en date et celle qui a été utilisée pour ce test. Dans l’onglet “Temperature” des profils de matériaux, une option “Auto Temperature” associé à un “Flow Temperature Graph” a été ajoutée. Une liste de couples, un tableau, un débit (mm³) et une température (°C) vont permettre au logiciel trancheur de faire varier la température d’extrusion en fonction du débit.


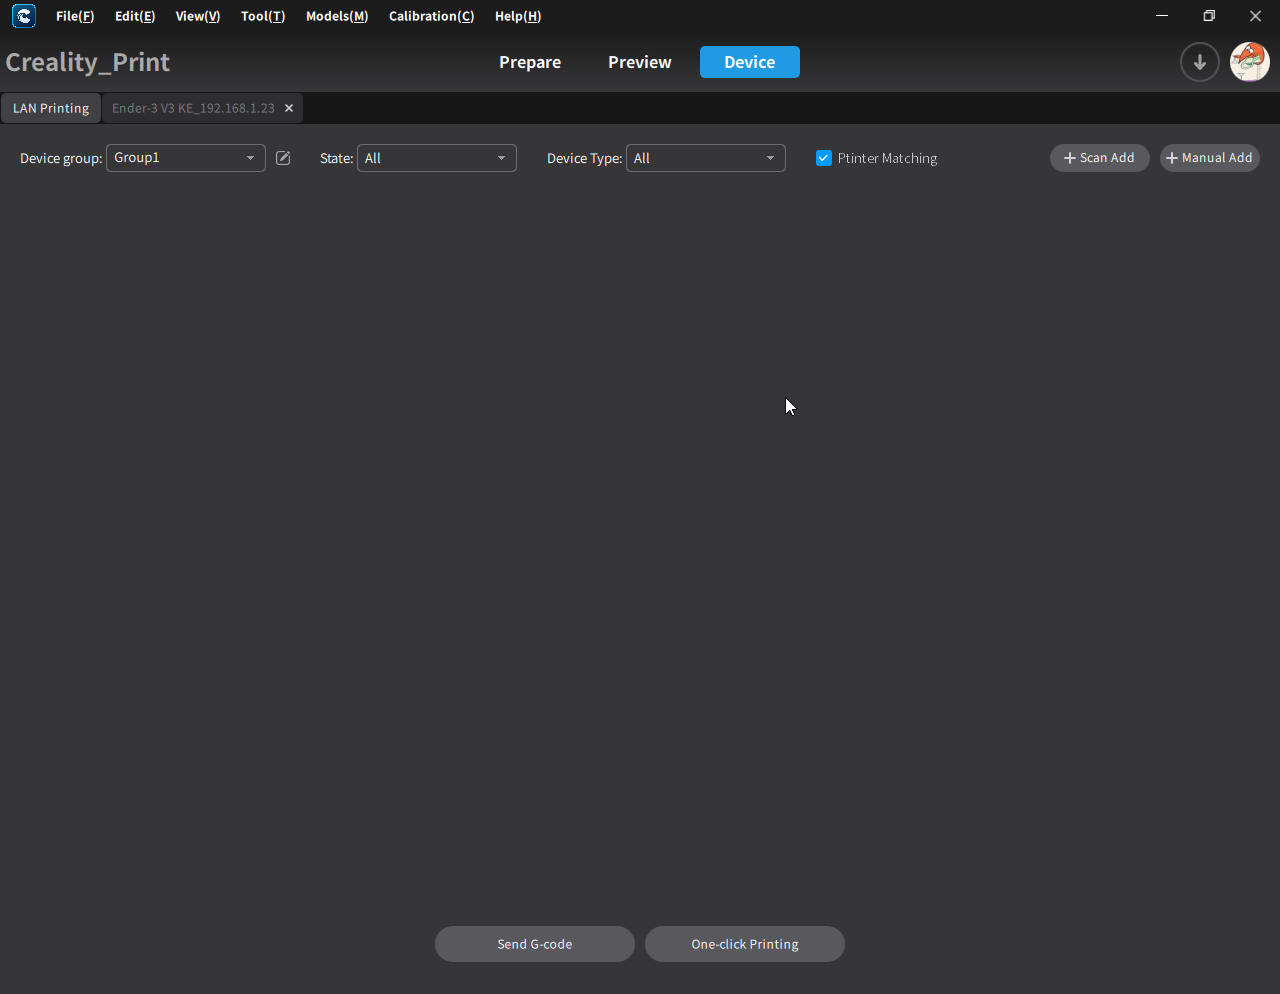
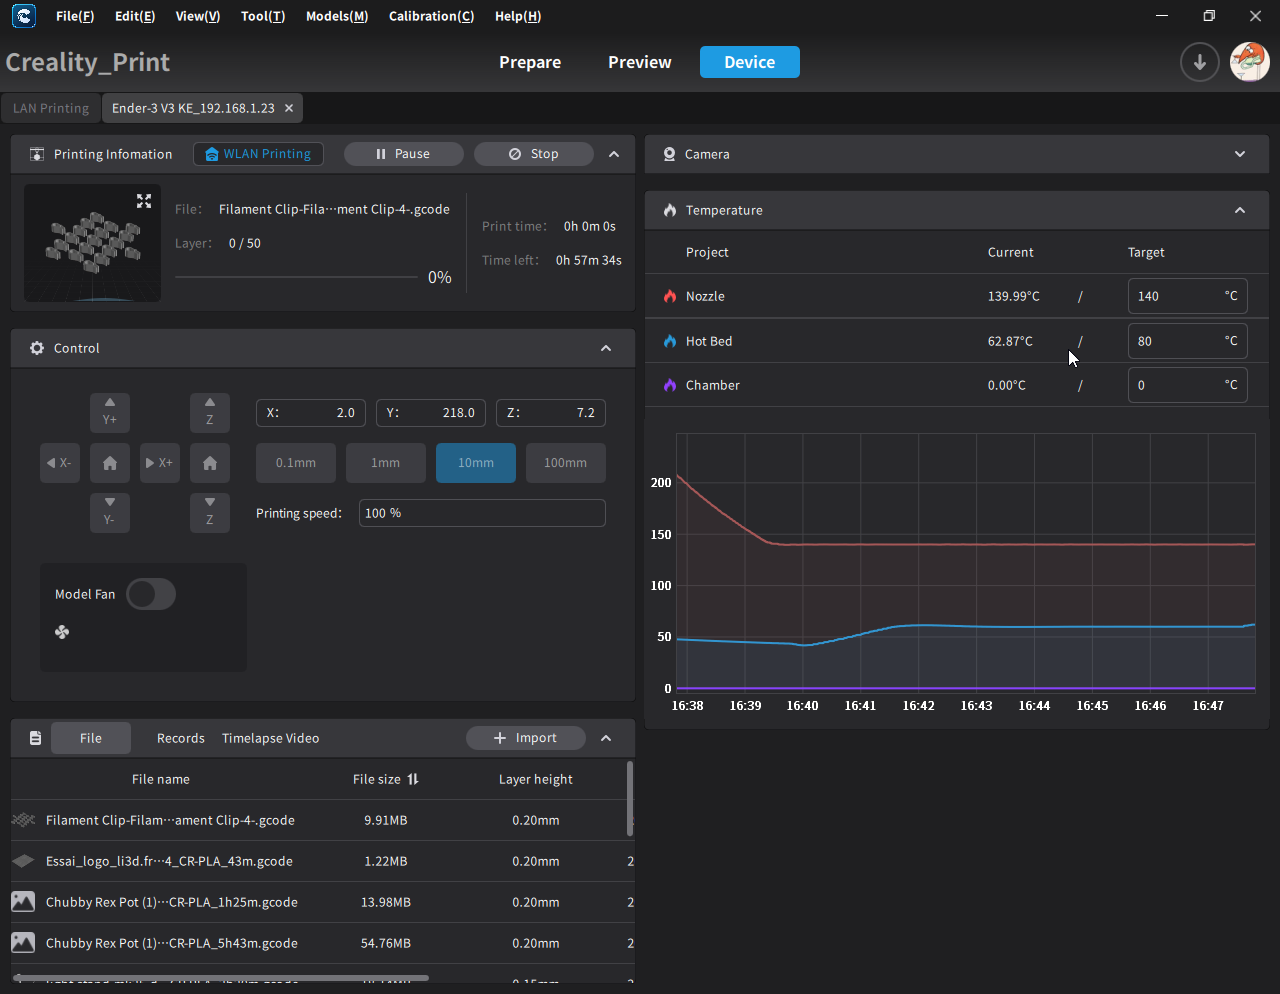
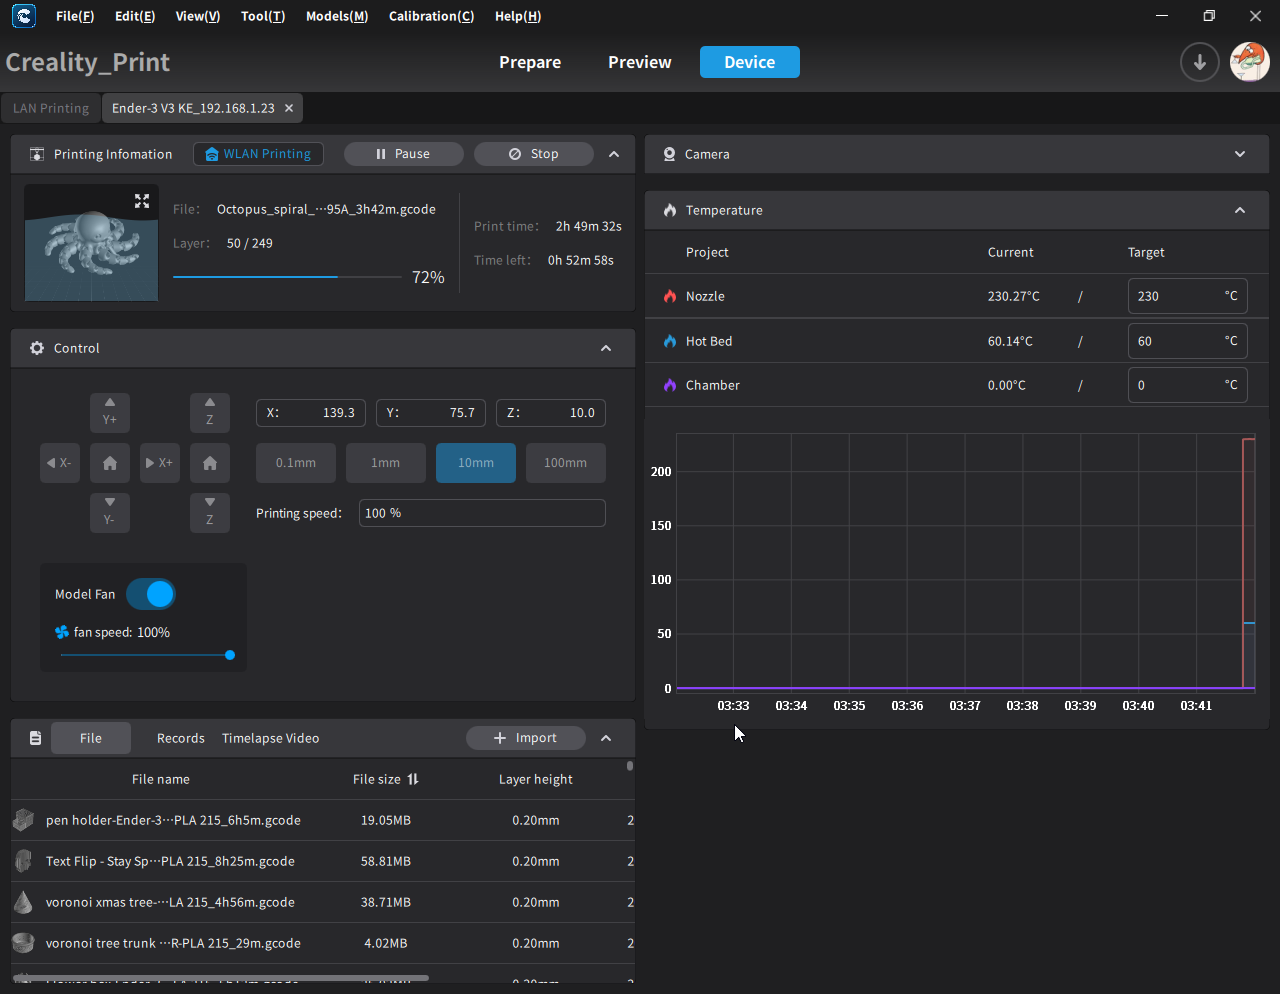
De plus, la connectivité WiFi nous permet d’envoyer et d’imprimer le fichier 3D en quelques clics, après sa découpe. On peut également suivre l’avancement des tâches dans Creality Print.
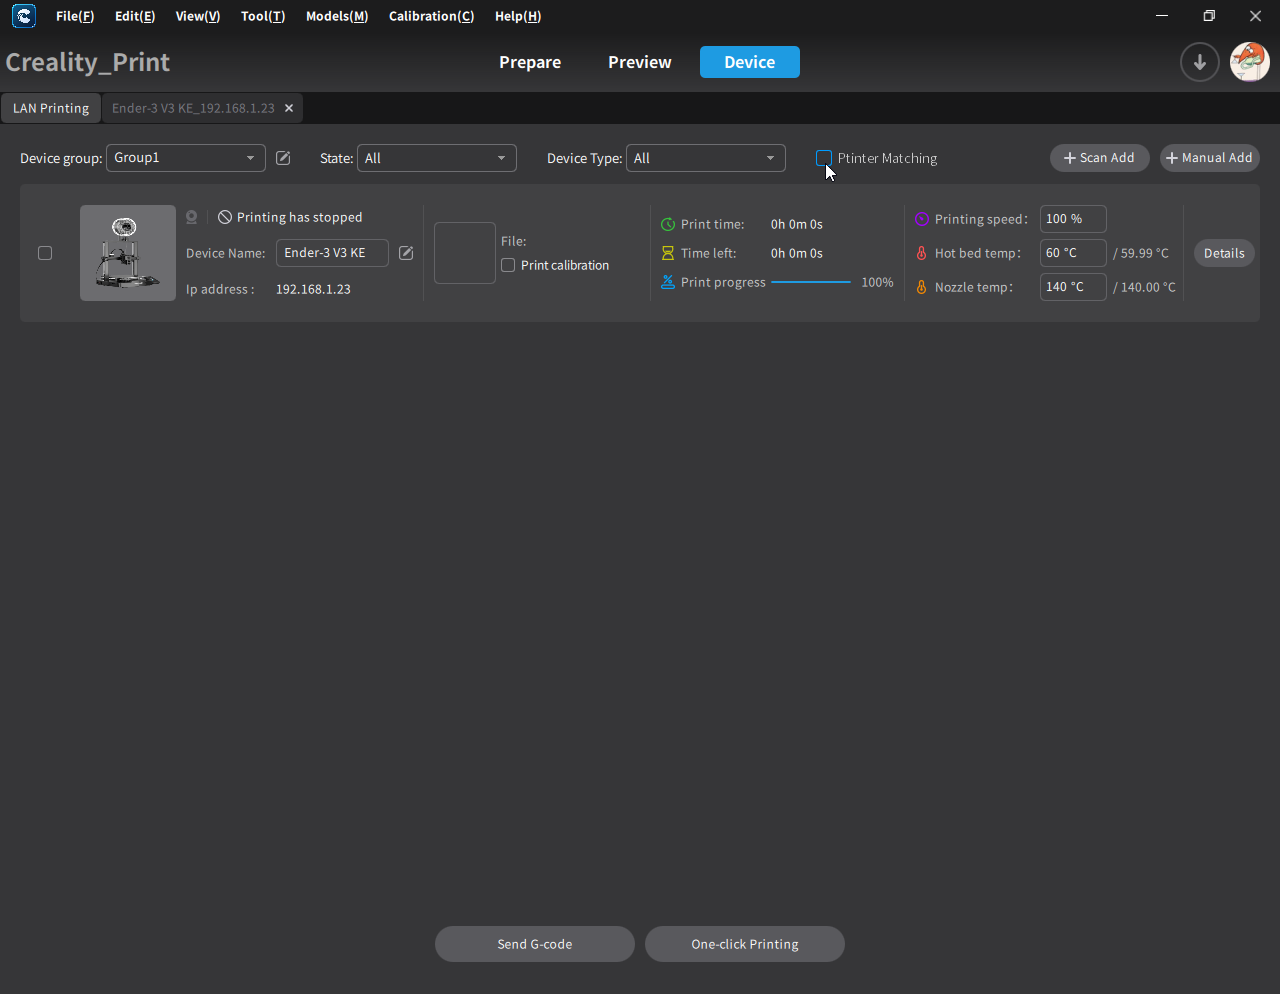
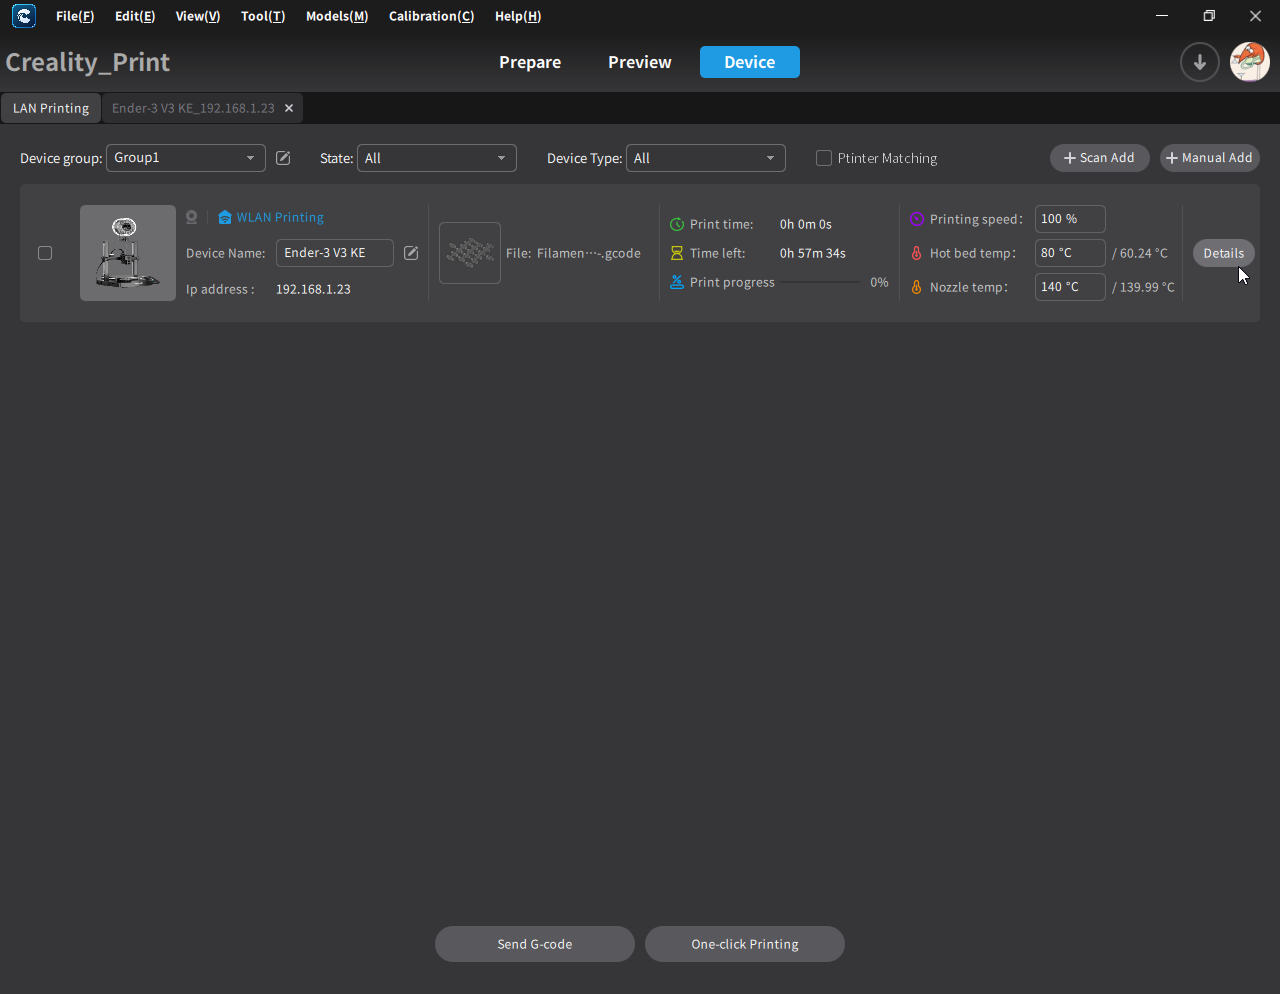
Le fait que j’ai eu à décocher “Ptinter Matching” (typo de traduction?) pour que l’imprimante soit visible dans la liste des imprimantes connectées, est sûrement un petit bug qui sera corrigé dans les prochaines versions du logiciel.
Avec un simple navigateur web, on retrouve une interface de surveillance et de contrôle distant équivalant au logiciel. Il vous faudra saisir une adresse de la forme “http://192.168.1.23” (ici “192.168.1.23” est l’adresse IP de la machine attribué par le serveur DHCP de ma box Internet). On peut retrouver cette adresse IP depuis l’écran de contrôle de la Ender3 V3 KE, dans l’onglet “Network” / “Réseau” de l’imprimante.

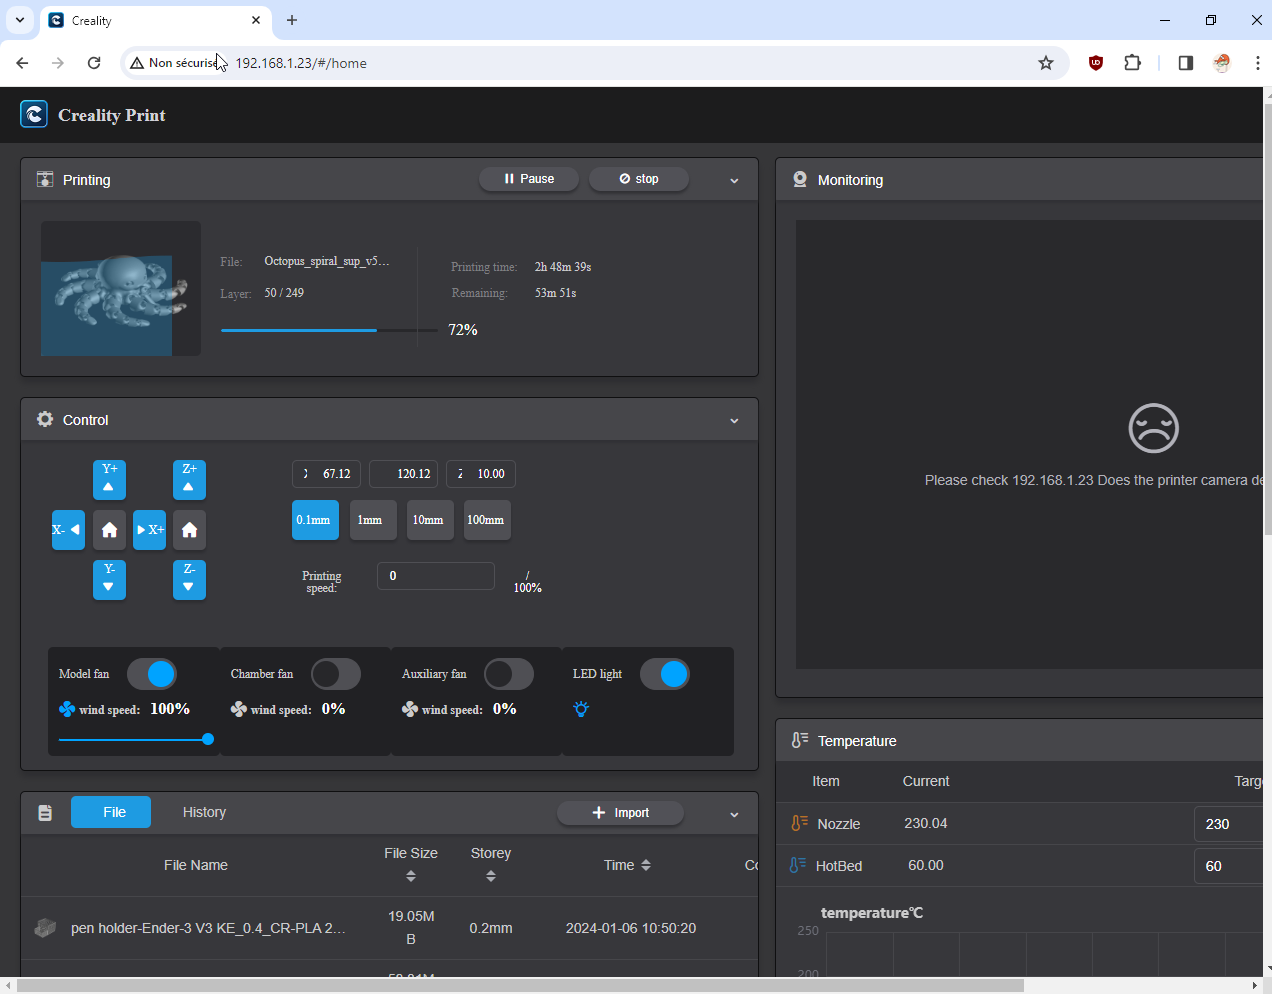
Il semble que quelques options (“Chamber fan”, “Auxiliary fan”, “LED light”) non disponibles avec cette machine soient visibles sur l’interface web mais elles n’ont pas d’impact si on les utilise.
L’interface web qui semble basée sur “Fluidd”est épurée et limitée dans la version proposée par Creality :
- Il n’y a pas de champs pour saisir et envoyer de commande g-code ni de console des retours du firmware.
- Il n’est pas possible d’accéder et de modifier les fichiers de configuration Klipper.
- Il n’est pas possible de directement télécharger les fichiers de logs.
Via l’écran Nebula Pad, il est possible de demander un export des logs vers une clé USB mais on obtient un fichier archive “.7z” protégé par un mot de passe qui n’est pas communiqué par Creality.
Ces limitations faciliteront la prise en main pour de nouveaux utilisateurs. Avec la version 1.1.0.12 du firmware de l’imprimante, il est possible pour un utilisateur expérimenté, après avoir activer le mode “root”, d’installer l’interface Fluidd non limitée et/ou l’interface Mainsail.
N’ayant pas un smartphone suffisamment récent (version Android incompatible) pour installer l’application mobile Creality Cloud, je n’ai pas pu tester l’interface de l’app ni associer ma machine à mon compte utilisateur Creality Cloud.
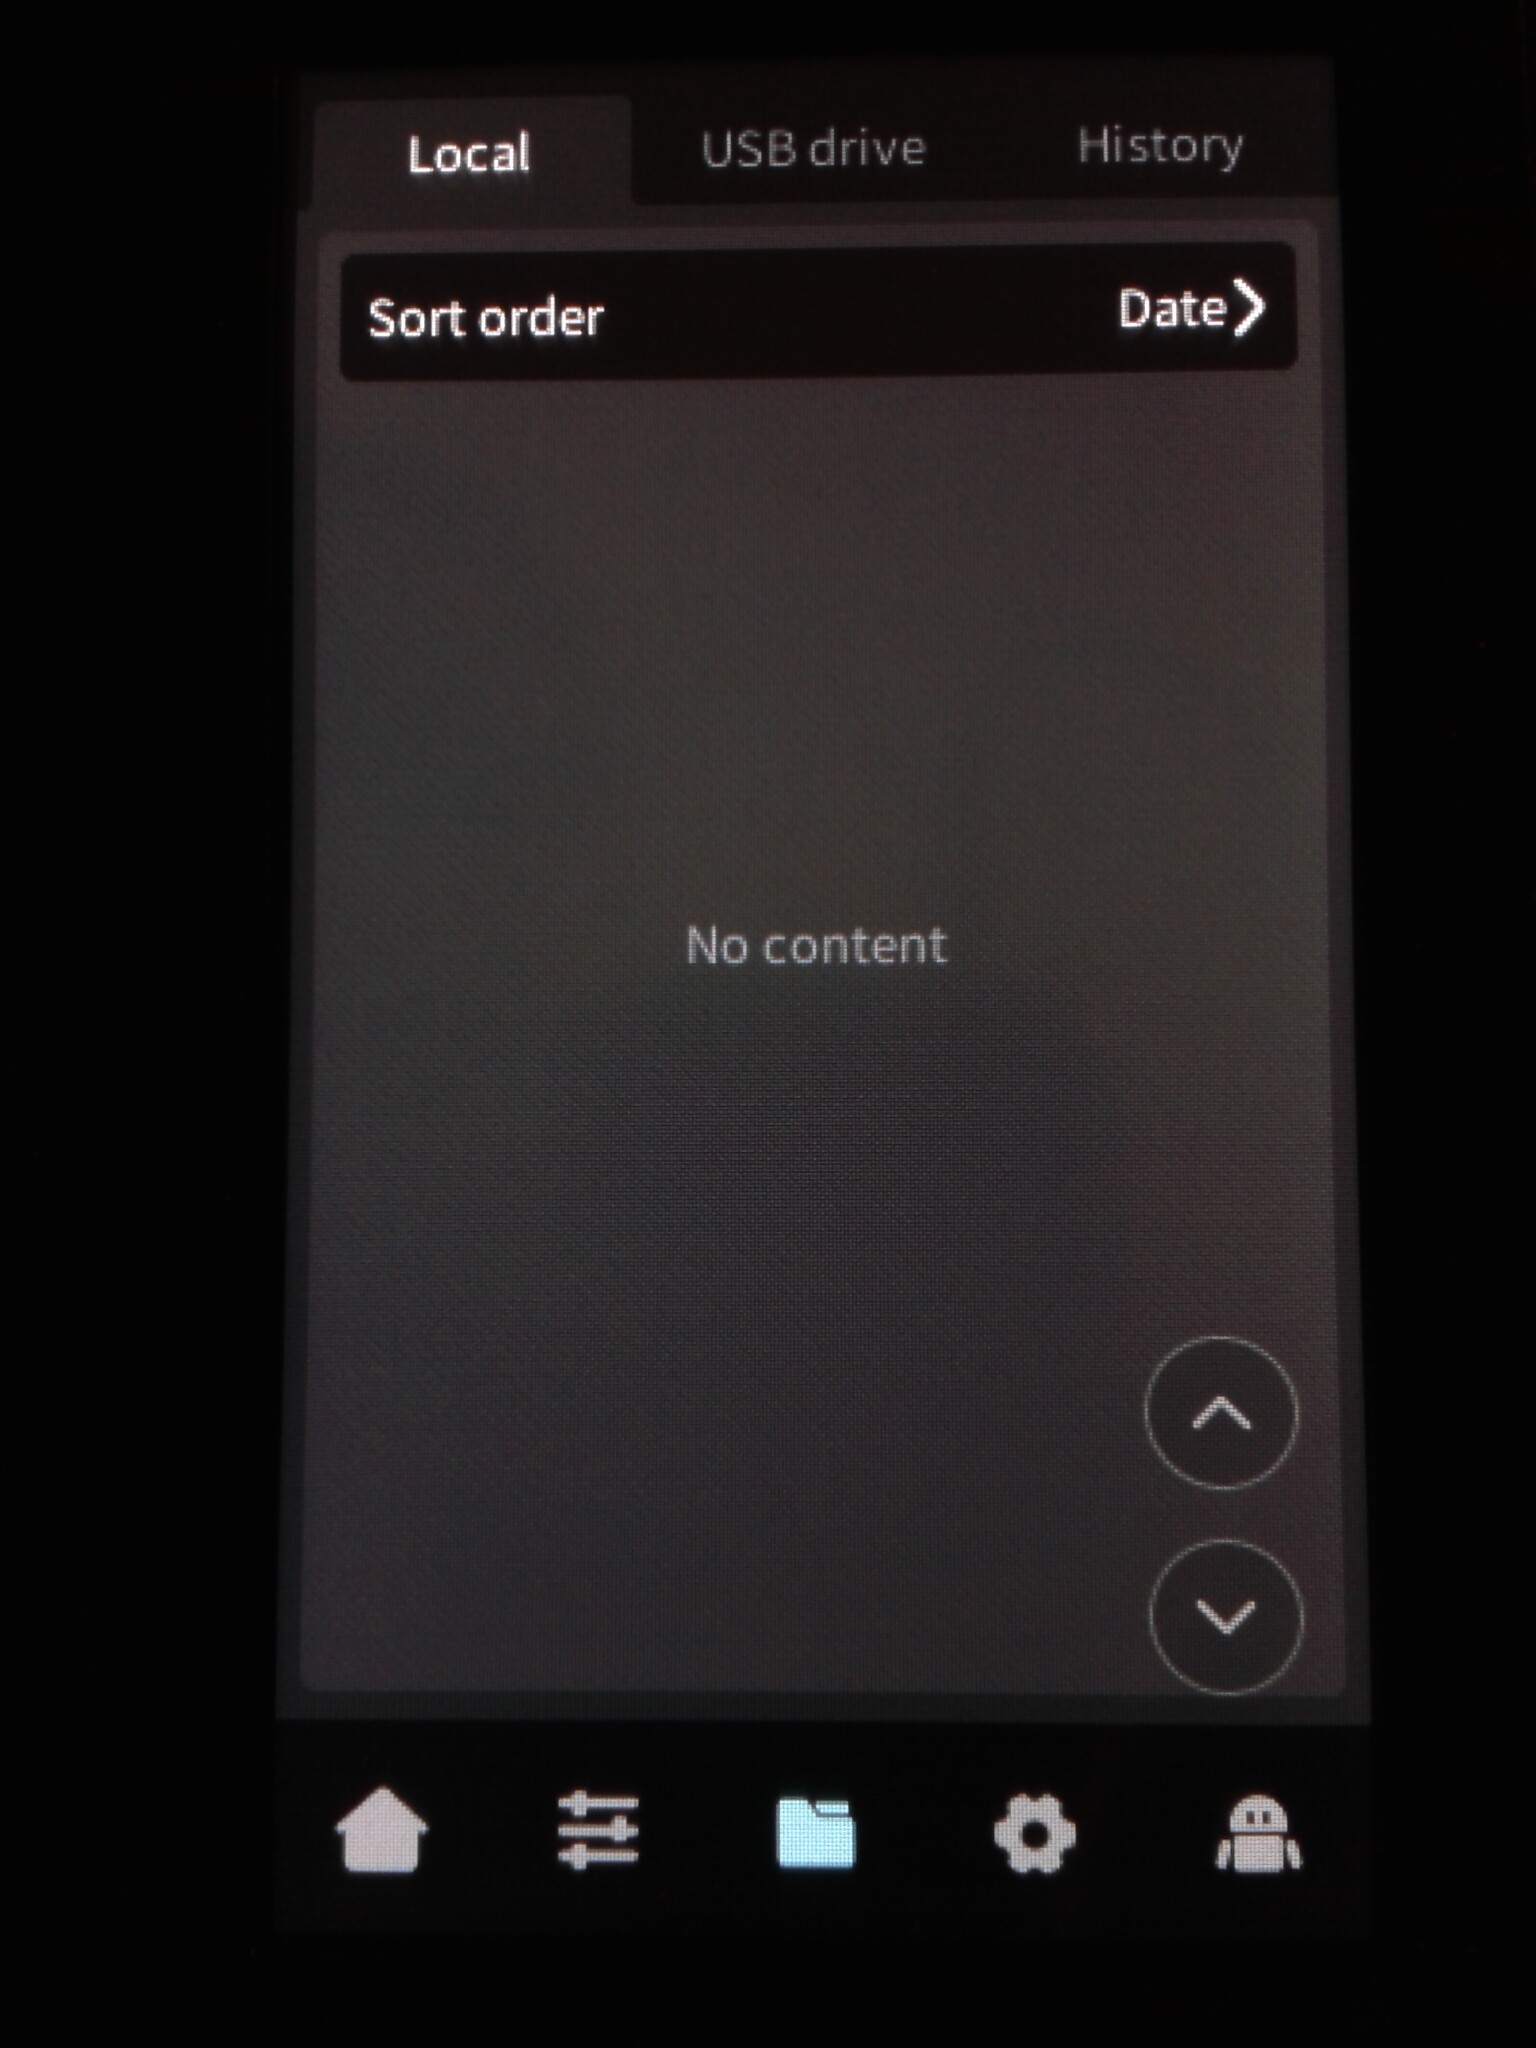
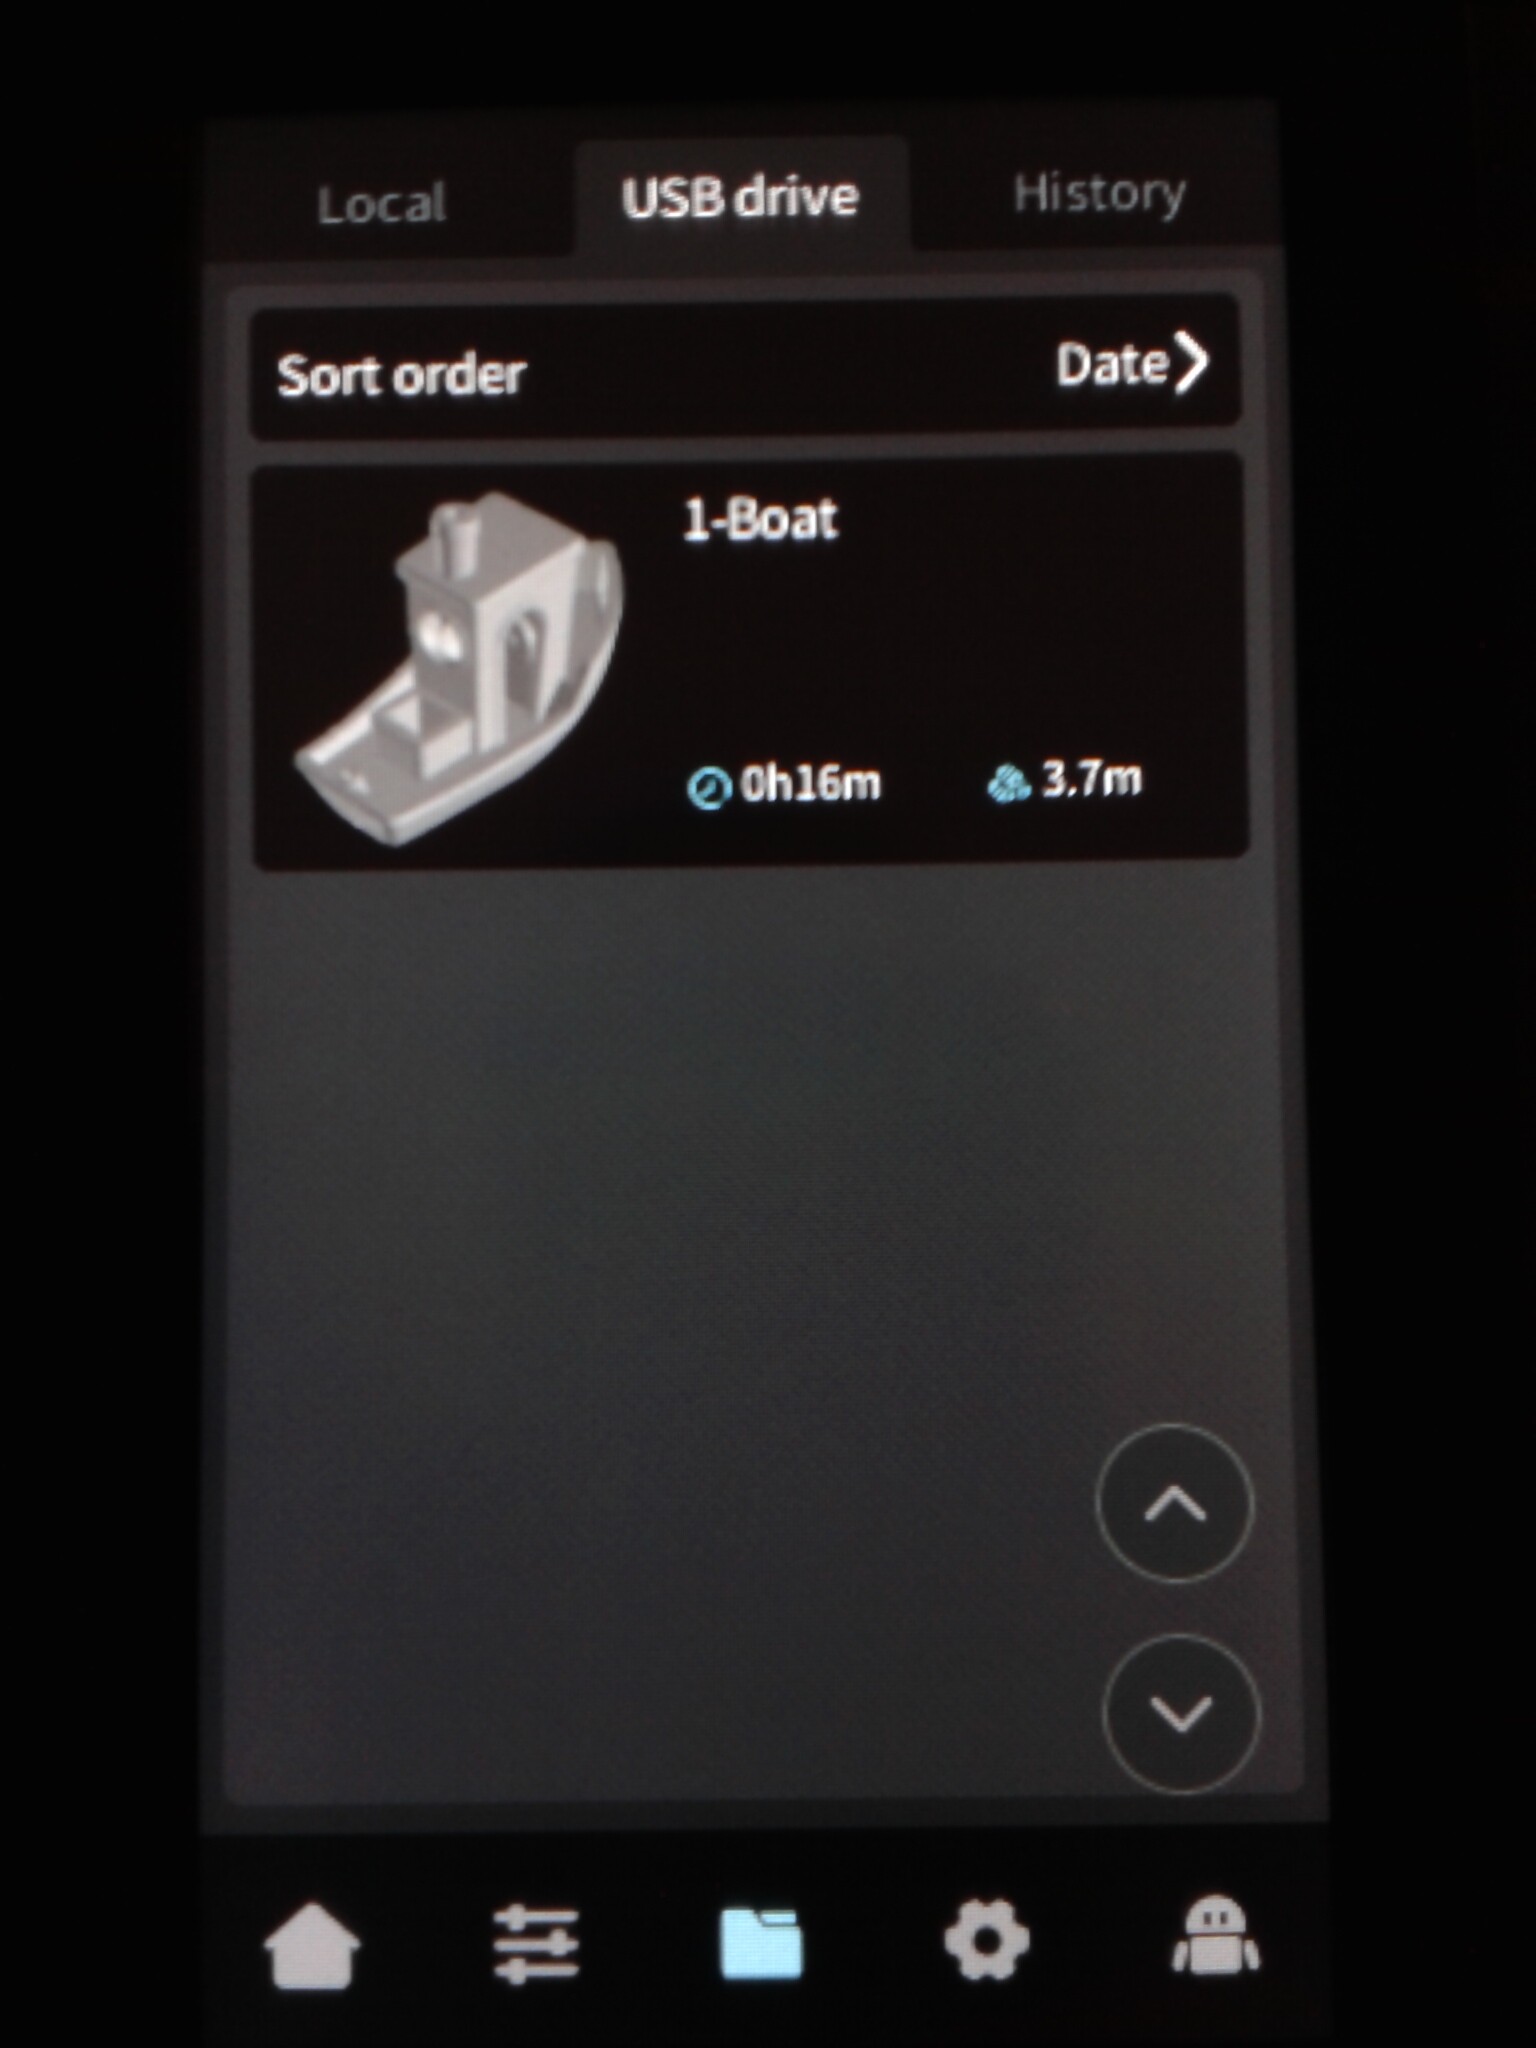
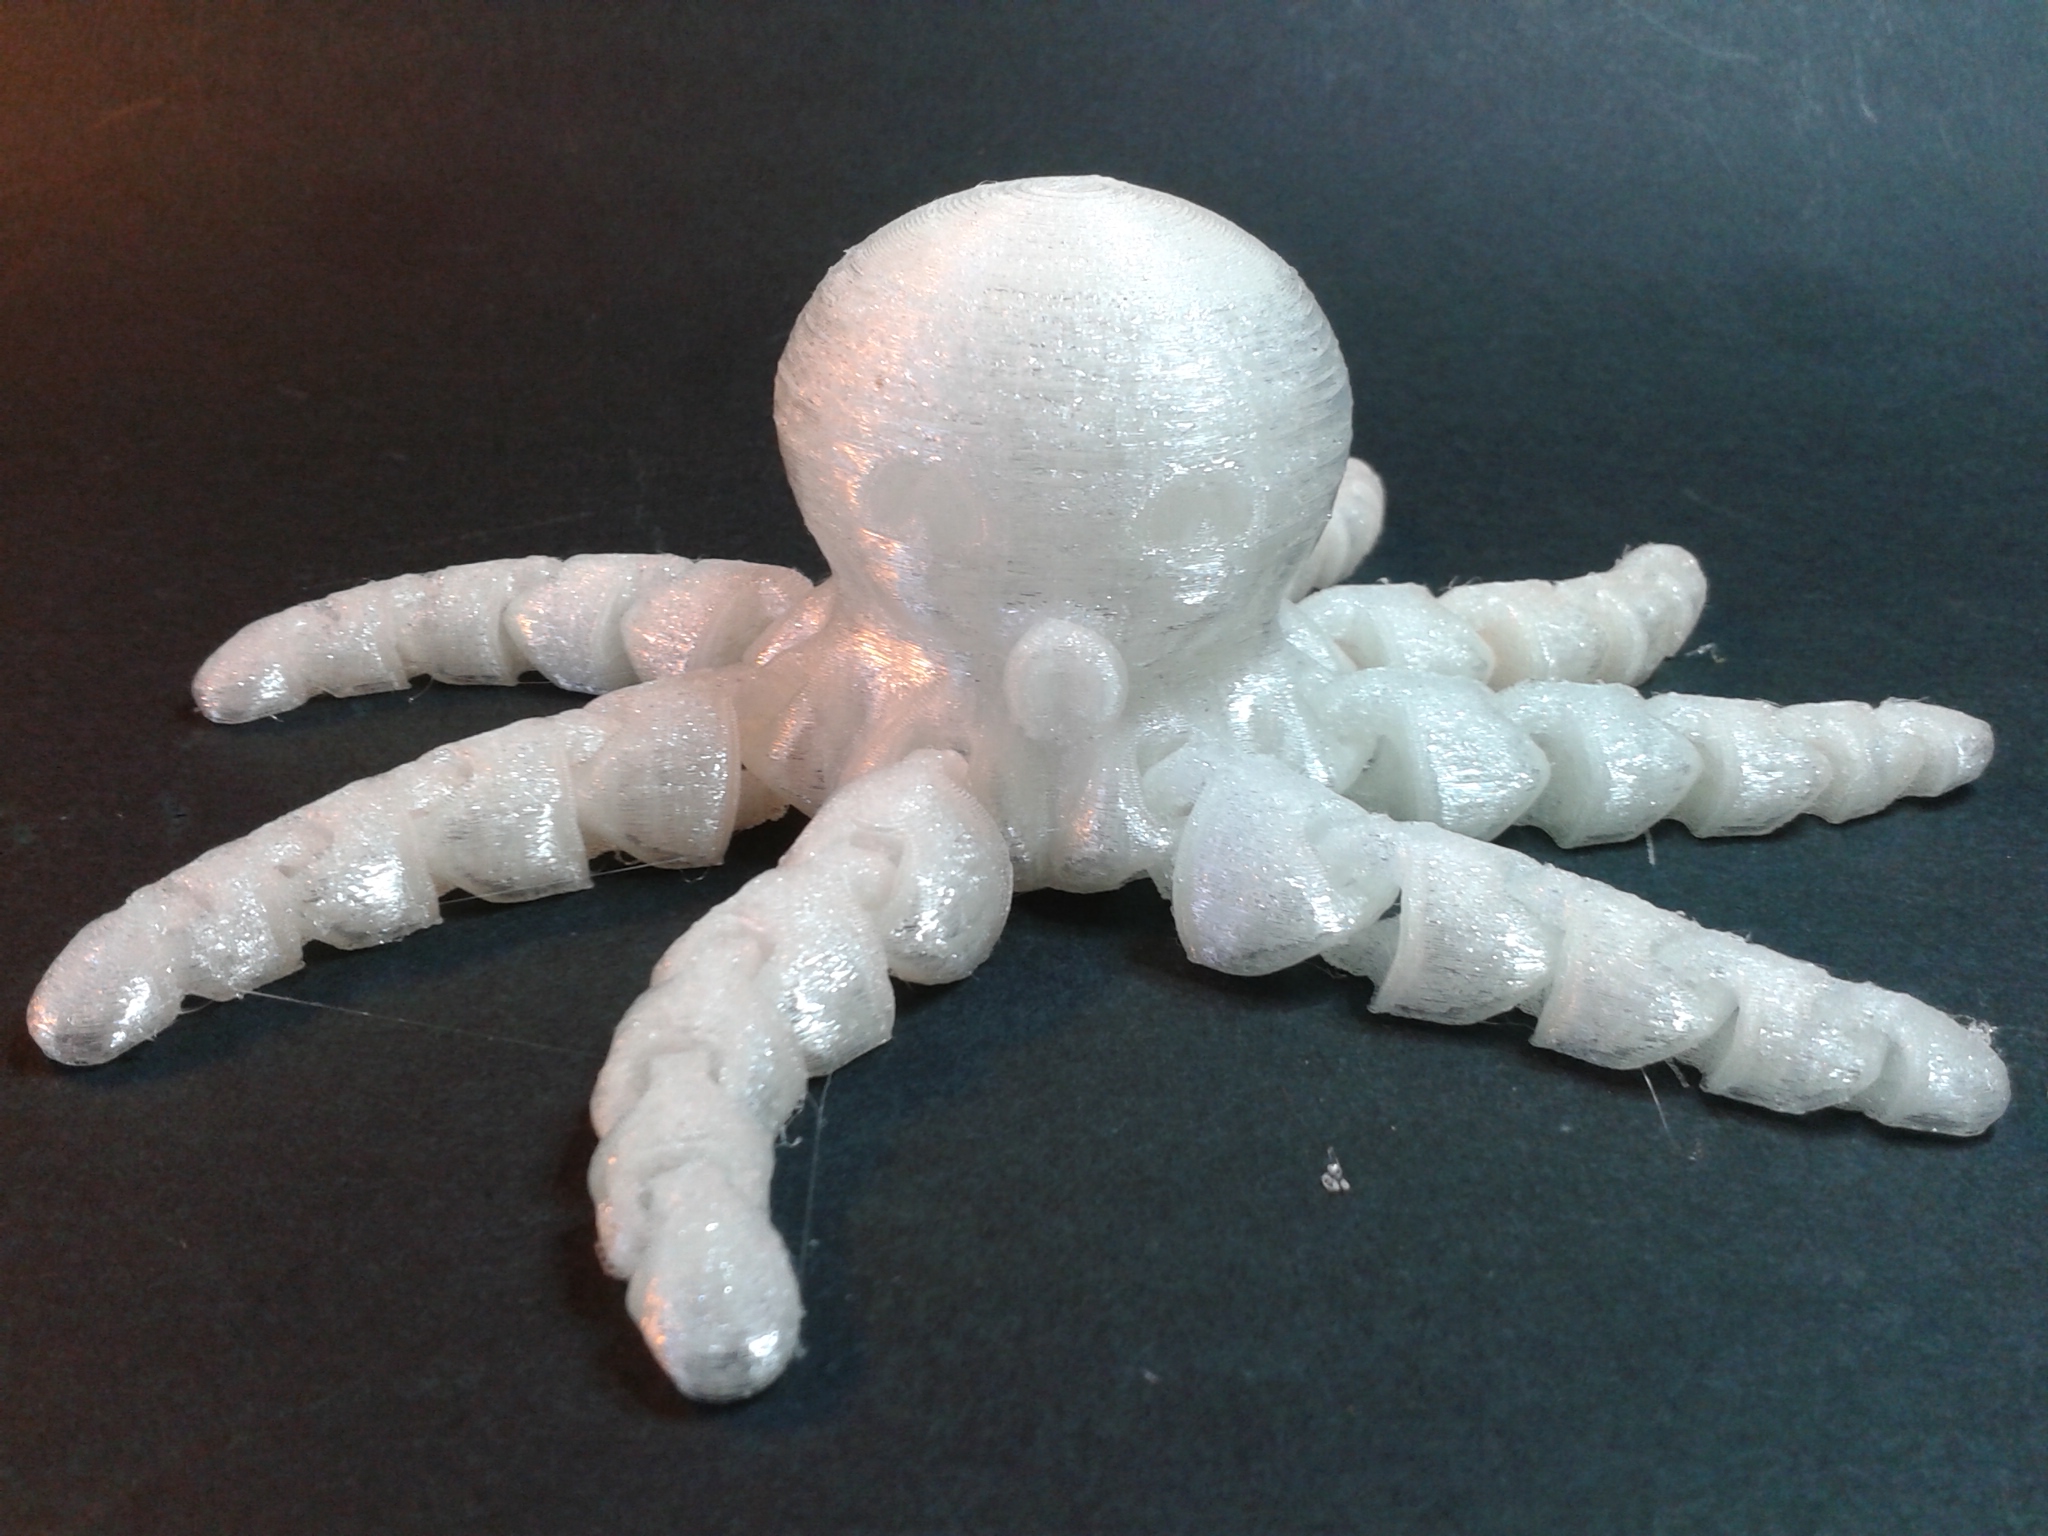
Acheter la Creality Ender-3 V3 KEImpression de test (PLA)
Sur la clé USB fournie se trouve un seul fichier d’impression de test, nommé “1-Boat.gcode”.
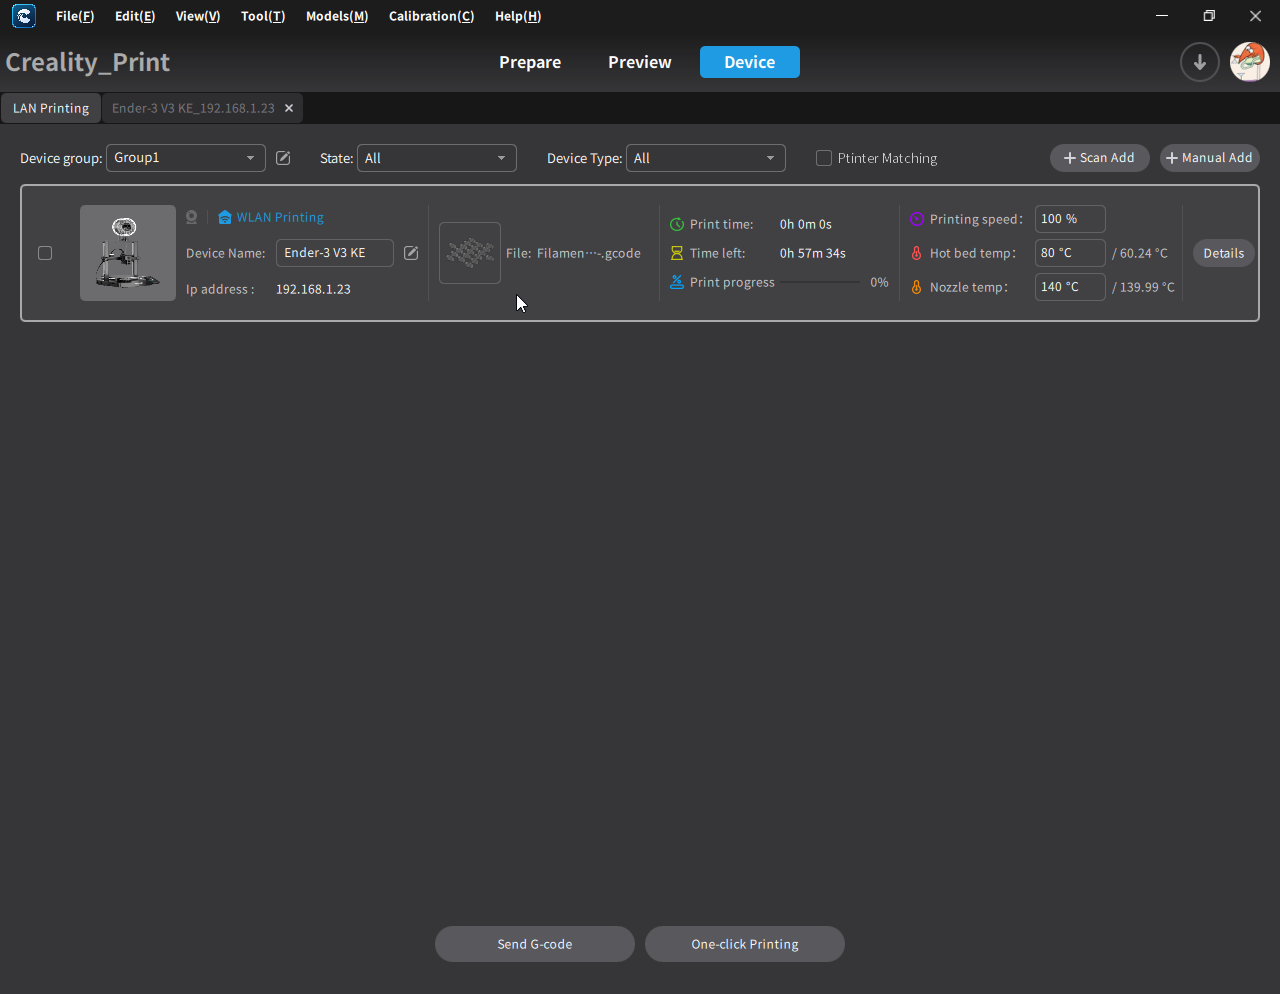
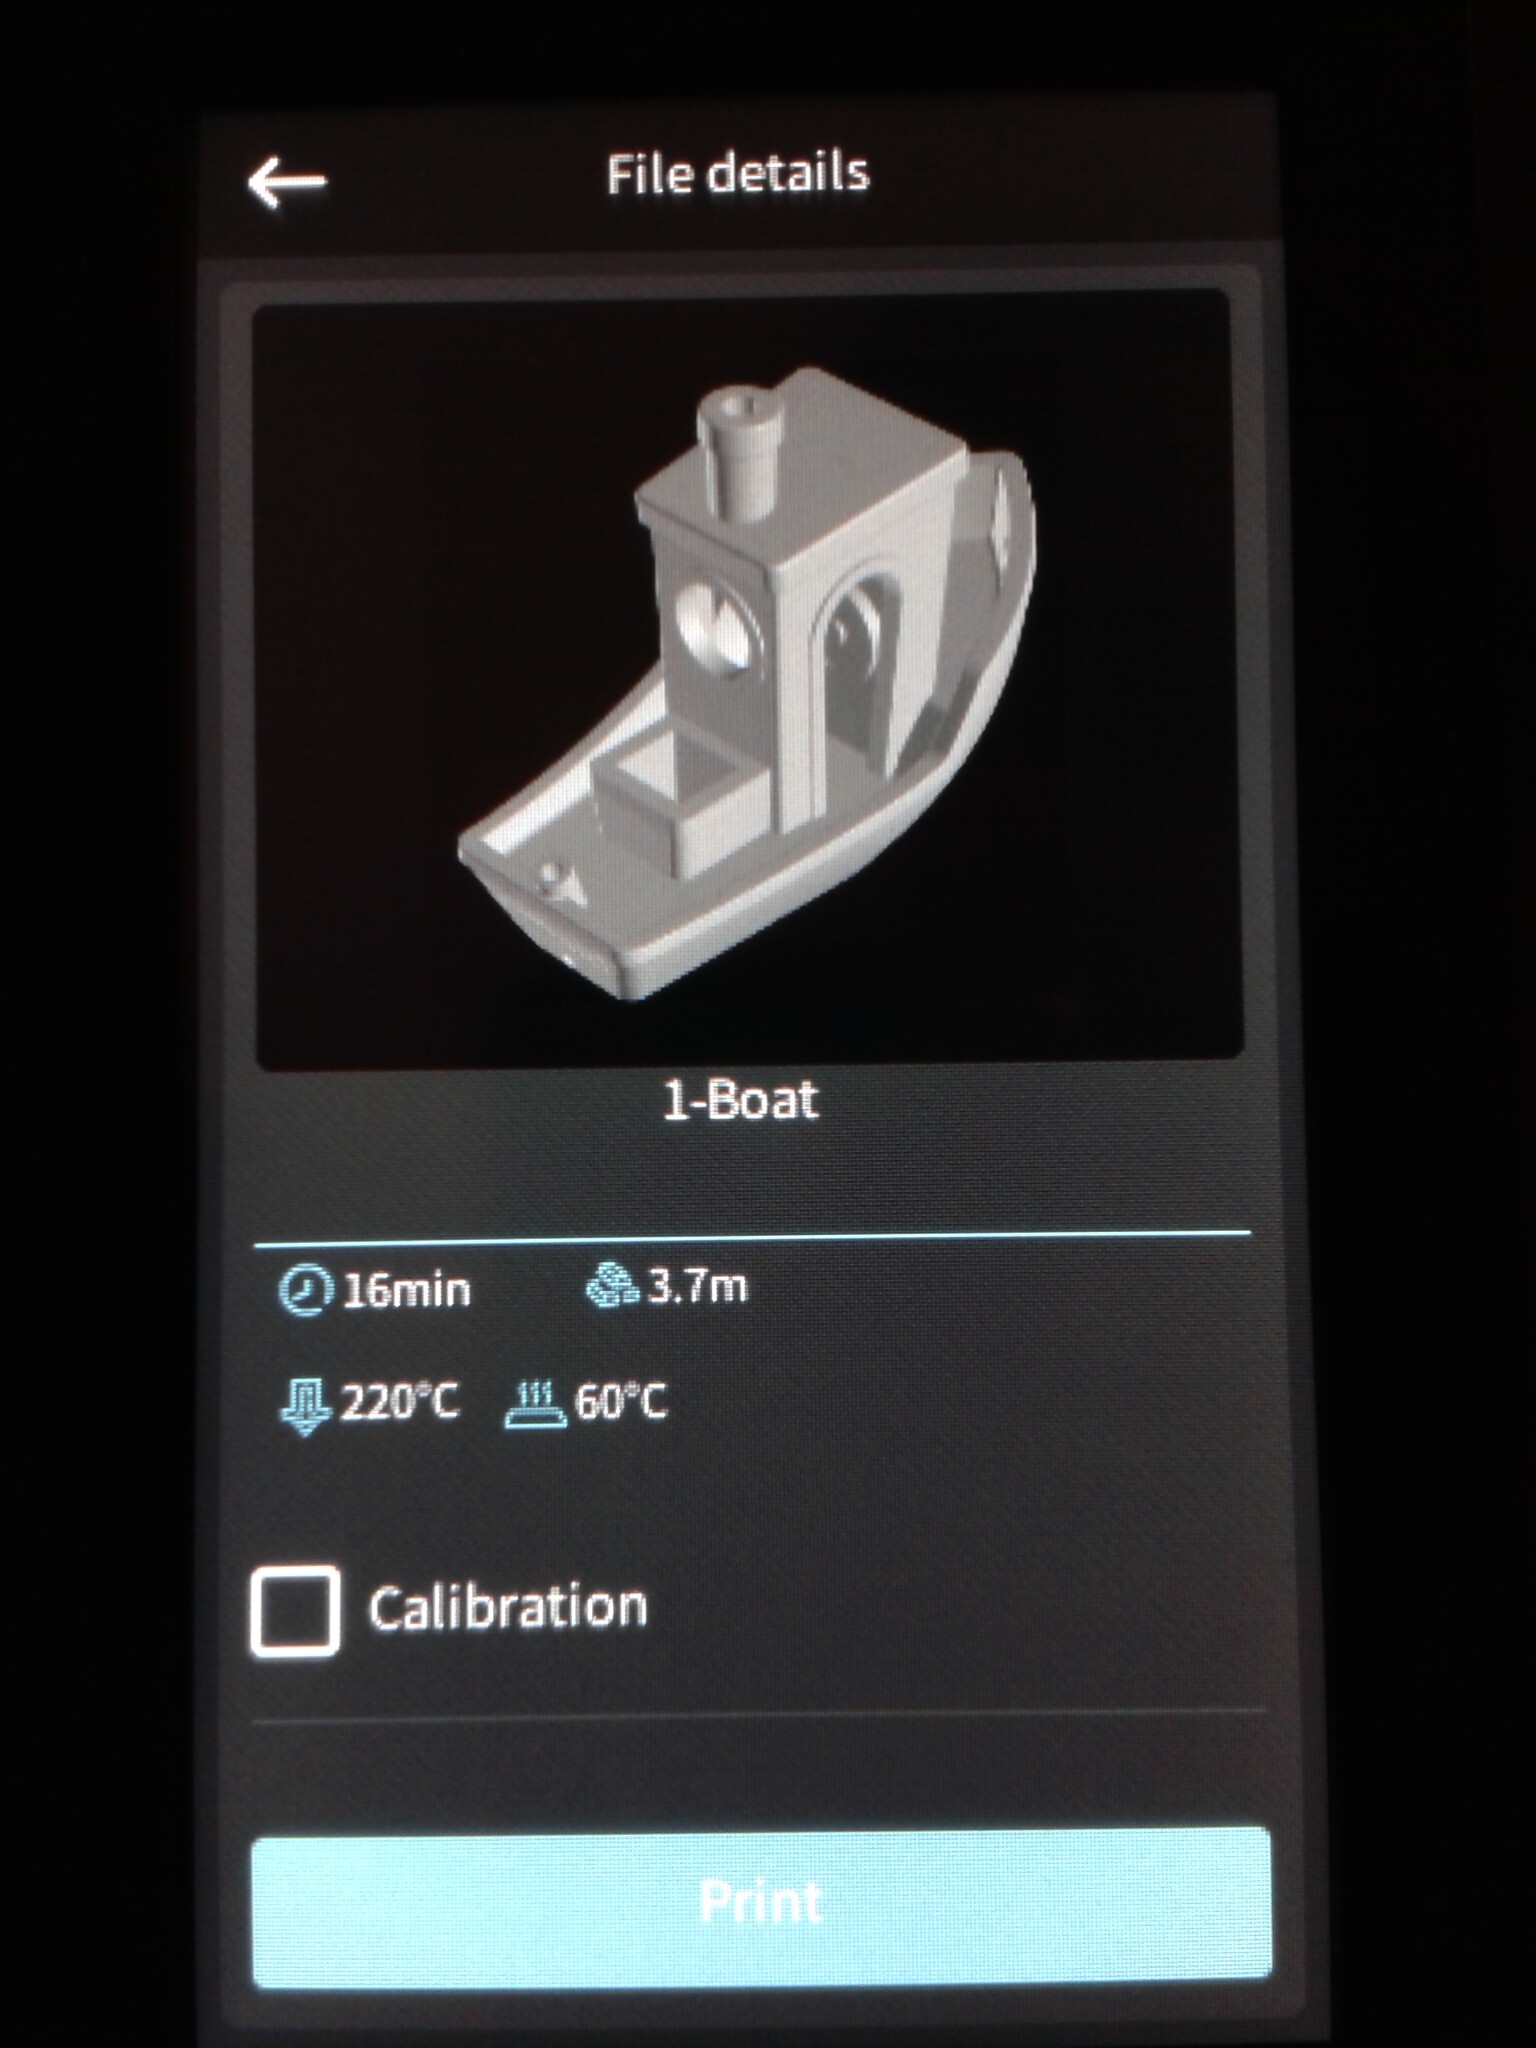
Lancement de l’impression via l’écran Nebula Pad après y avoir inséré la clé USB. J’ai décoché “Calibration” pour ne pas avoir de nouveau la détermination automatique du Z-Offset suivie du palpage complet du plateau. Un appui sur “Print” de l’écran va copier le fichier gcode dans la mémoire interne eMMC de 8 Go du Pad et démarre l’impression.
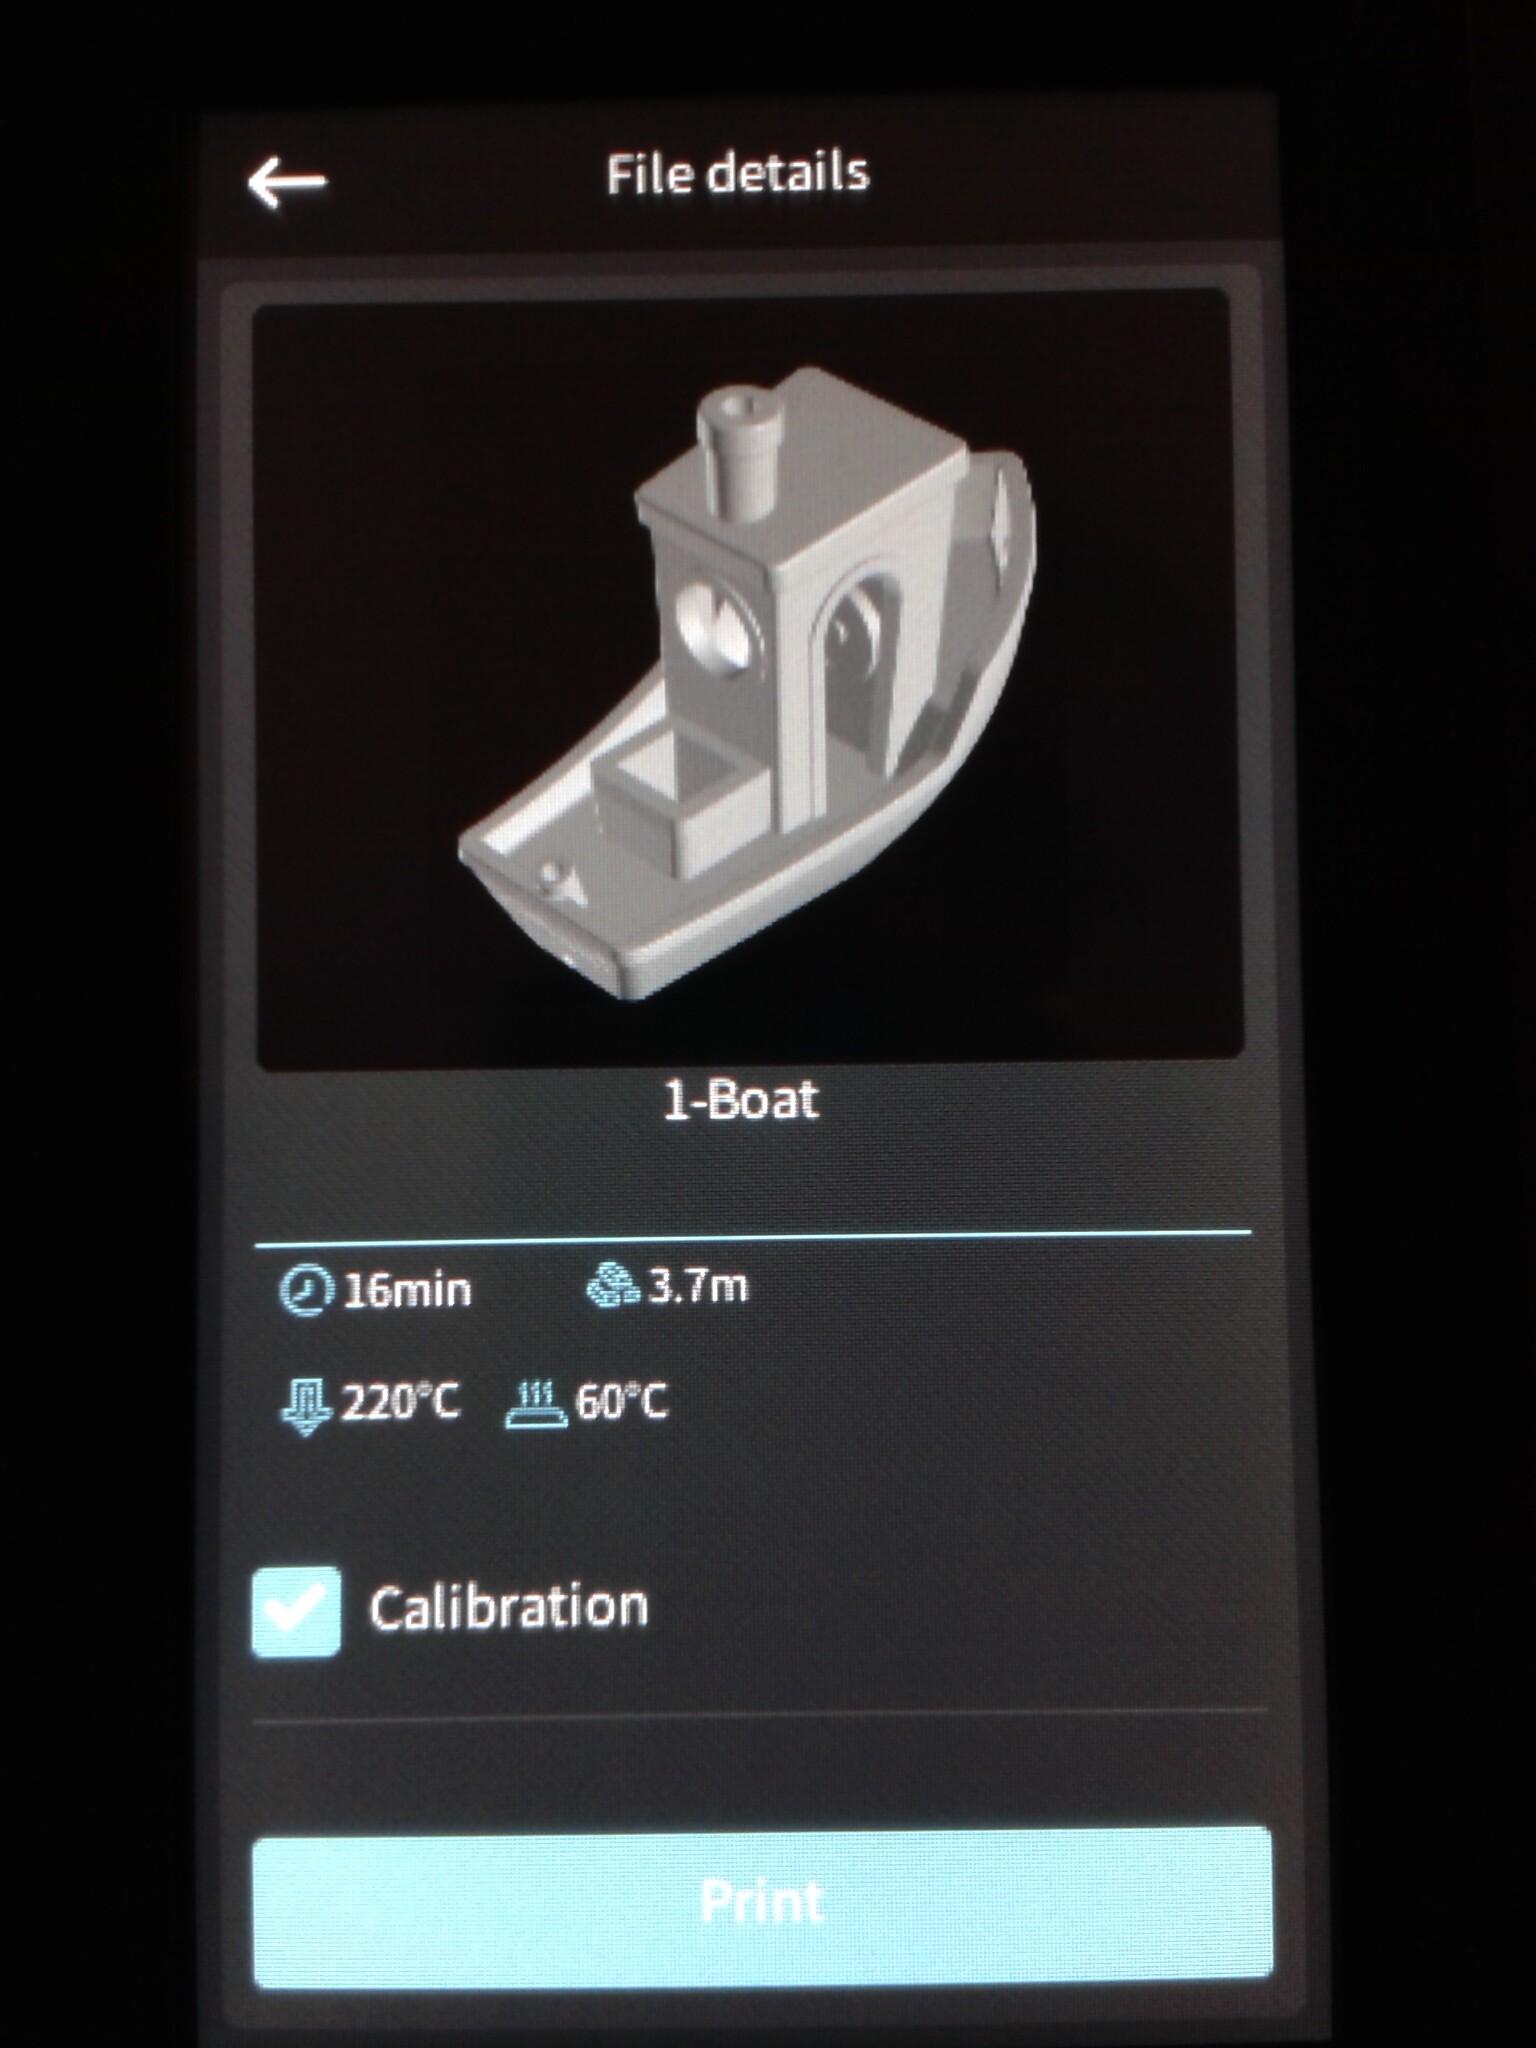
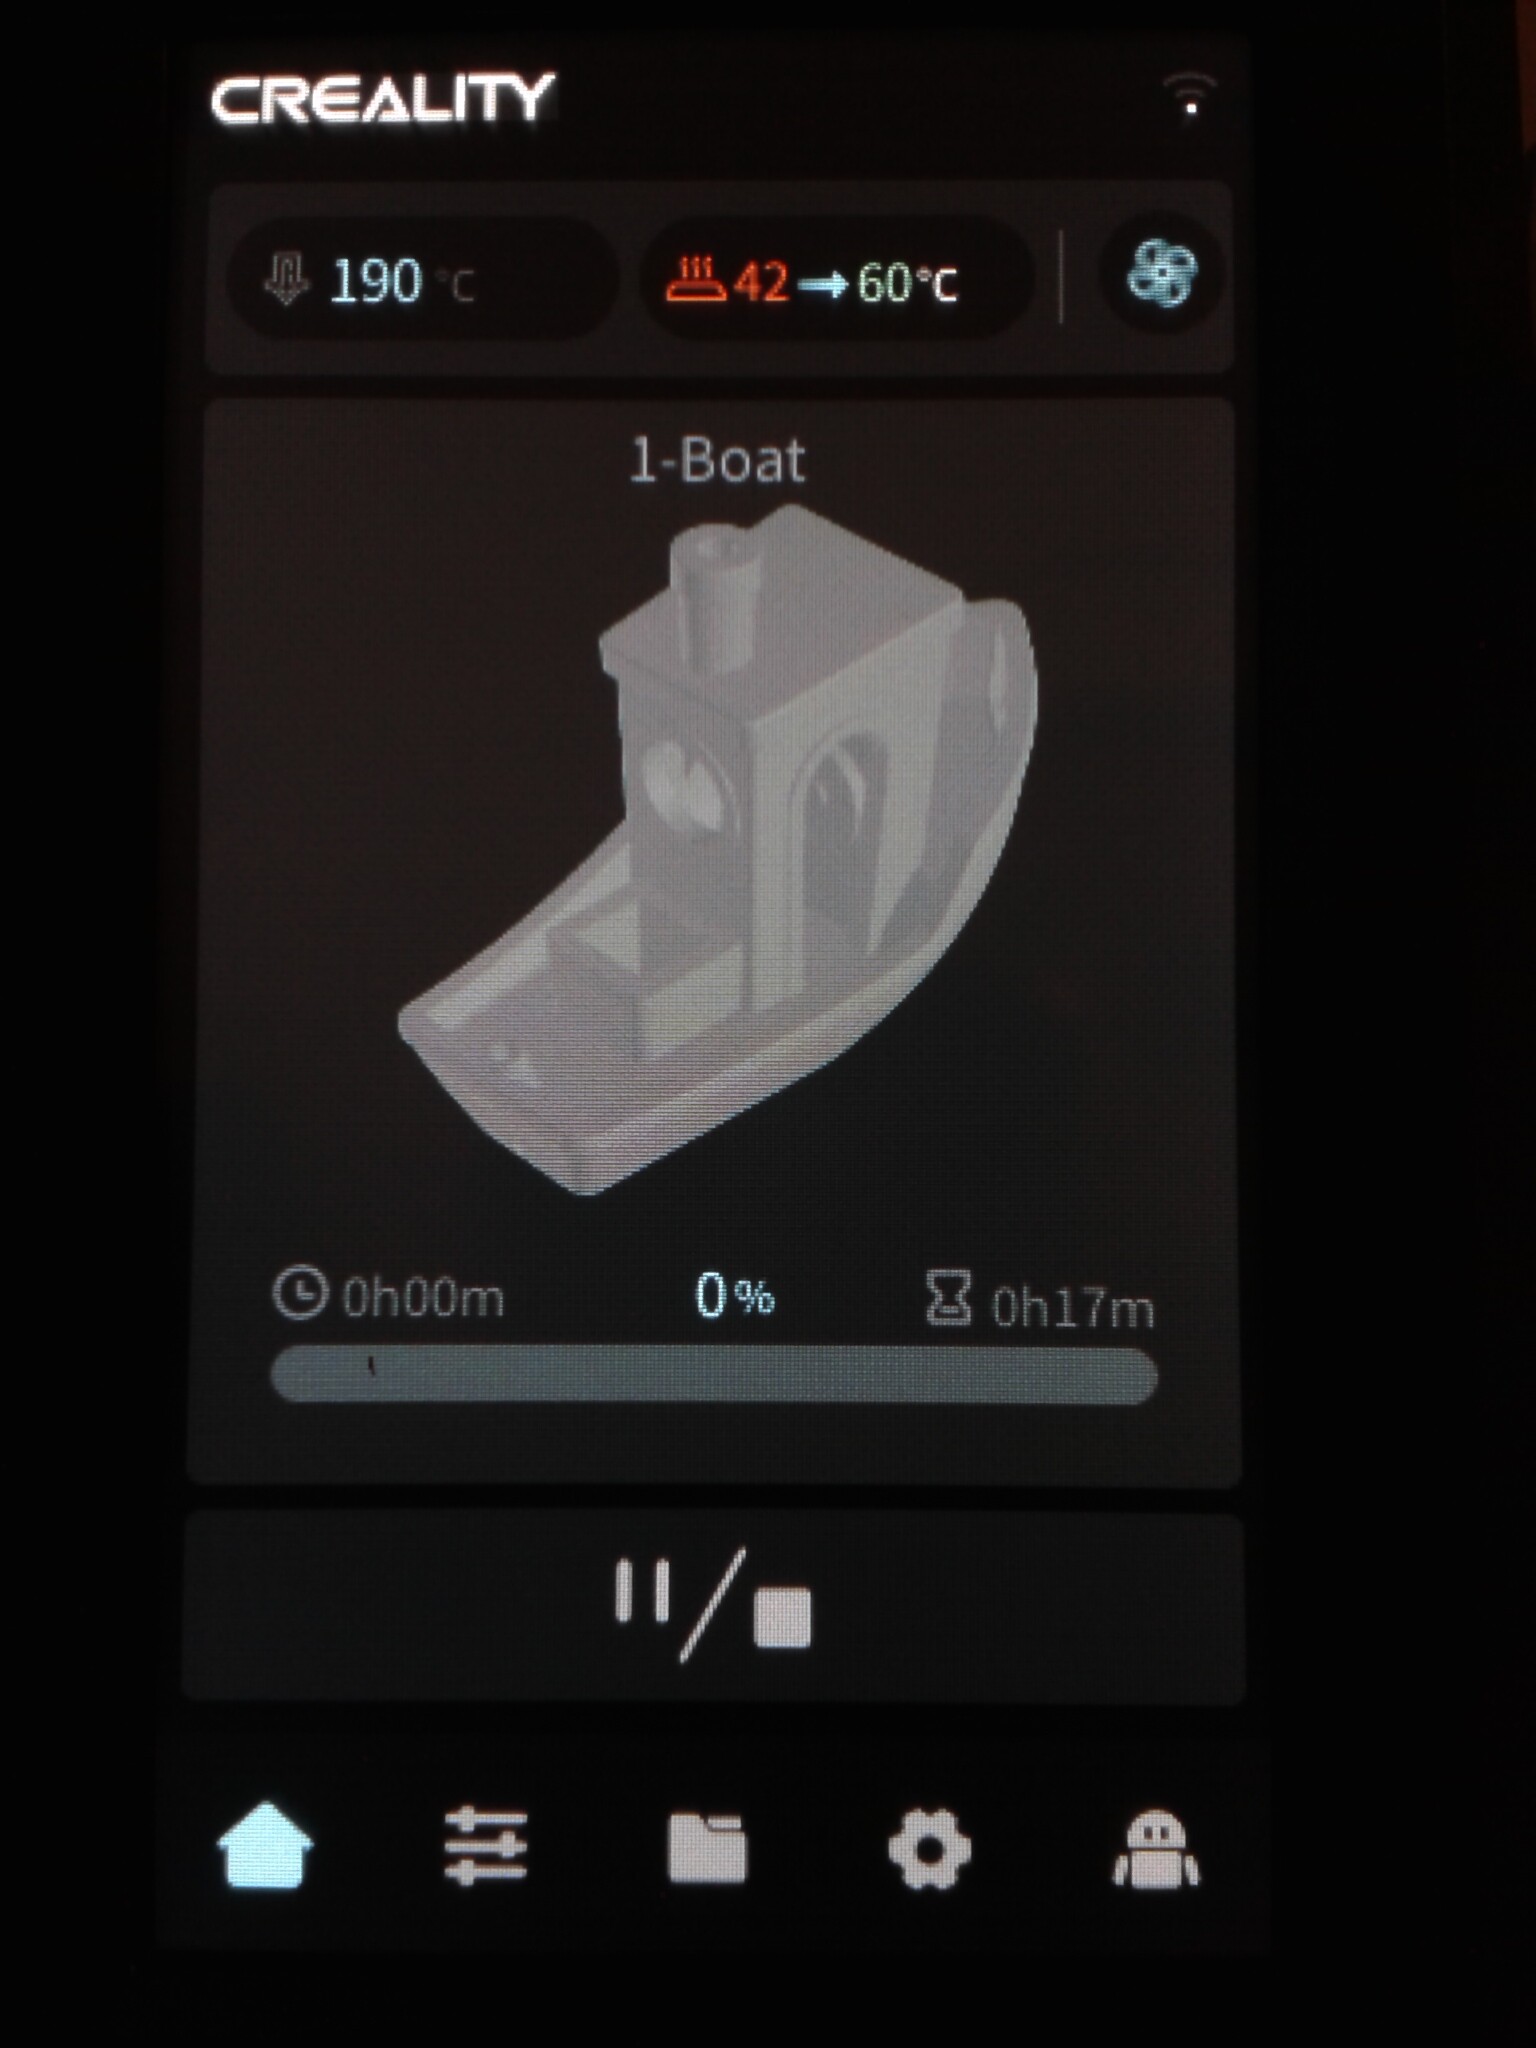
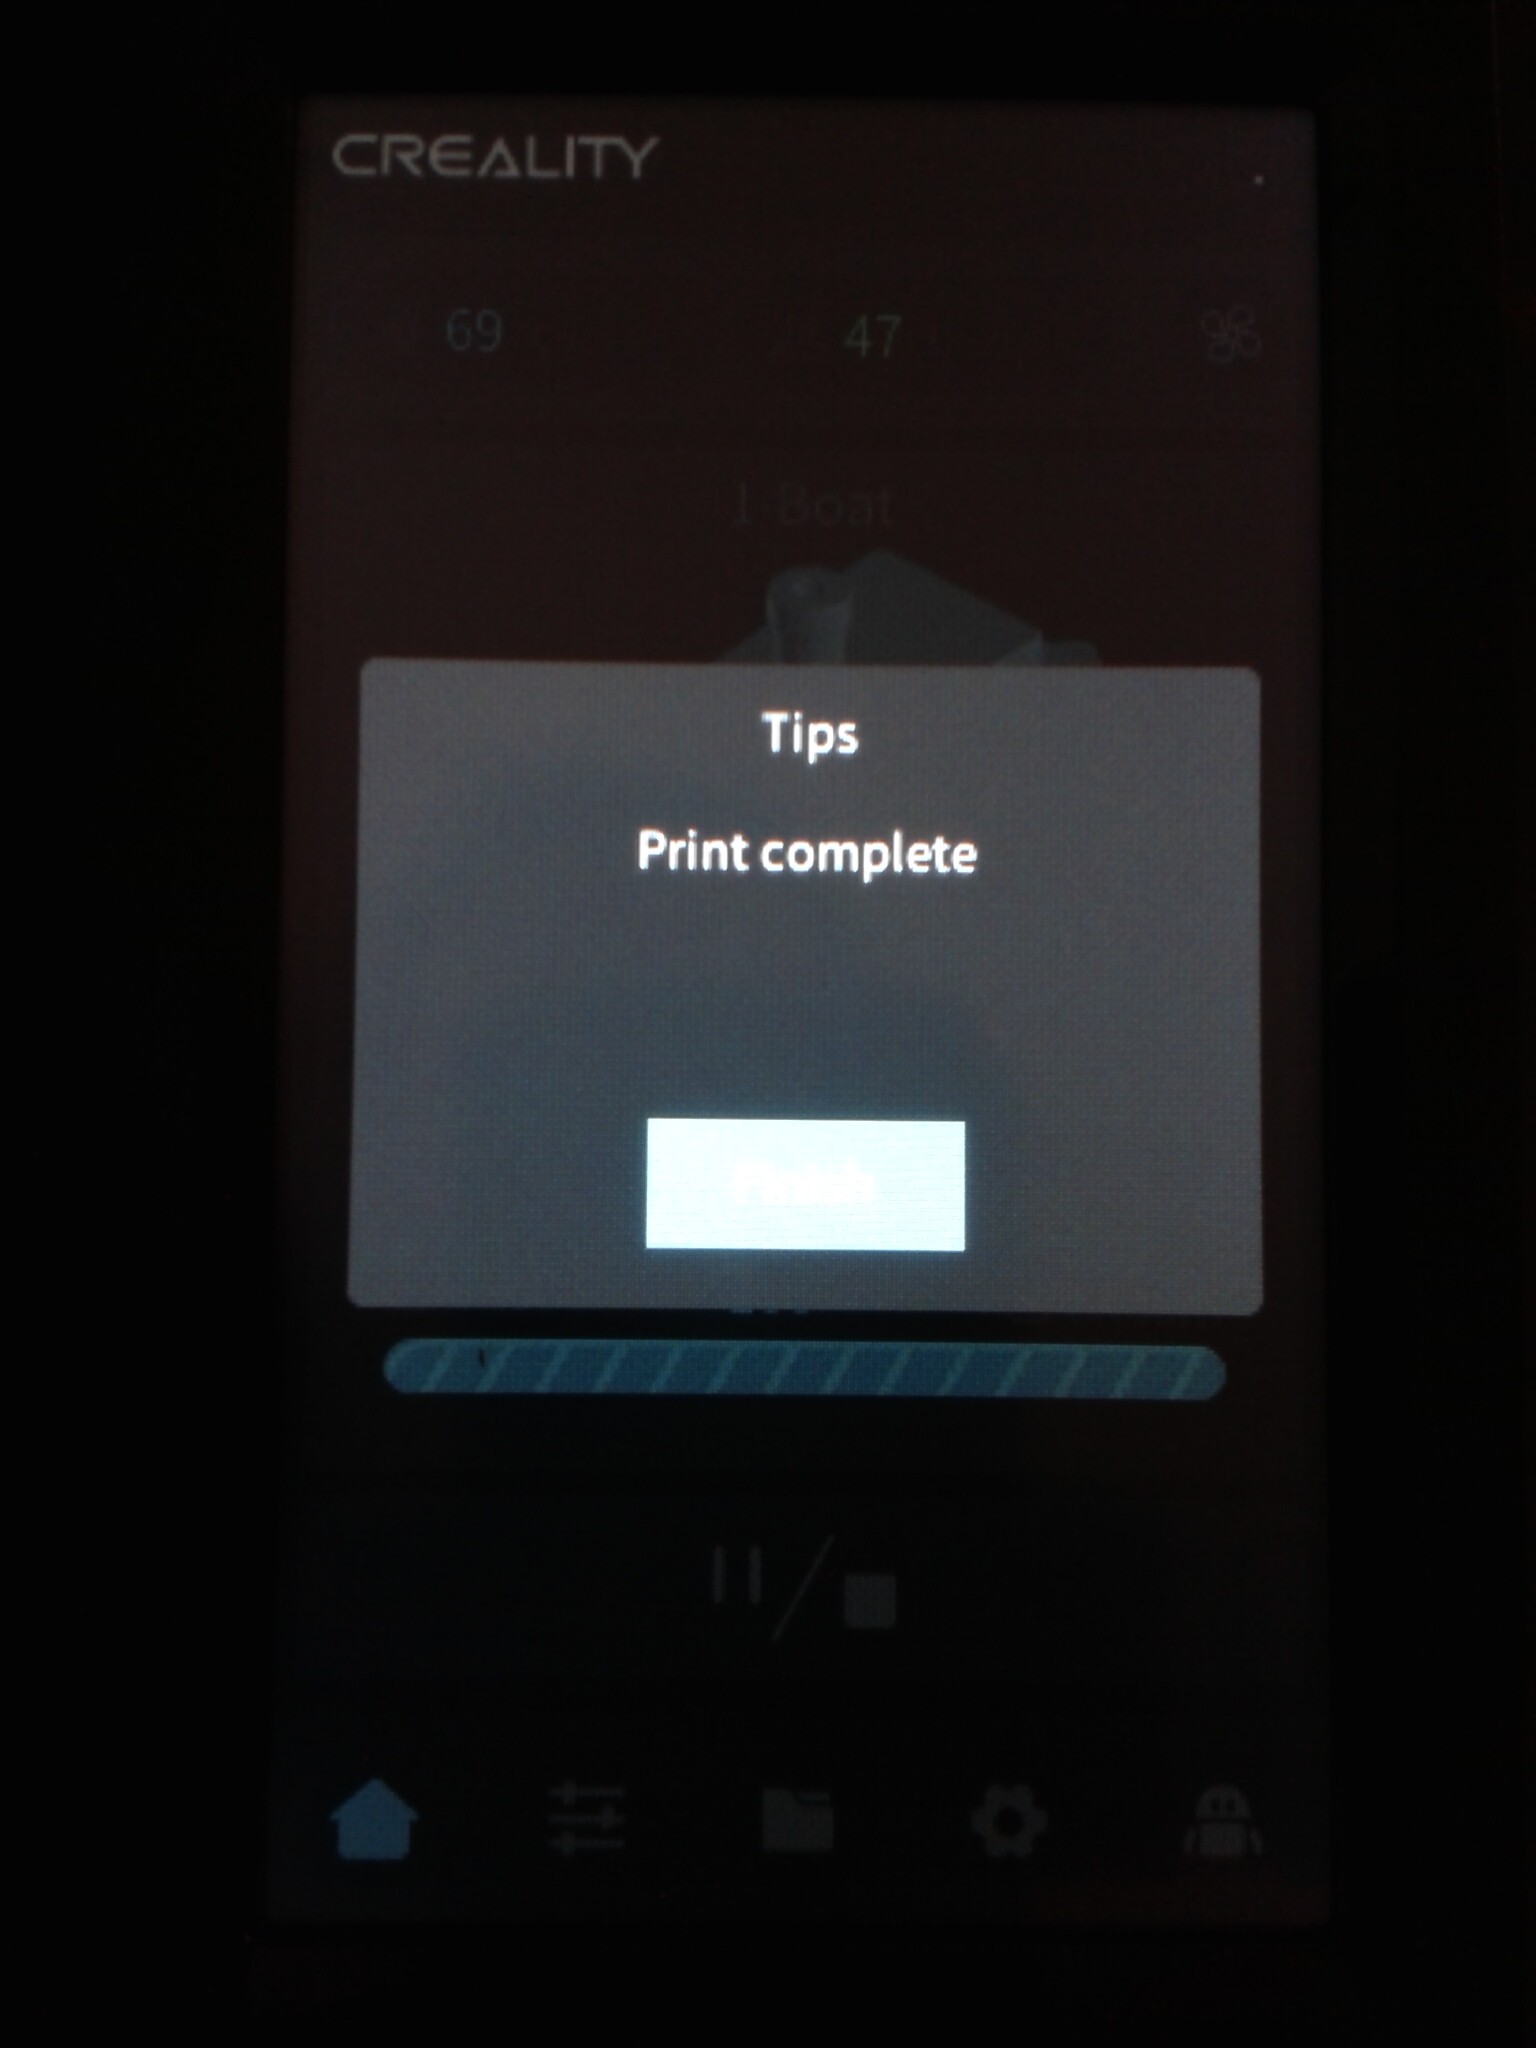
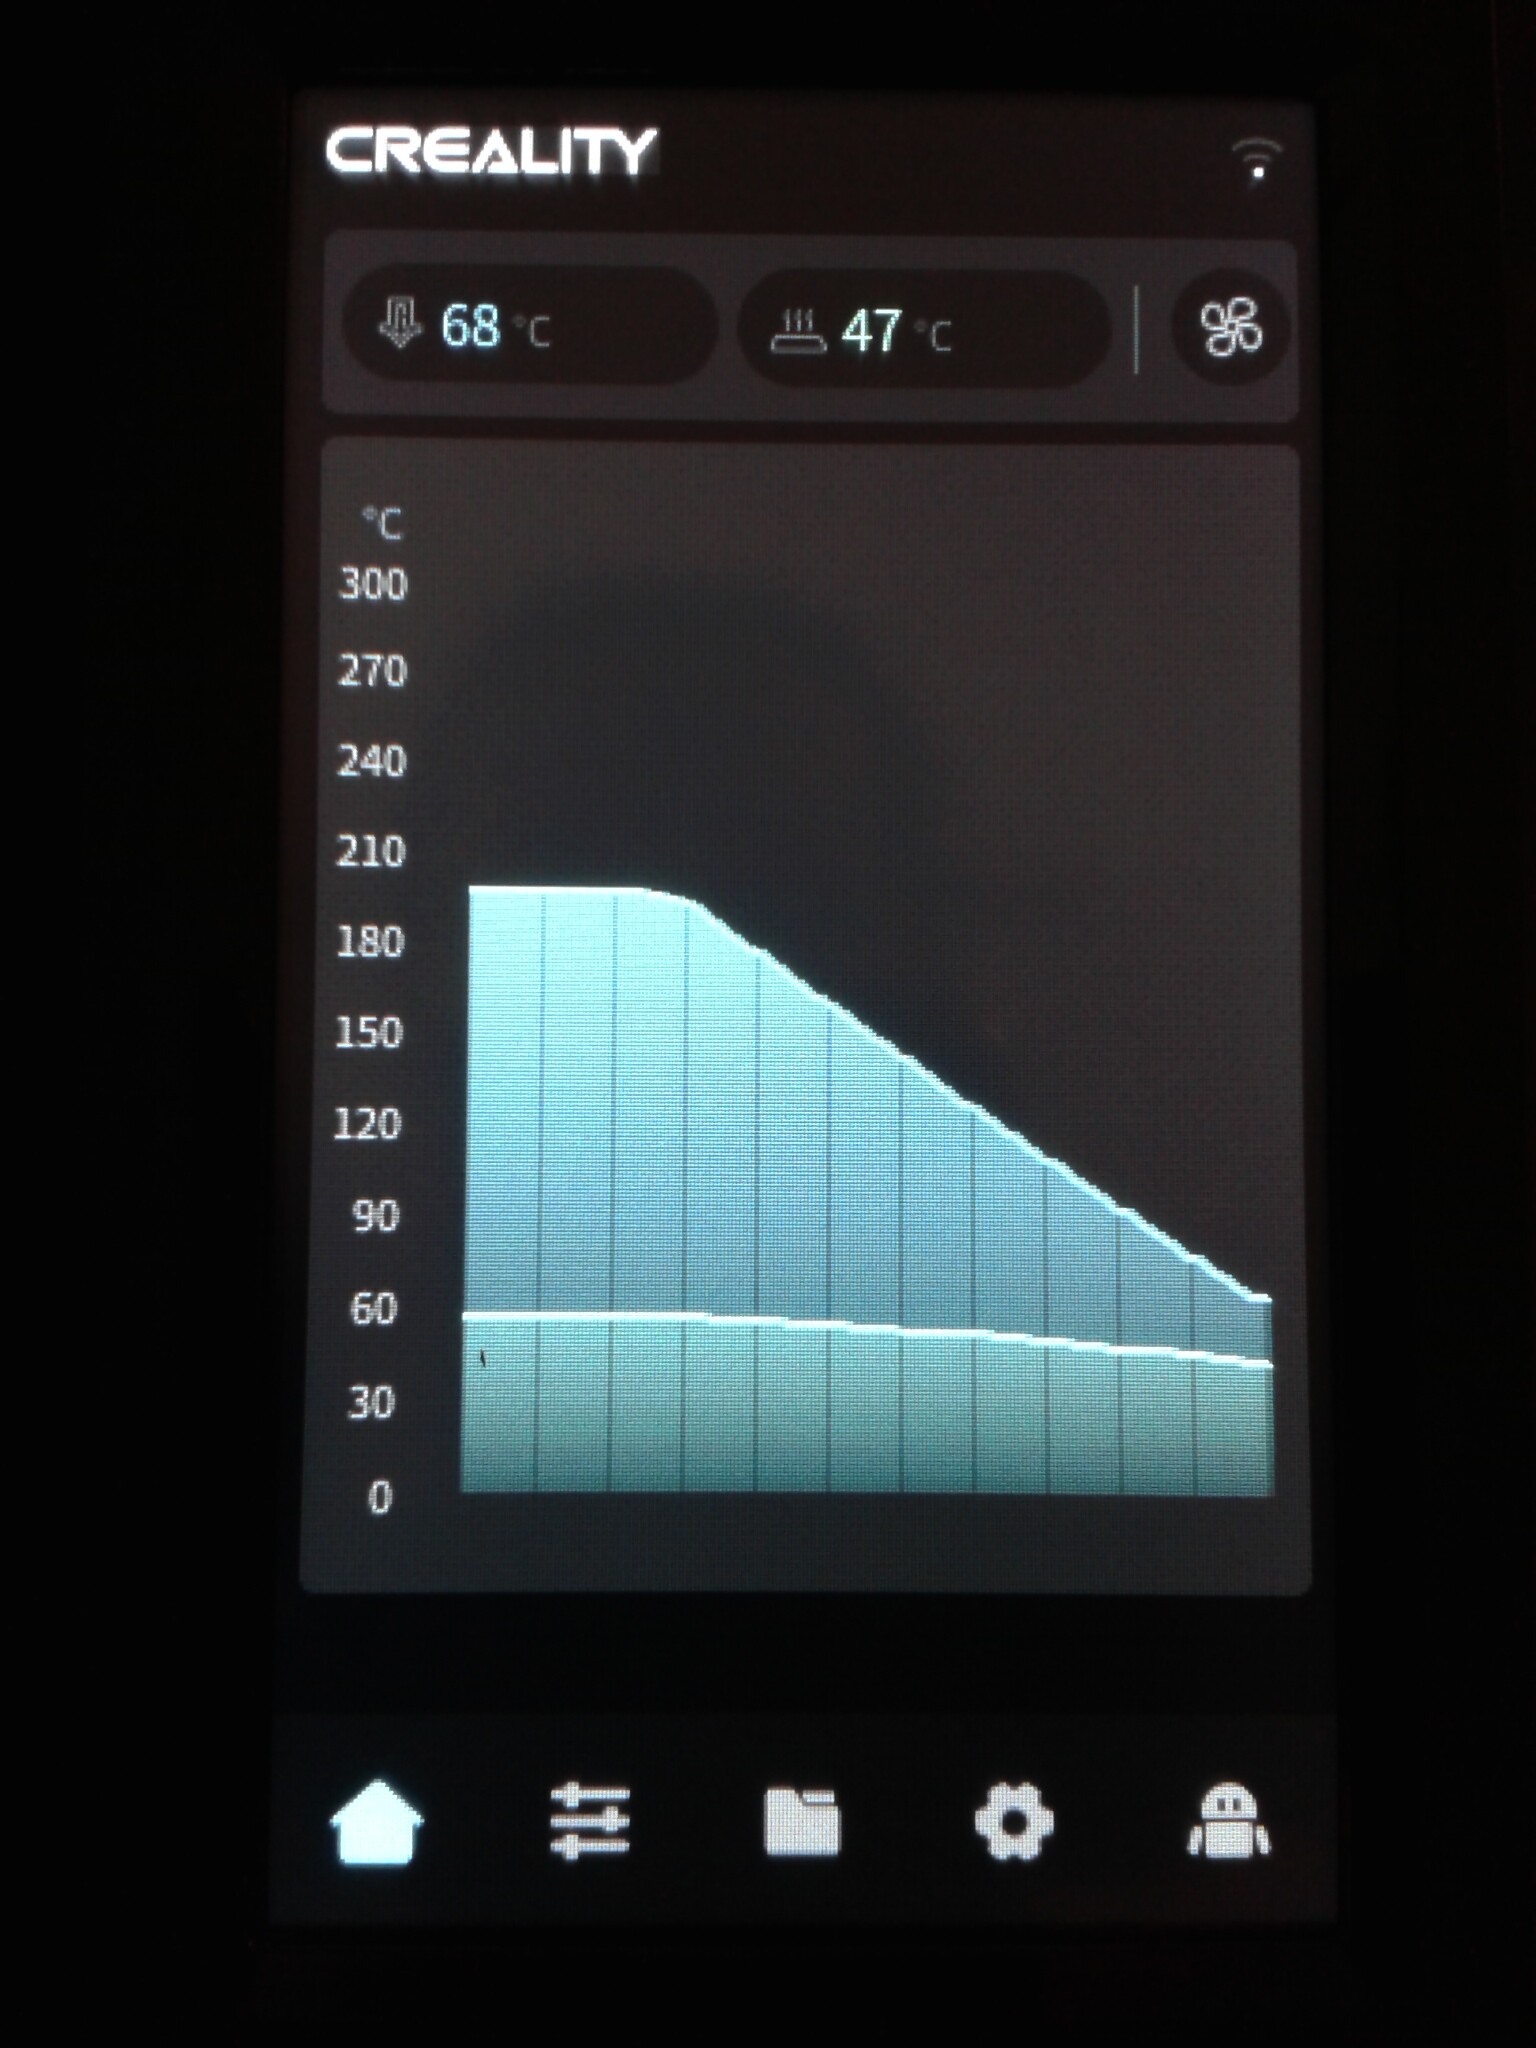
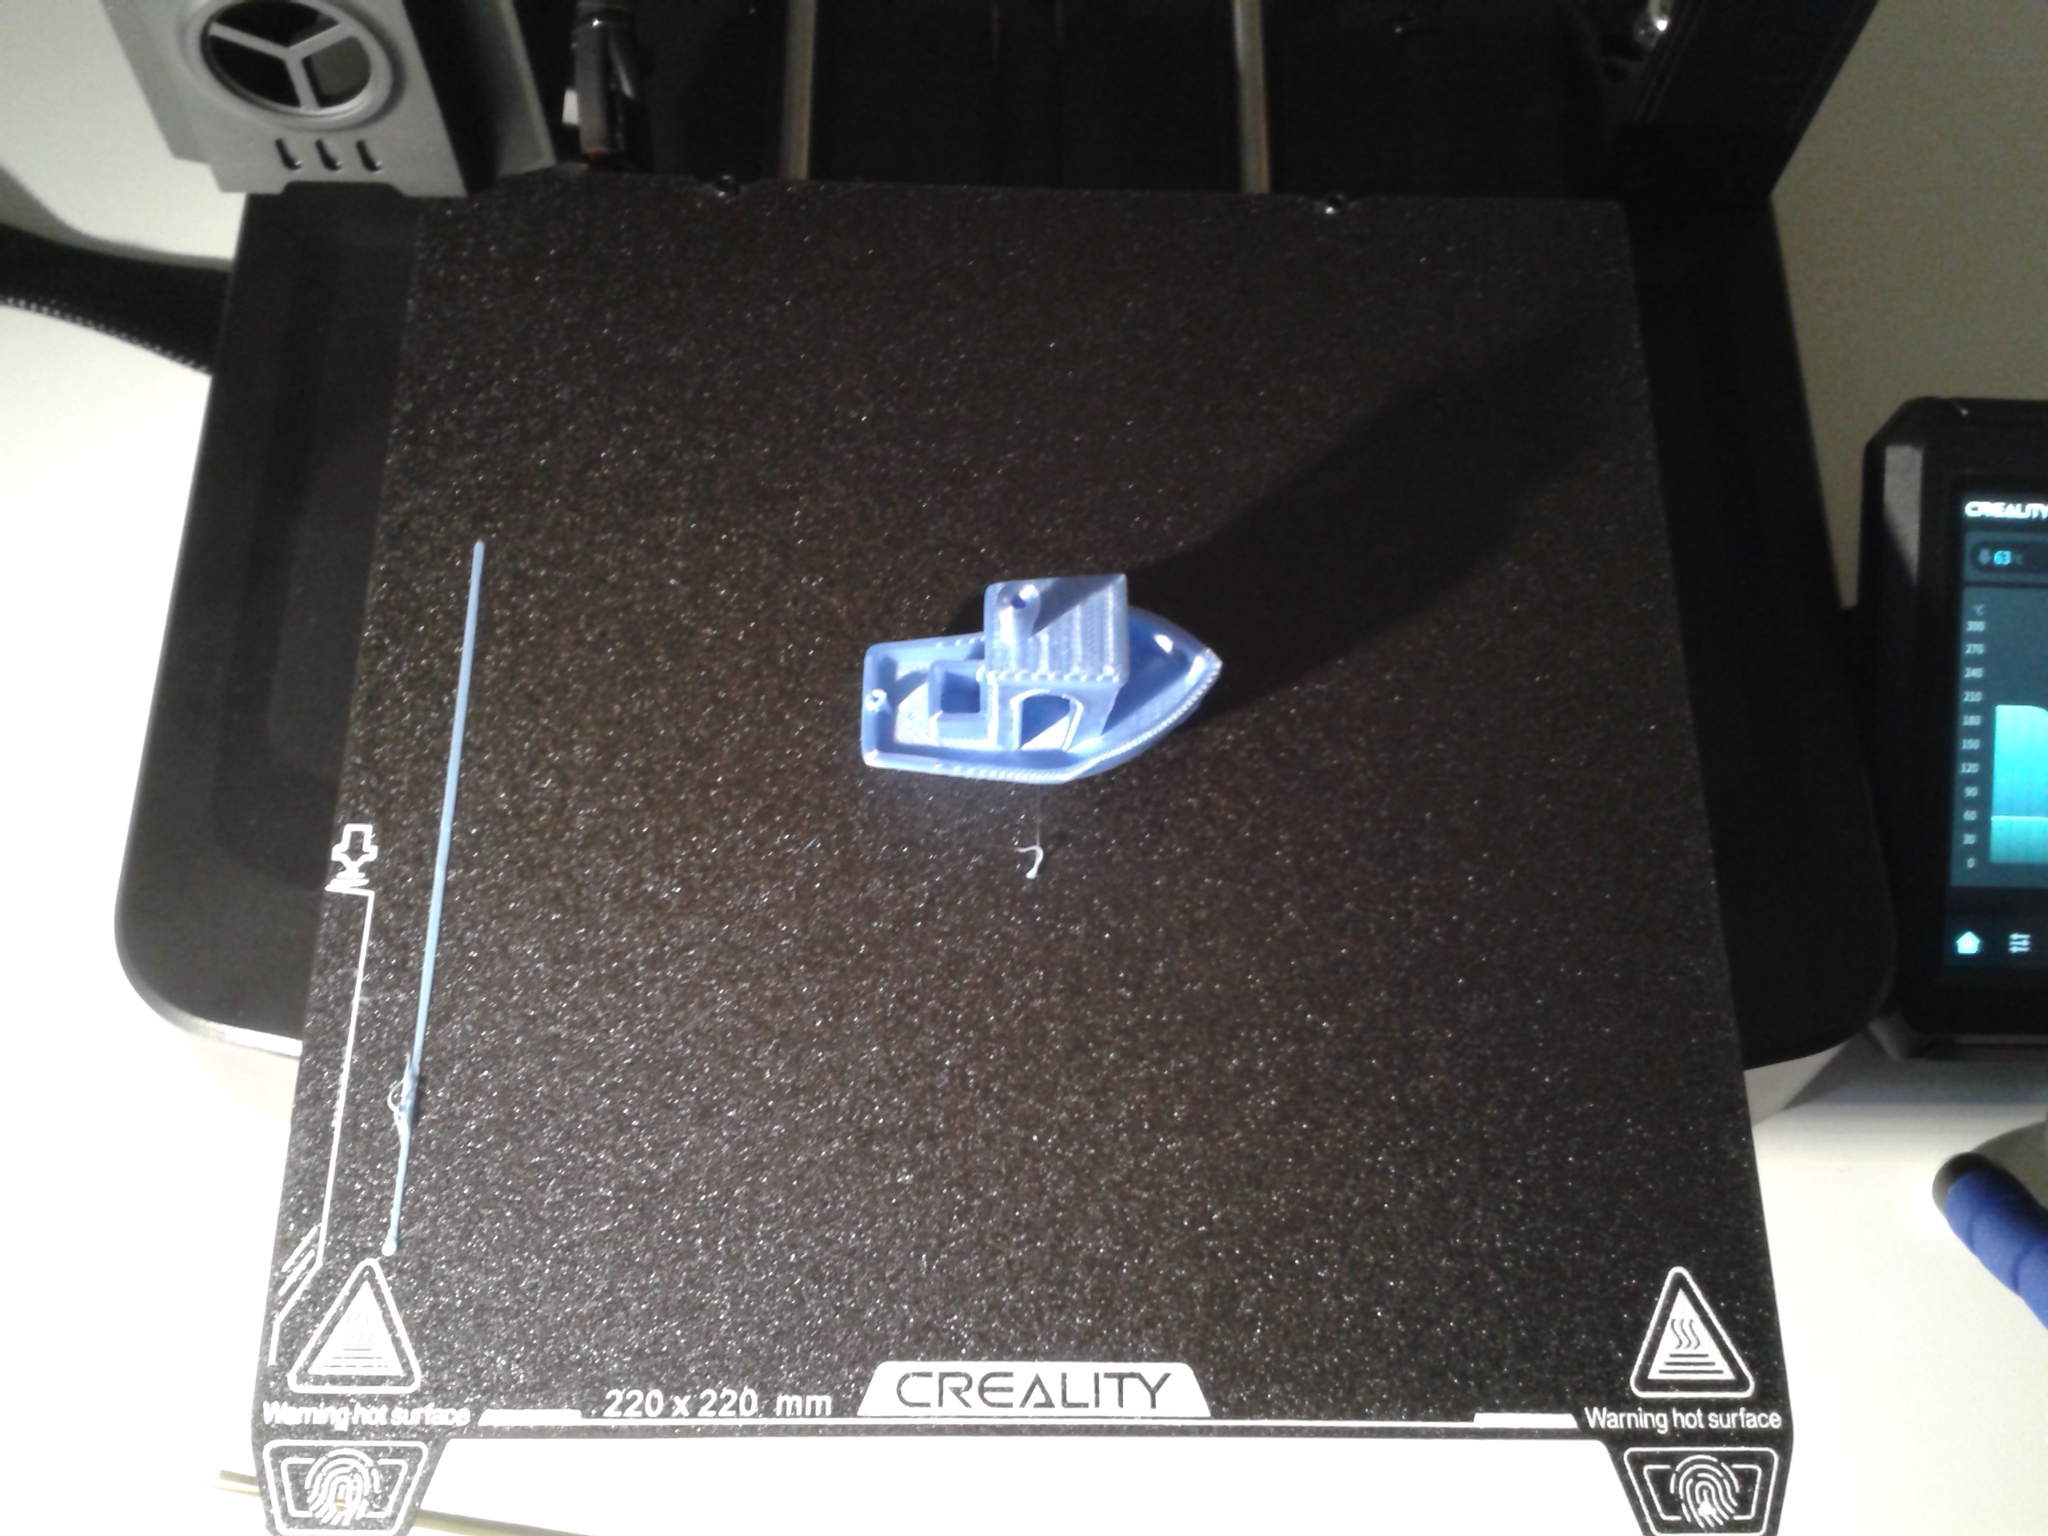
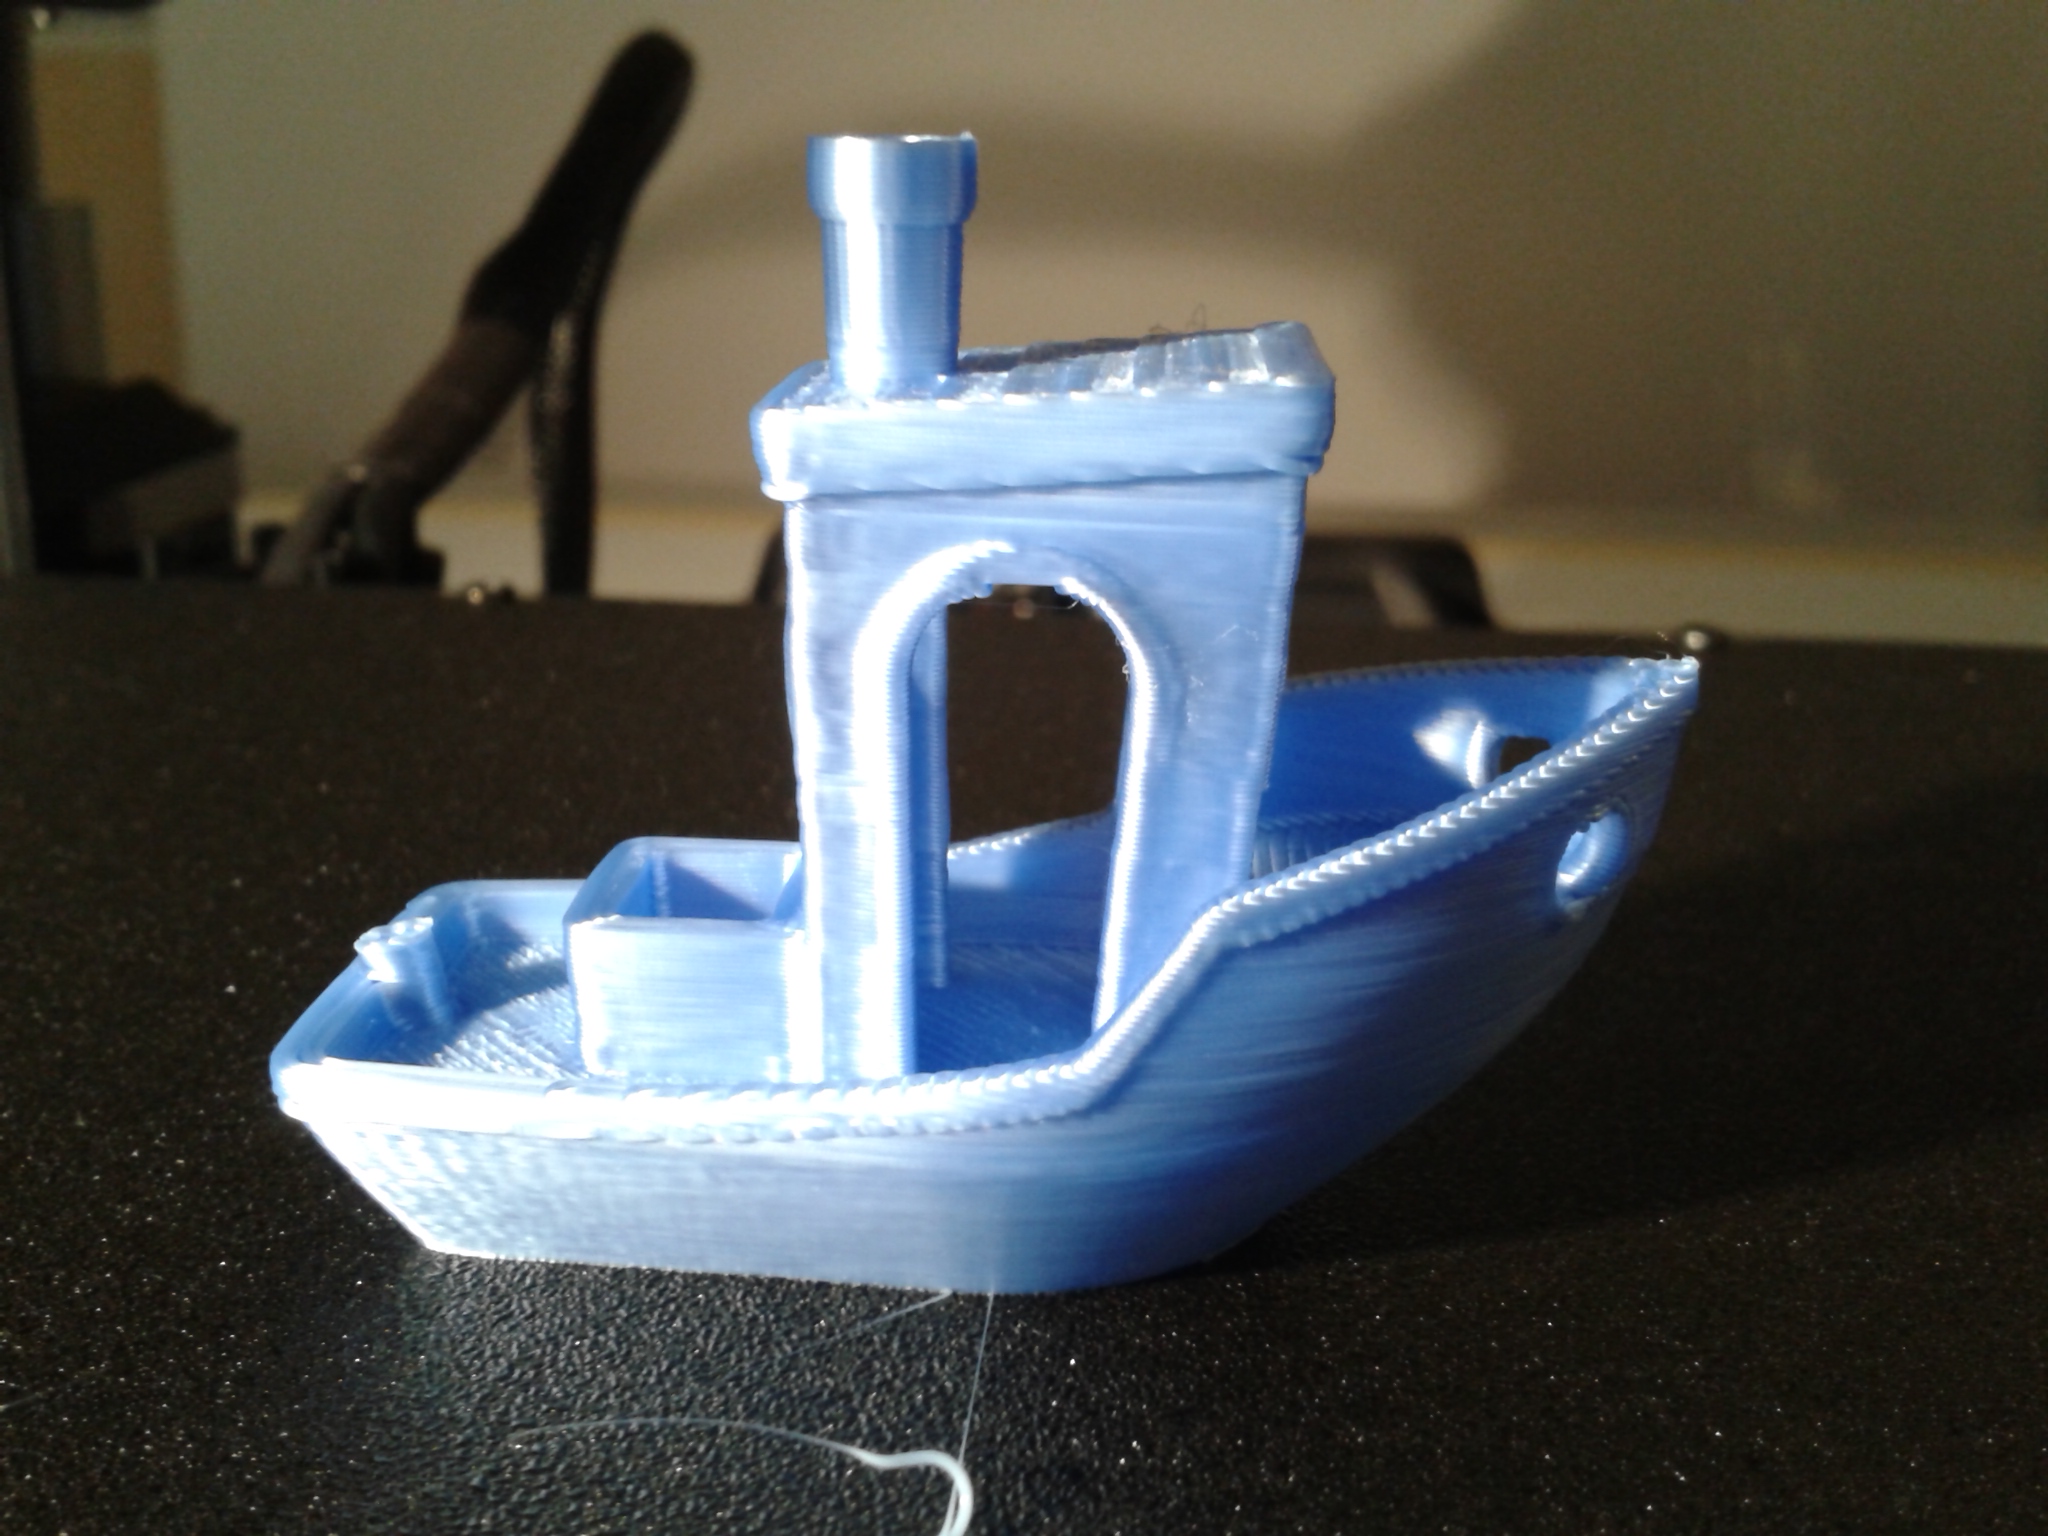
D’après l’historique d’impression de l’interface web ou de l’interface de contrôle sous Creality Print, l’impression de ce Benchy boat a duré 19 minutes et 18 secondes.
J’ai effectué plusieurs fois cette impression avec différent filaments. PLA Silk bleu ArianePlast, Hyper PLA blanc Creality et Hyper PLA bleu Creality.
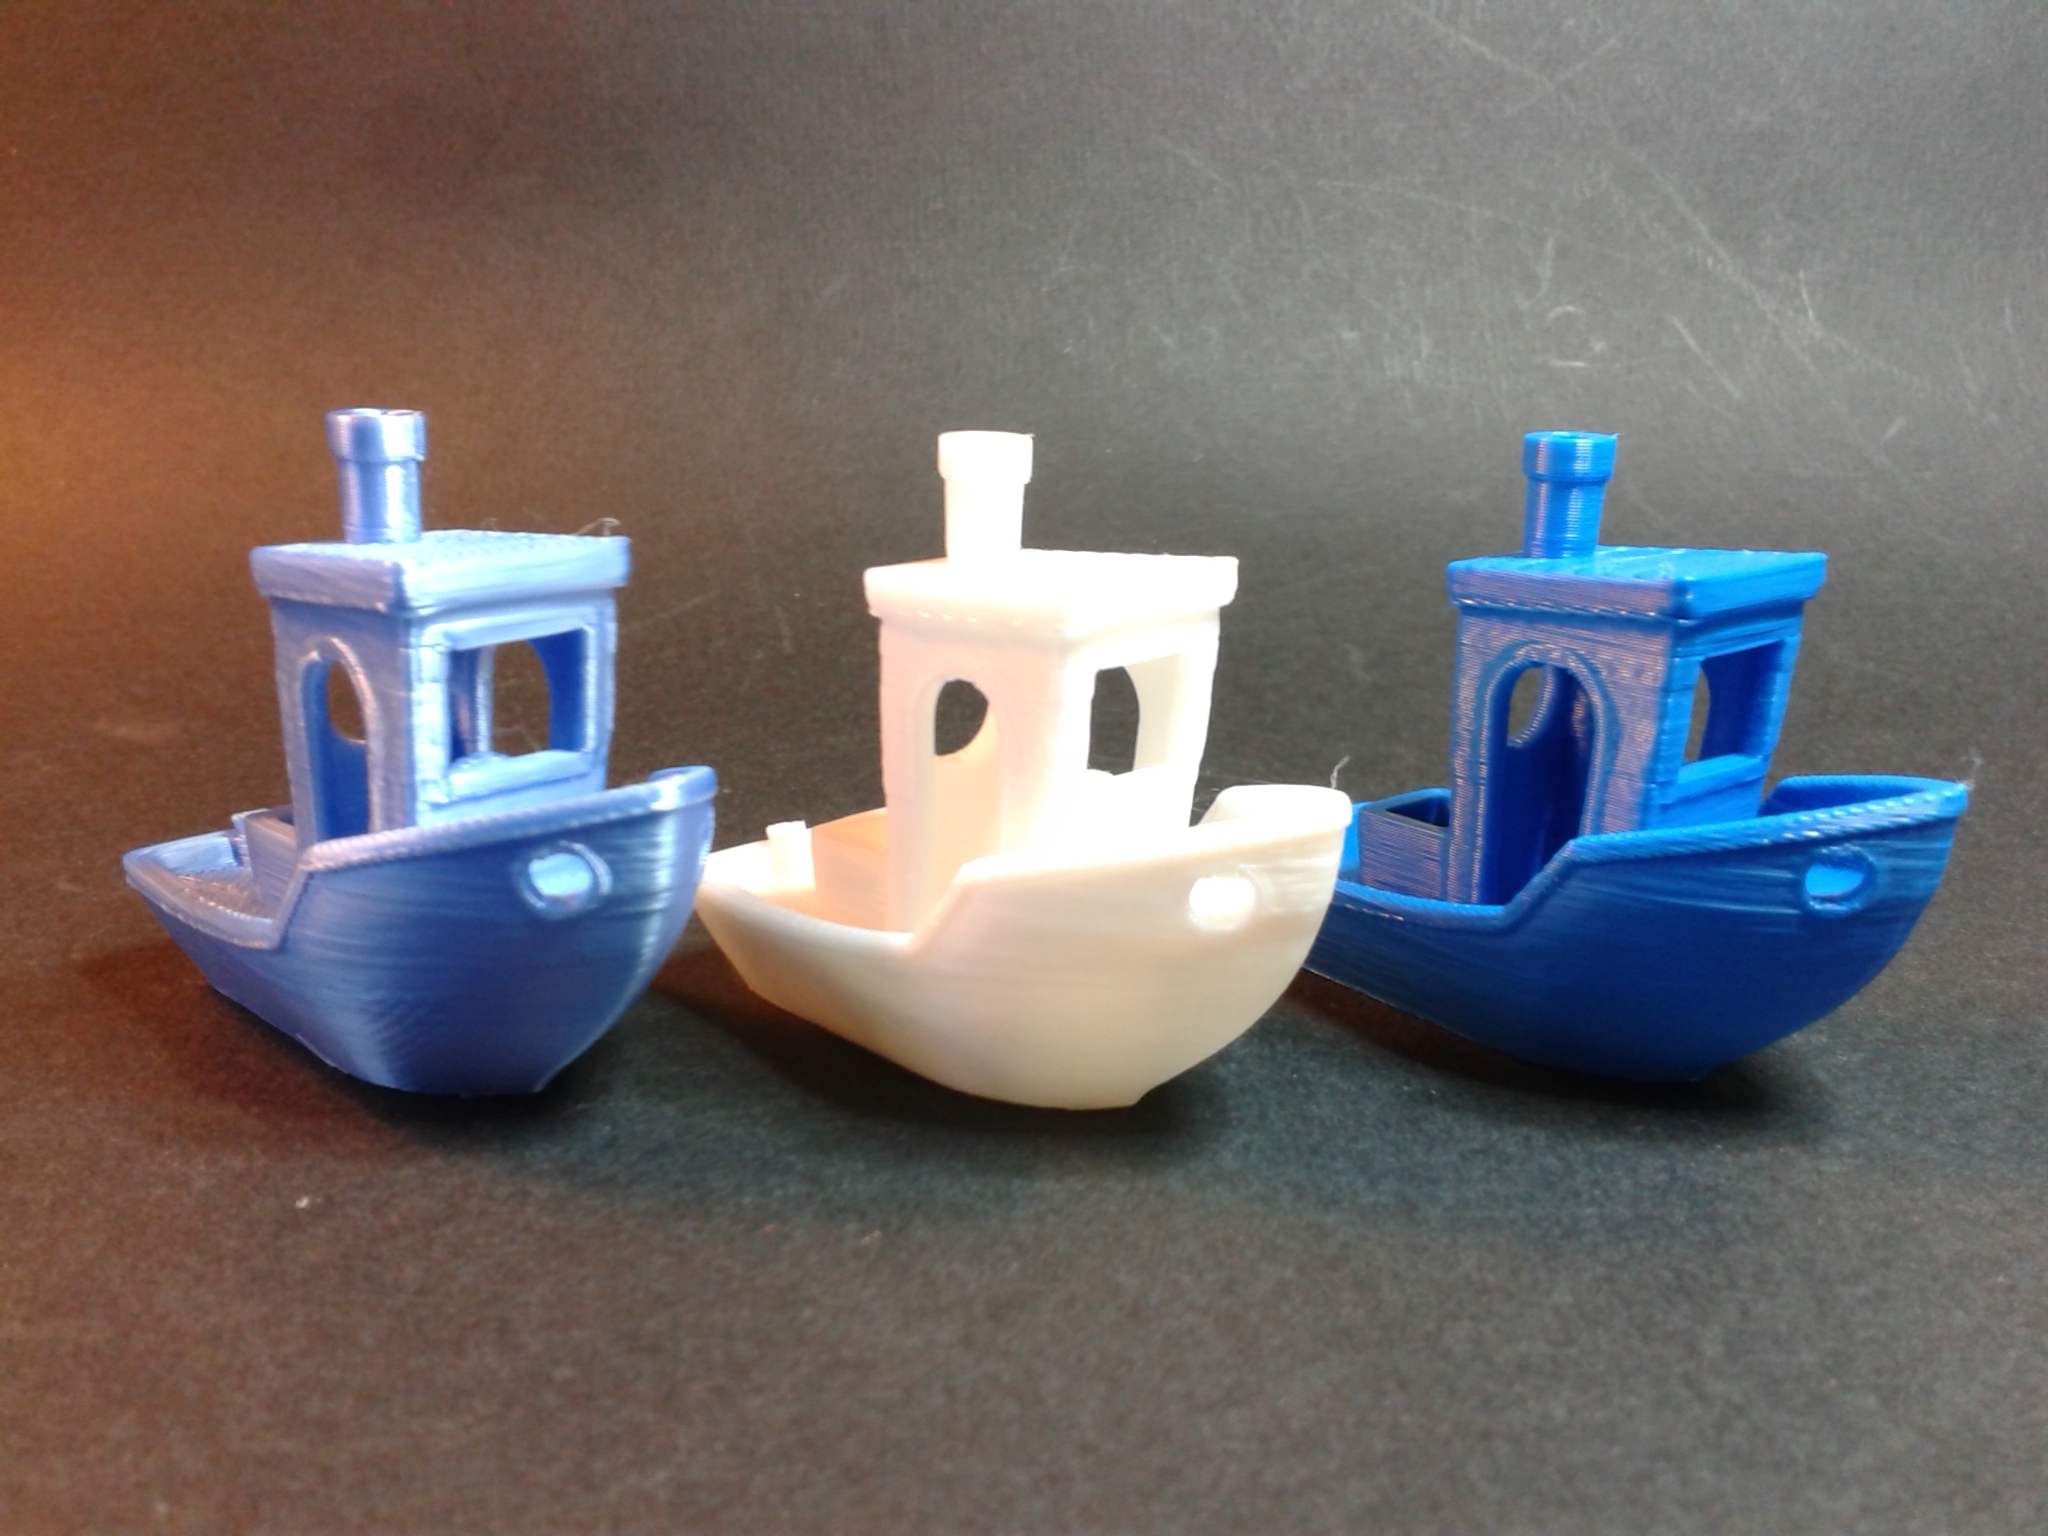
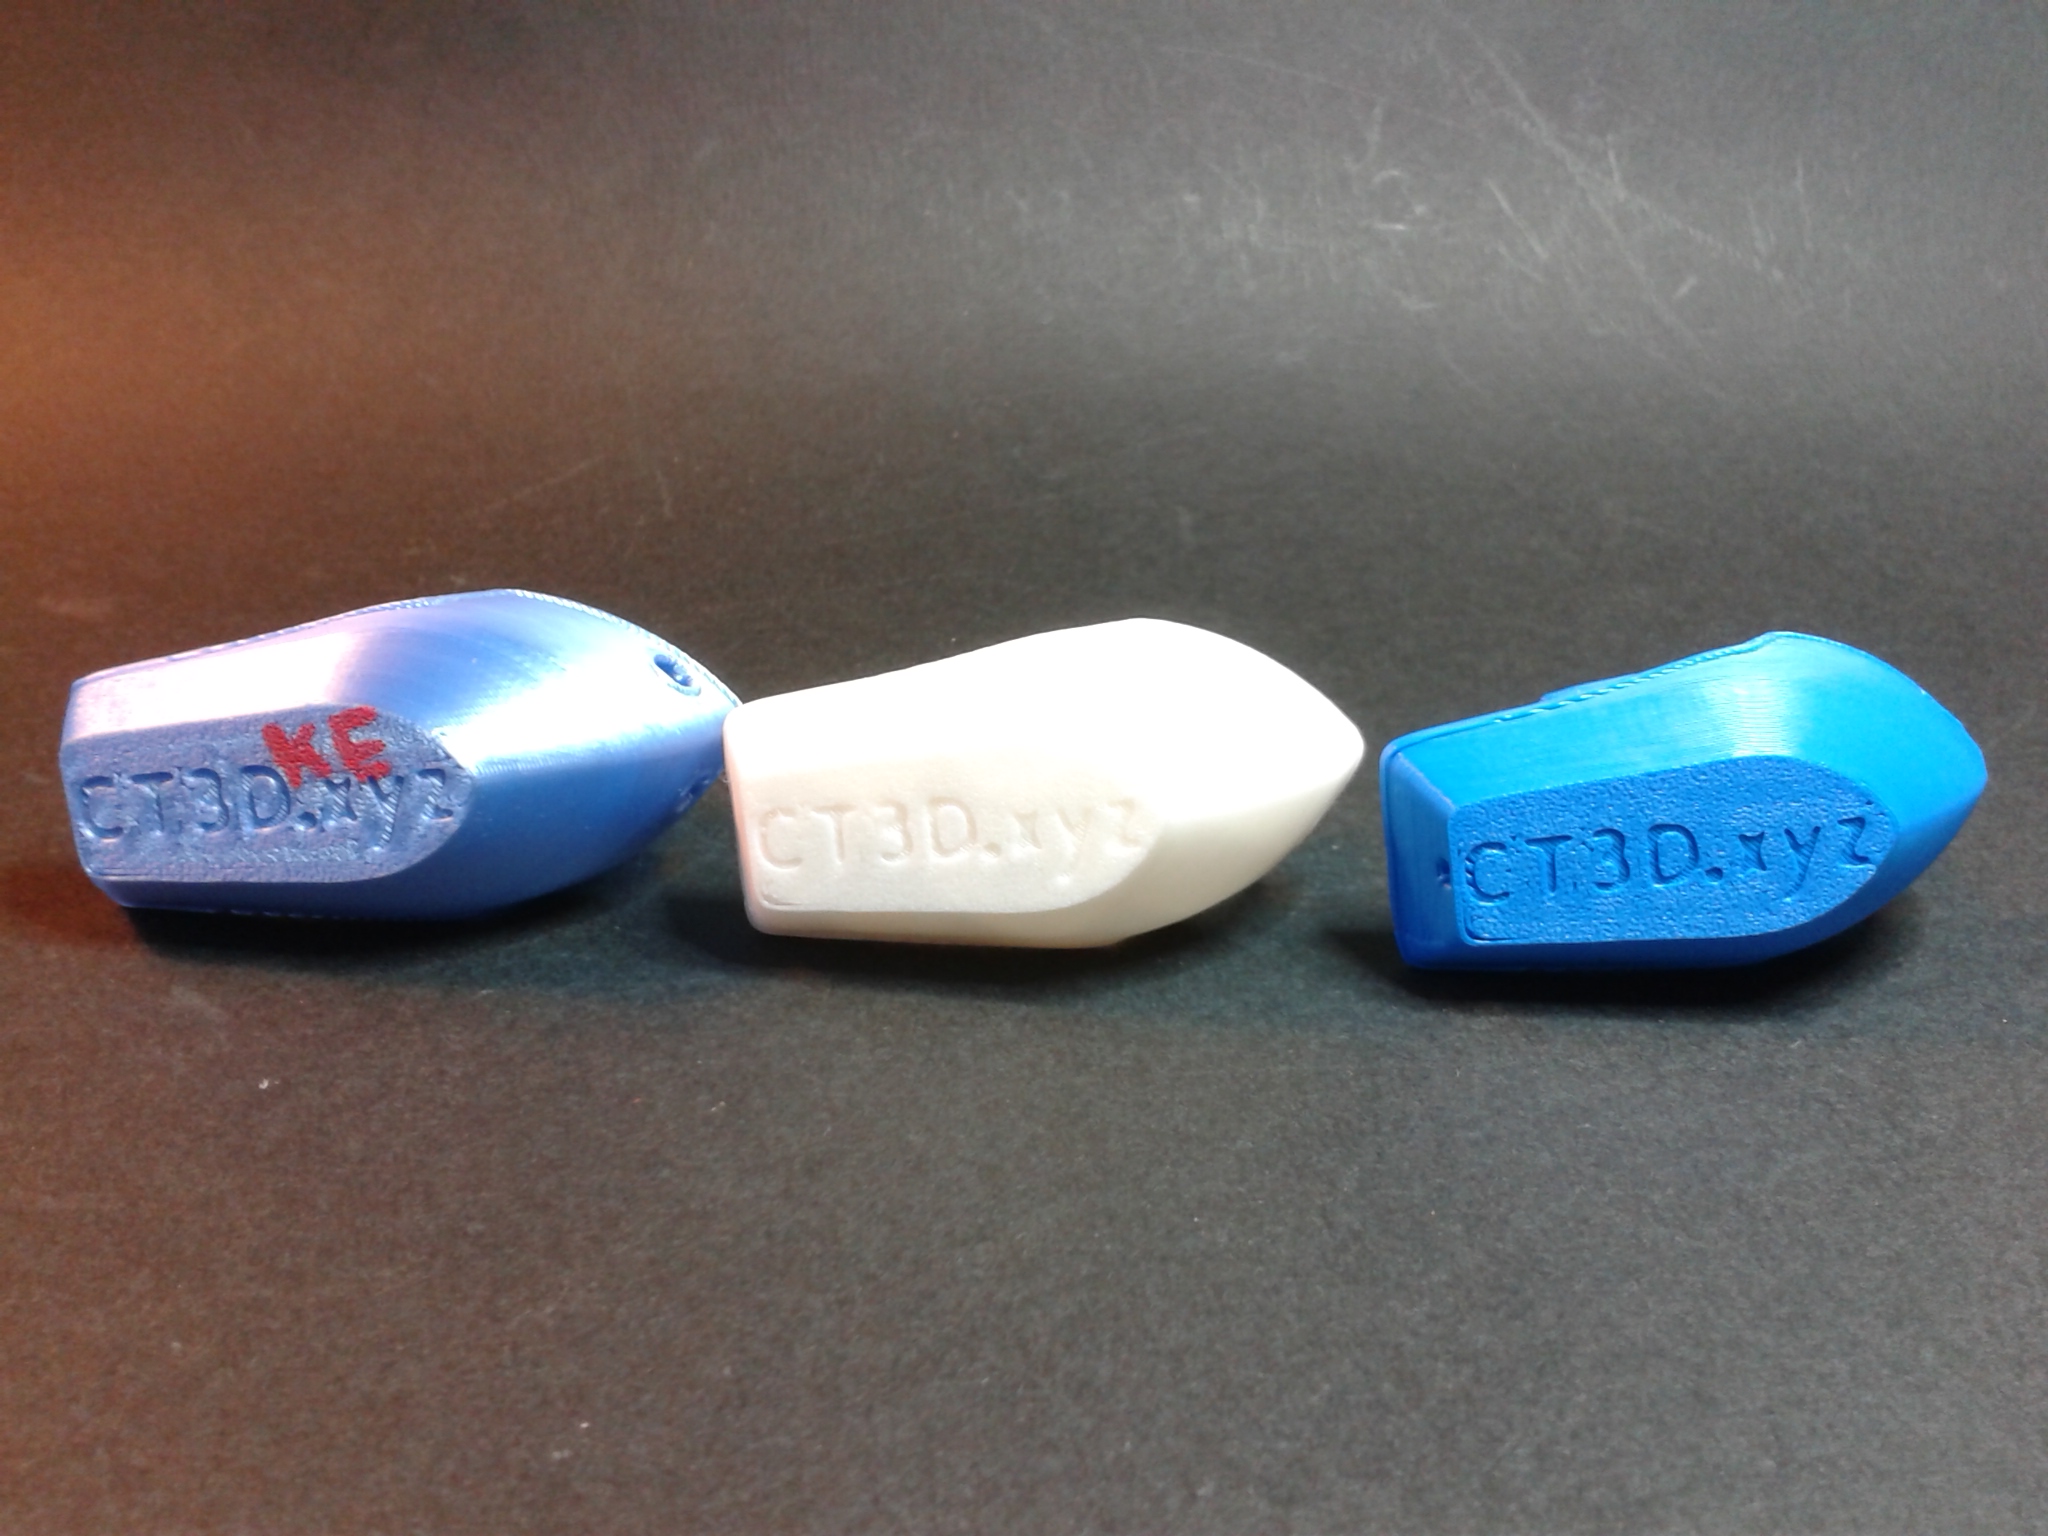

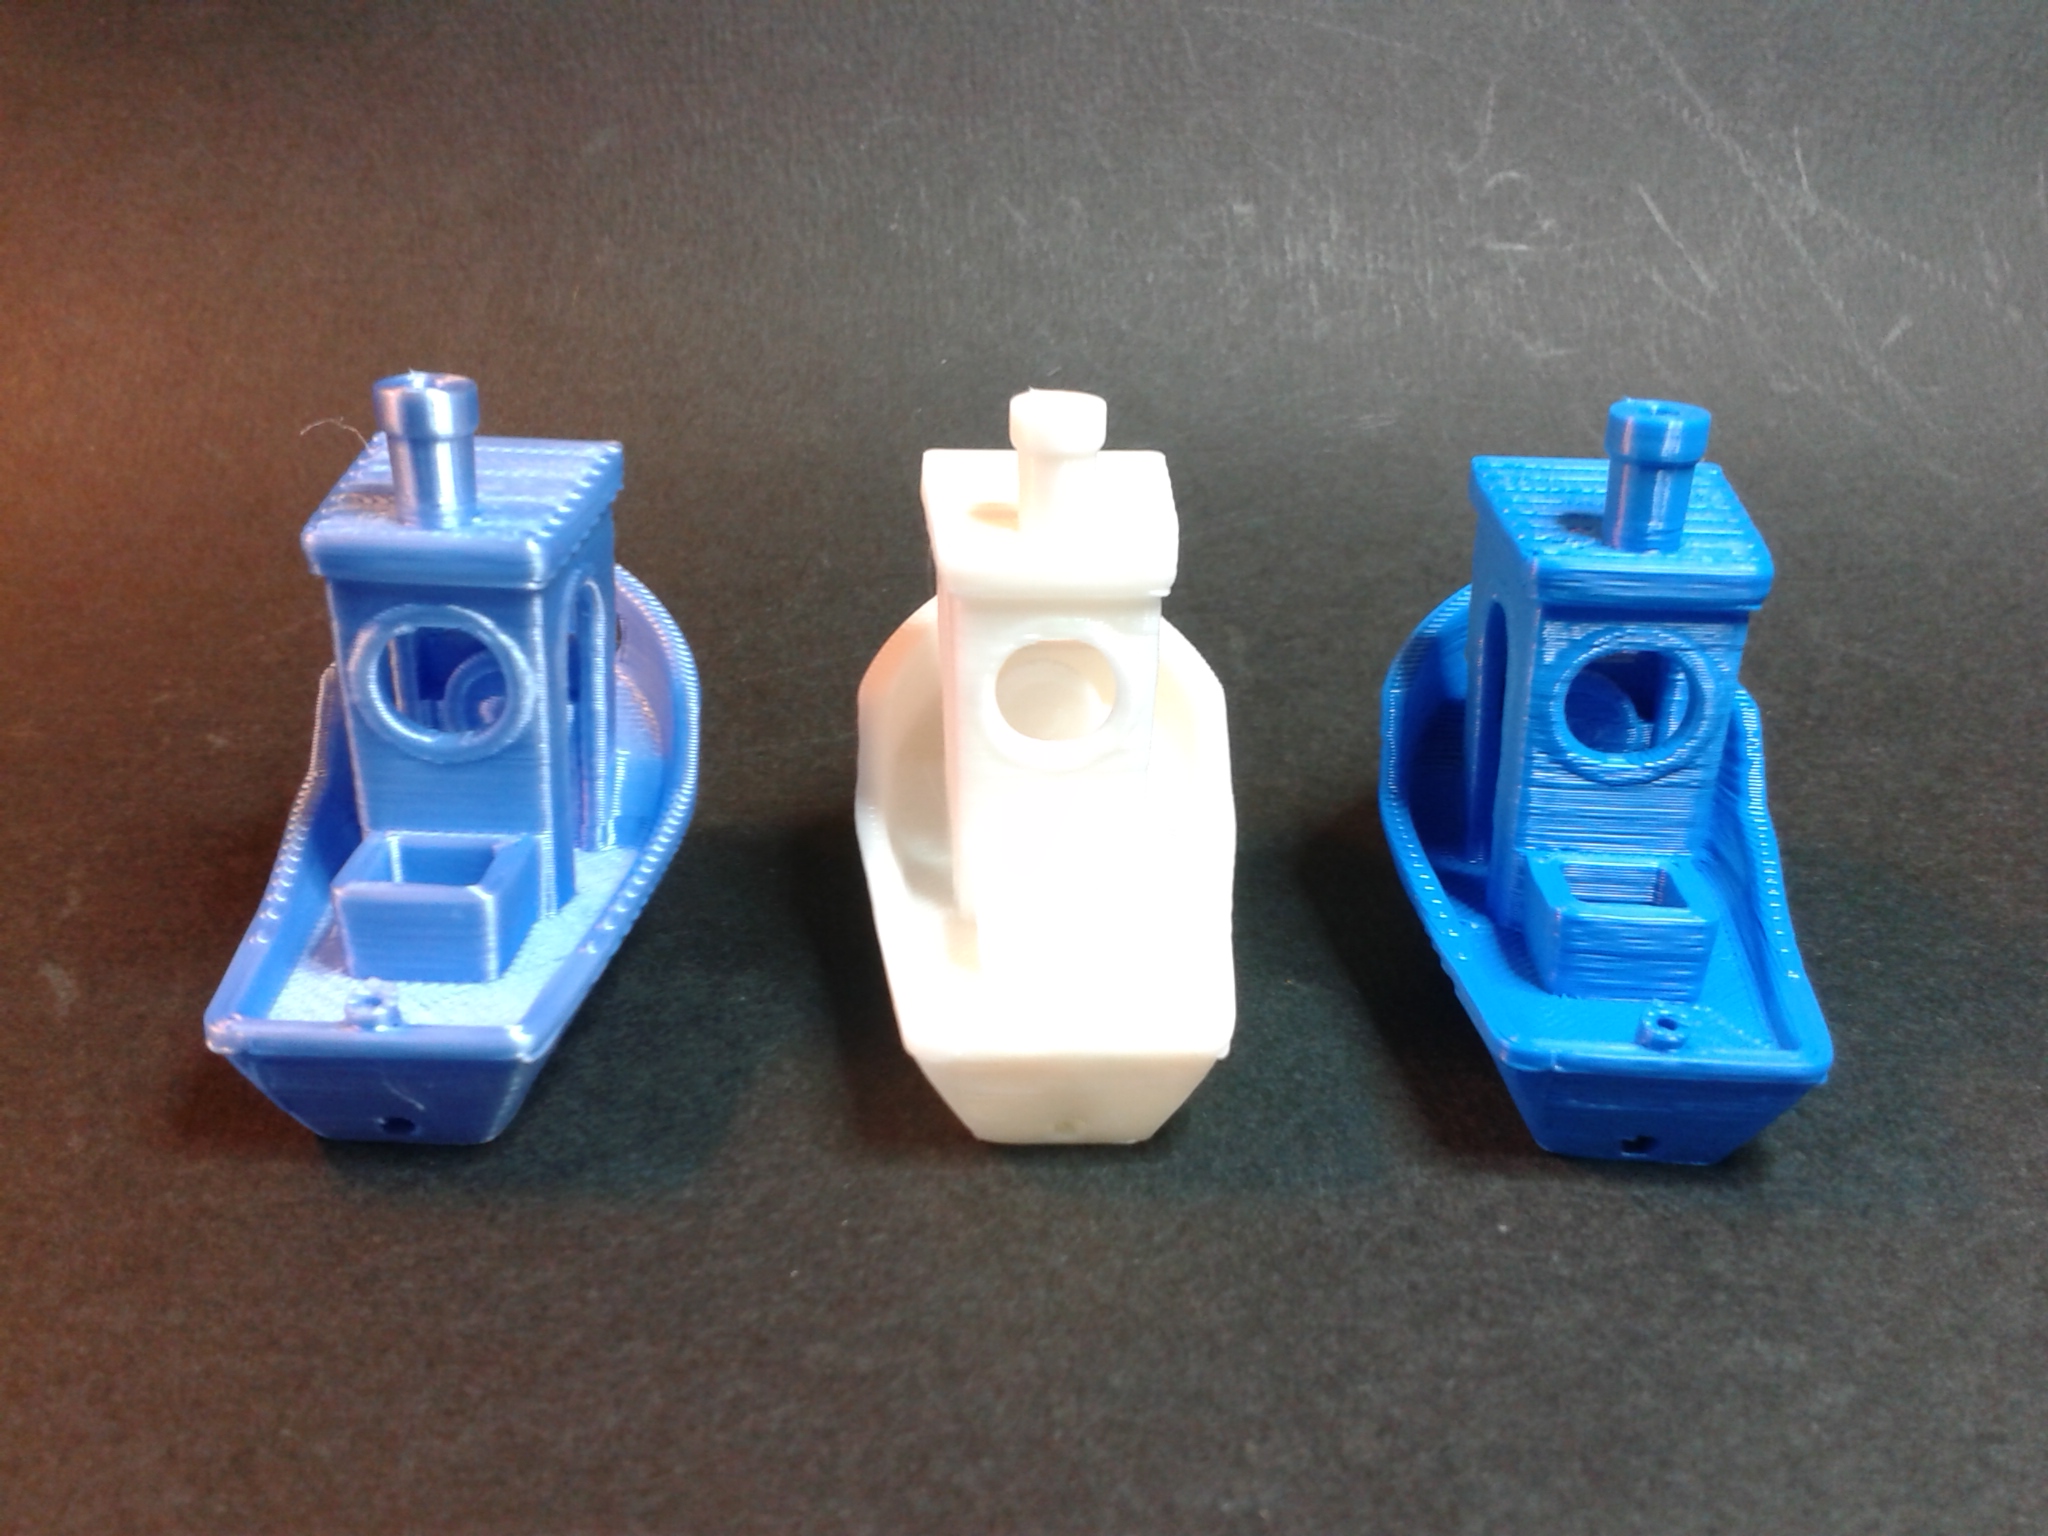
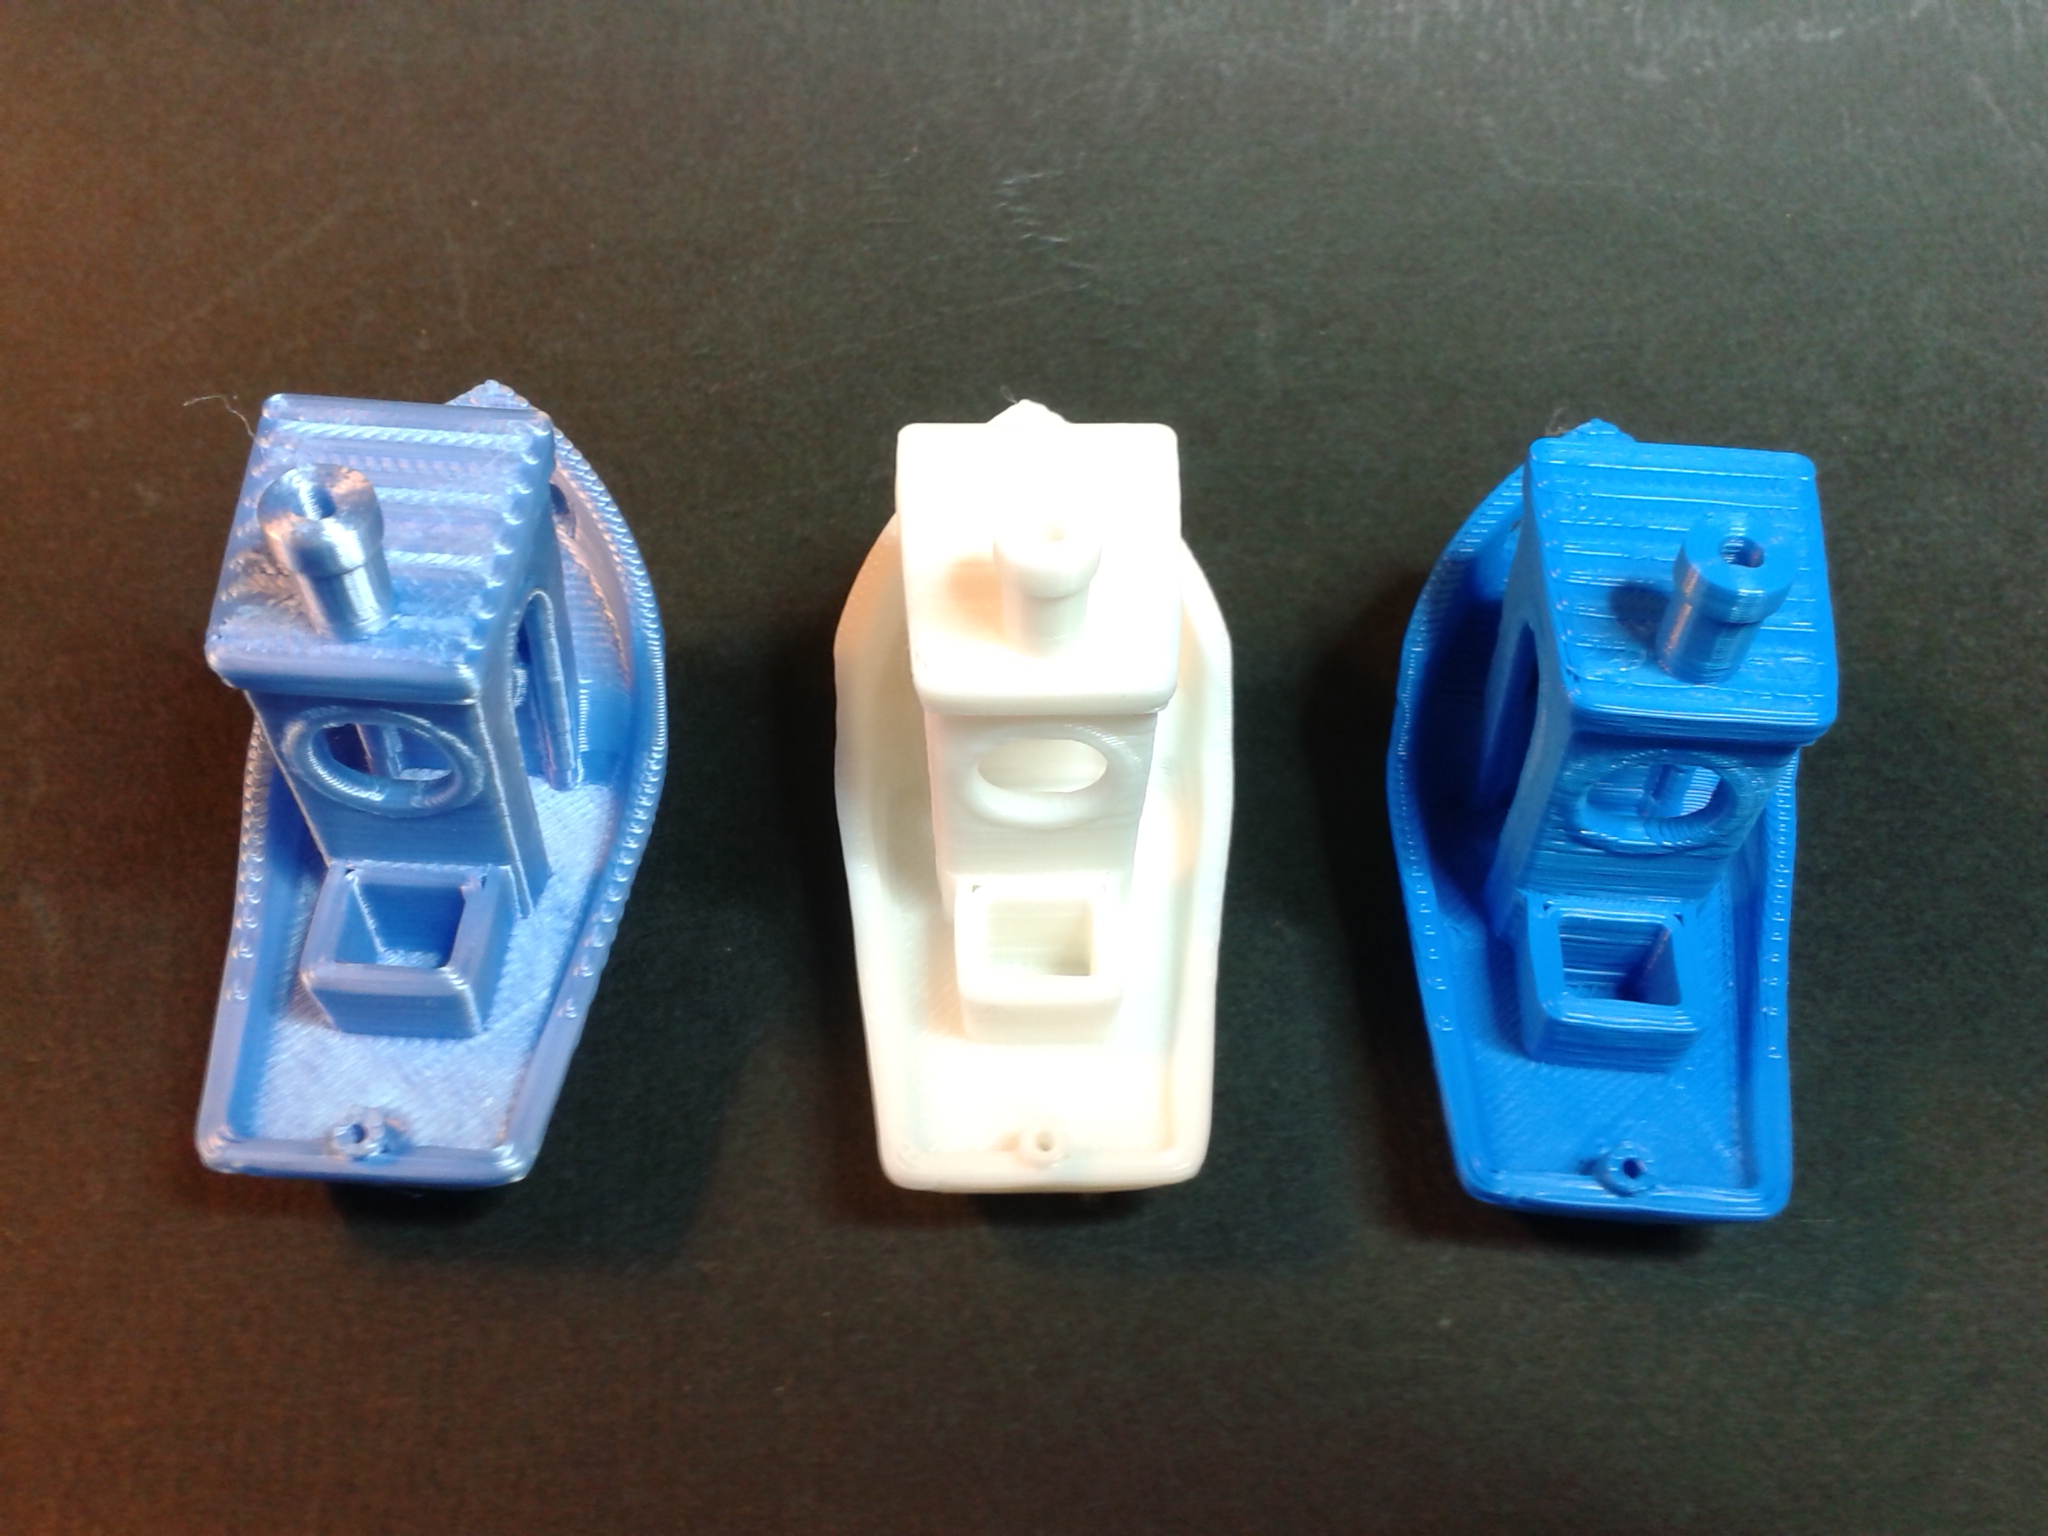
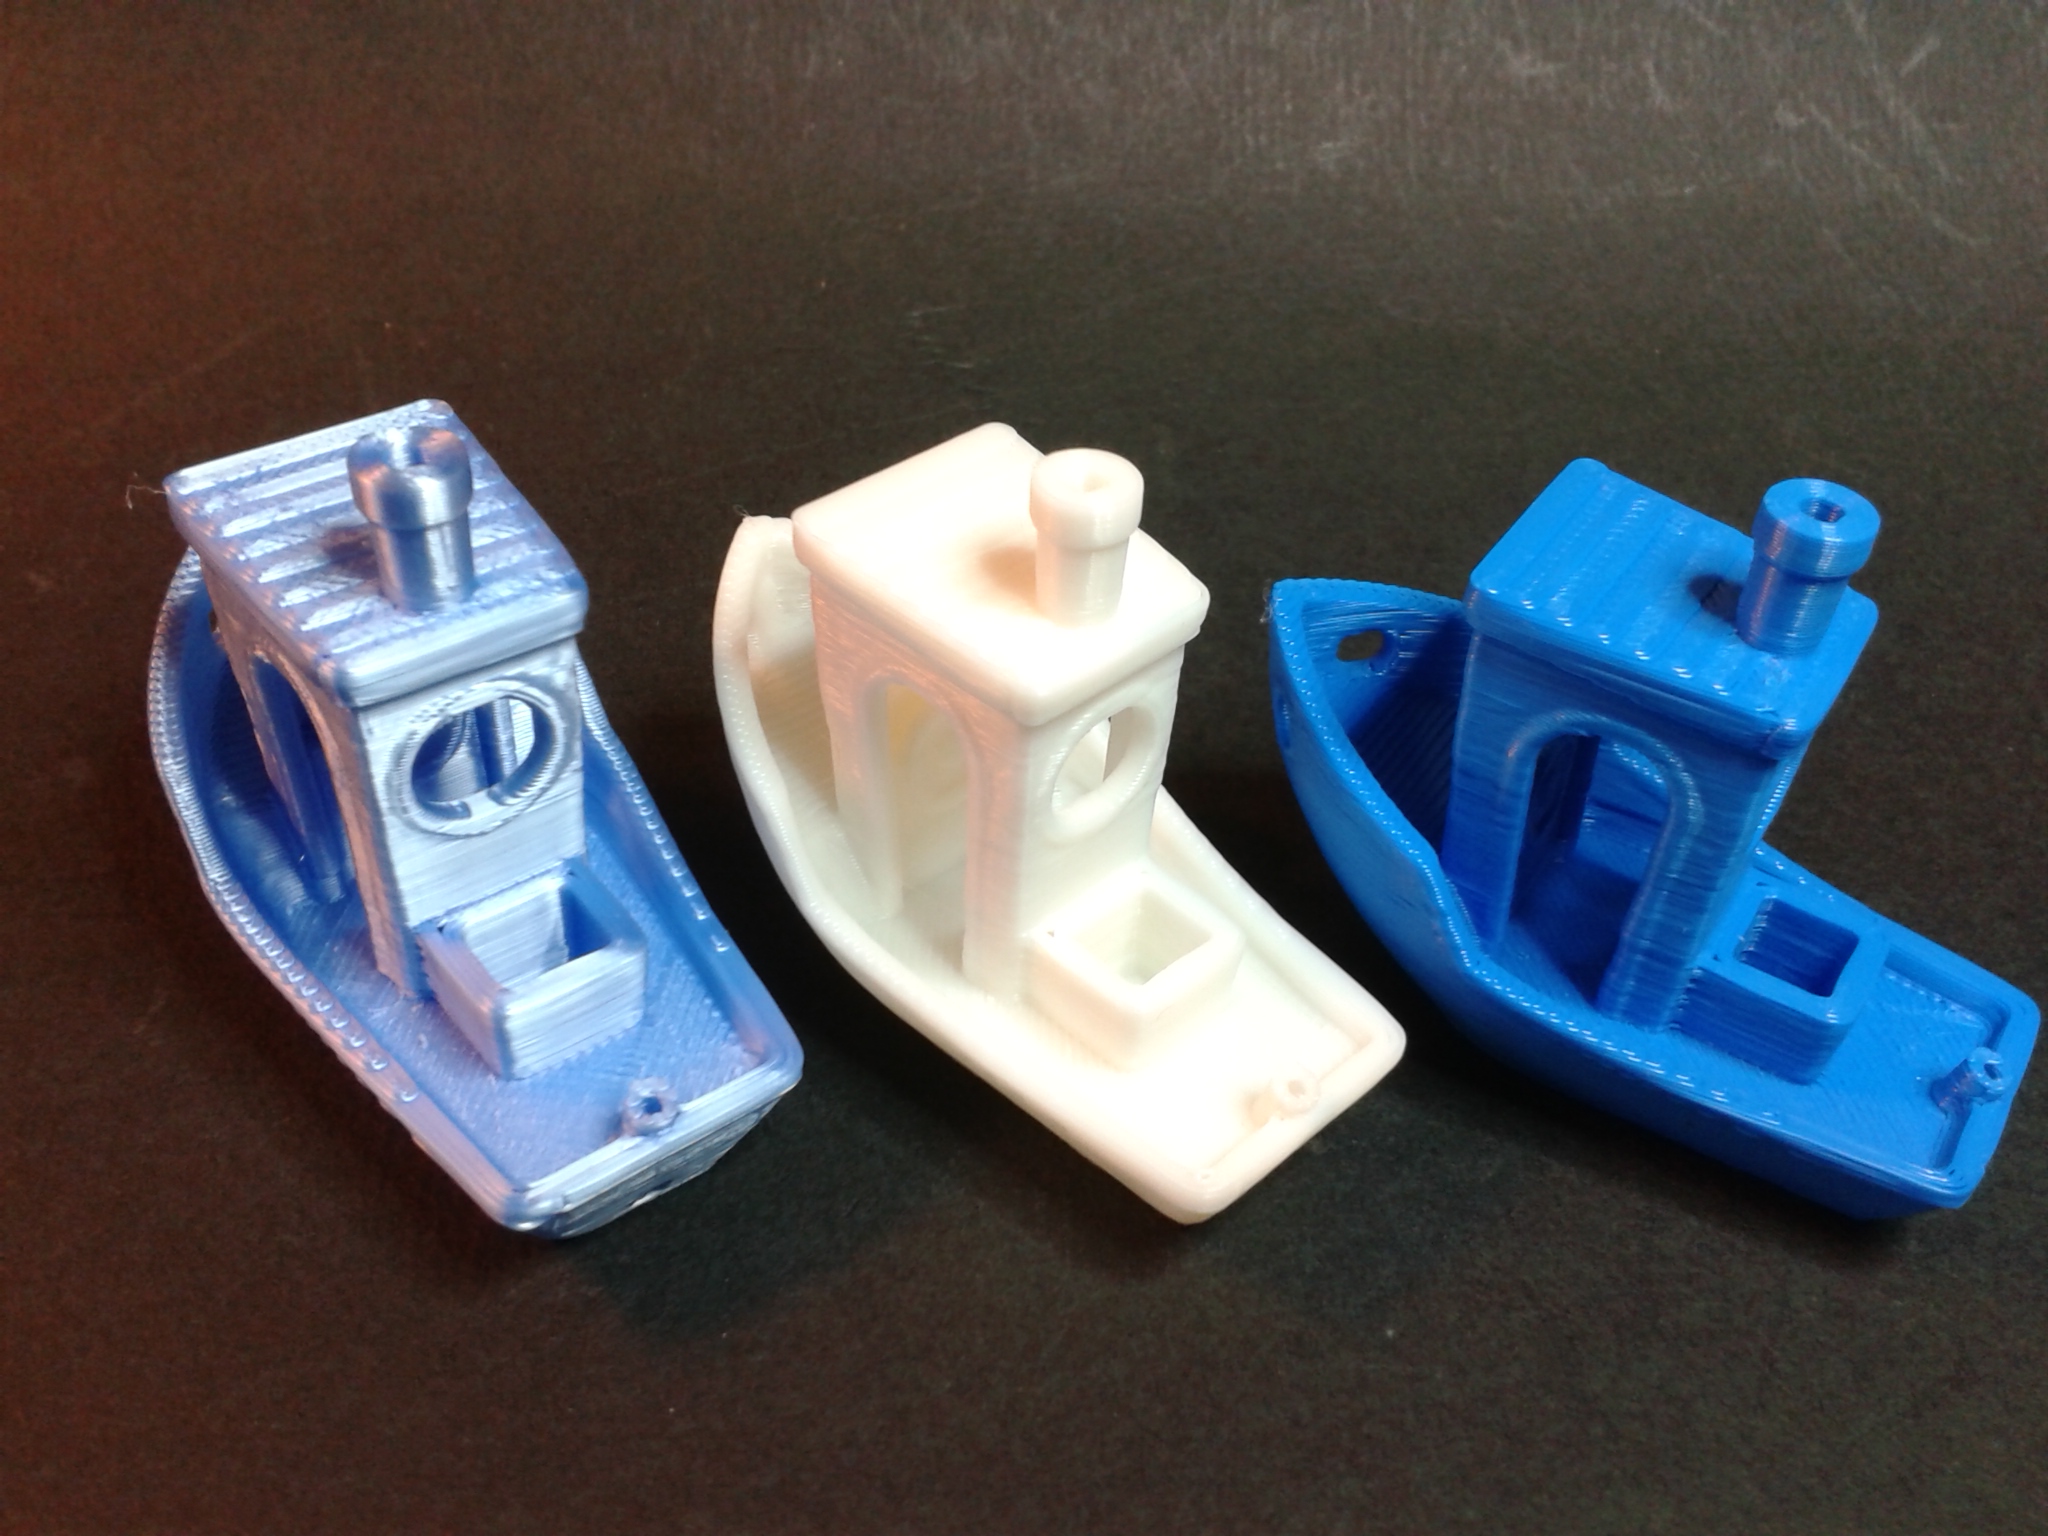
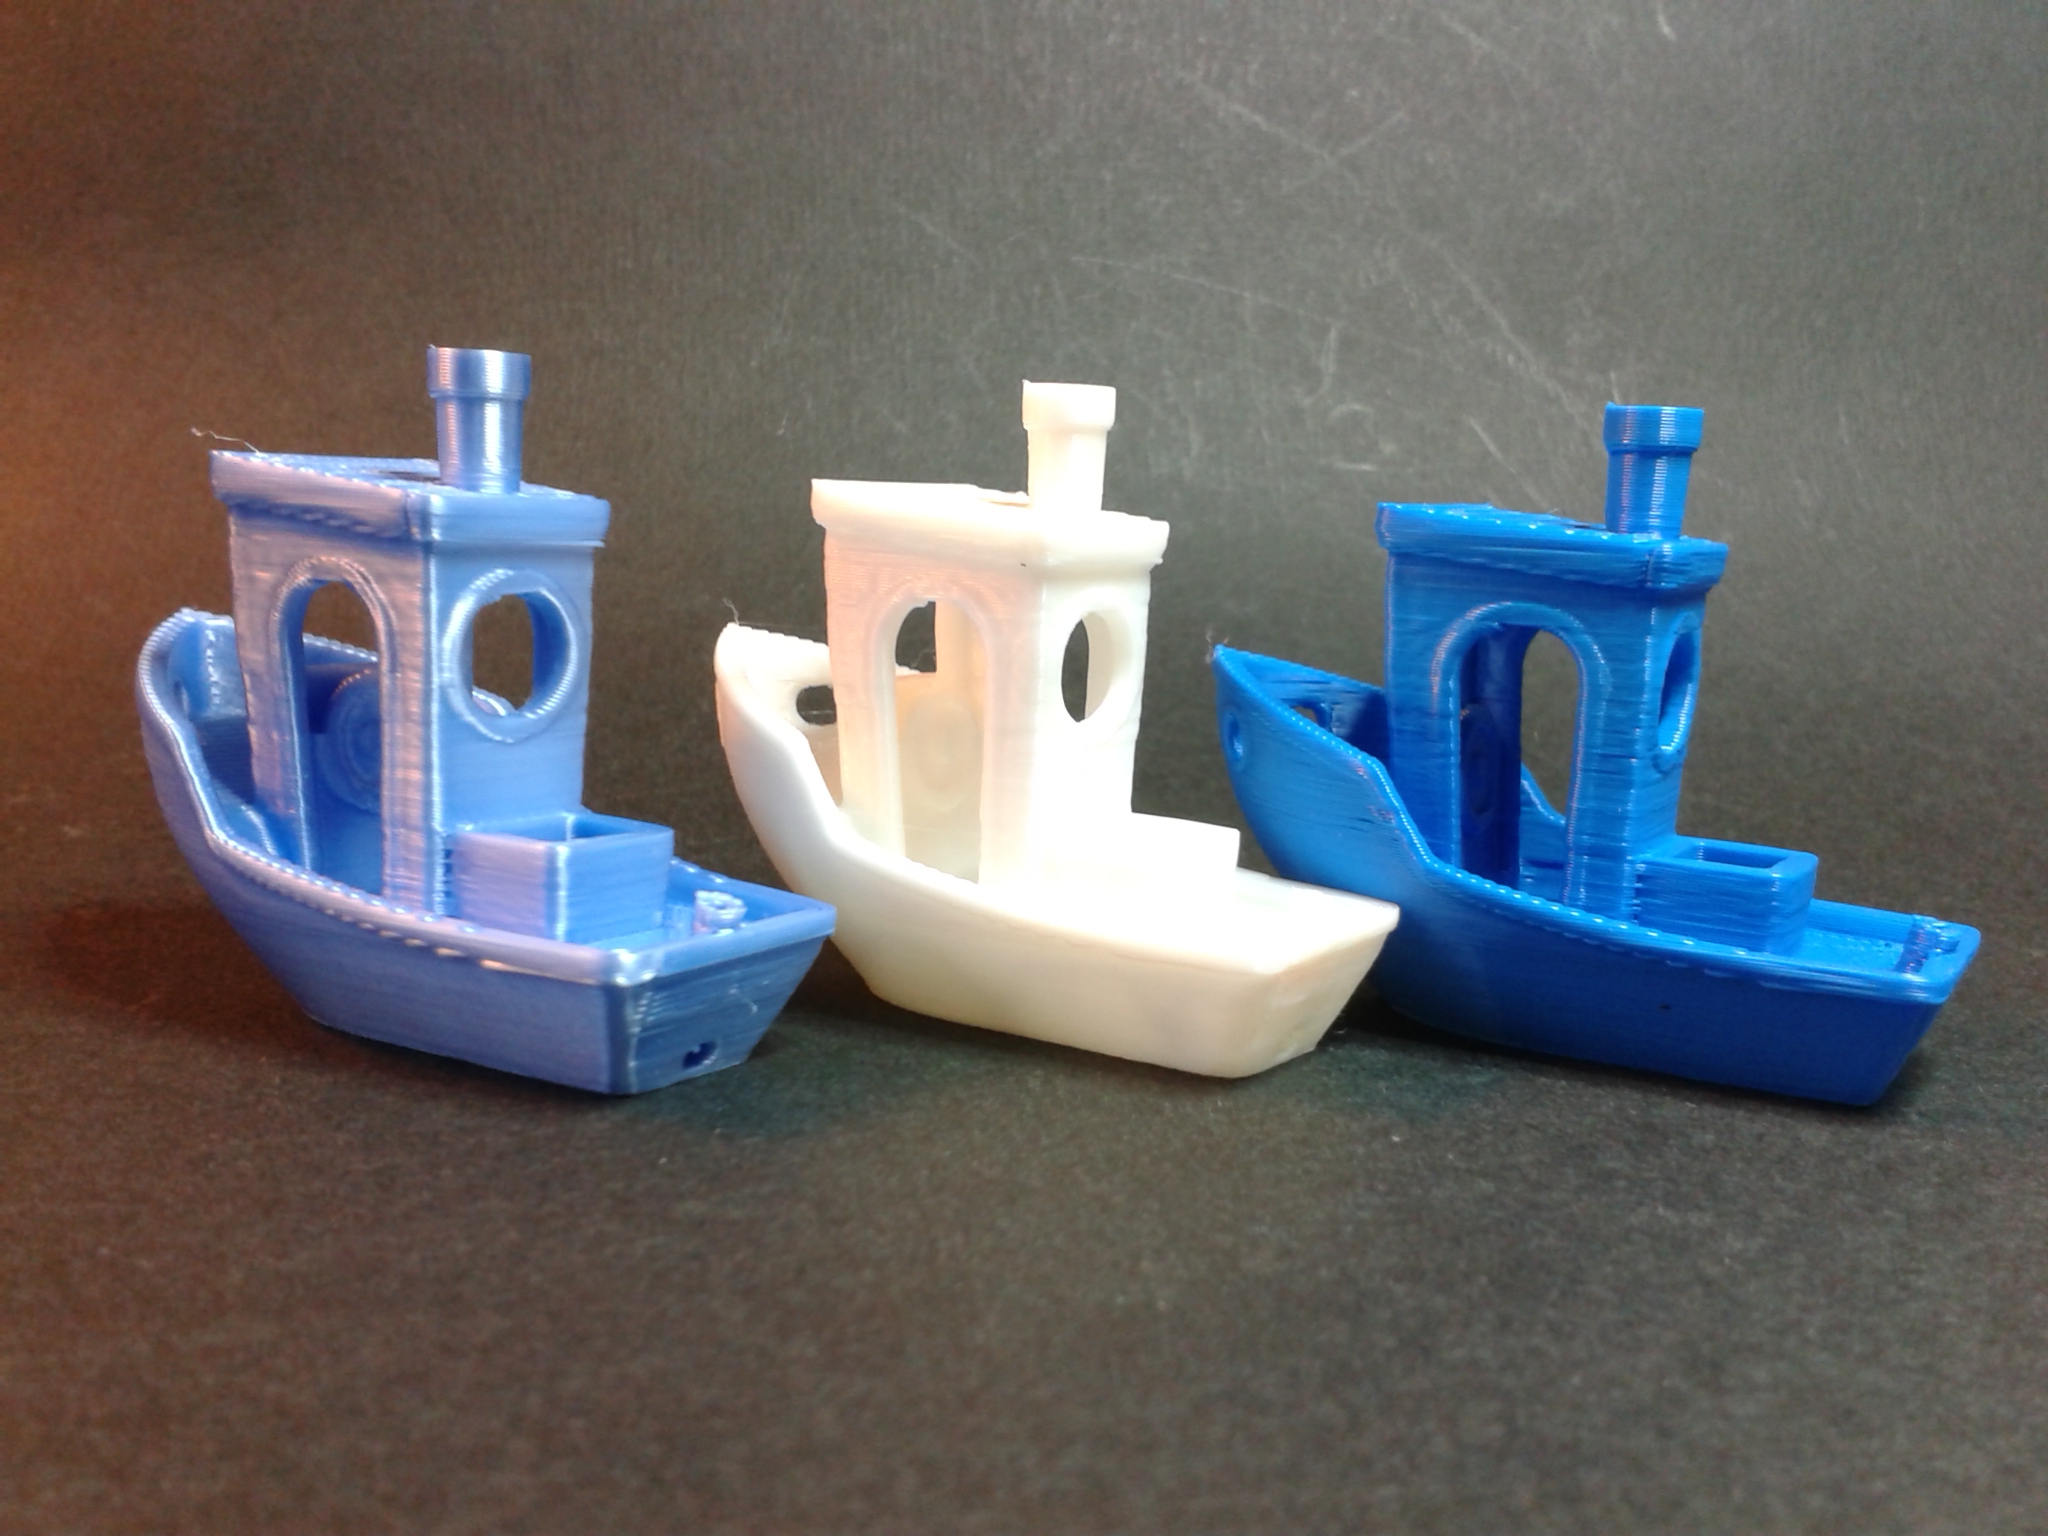
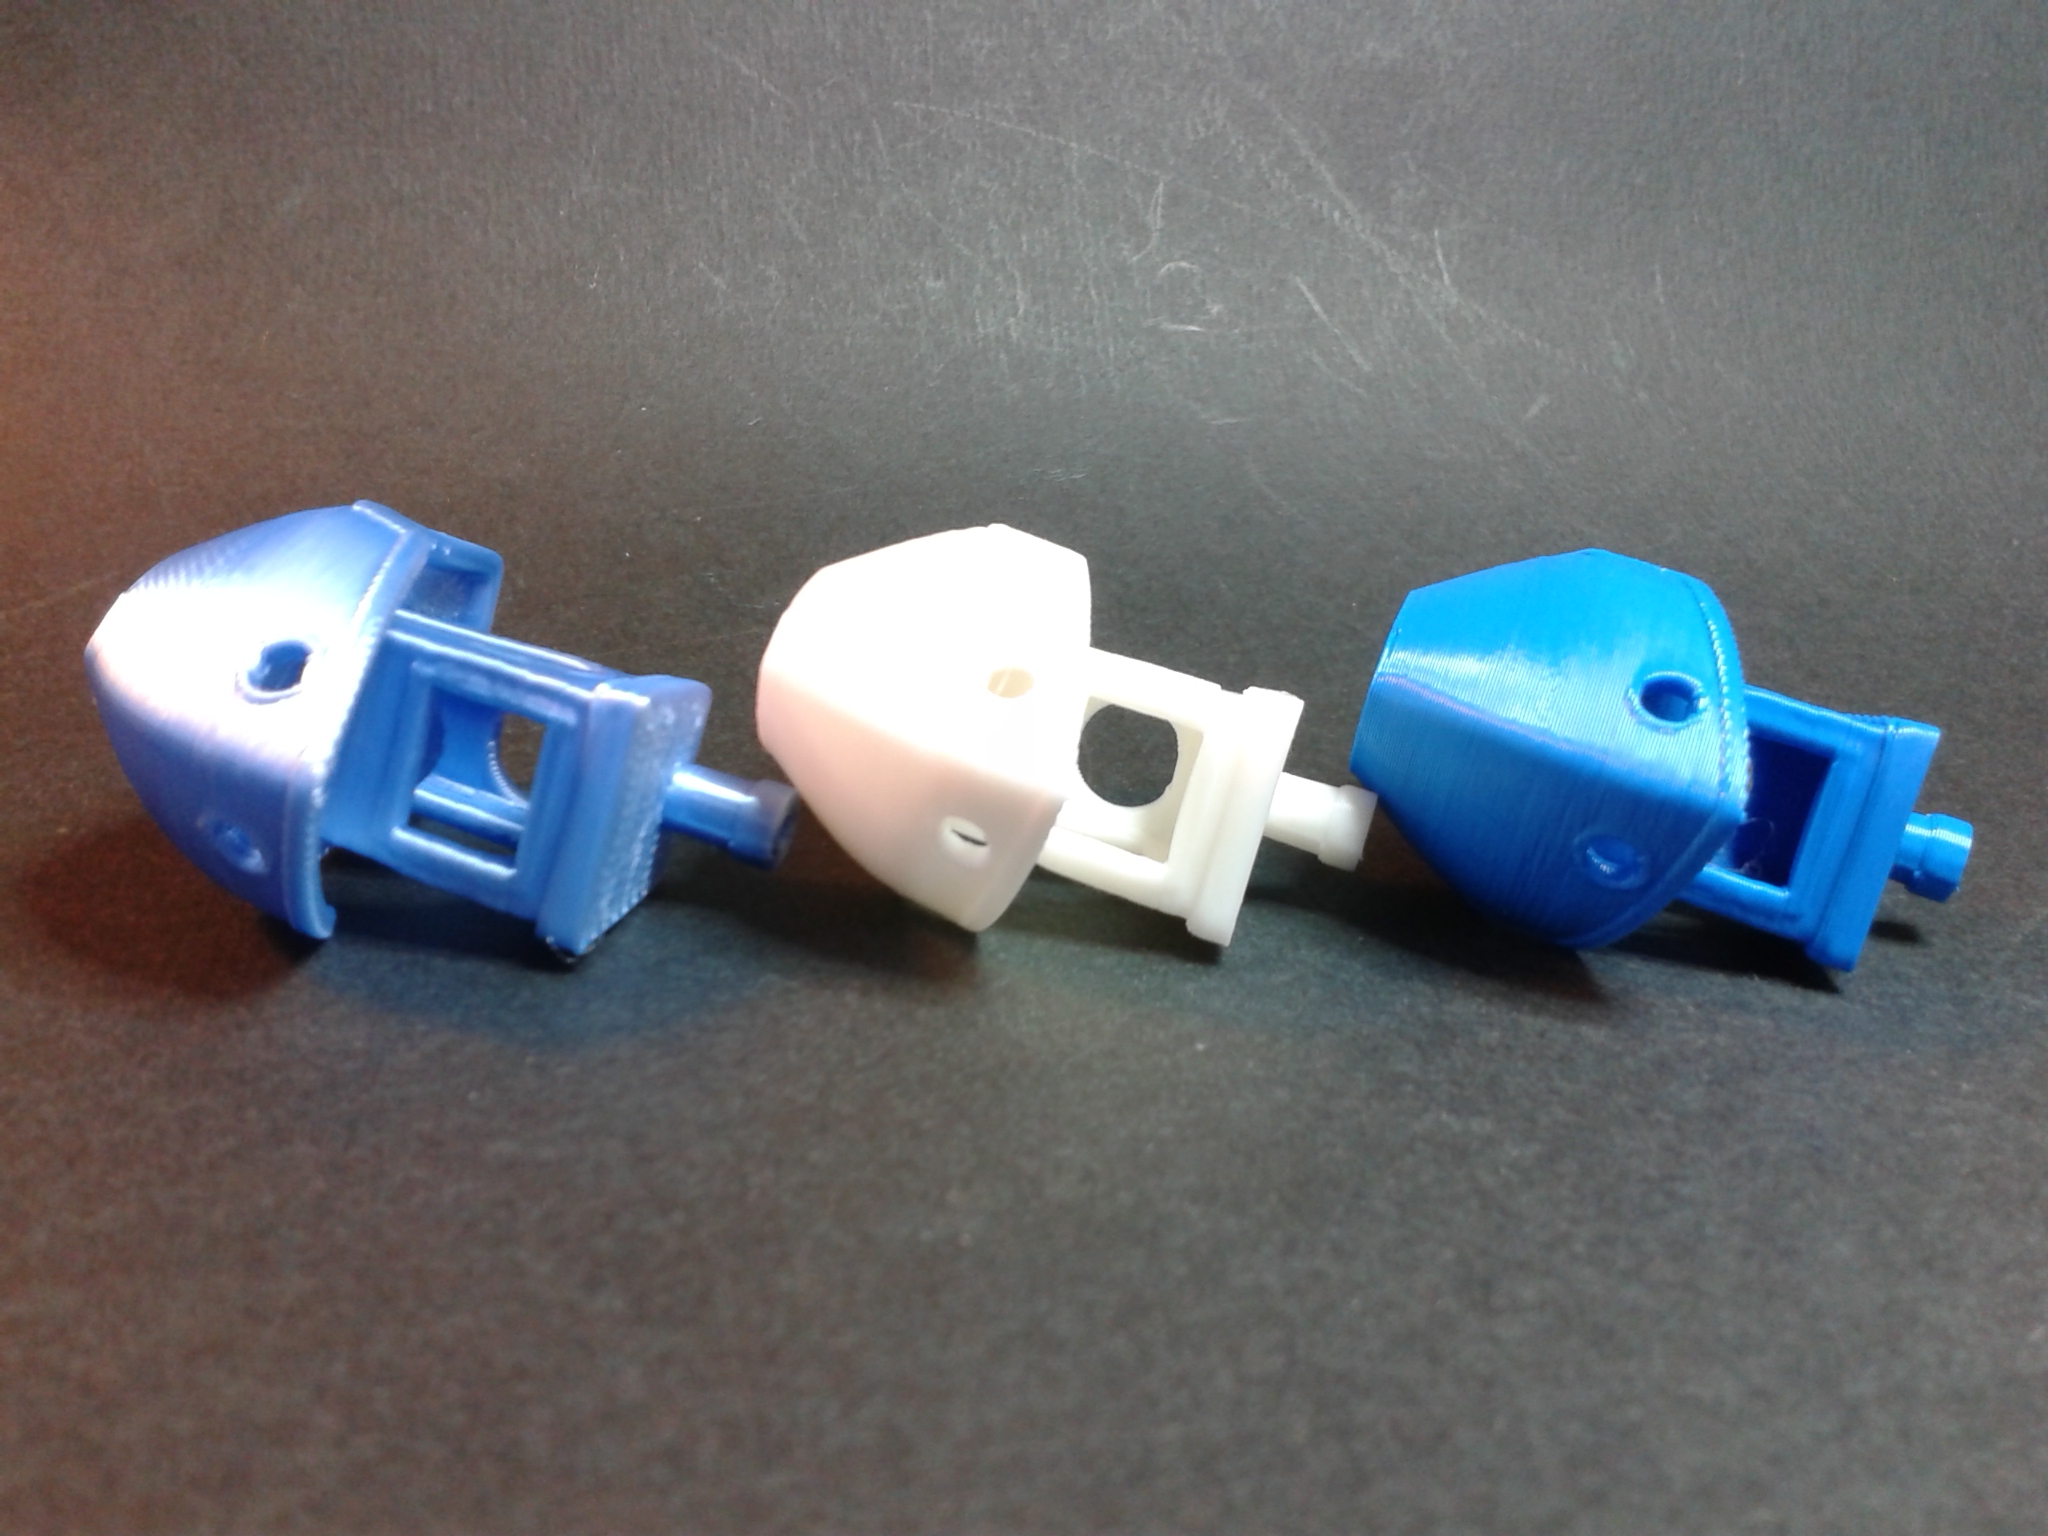
Les résultats d’impression même s’ils ne sont pas parfaits, me semblent, avec les paramètres par défaut (“pressure advance” et “input shaping”(“compensation de la résonance”) pour Klipper spécifié avec des valeurs prédéfinies par Creality) très honorable pour cette vitesse d’impression.
D’autres impressions en PLA
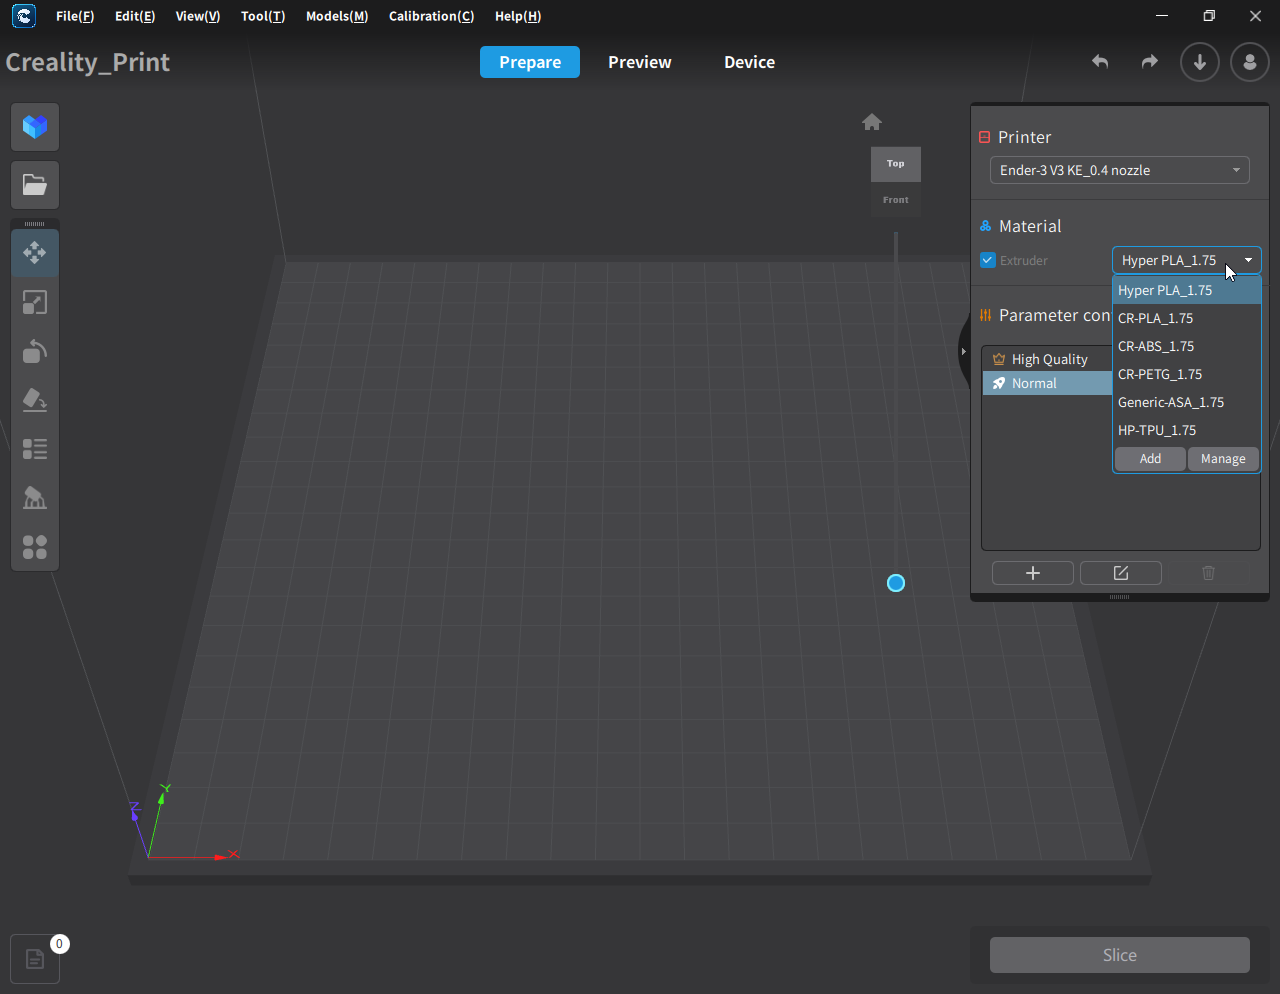
Pour l’ensemble des impressions réalisées, j’ai utilisé Creality Print v4.3.8 sur Windows avec un profil de qualité “Normal” selon ces paramètres détaillés :
- Vitesse d’impression du remplissage : 300 mm/s
- Vitesse d’impression des parois externes : 200 mm/s
- Vitesse d’impression des parois internes : 300 mm/s
- Vitesse d’impression des couches du dessus et du dessous : 200 mm/s
- Vitesse de déplacement : 300 mm/s
- Vitesse d’impression lors de la couche initiale : 100 mm/s
- Vitesse de déplacement lors de la couche initiale : 300 mm/s
Vitesses qui seront limitées, lors du découpage, par la vitesse volumétrique maximale du profil matériau utilisé. Par exemple le profil matériau “CR-PLA_1.75” a une vitesse volumétrique maximale de 20.00 mm³/s alors que le profil matériau “Hyper PLA_1.75” offre une vitesse volumétrique maximale 27.00 mm³/s.
Pour les filaments de type “Silk”, j’ai préféré désactiver l’option “Auto Temperature” afin d’éviter des changements de nuance de couleurs car pour certains filaments, la nuance de couleur varie en fonction de la température d’impression utilisée.
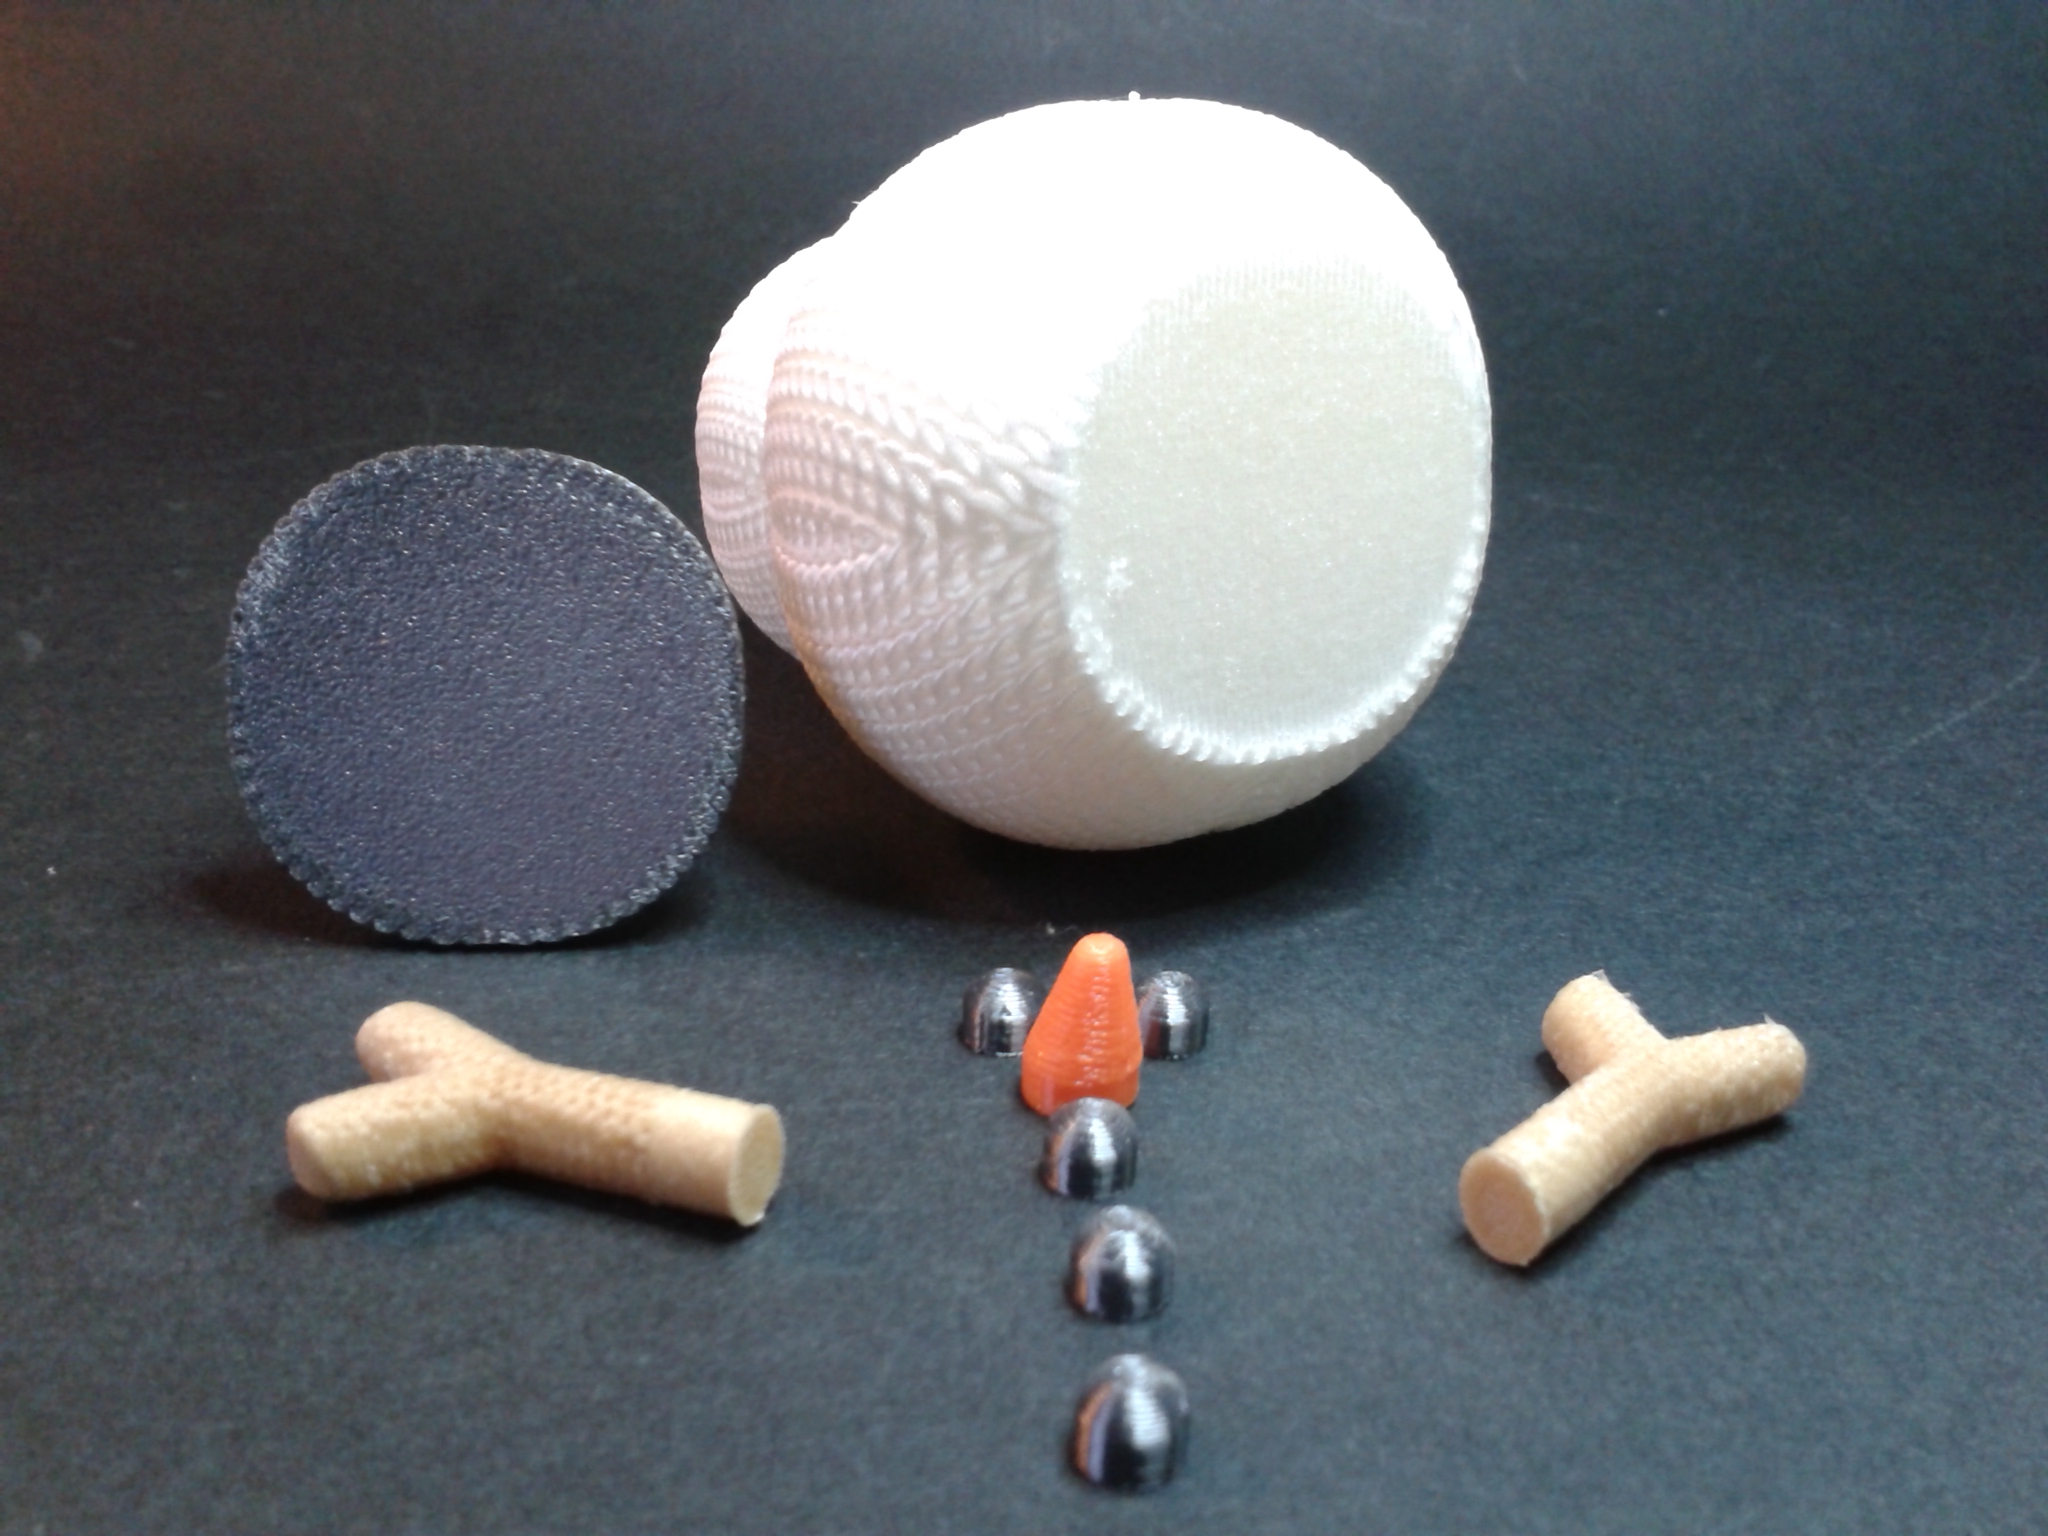
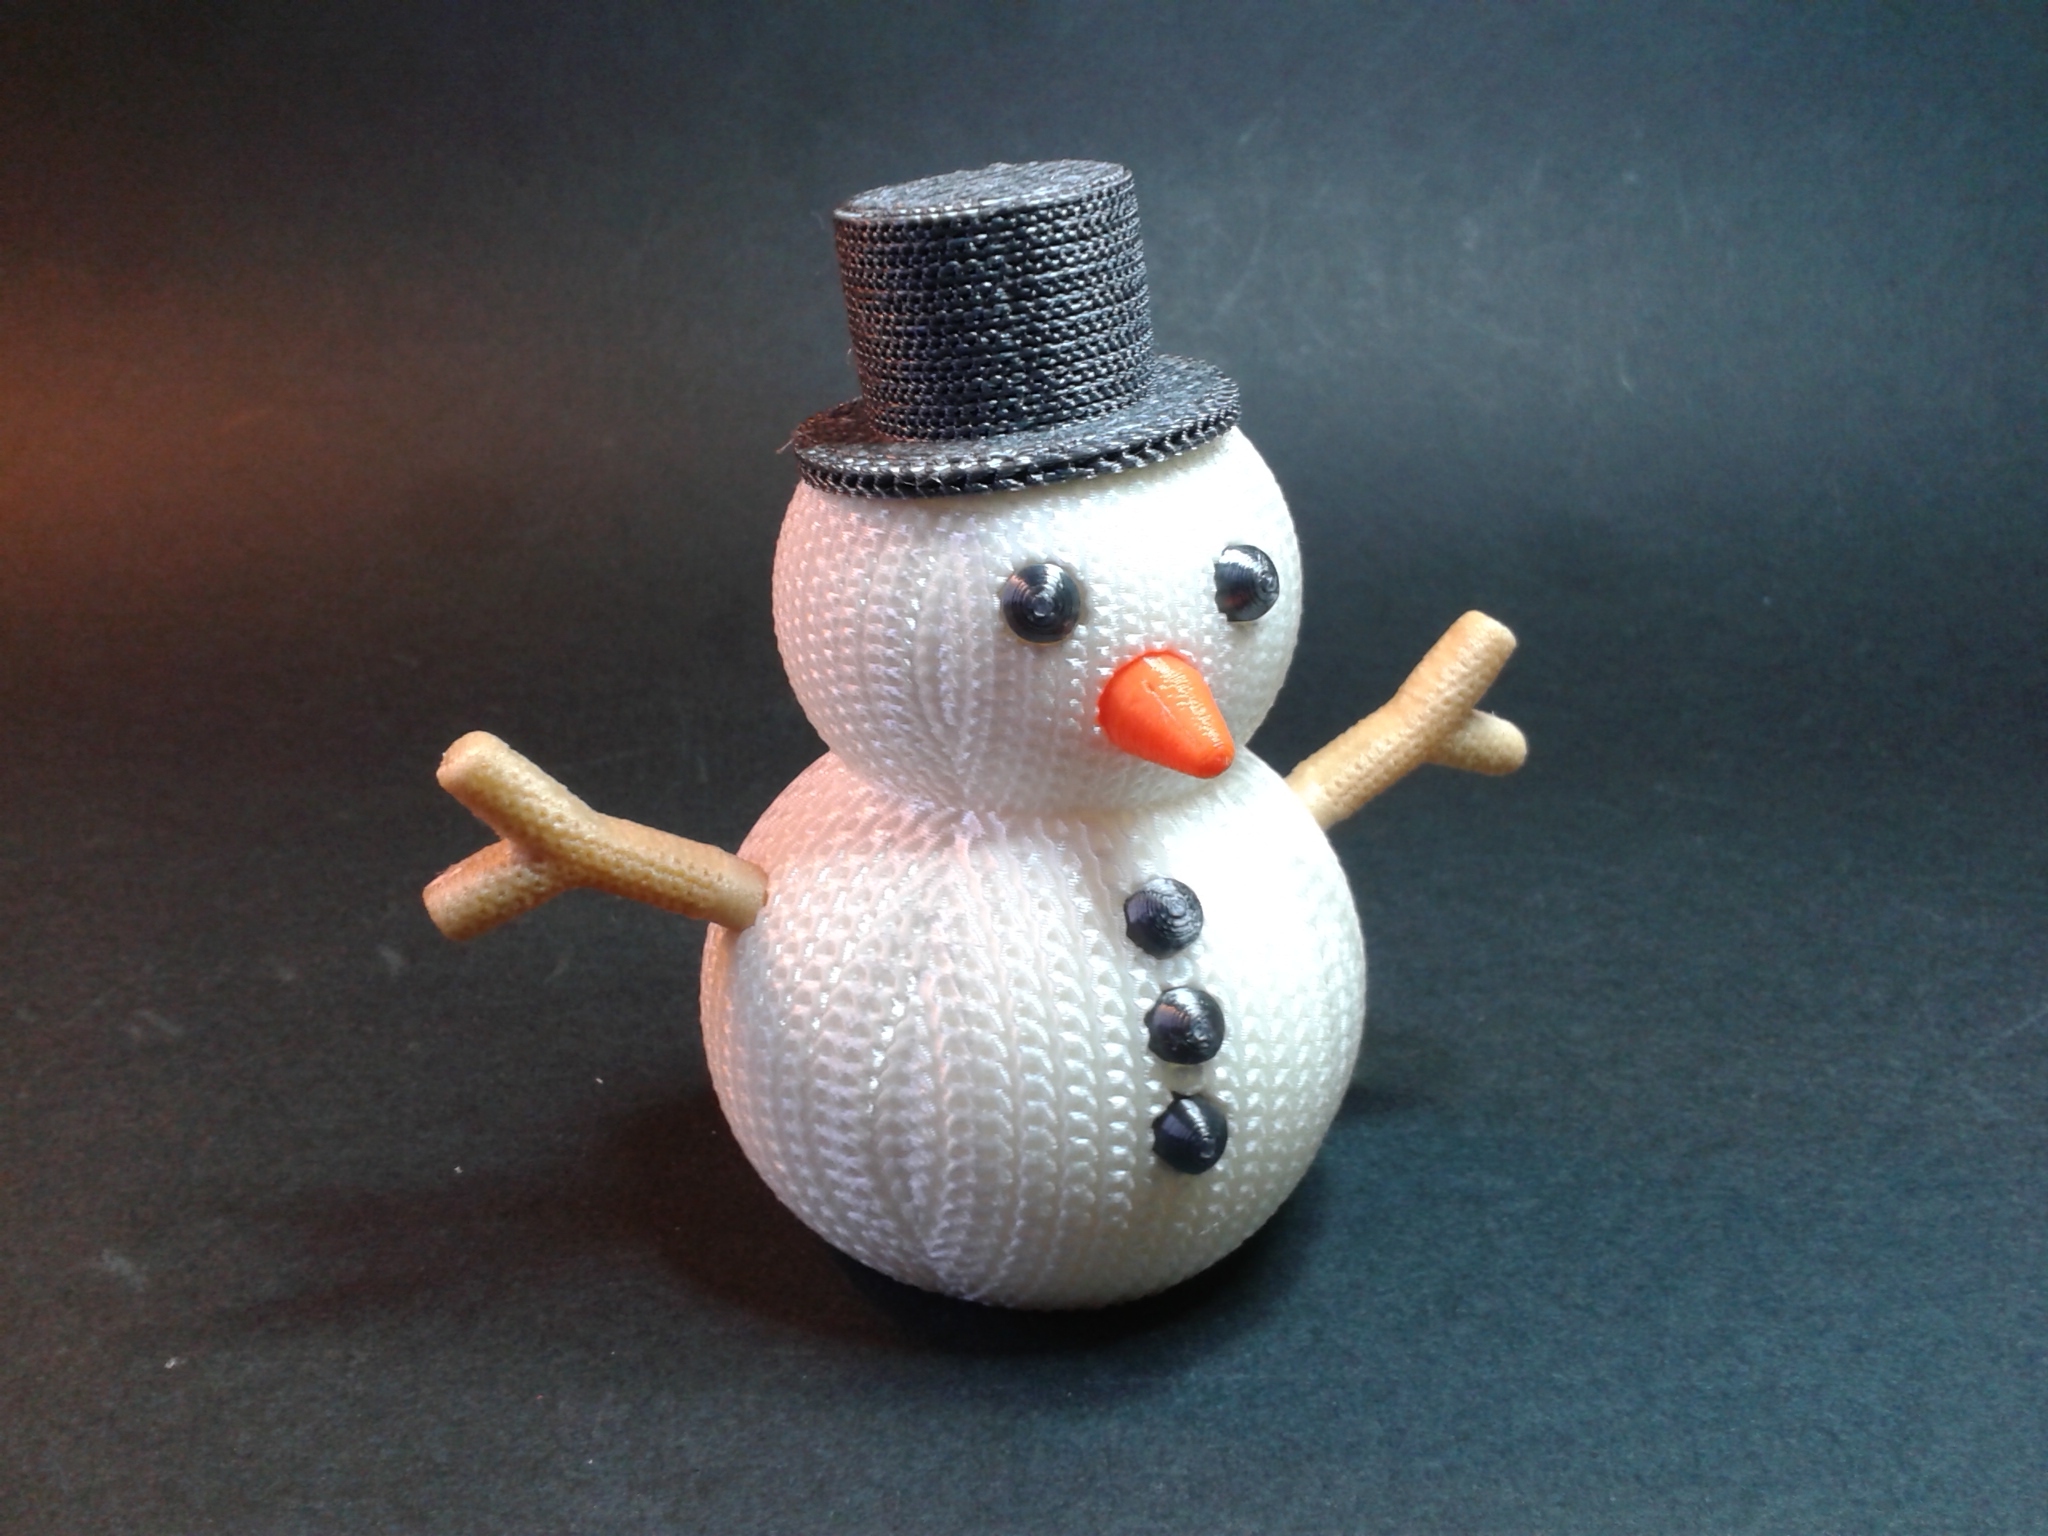
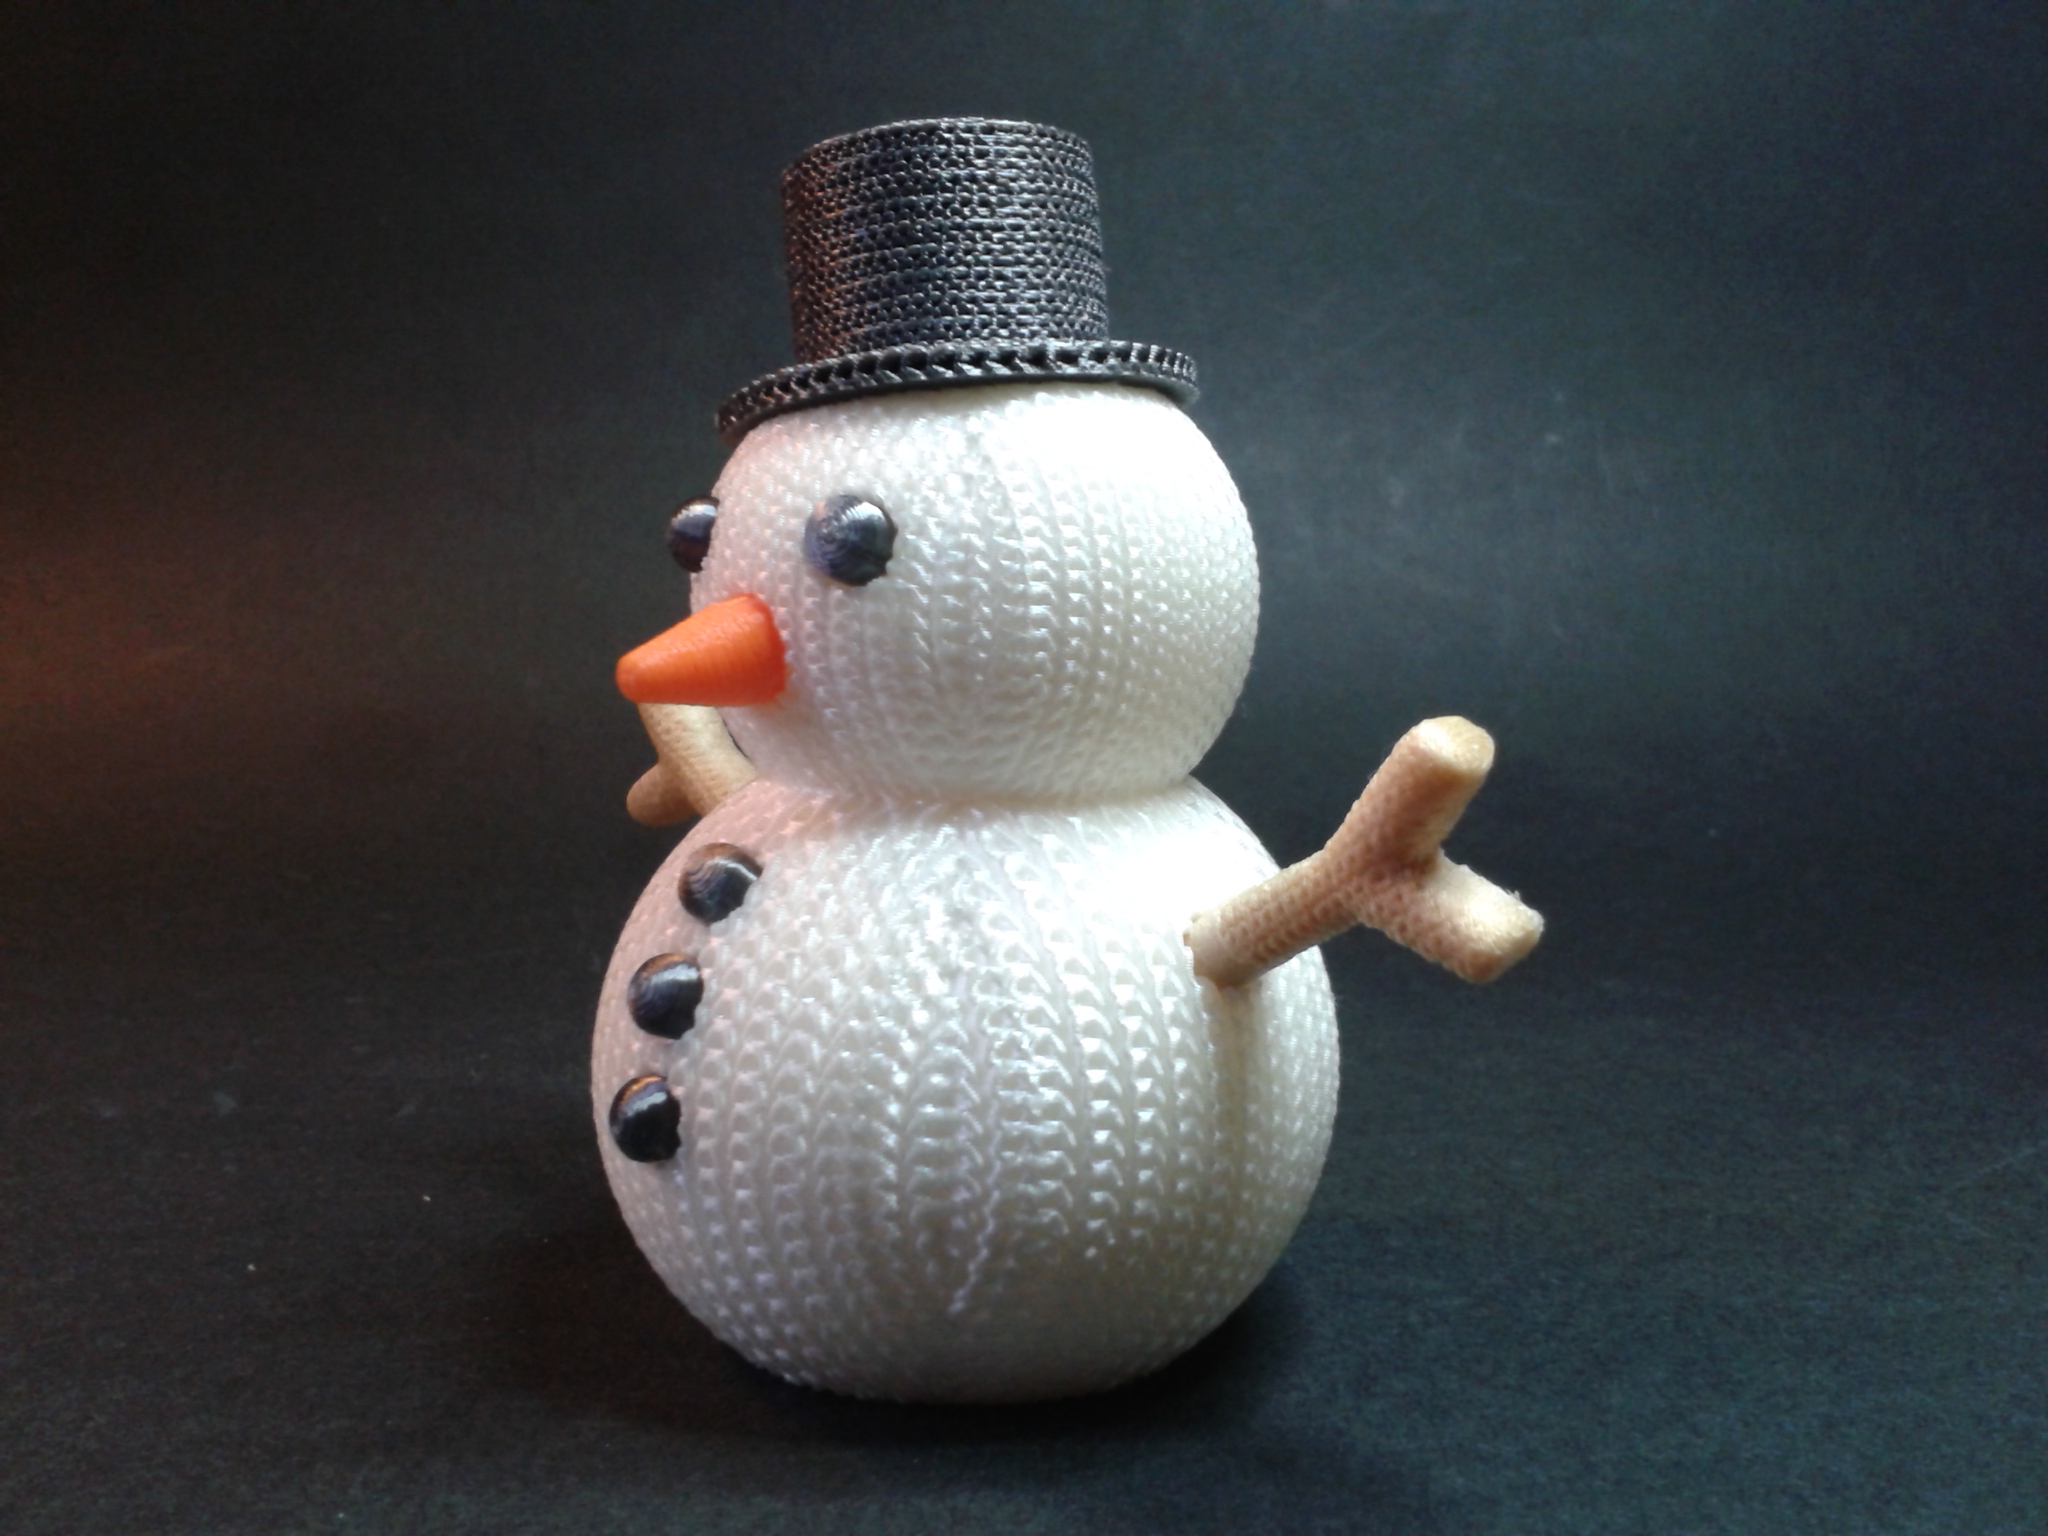
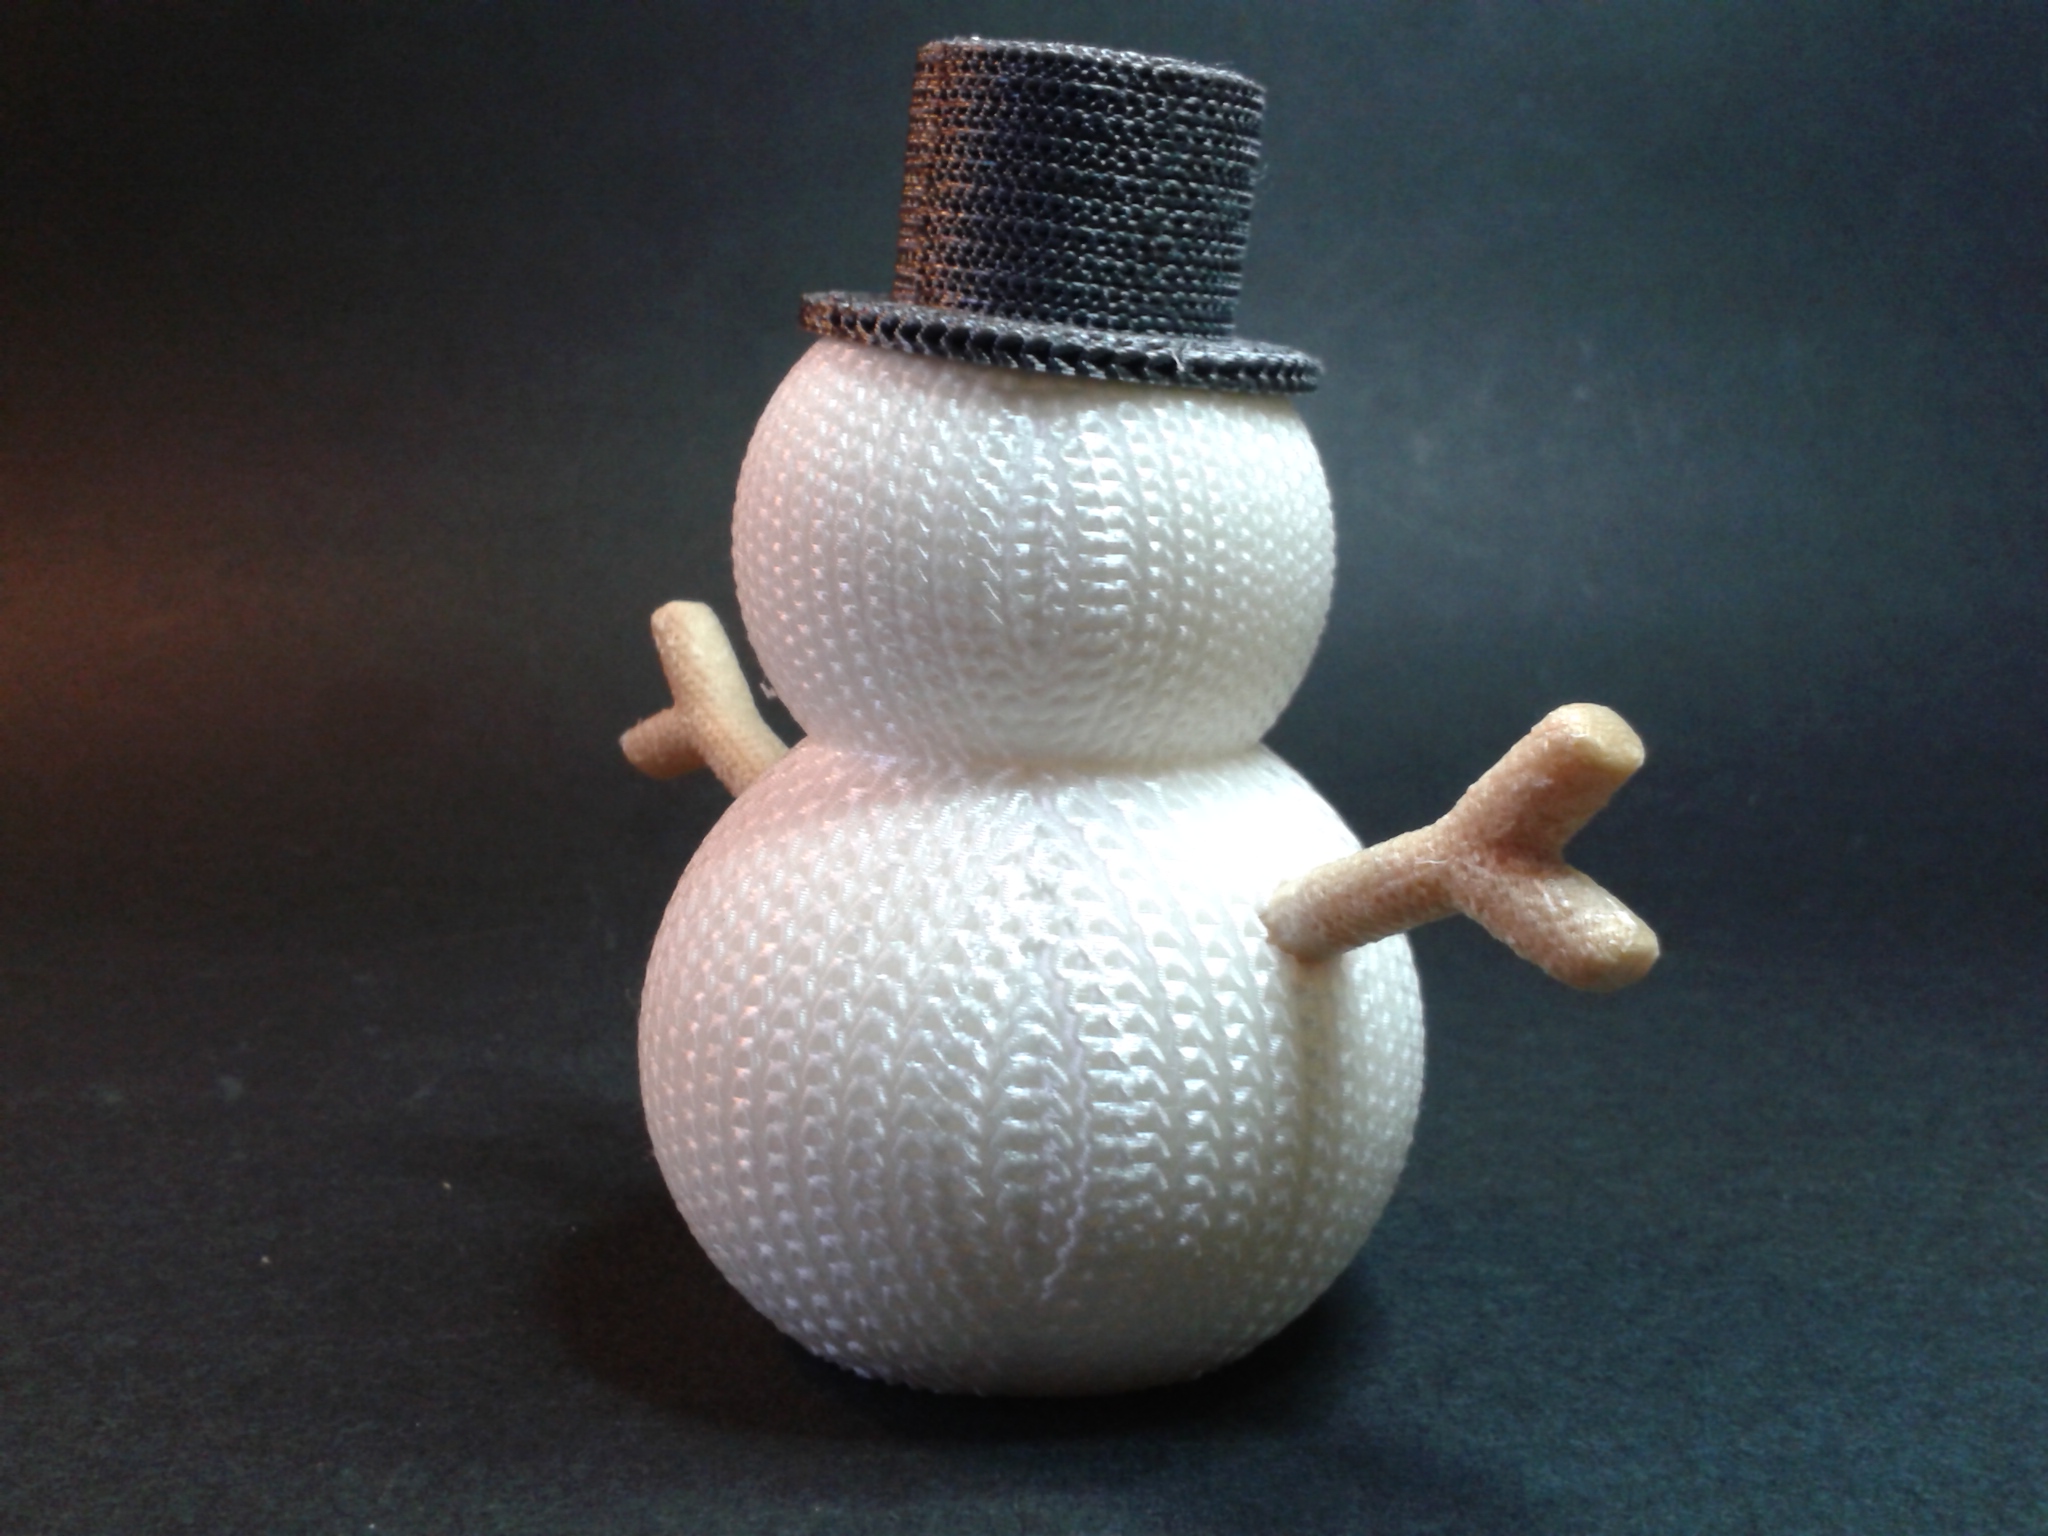
Bonhomme de neige
“Knitted Snowman” de “IK3D” (payant mais gratuit si on est abonné Creality Cloud Premium).
Filaments : PLA Wood Velleman, PLA Silk ArianePlast blanc, PLA Silk ArianePlast noir, PLA Eryone orange.
En cinq plateaux pour un total d’environ 5h04 d’impression.


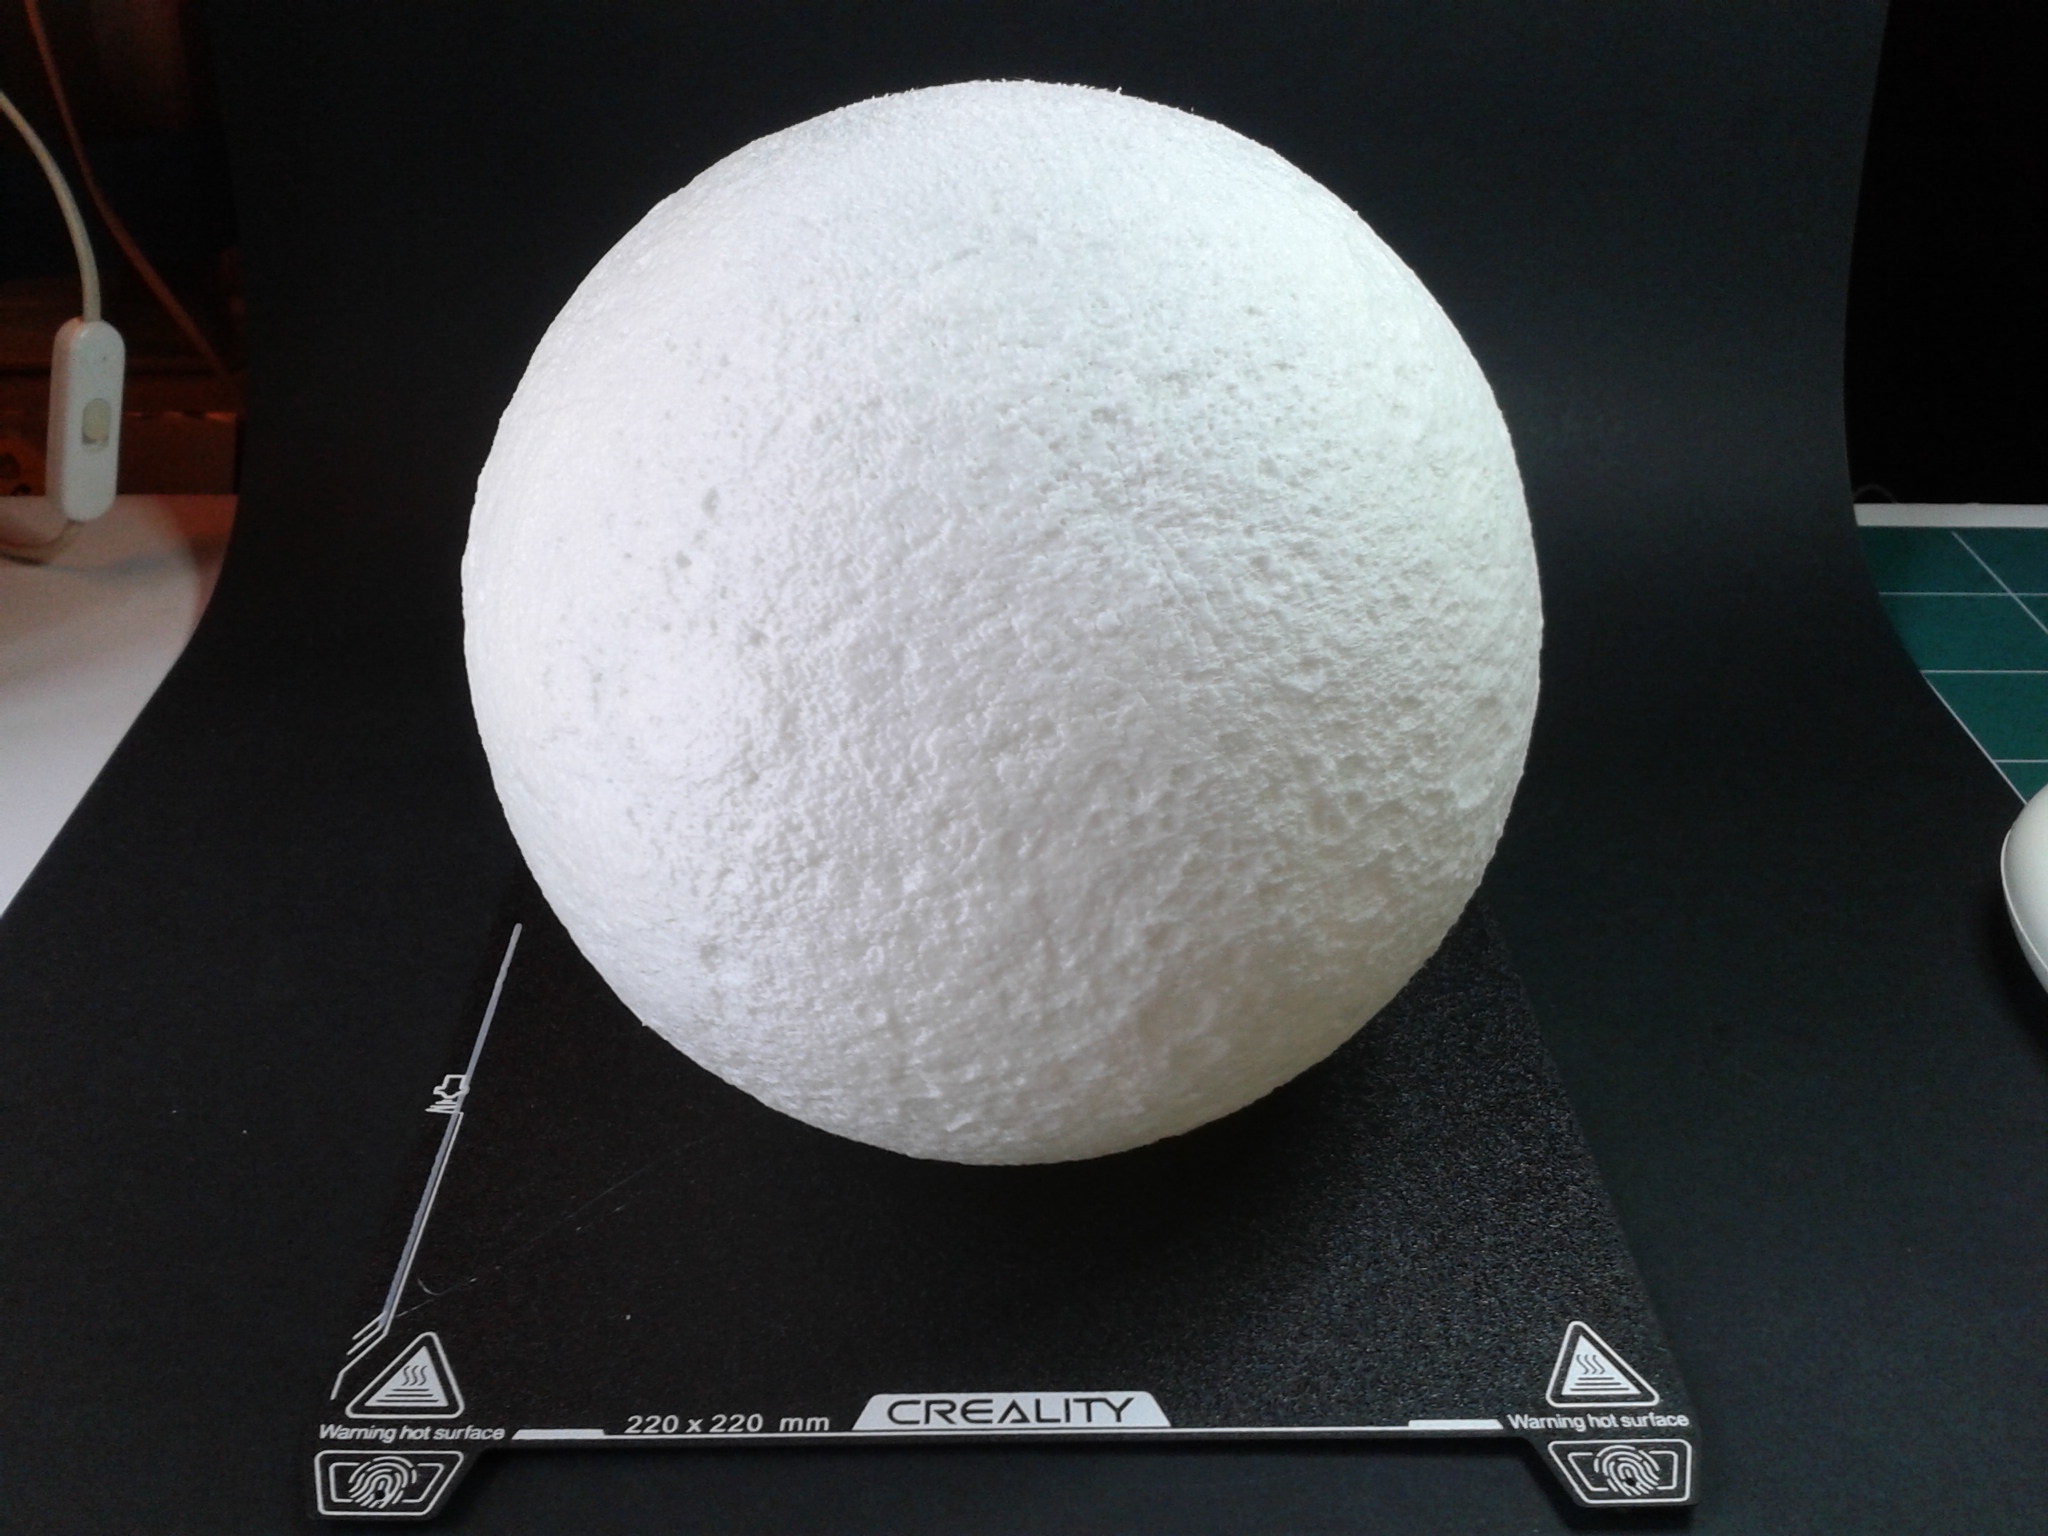
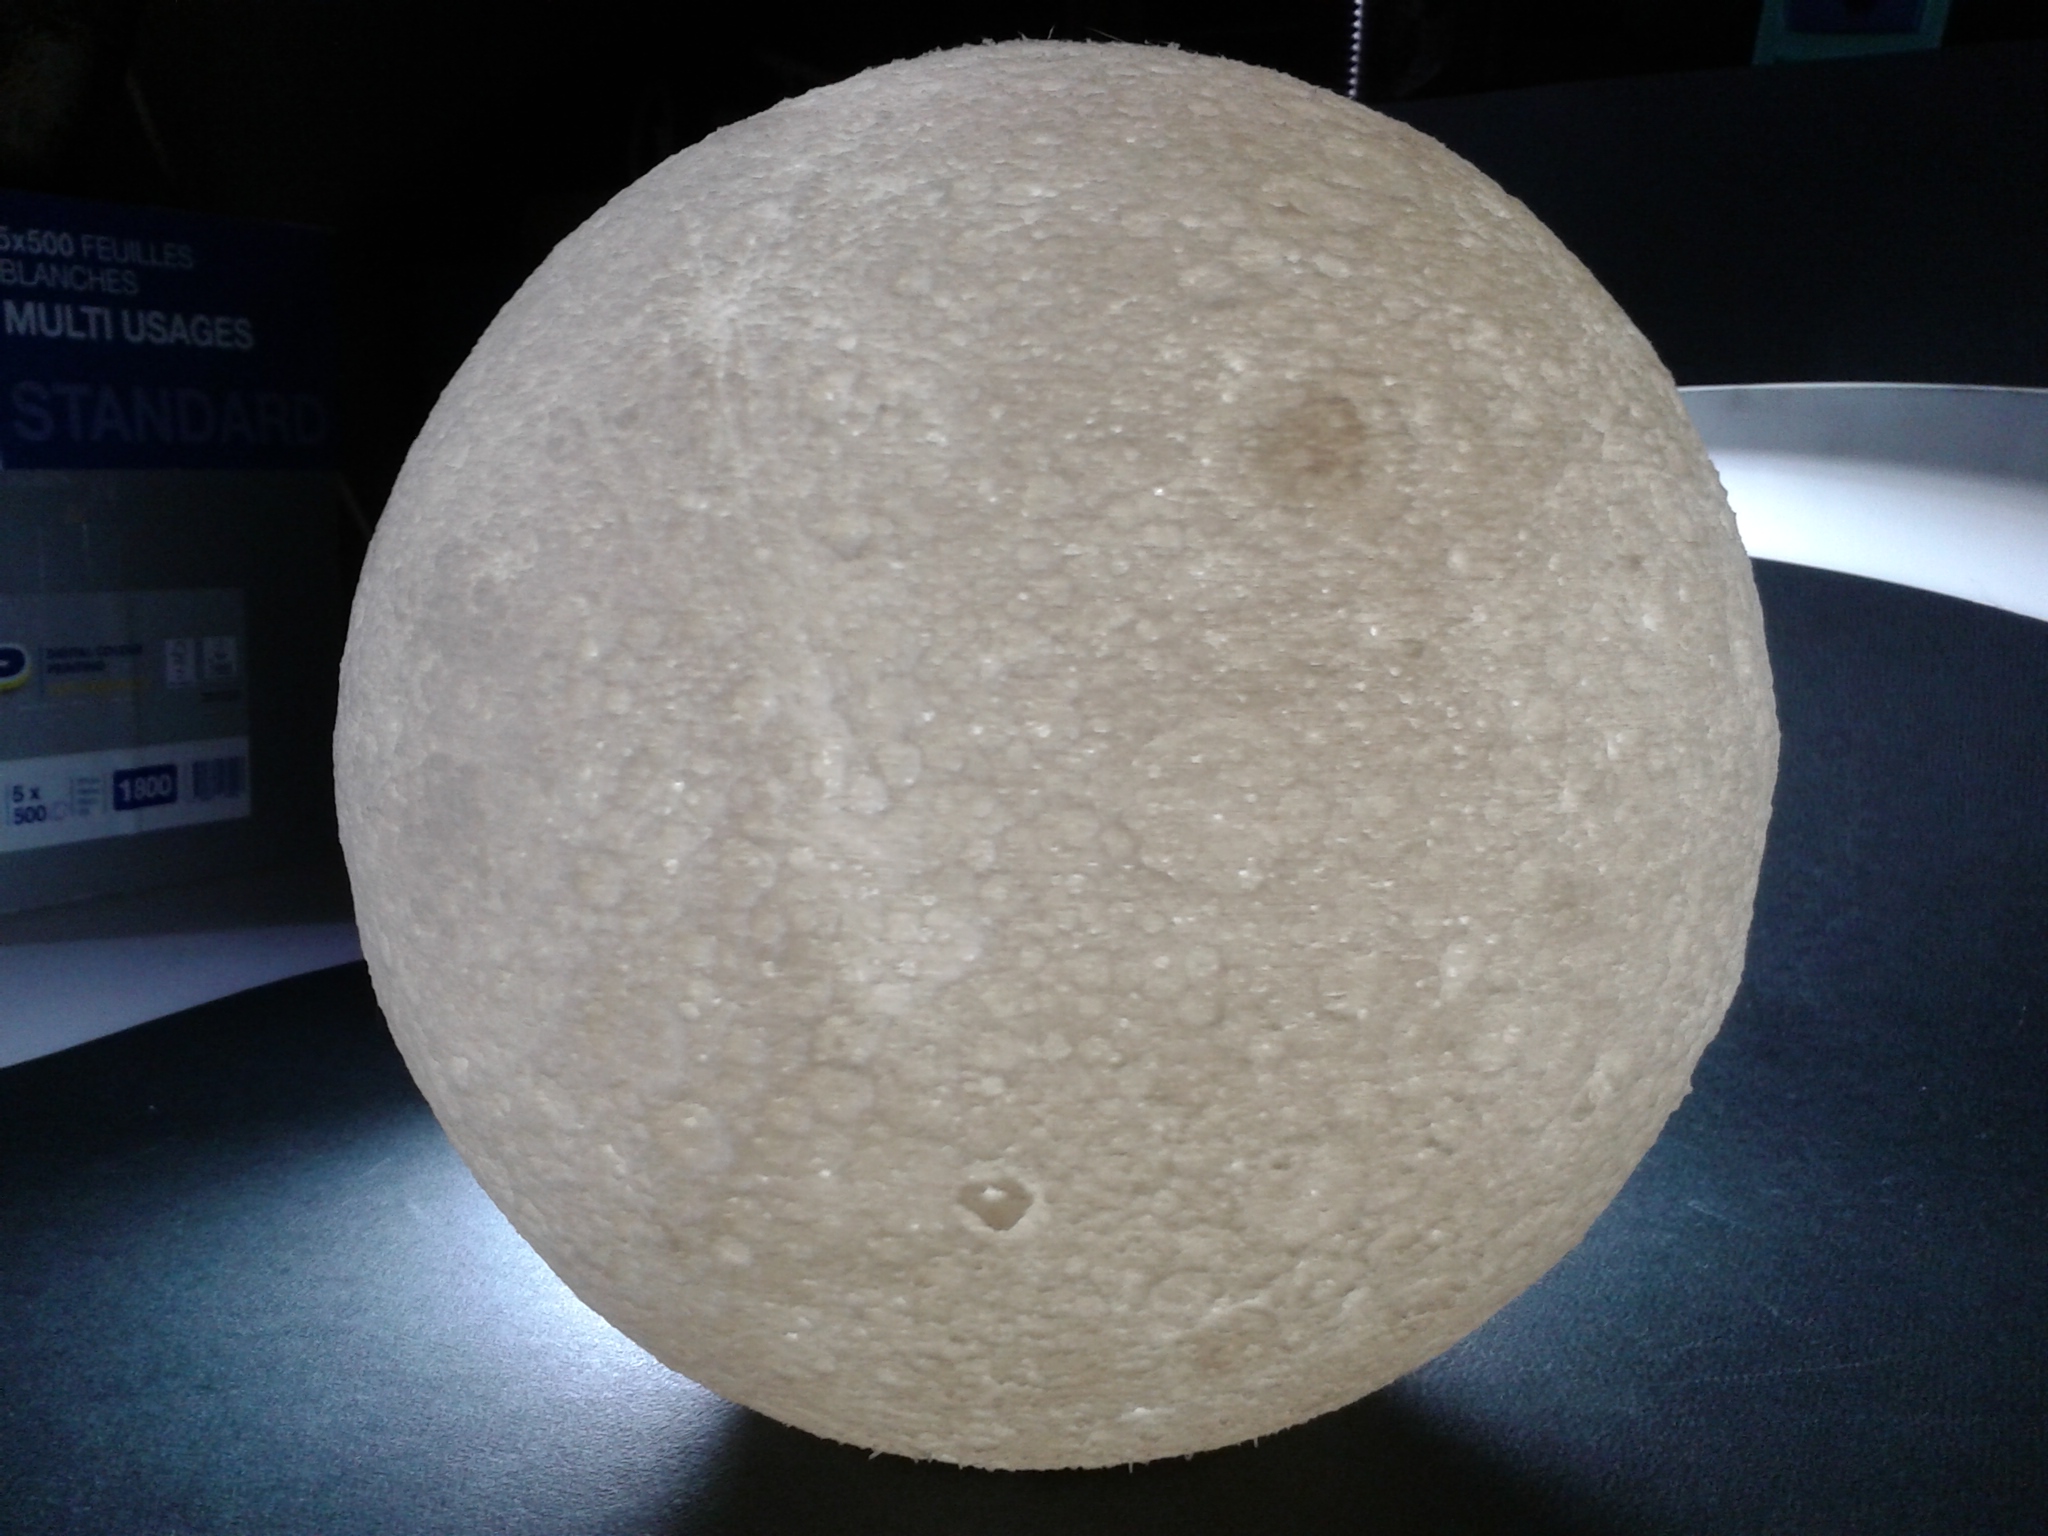
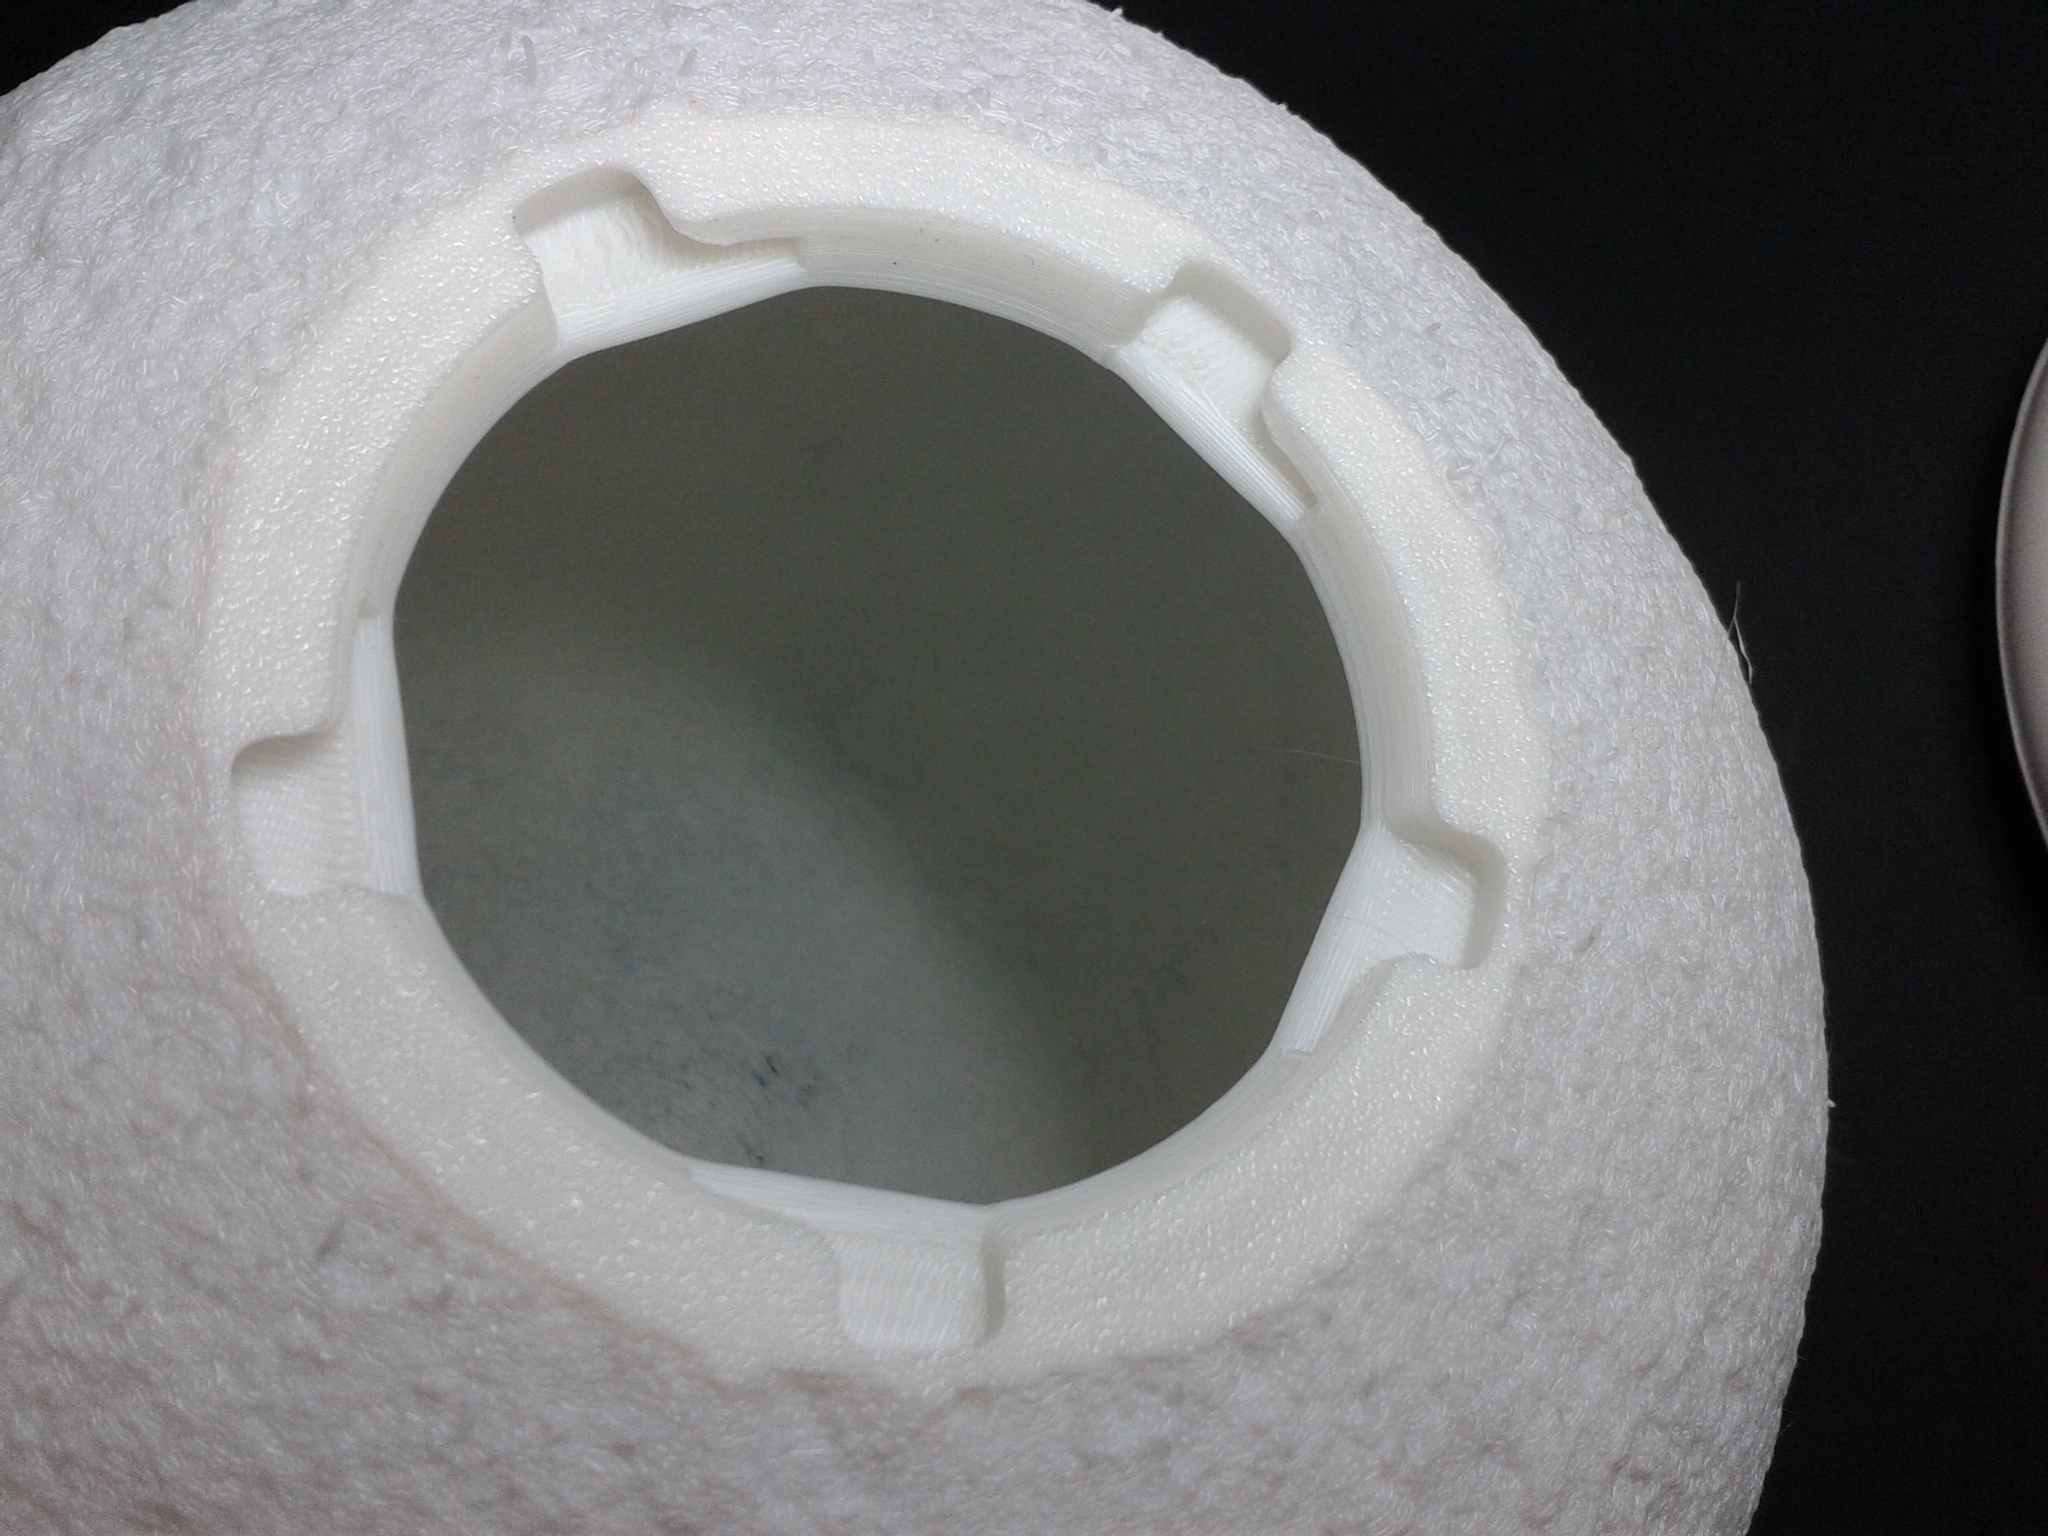
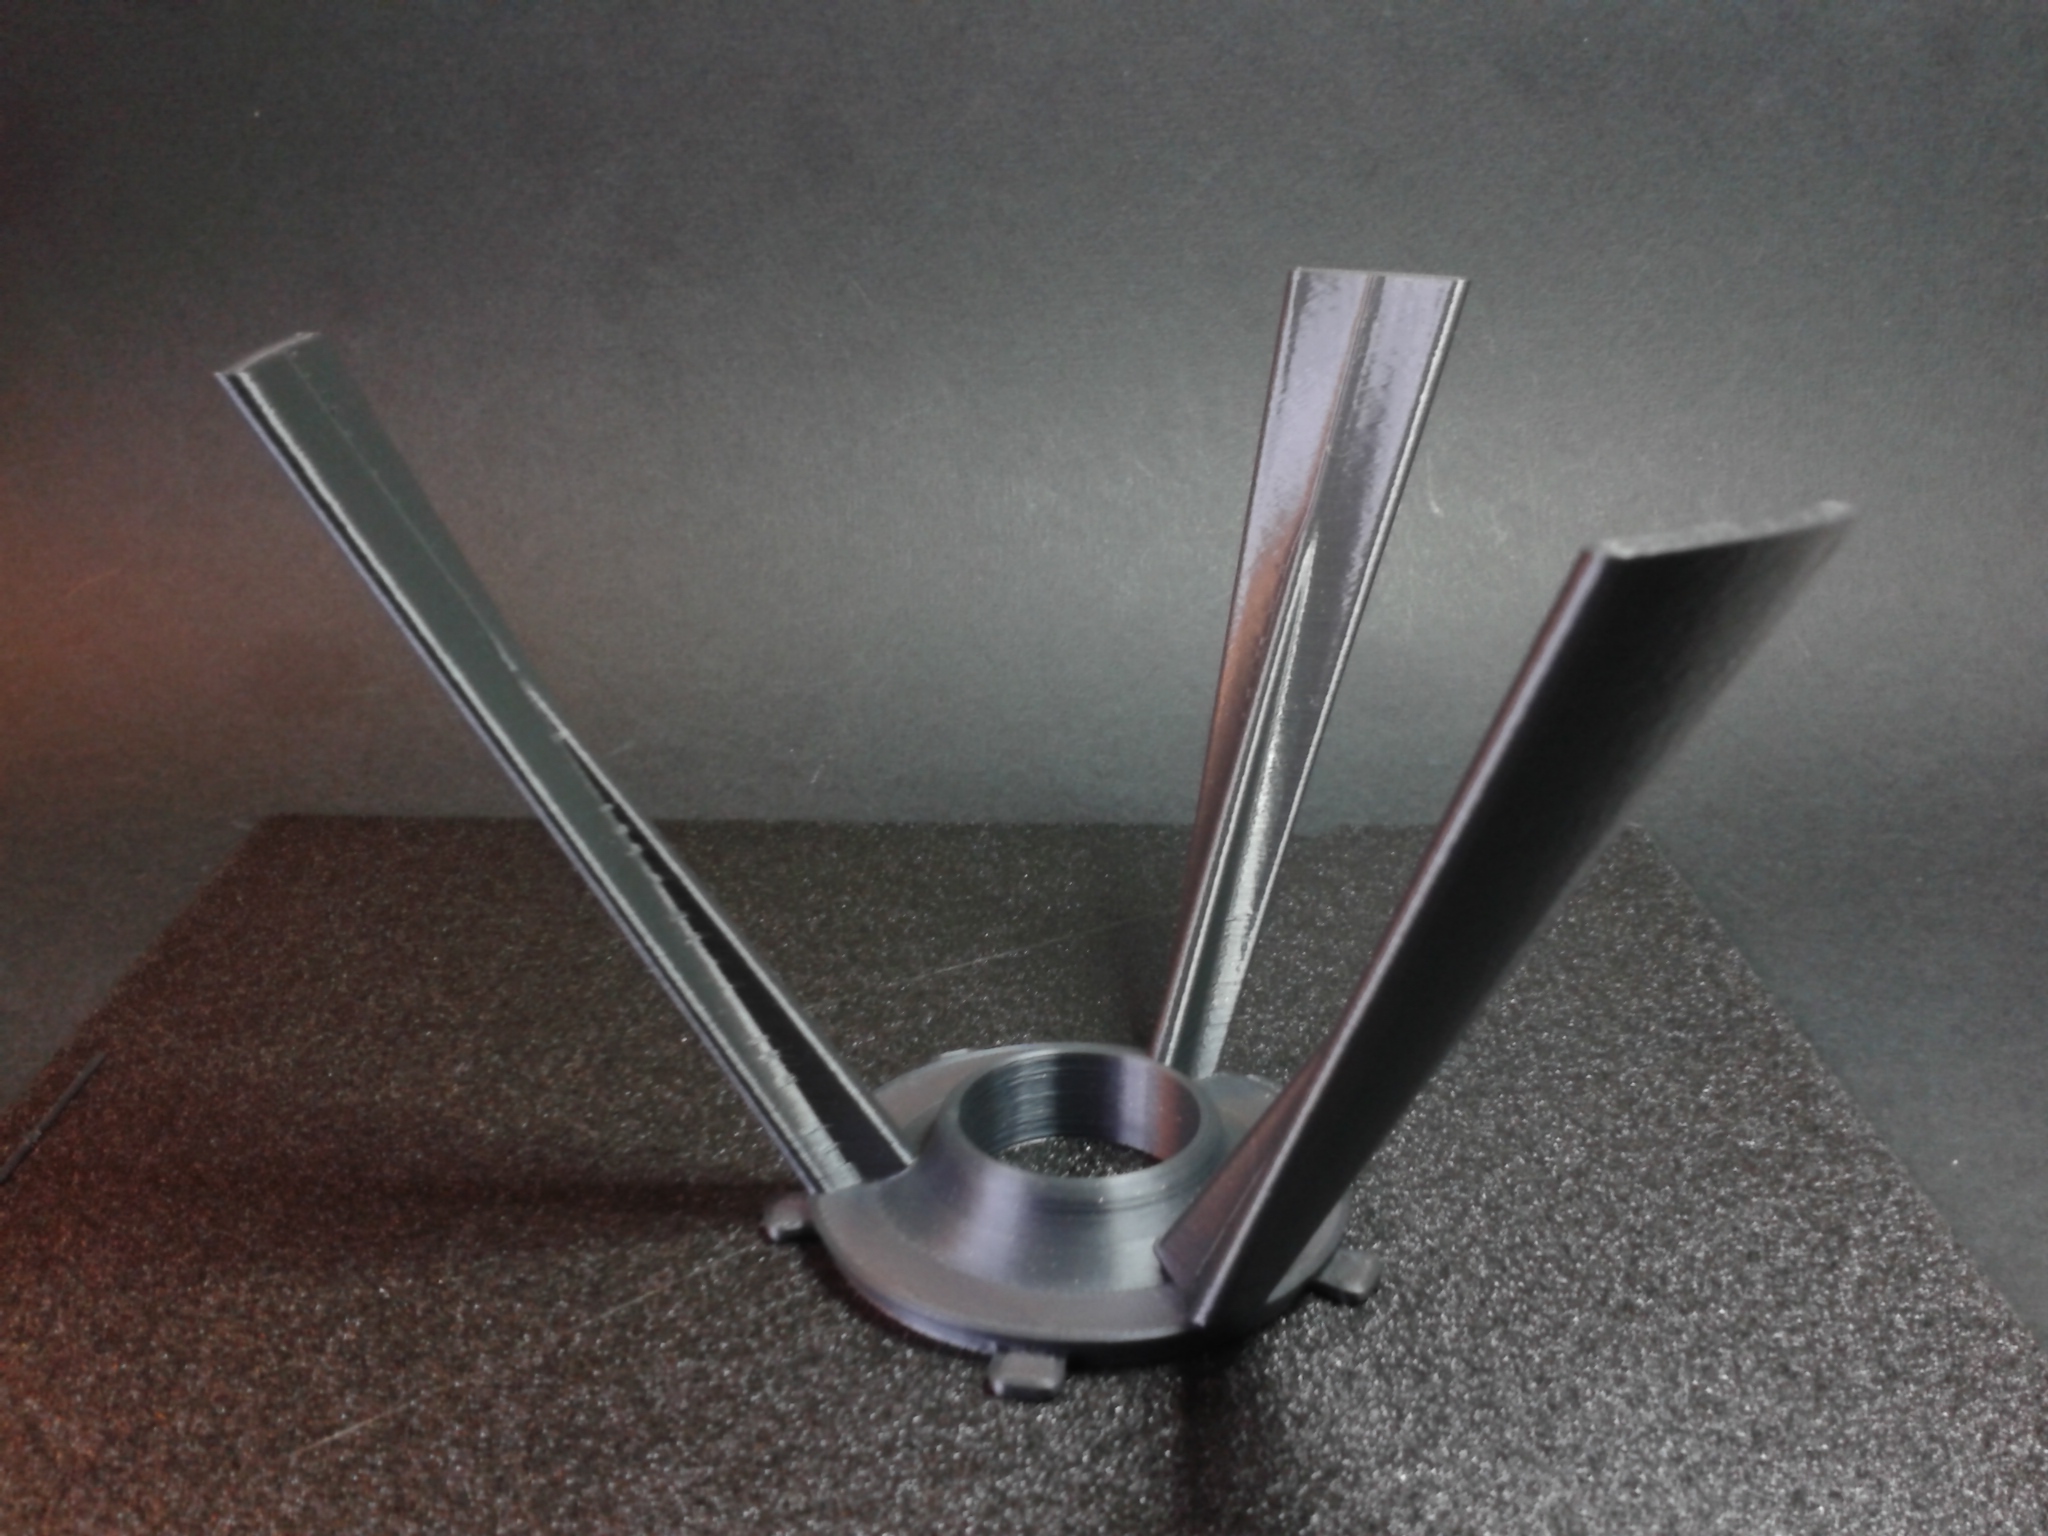
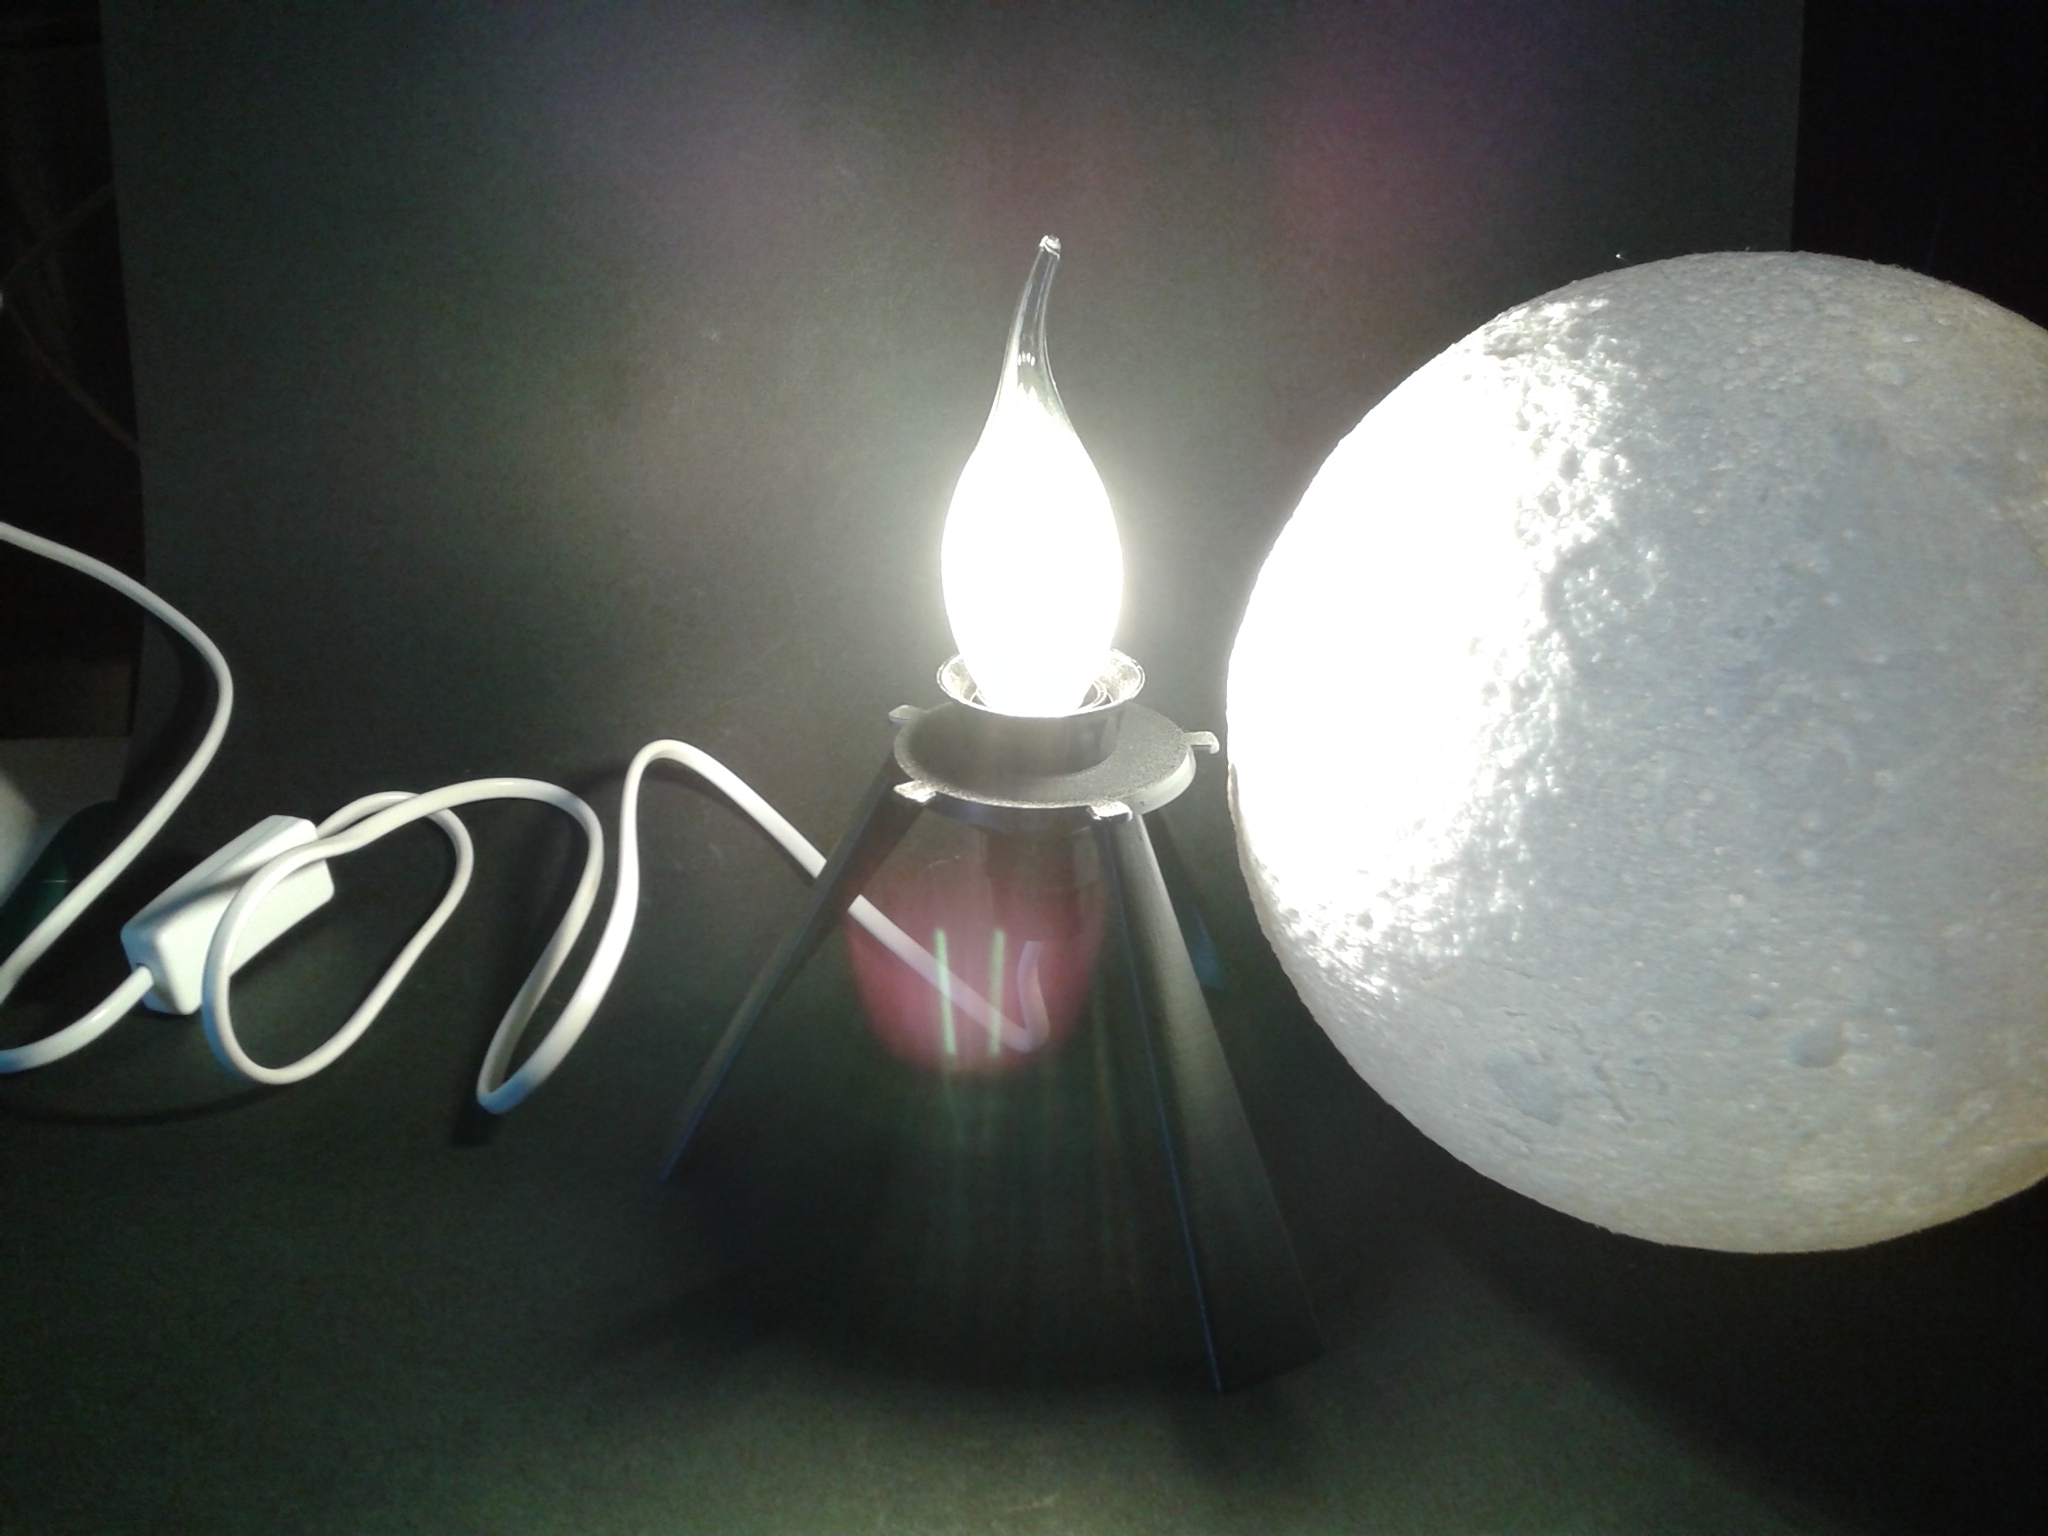
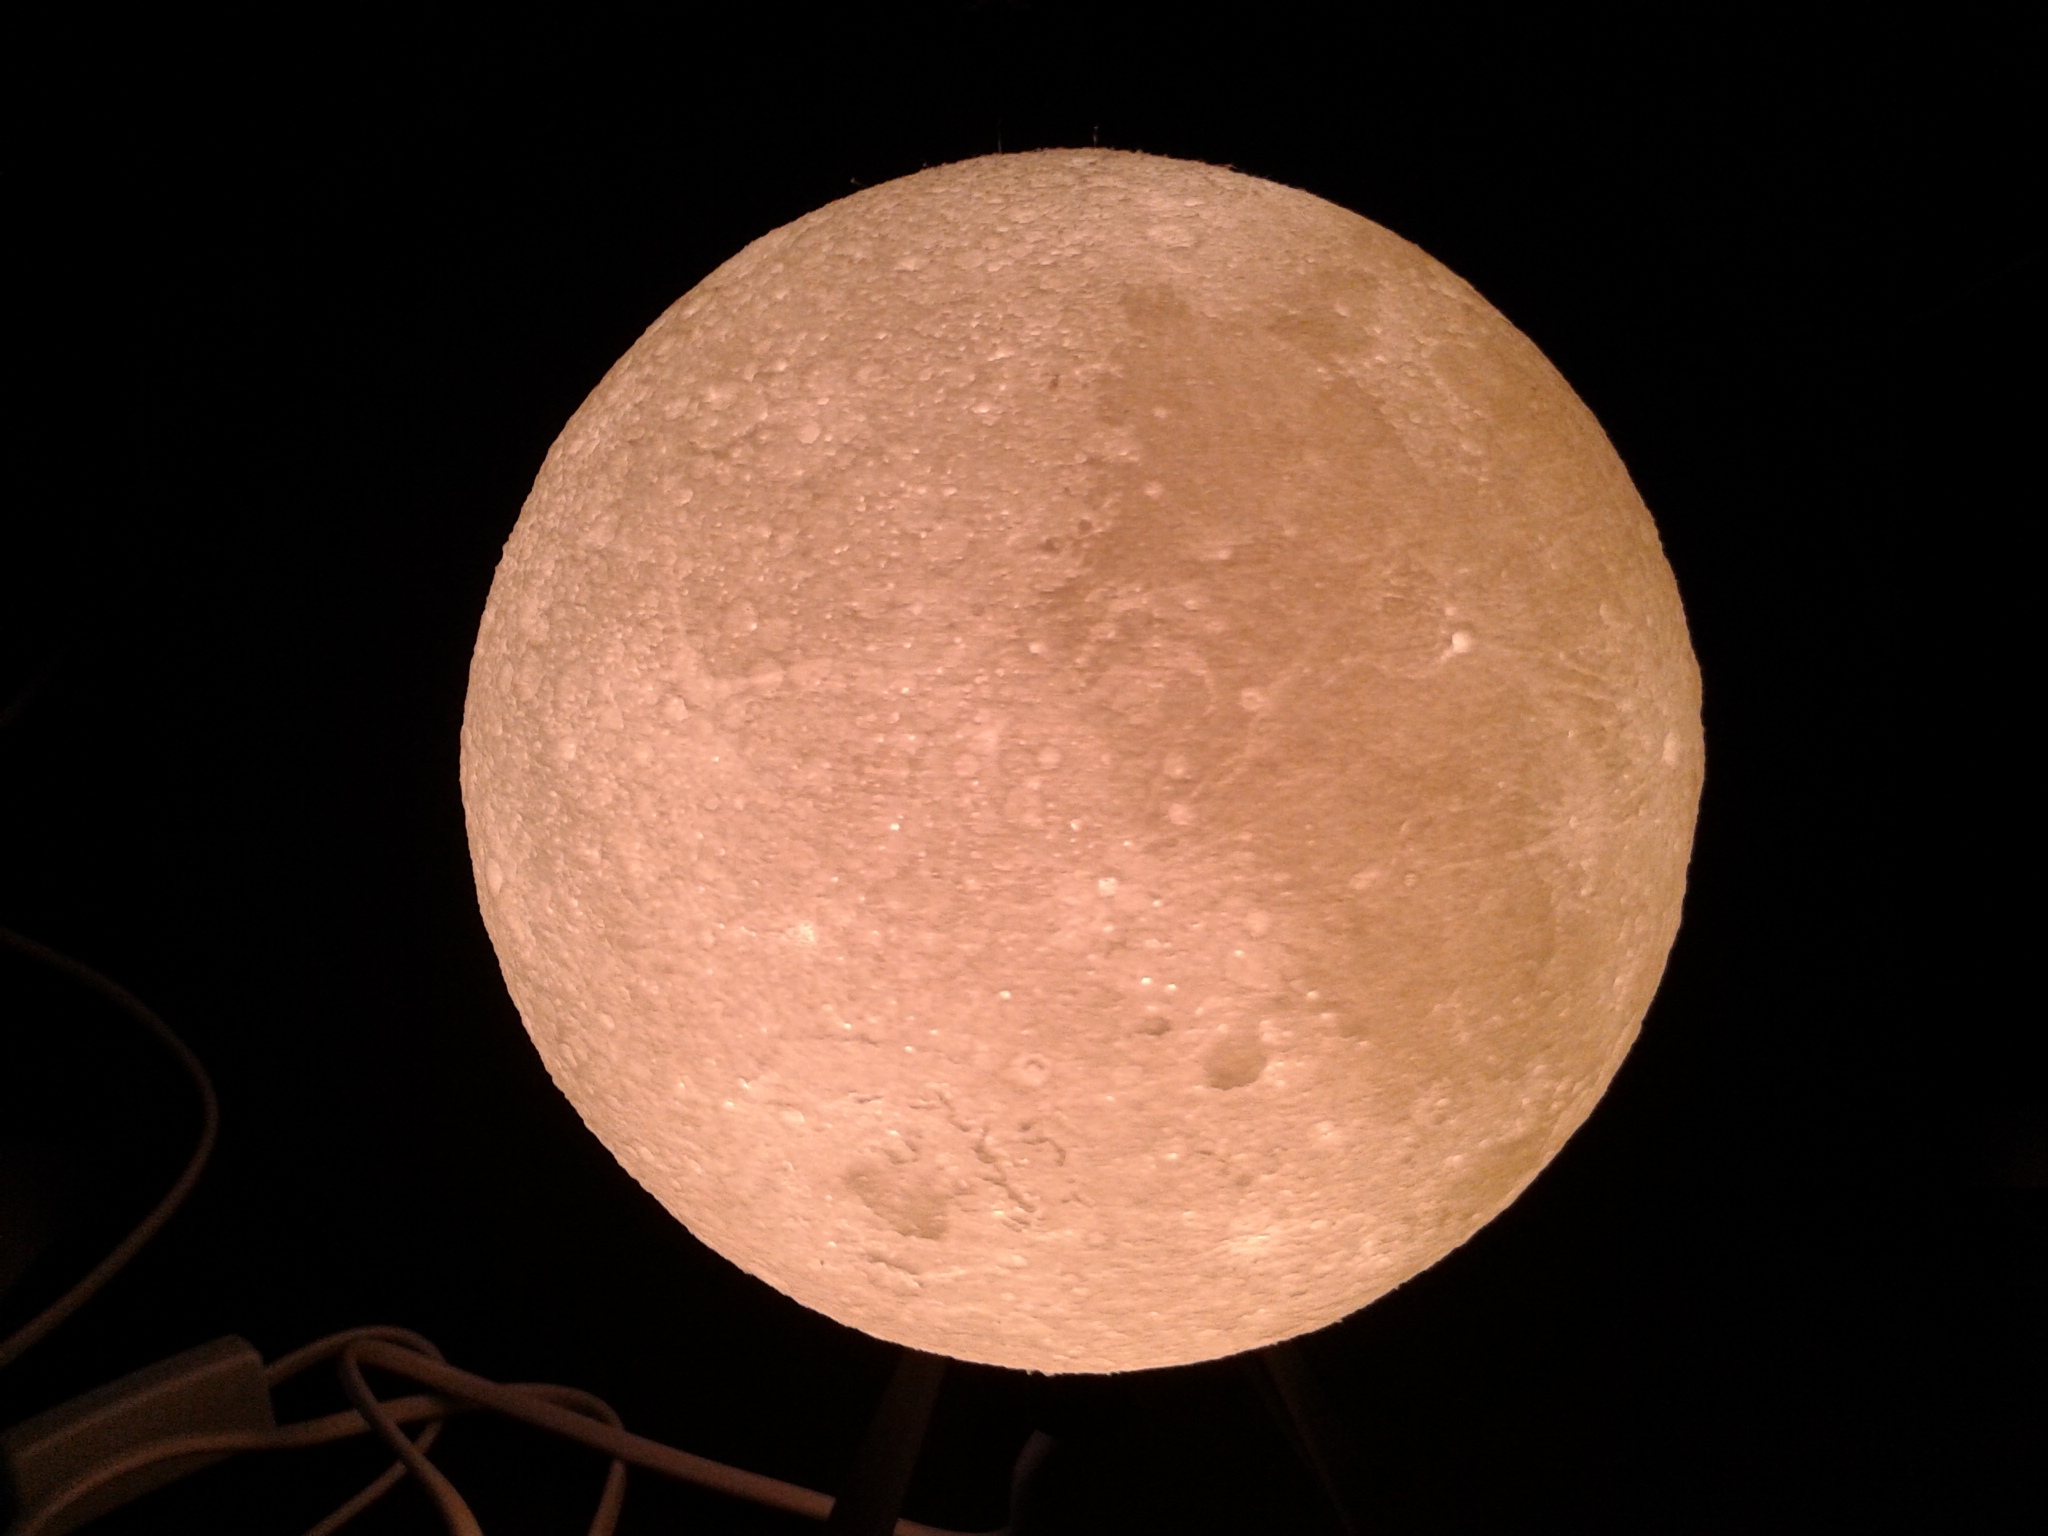
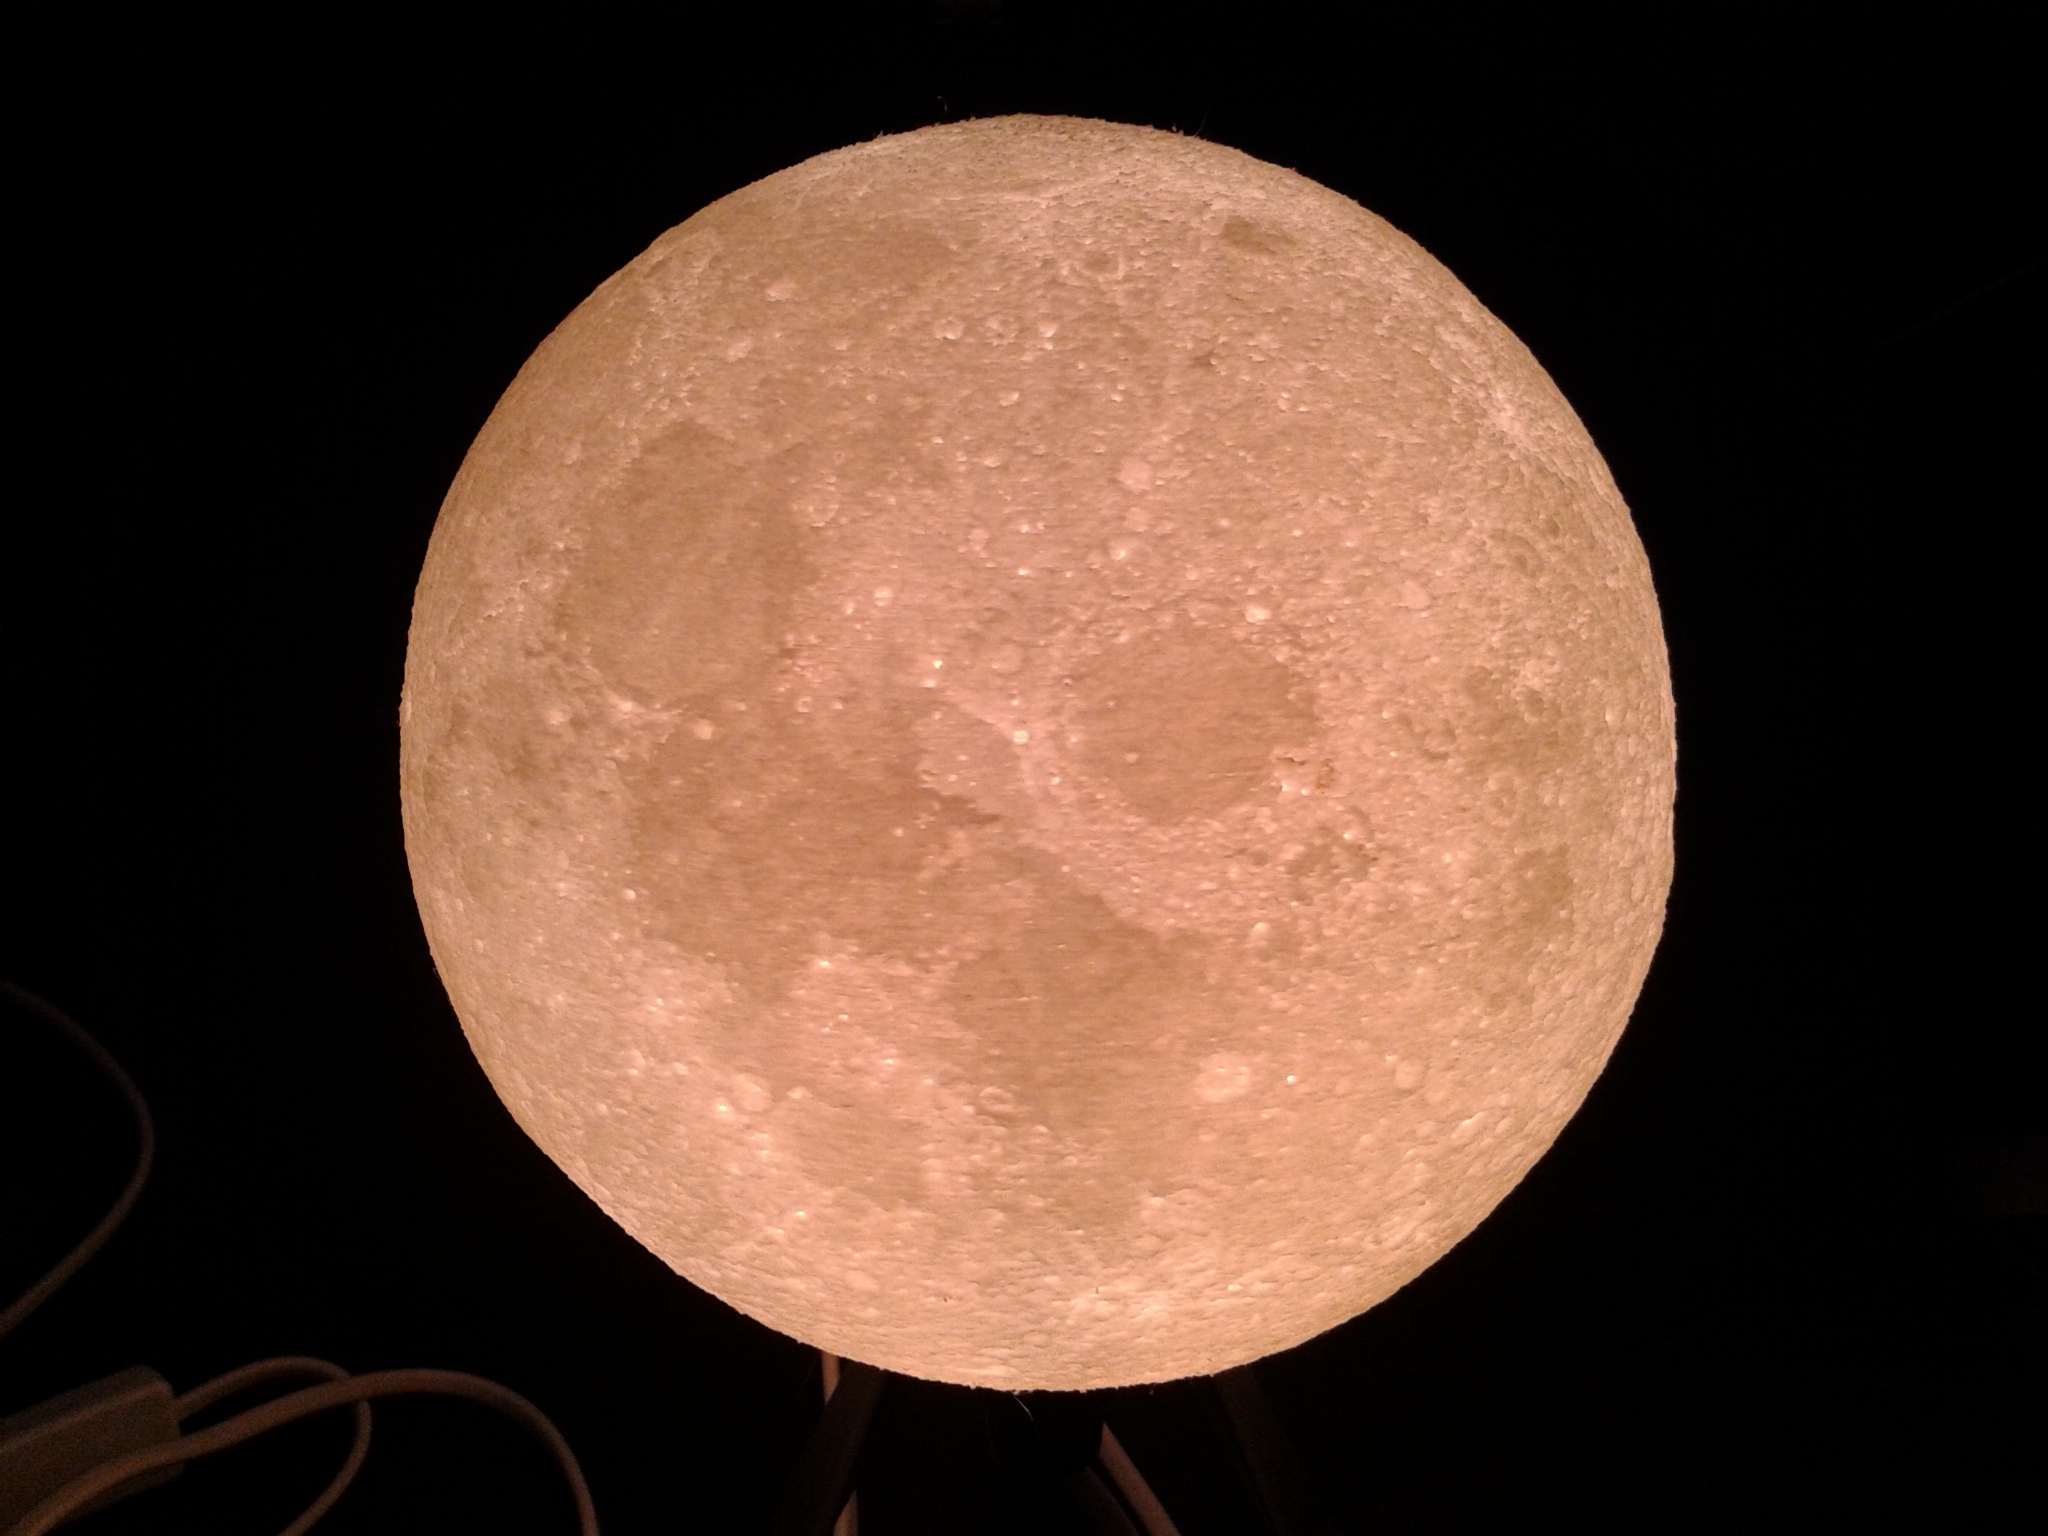
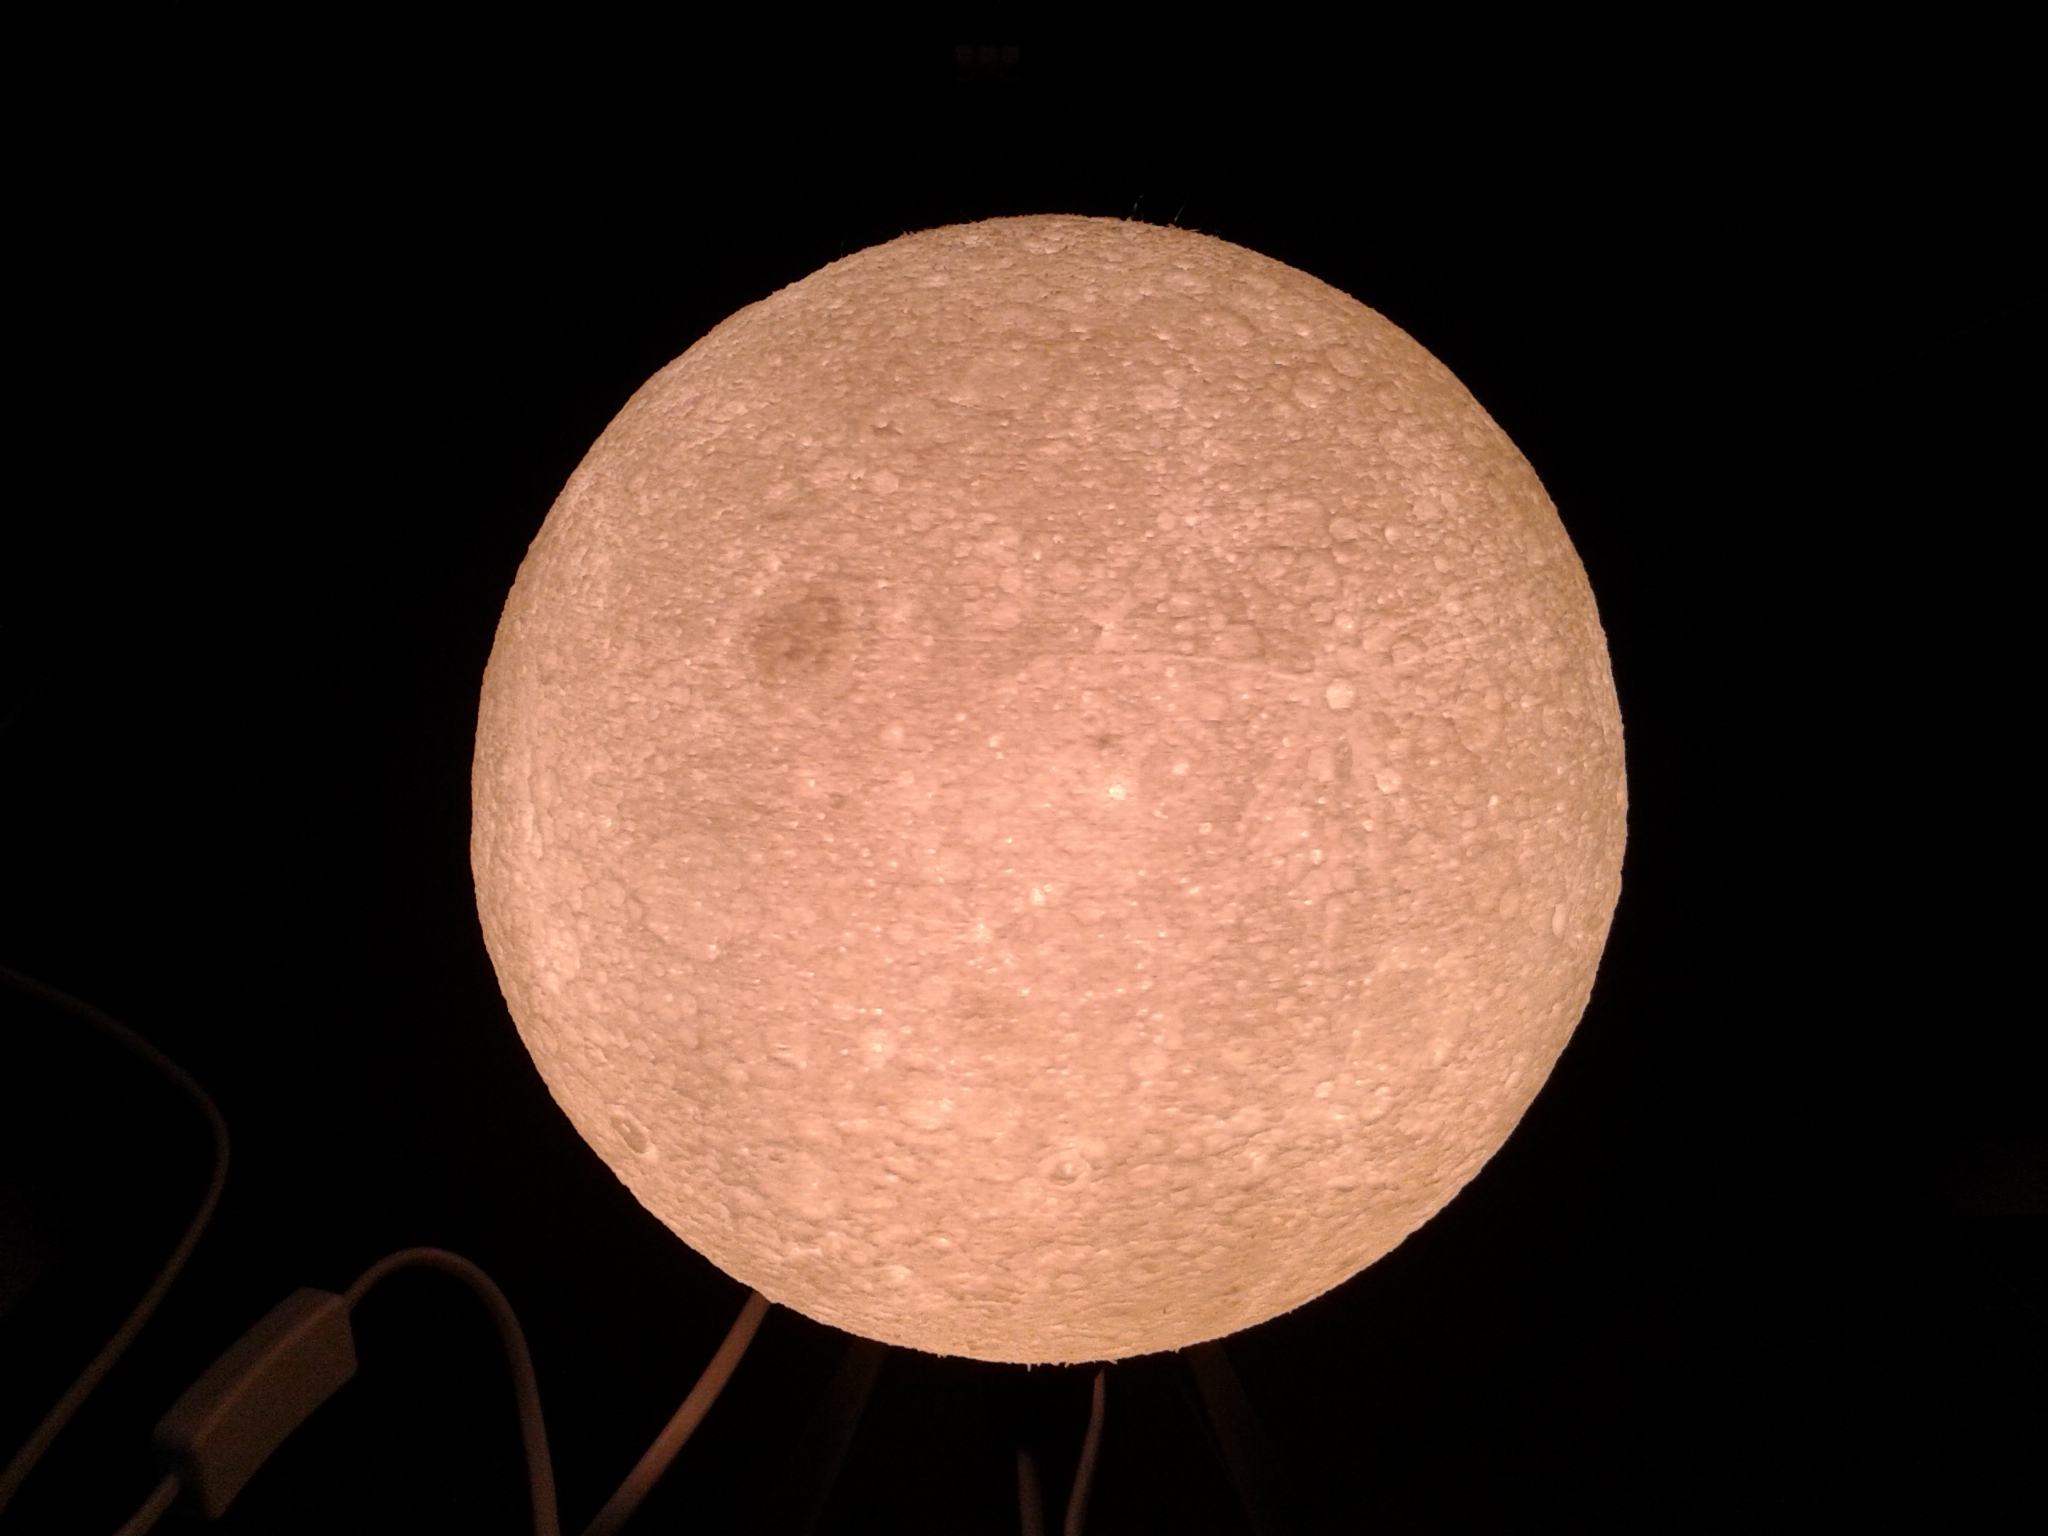
Lampe lune
“Designer Lithophane Moon Lamp” par “Frank Deschner”.
Le globe (échelle 100%, hauteur de couches 0.20 mm, remplissage 15%, 5 périmètres), filament Creality Hyper PLA blanc pour 25h48 d’impression.
La base (échelle 100%, hauteur de couches 0.15 mm, remplissage 30%, 3 périmètres), filament PLA recyclé ArianePlast. Durée d’impression : 2h26.
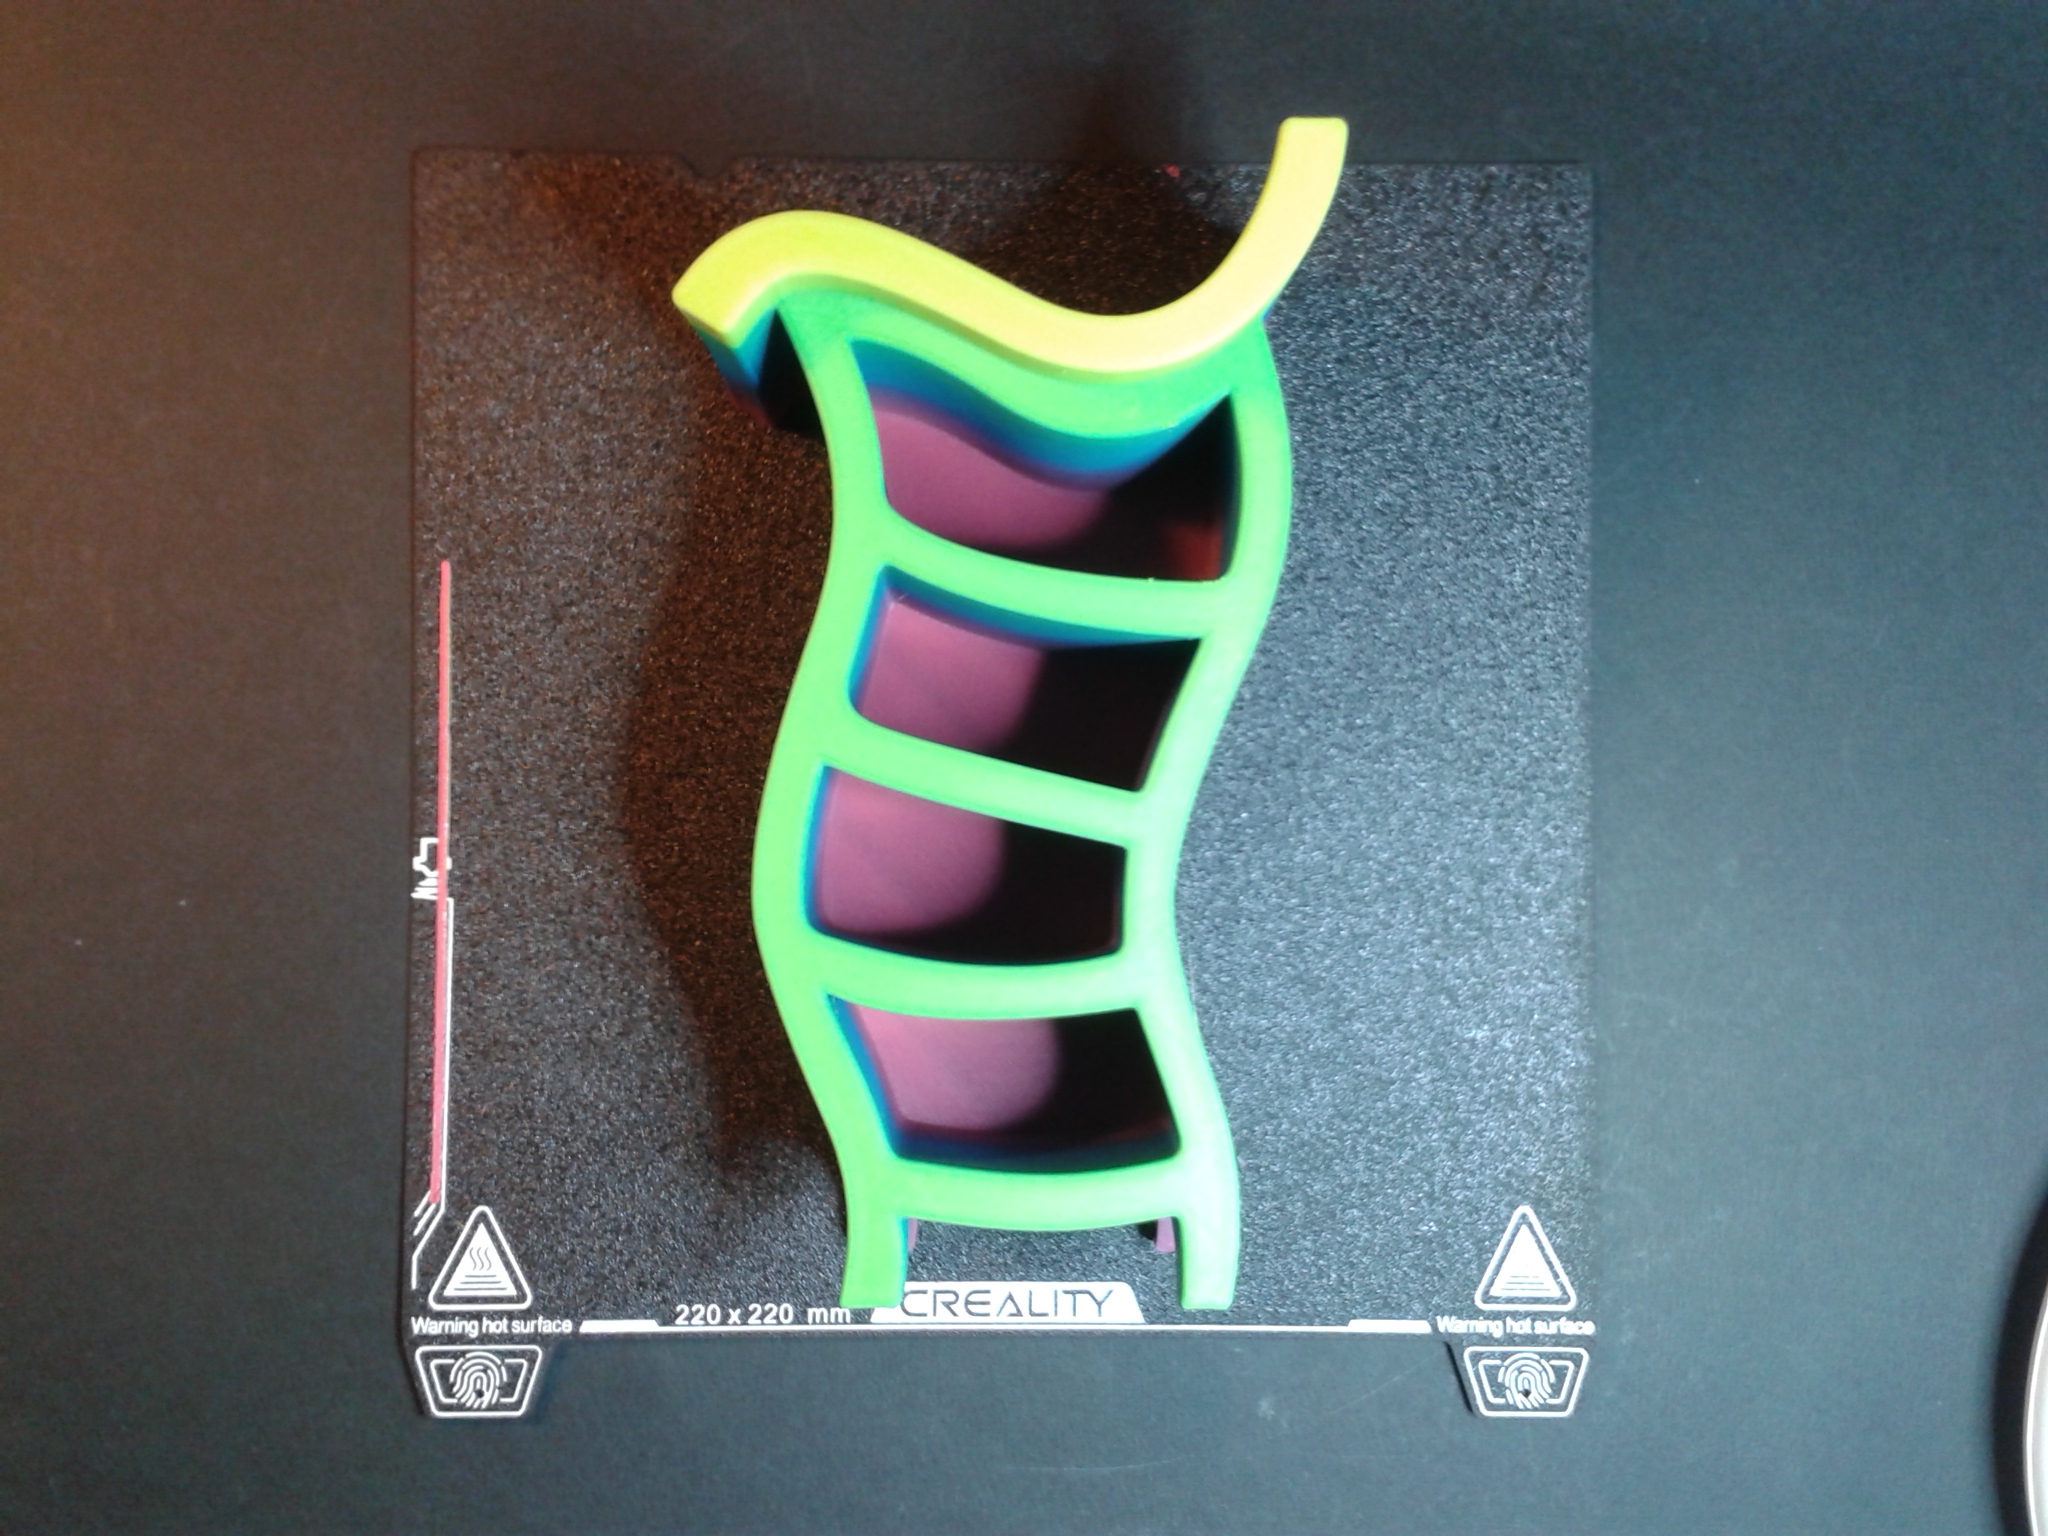
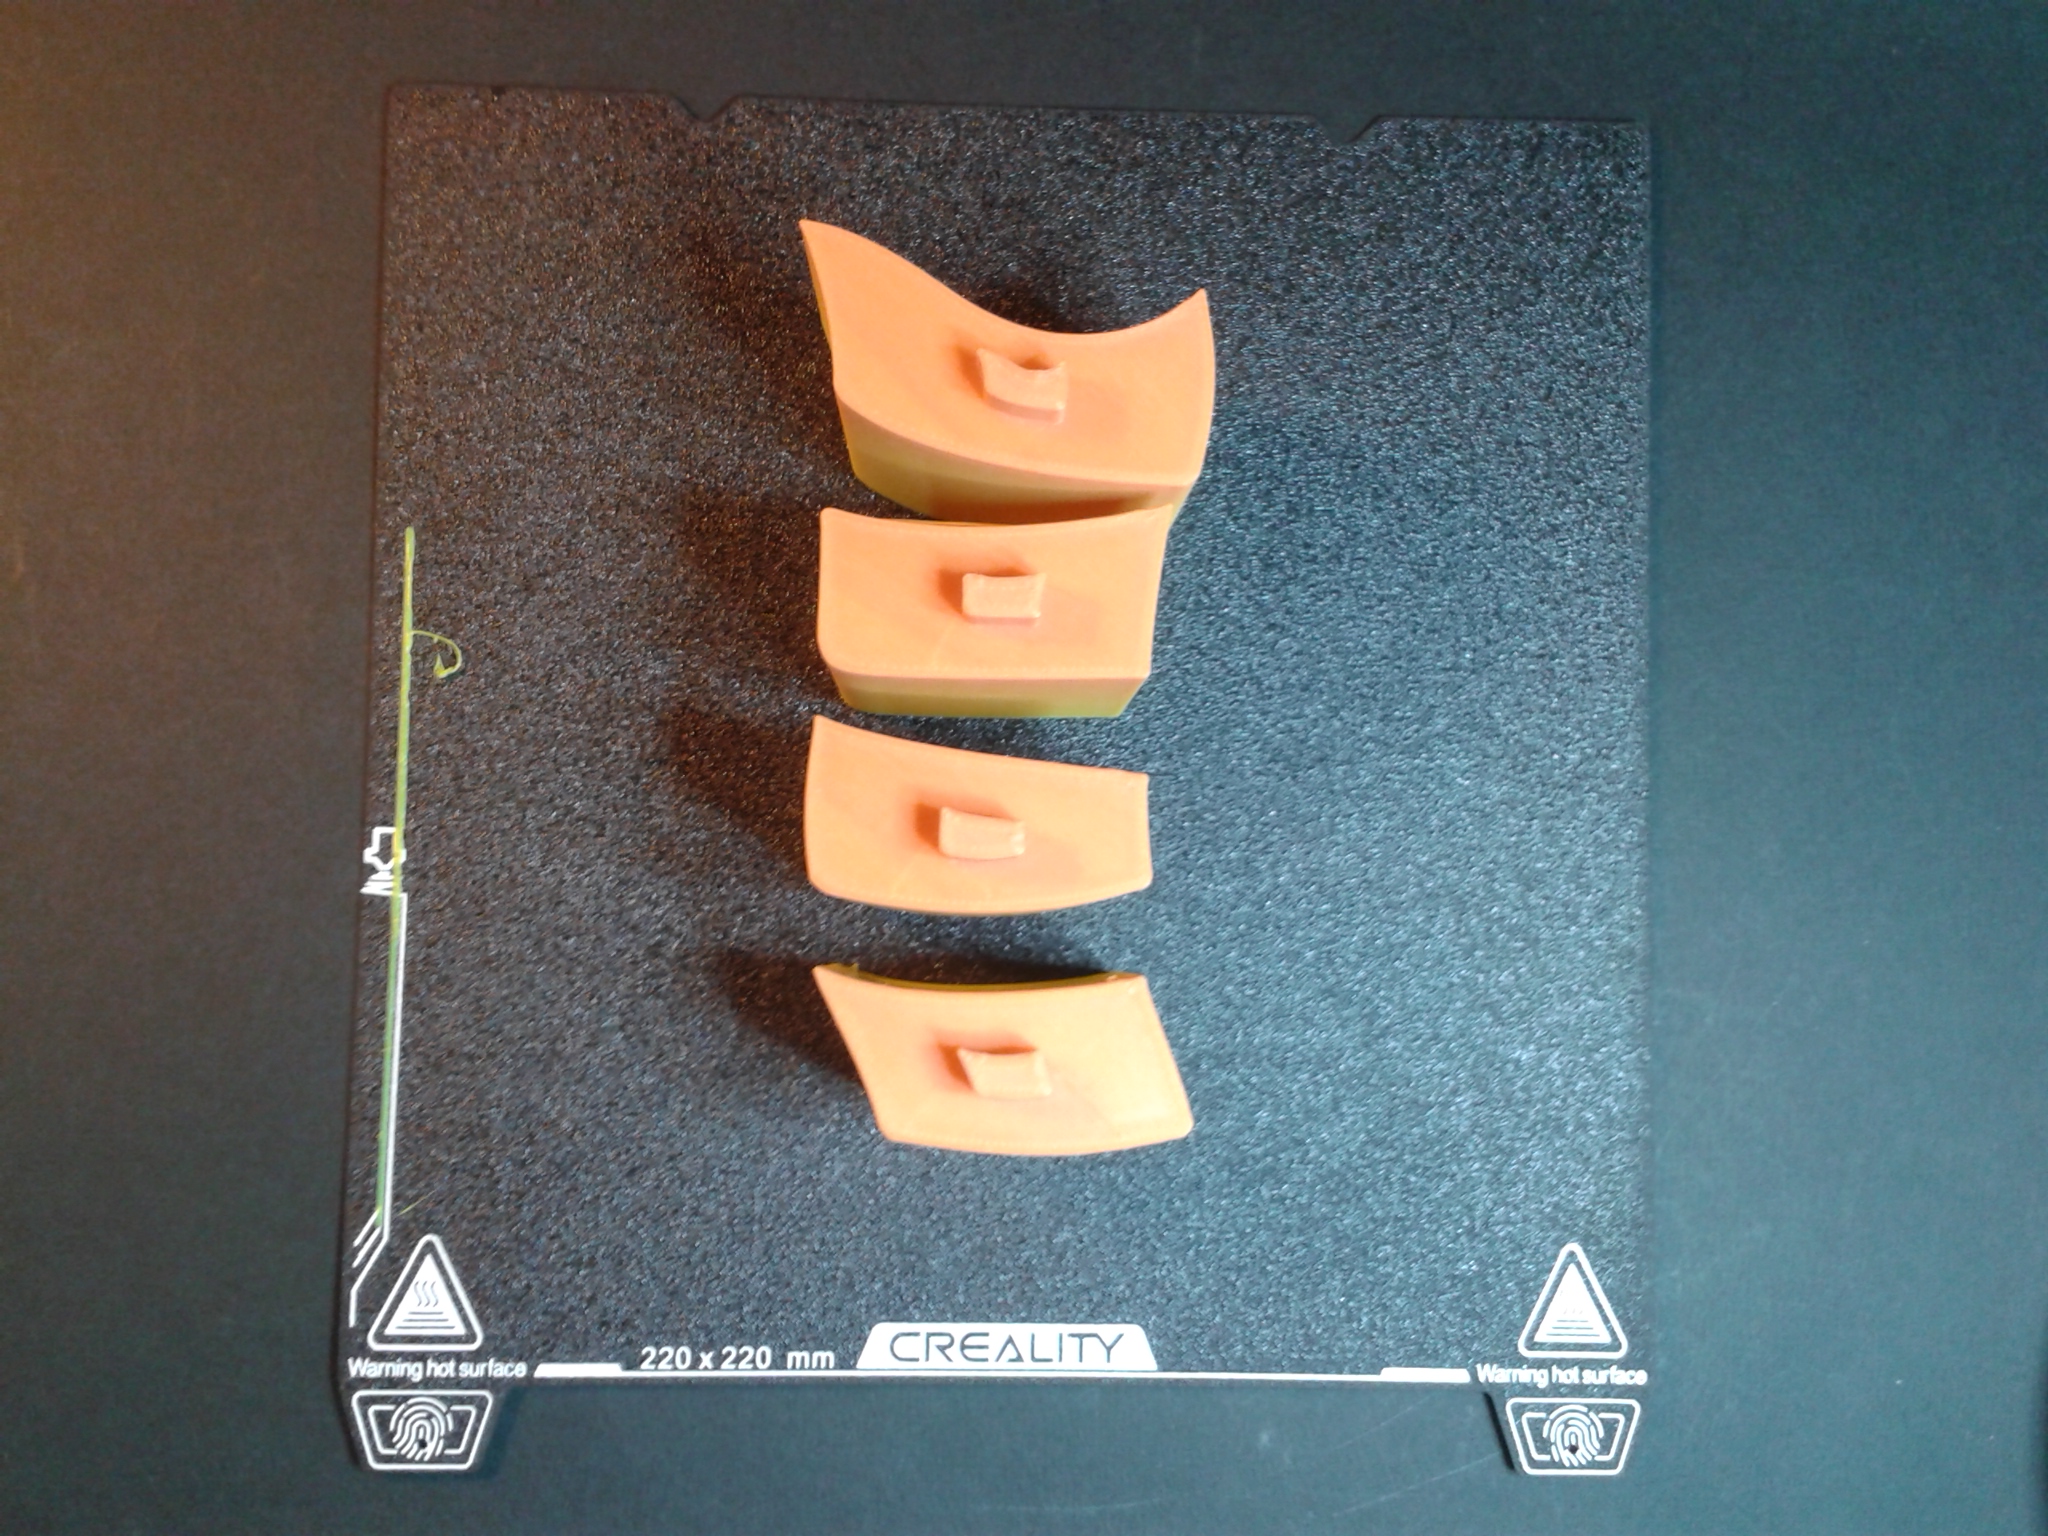
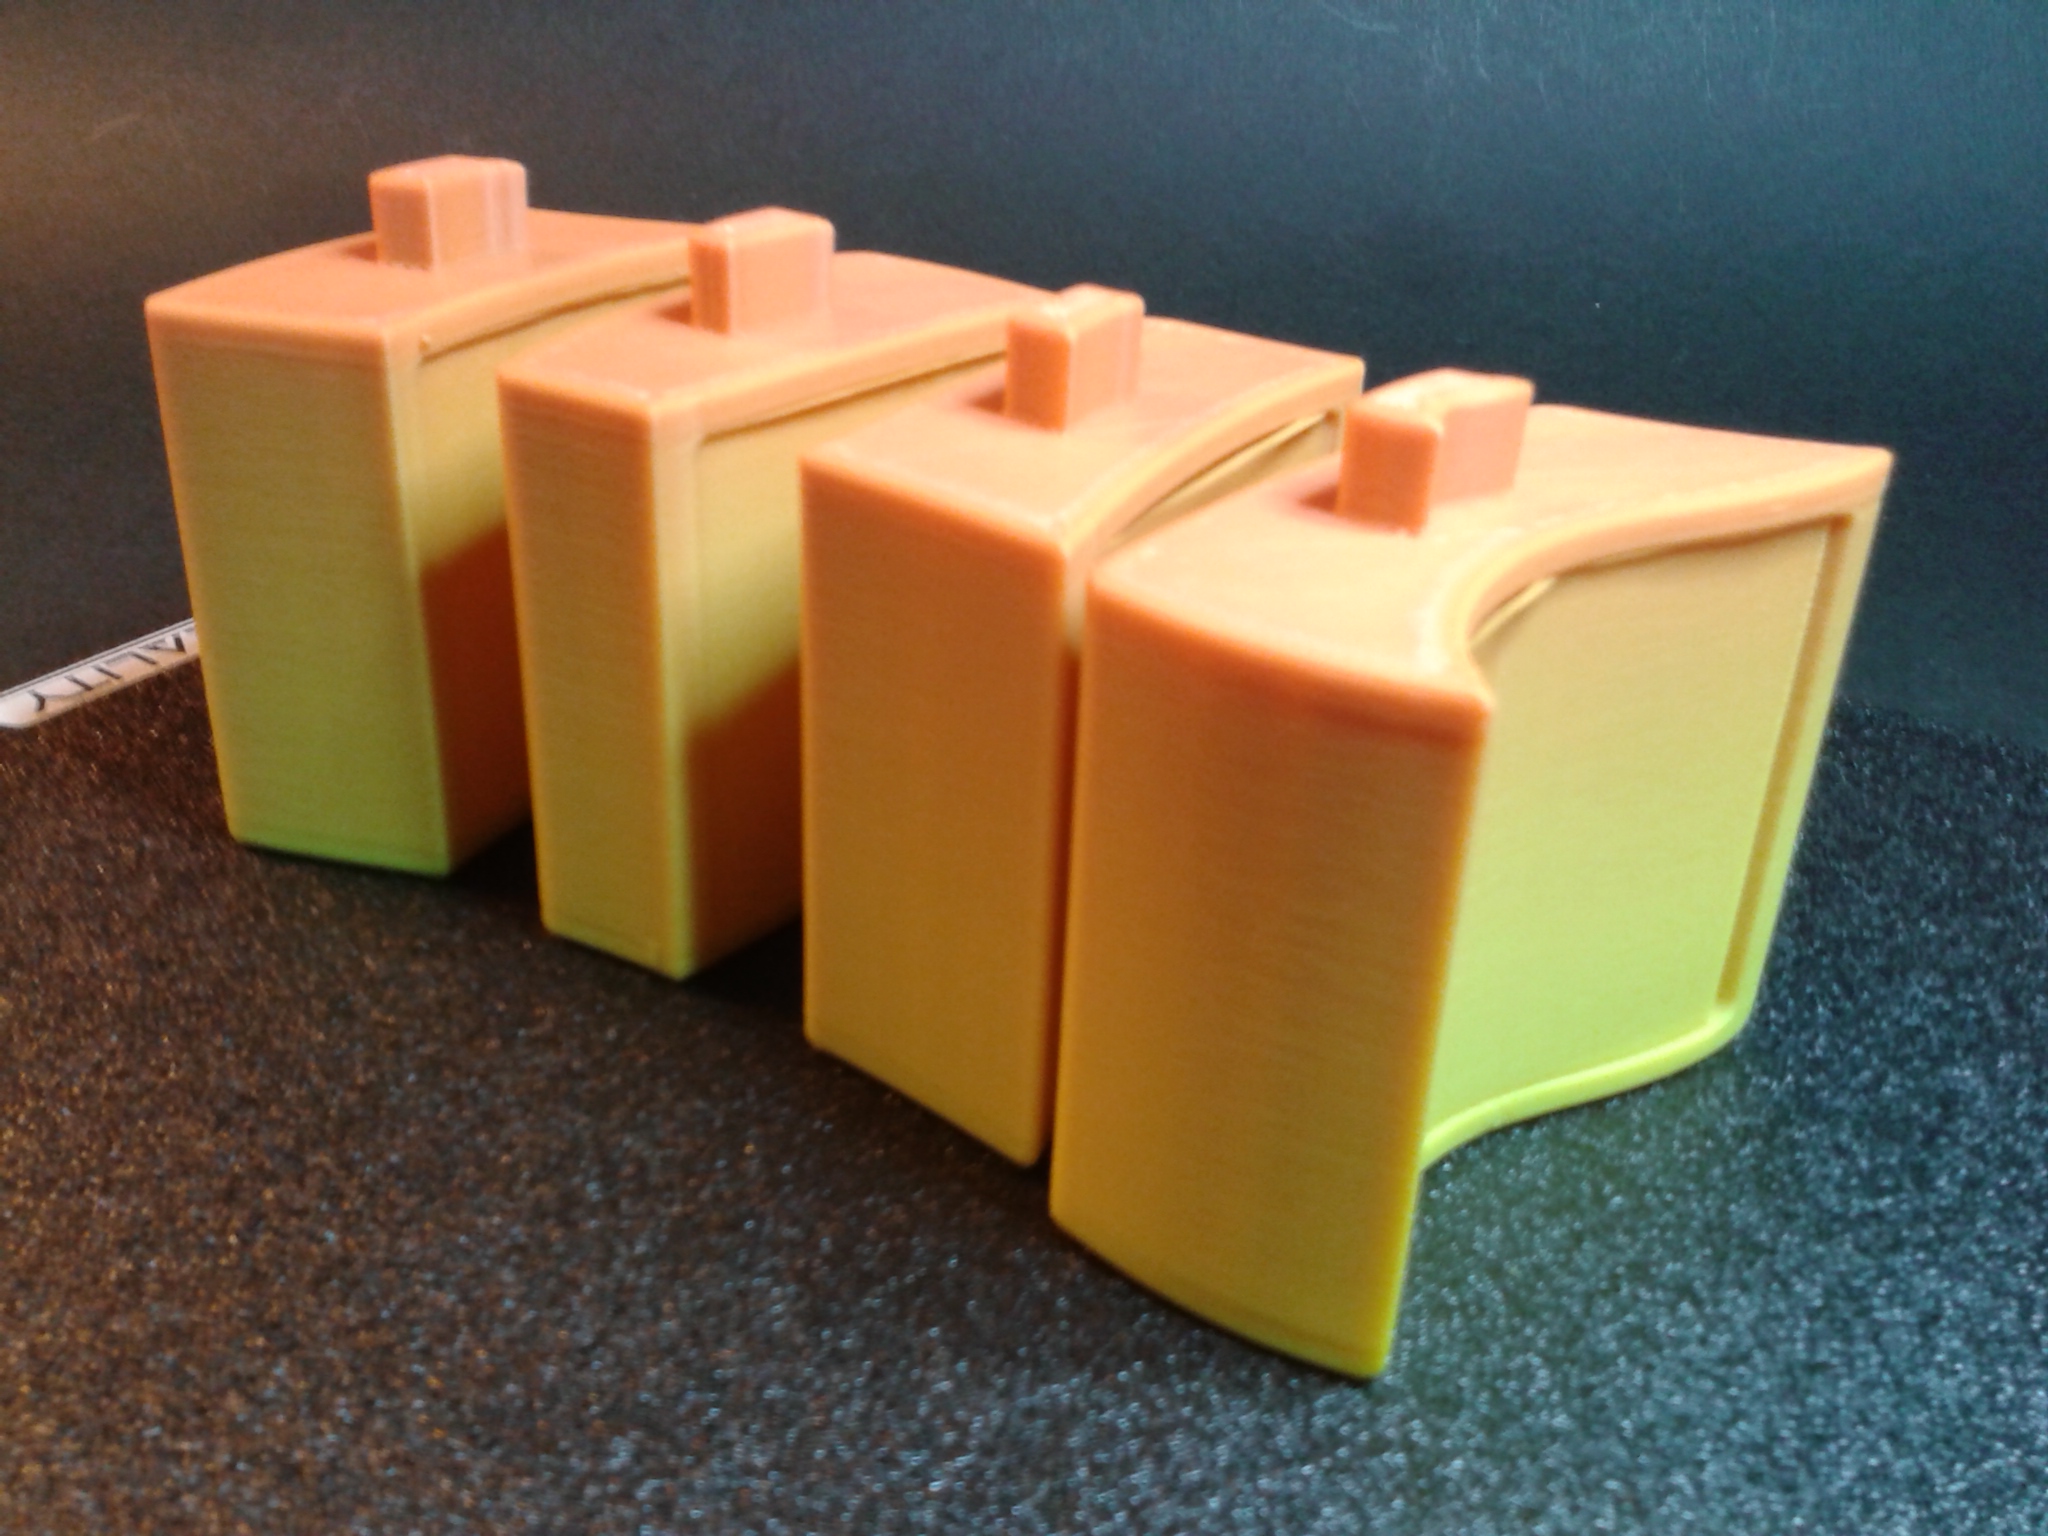
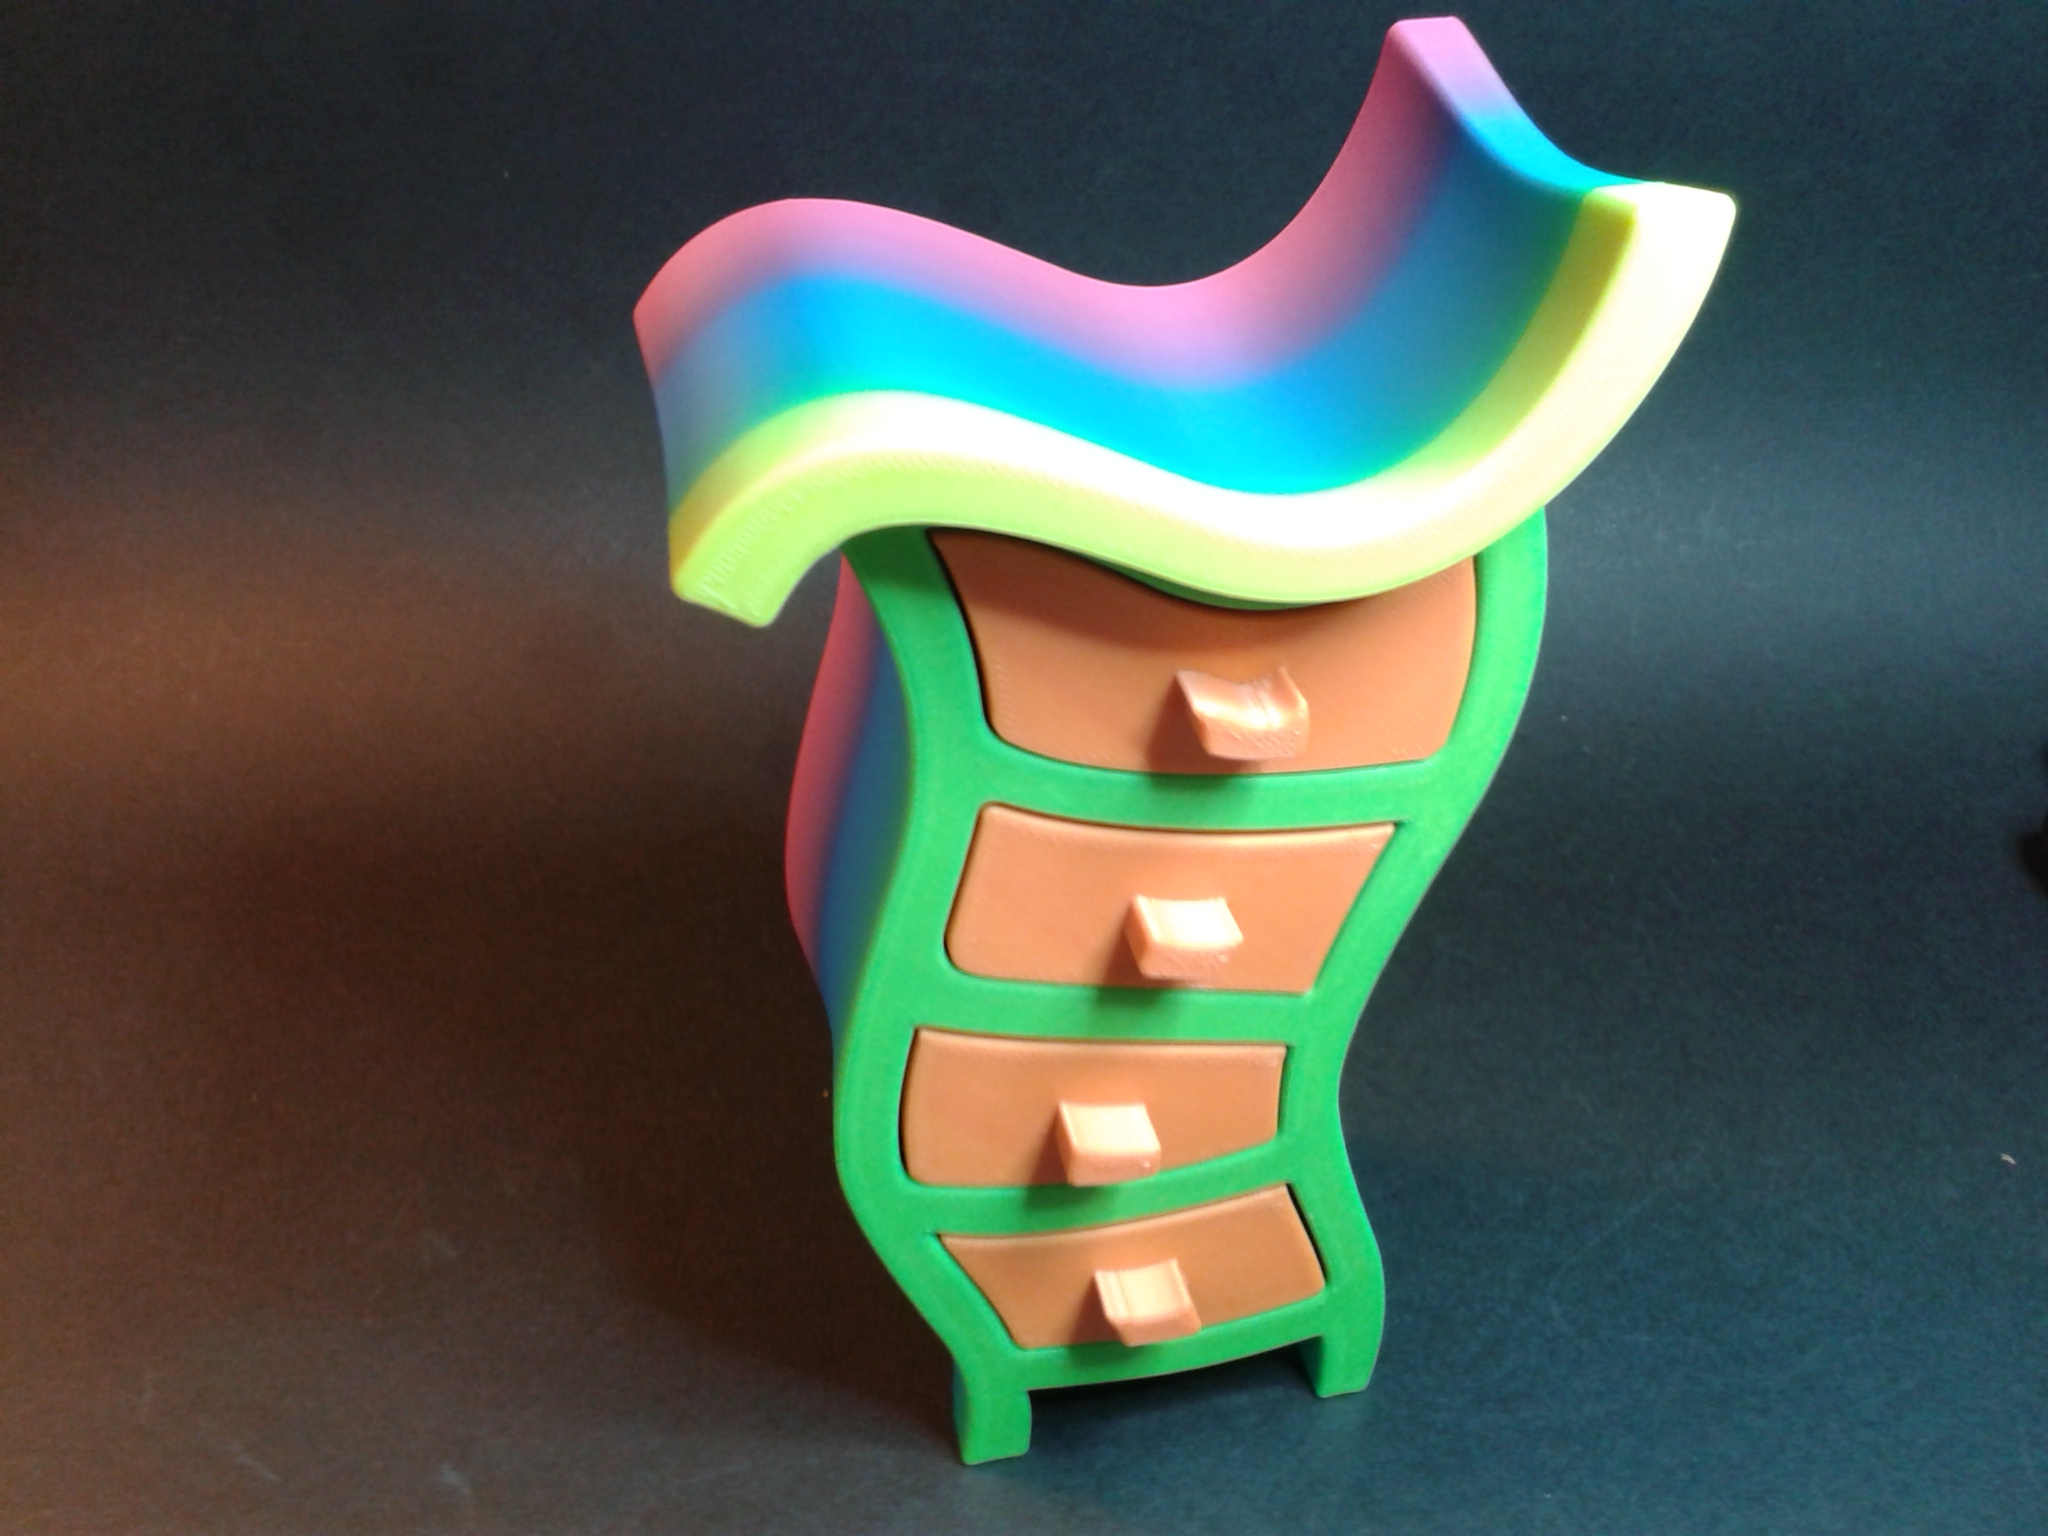
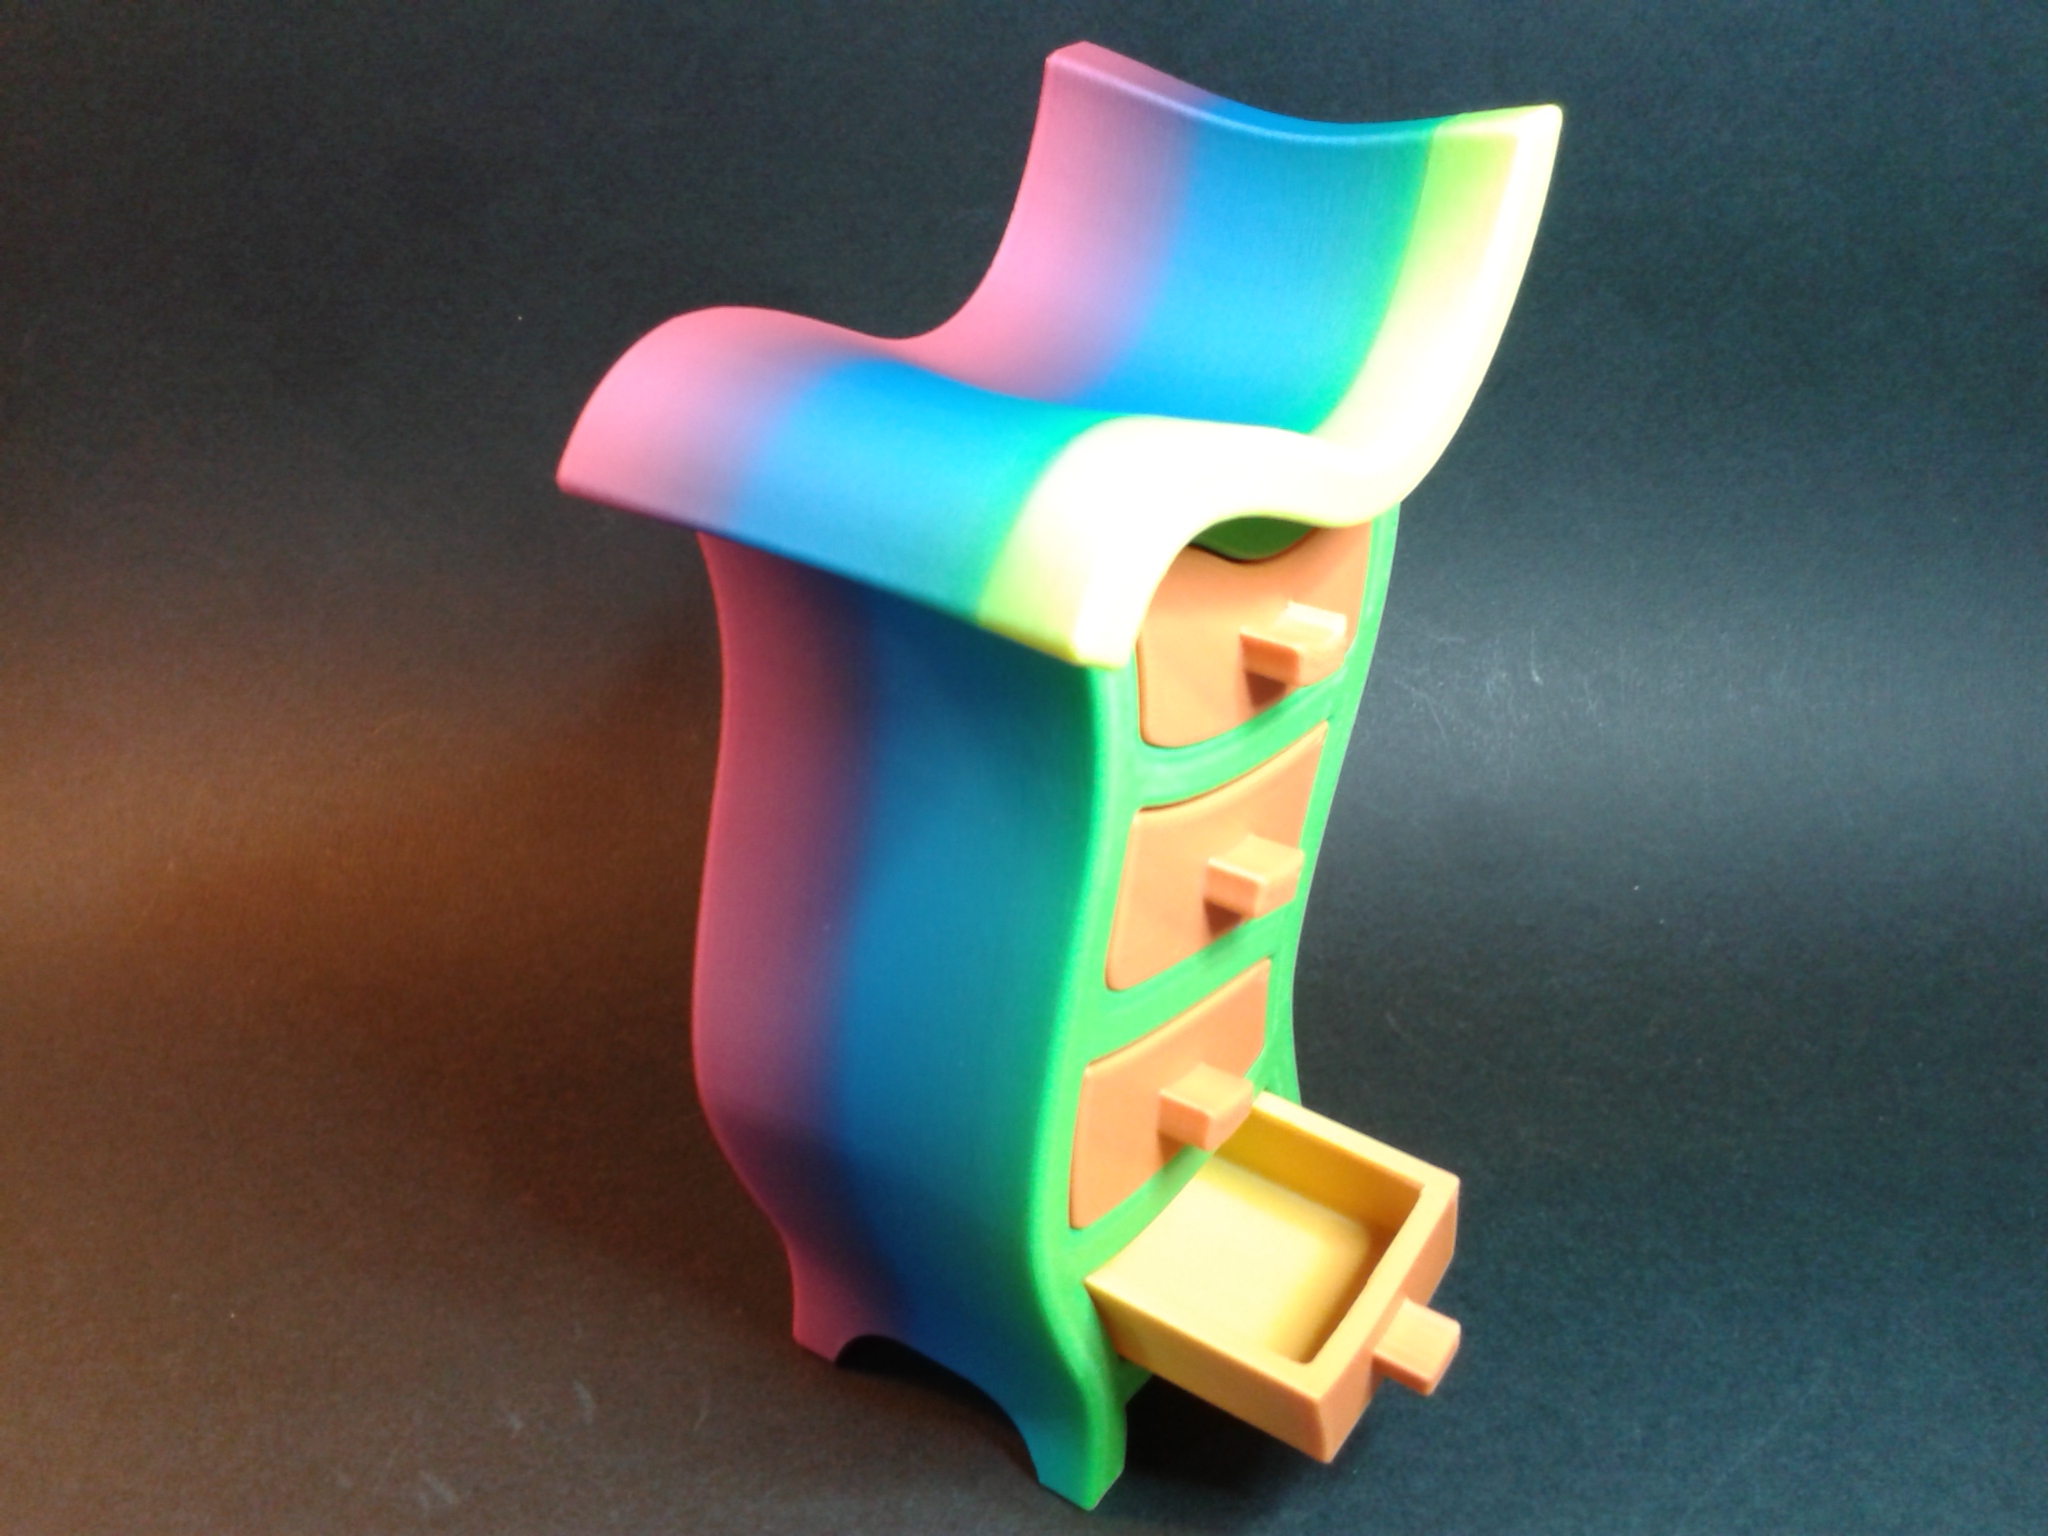
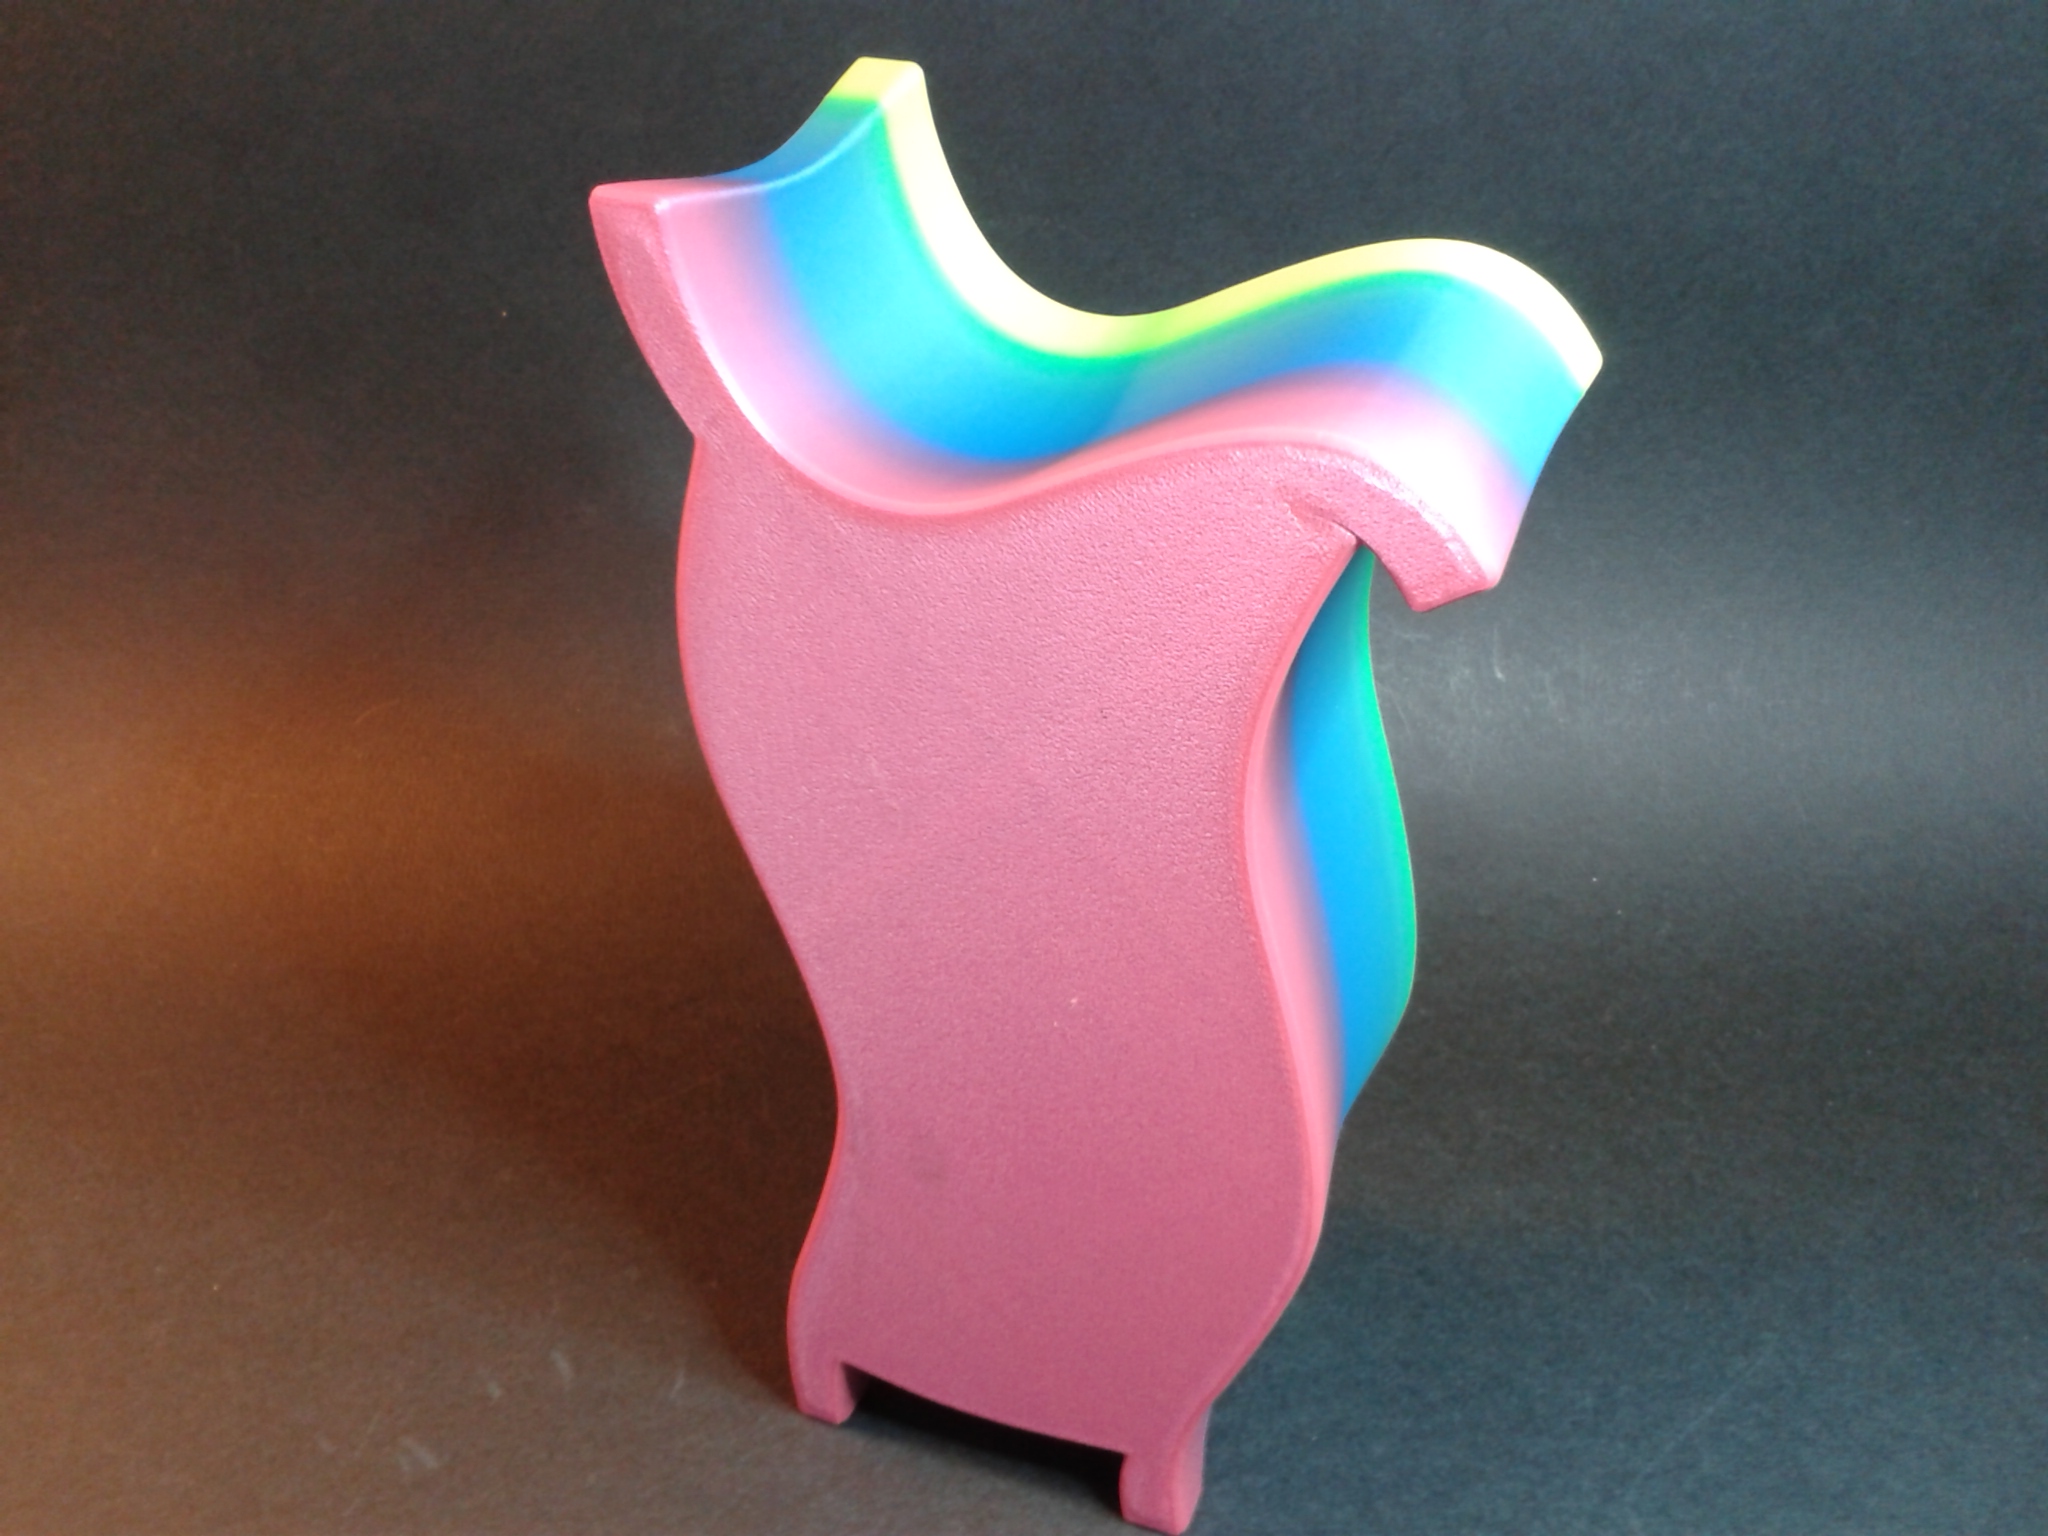
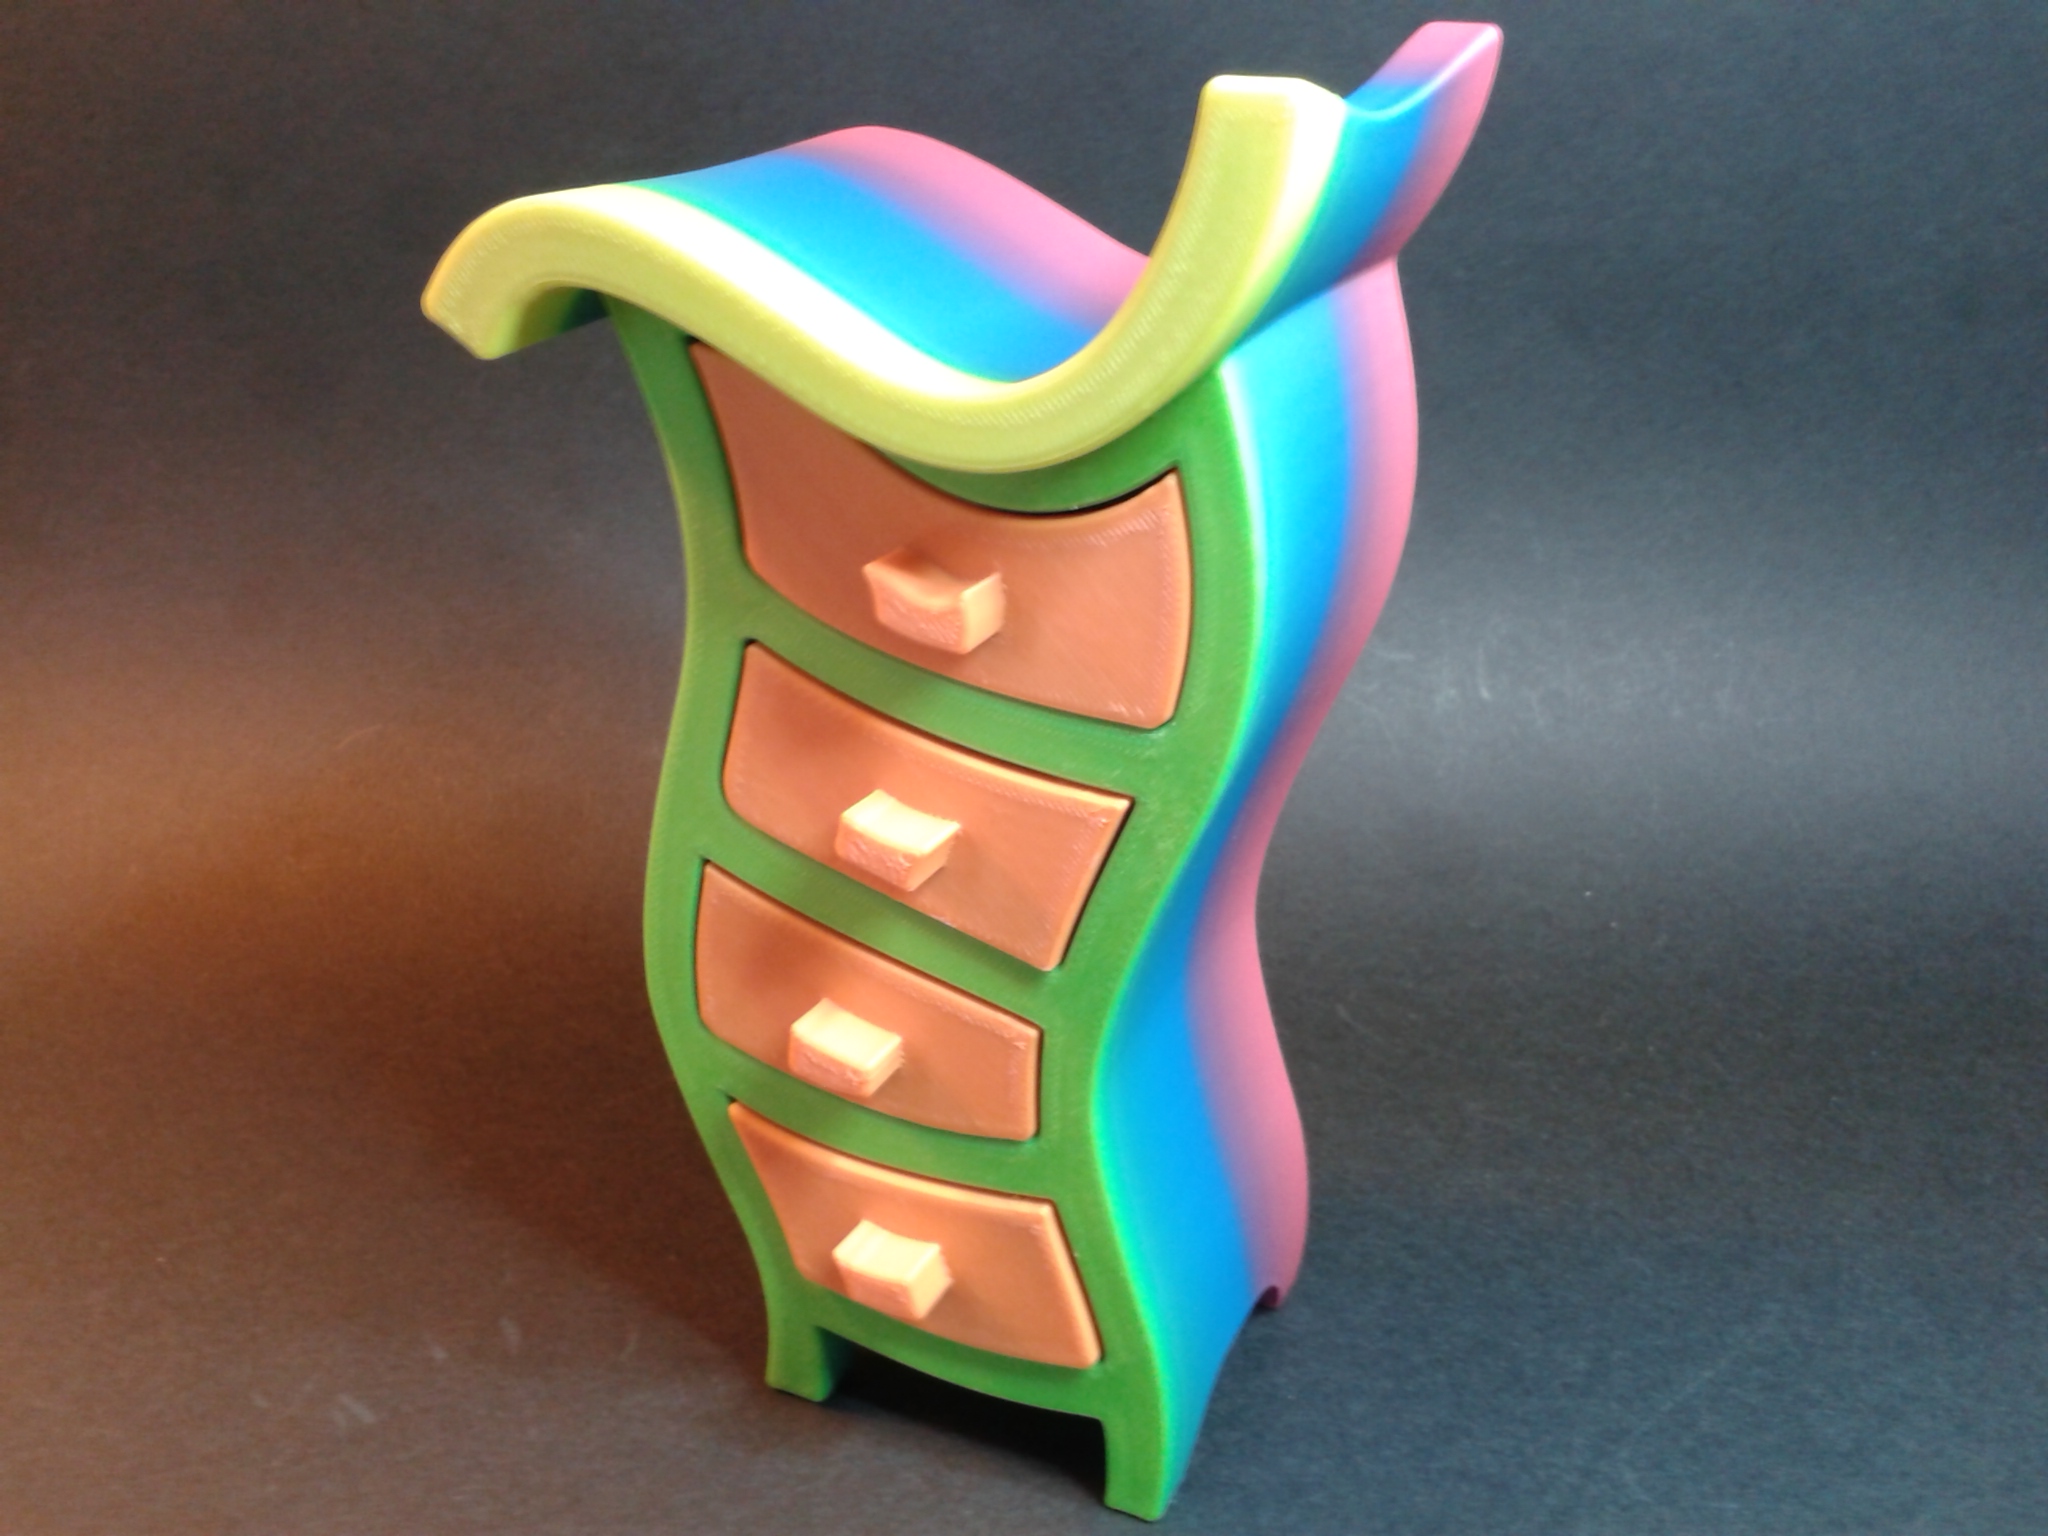
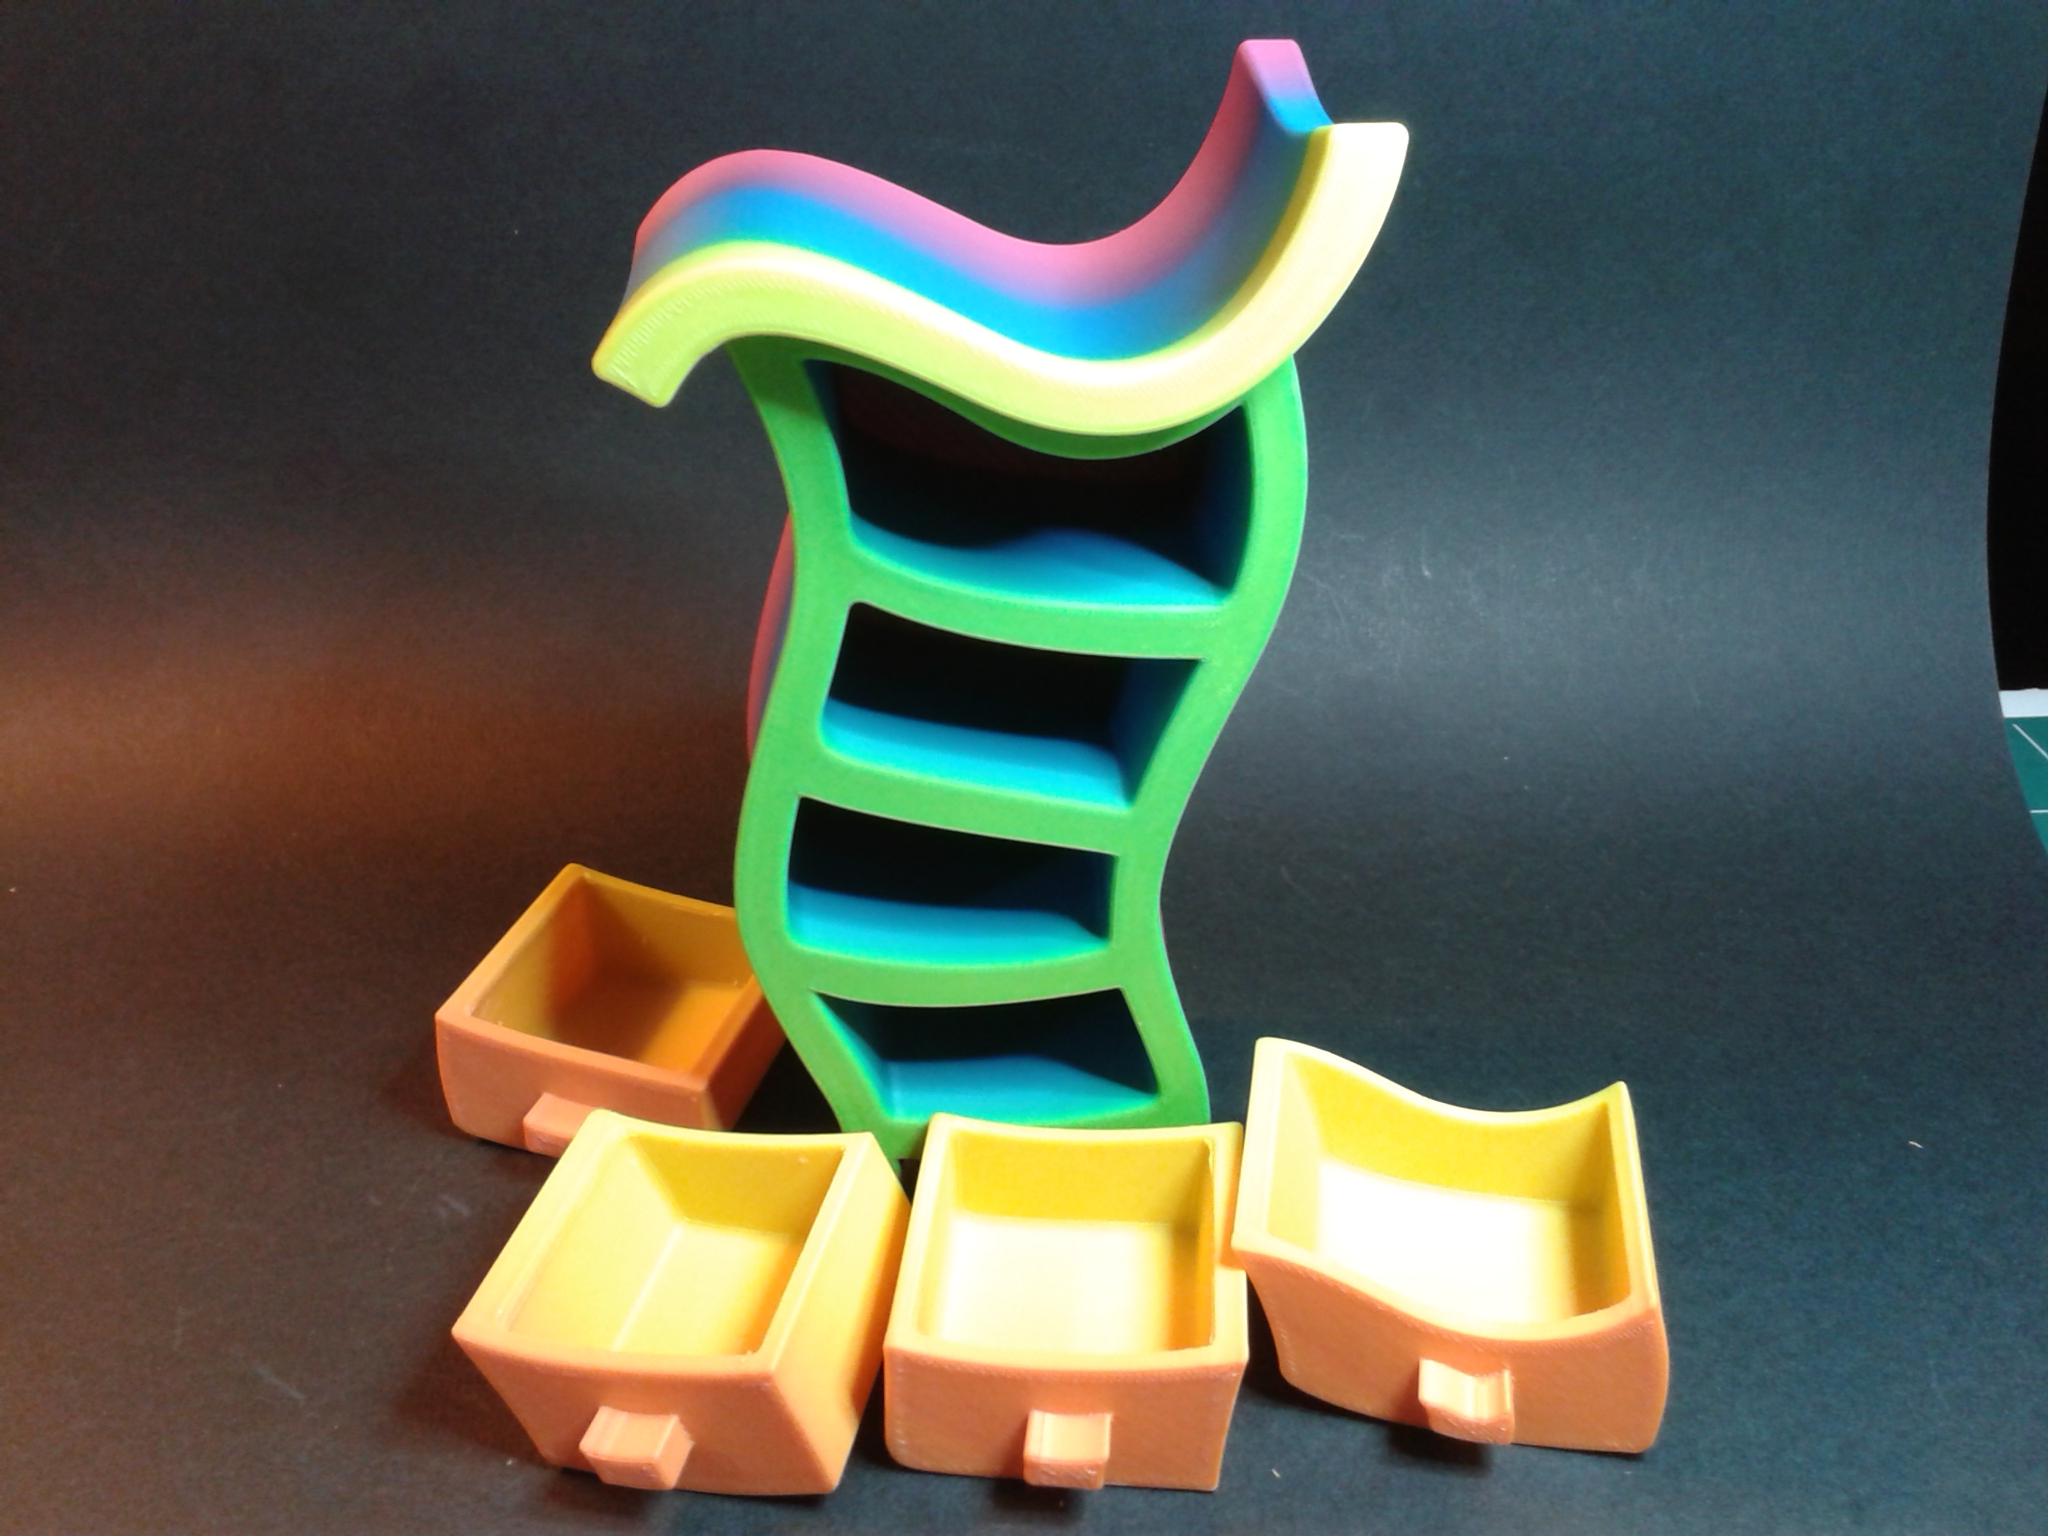
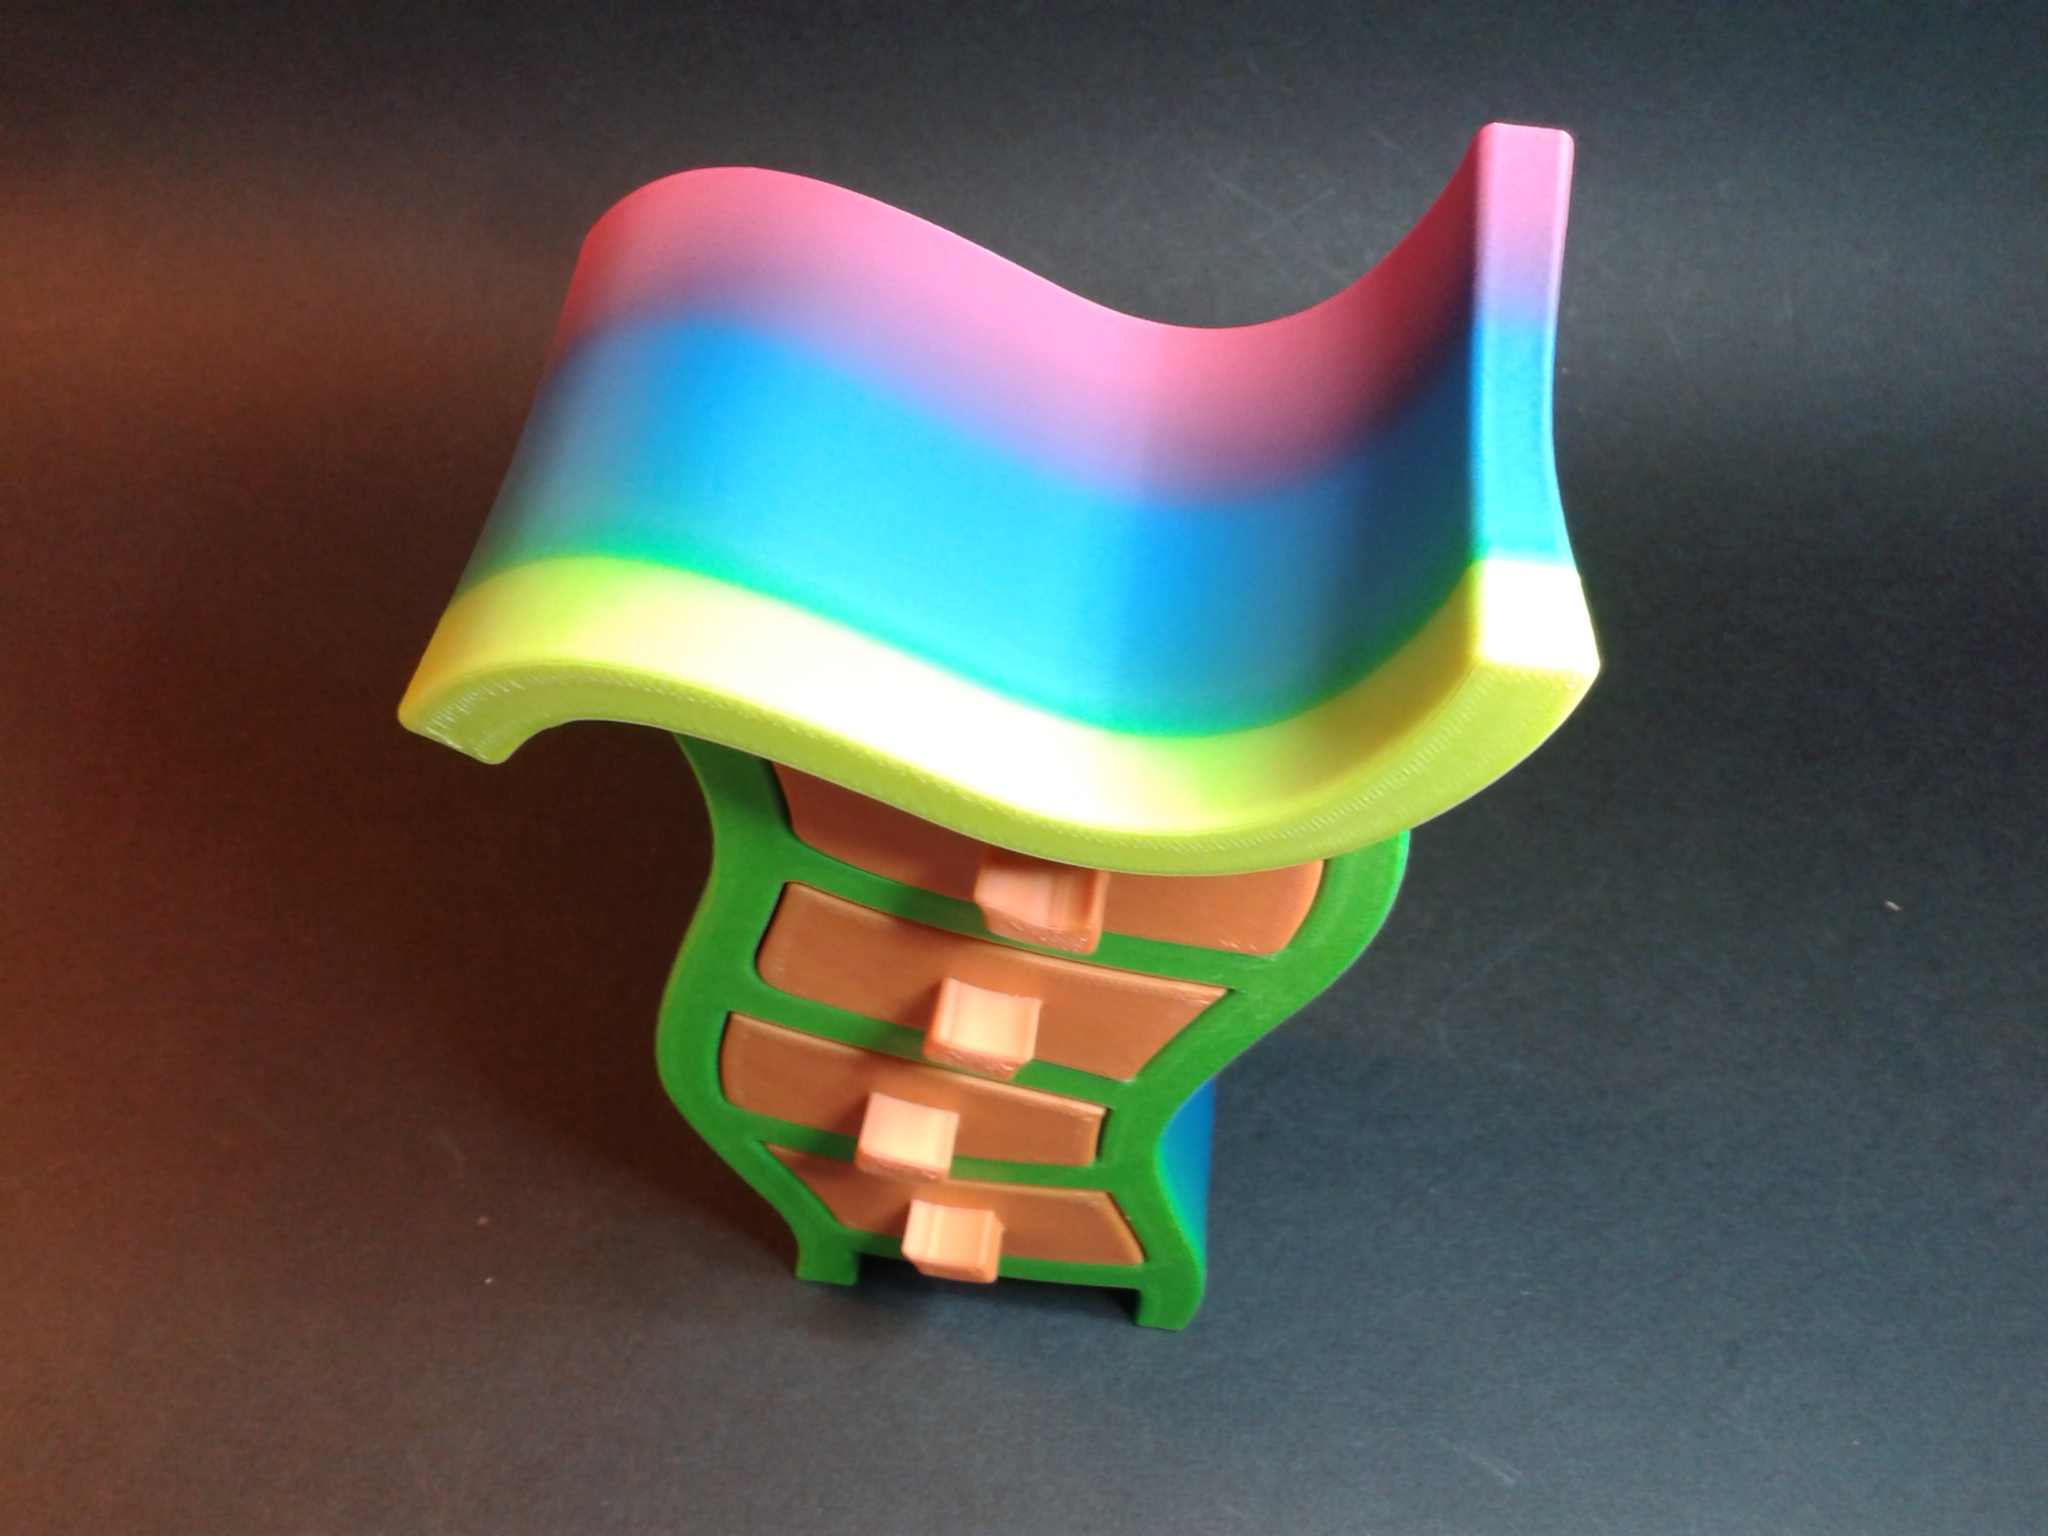
Etagère arc-en-ciel
“Wonkey Chest of Drawers” de “francfalco”
En deux impressions, le corps du meuble en 4h53, les tiroirs en 3h24 avec du CR-PLA rainbow de Creality.
Logo Lesimprimantes3D.fr
Une de mes versions du logo de LesImprimantes3D.fr : j’ai ajouté manuellement des lignes avec la commande M600 dans le fichier gcode obtenu après découpage sous Creality Print.
Durée : 0h44 d’impression avec deux changements de filament pour passer d’un PLA rainbow à un PLA éco blanc ArianePlast, puis à du PLA orange Eryone.
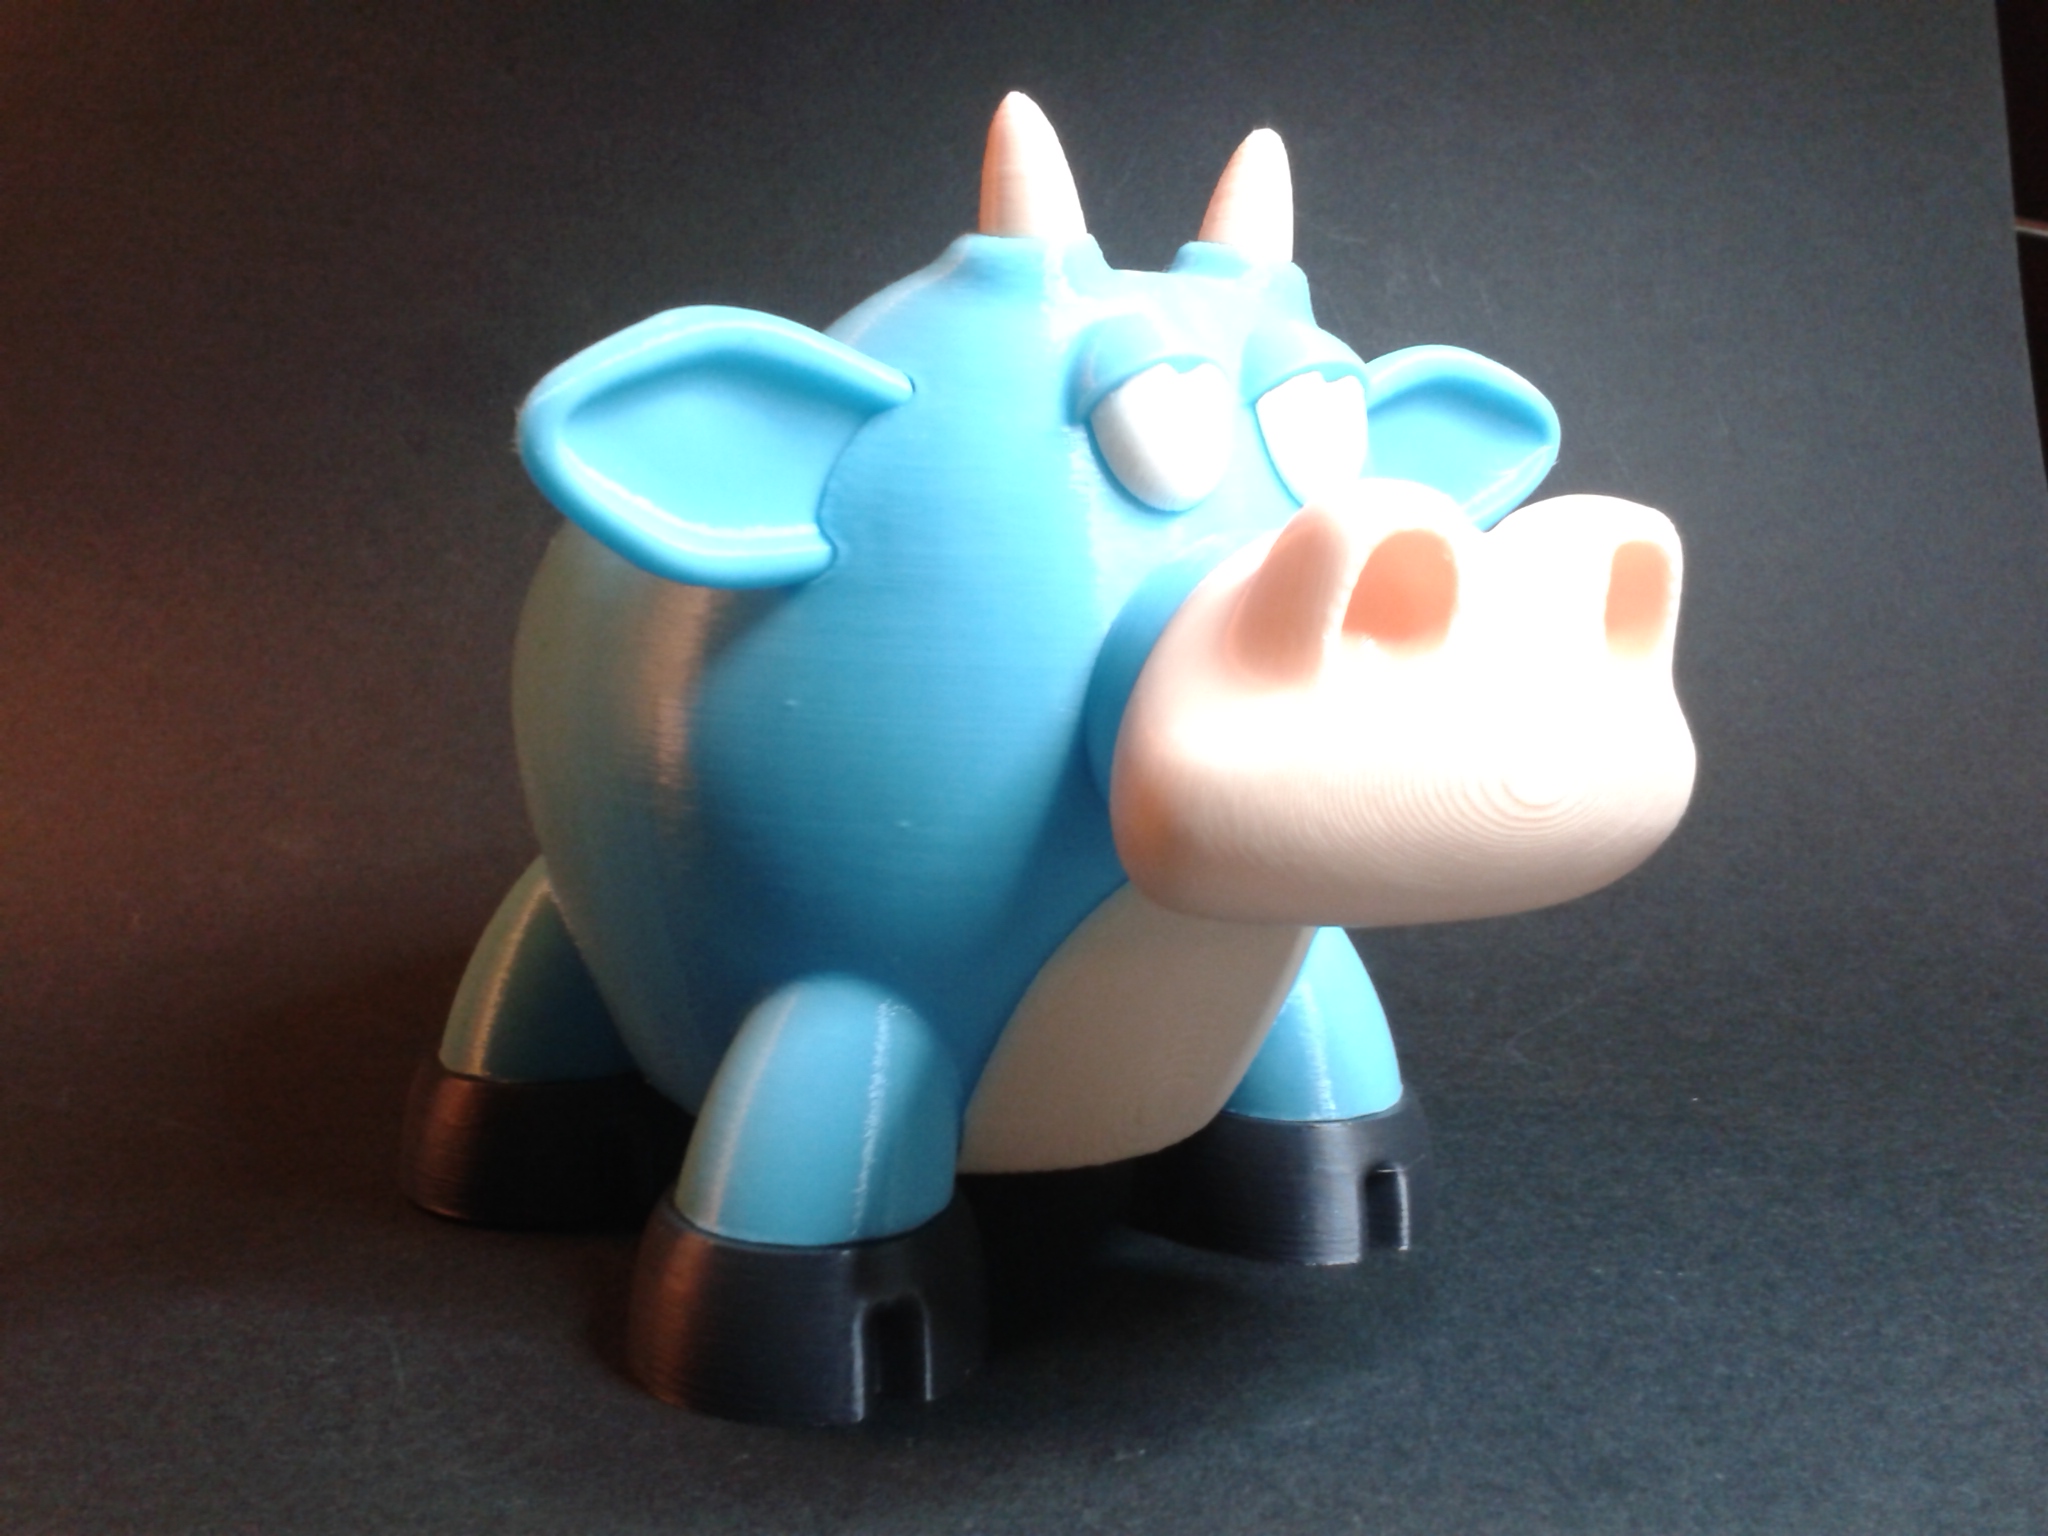
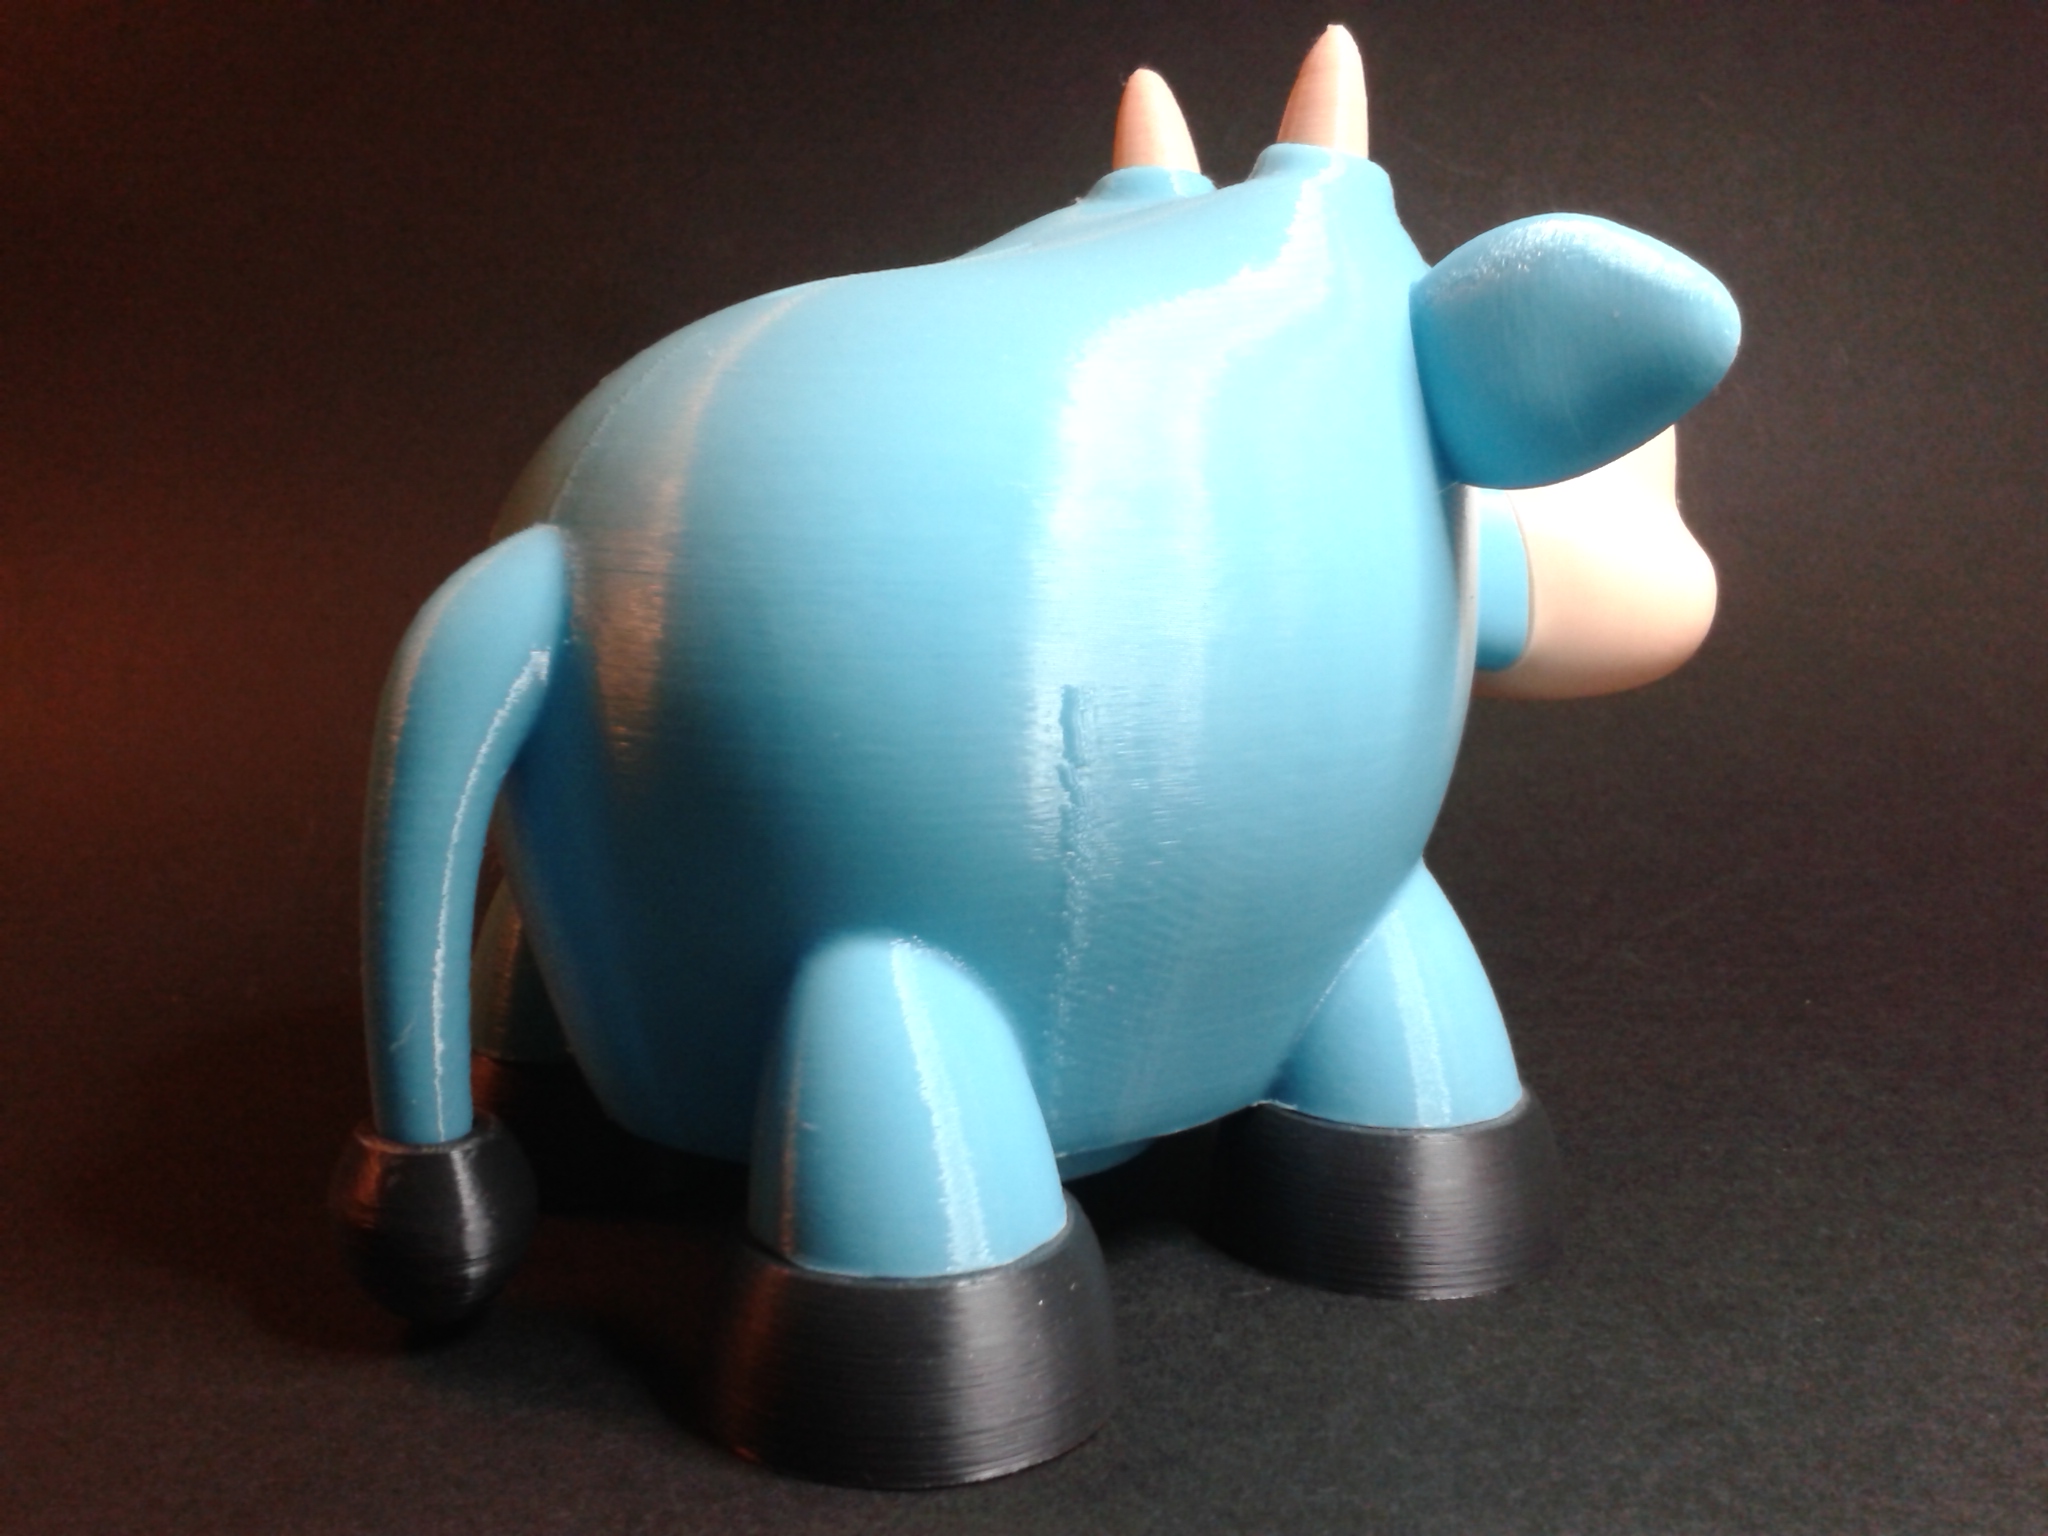
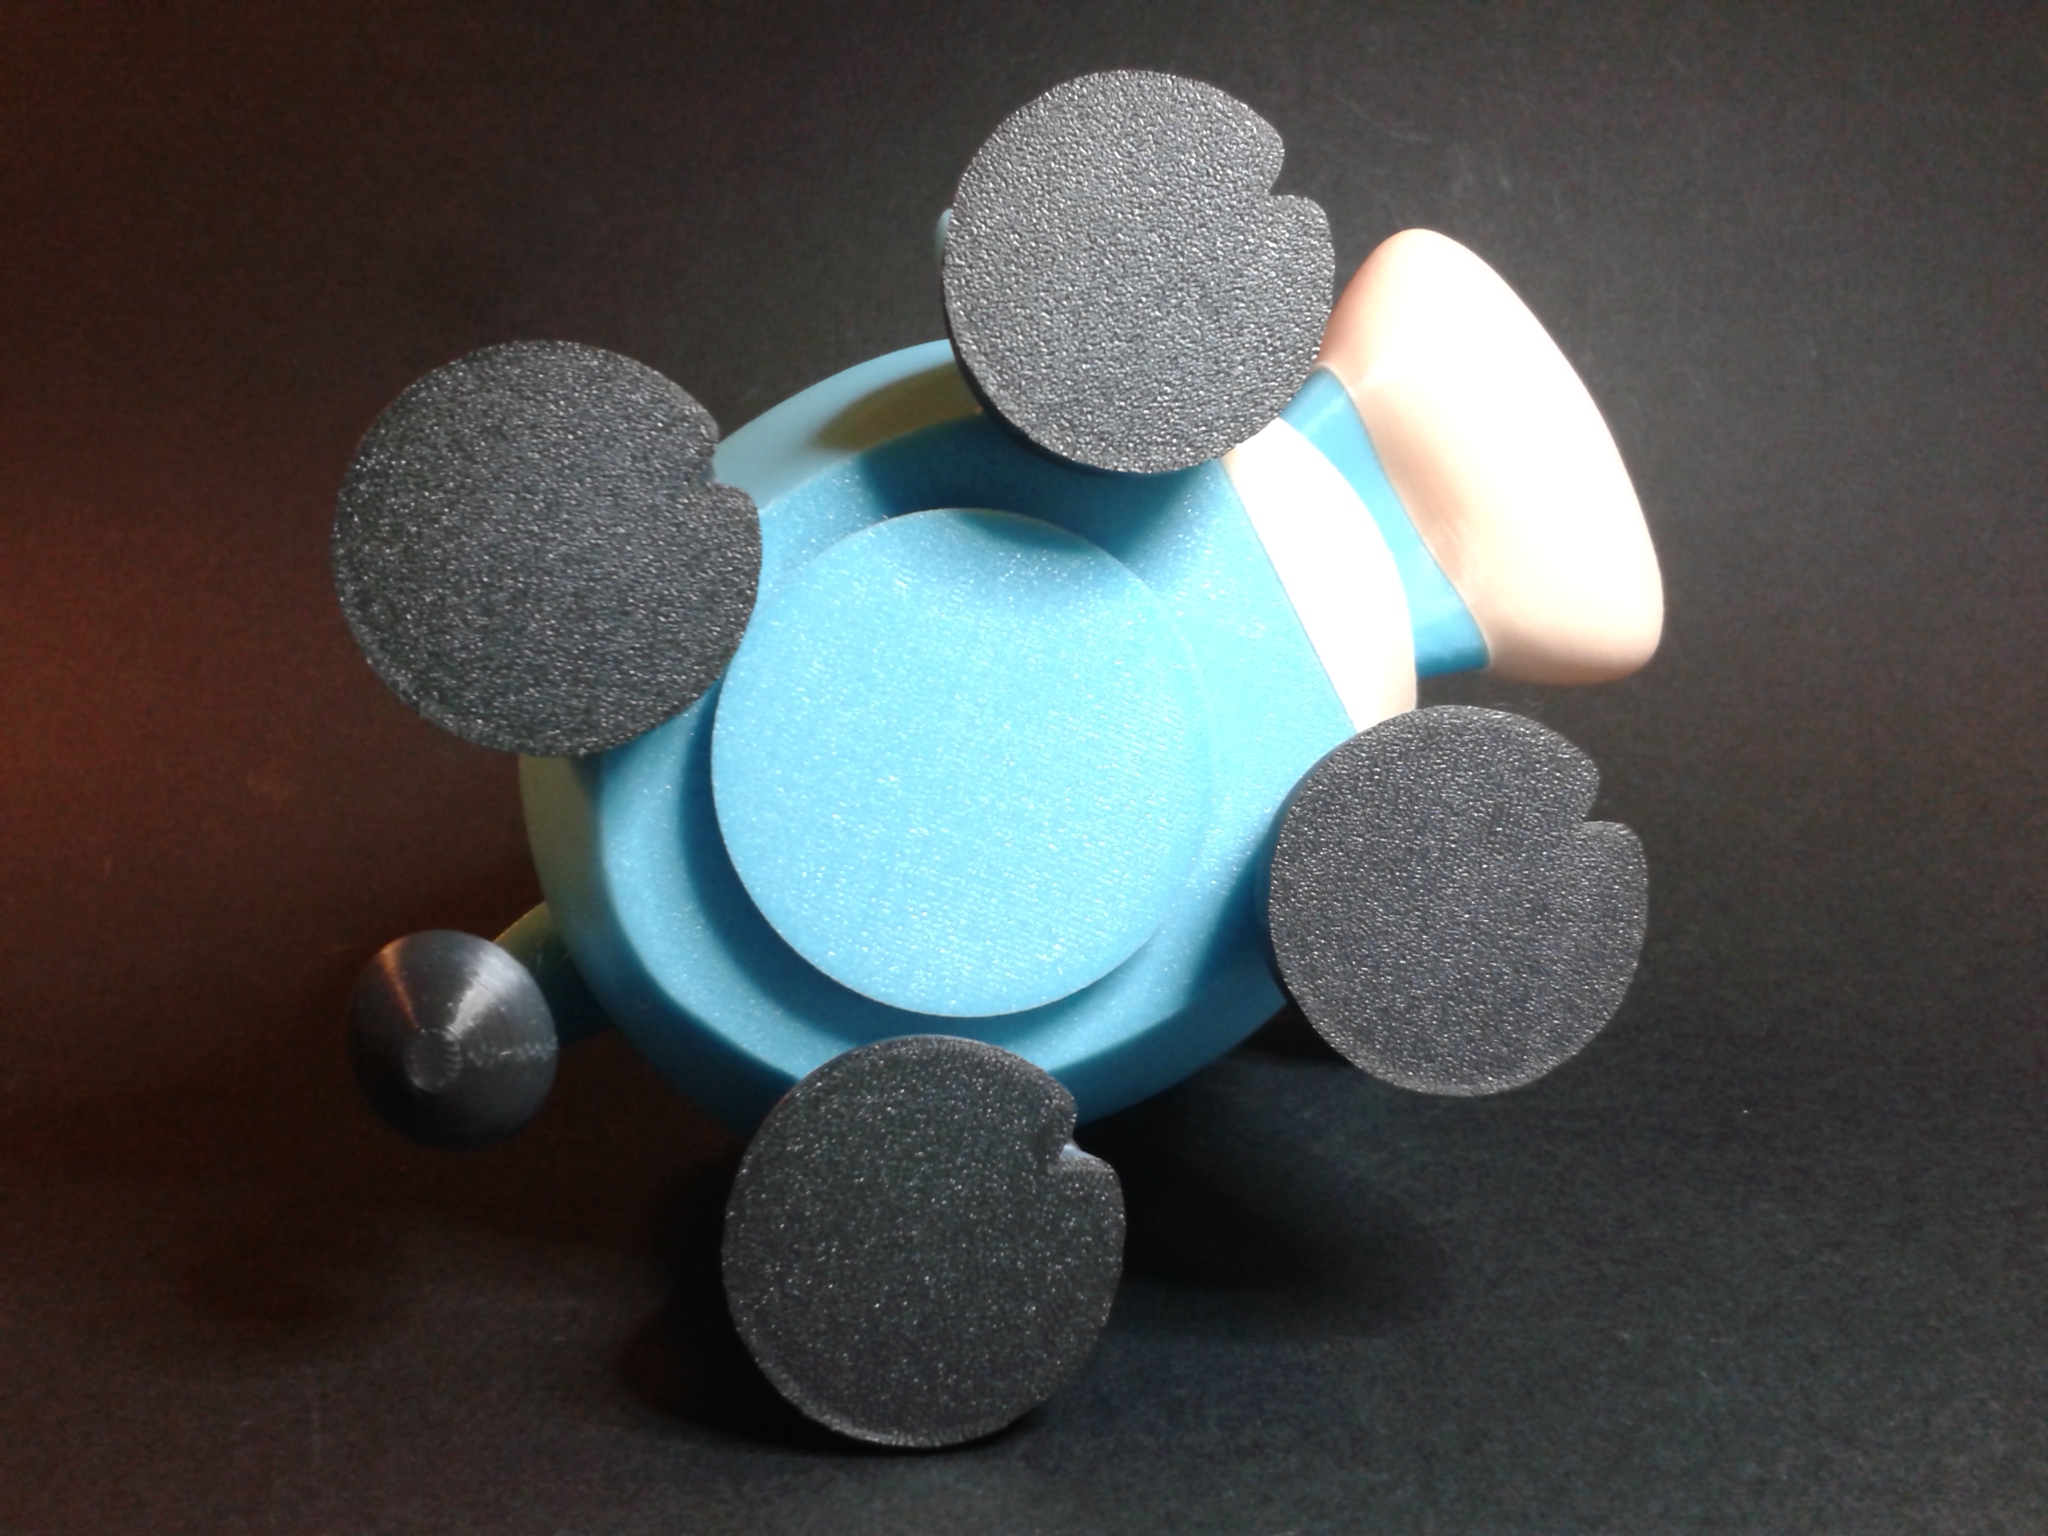
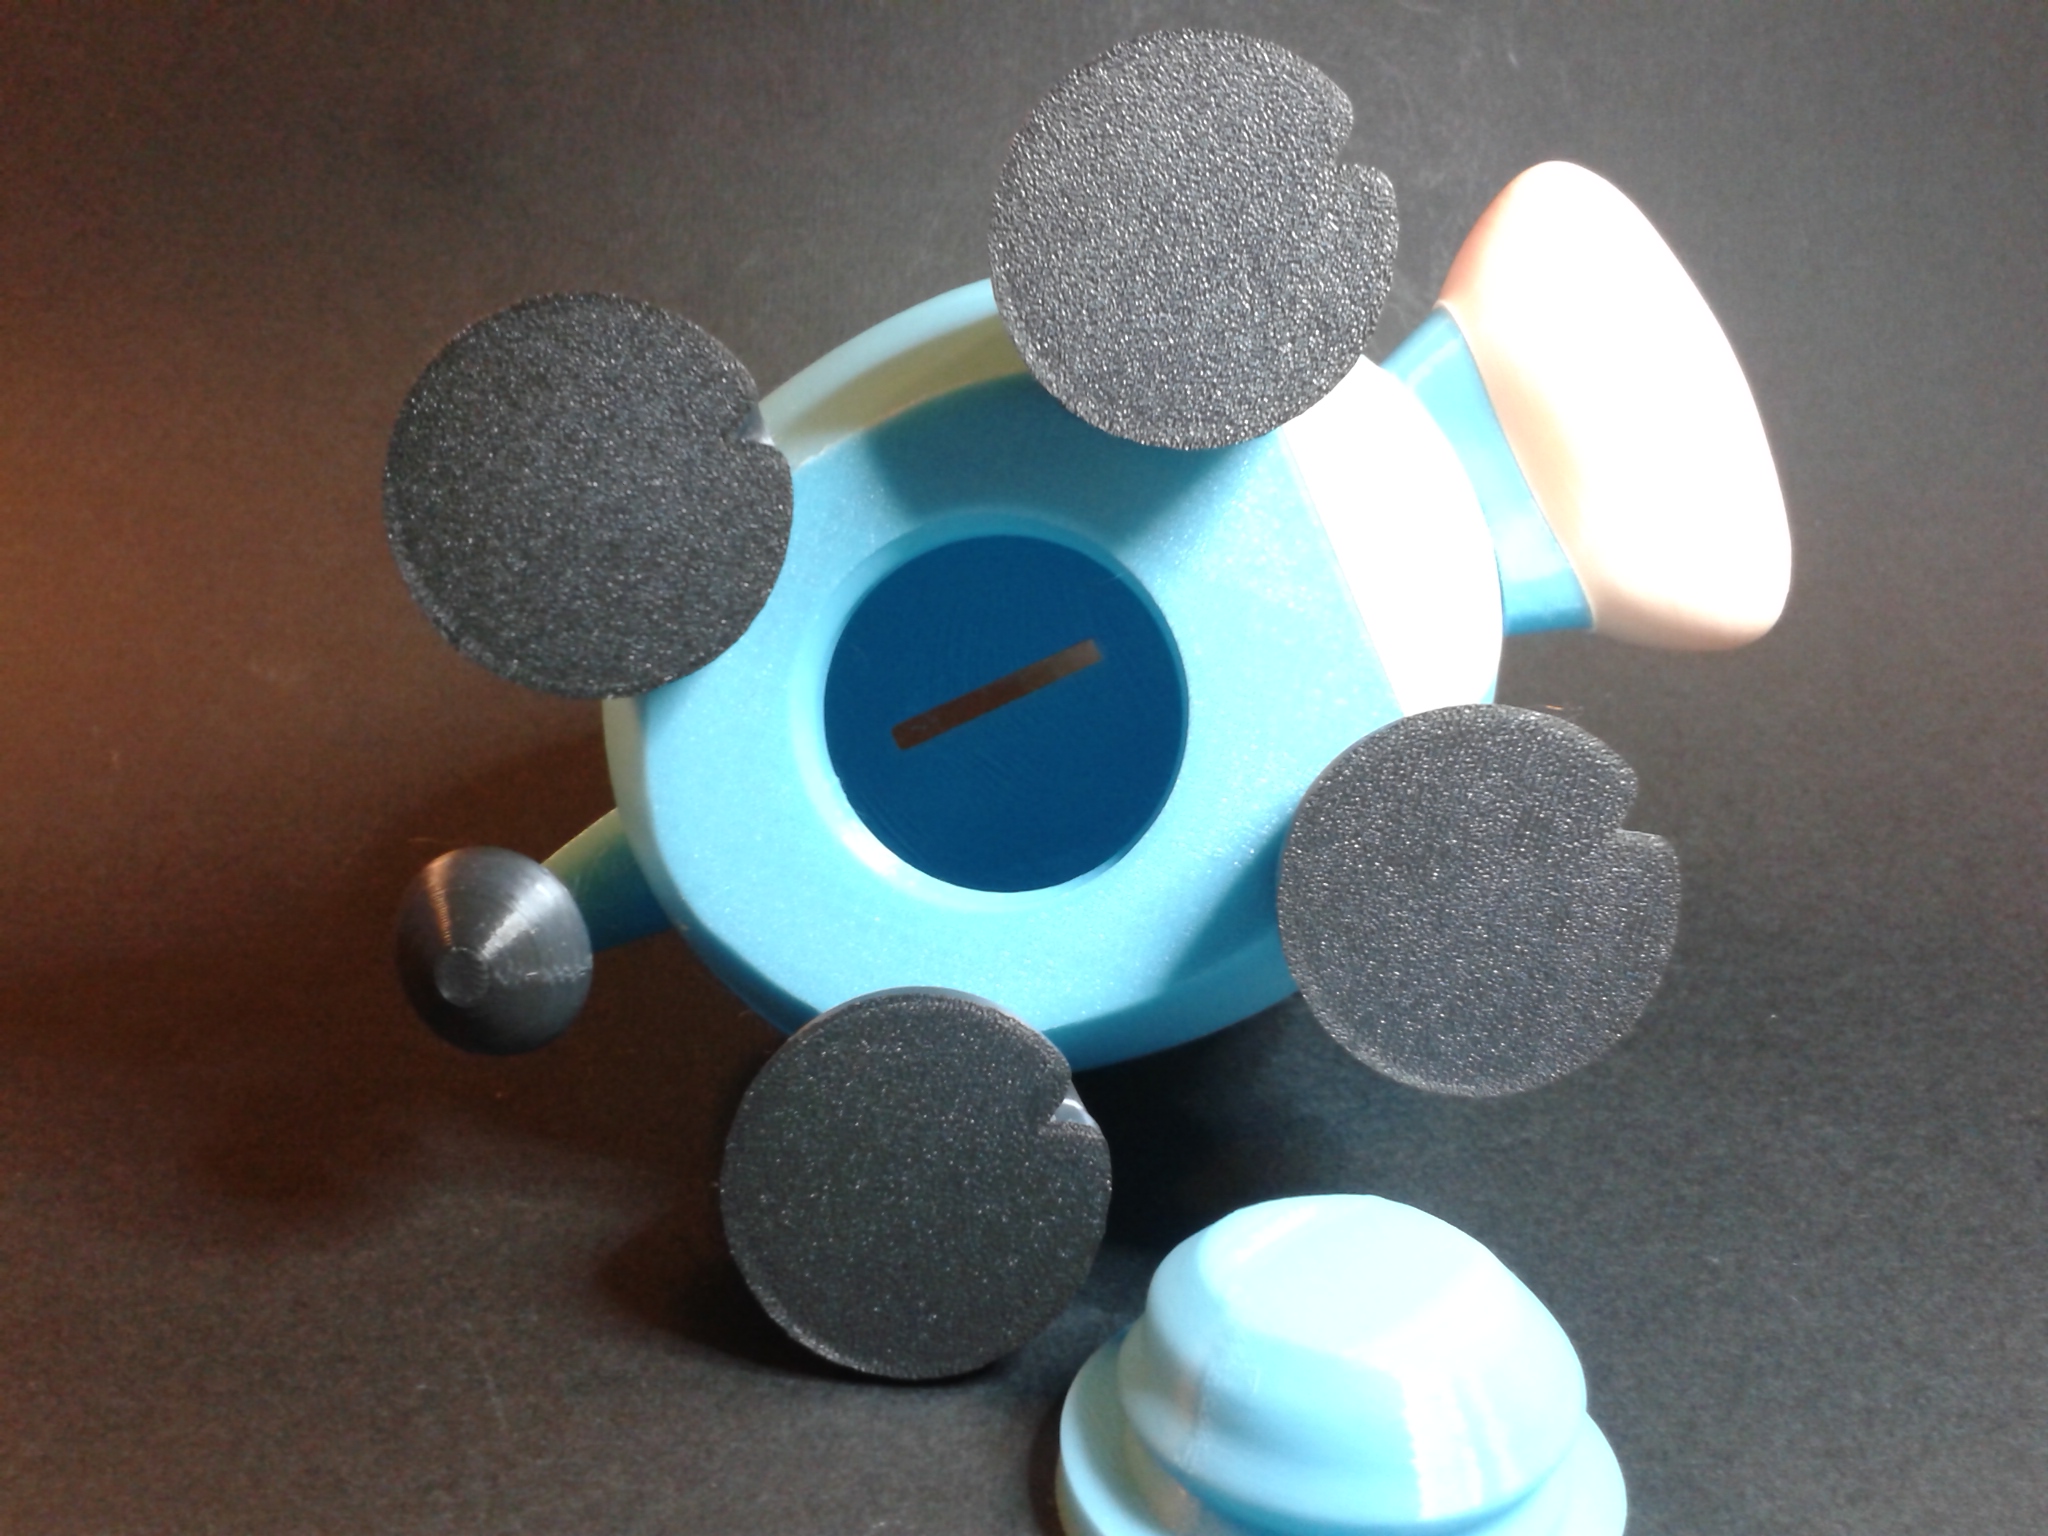
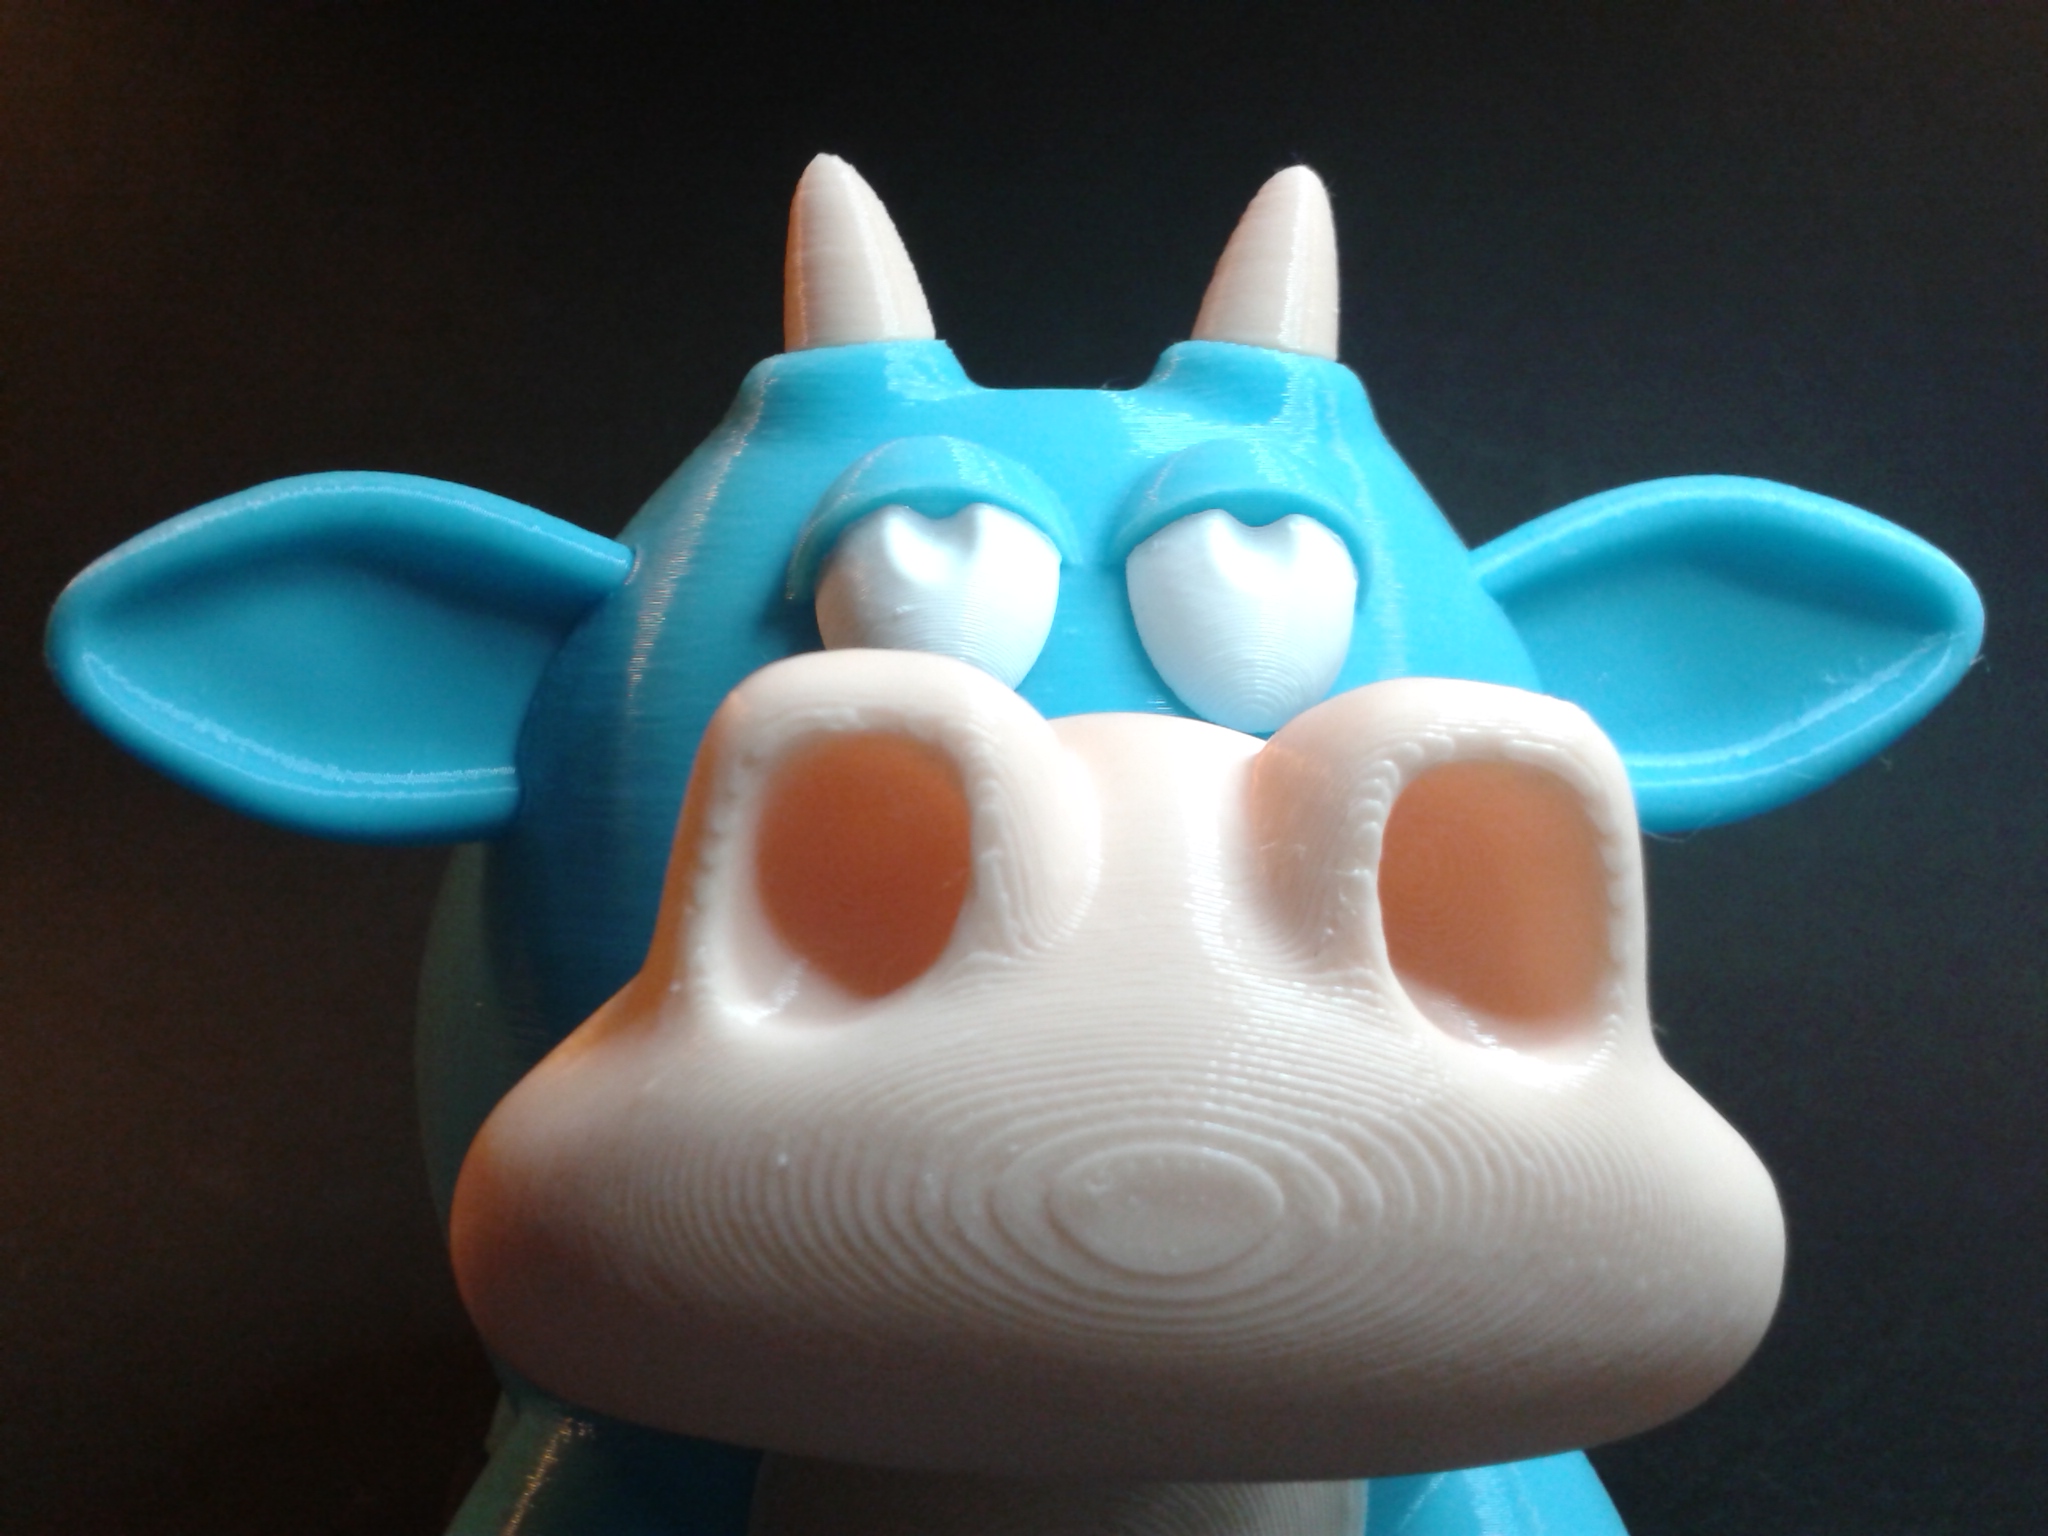
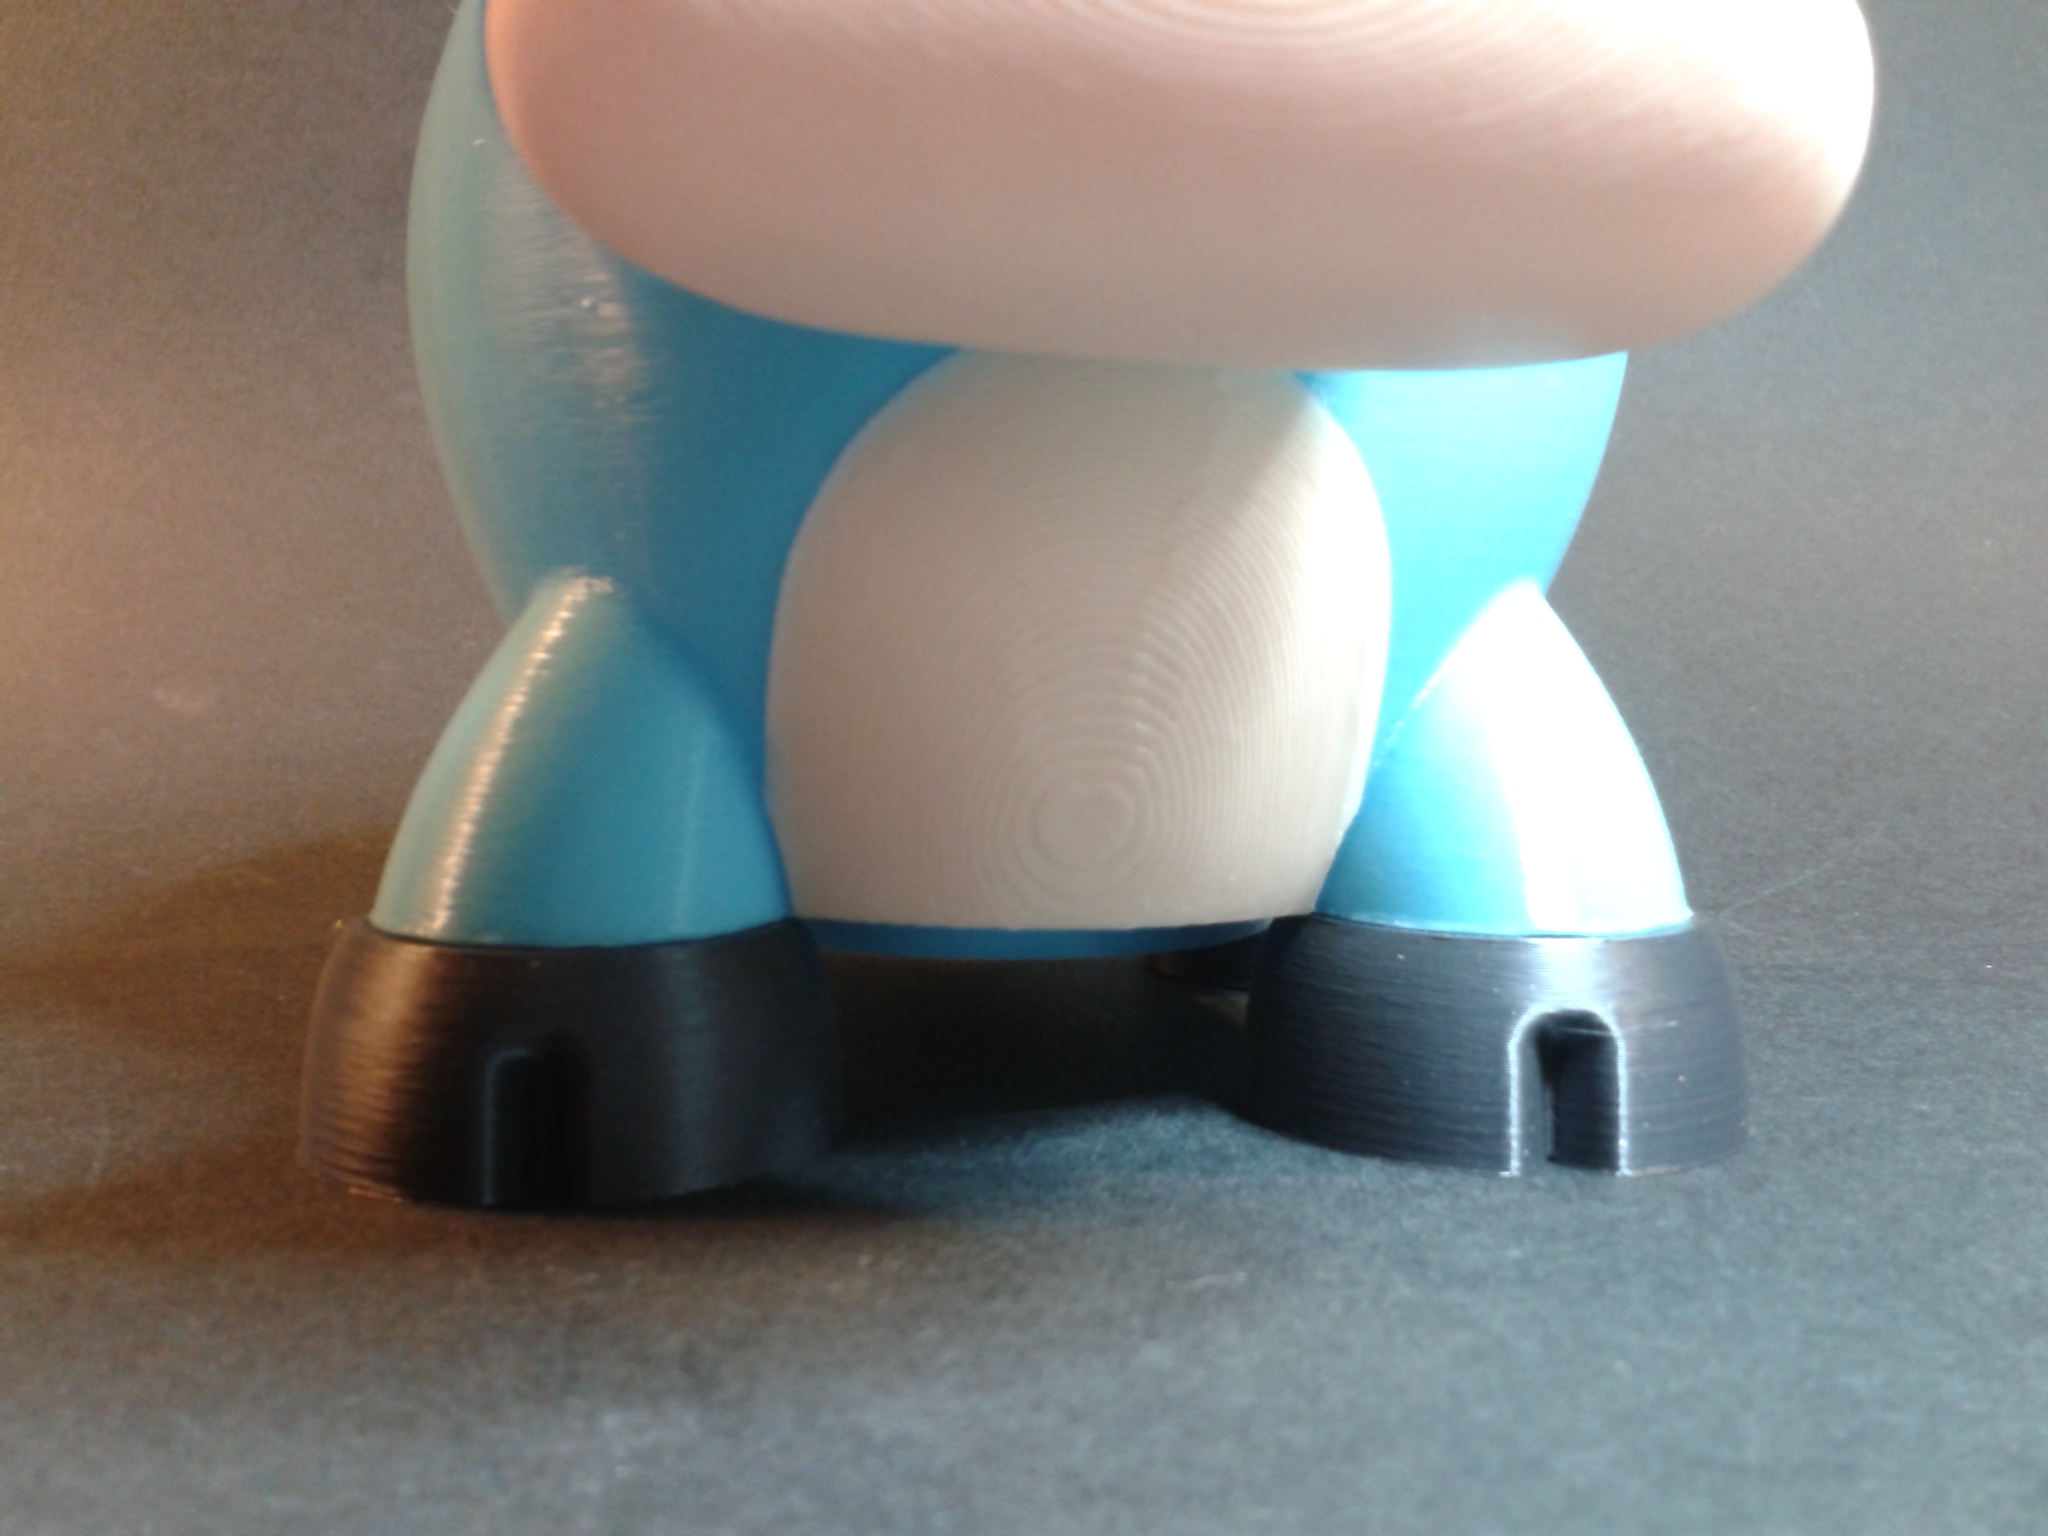
Tirelire vache
“Tirelire Meuuuh” de “didoff” (payant 6€ + TVA)
En six plateaux, pour un total d’environ 8 heures d’impression.
Filaments : PLA recyclé ArianePlast, PLA+ blanc ArianePlast, PLA Skin color Velleman, PLA Light blue Velleman.
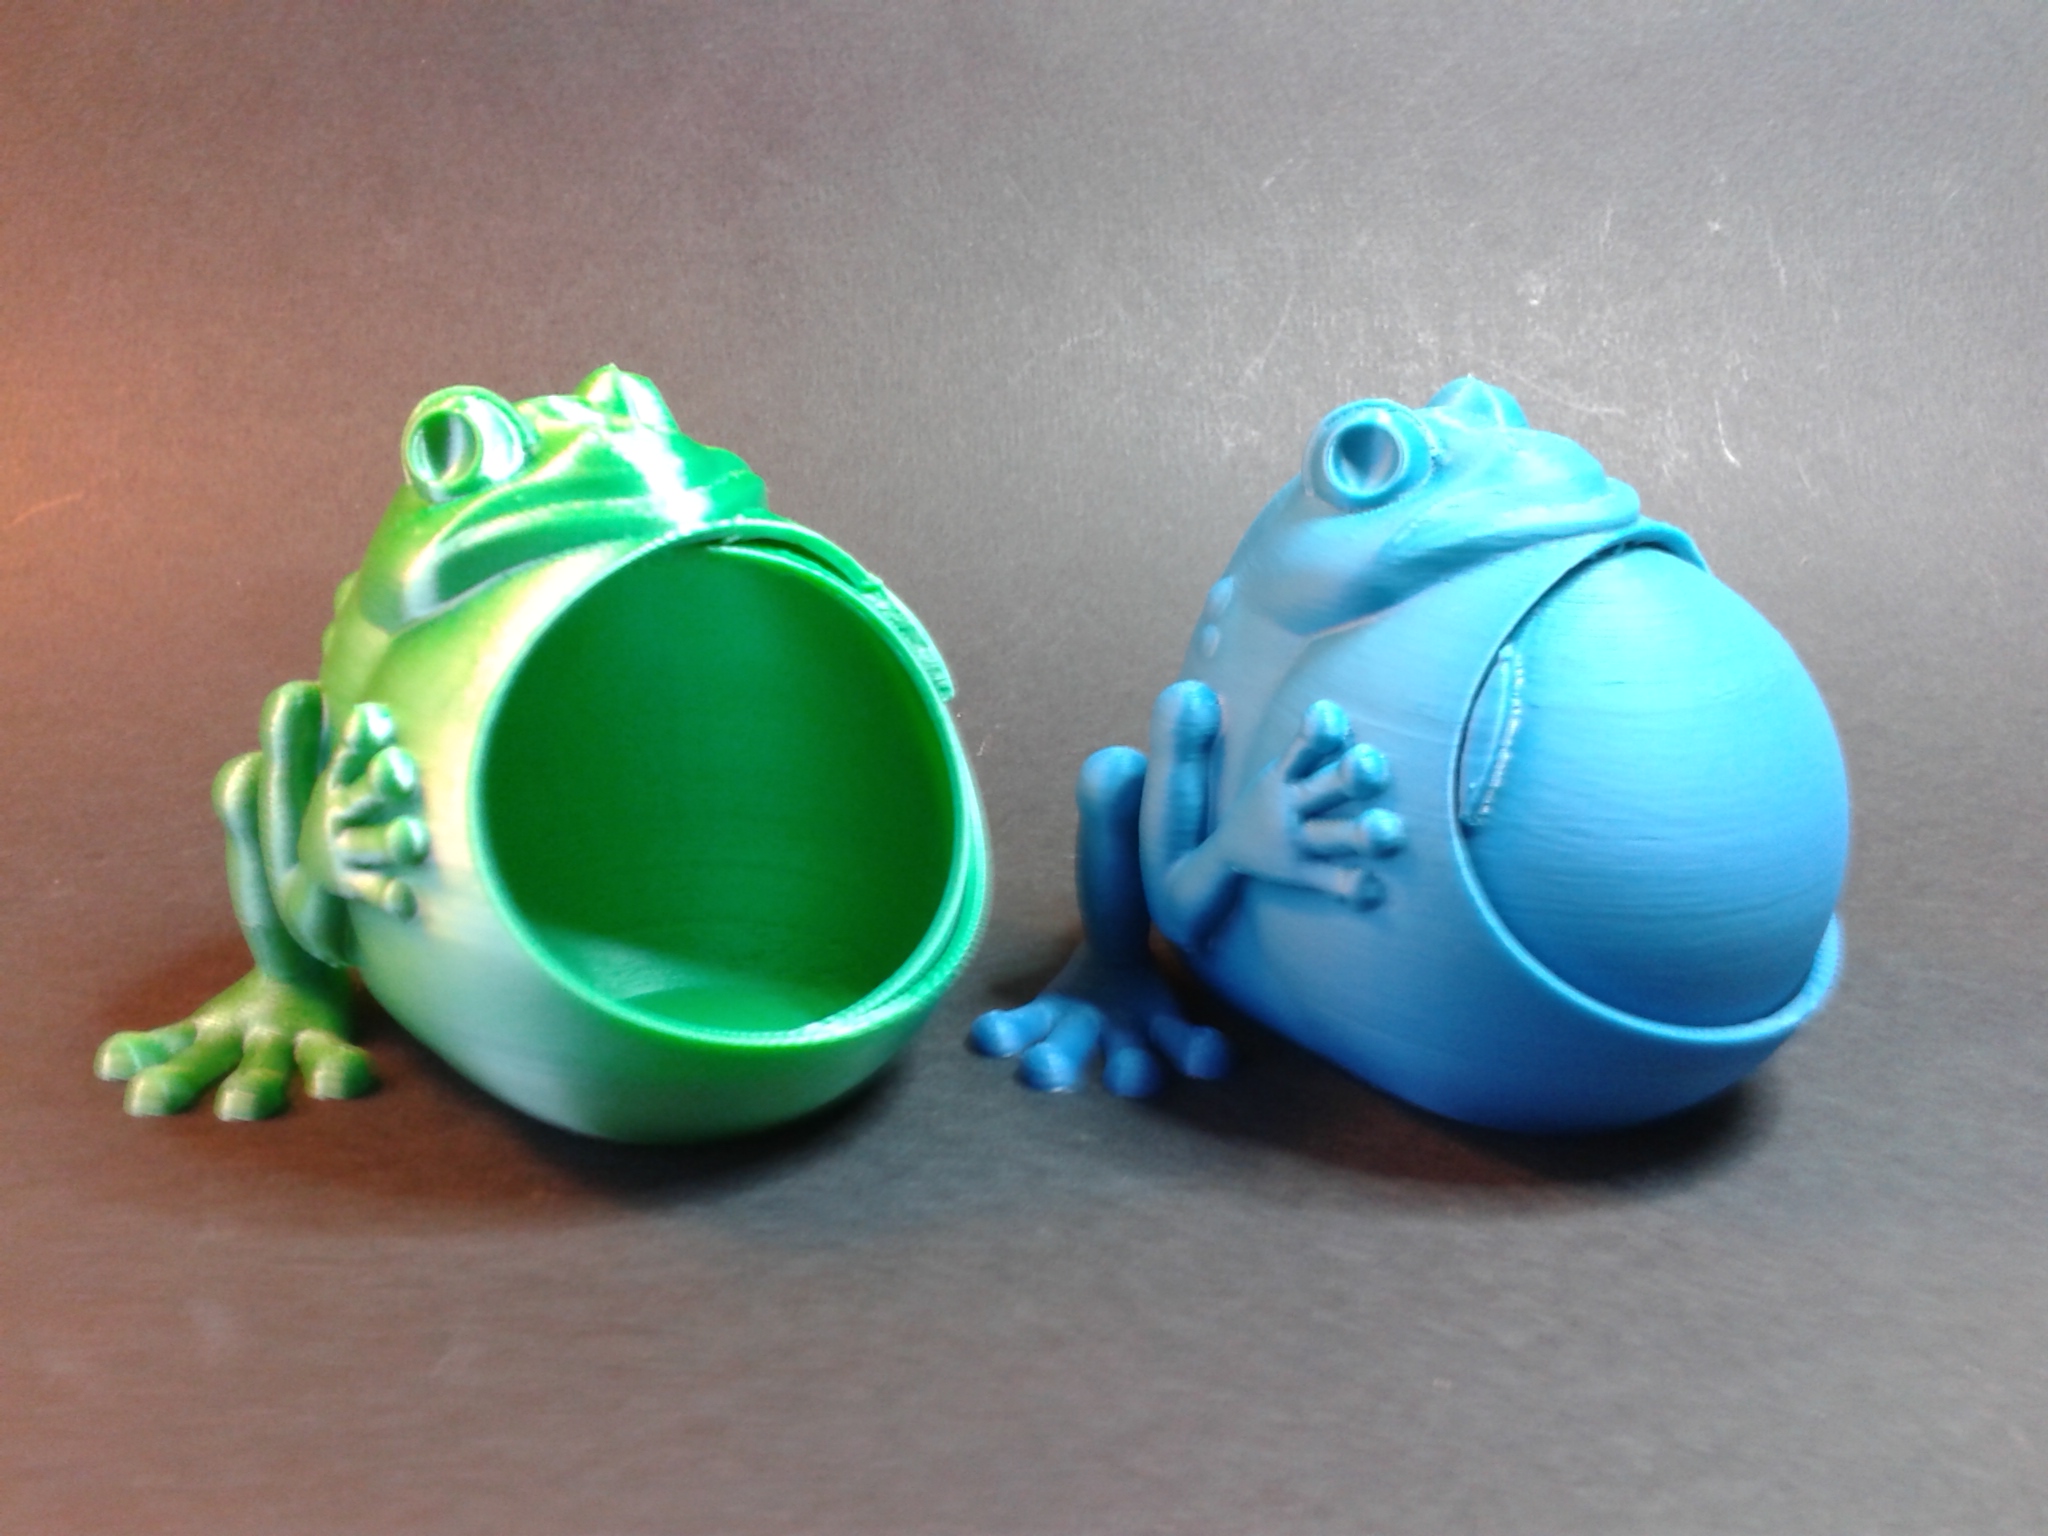
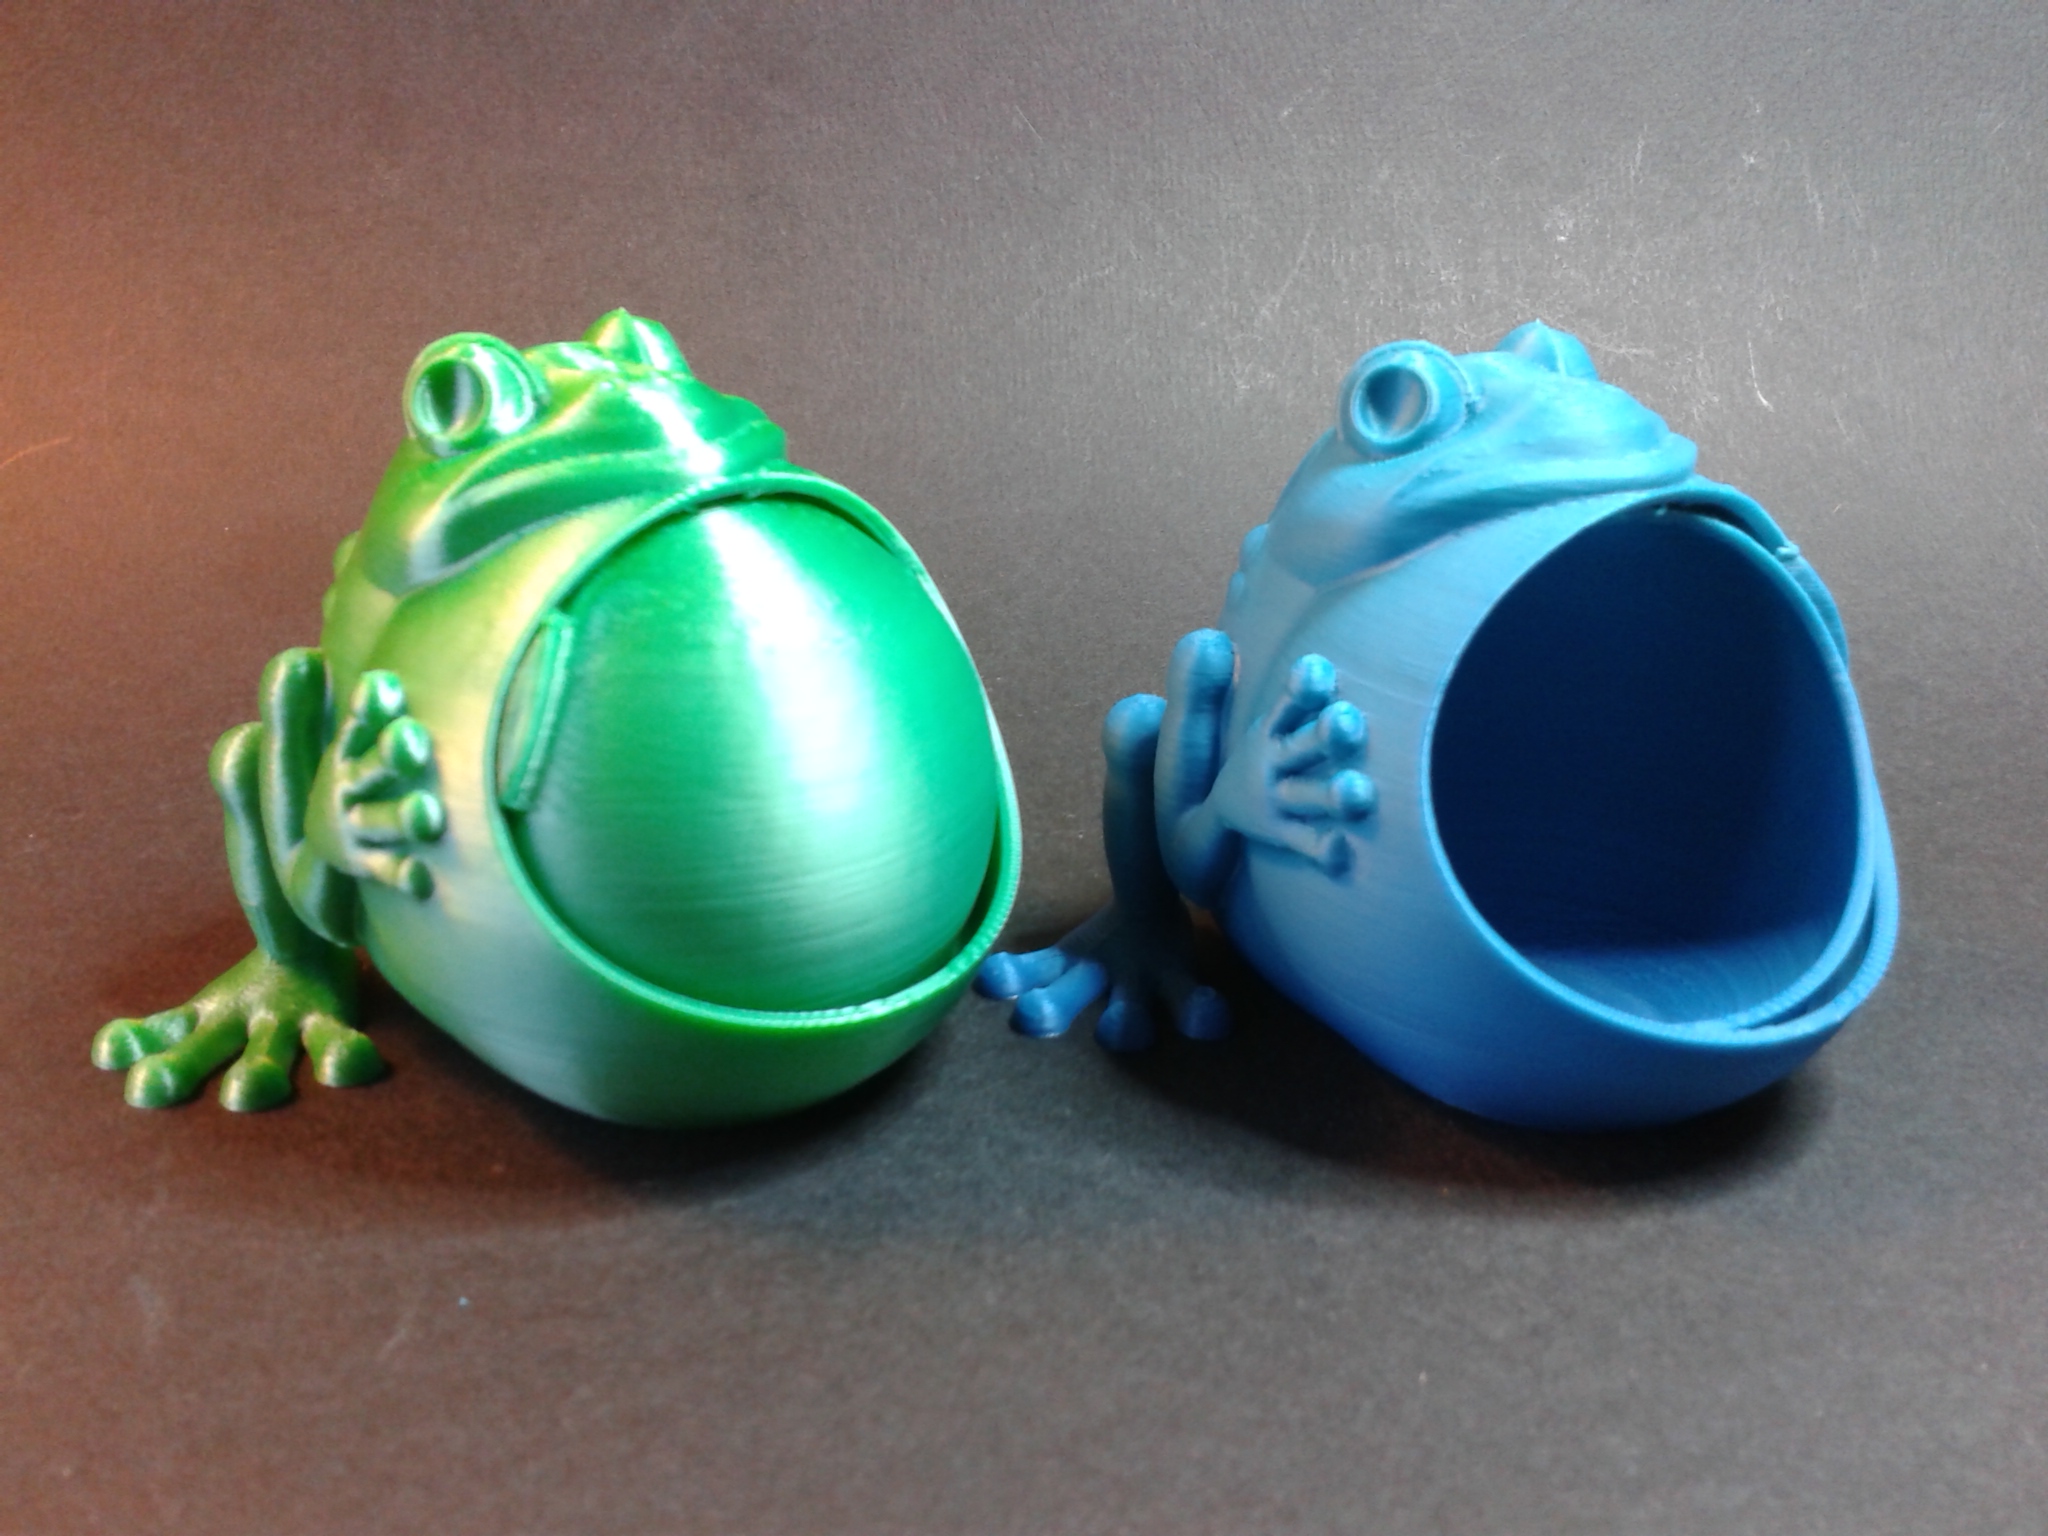
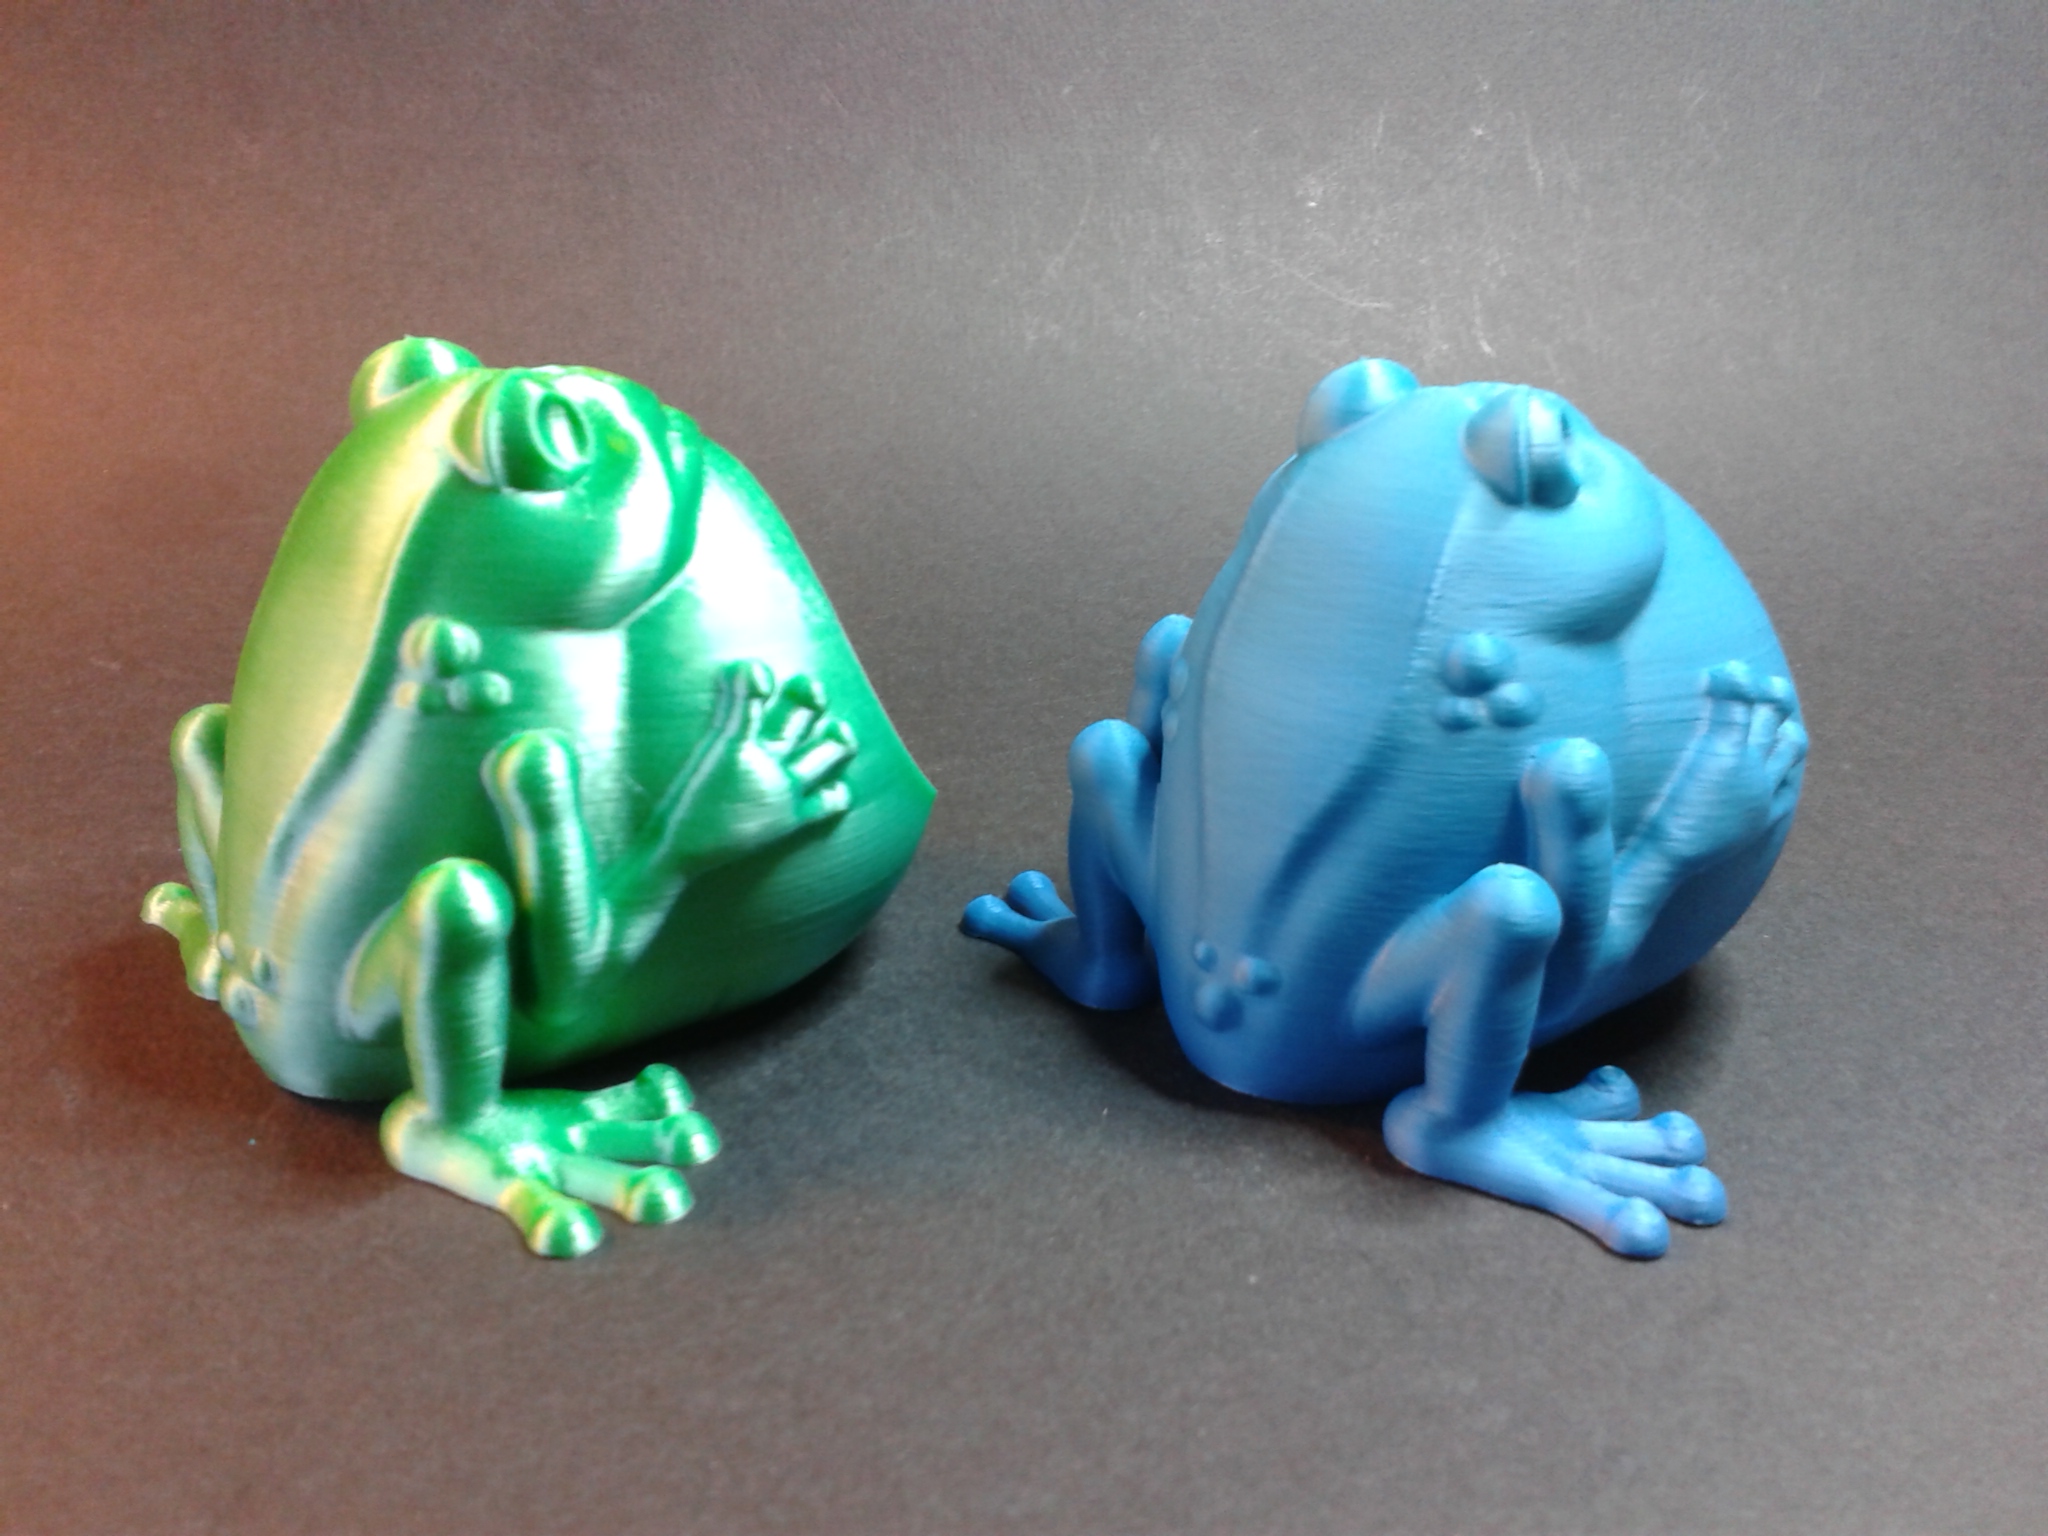
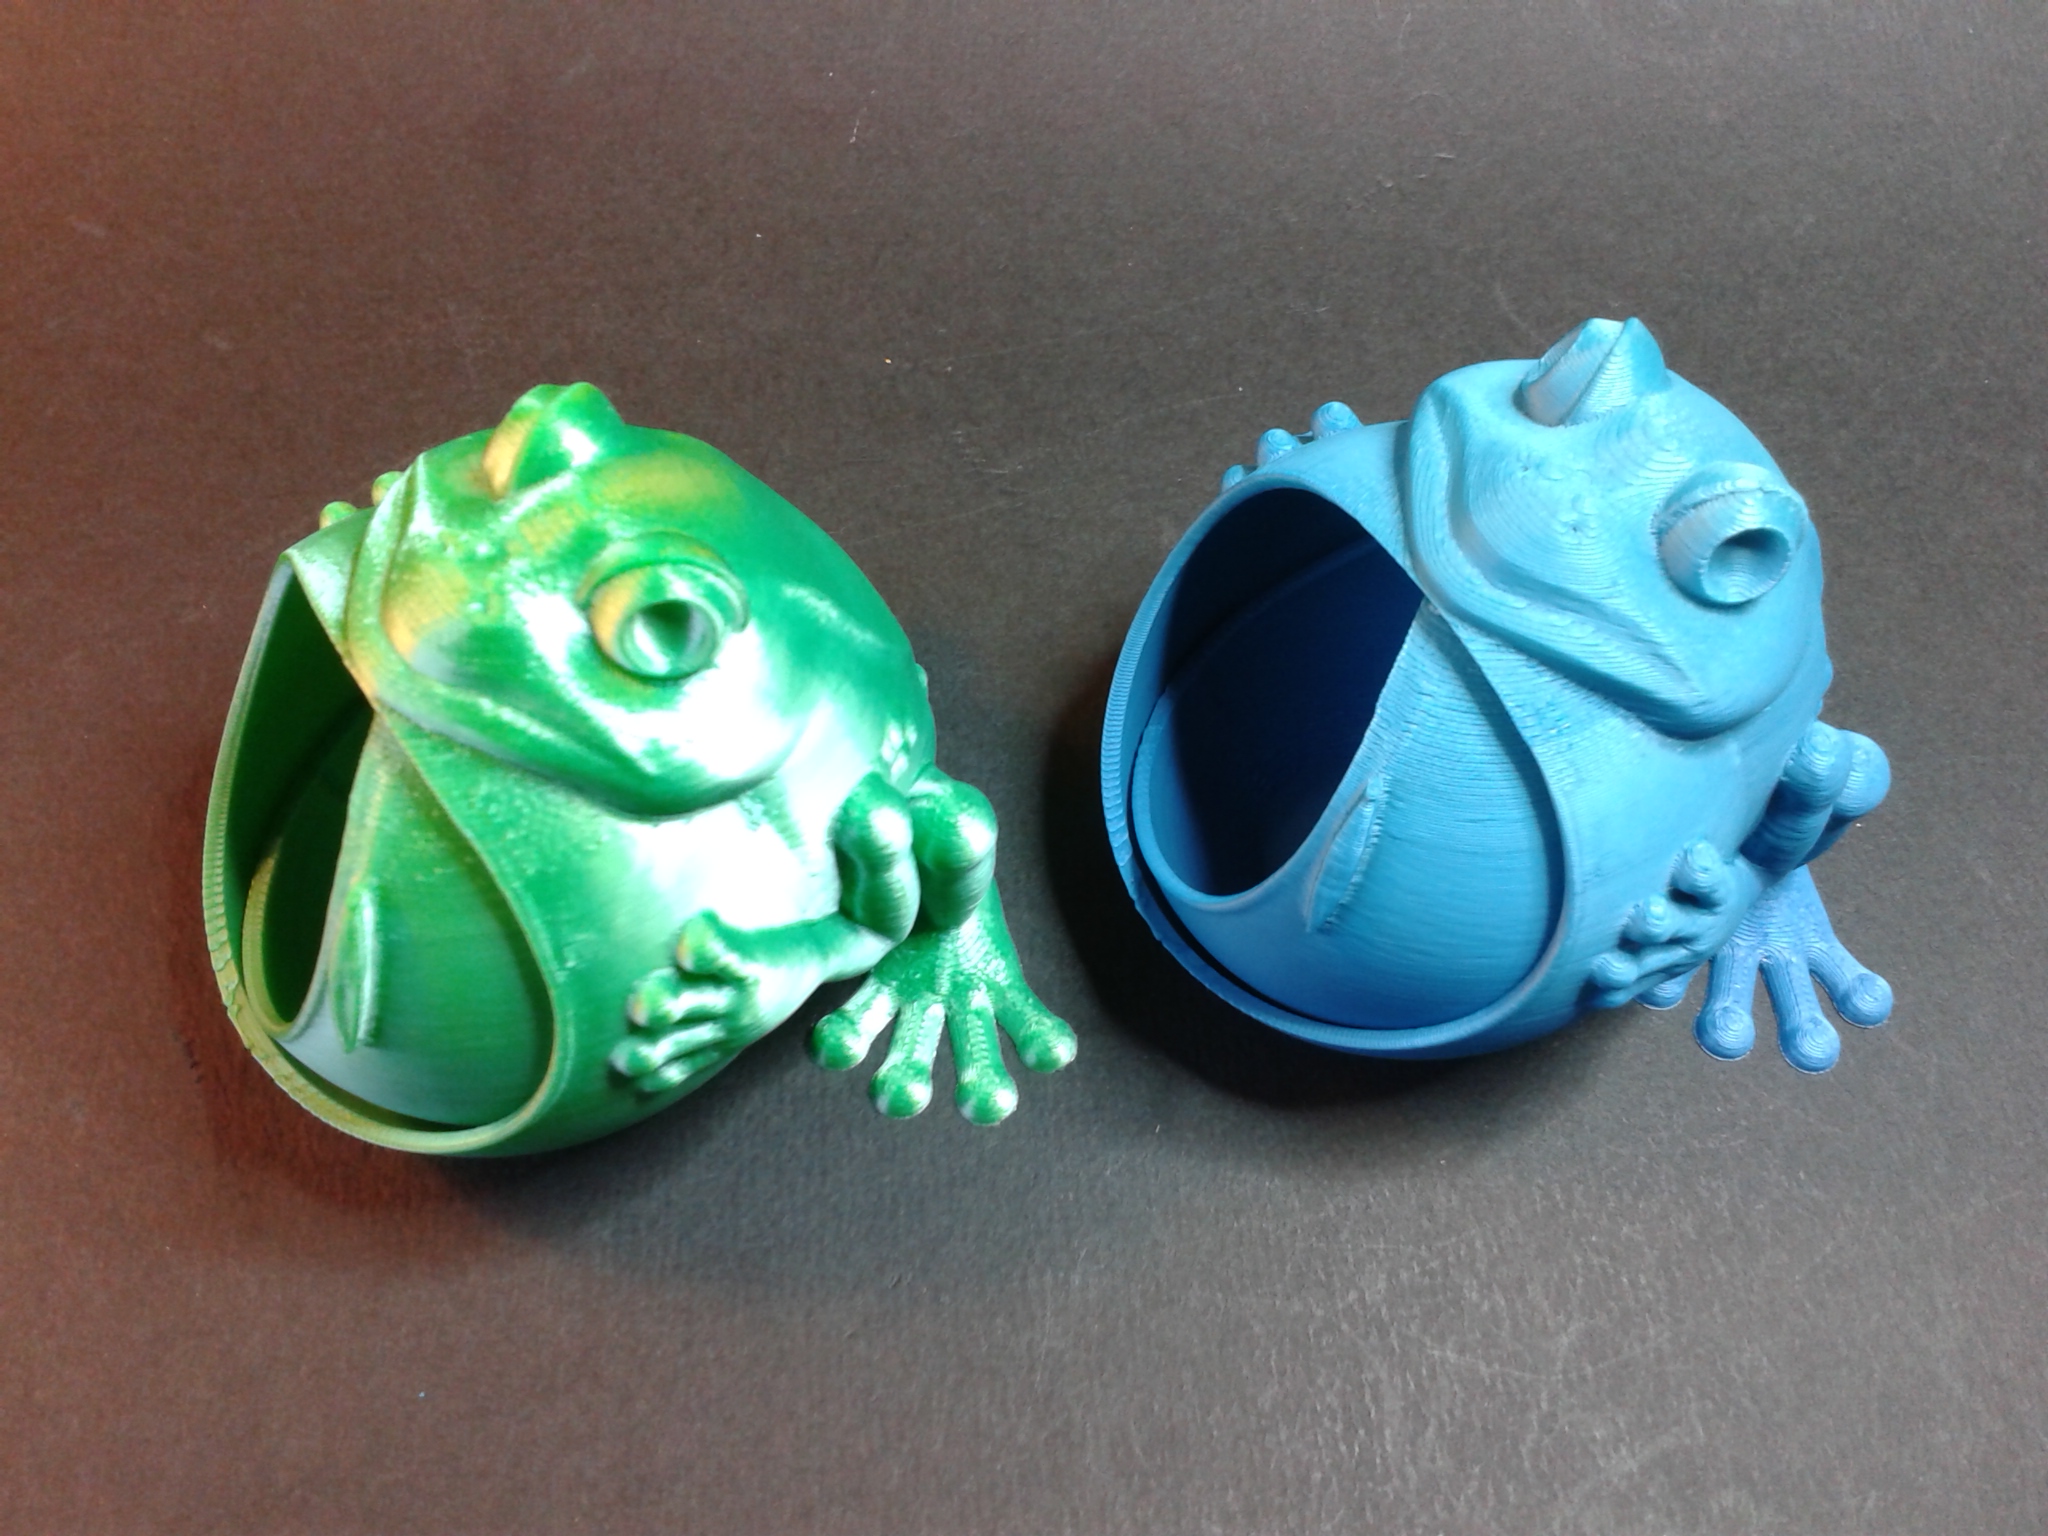
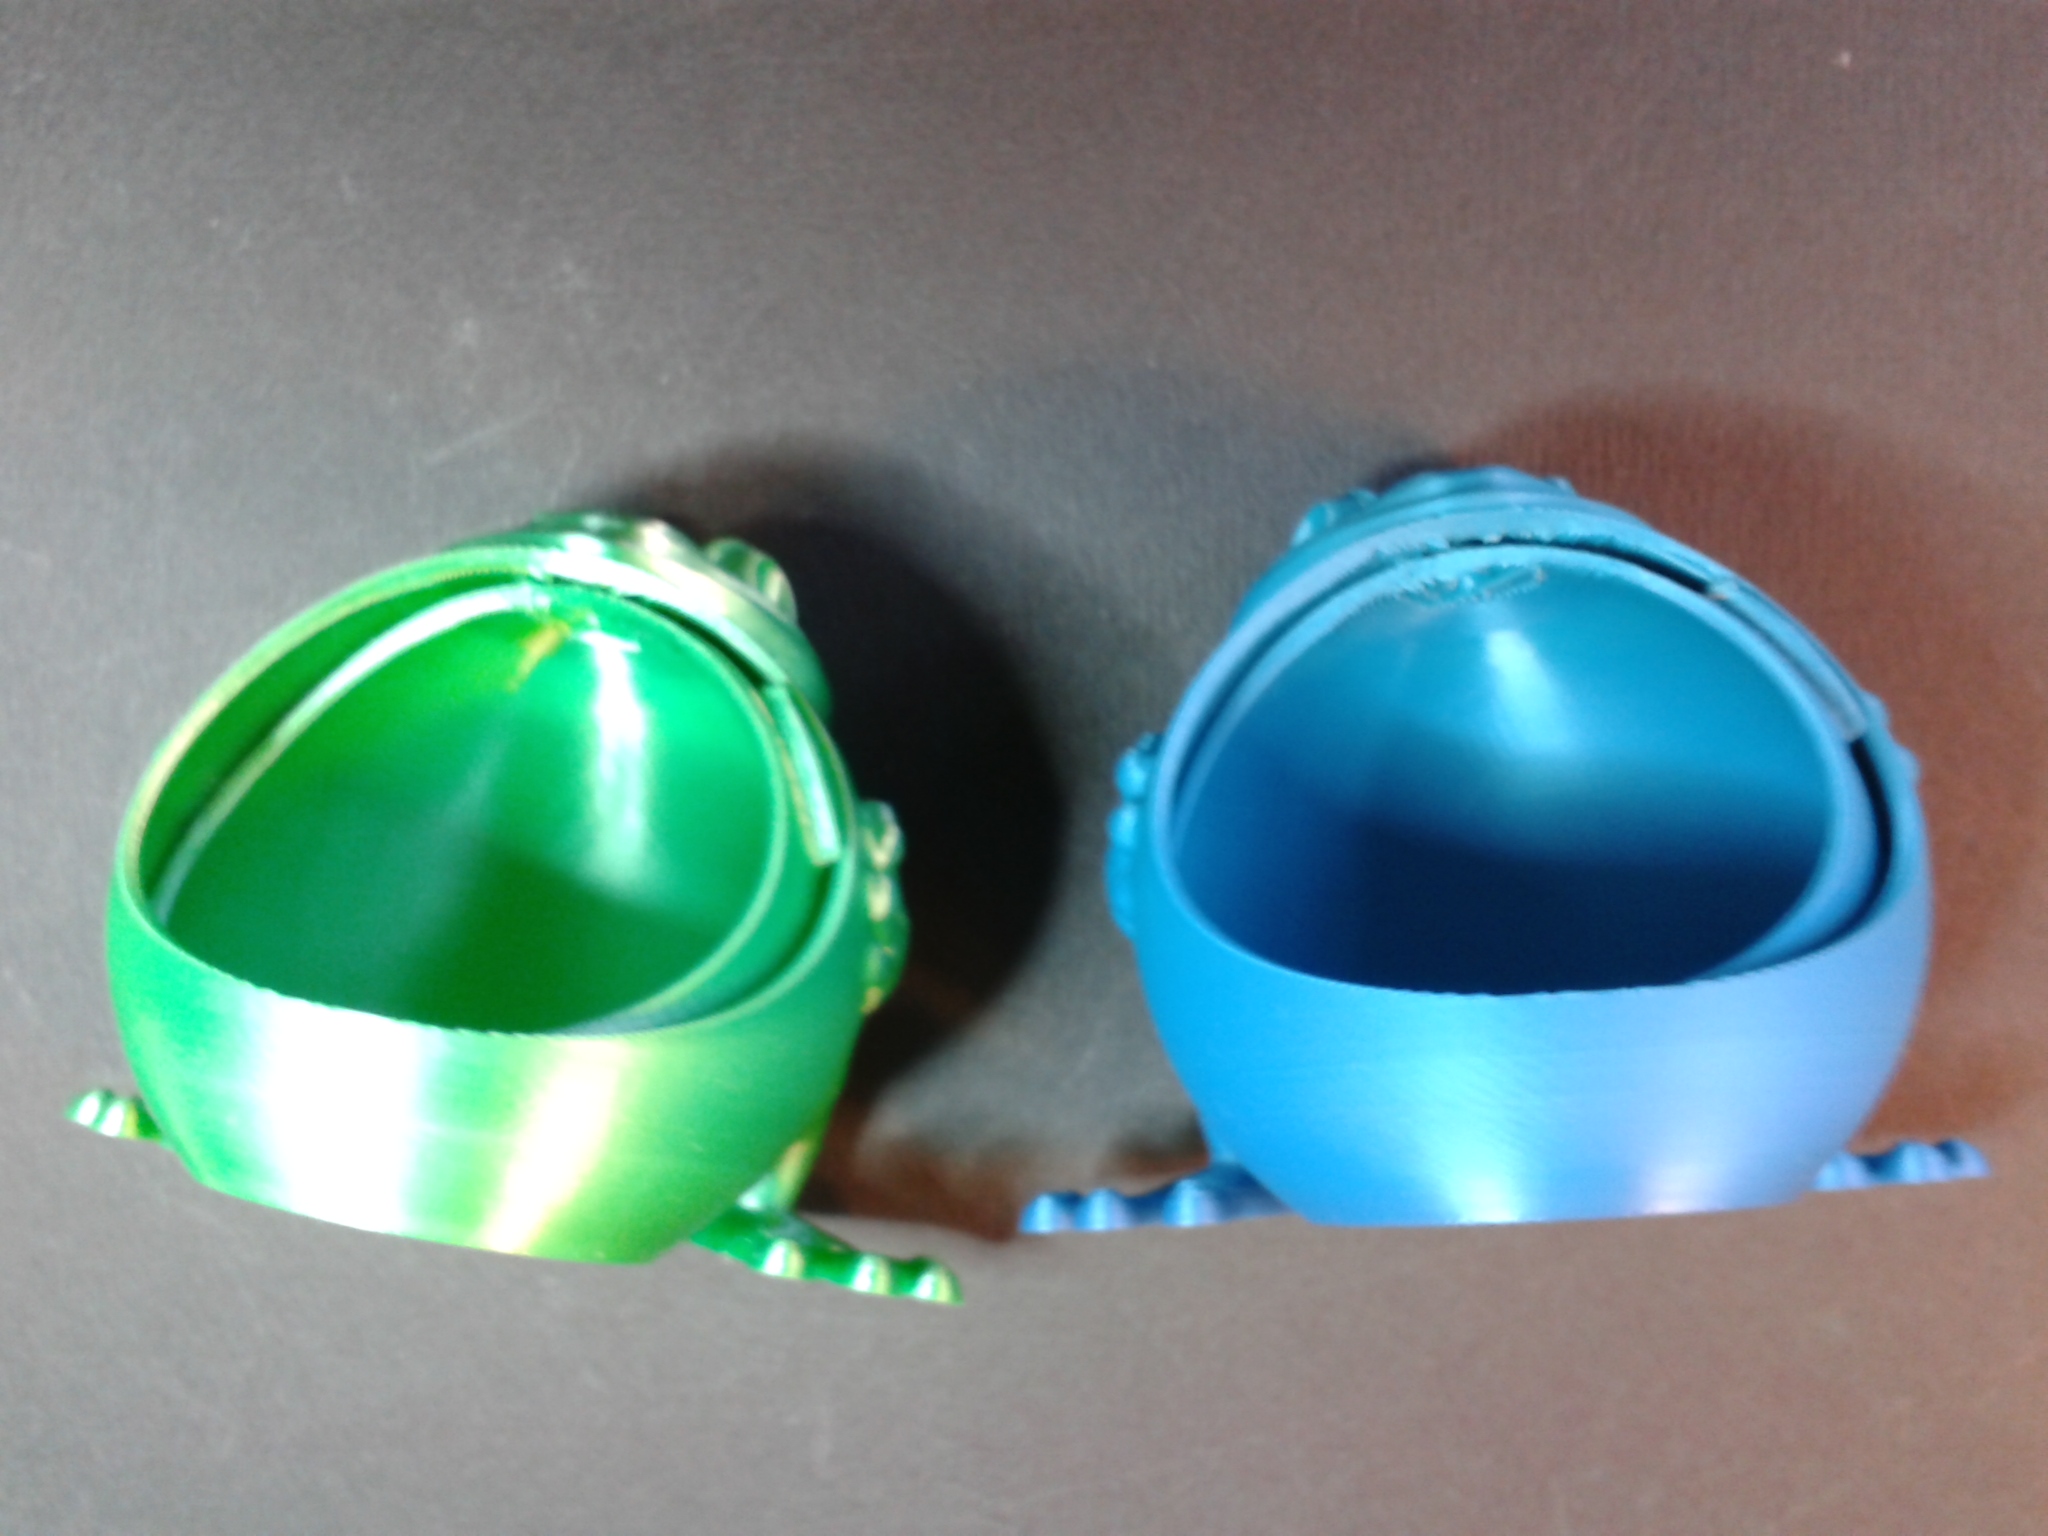
Grenouilles range bijoux
“Frog keeps jewelry (not support)” de “Aslan3D” (payant sauf pour les abonnés Premium Creality Cloud).
Environ 2h02 pour une impression en filament PLA Silk vert ArianePlast et une autre en CR-PLA rainbow Creality.

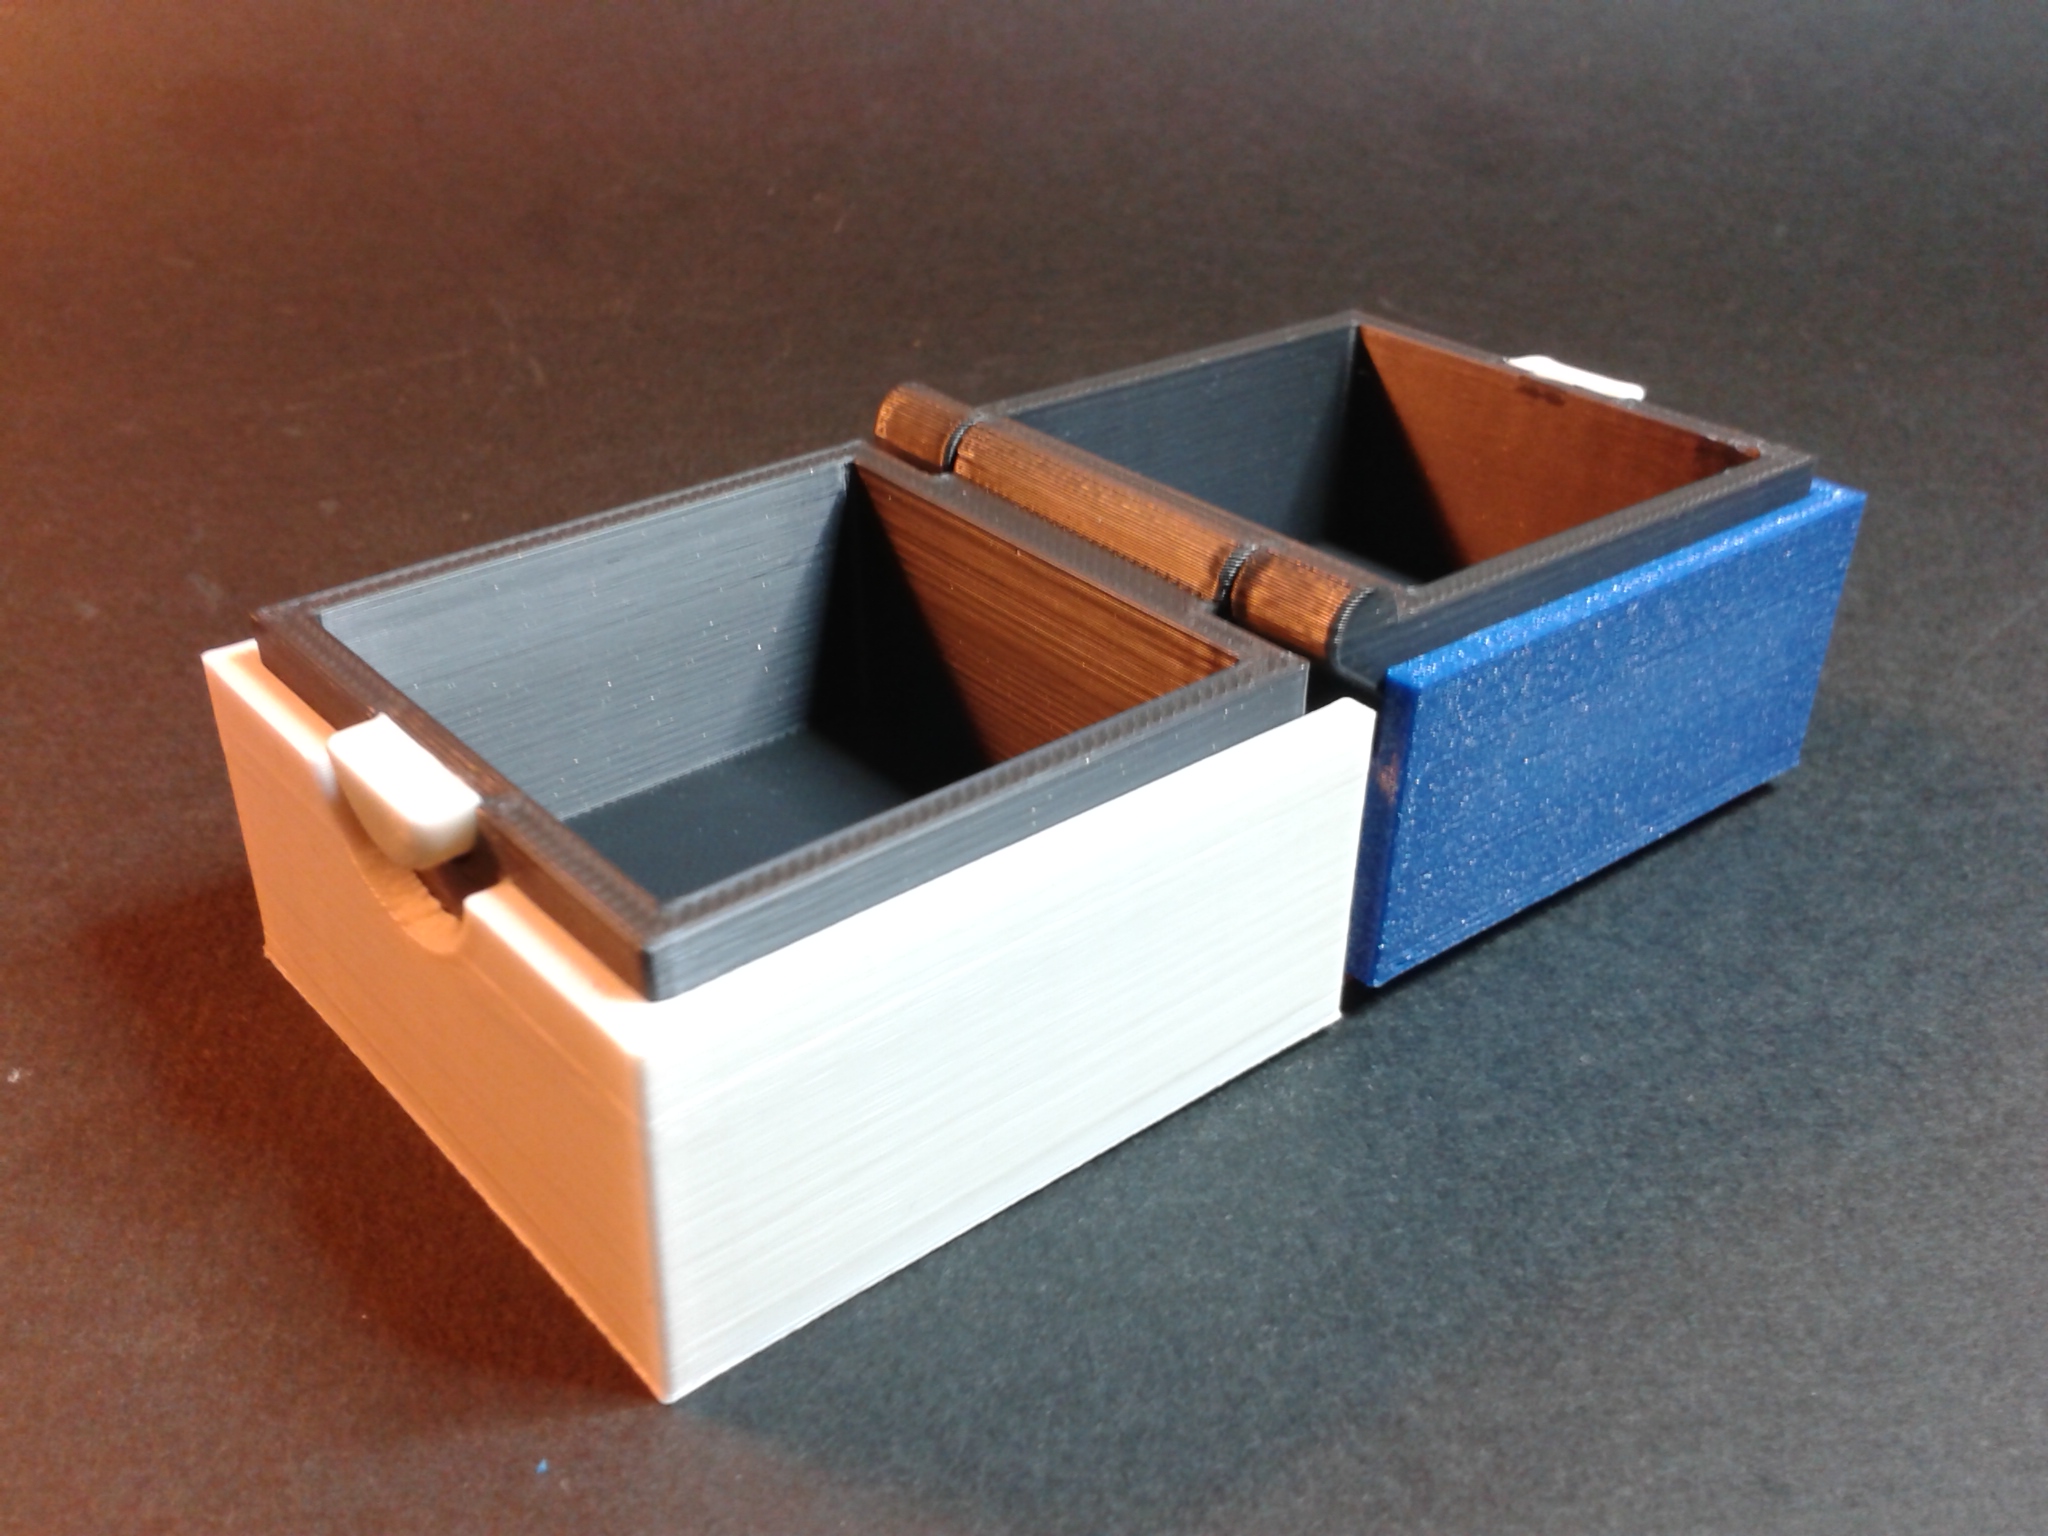
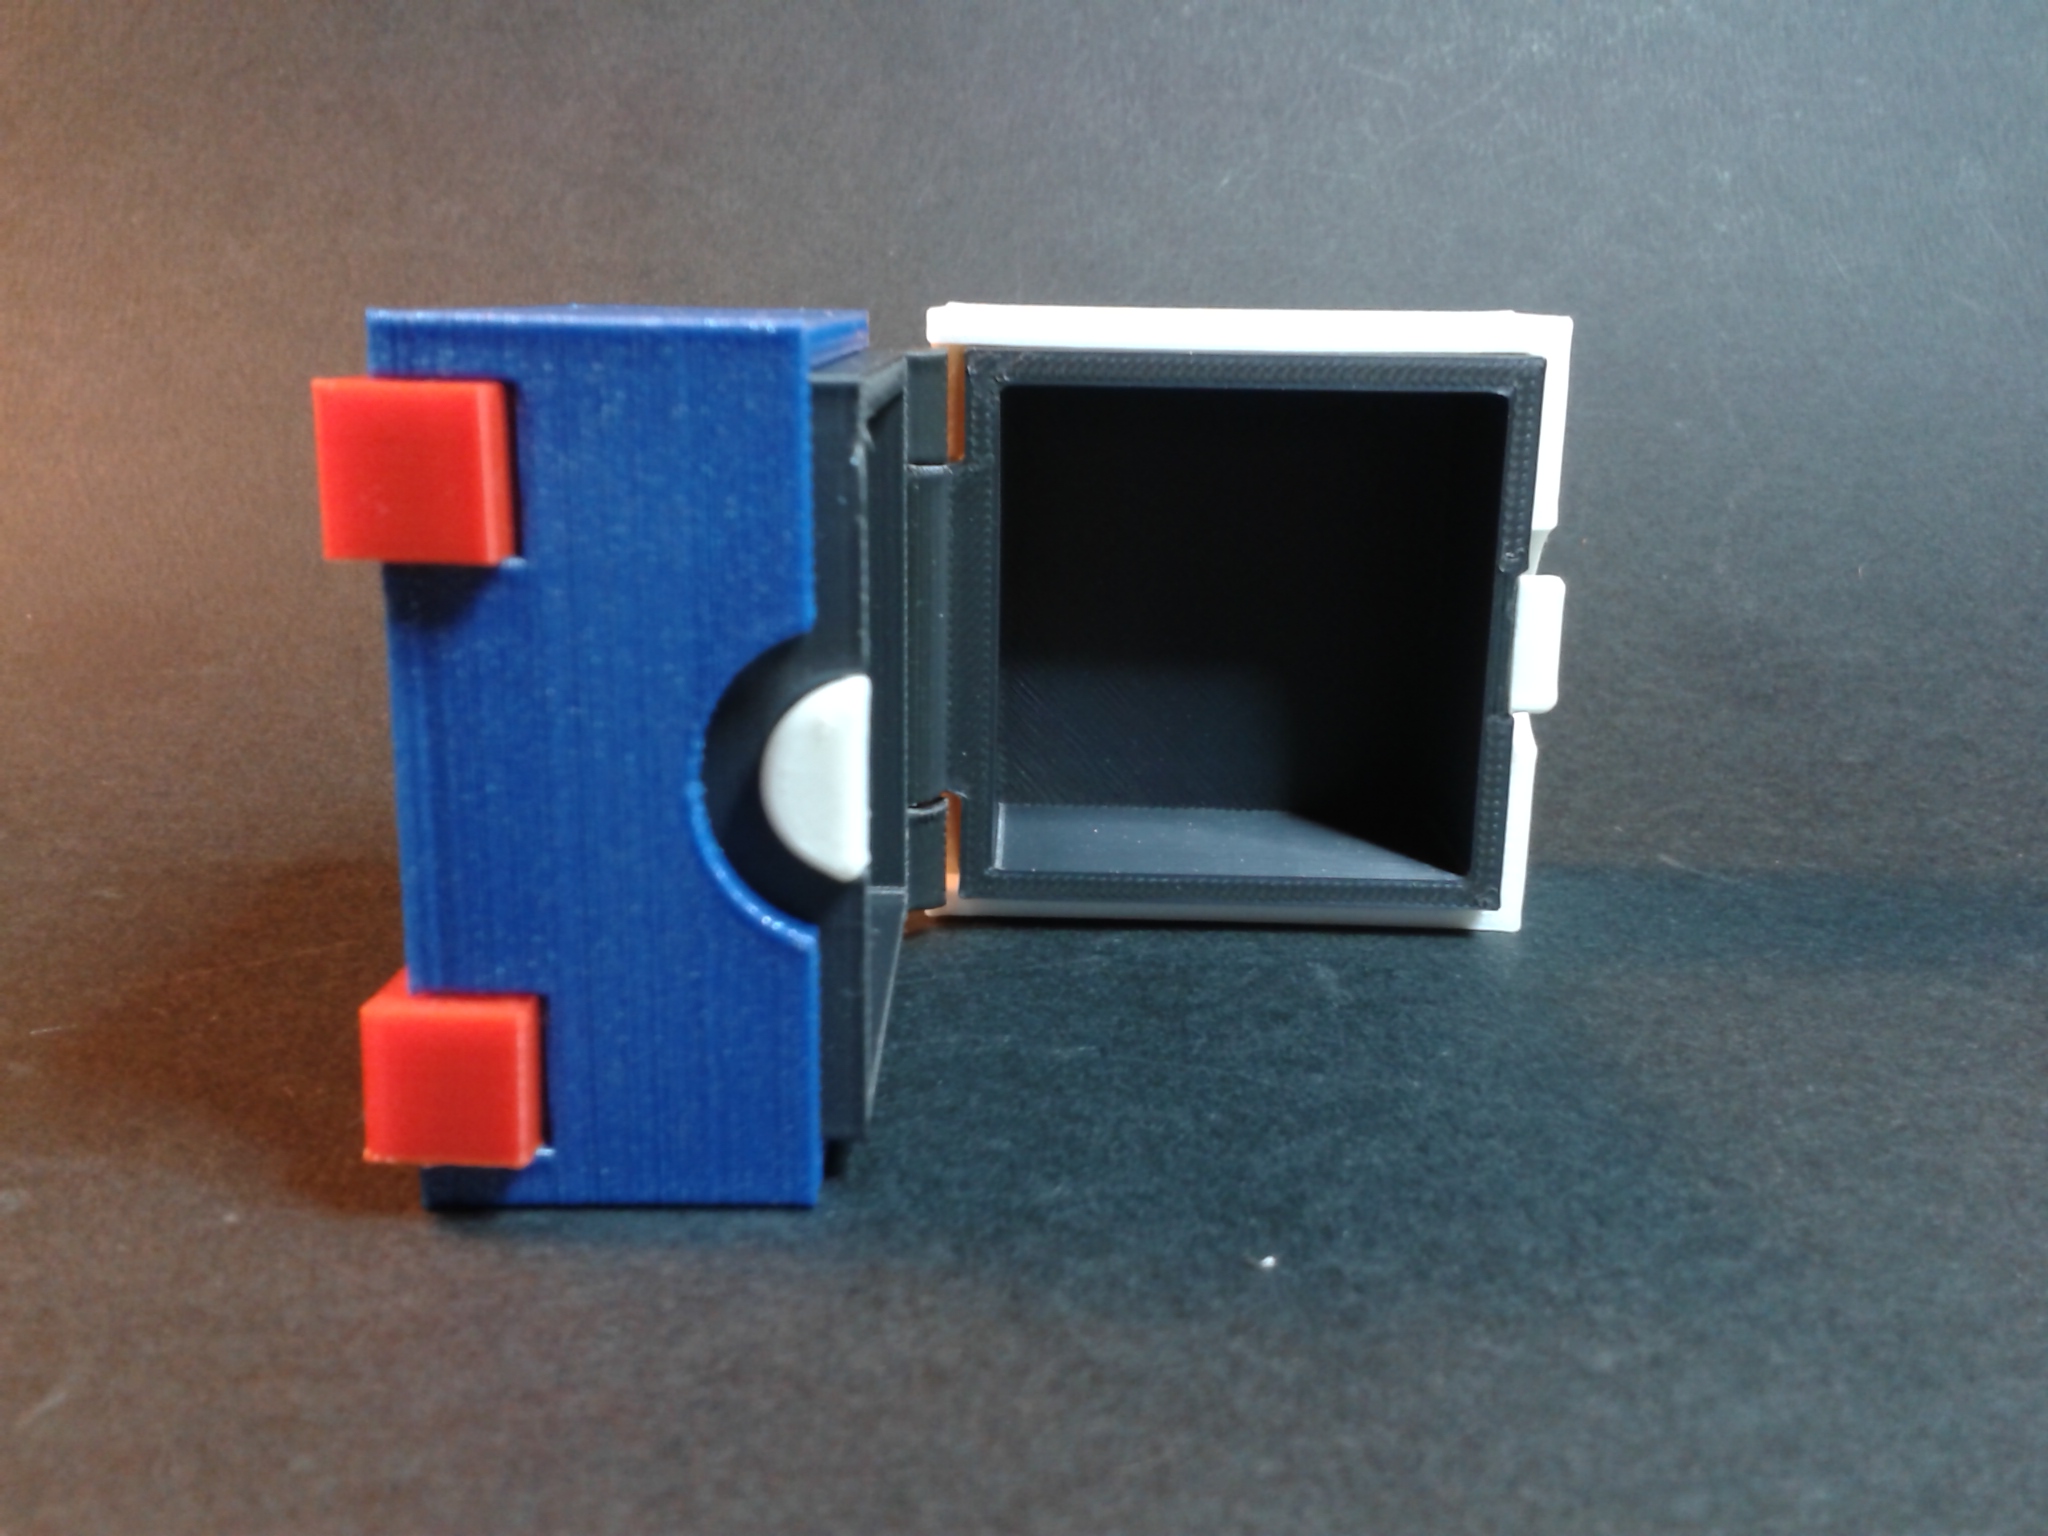
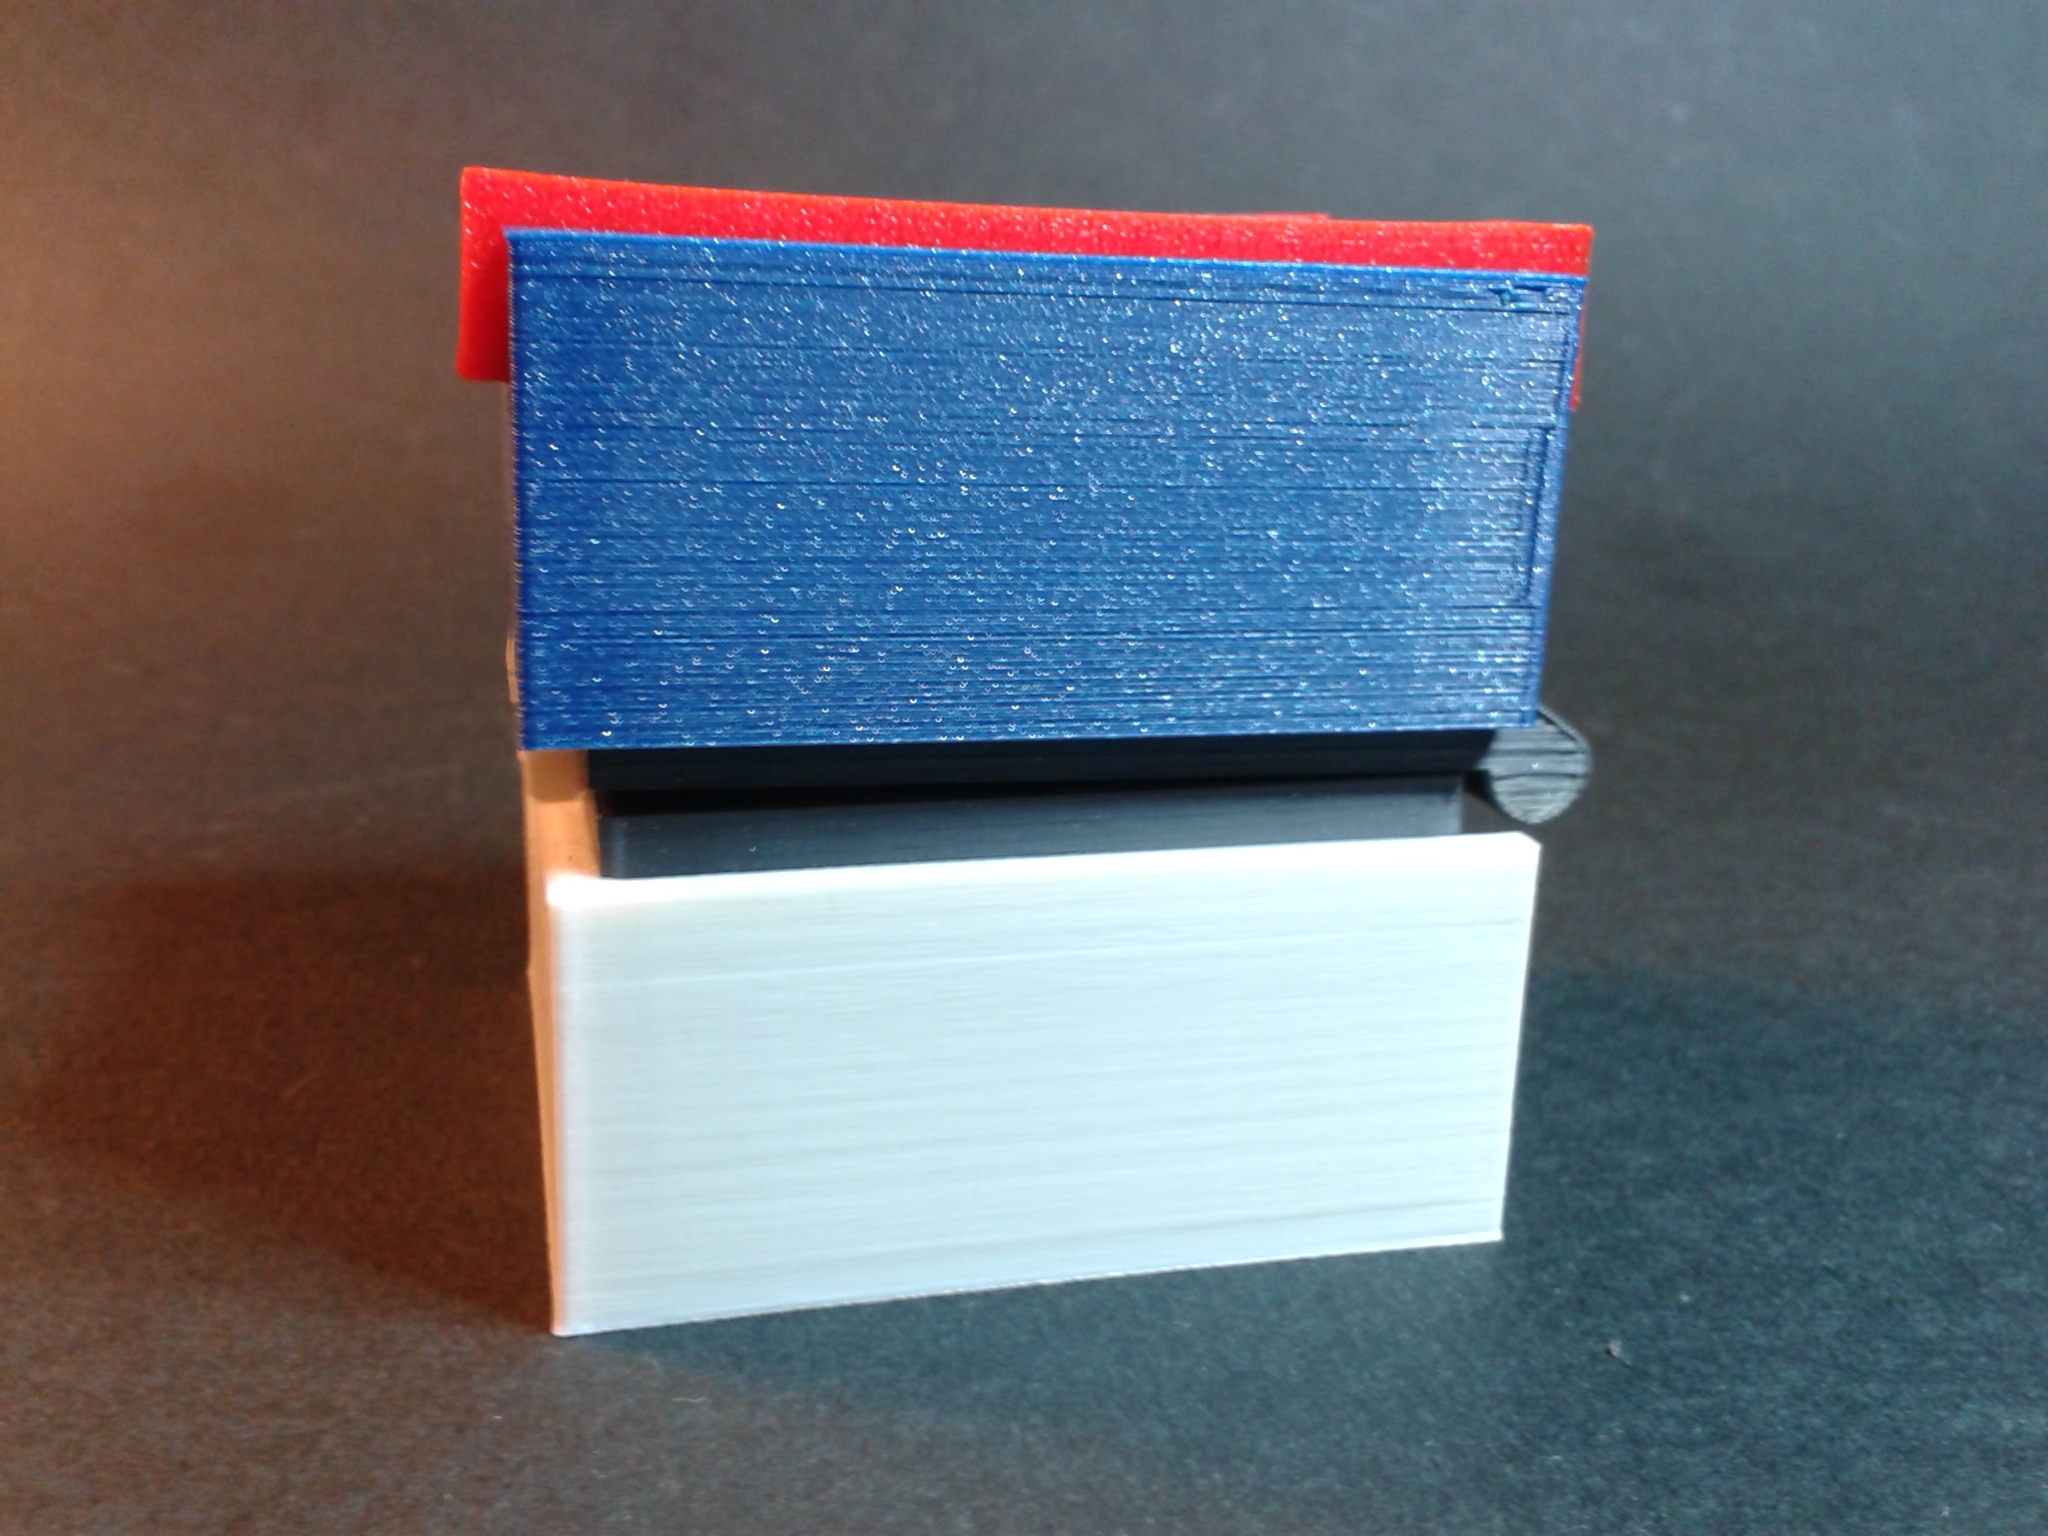
Conteneur cube
“The great cube container” de “PressPrint” (gratuit avec Creality Cloud Premium).
En cinq plateaux, pour un total de 2h32 min d’impression.
Filaments : PLA rouge Velleman, PLA blanc ArianePlast, PLA bleu métallisé ArianePlast, PLA recyclé ArianePlast.
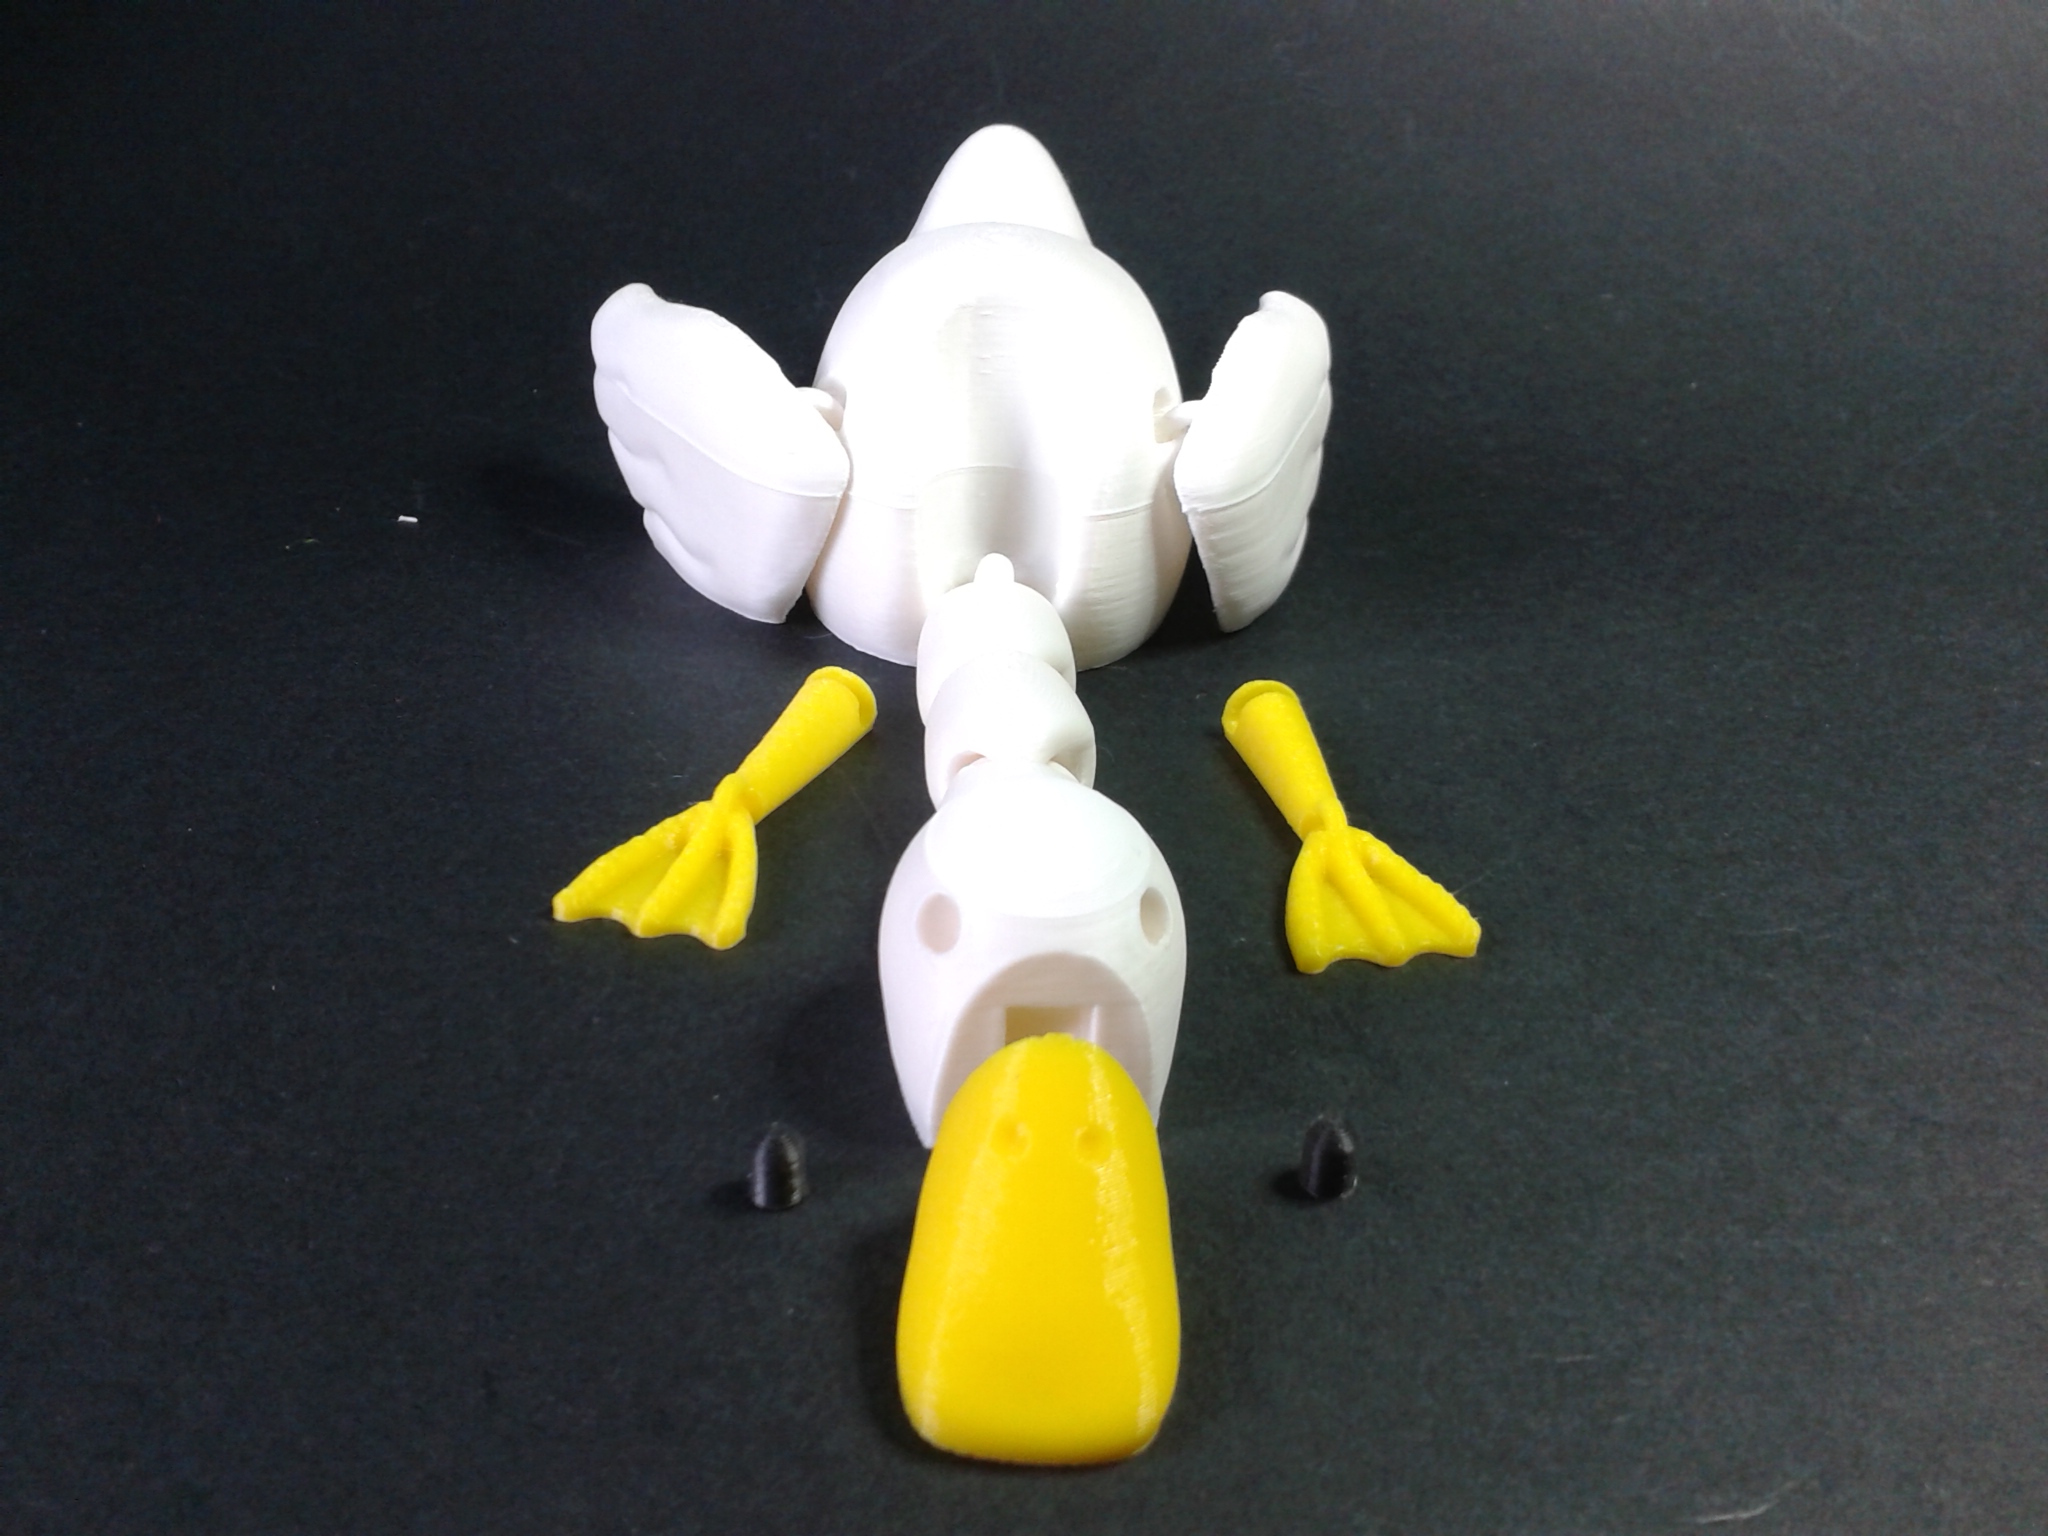
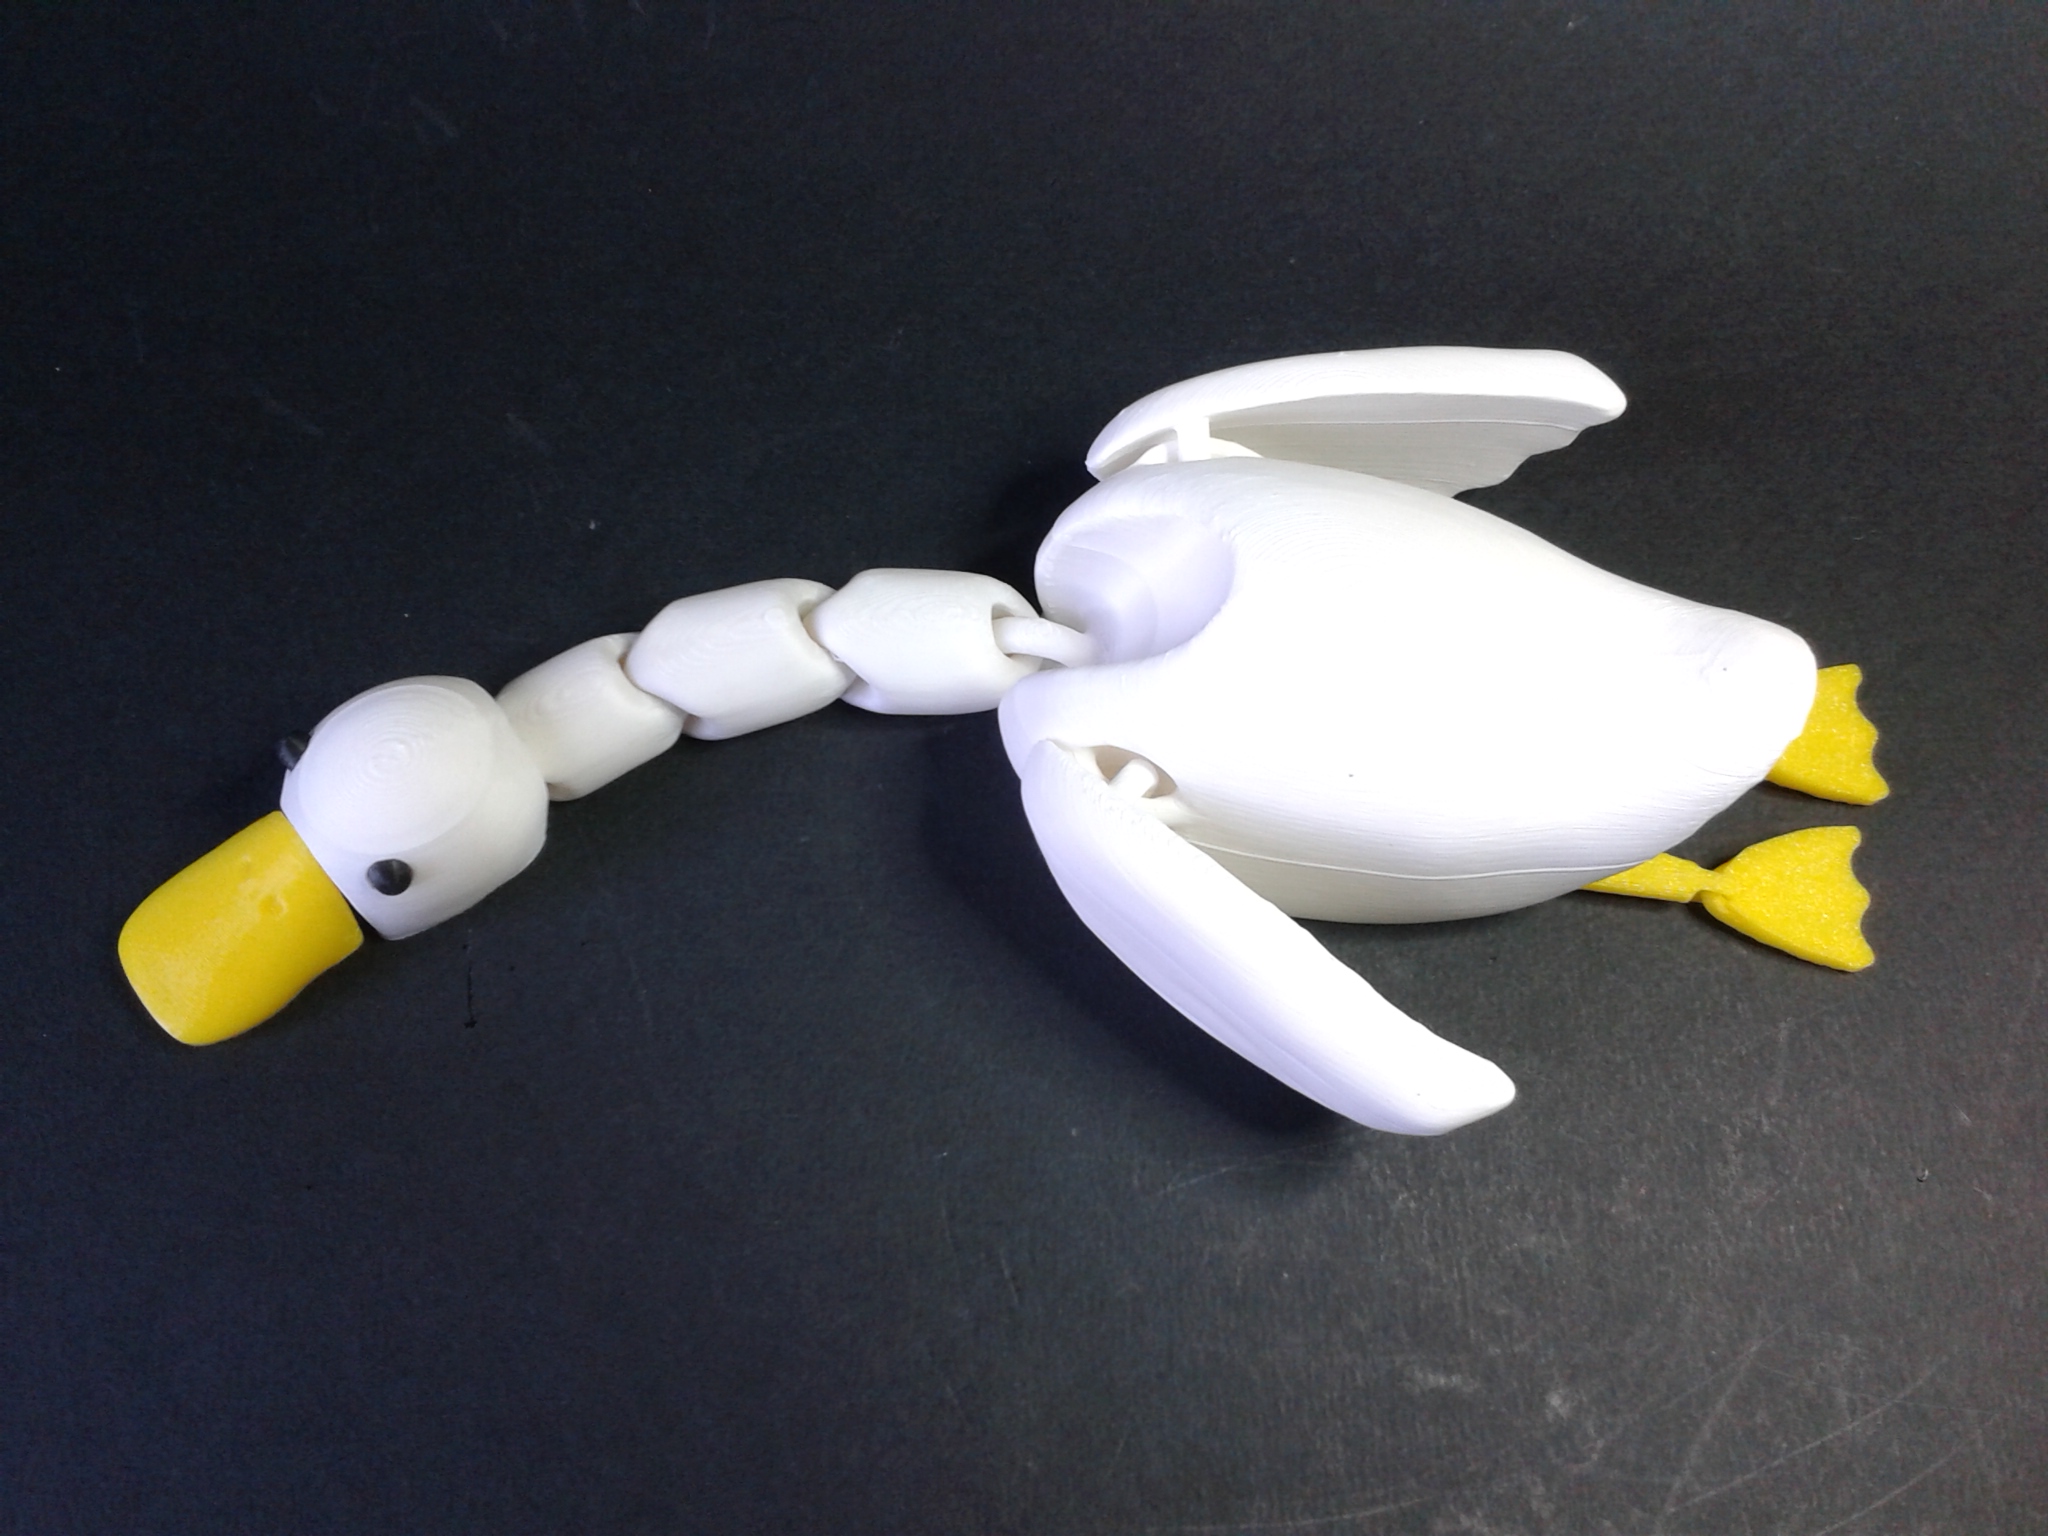
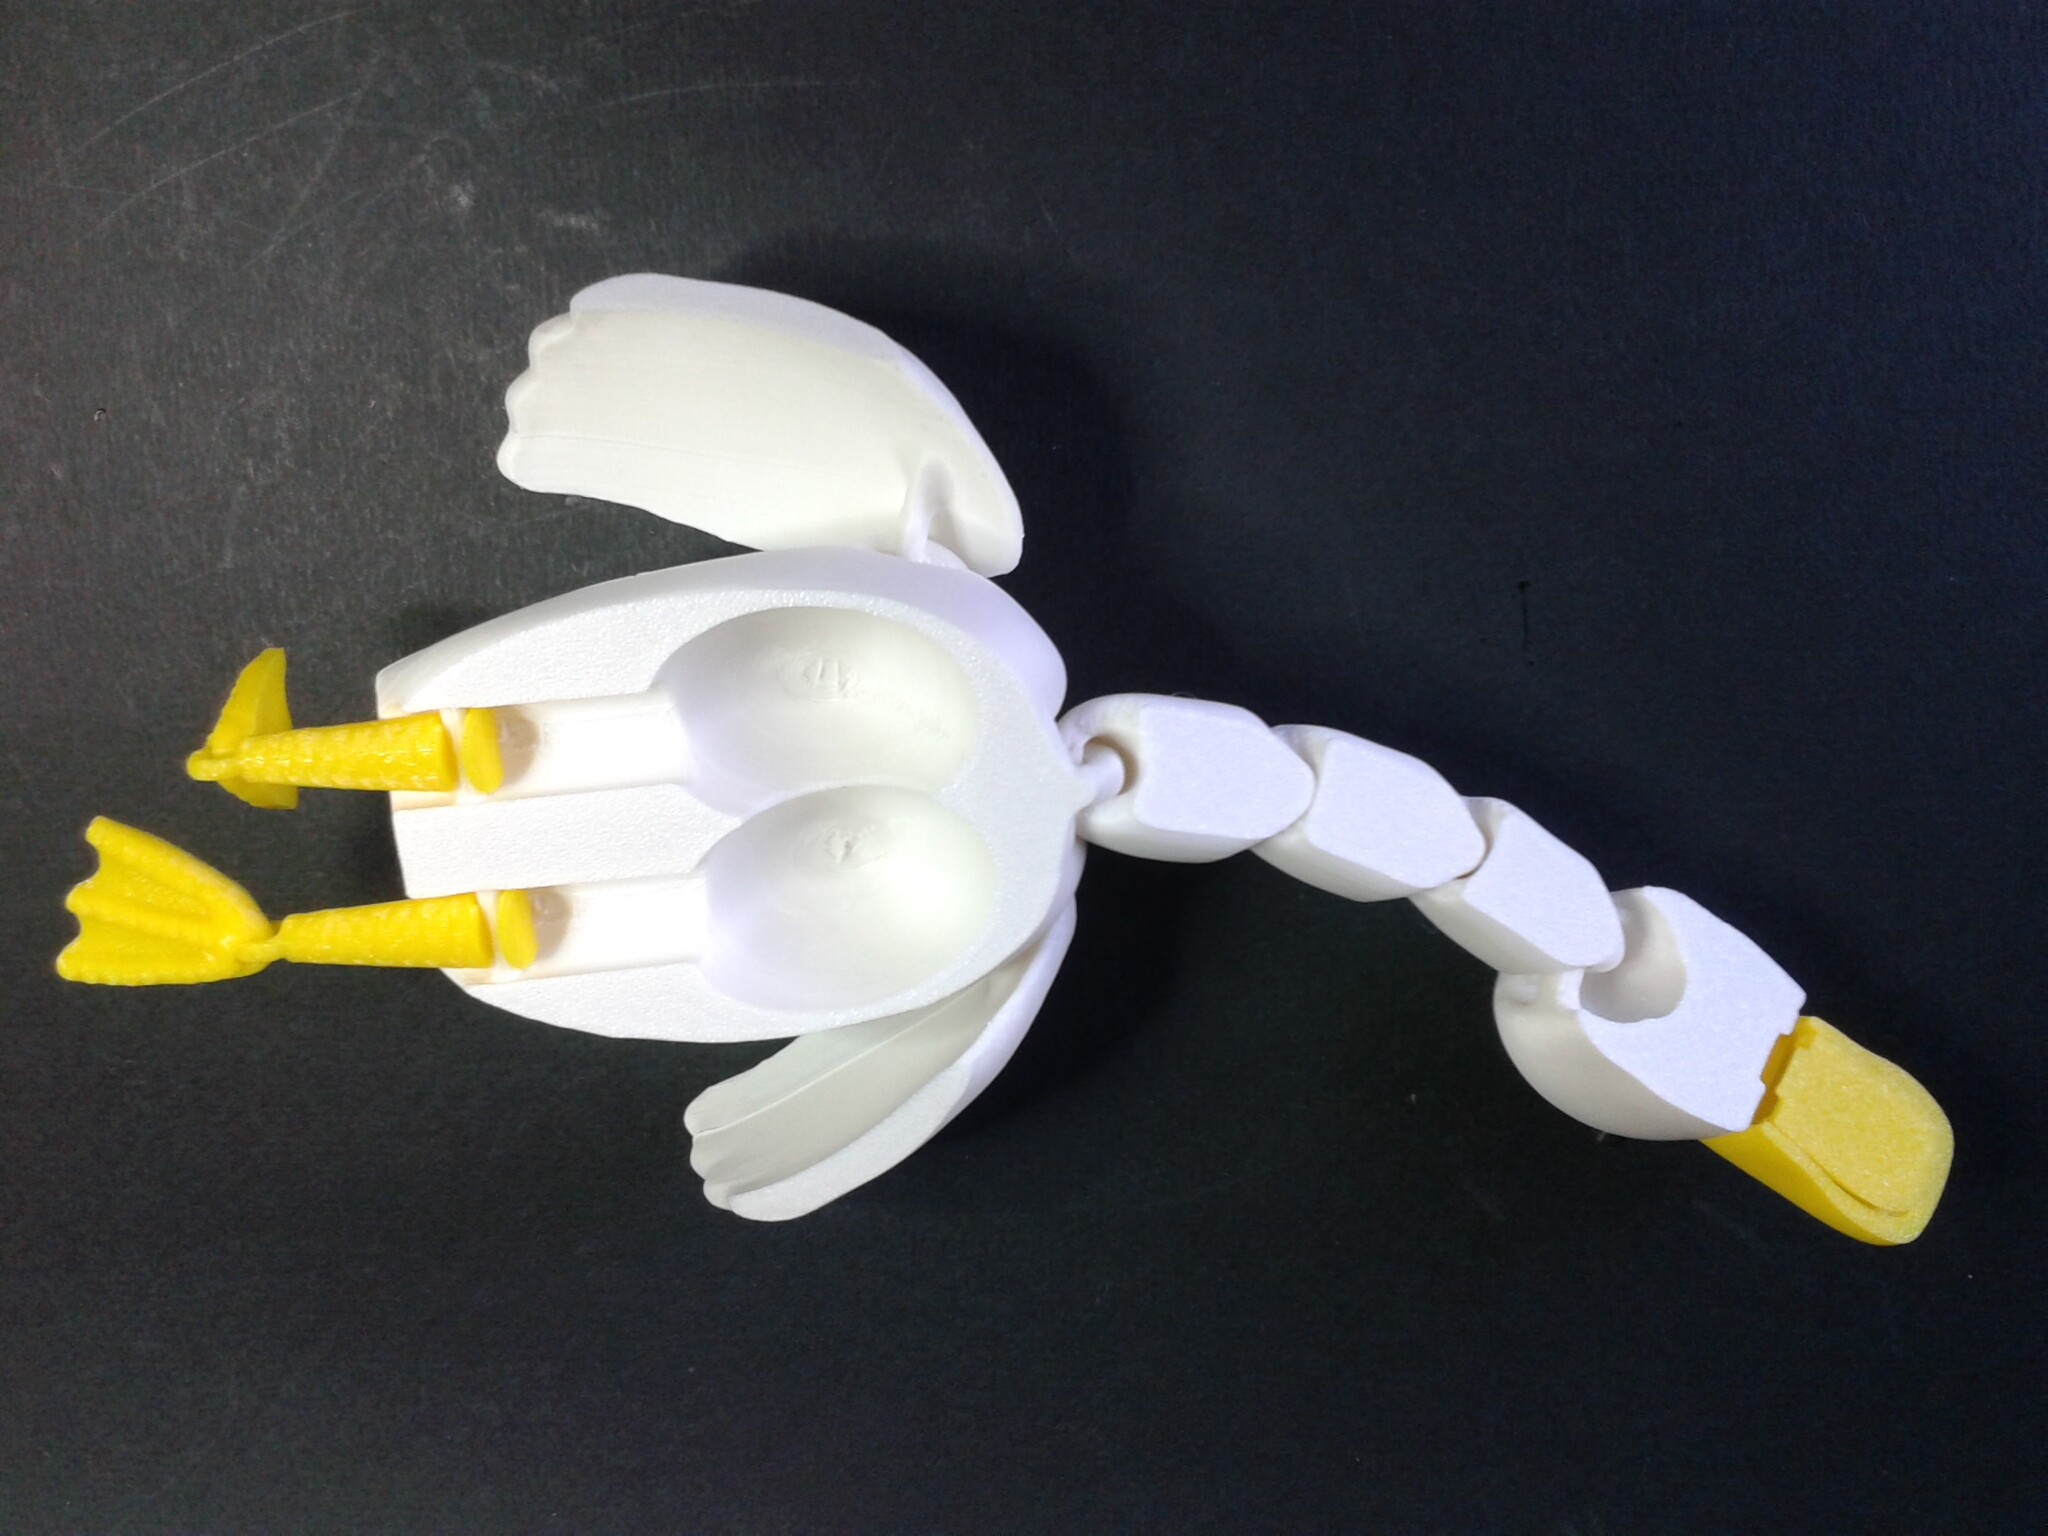
Flexi Duck
“Flexi Duck Print In Place Multiparts” de “IK3D” (payant hors Premium sur Creality Cloud).
En trois plateaux, pour un total d’environ 3h28 d’impression.
Filaments : PLA jaune Velleman, PLA éco blanc ArianePlast PLA+ Blanc ArianePlast, PLA Recyclé ArianePlast.
Sur ce print, j’ai terminé ma bobine de PLA+ : la reprise après détection d’une fin de filament semble reprendre au début de la couche interrompue, d’où le défaut de couche à mi-hauteur sur le corps du canard.


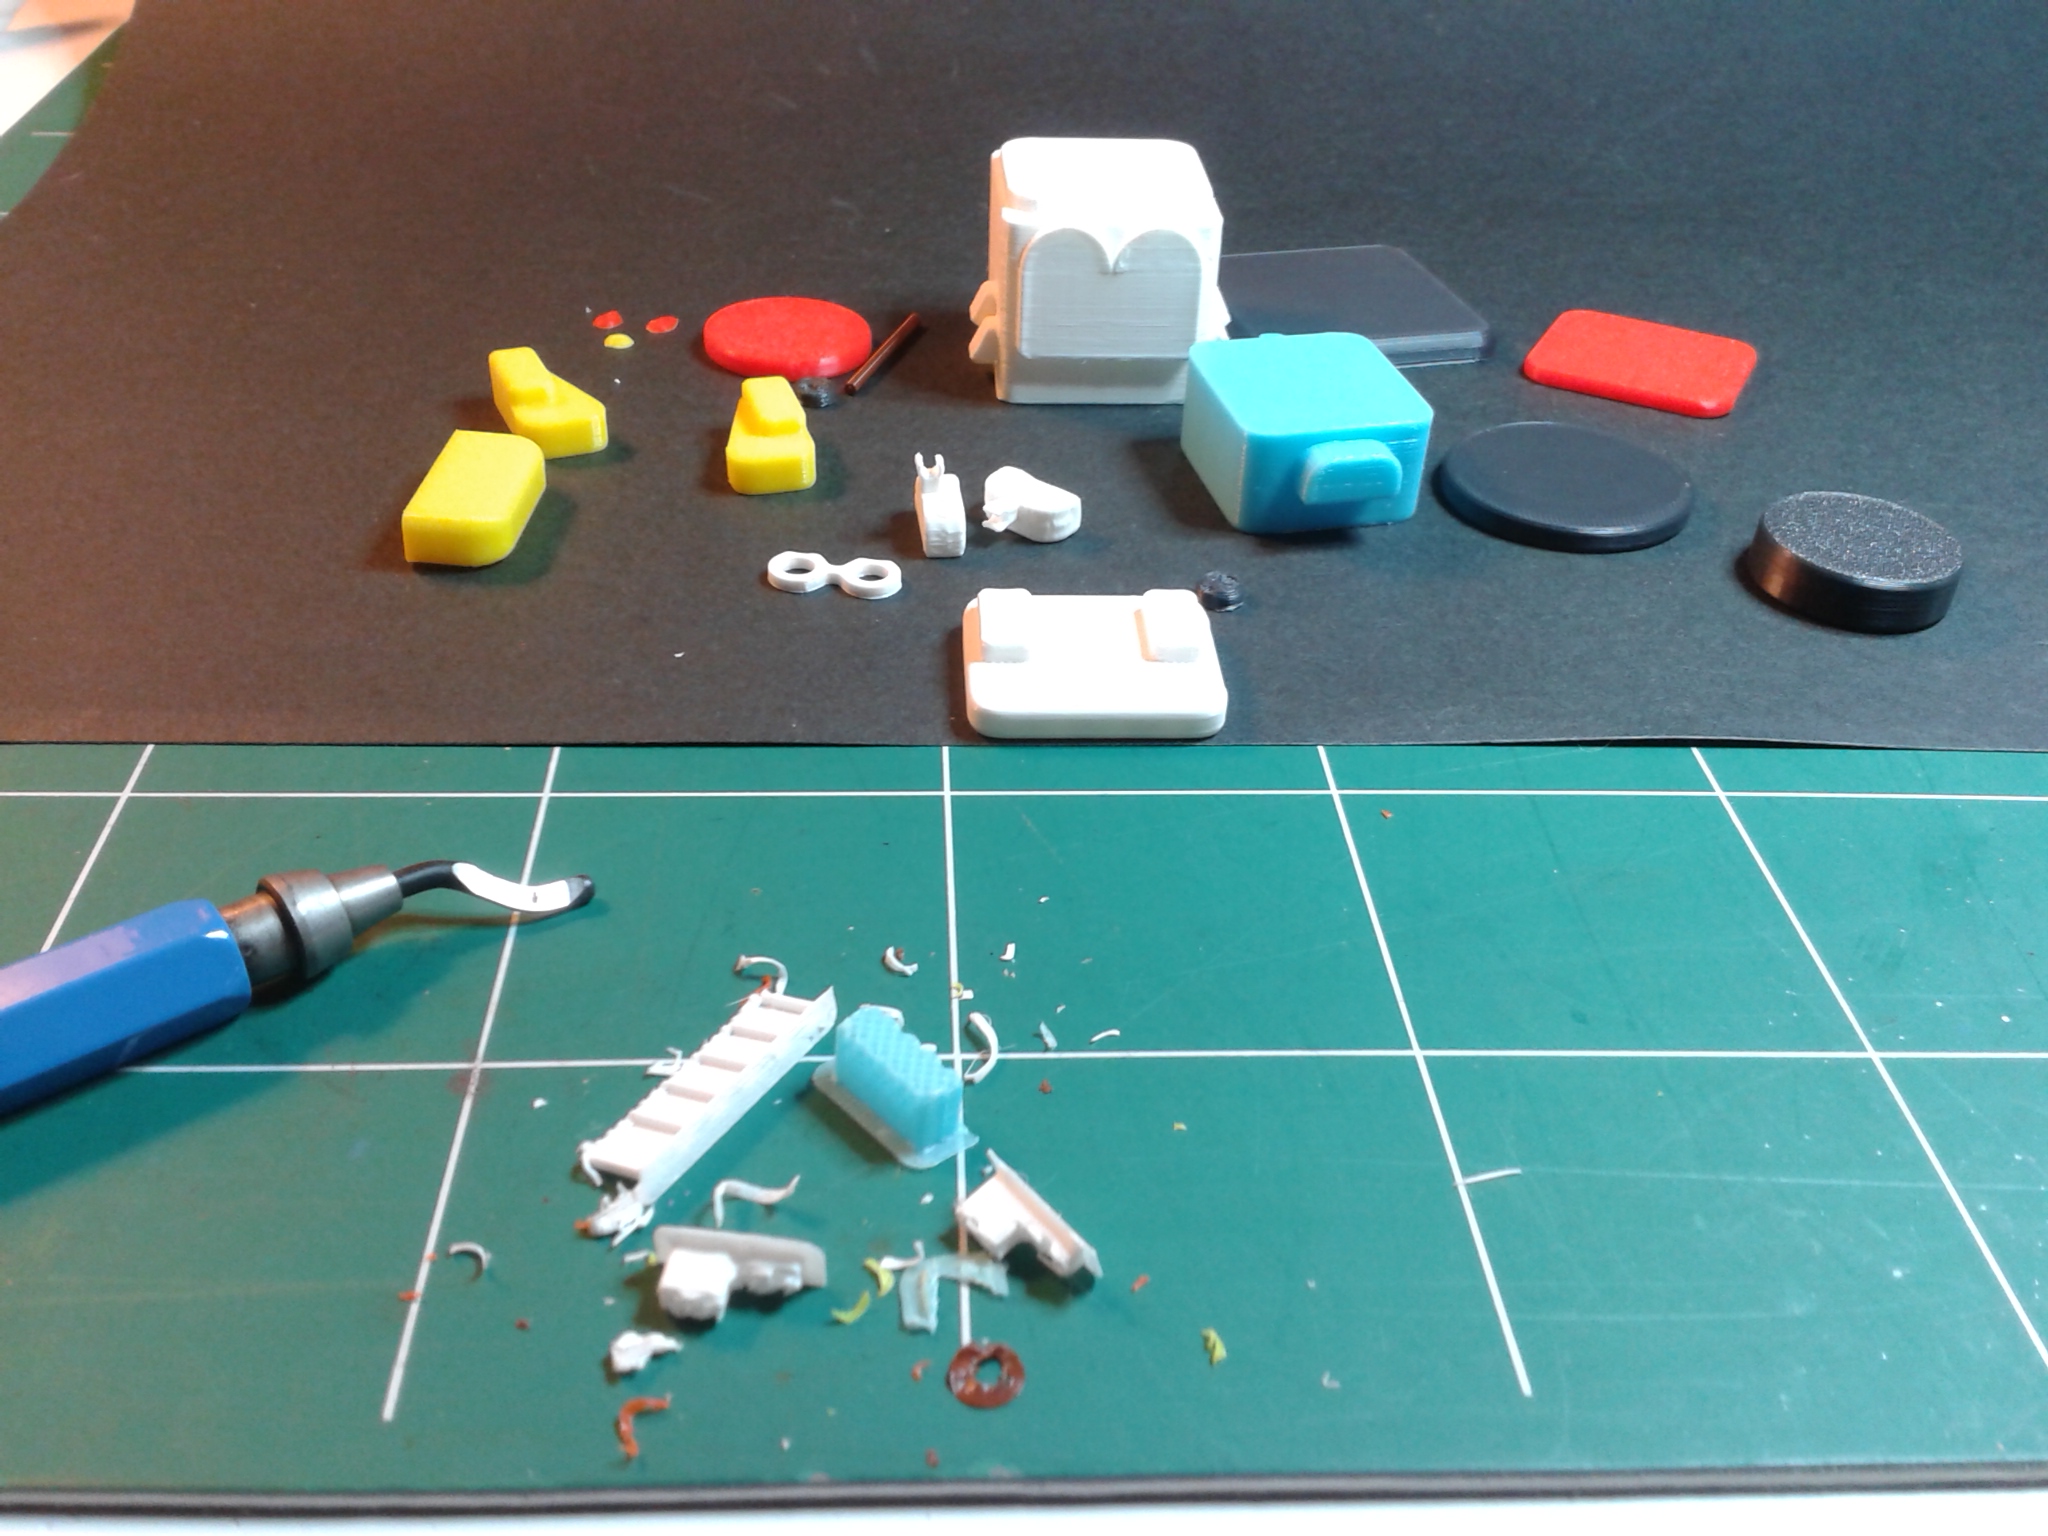
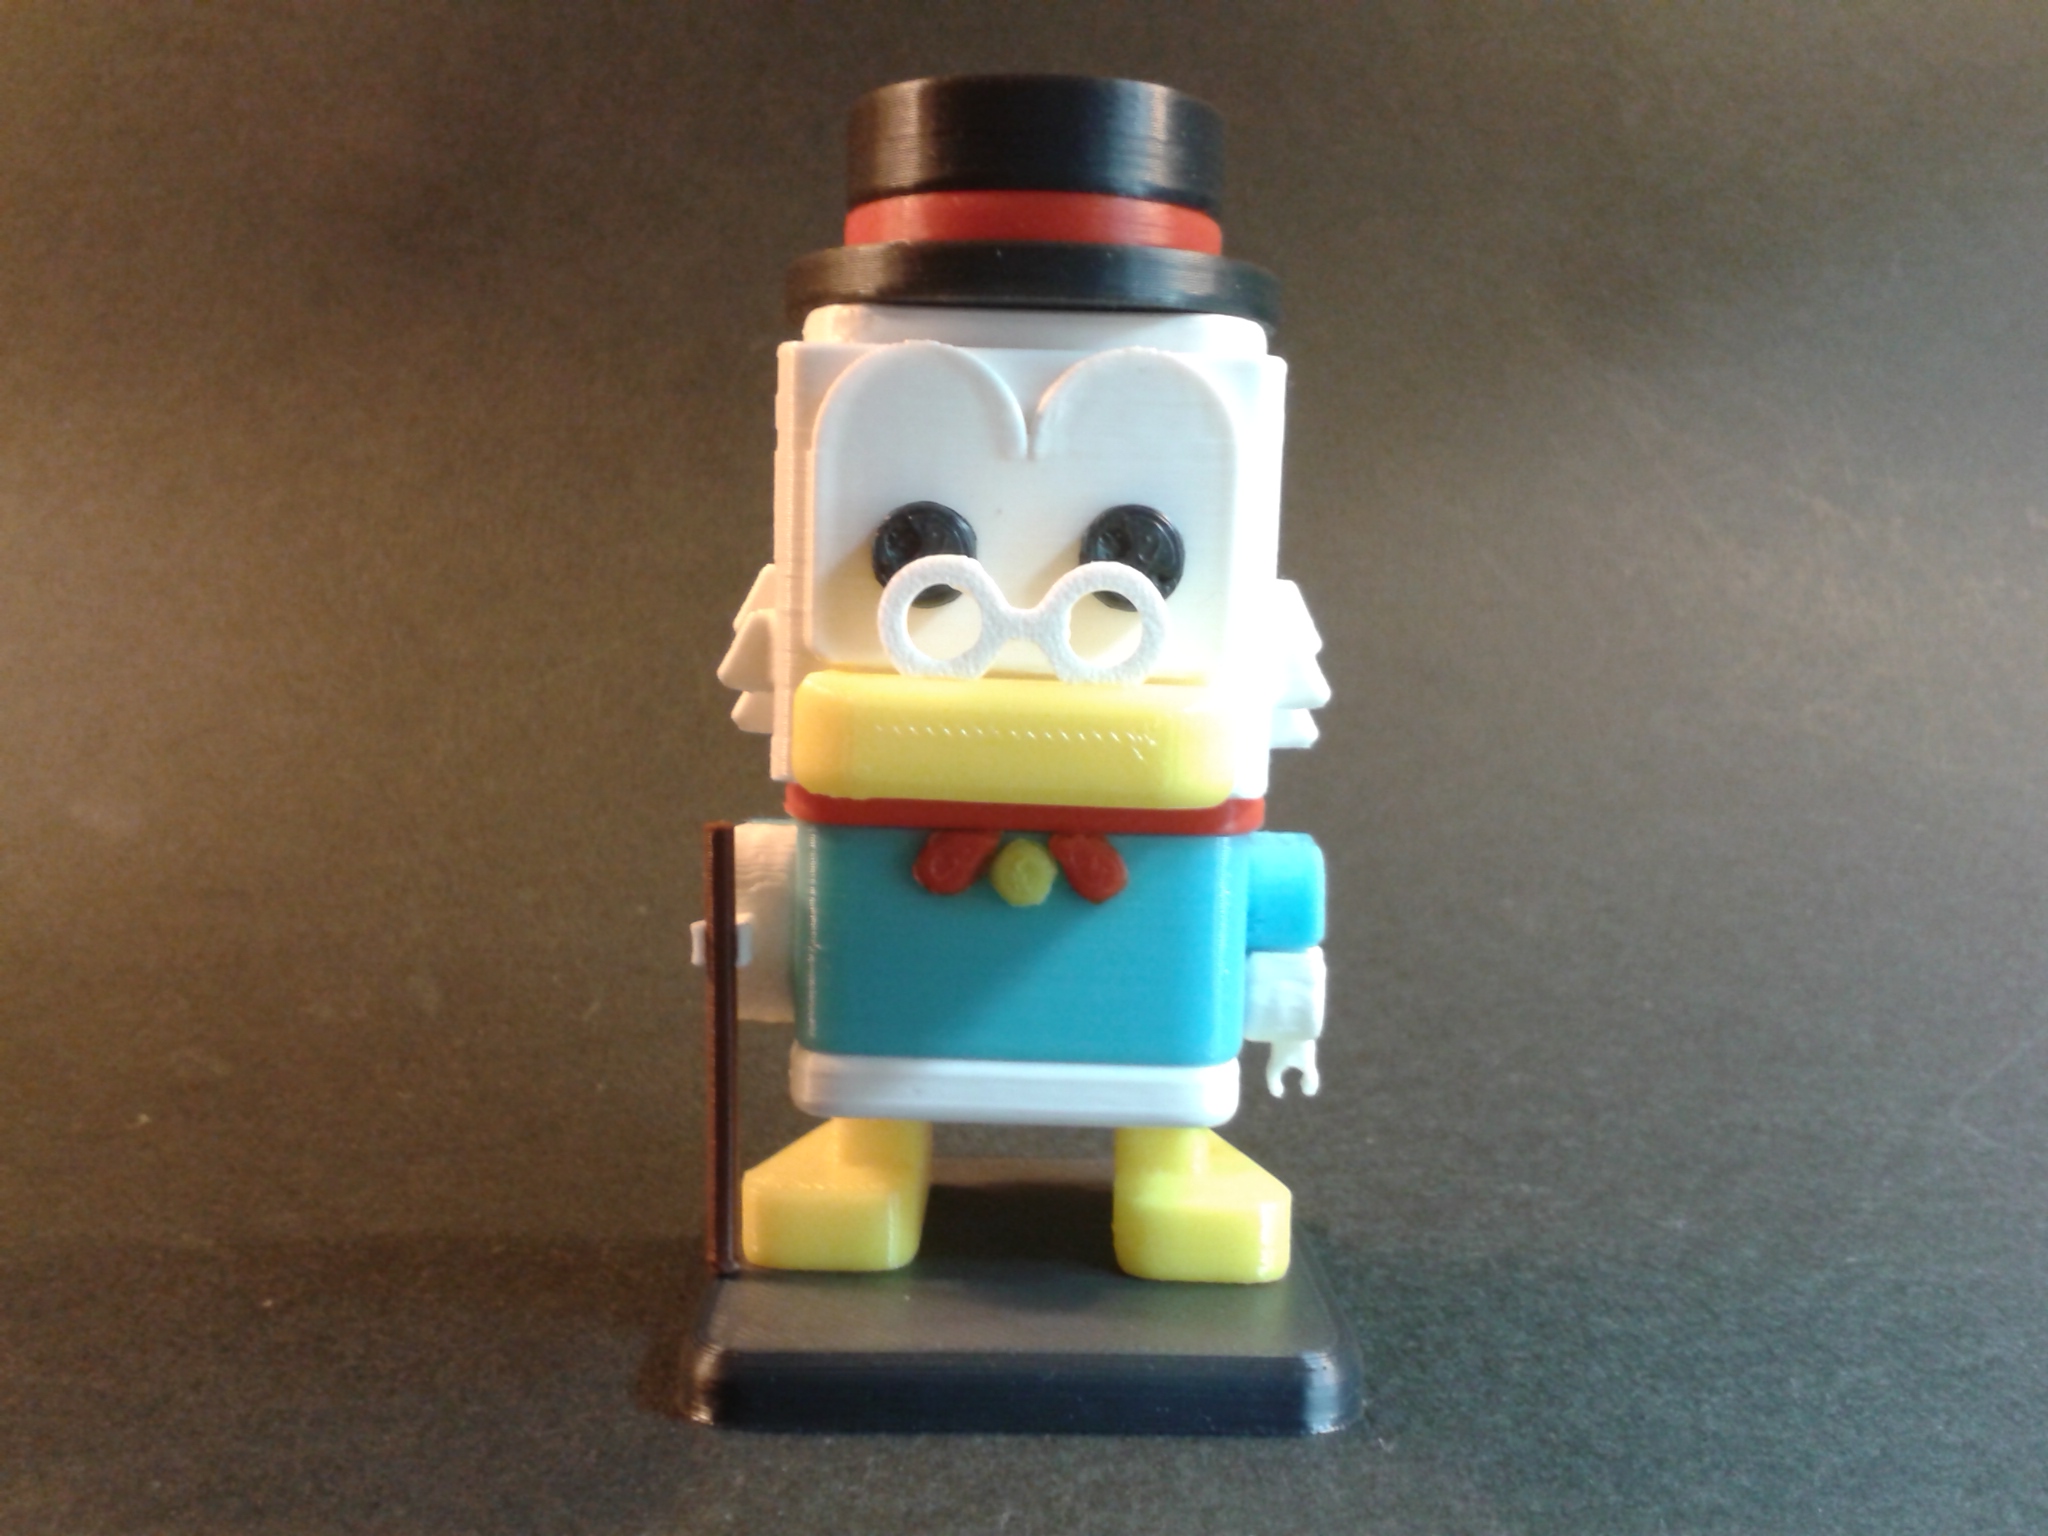
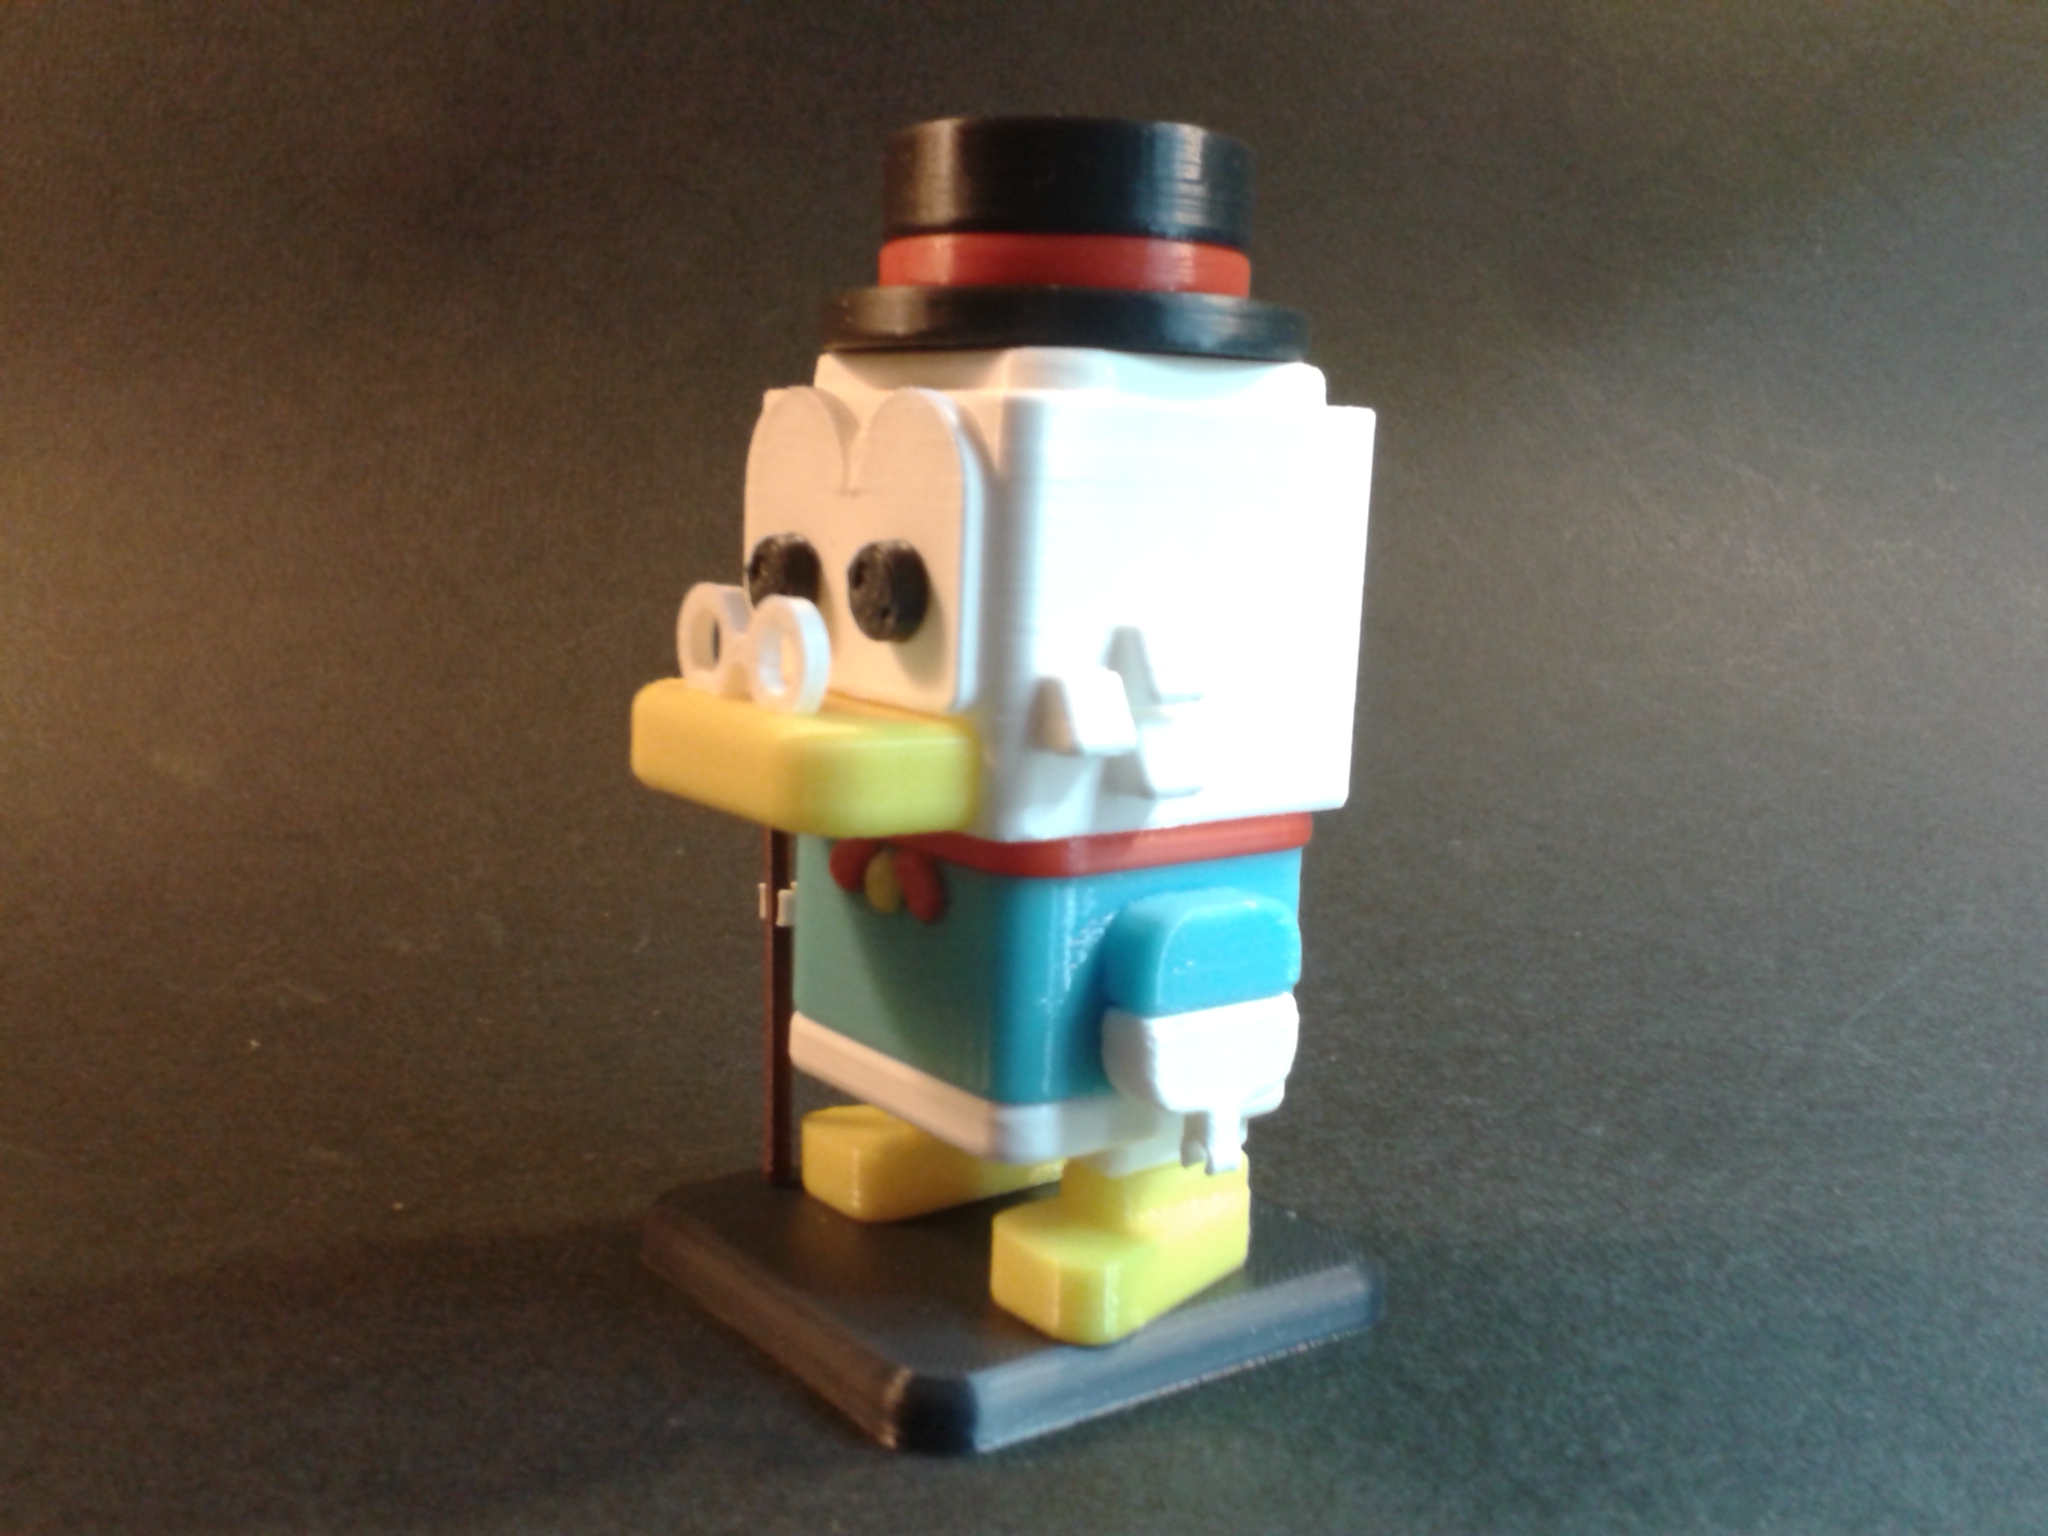
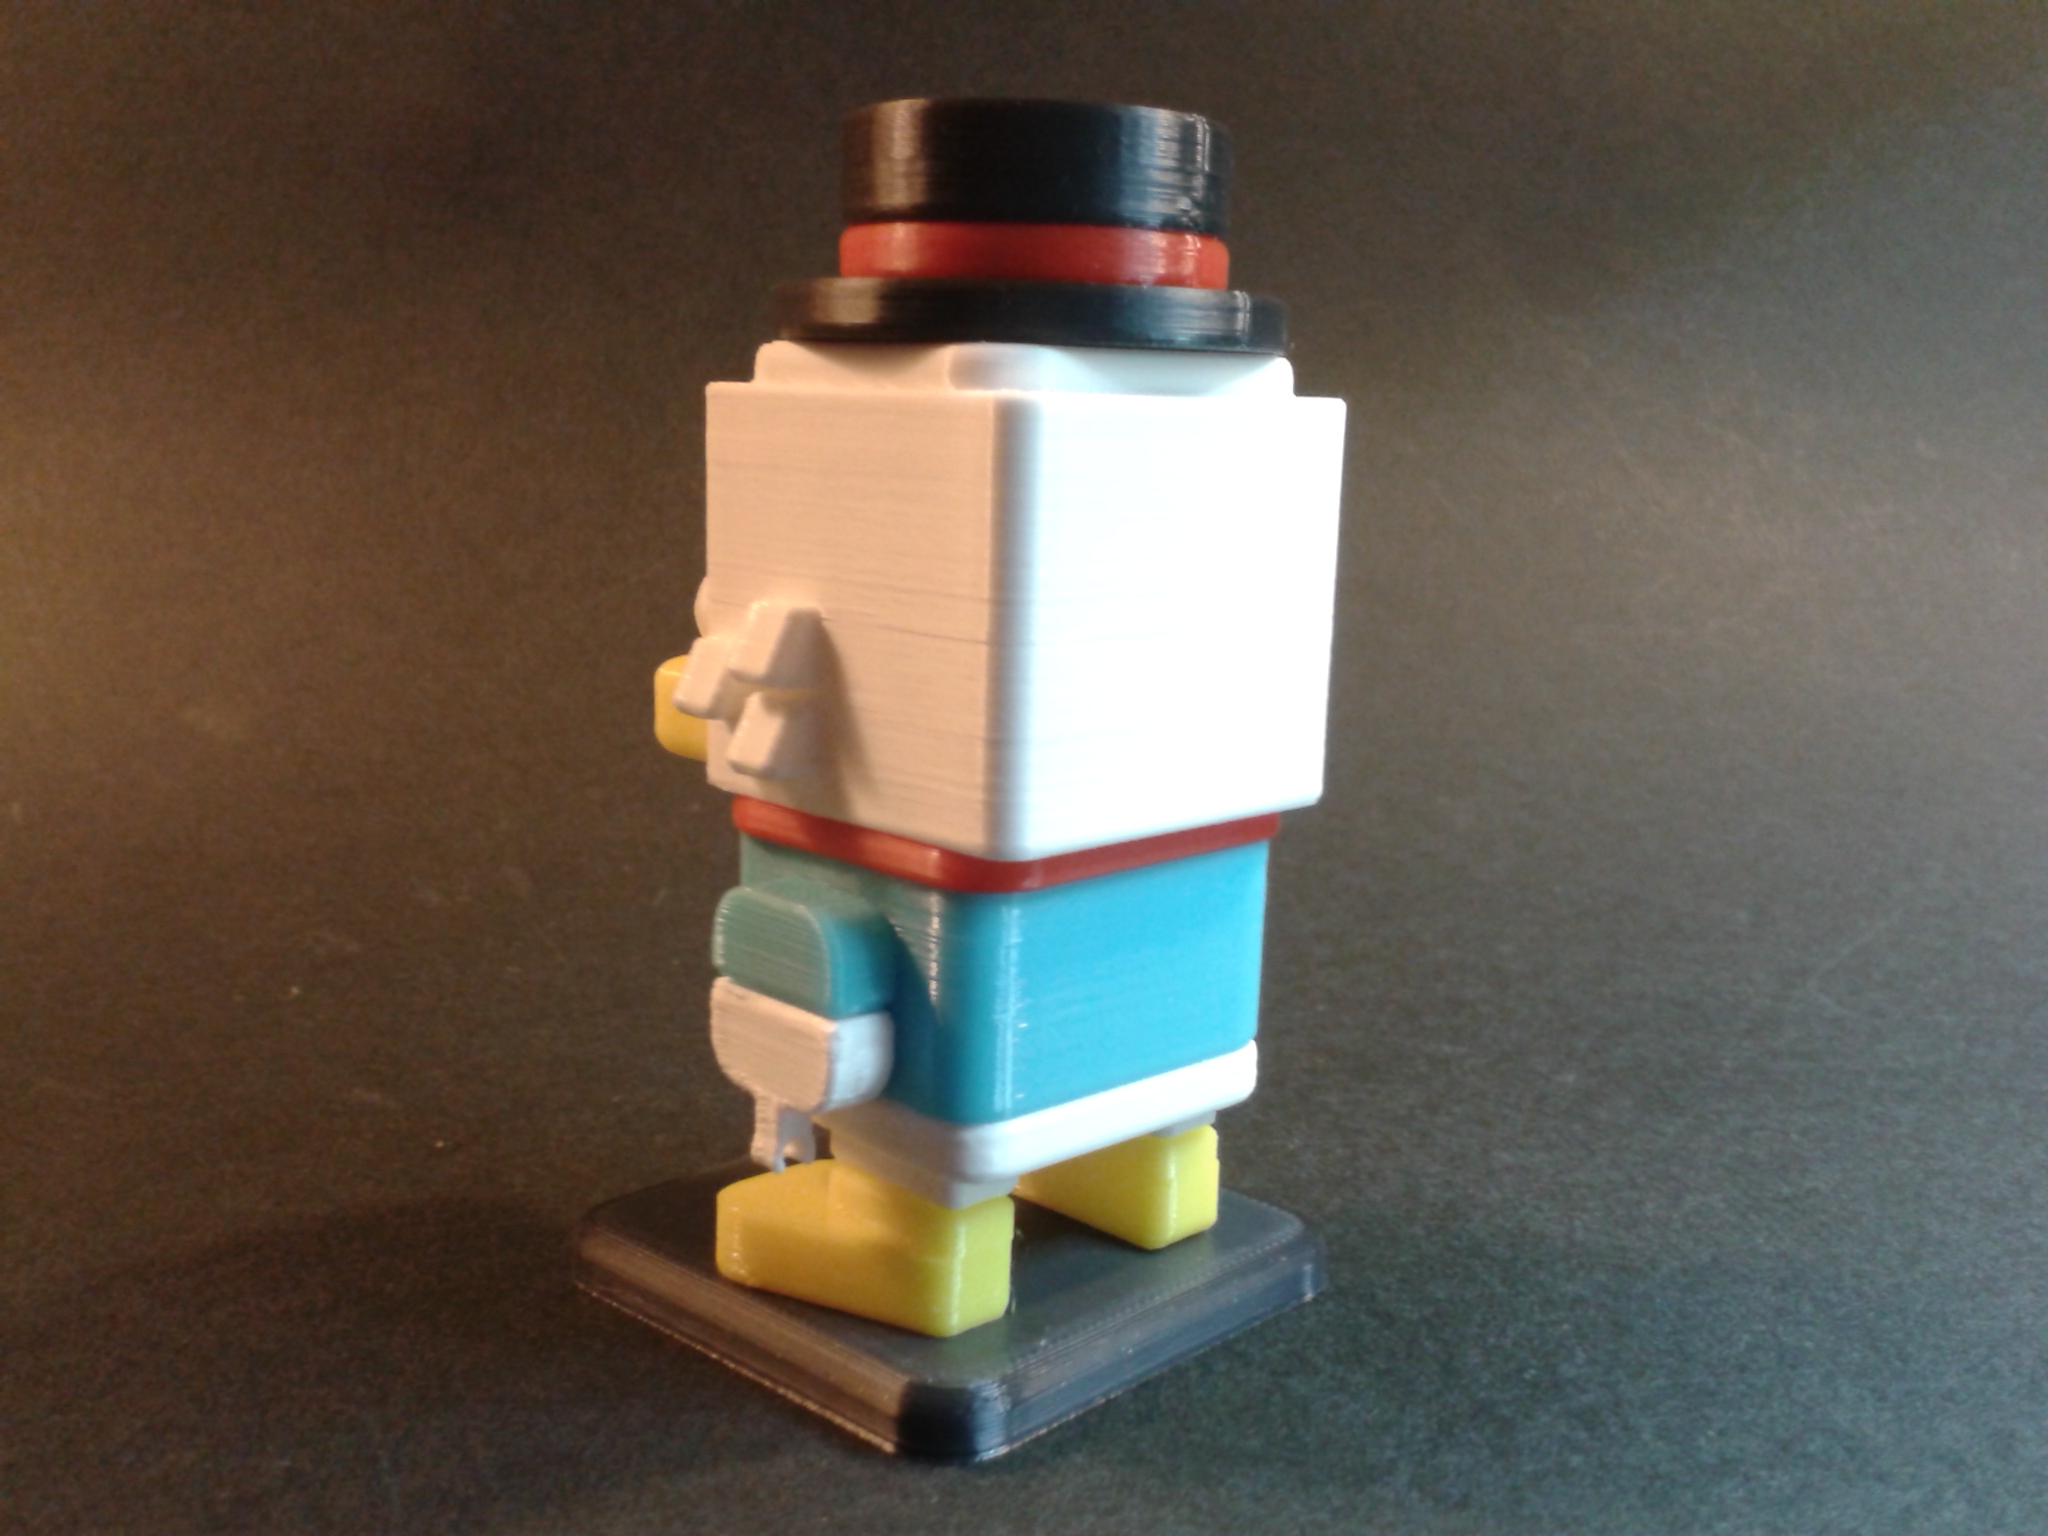
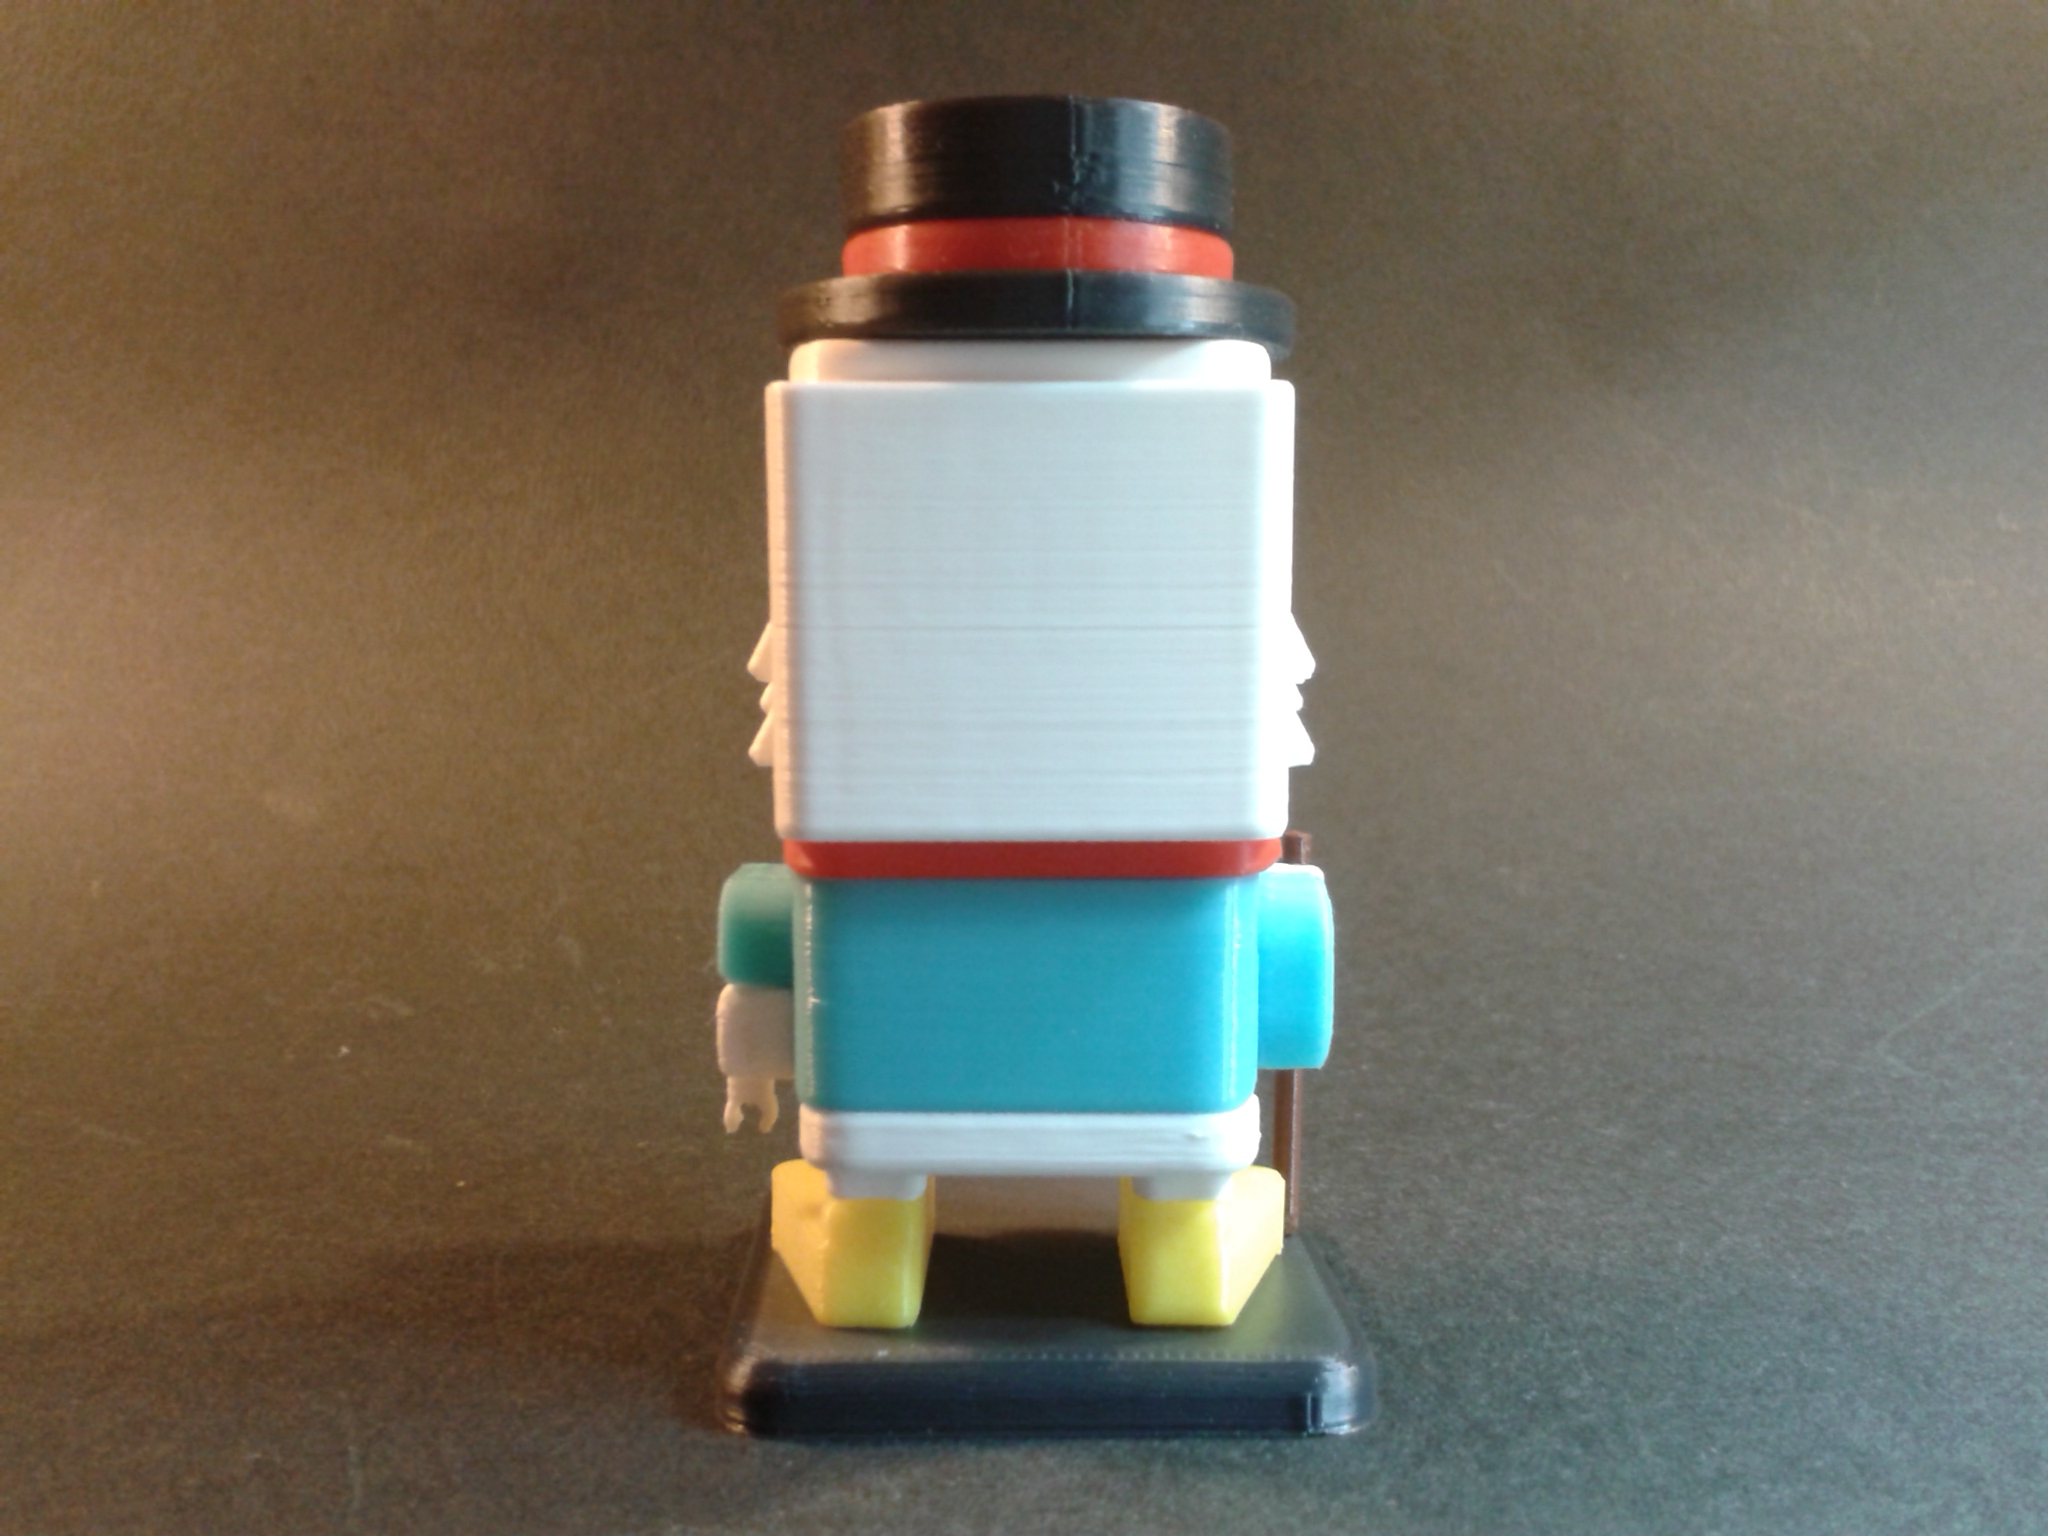
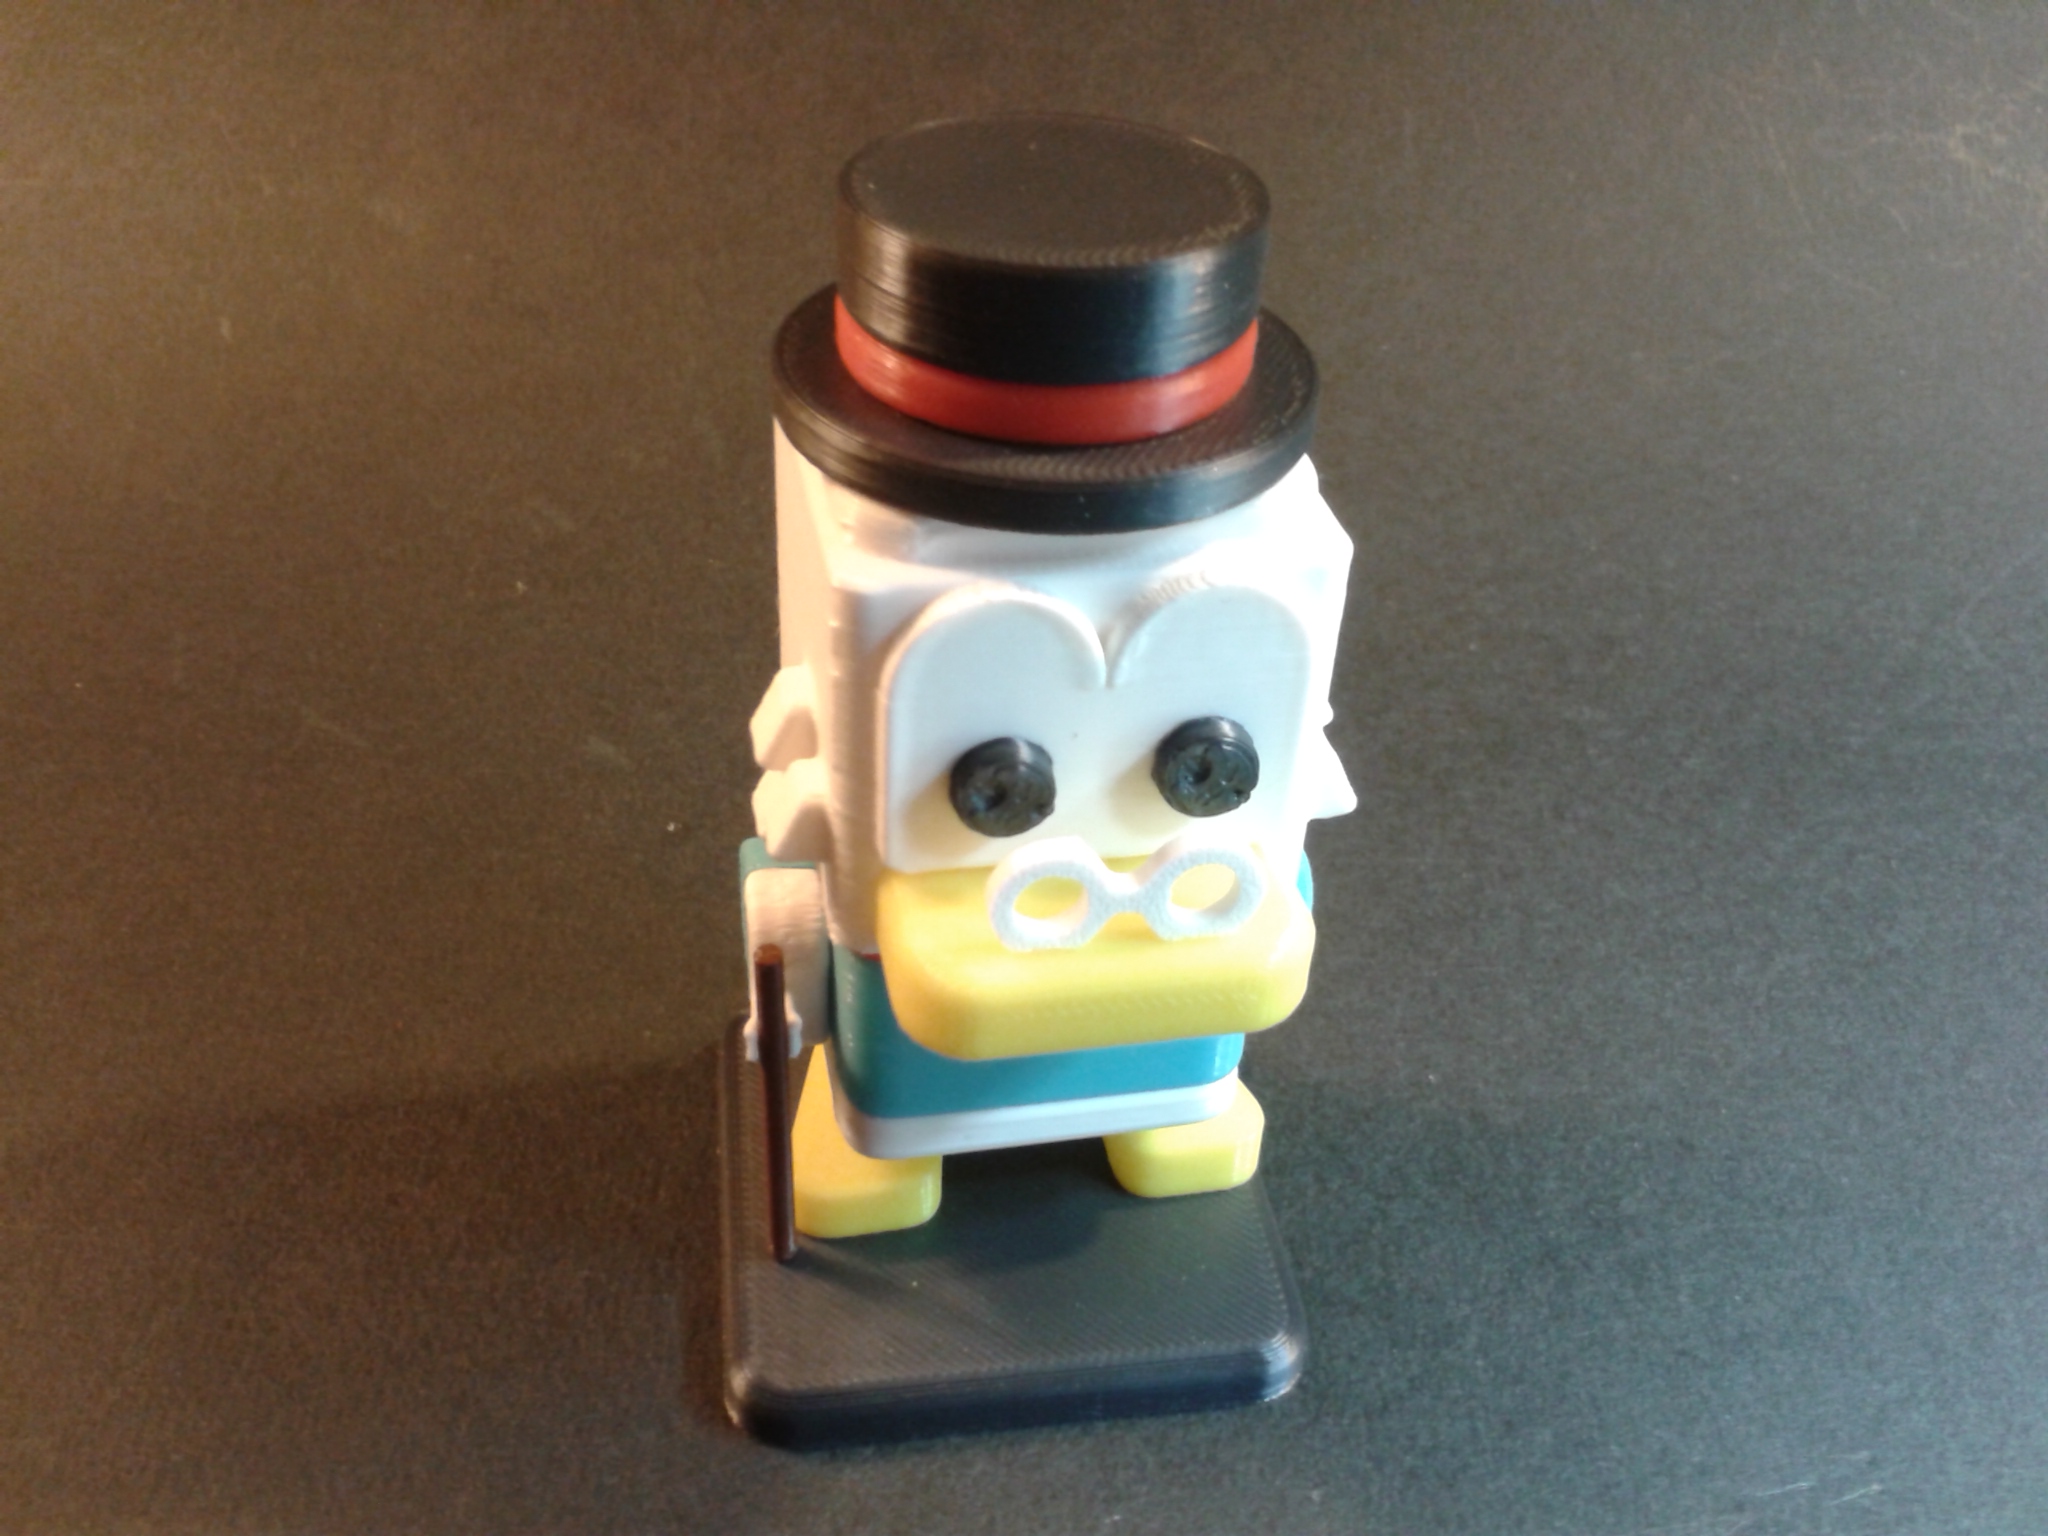
Picsou
“Squared Scrooge McDuck” de “Mech3D Printing” (Creality Cloud Premium).
En sept plateaux, pour un total d’environ 1 h 55 min d’impression.
Filaments : PLA+ marron 4043D ArianePlast, PLA Light blue Velleman, PLA red Velleman, PLA yellow Velleman, PLA+ blanc ArianePlast, PLA recyclé ArianePlast.
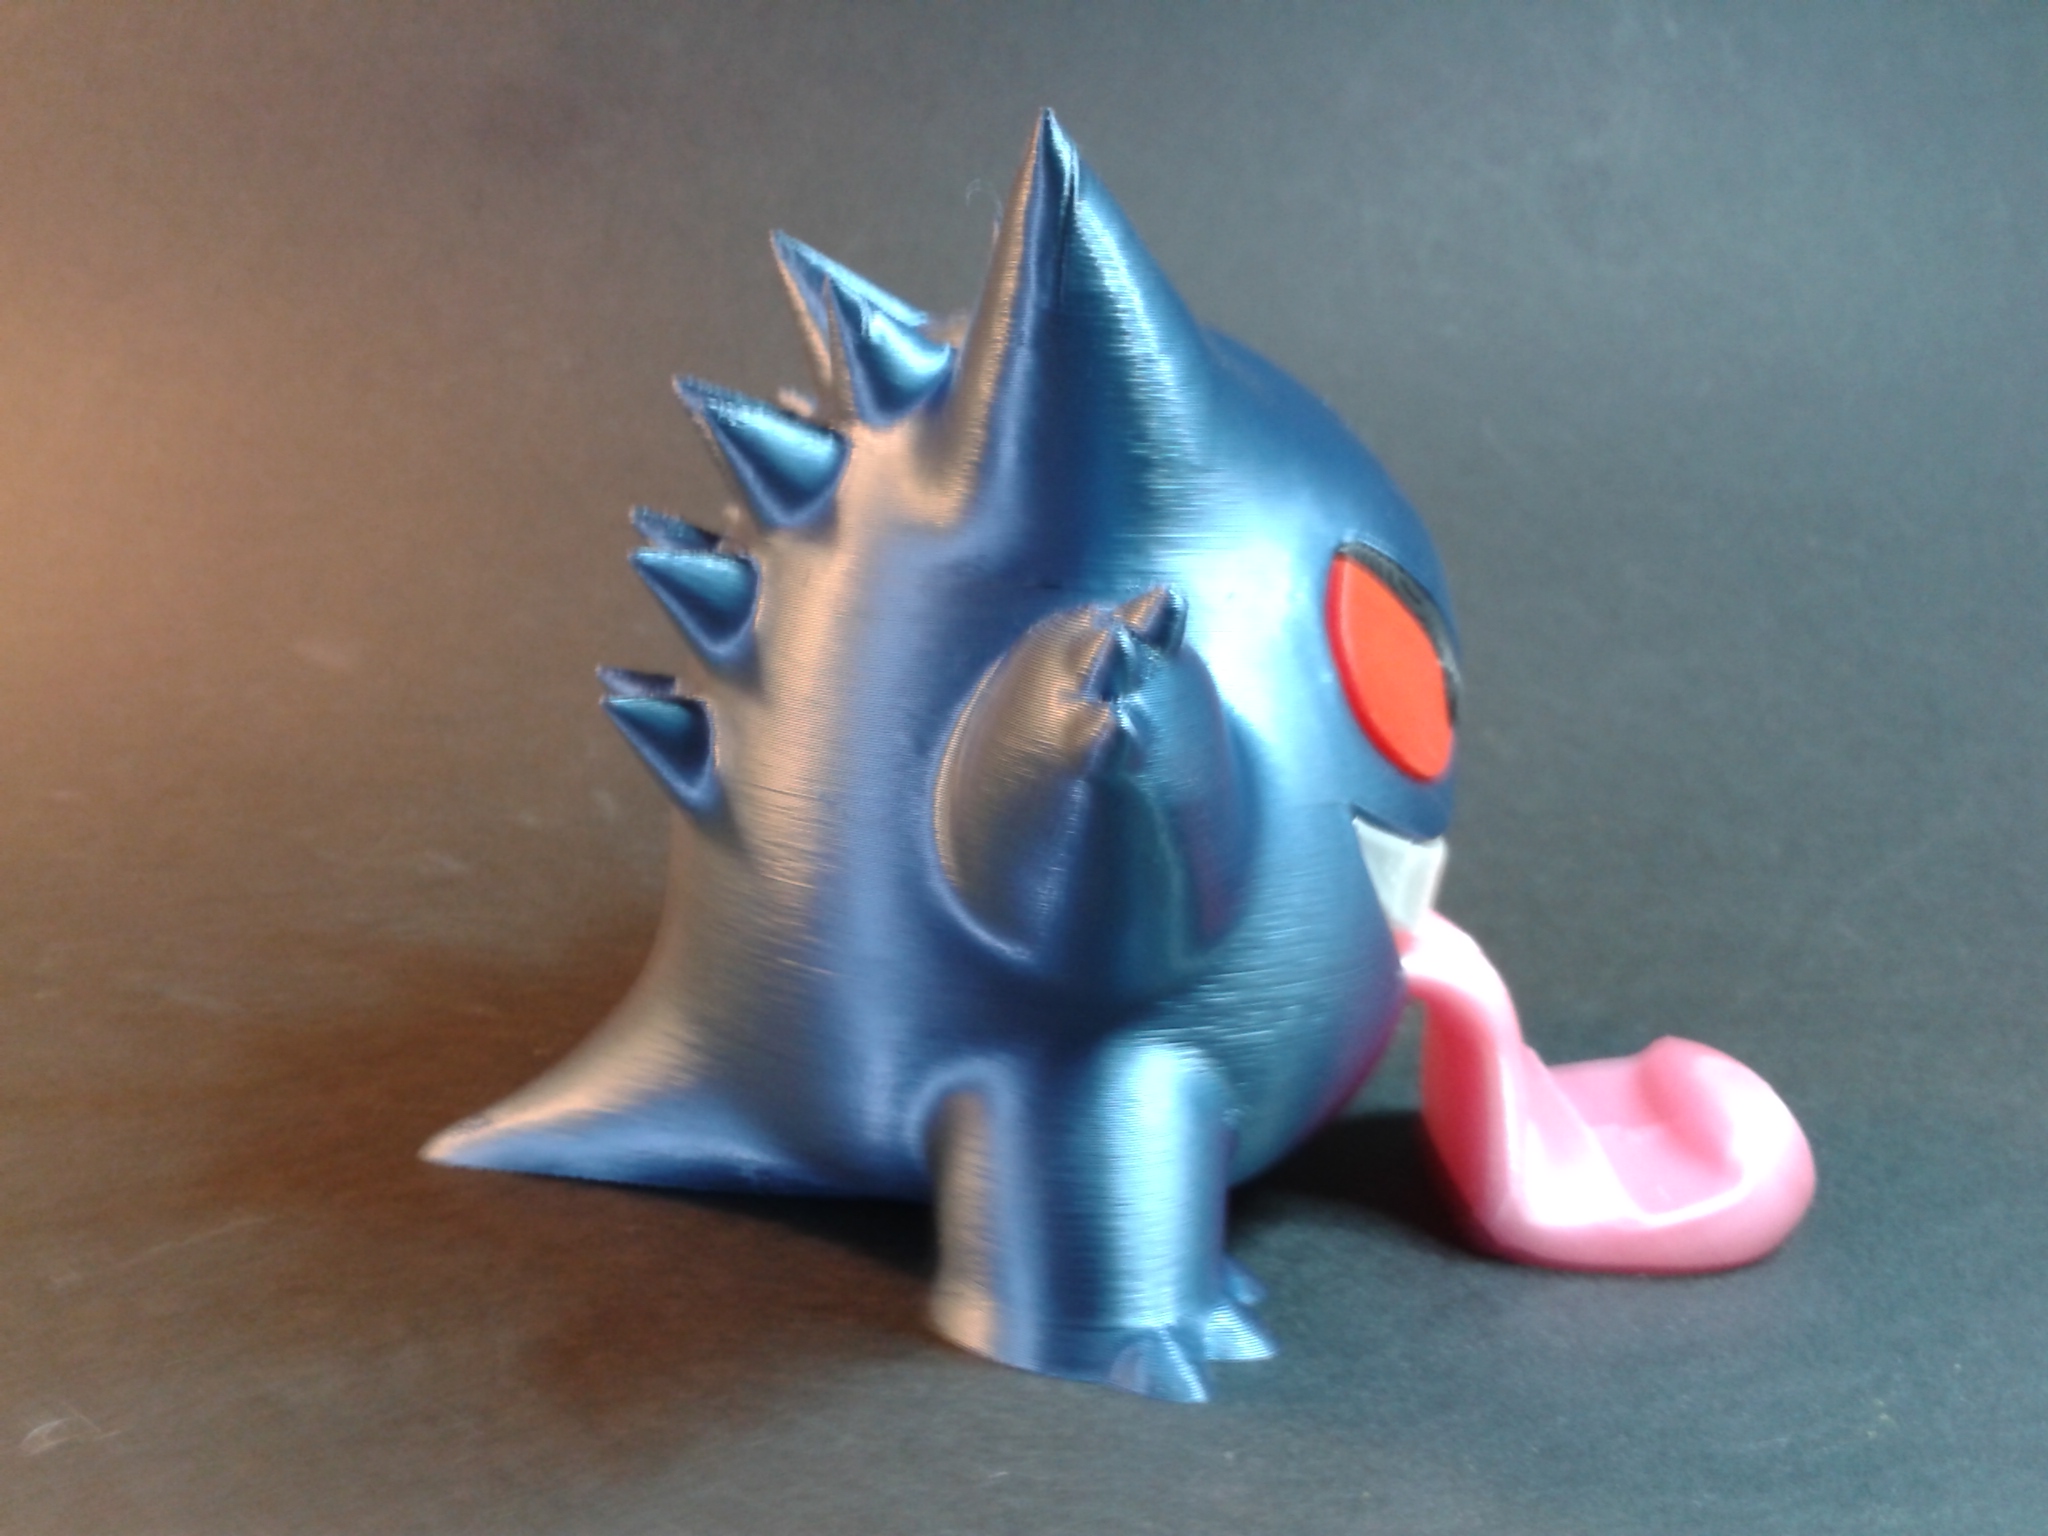
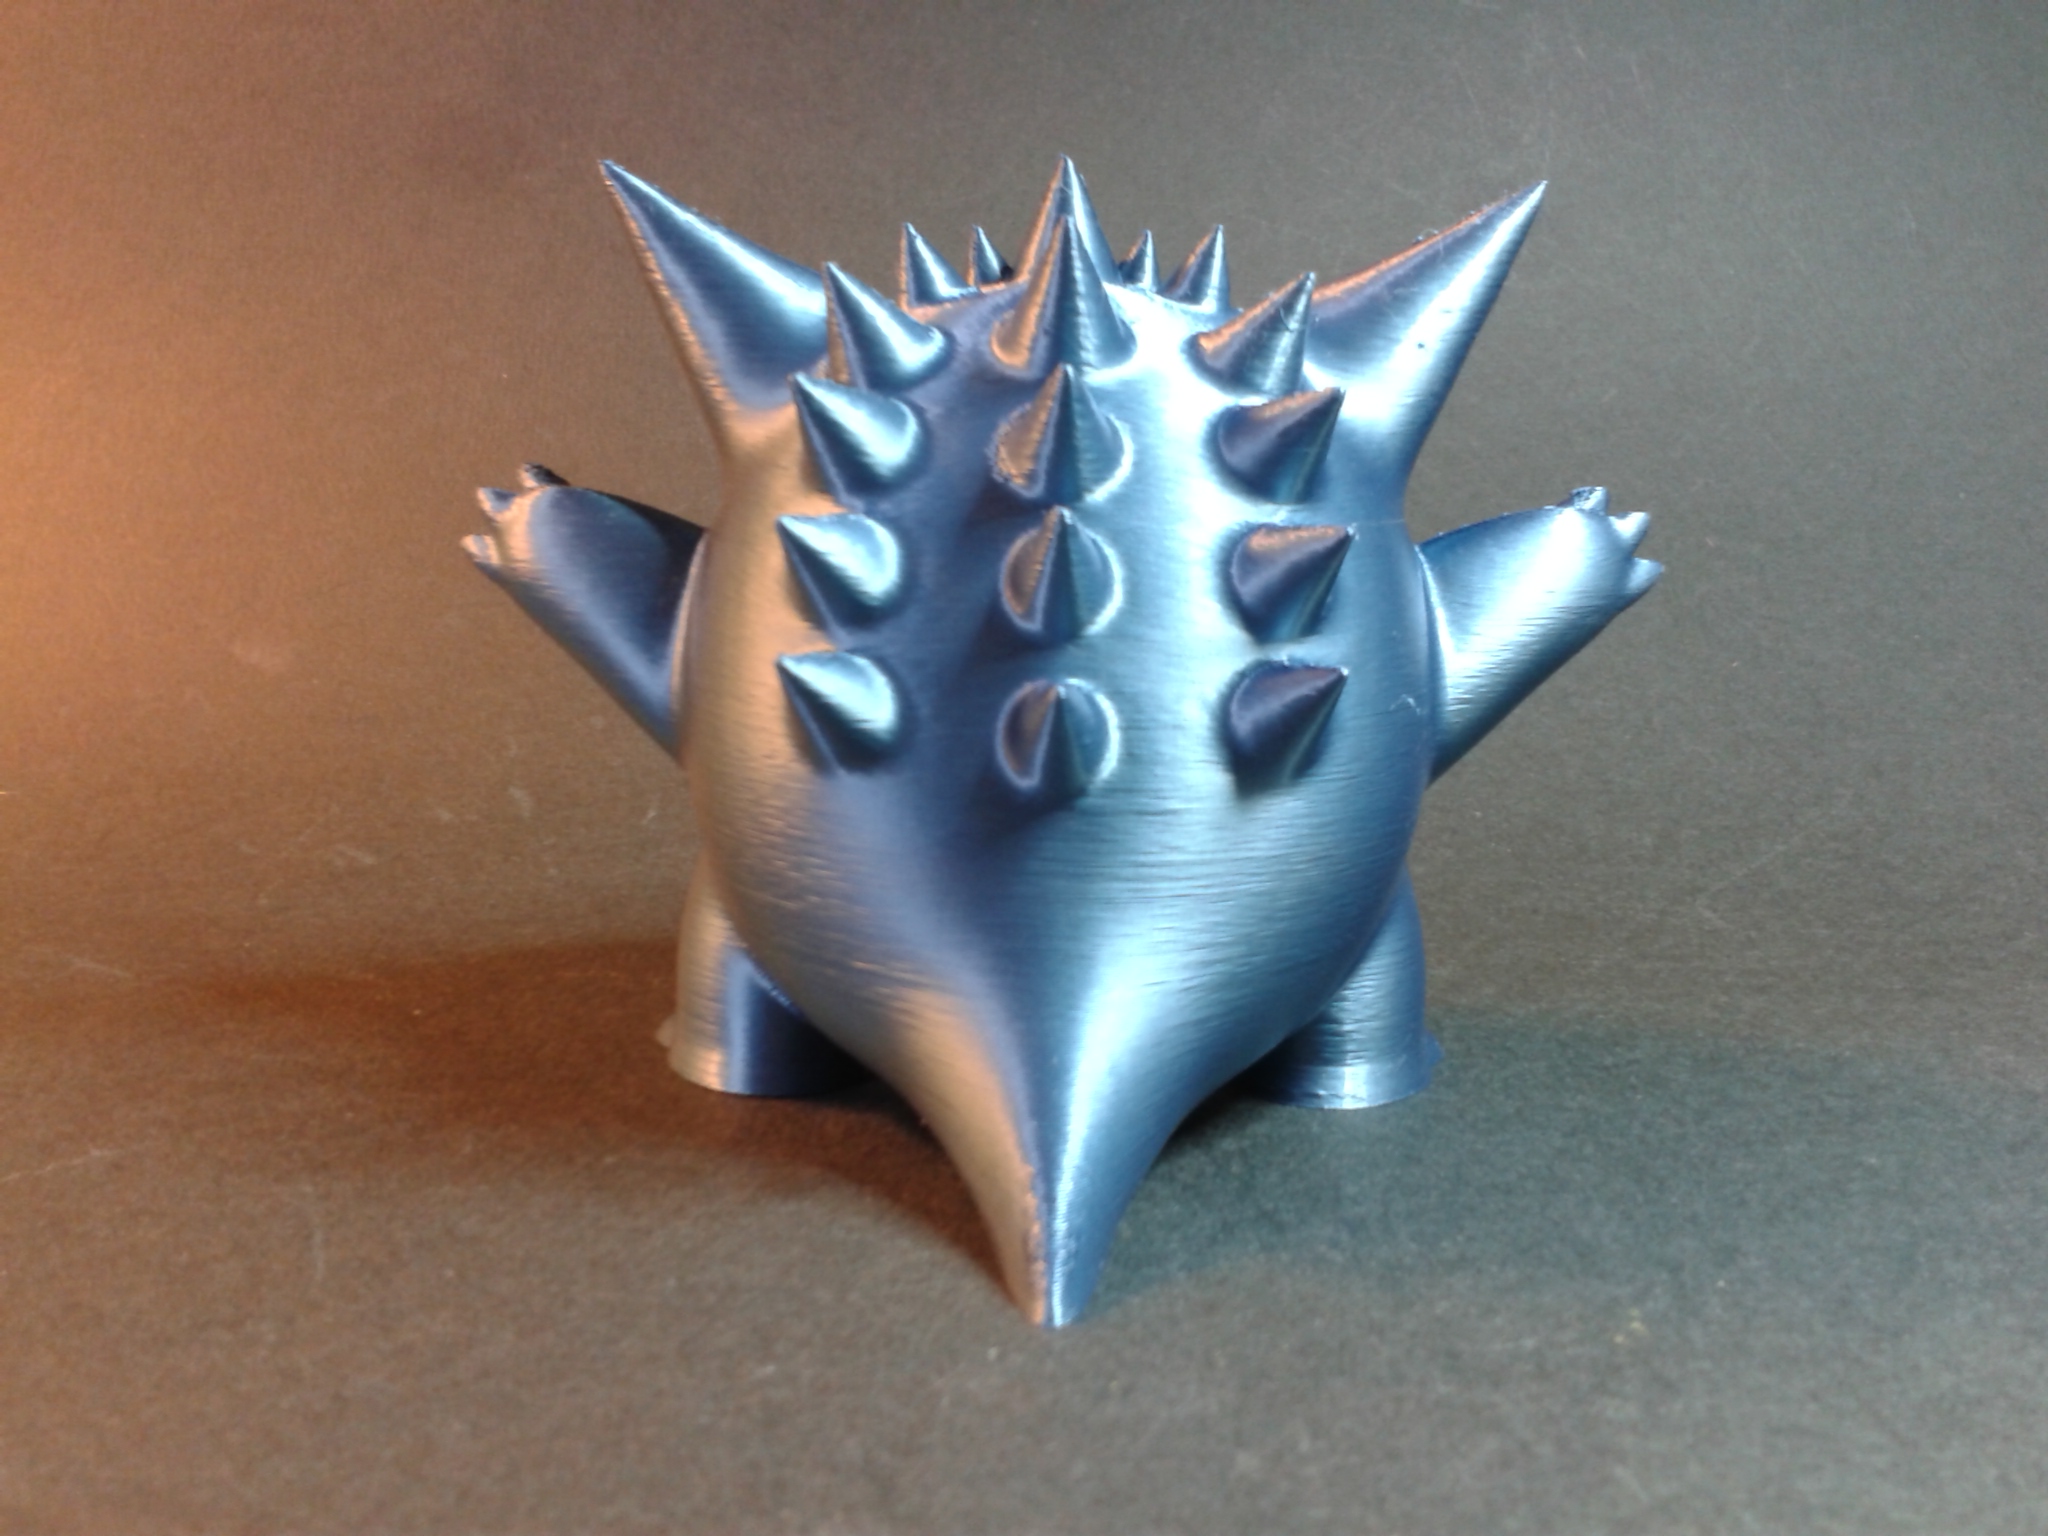
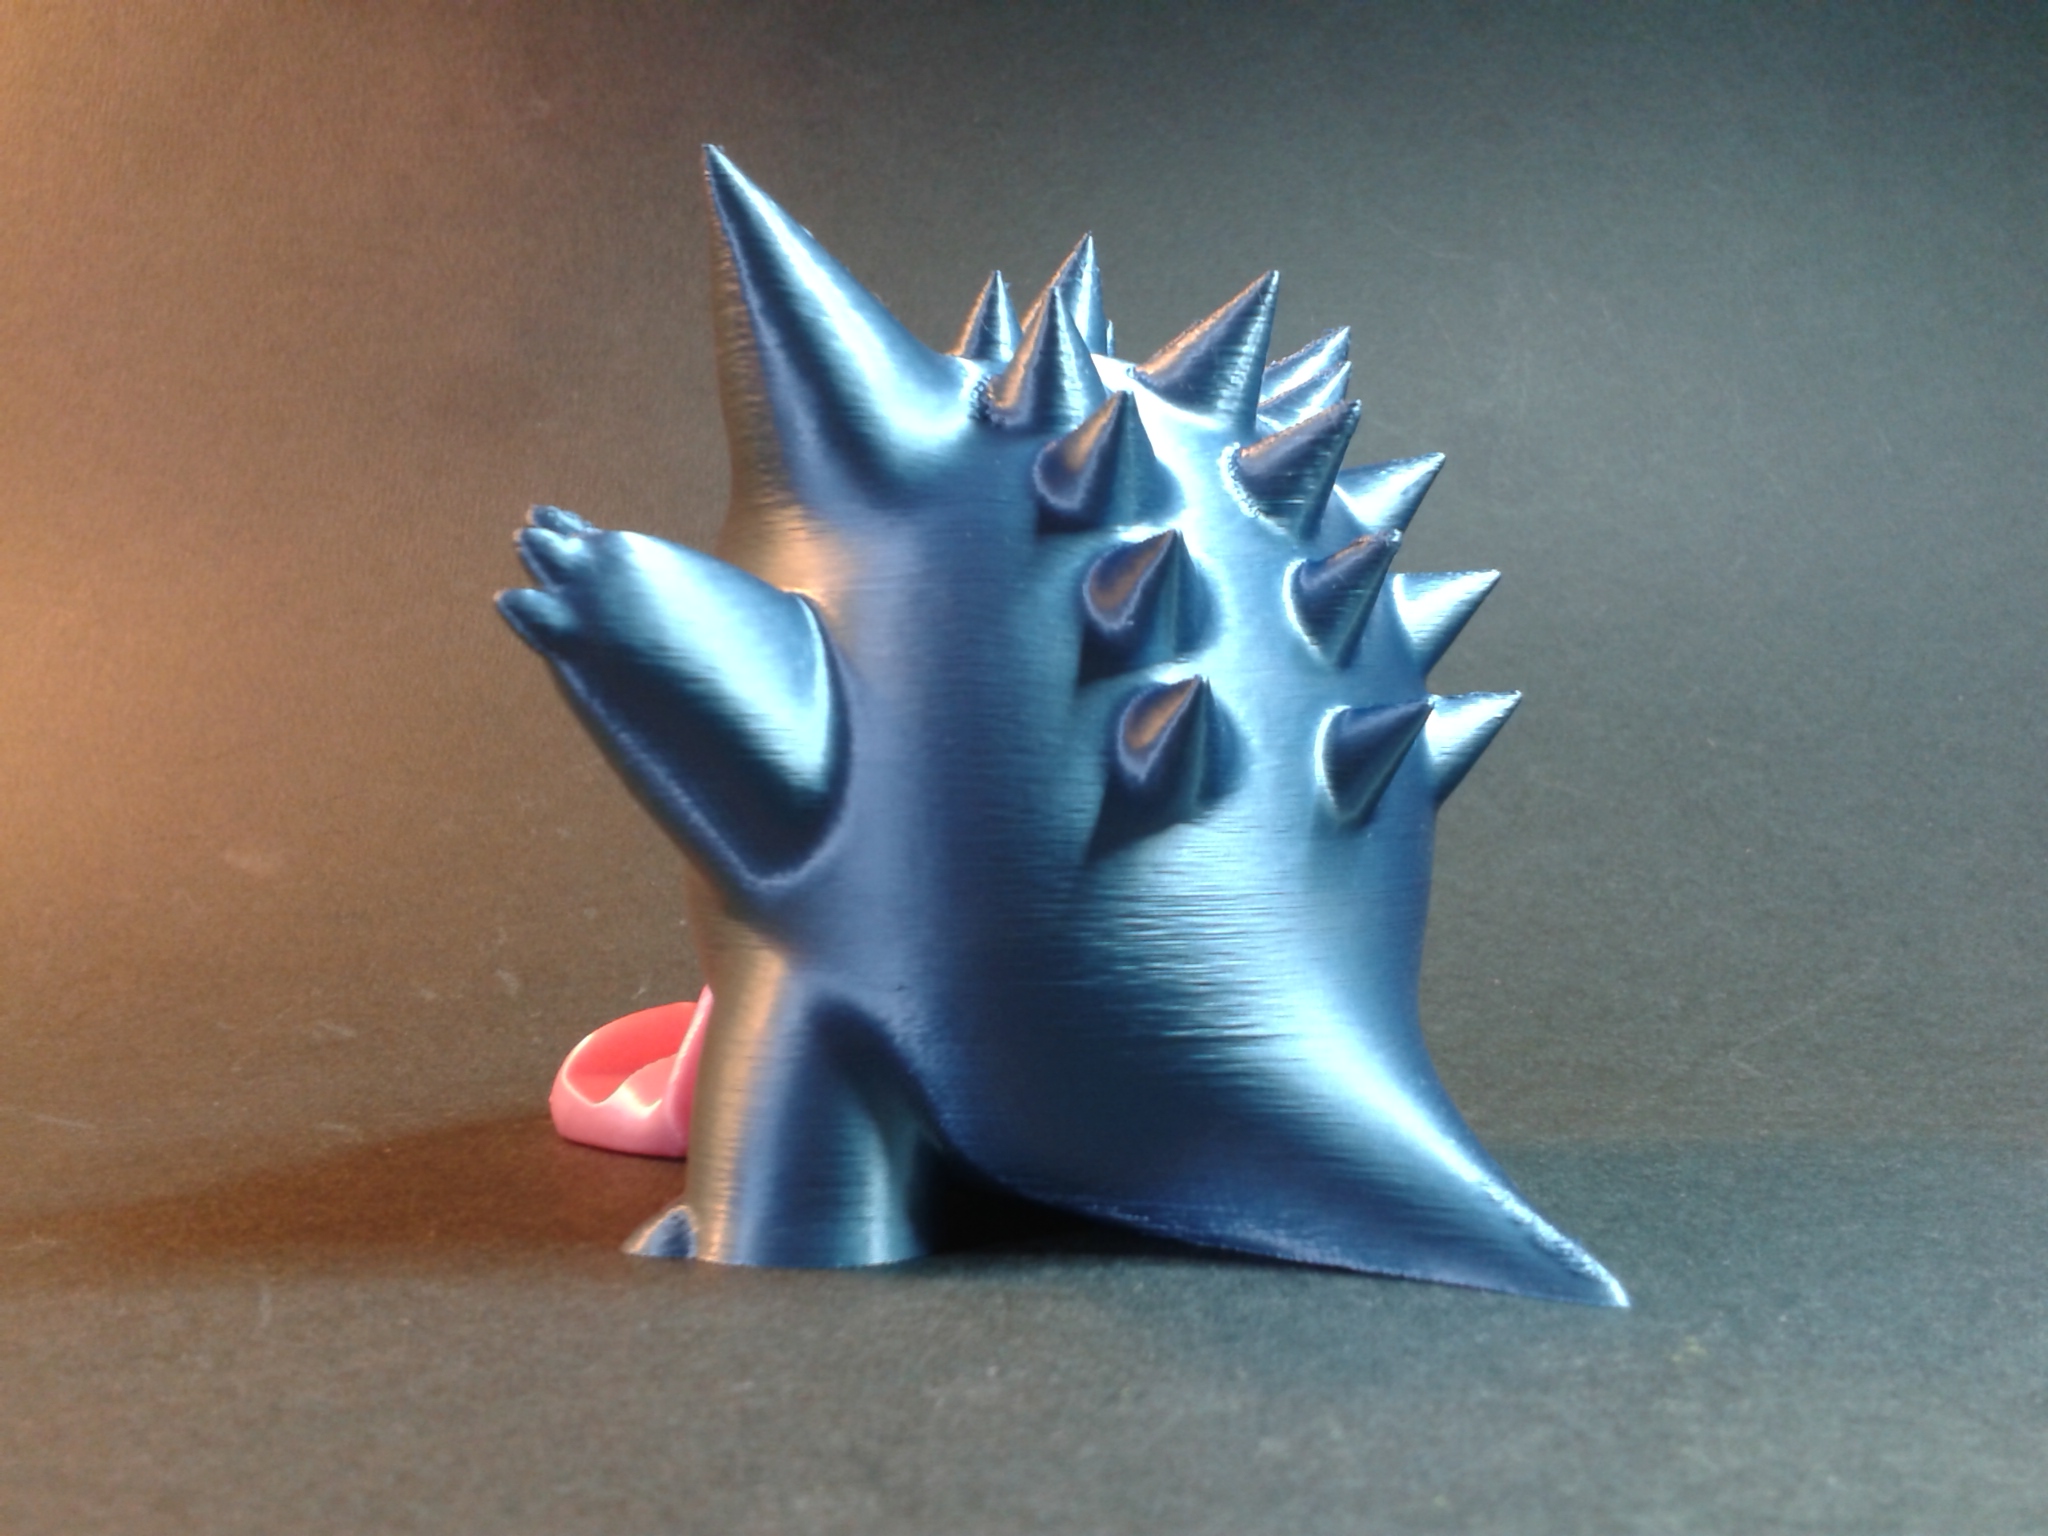
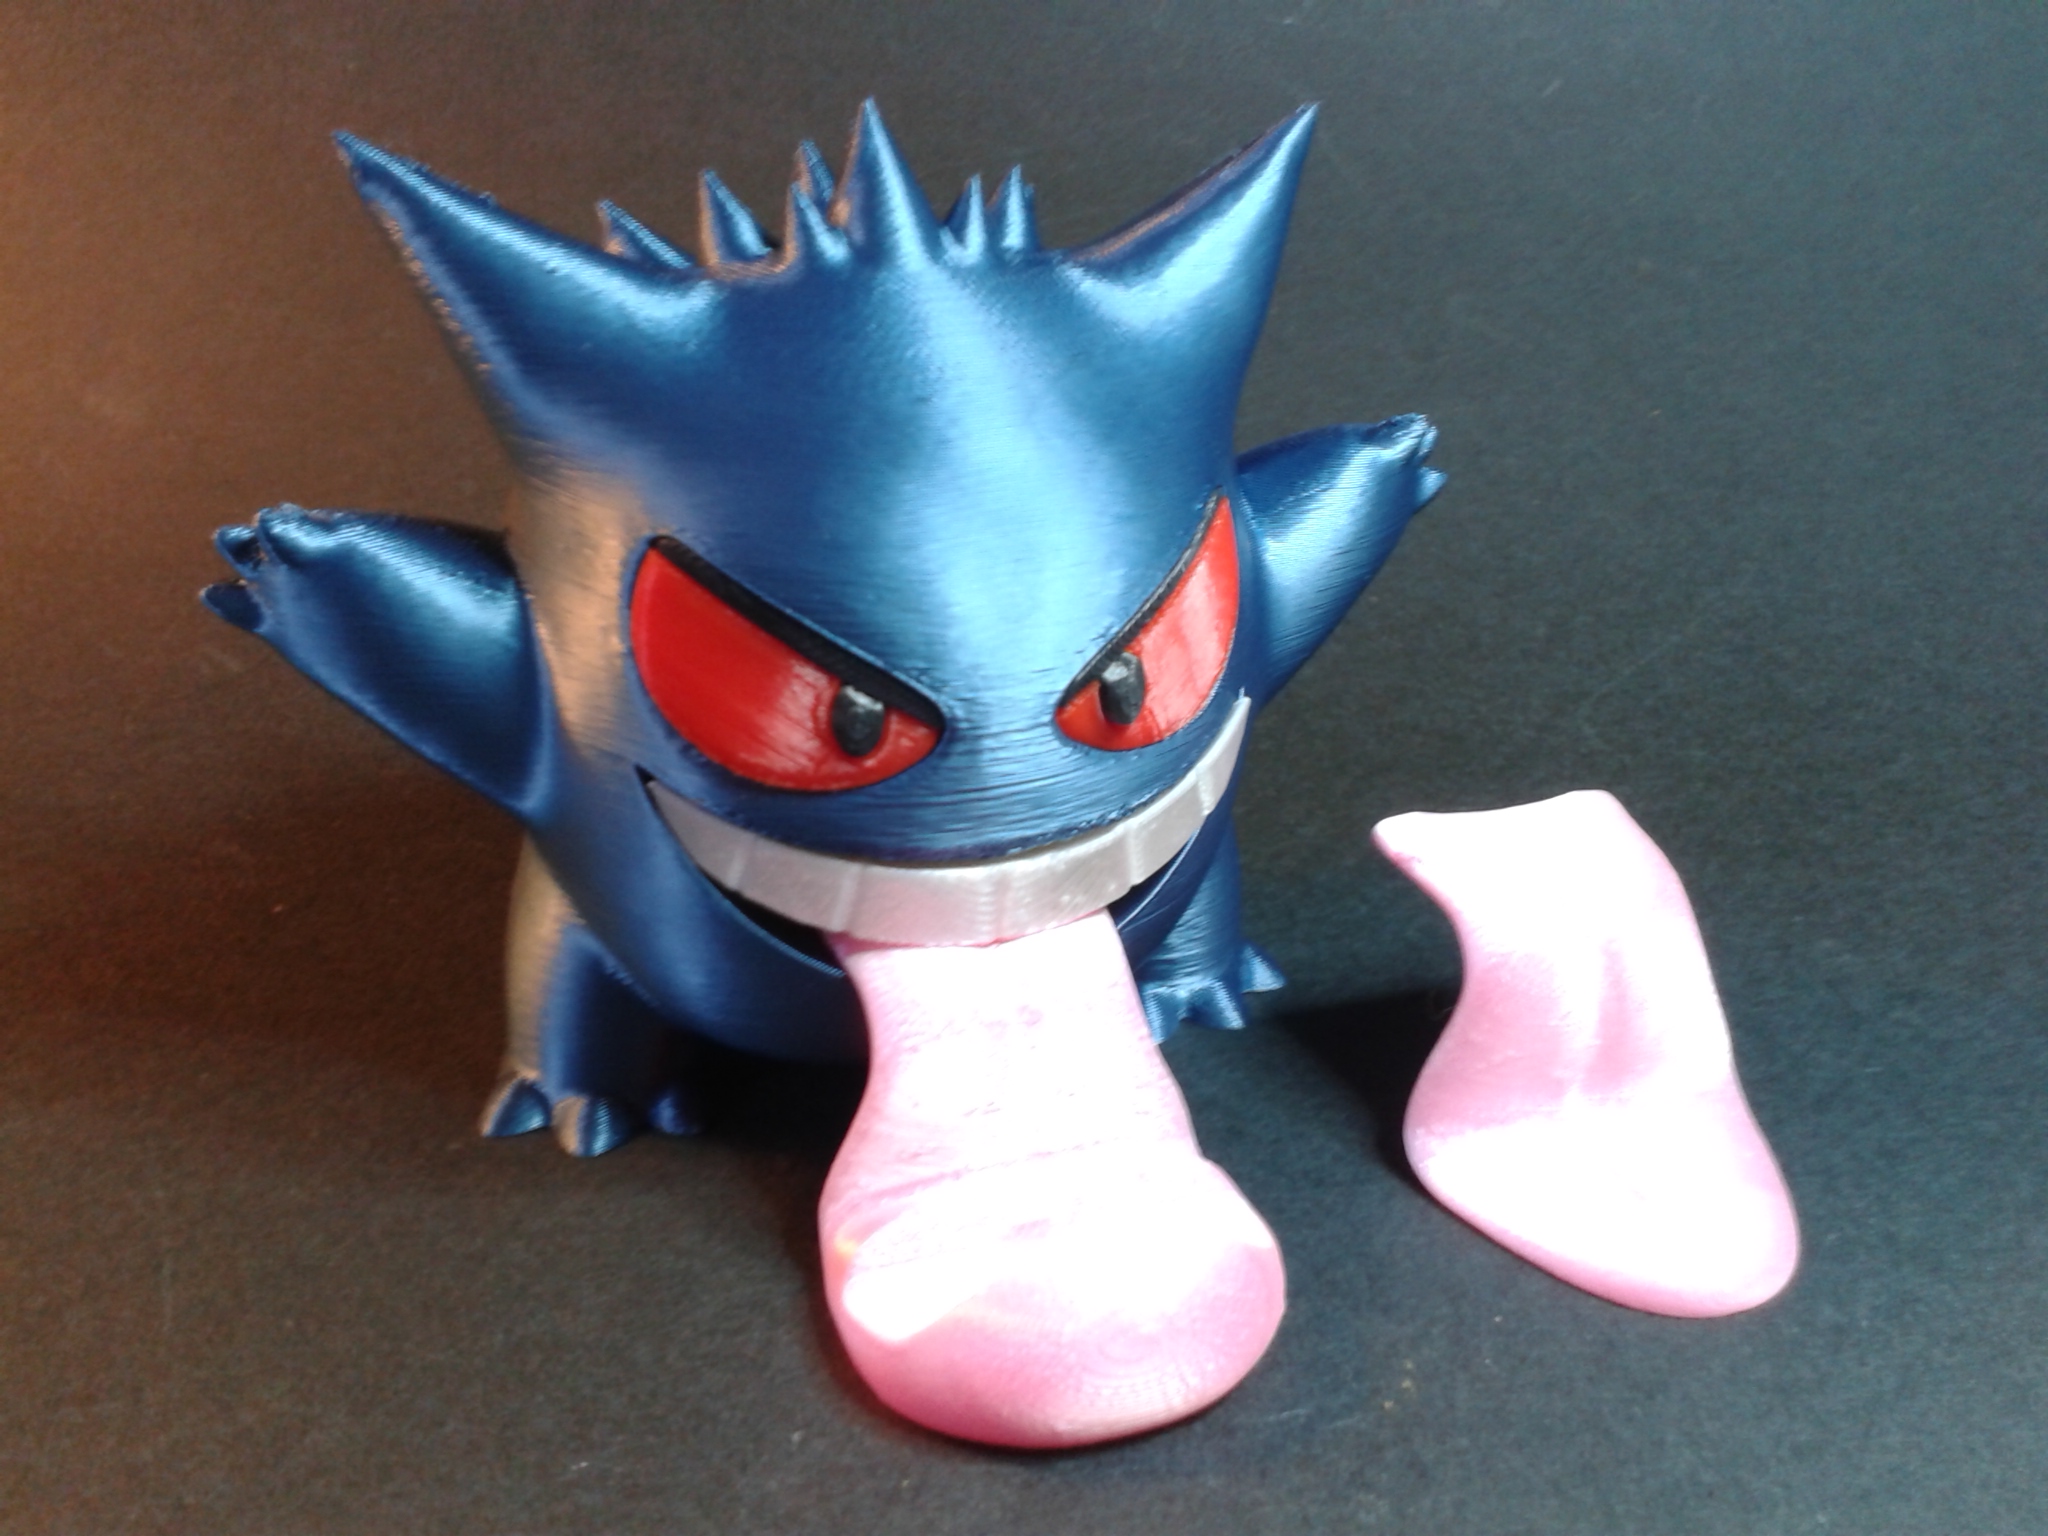
Ectoplasma (Gengar)
“Gengar by colors” de “Aslan3D” (encore Premium Creality Cloud).
Echelle 75%, en six plateaux, pour environ 4h04 d’impression.
Filaments : PLA Silk Blanc ArianePlast, PLA Slik Rose ArianePlast, PLA Red Velleman, PLA Silk metal blue Anycubic, PLA recyclé ArianePlast.


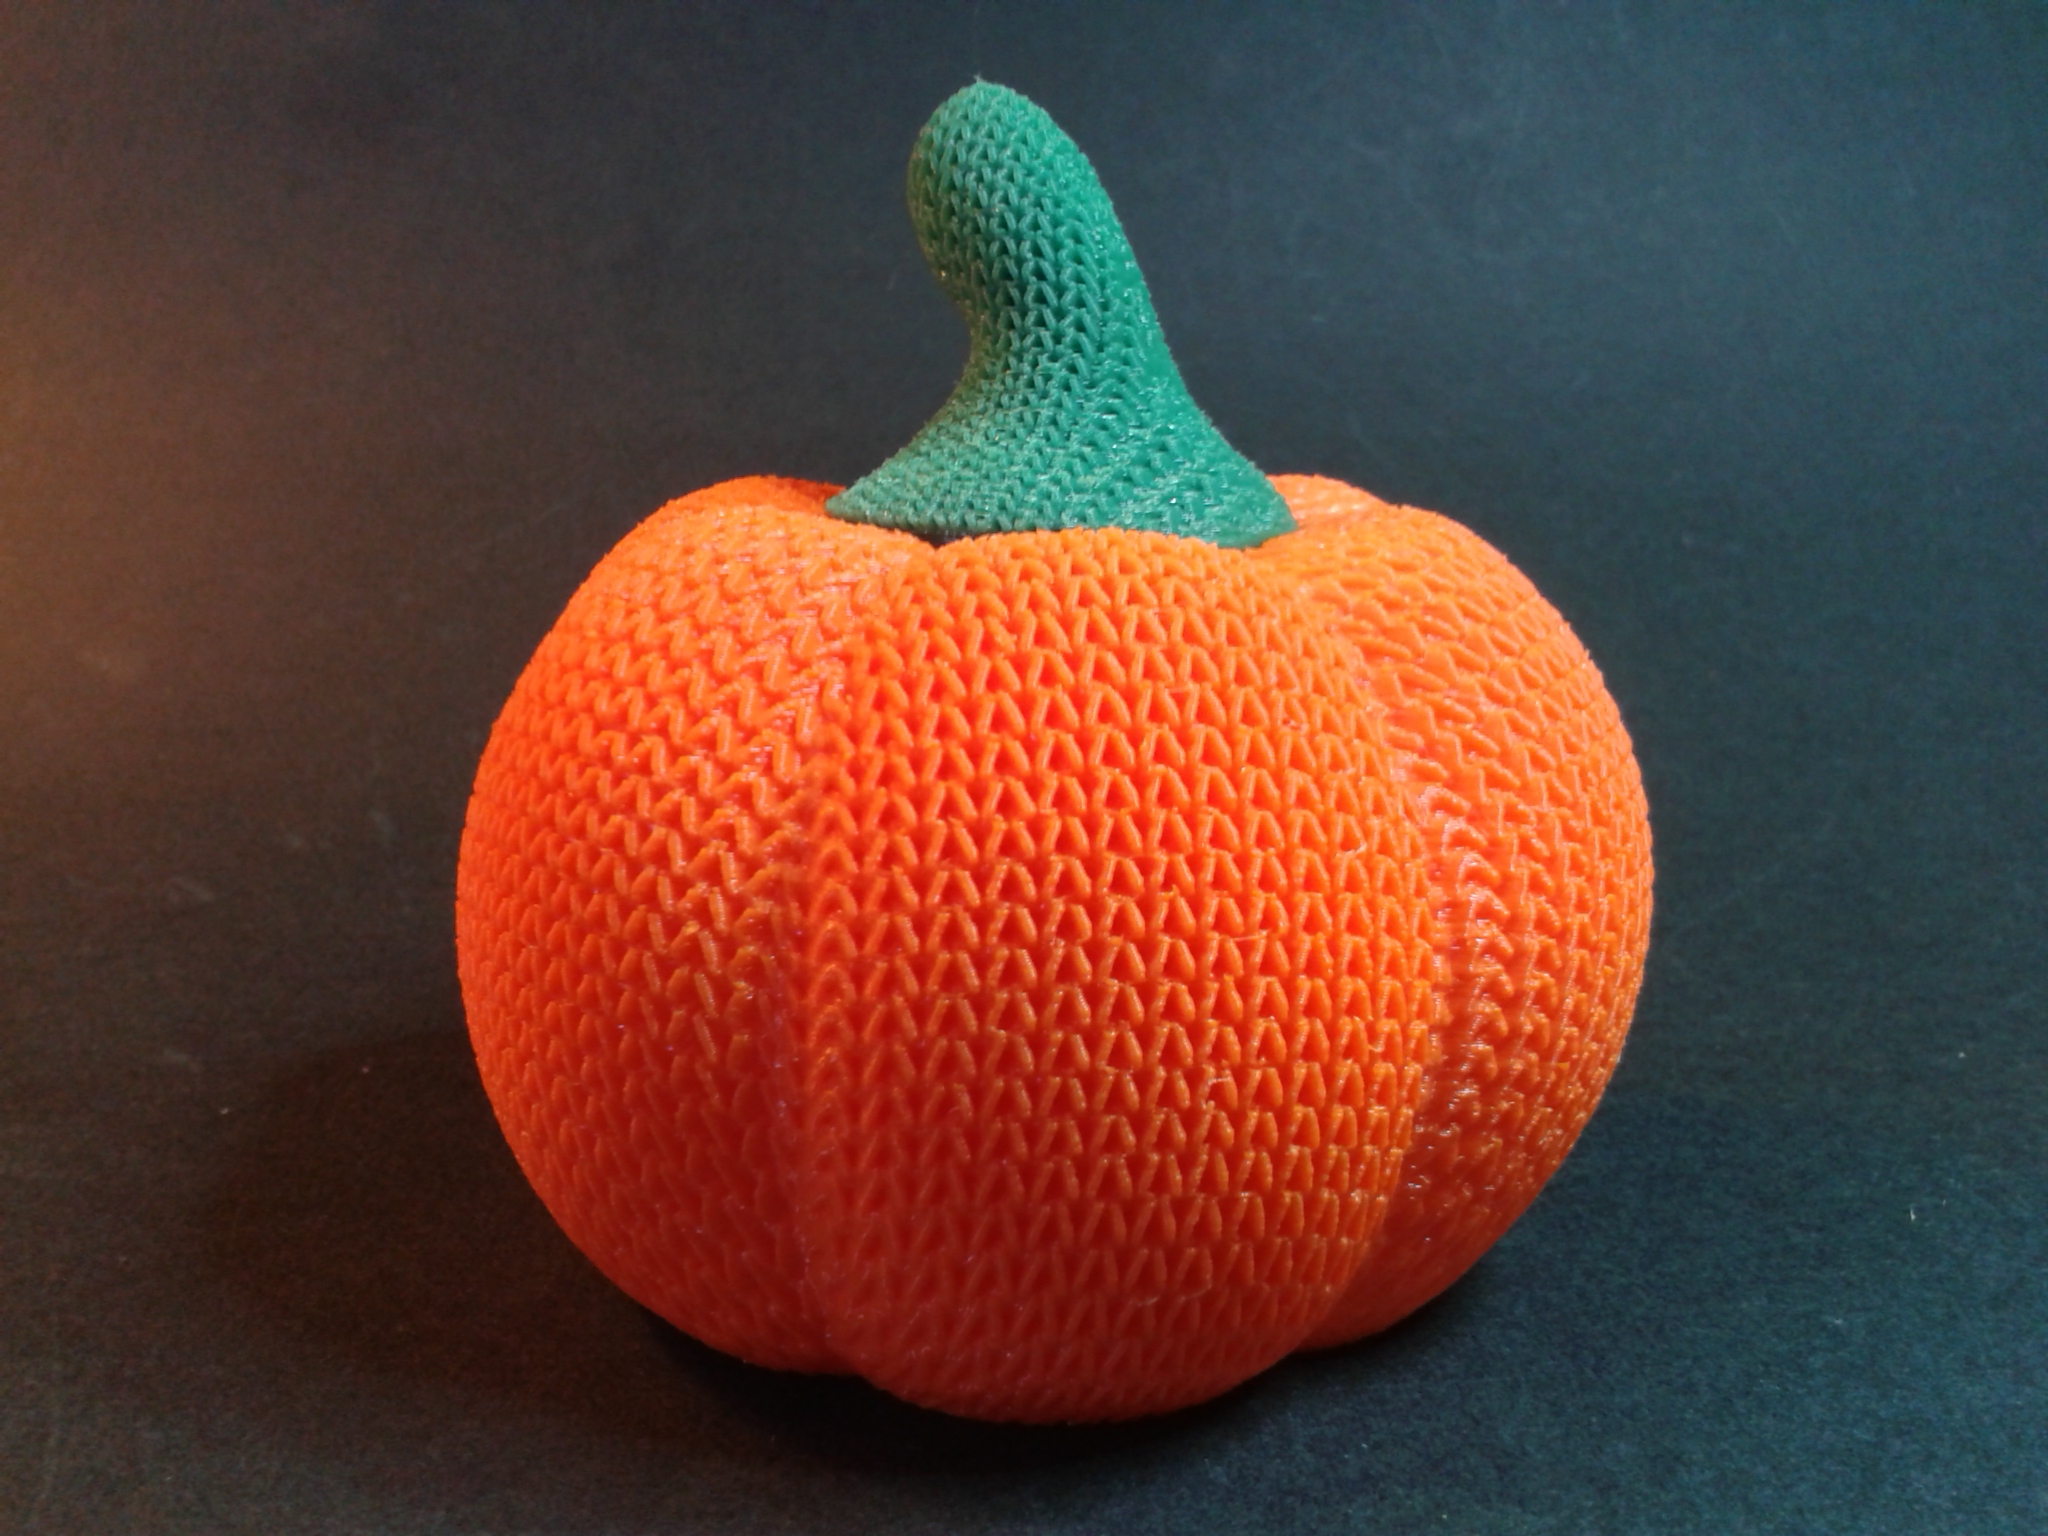
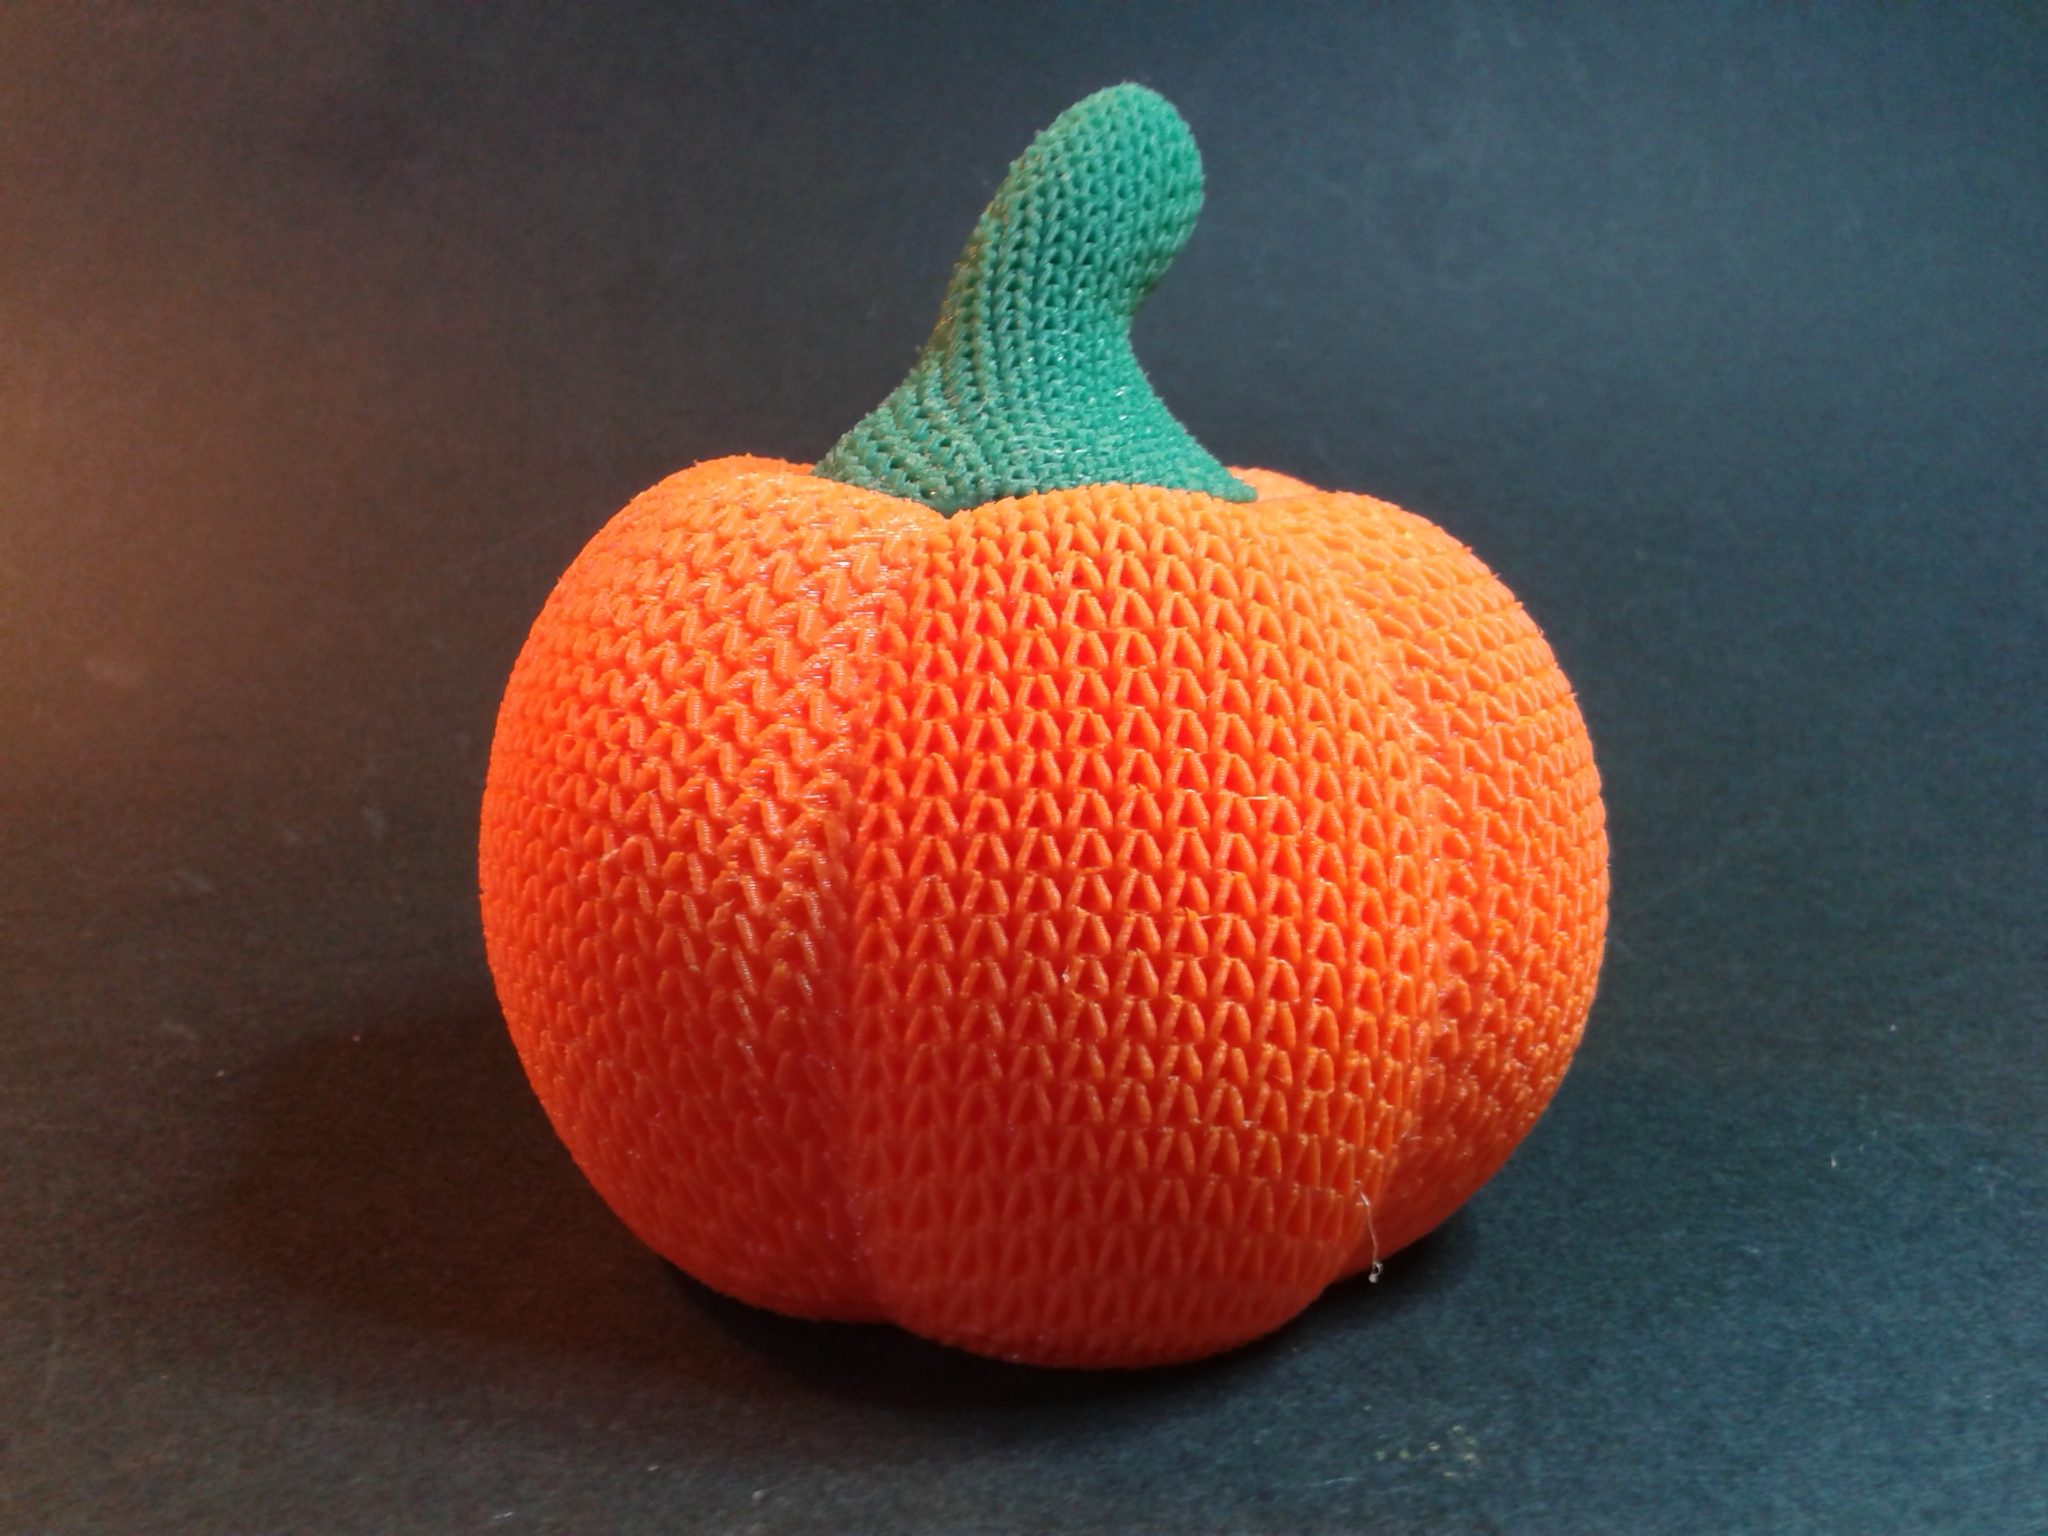
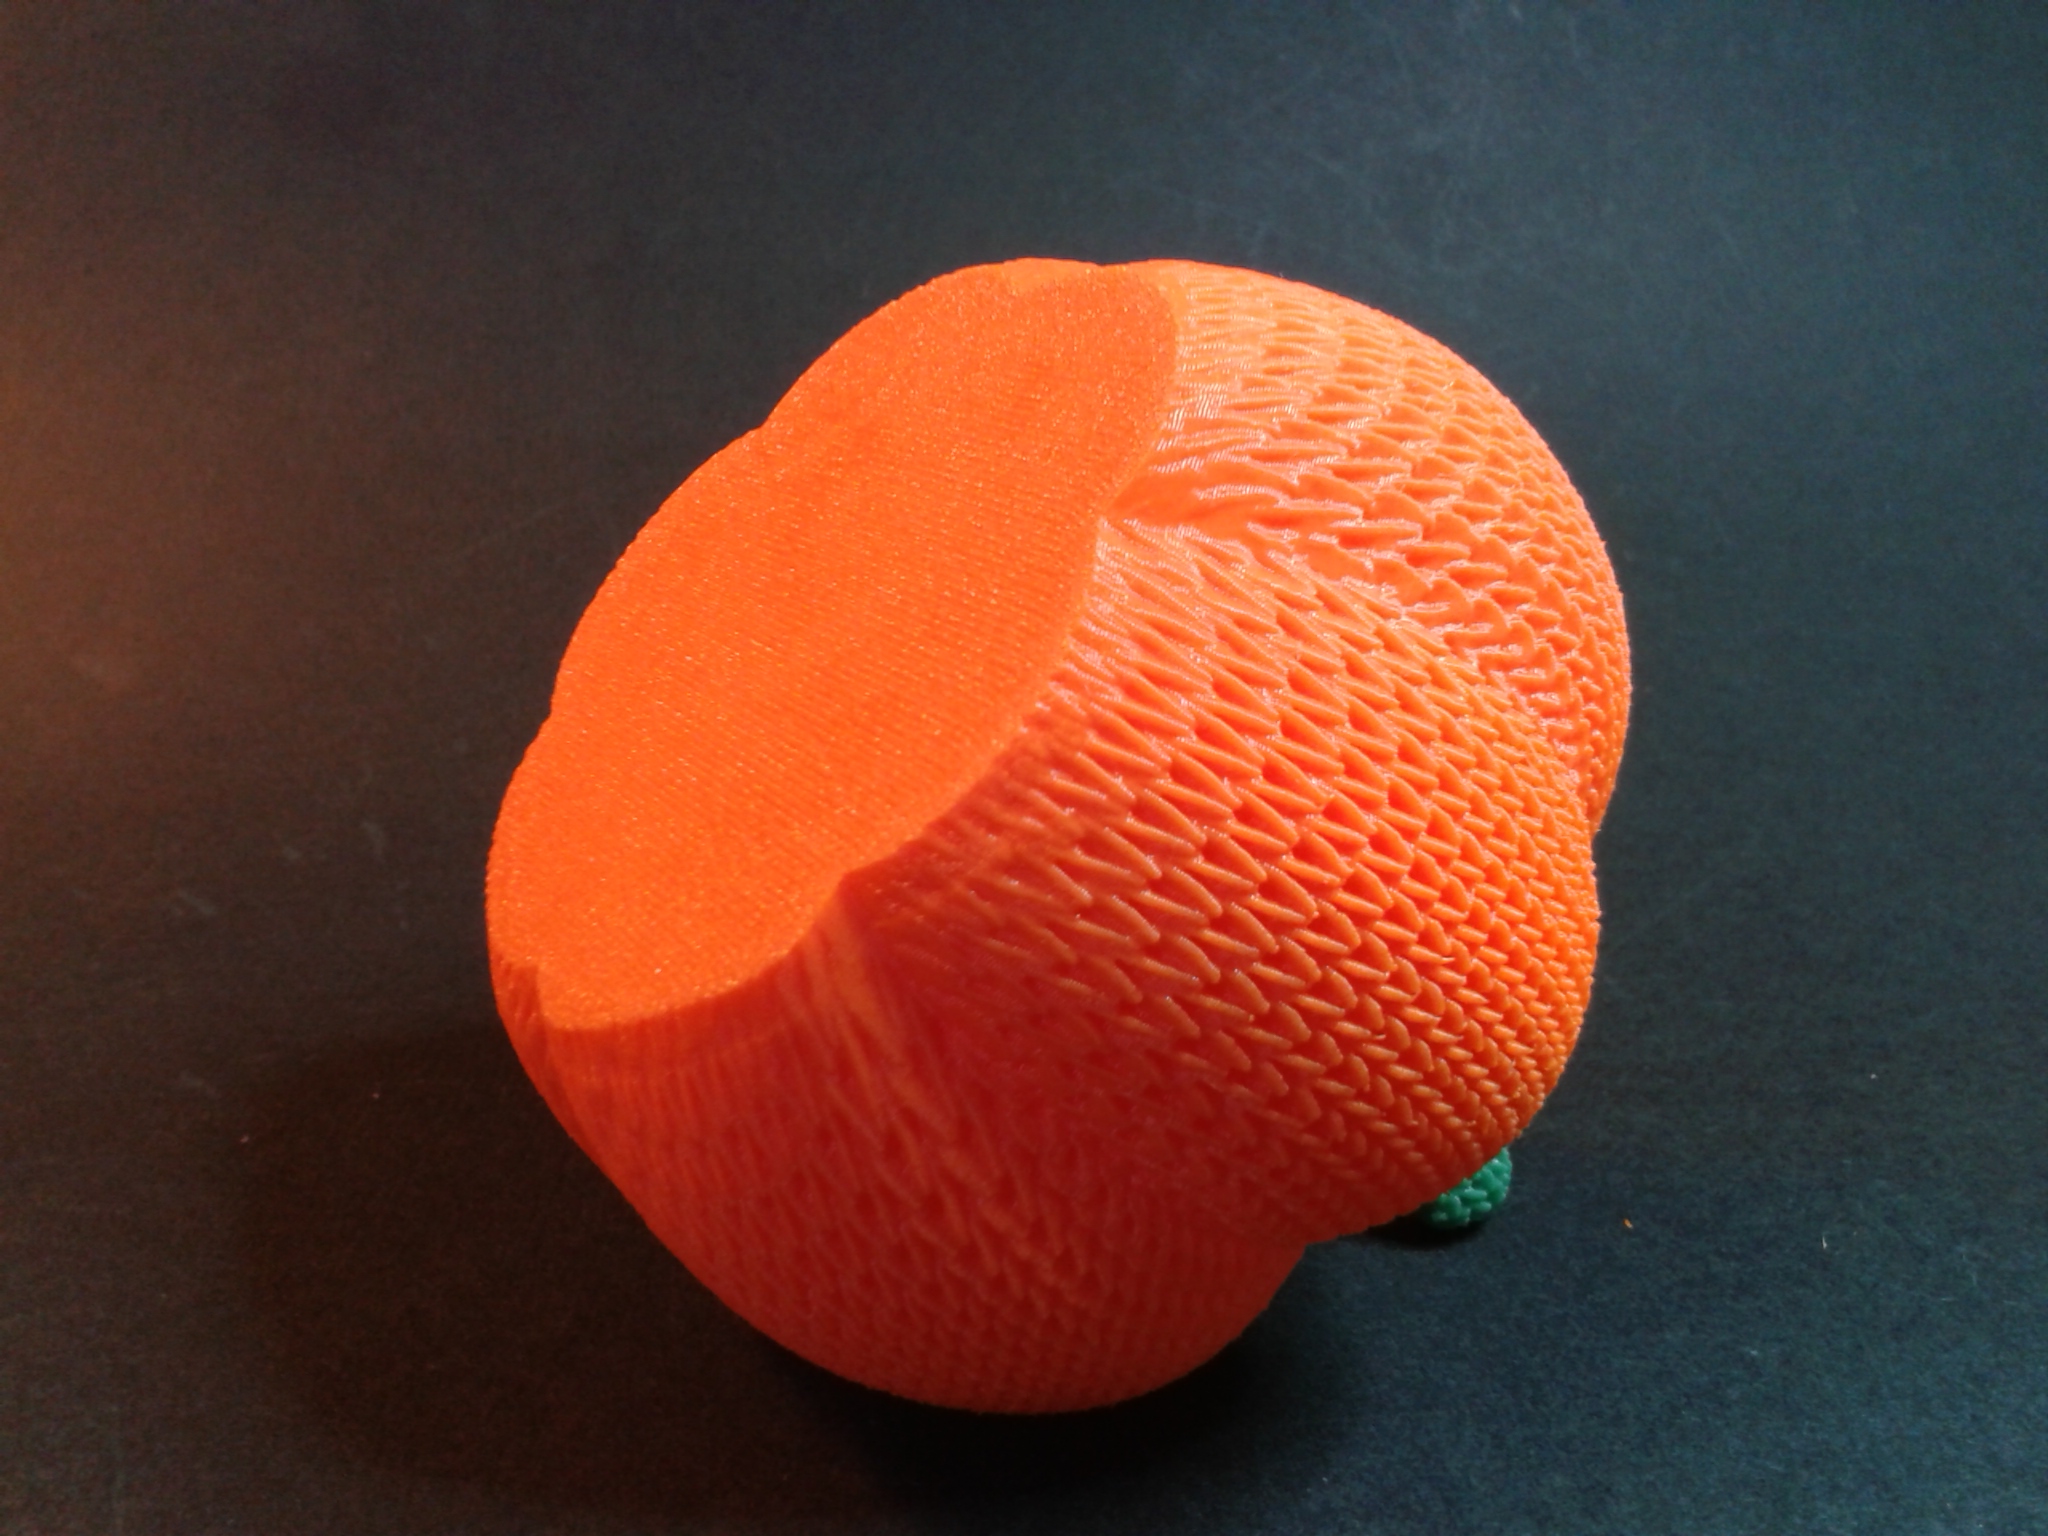
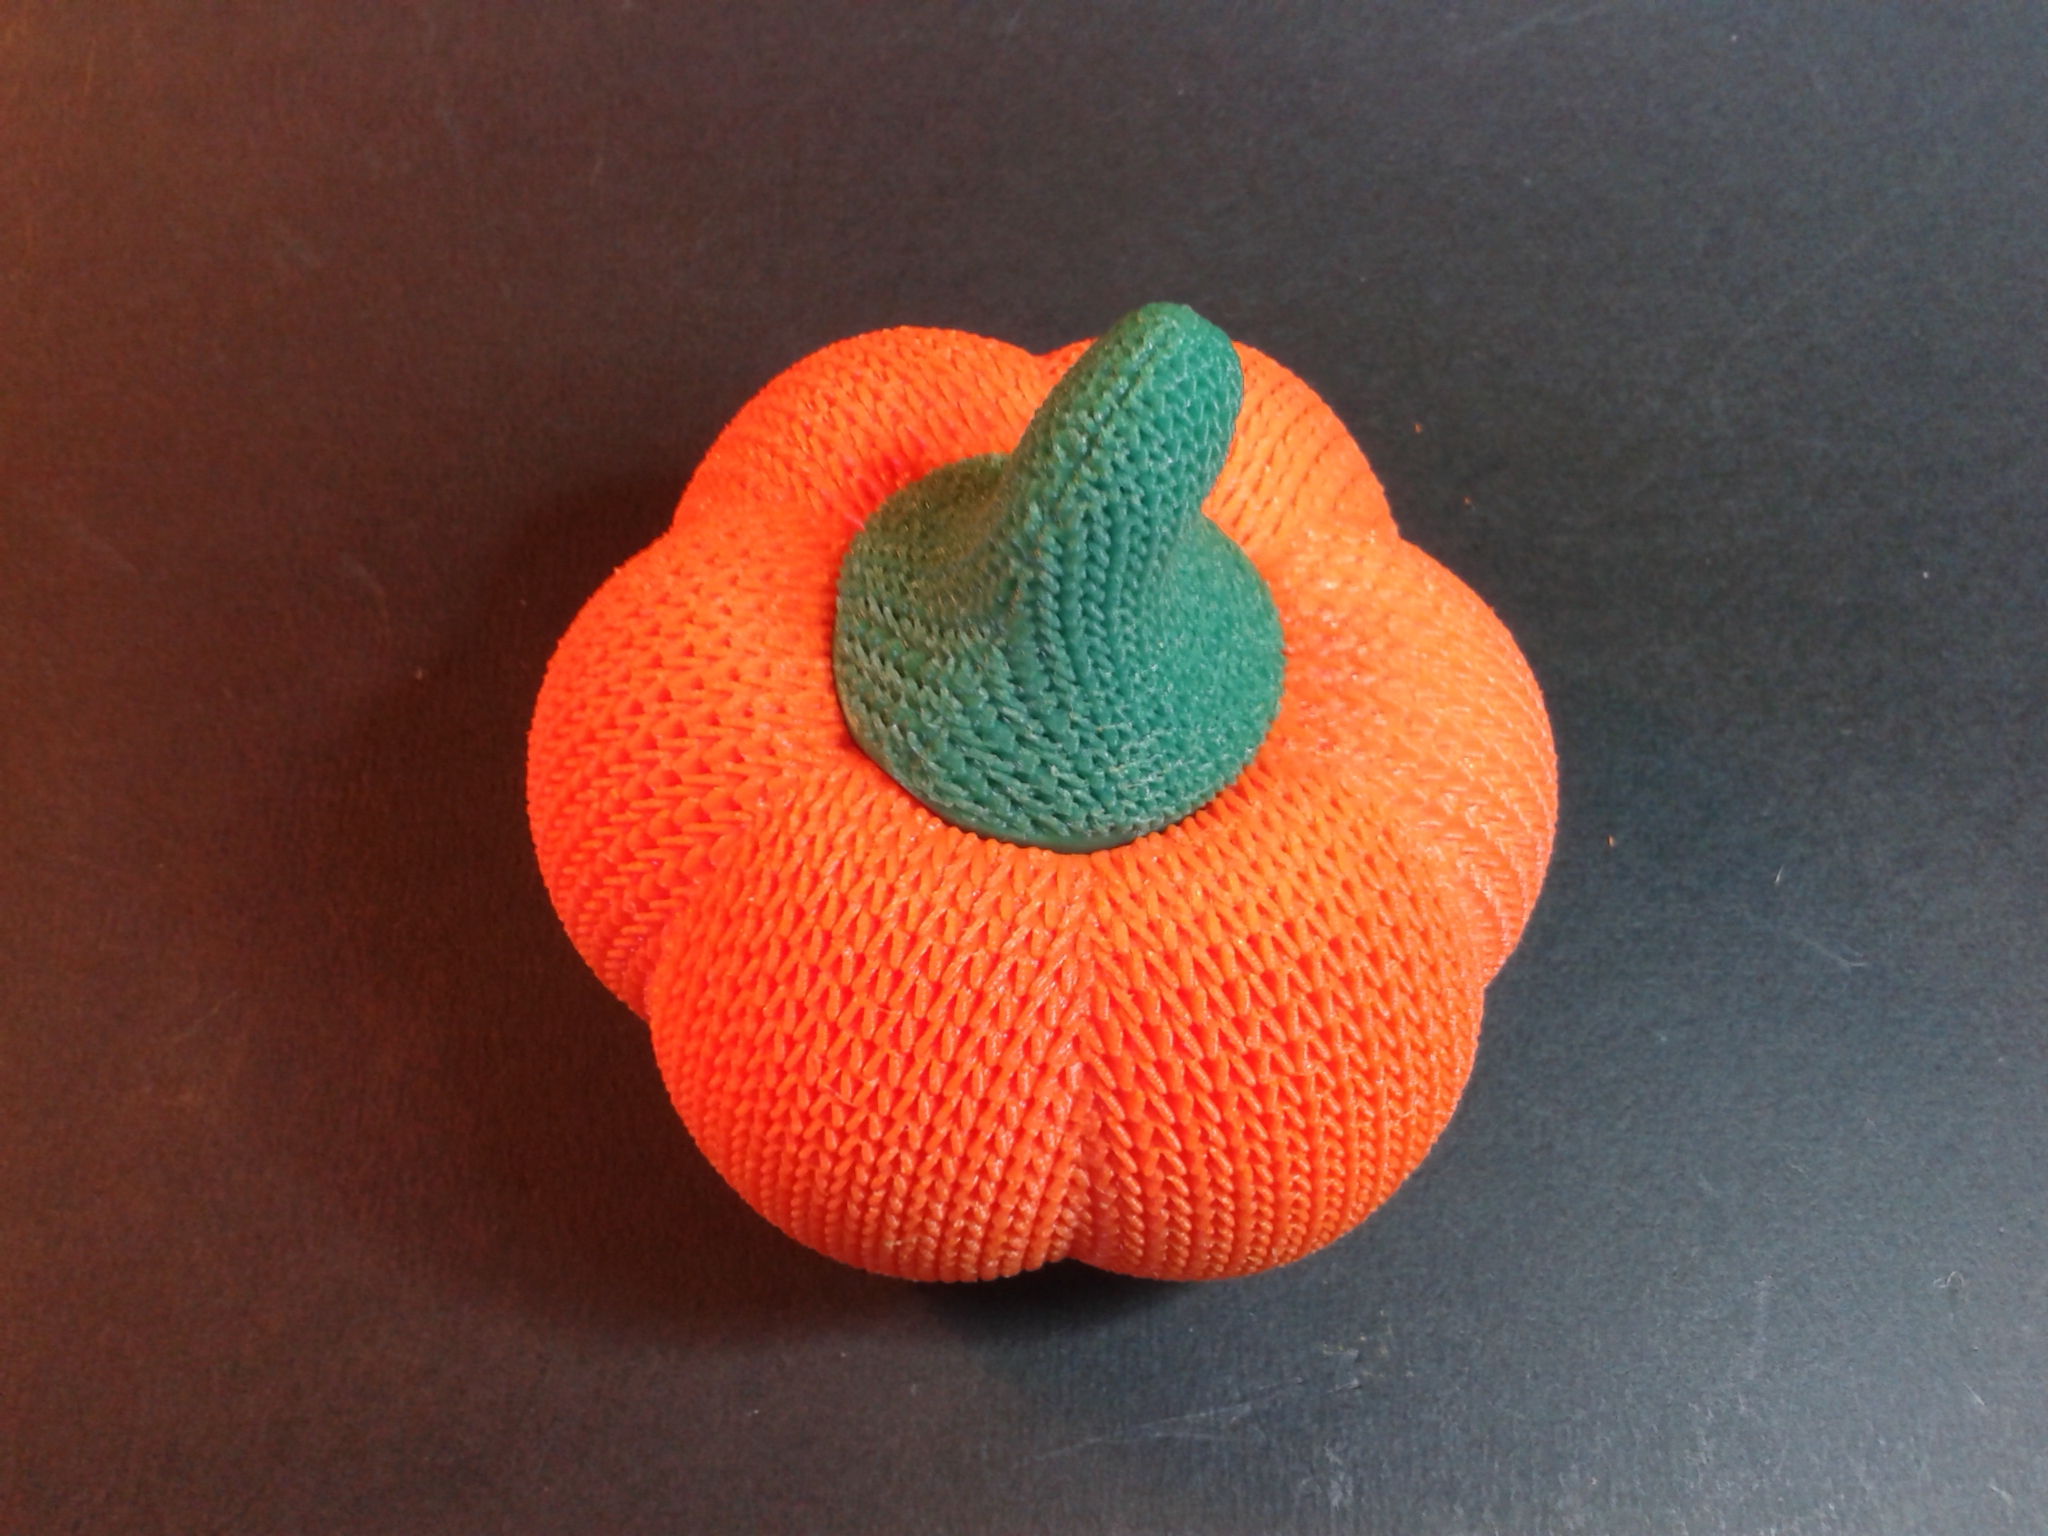
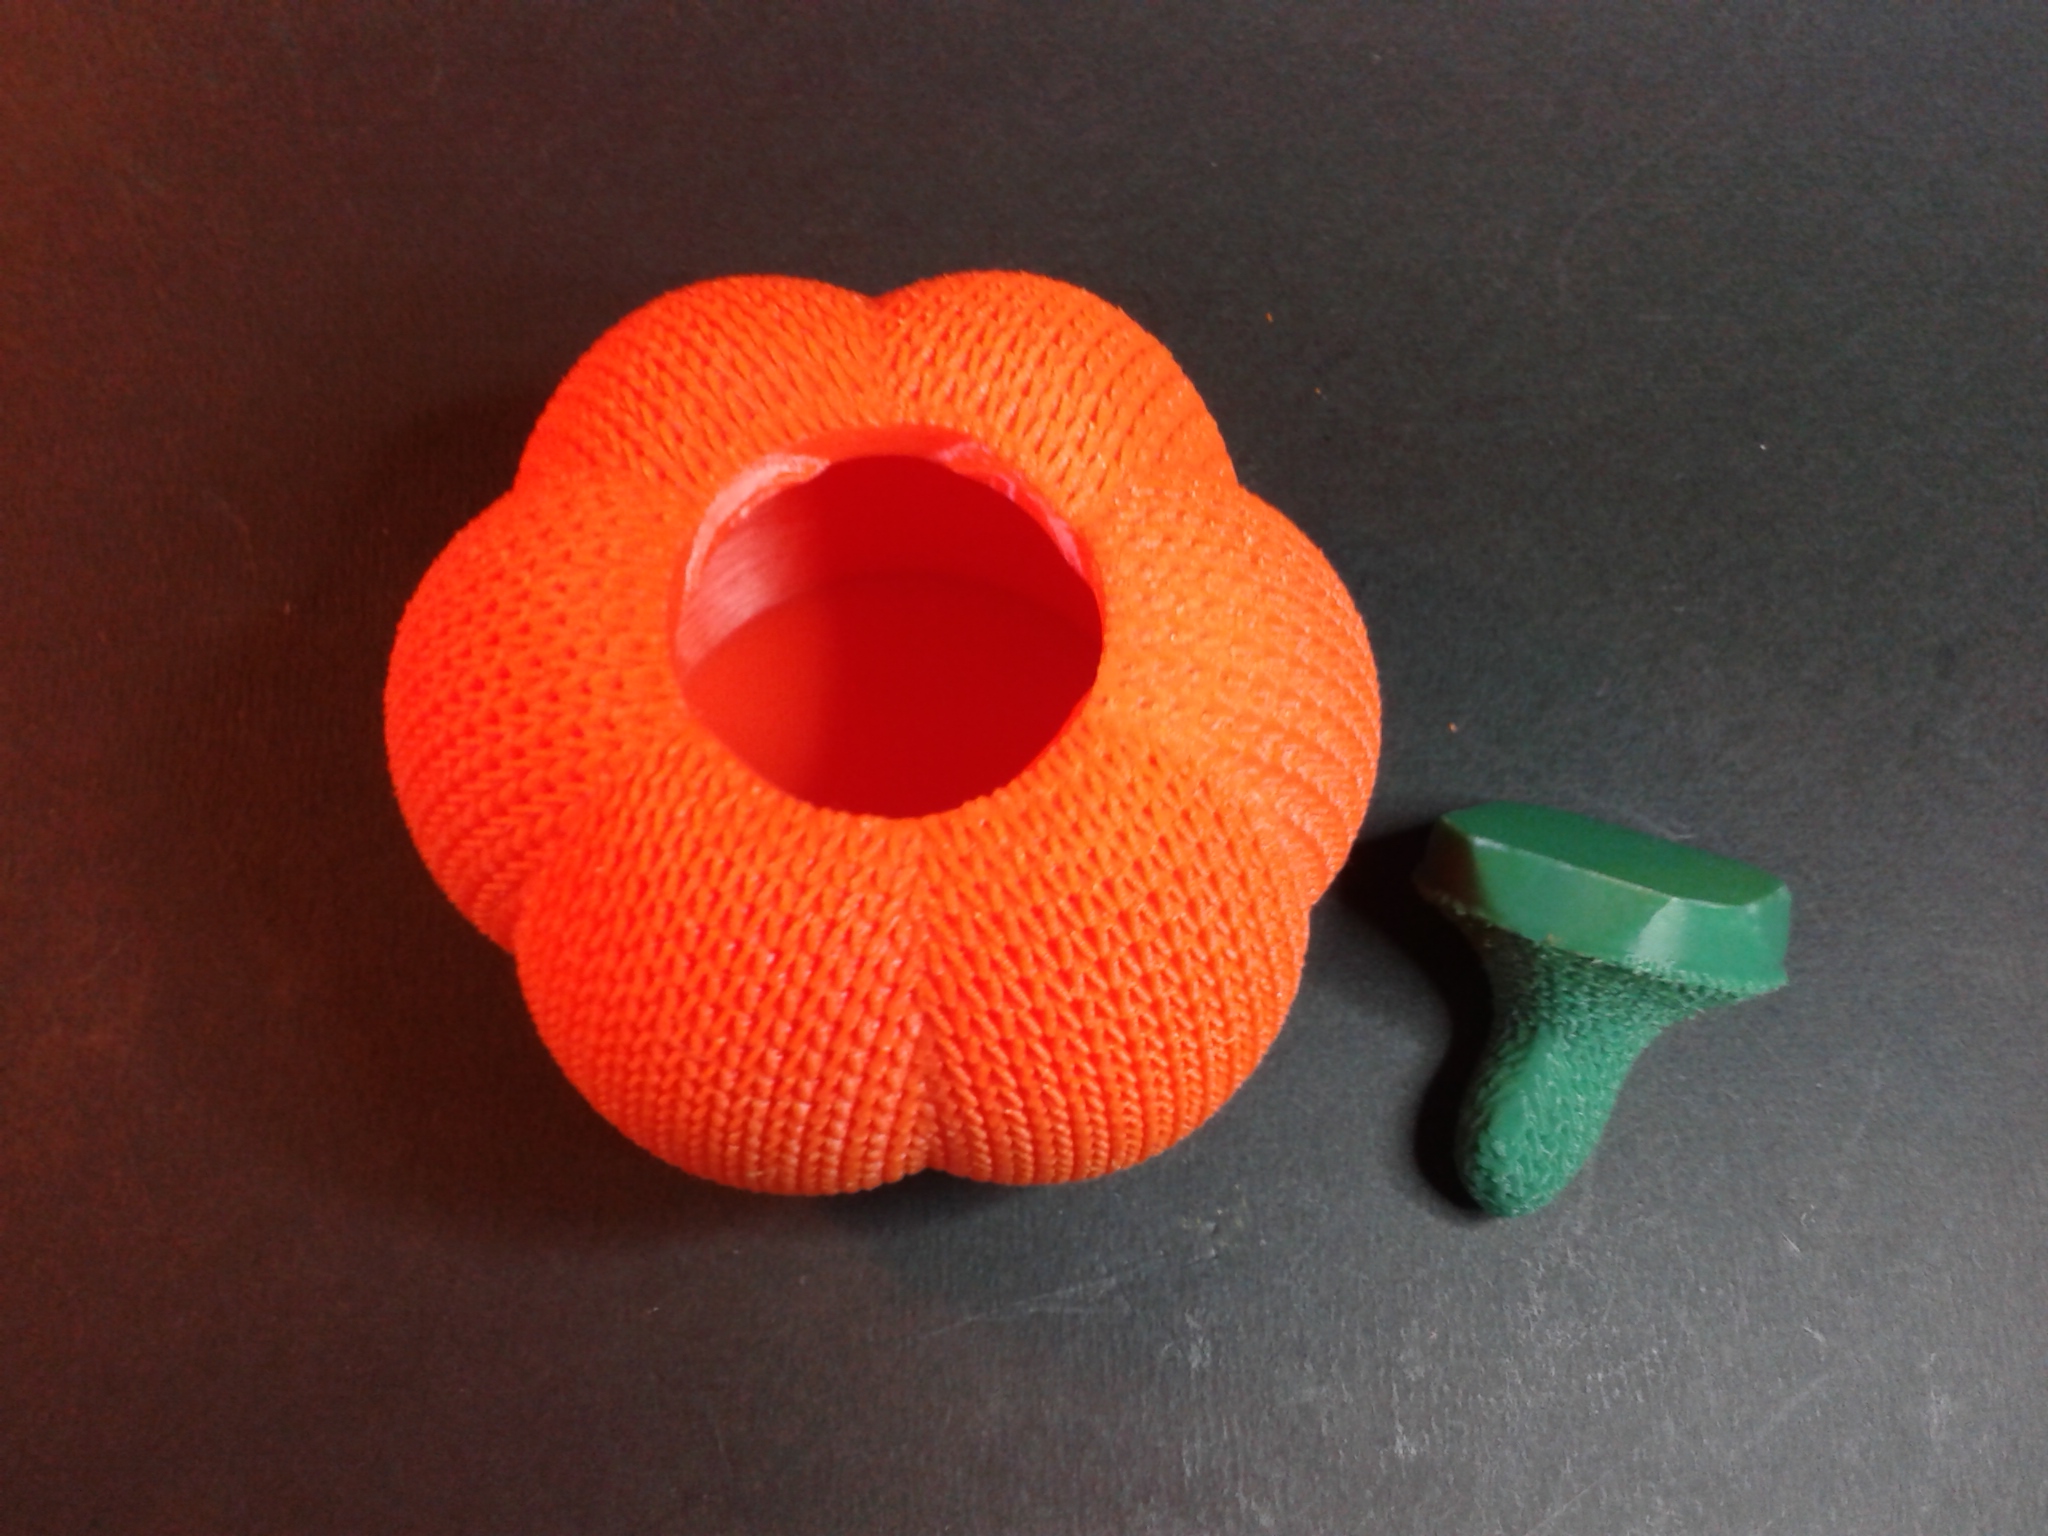
Citrouille
“Knitted Pumpkin” (la version “no face”) de “IK3D” (gratuit avec Creality Cloud Premium).
En deux plateaux pour une durée total de 10h15.
Filaments : PLA Pine Green Velleman, PLA orange Eryone.

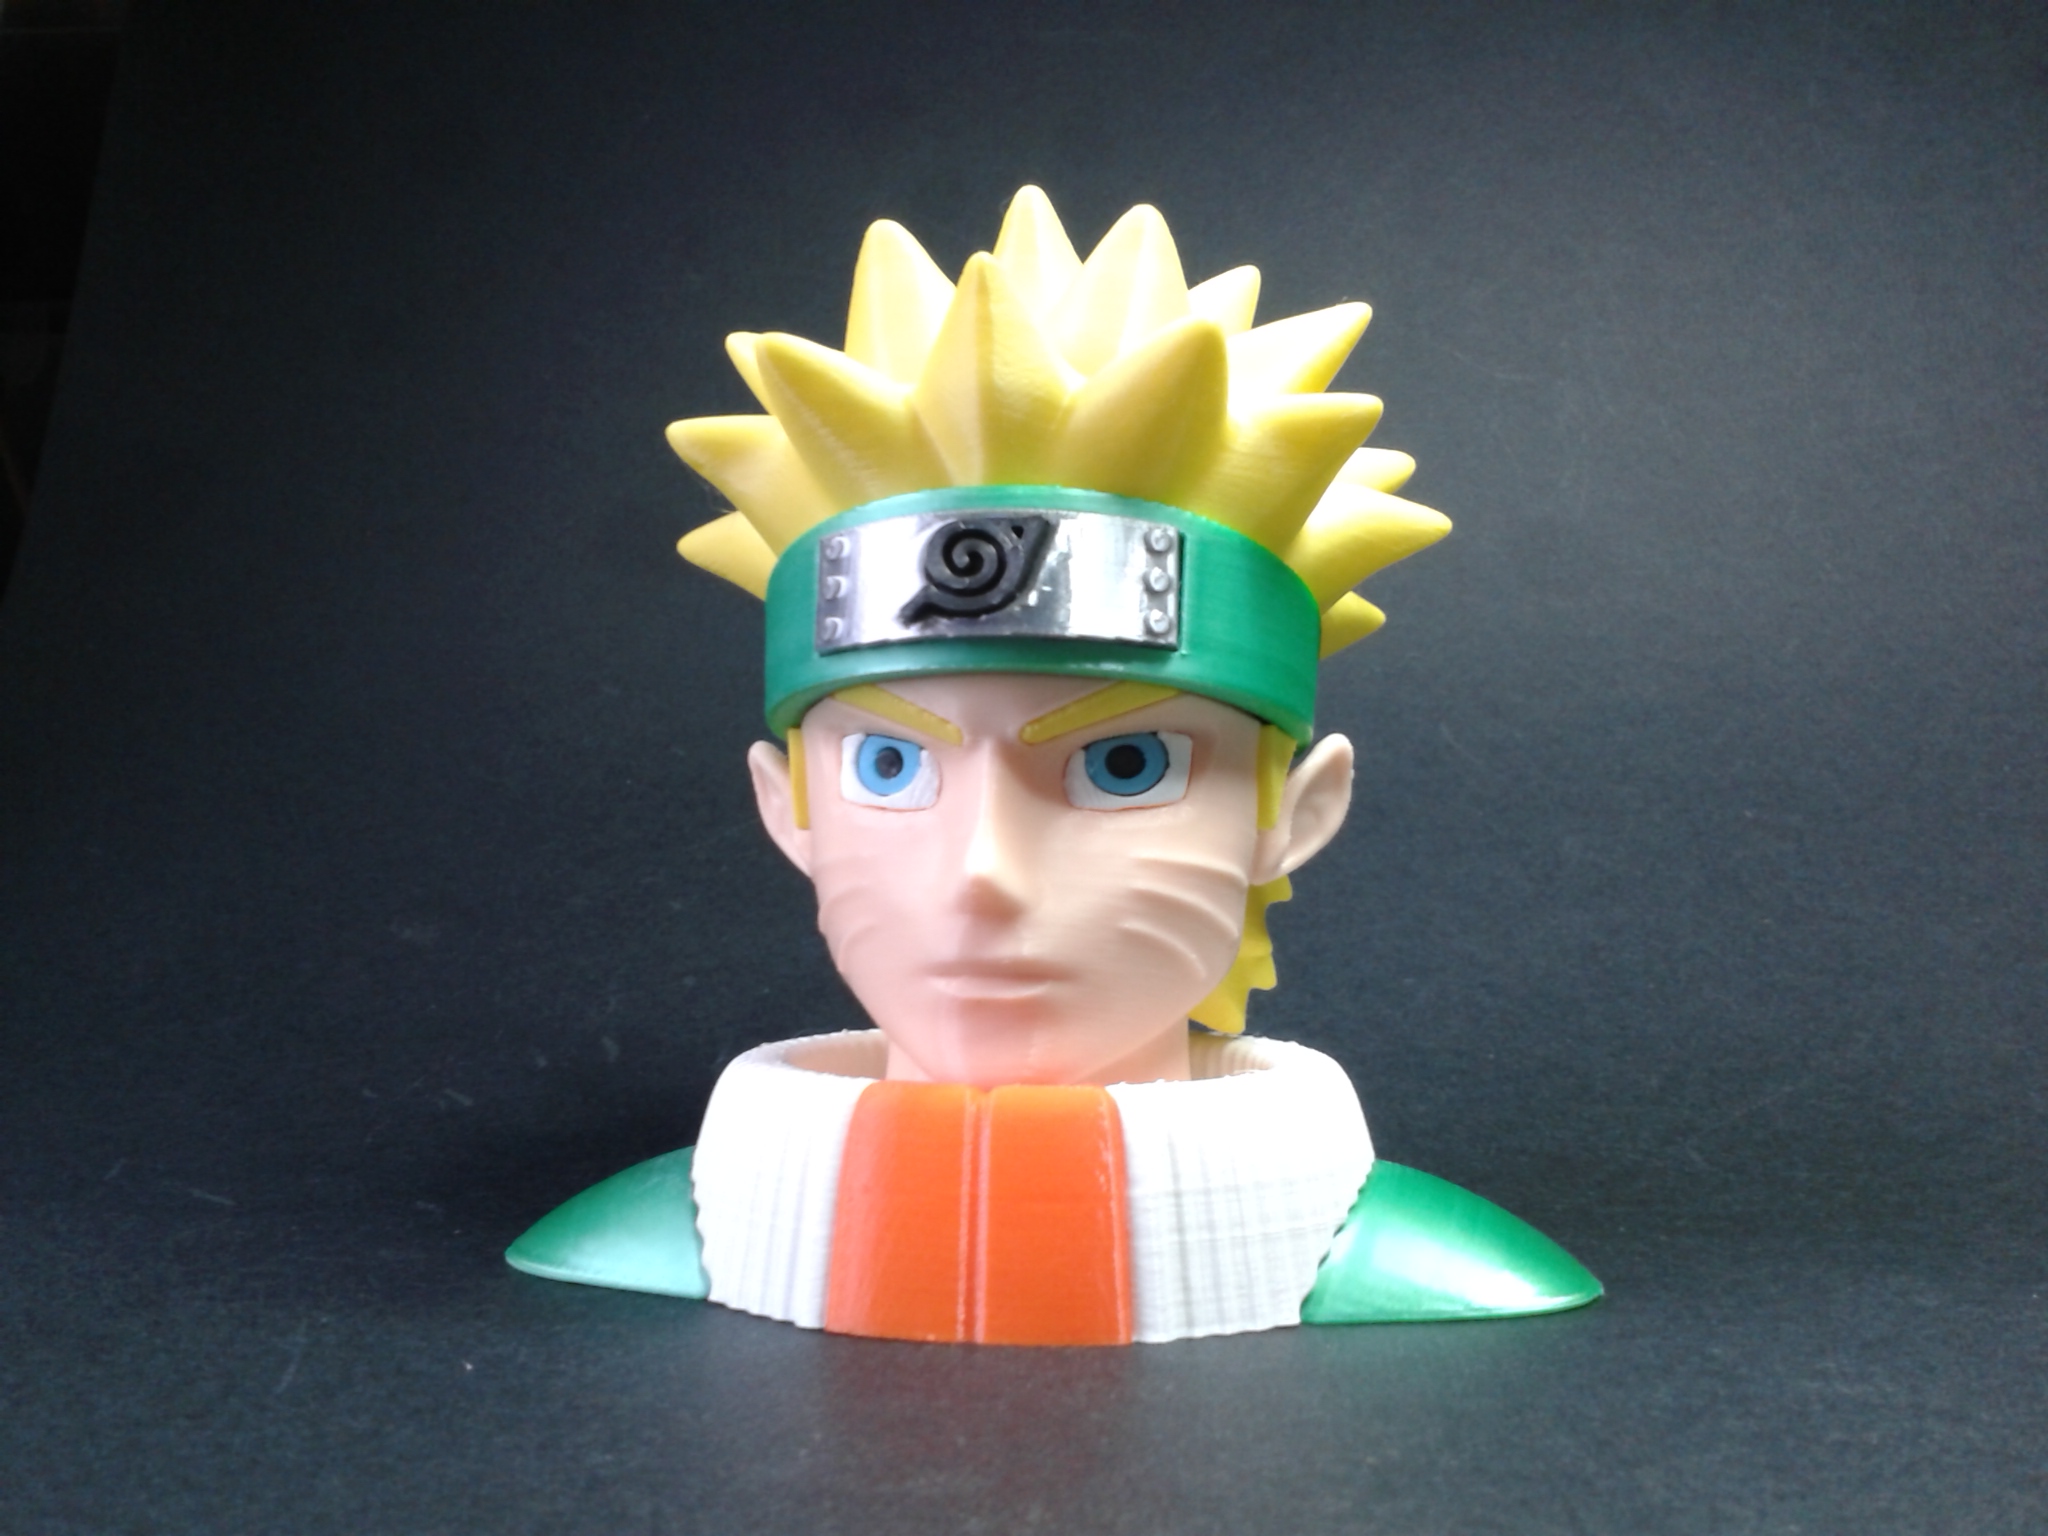
Naruto
“Naruto by colors” de “Aslan3D” (payant mais gratuit si abonné Premium Creality Cloud).
En huit plateaux, pour un total d’environ 6 h 46 min d’impression.
Filaments : PLA Yellow Polymaker, PLA Silk vert ArianePlast, PLA light blue Velleman, PLA Skin color Velleman, PLA Silk gris ArianePlast, PLA recyclé ArianePlast, PLA orange Eryone, PLA+ blanc ArianePlast.


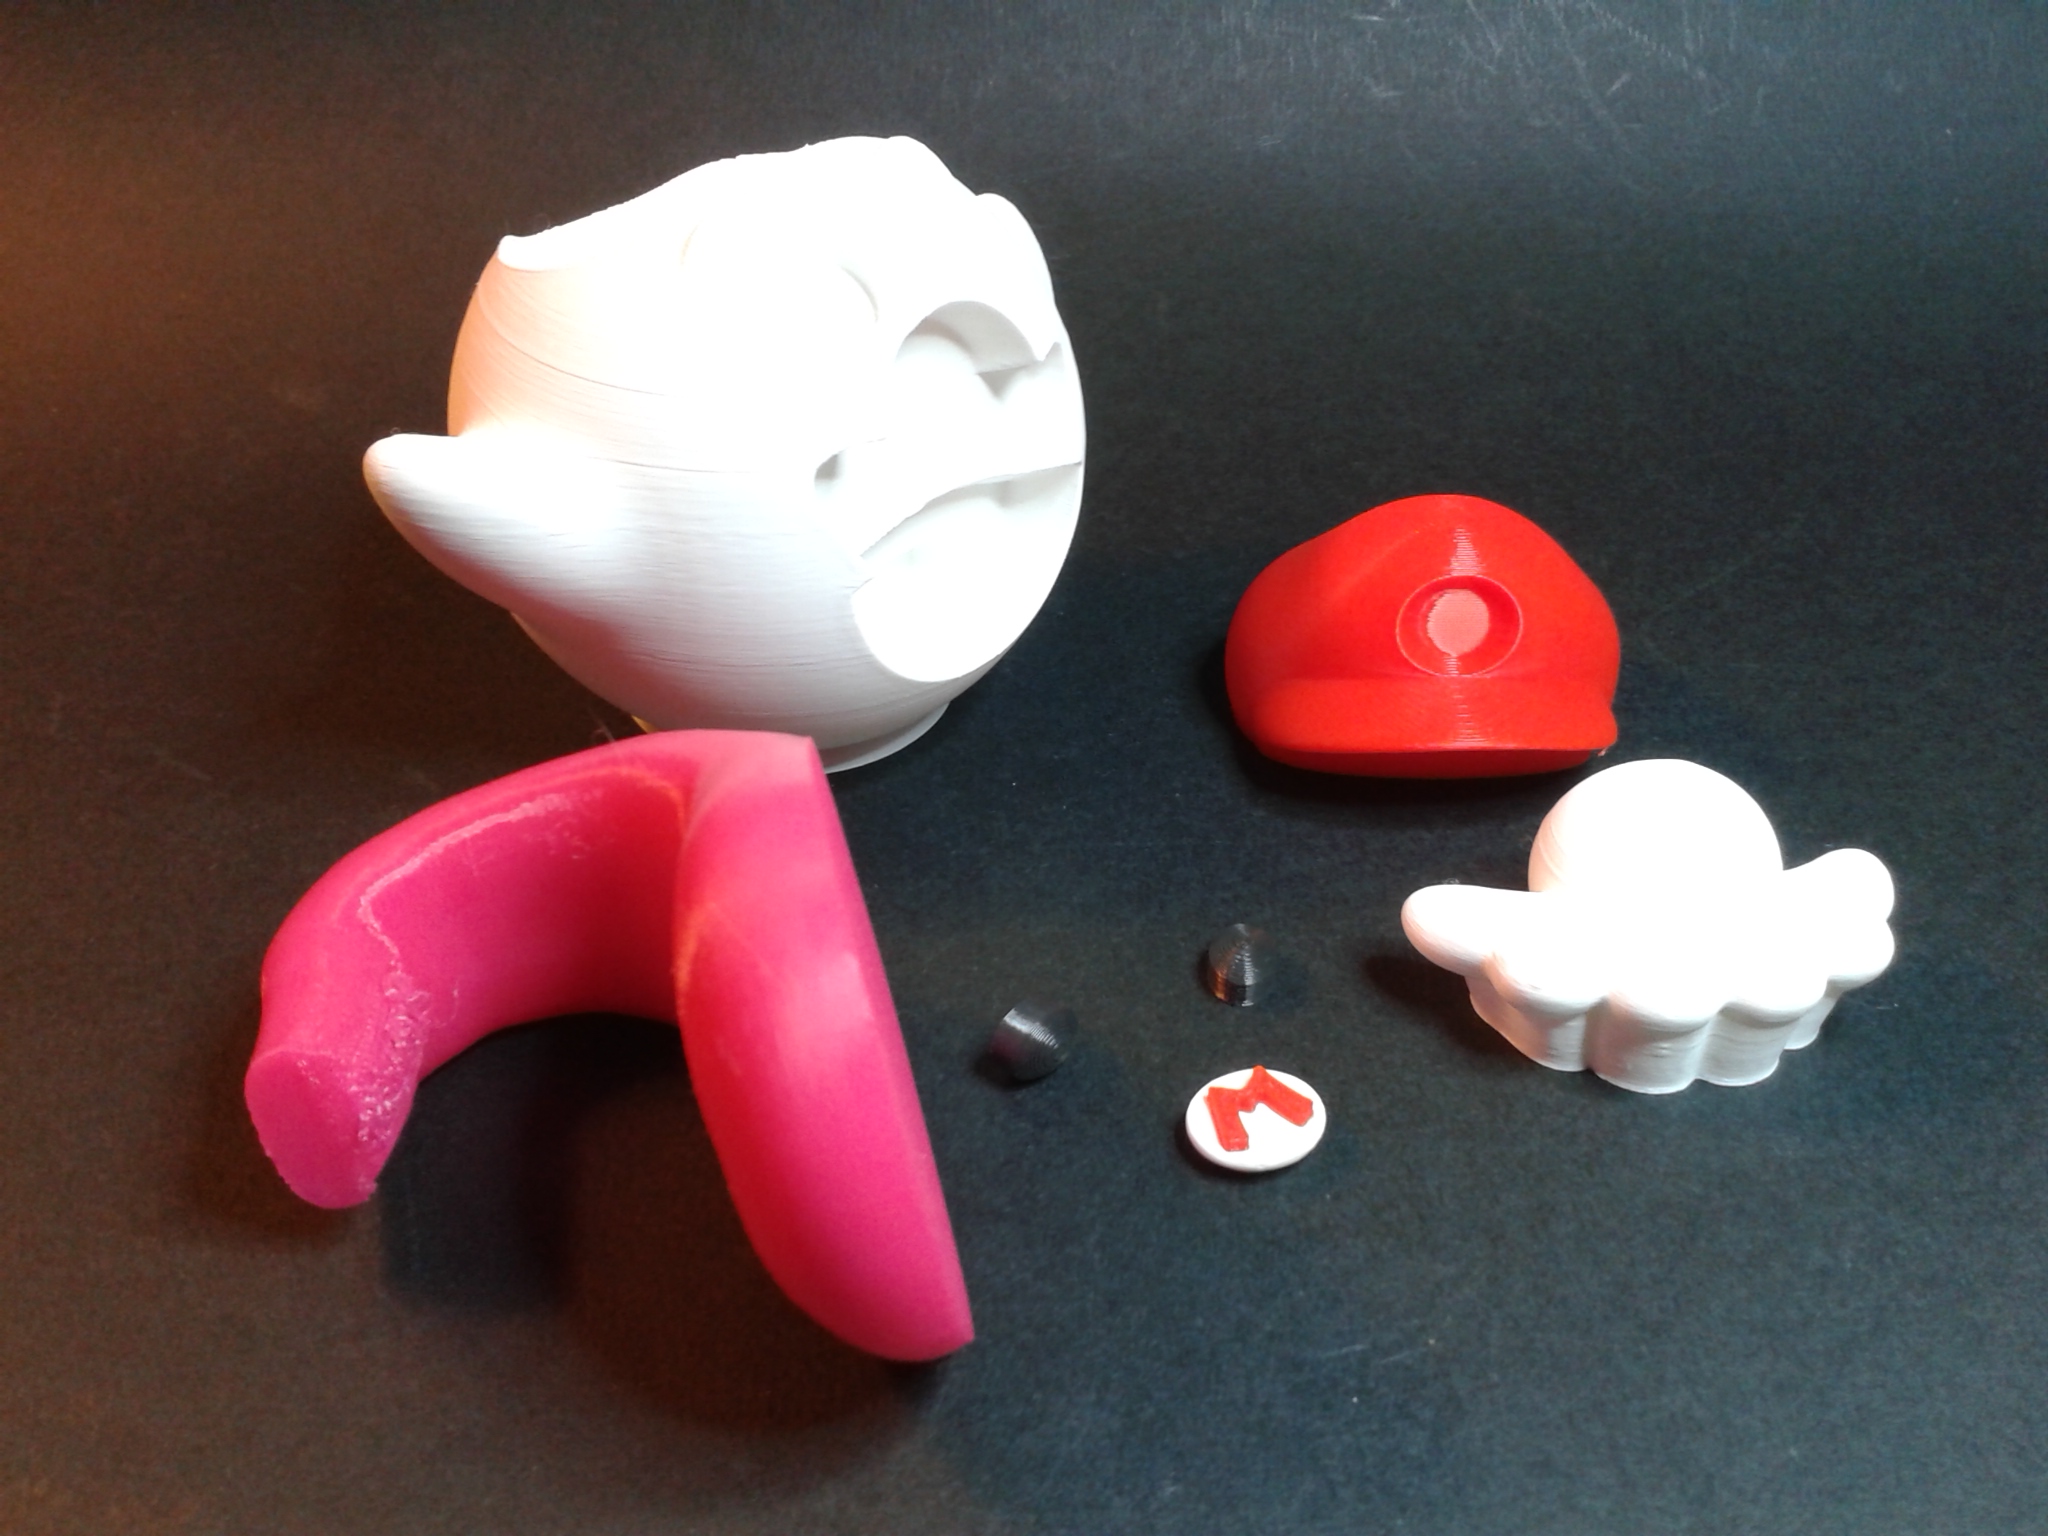
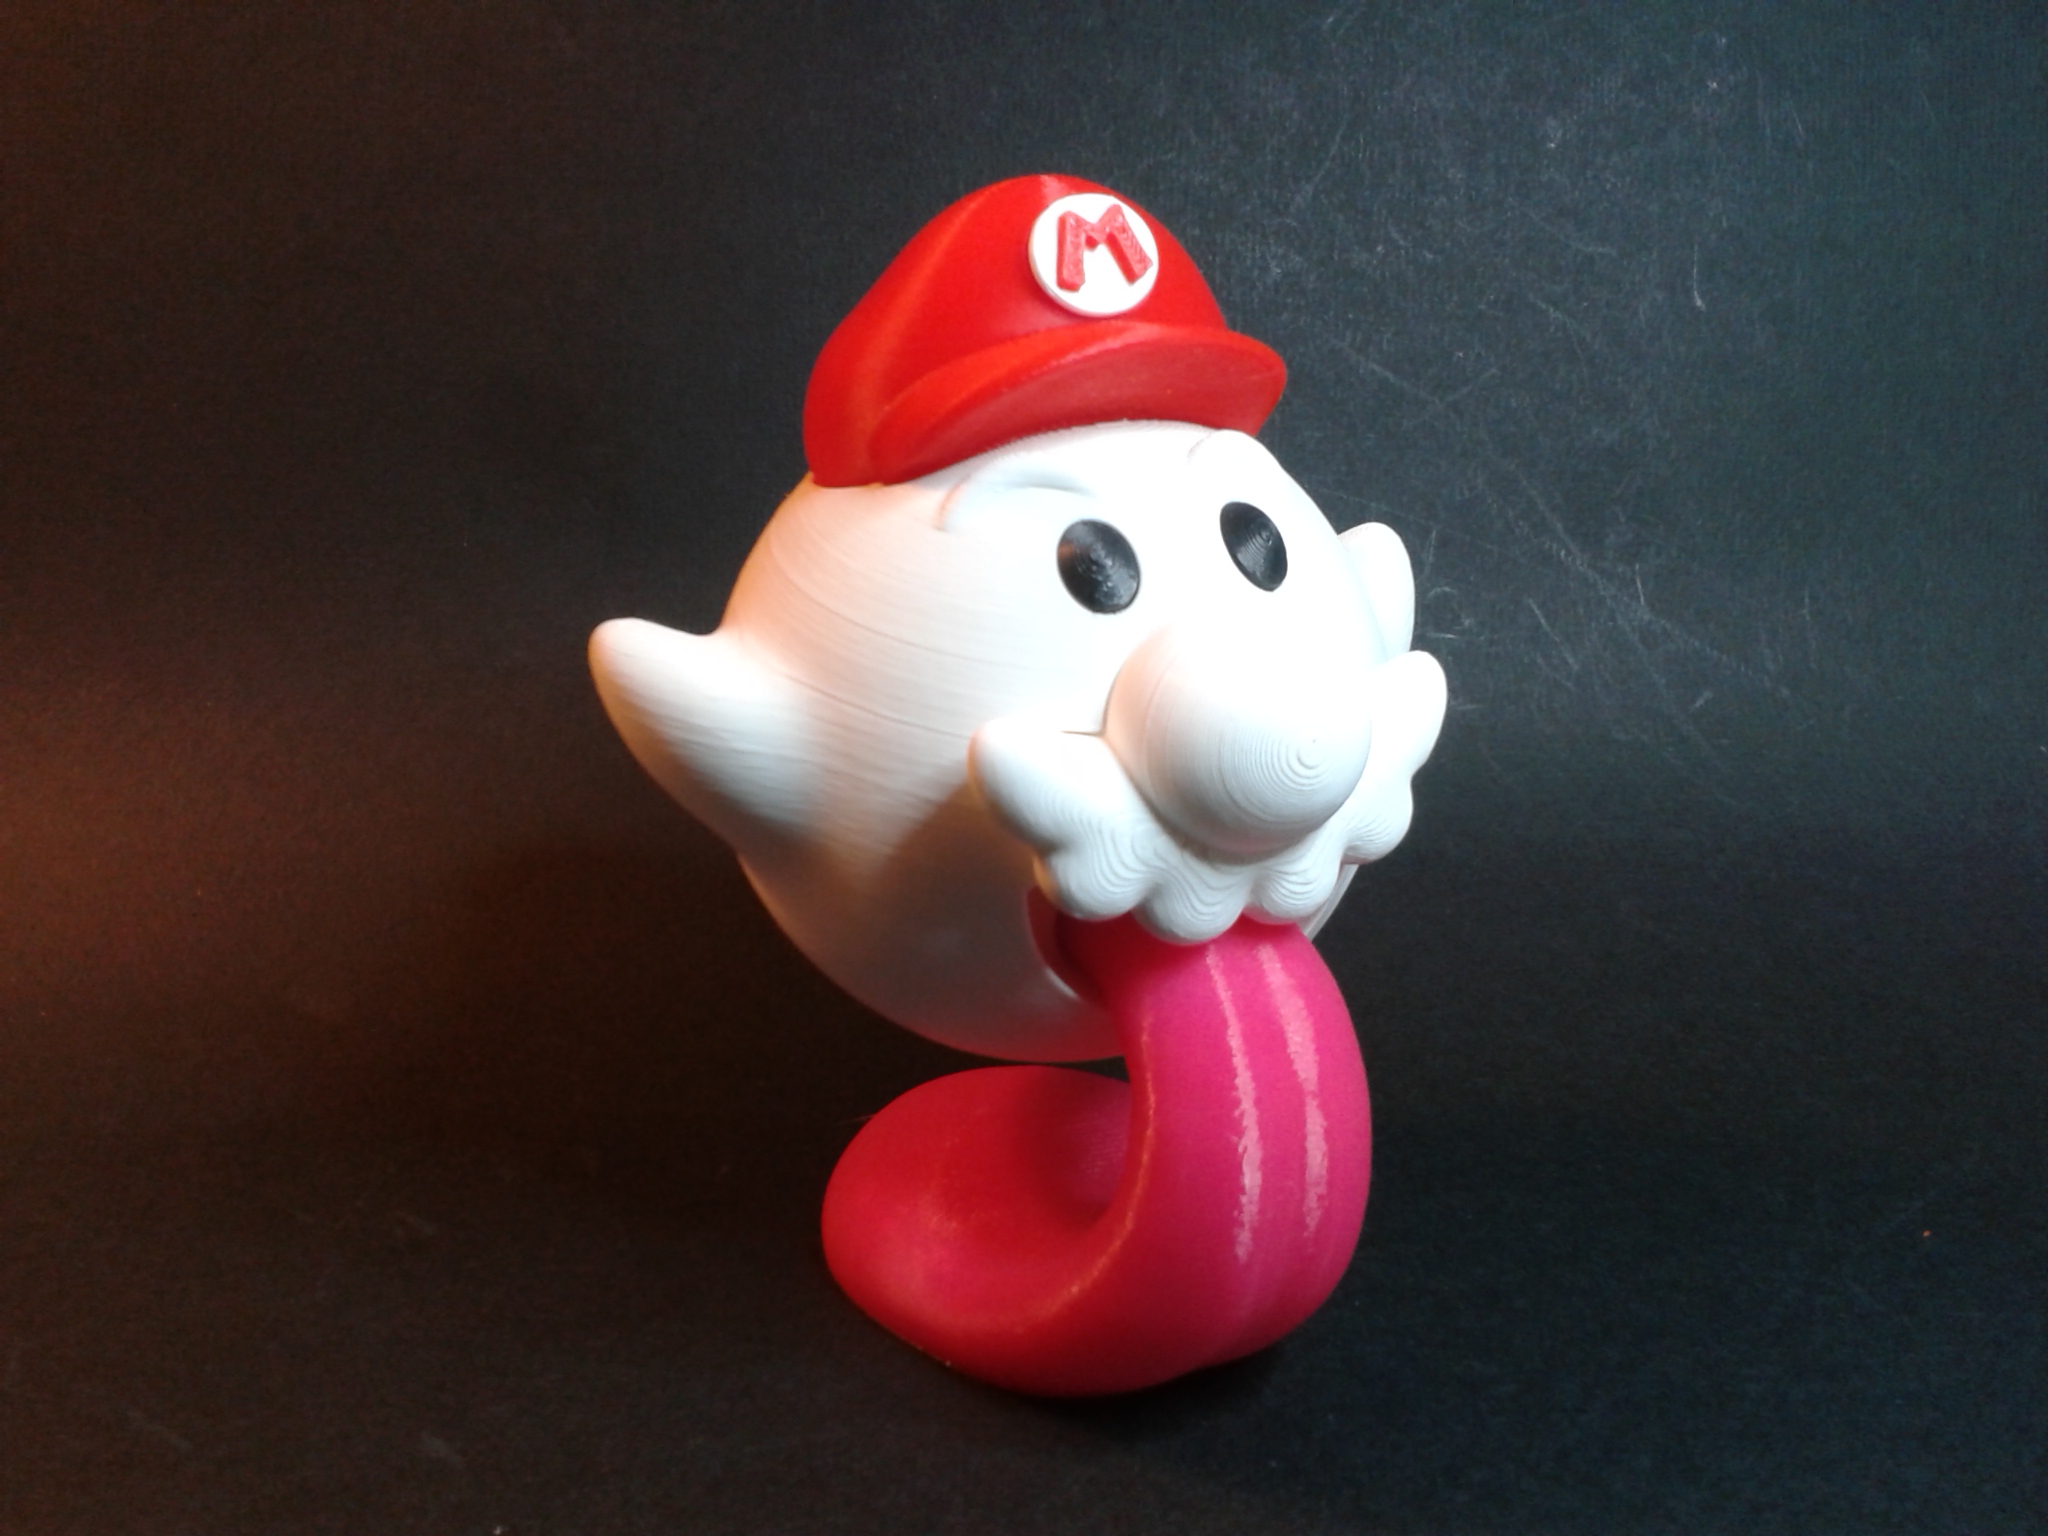
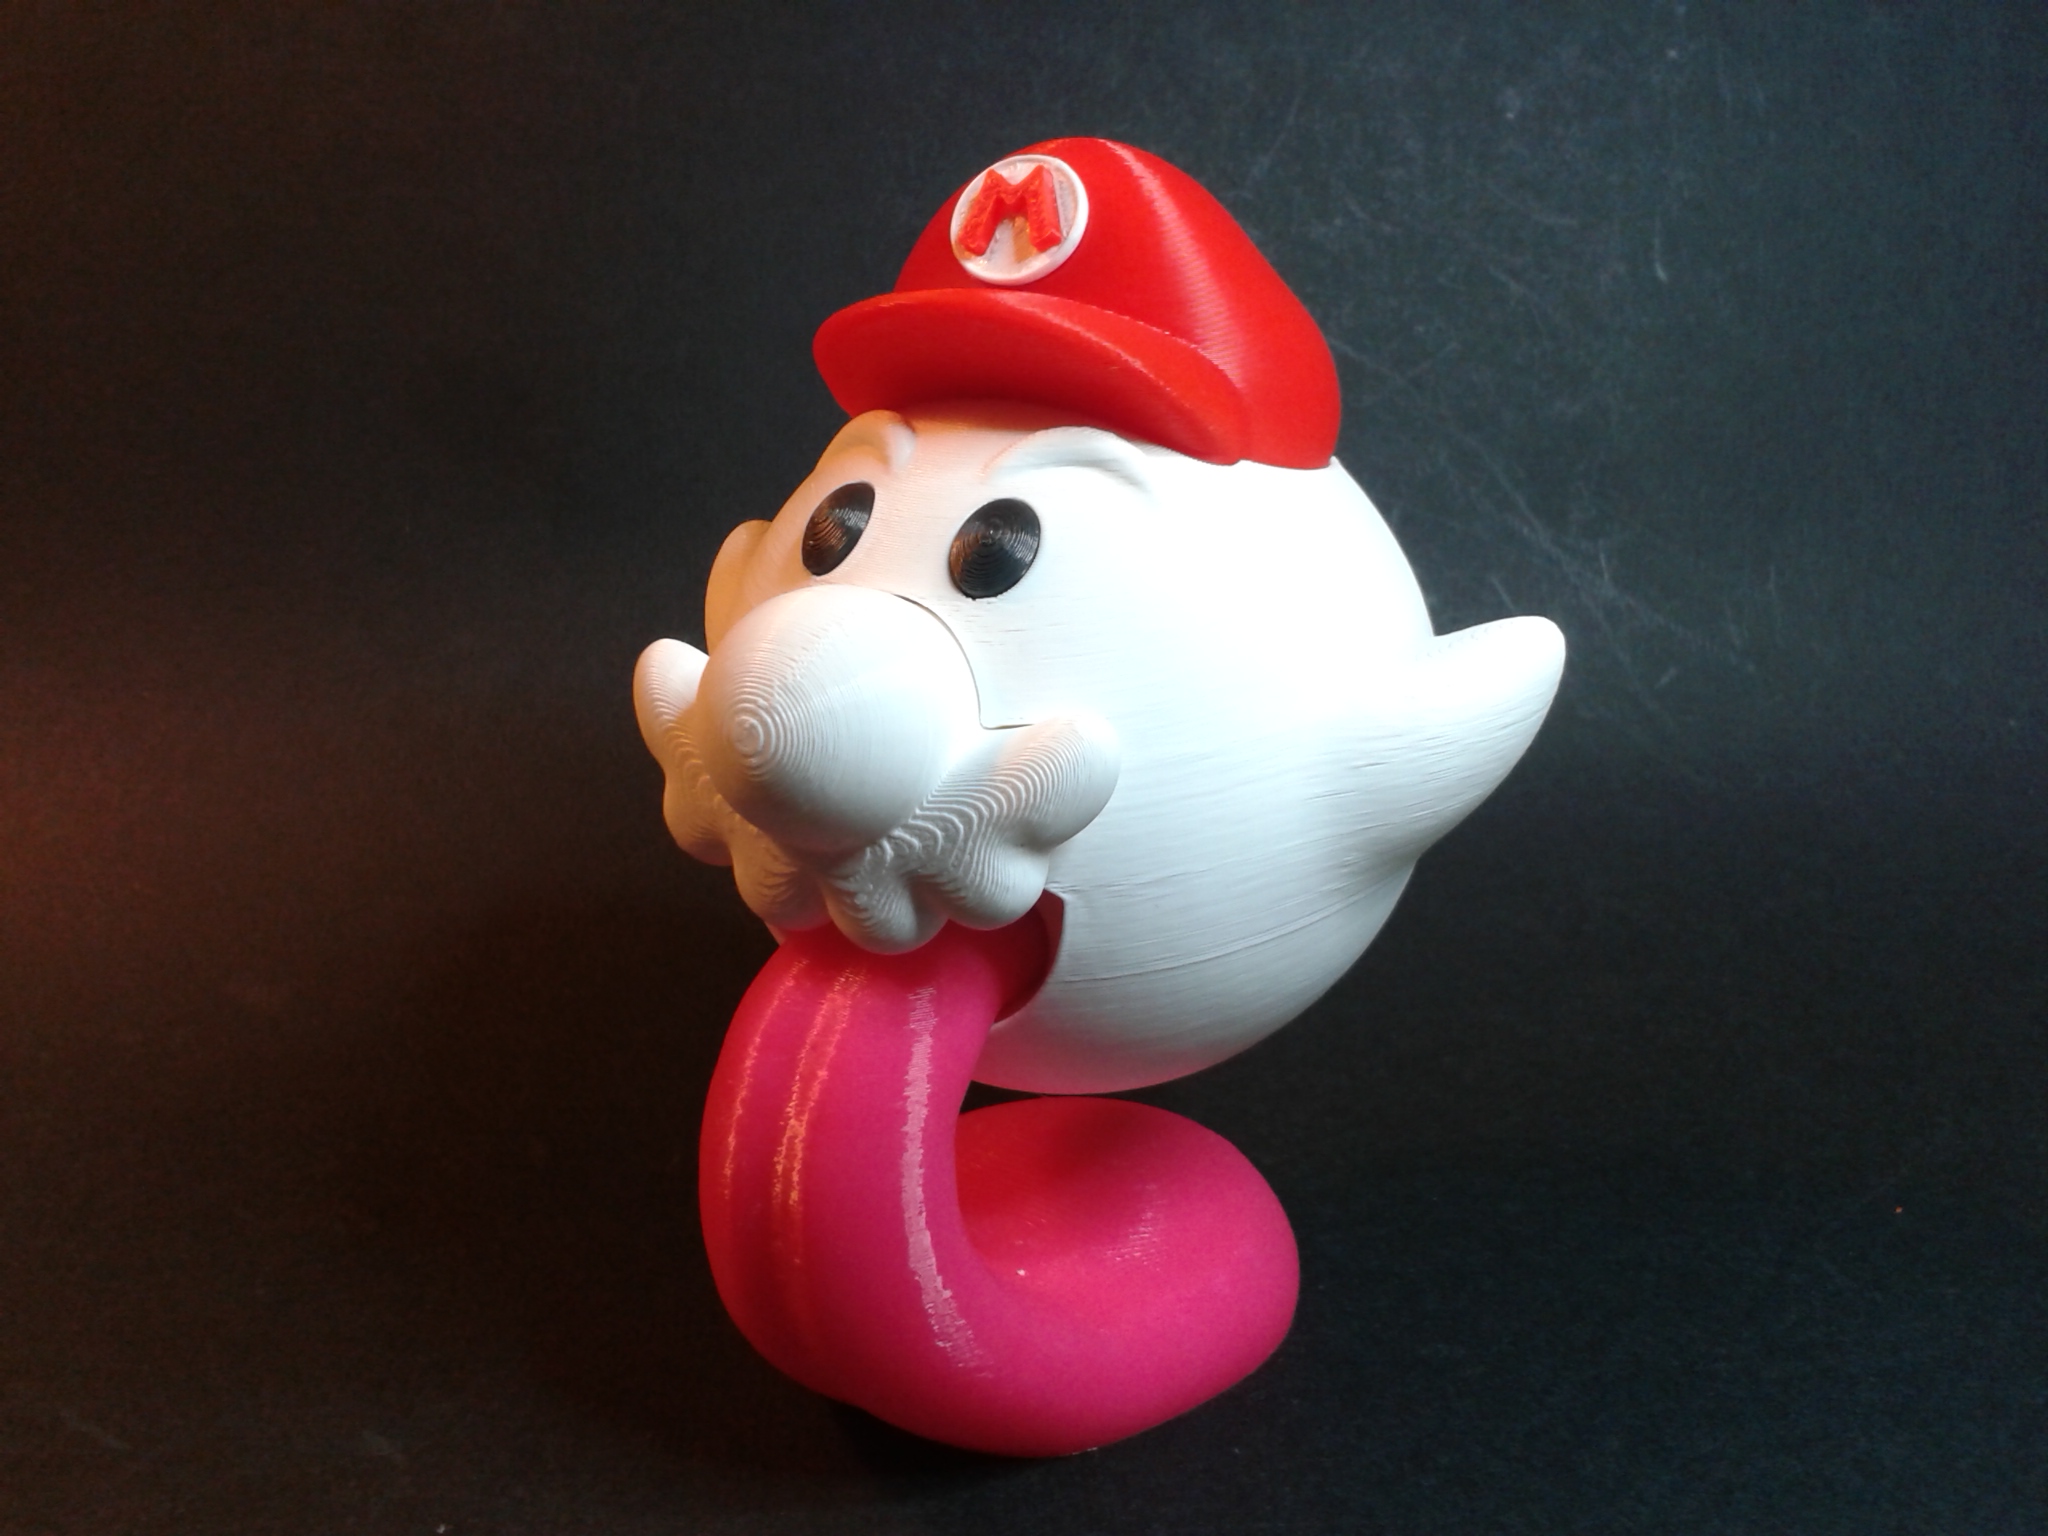
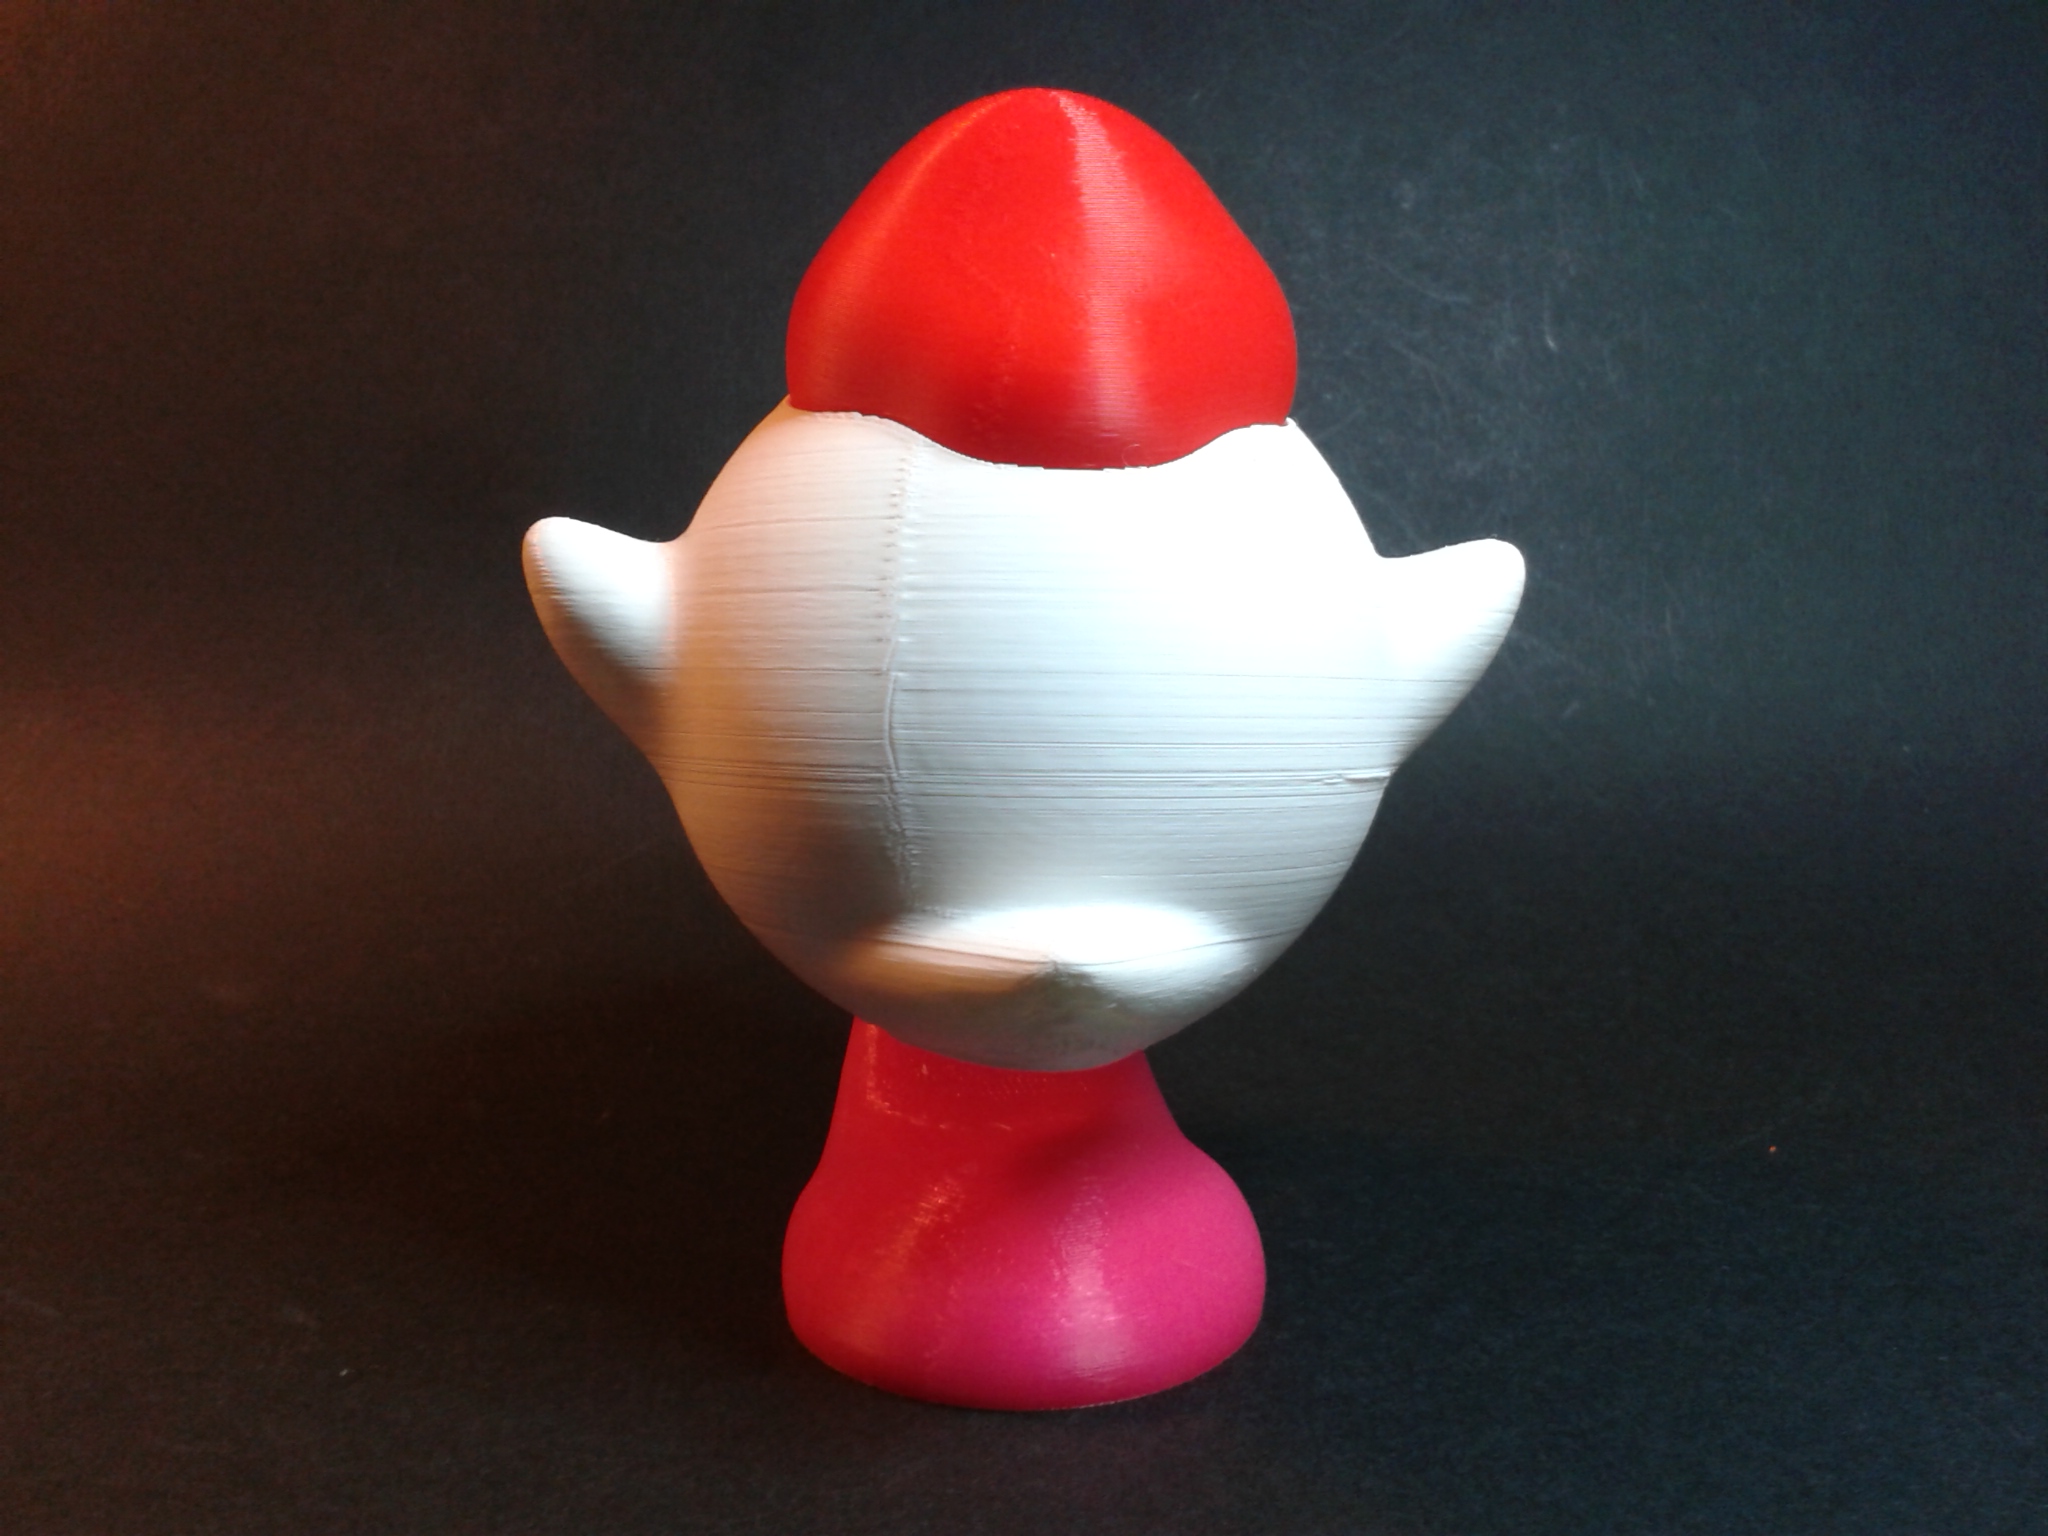
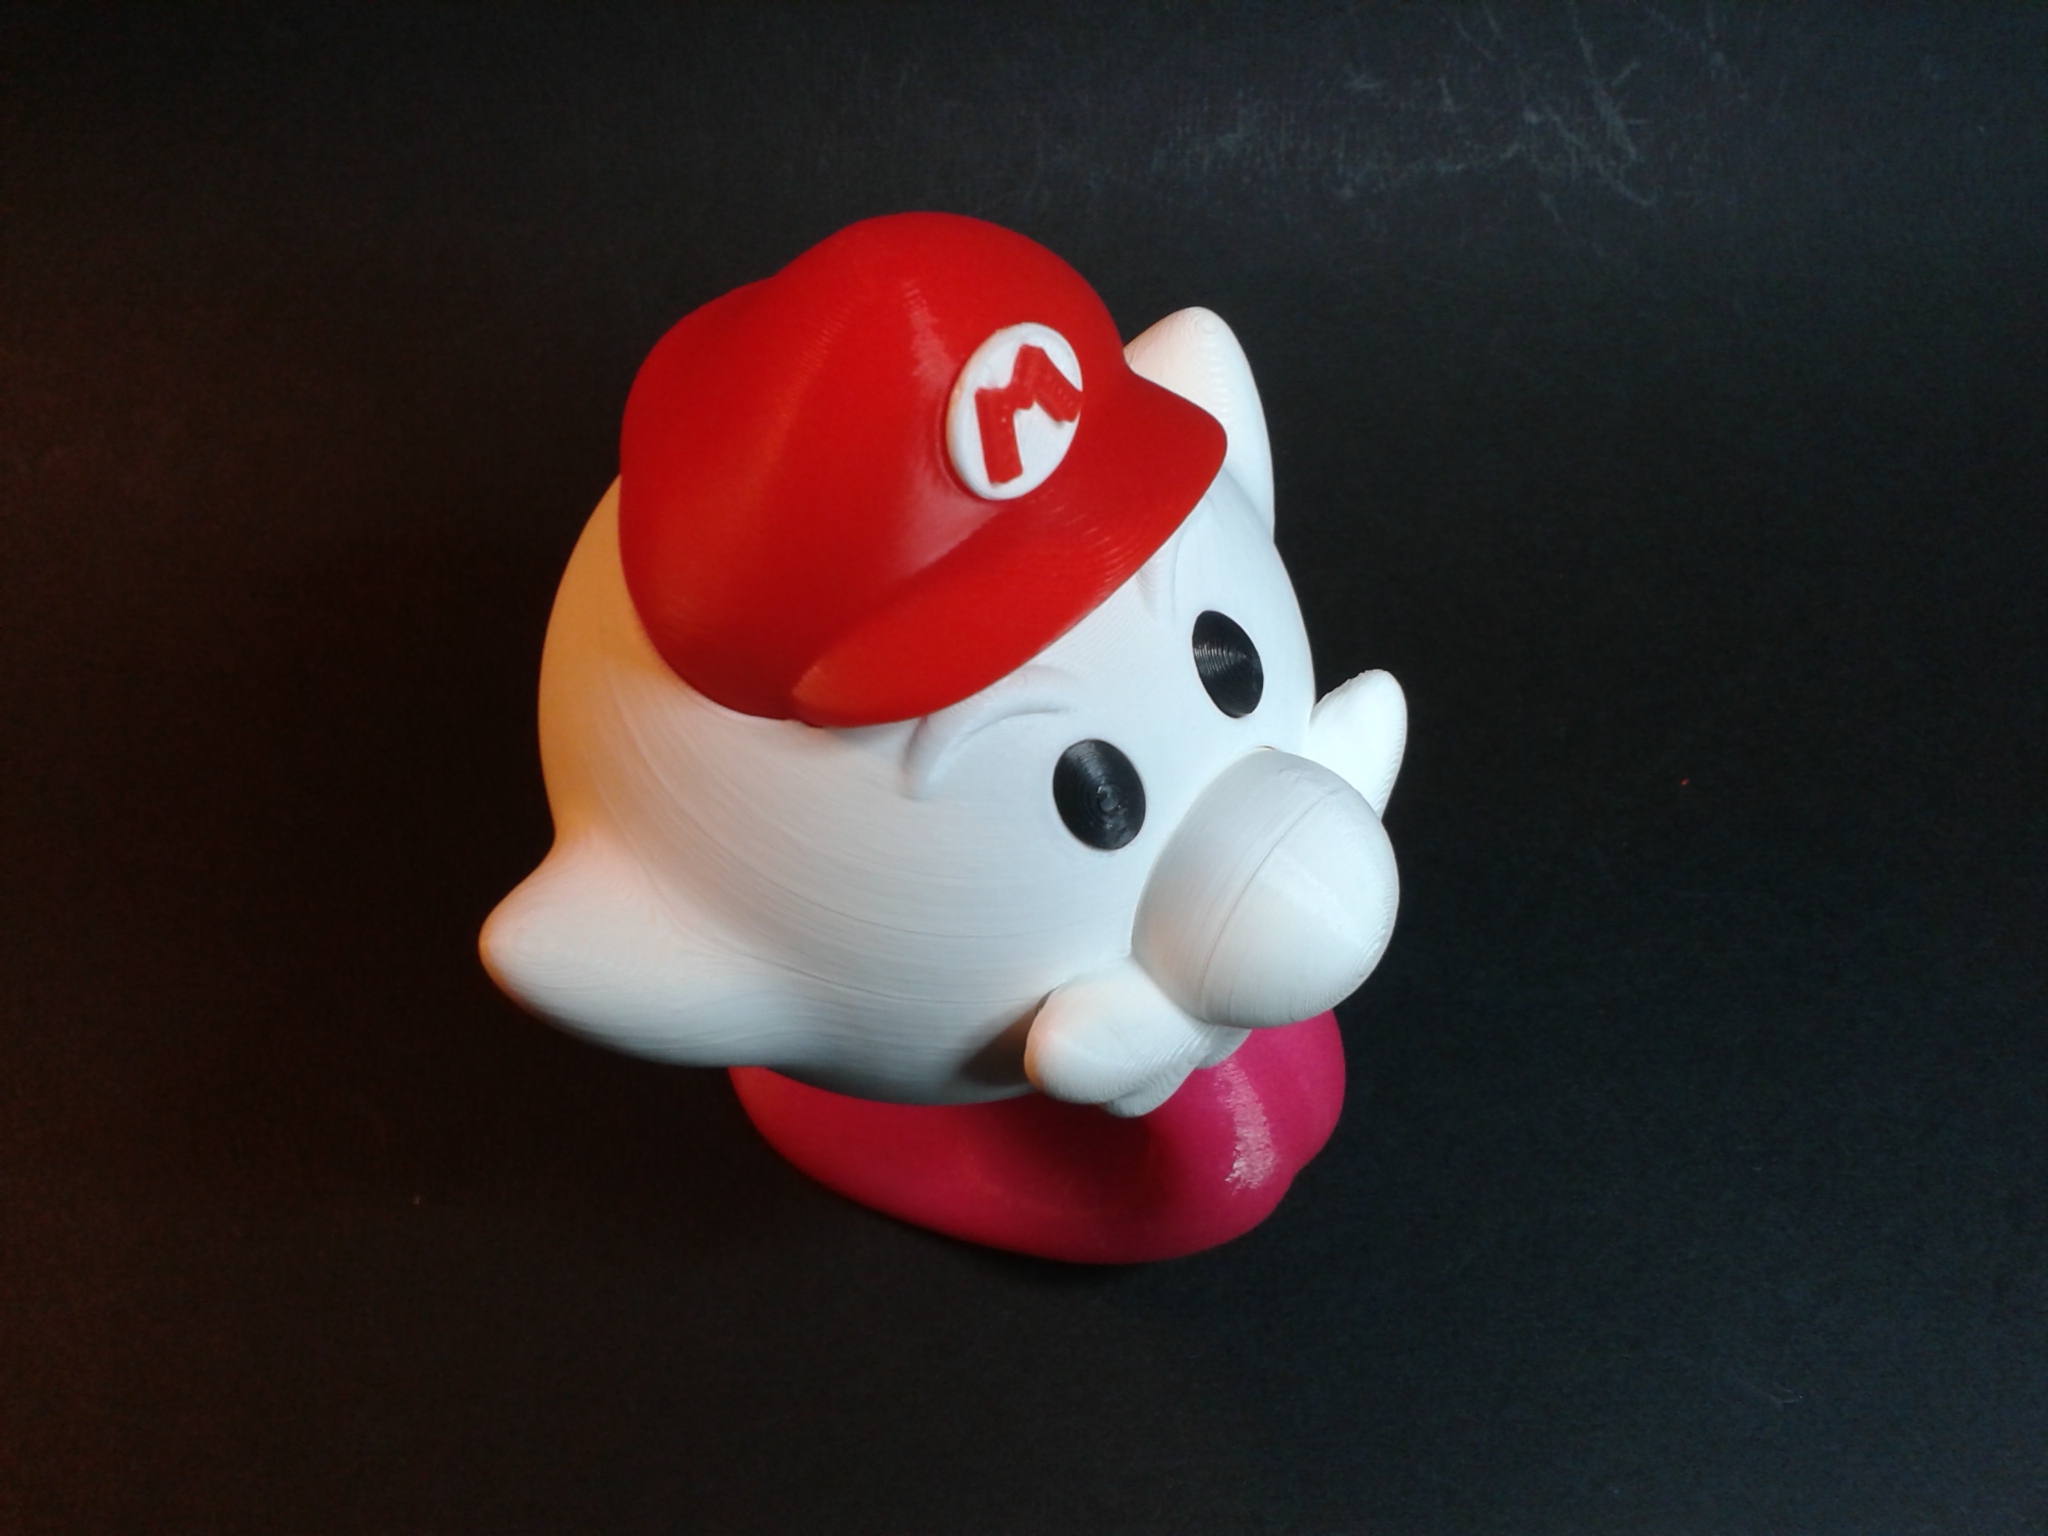
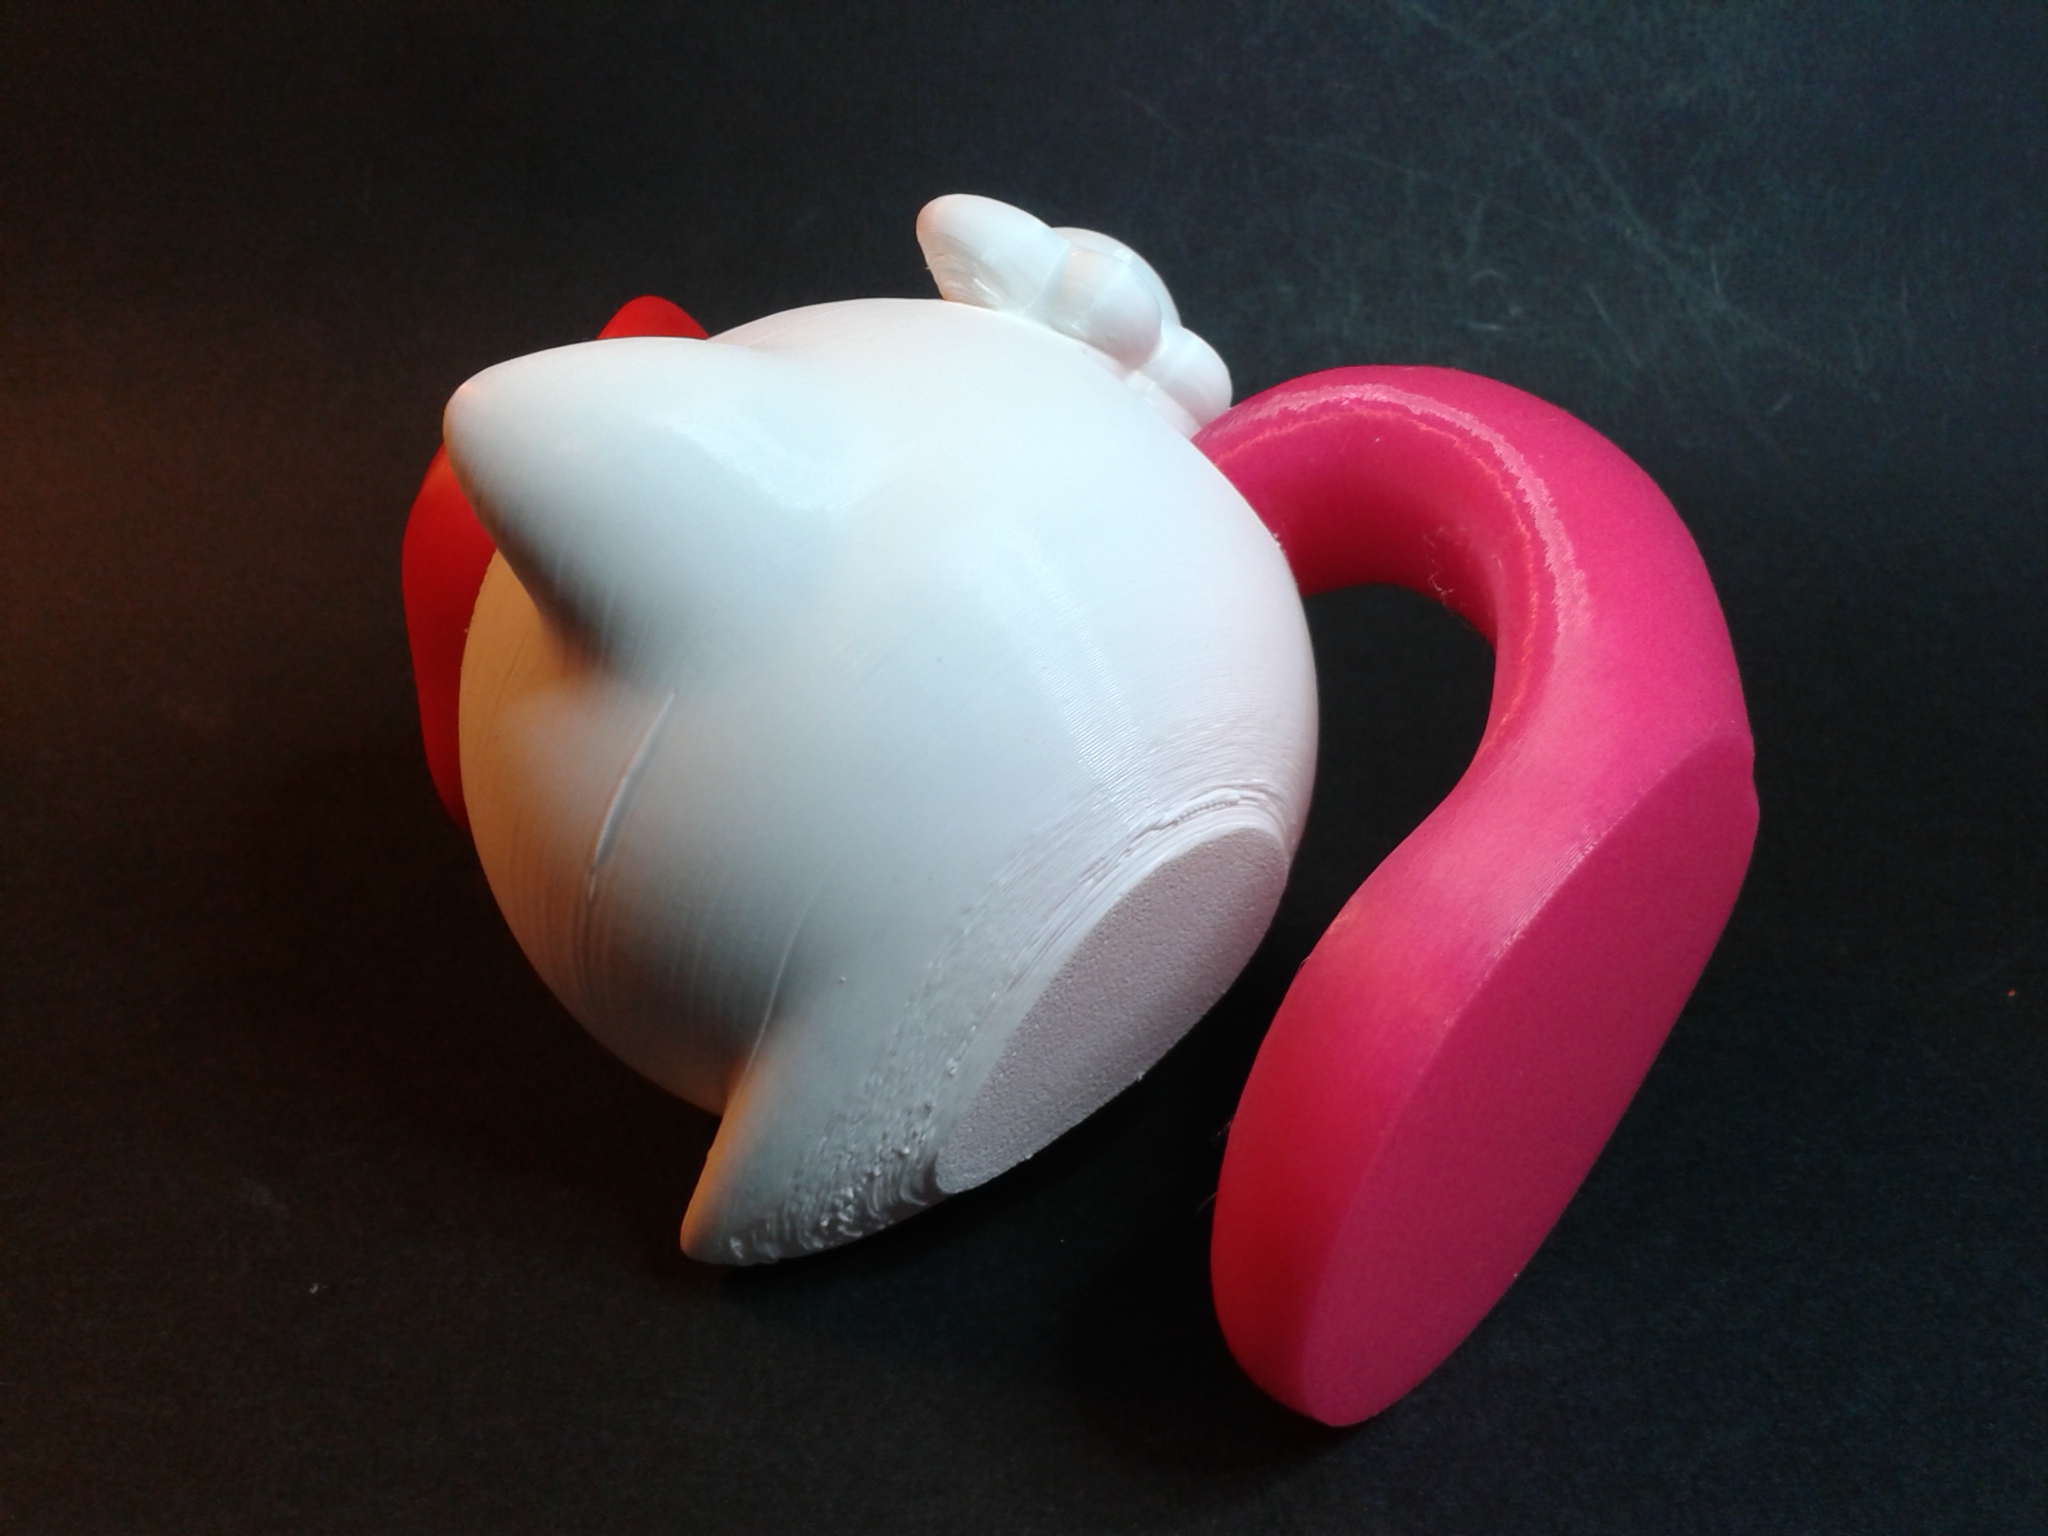
Fantôme Mario
“Mario Bros Ghost” de “Aslan3D” (un compte Creality Cloud Premium le rend gratuit).
En cinq plateaux pour 4h42 de travail.
Filaments : PLA+ blanc ArianePlast, PLA recyclé ArianePlast, PLA rouge Velleman, PLA magenta Velleman.
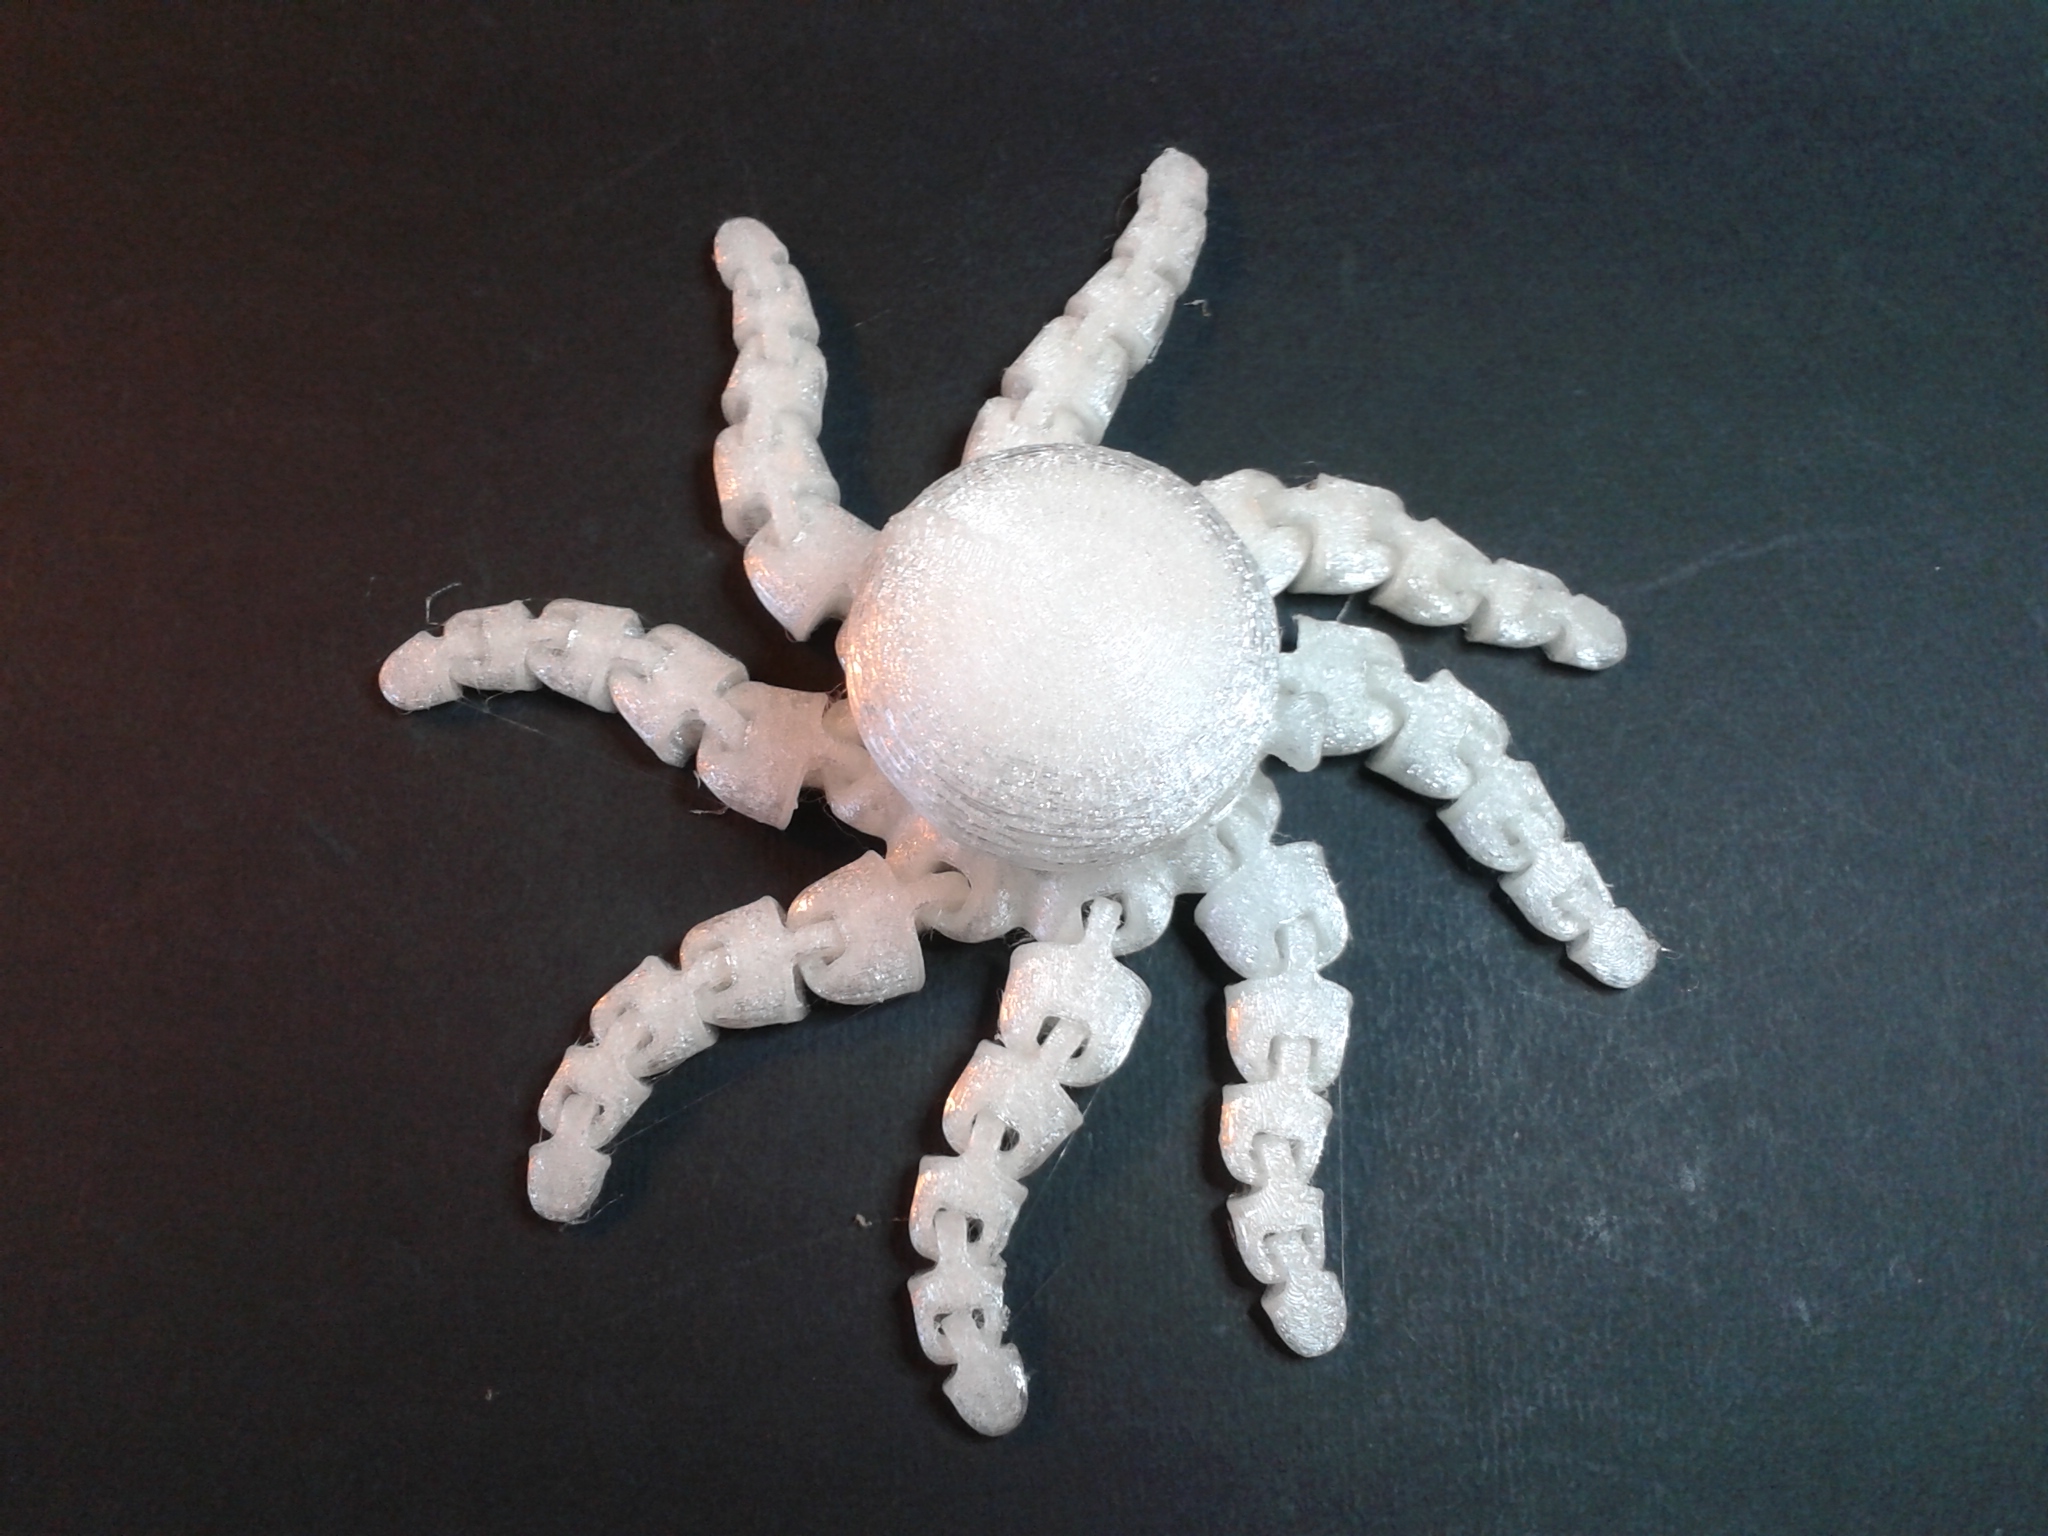
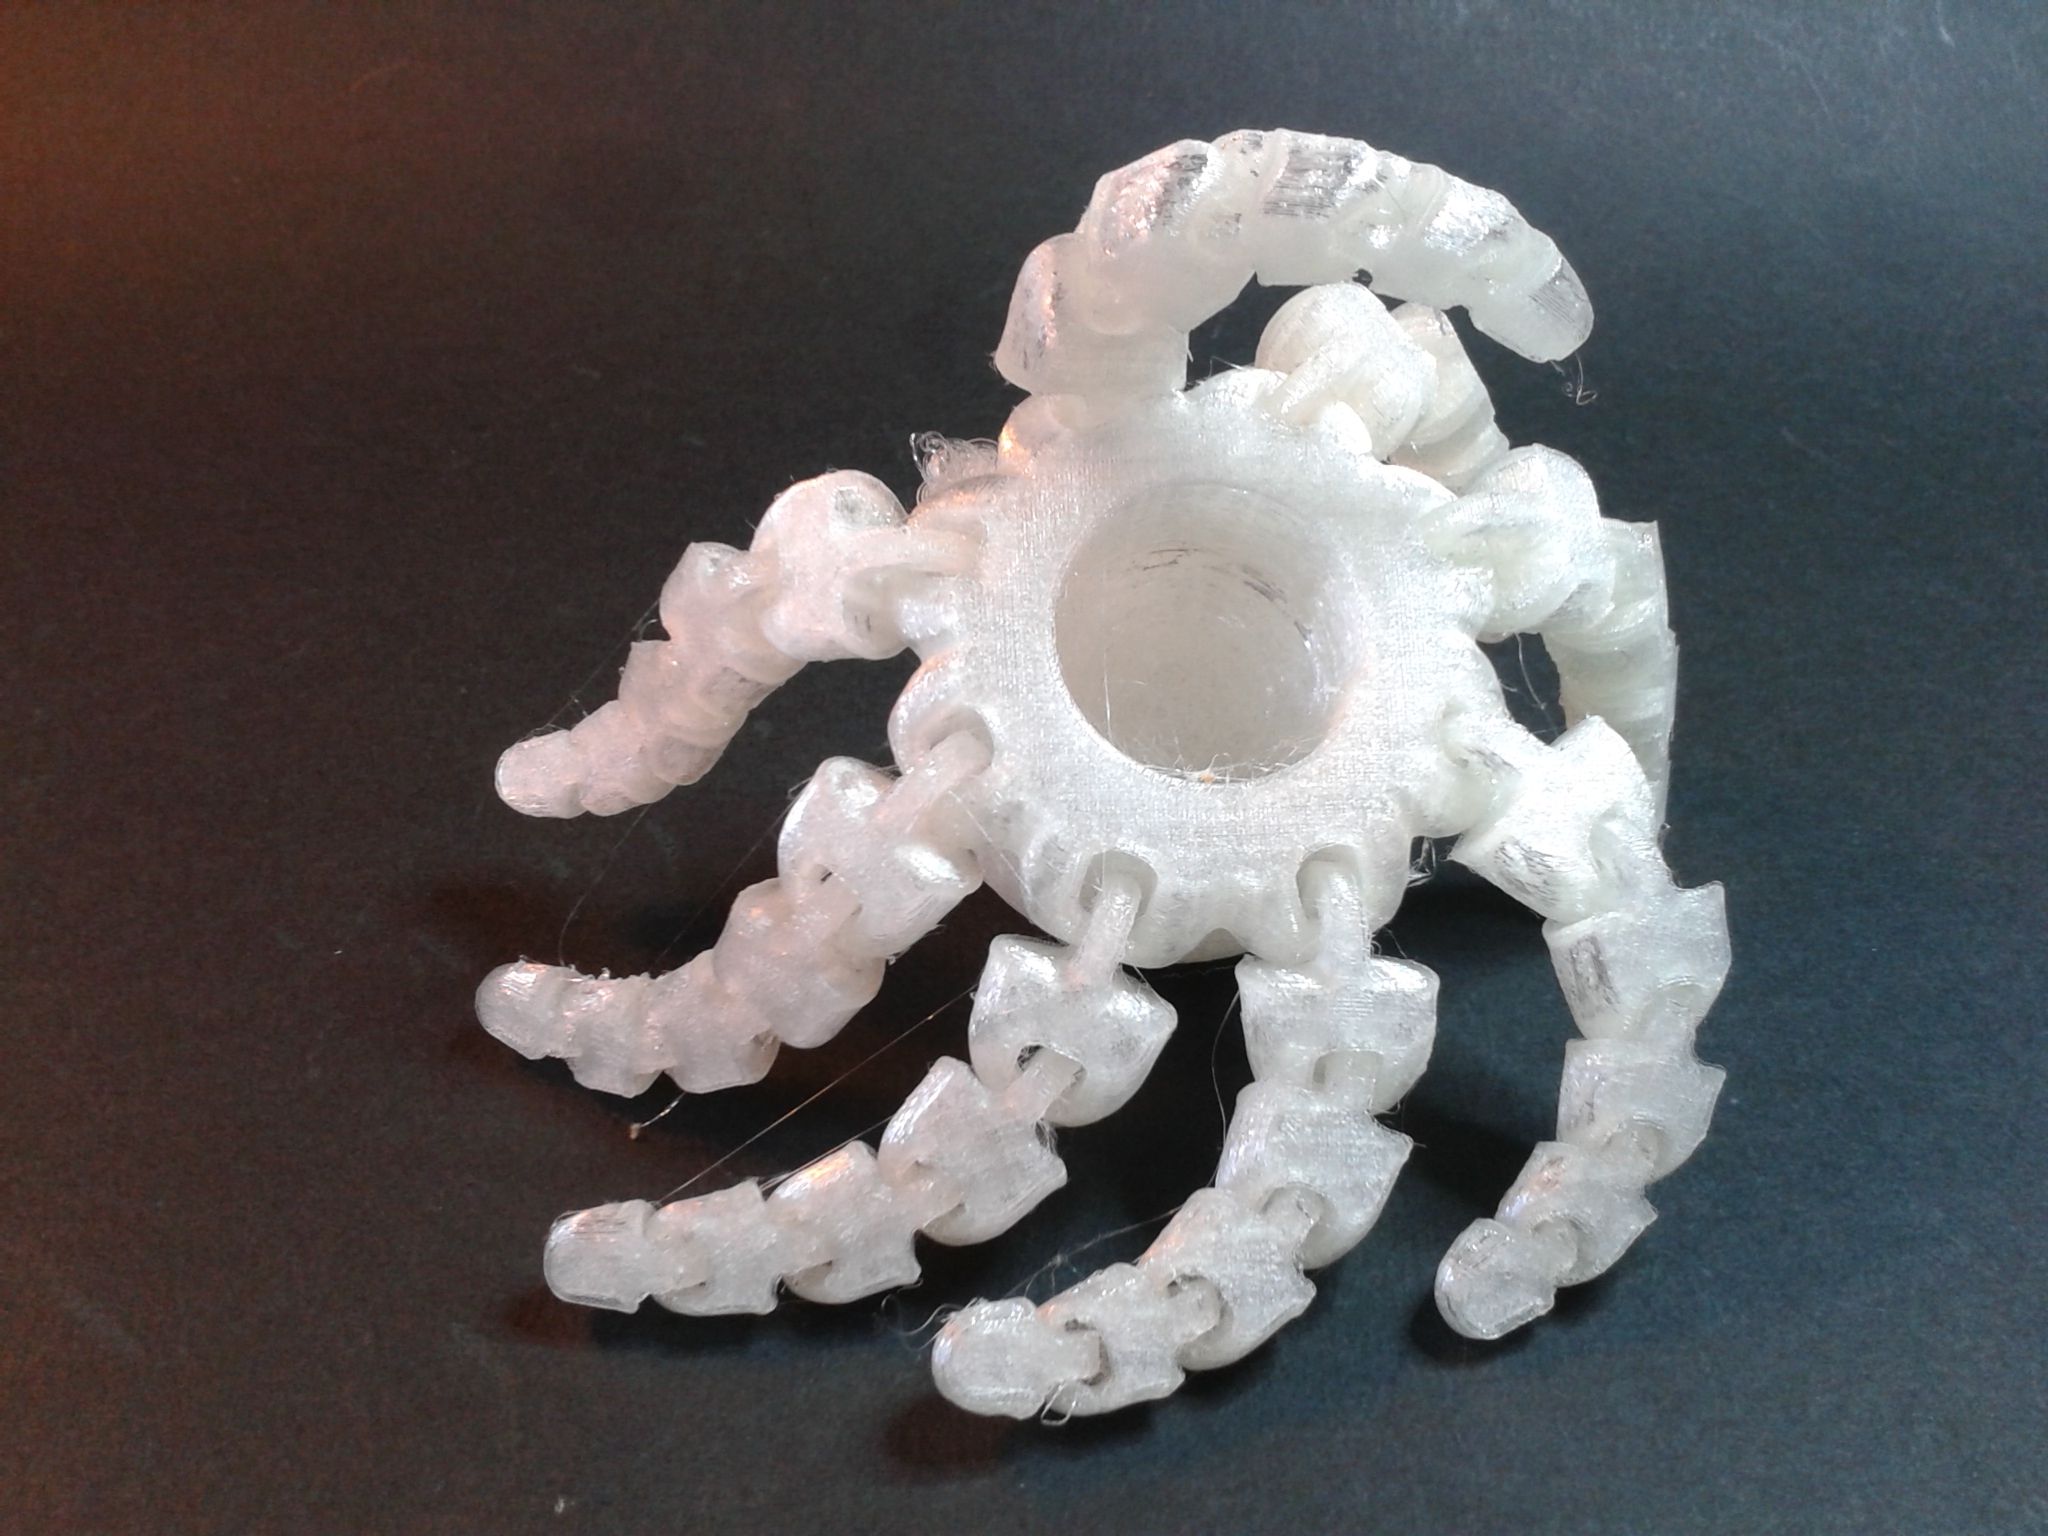
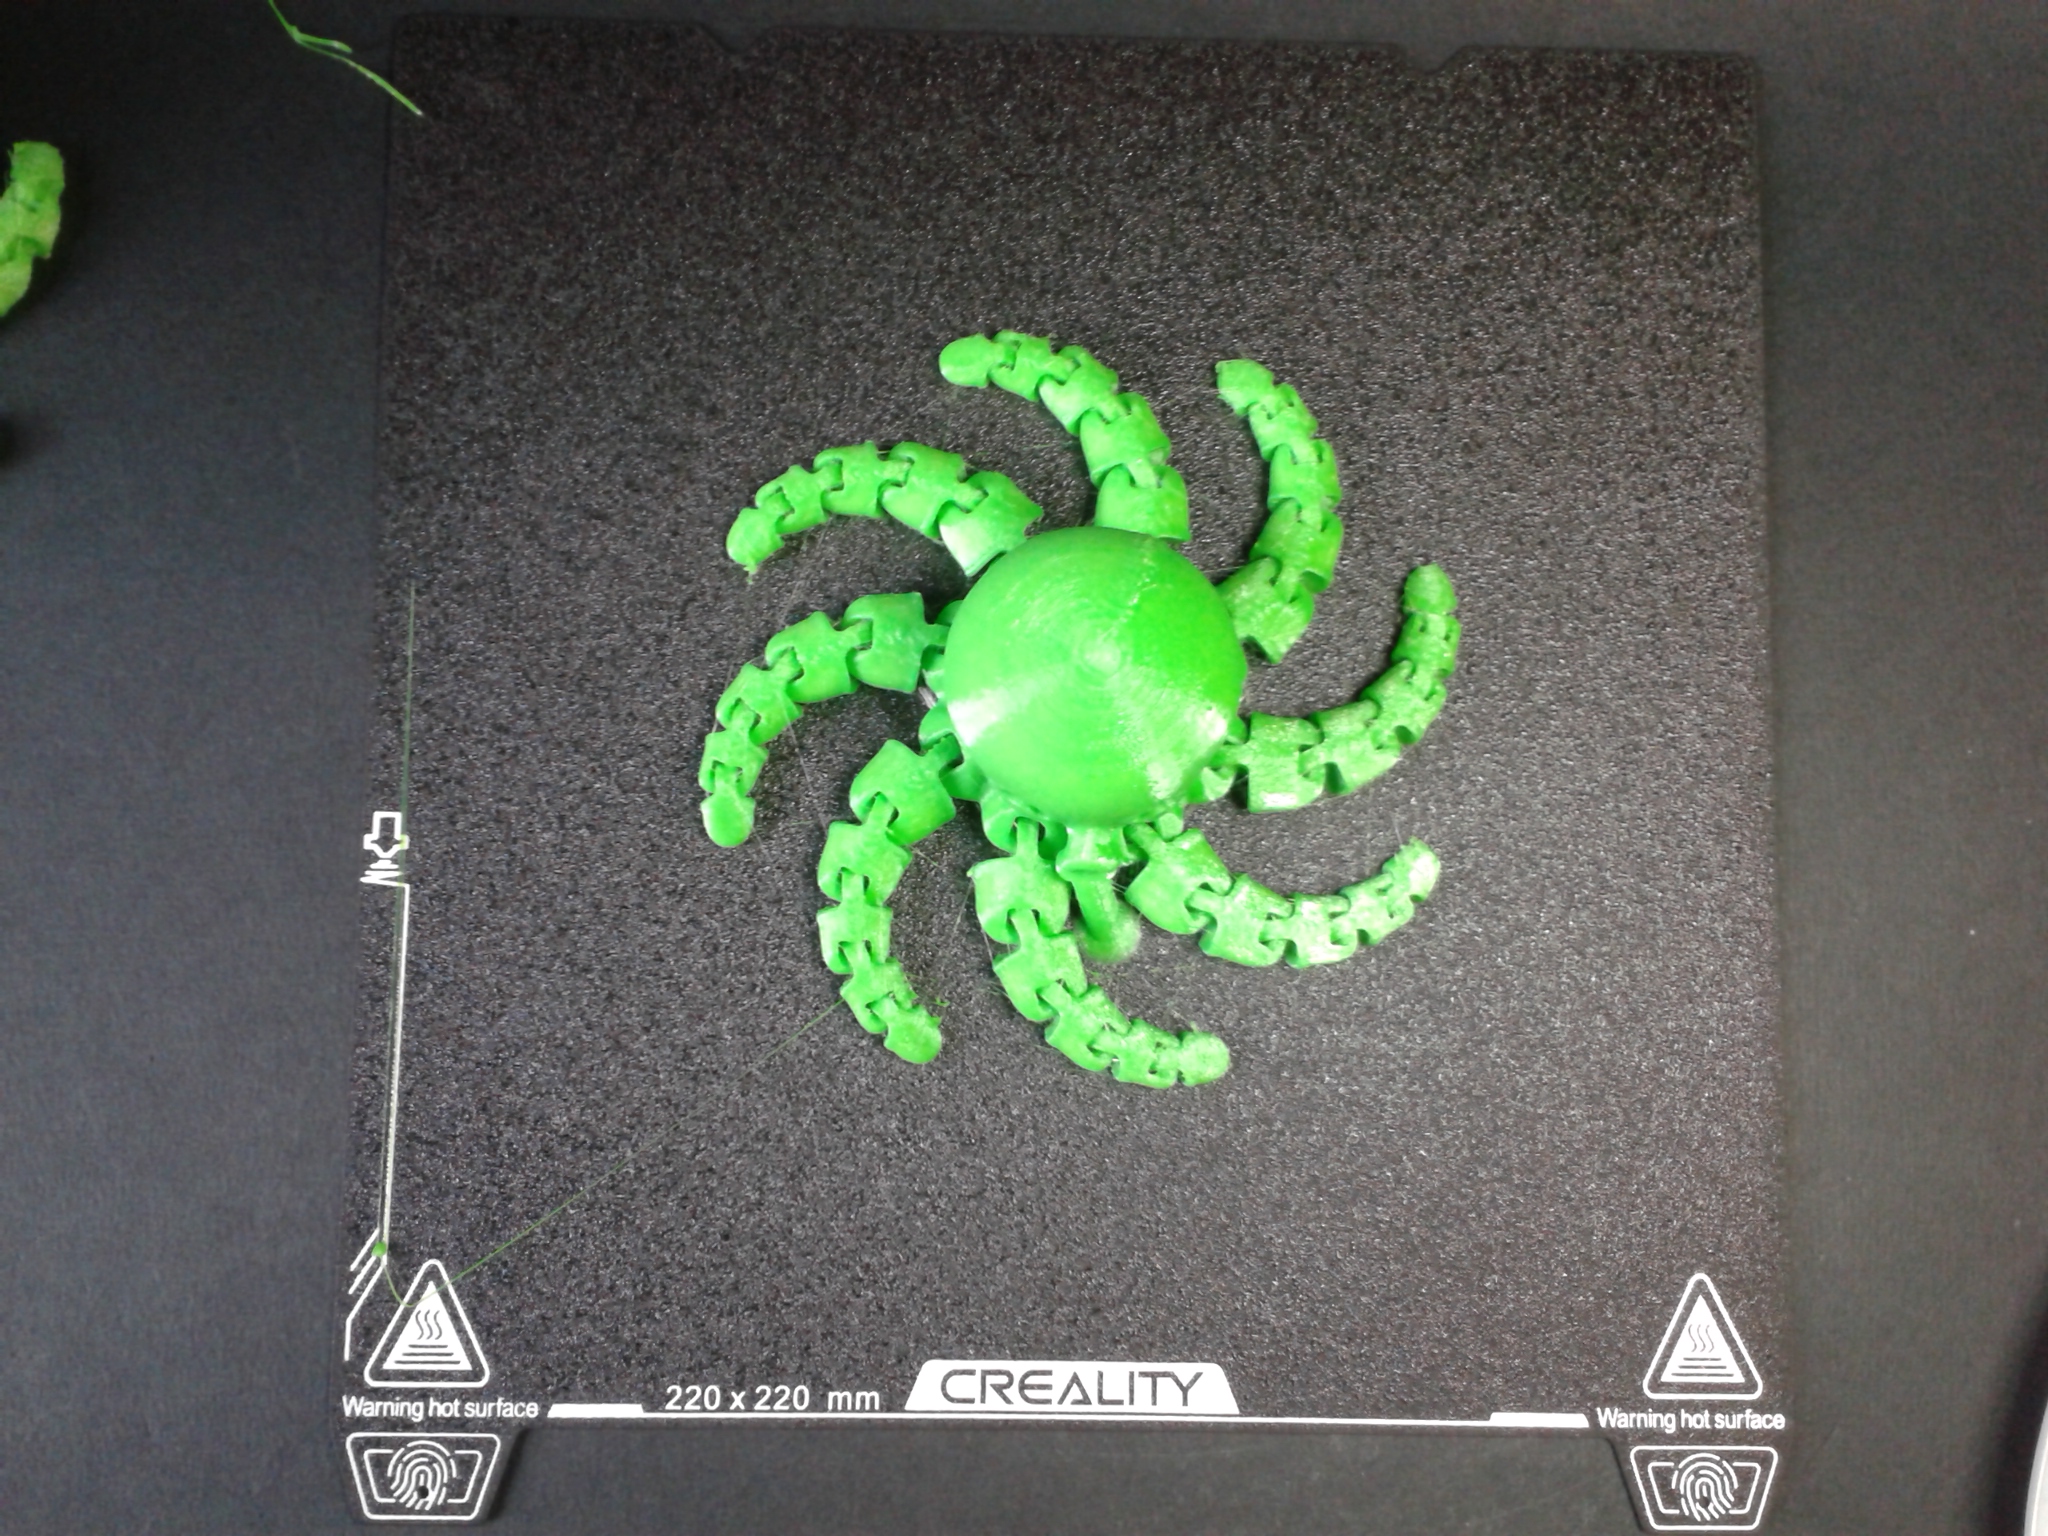
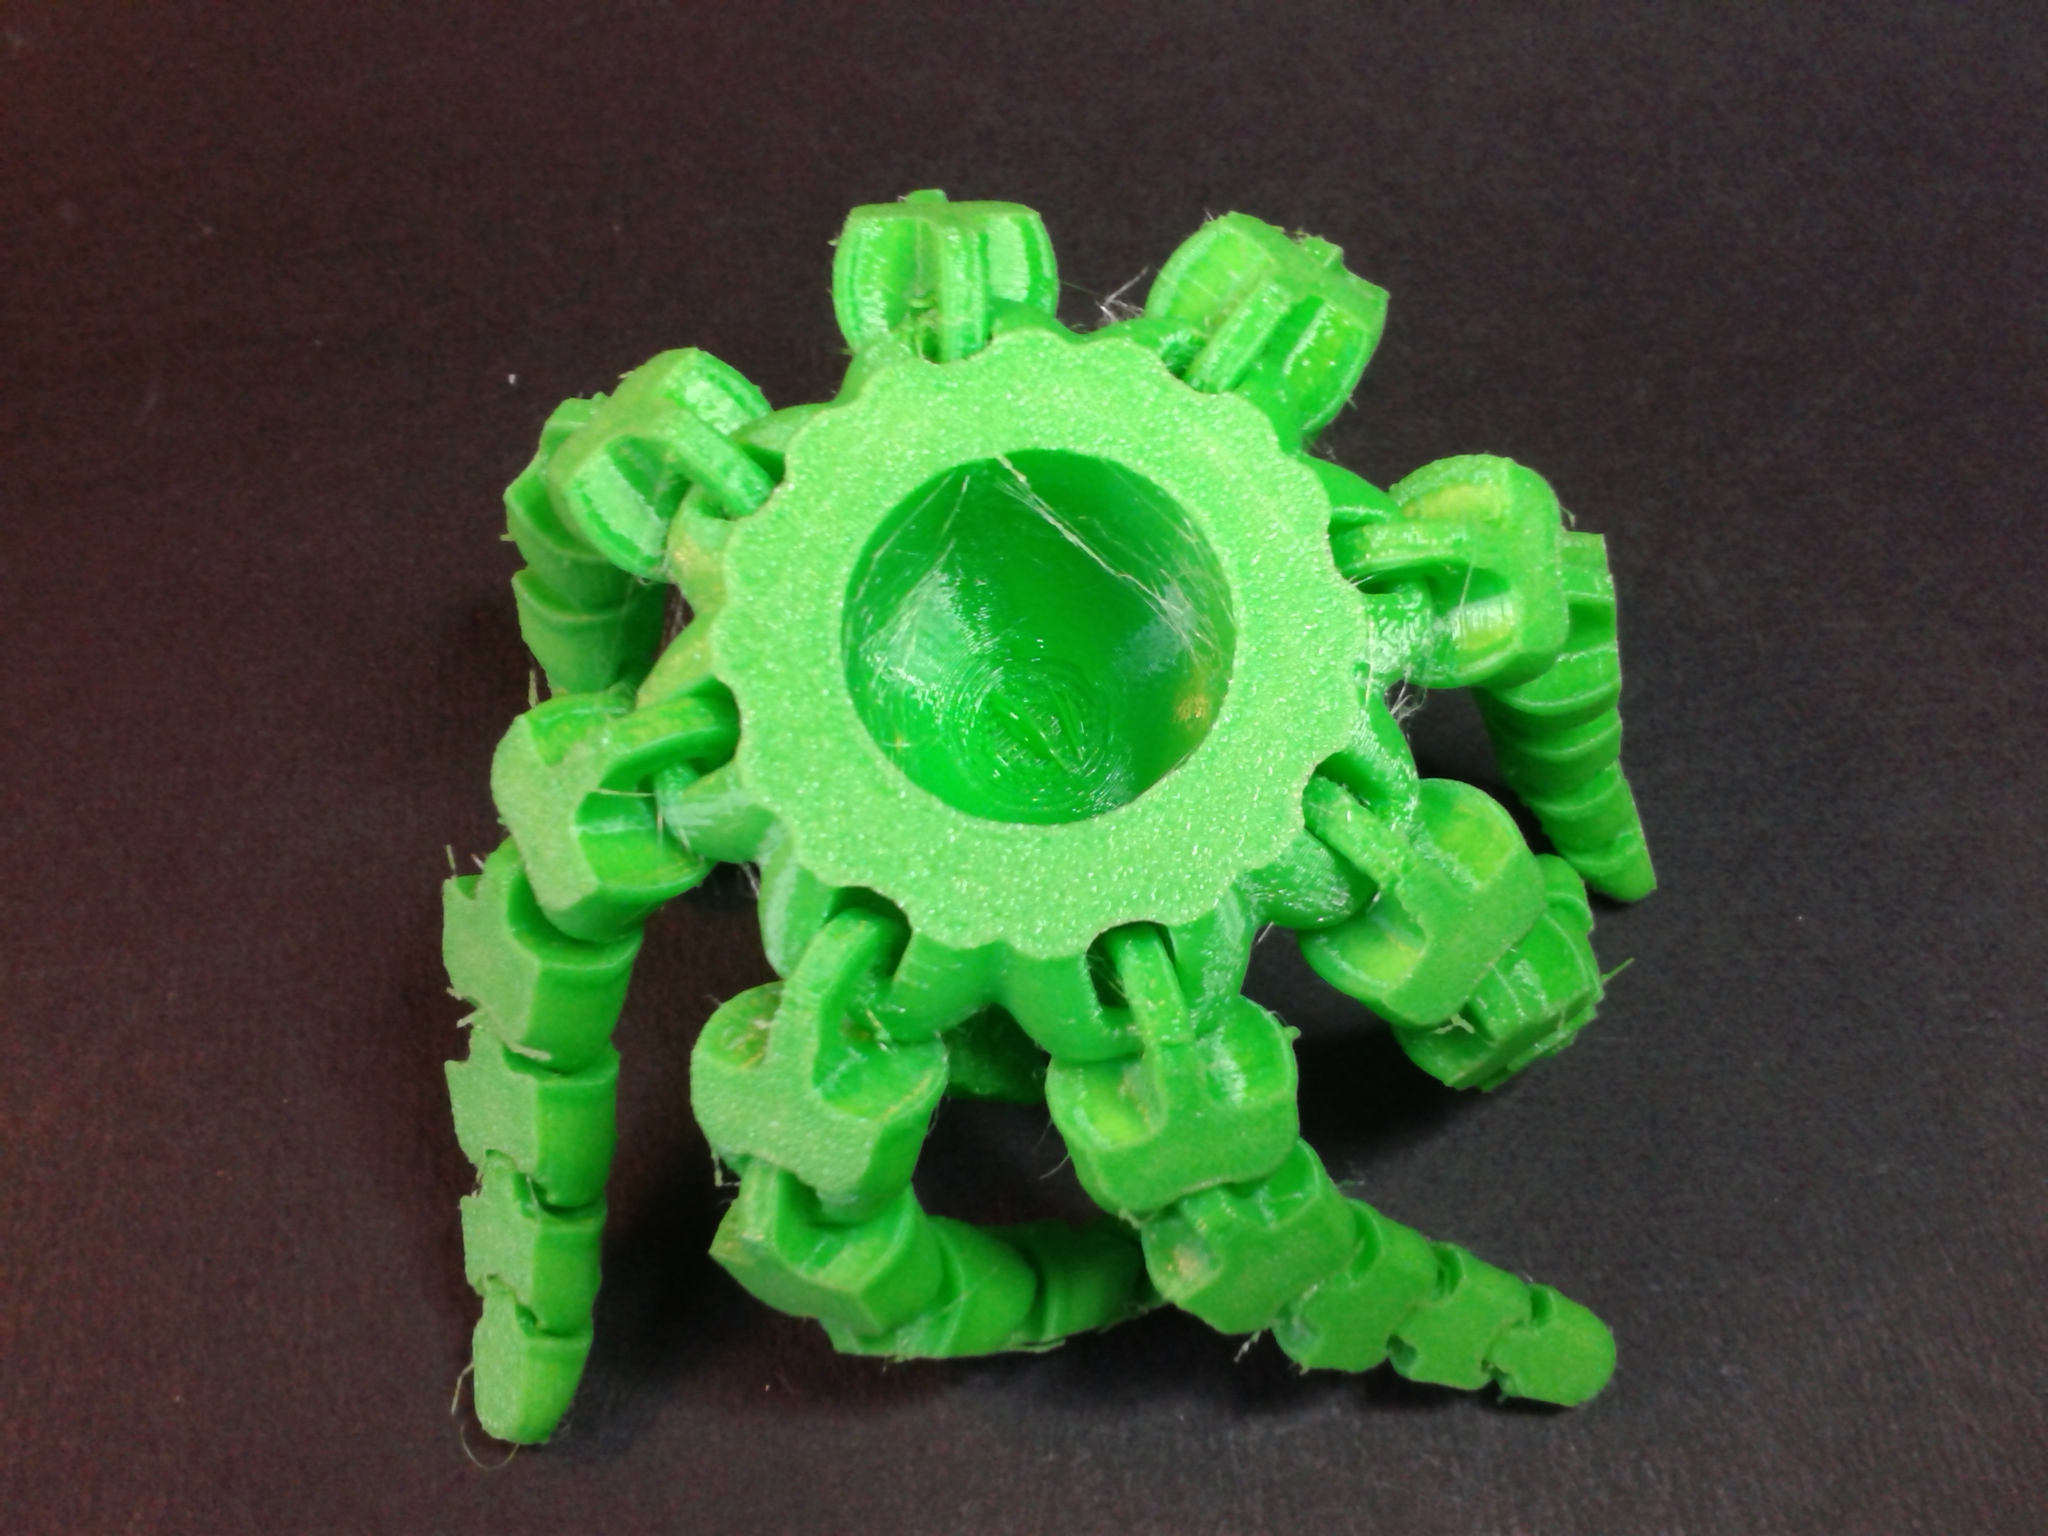
Impression en TPU 95A
N’ayant pas de “HP-TPU_1.75” mais du TPU générique, j’ai créé un profil matériau à partir de celui disponible dans Creality Print et en y modifiant la température buse pour 228°C et celle du plateau à 60°C.
“Cute Mini Octopus” de “McGybeer”
Echelle 150%, 3h54 d’impression.
Filament TPU 95A translucide ArianePlast, puis réimpression du même fichieravec du CR-TPU vert Creality.
Avec le filament TPU 95A translucide d’ArianePlast, j’ai eu besoin de désactiver le capteur de filament (le tromper avec un petit bout de filament ou le débrancher, pas d’option via l’écran pour le désactiver). Ceci pour ne plus y passer le filament et lubrifier le support de bobine afin de permettre un déroulement plus fluide du filament flexible car mon premier essai d’impression s’est terminé en échec sur des manques de matière, manque de couches, dû à de la sous-extrusion car ma bobine se déroulait mal.

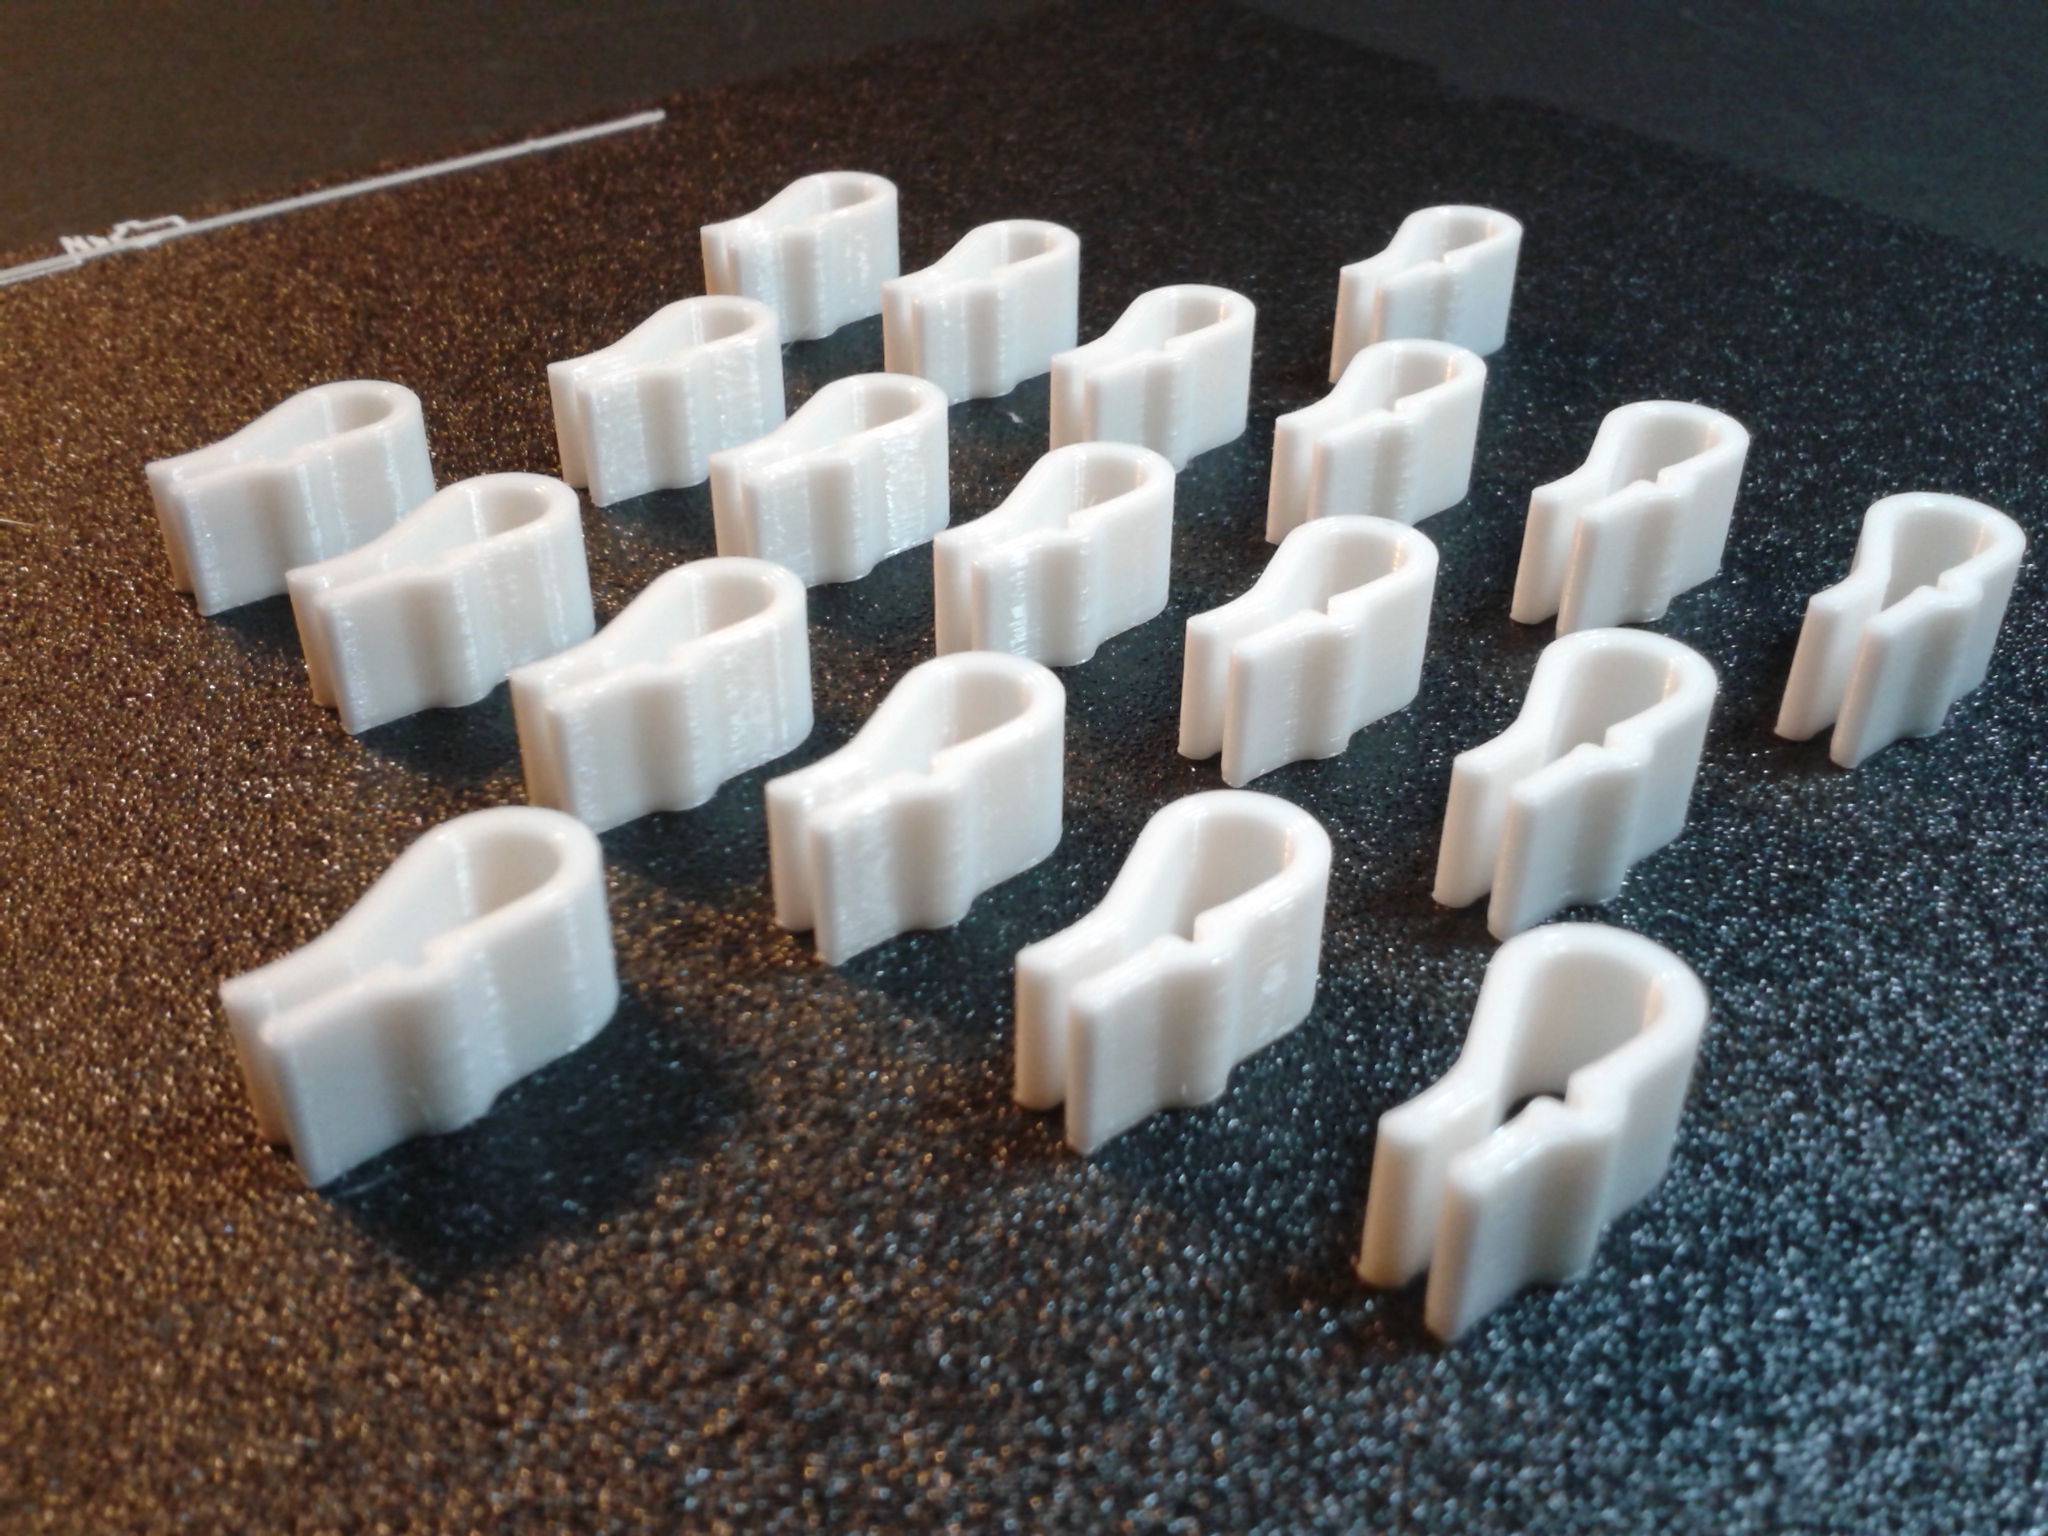
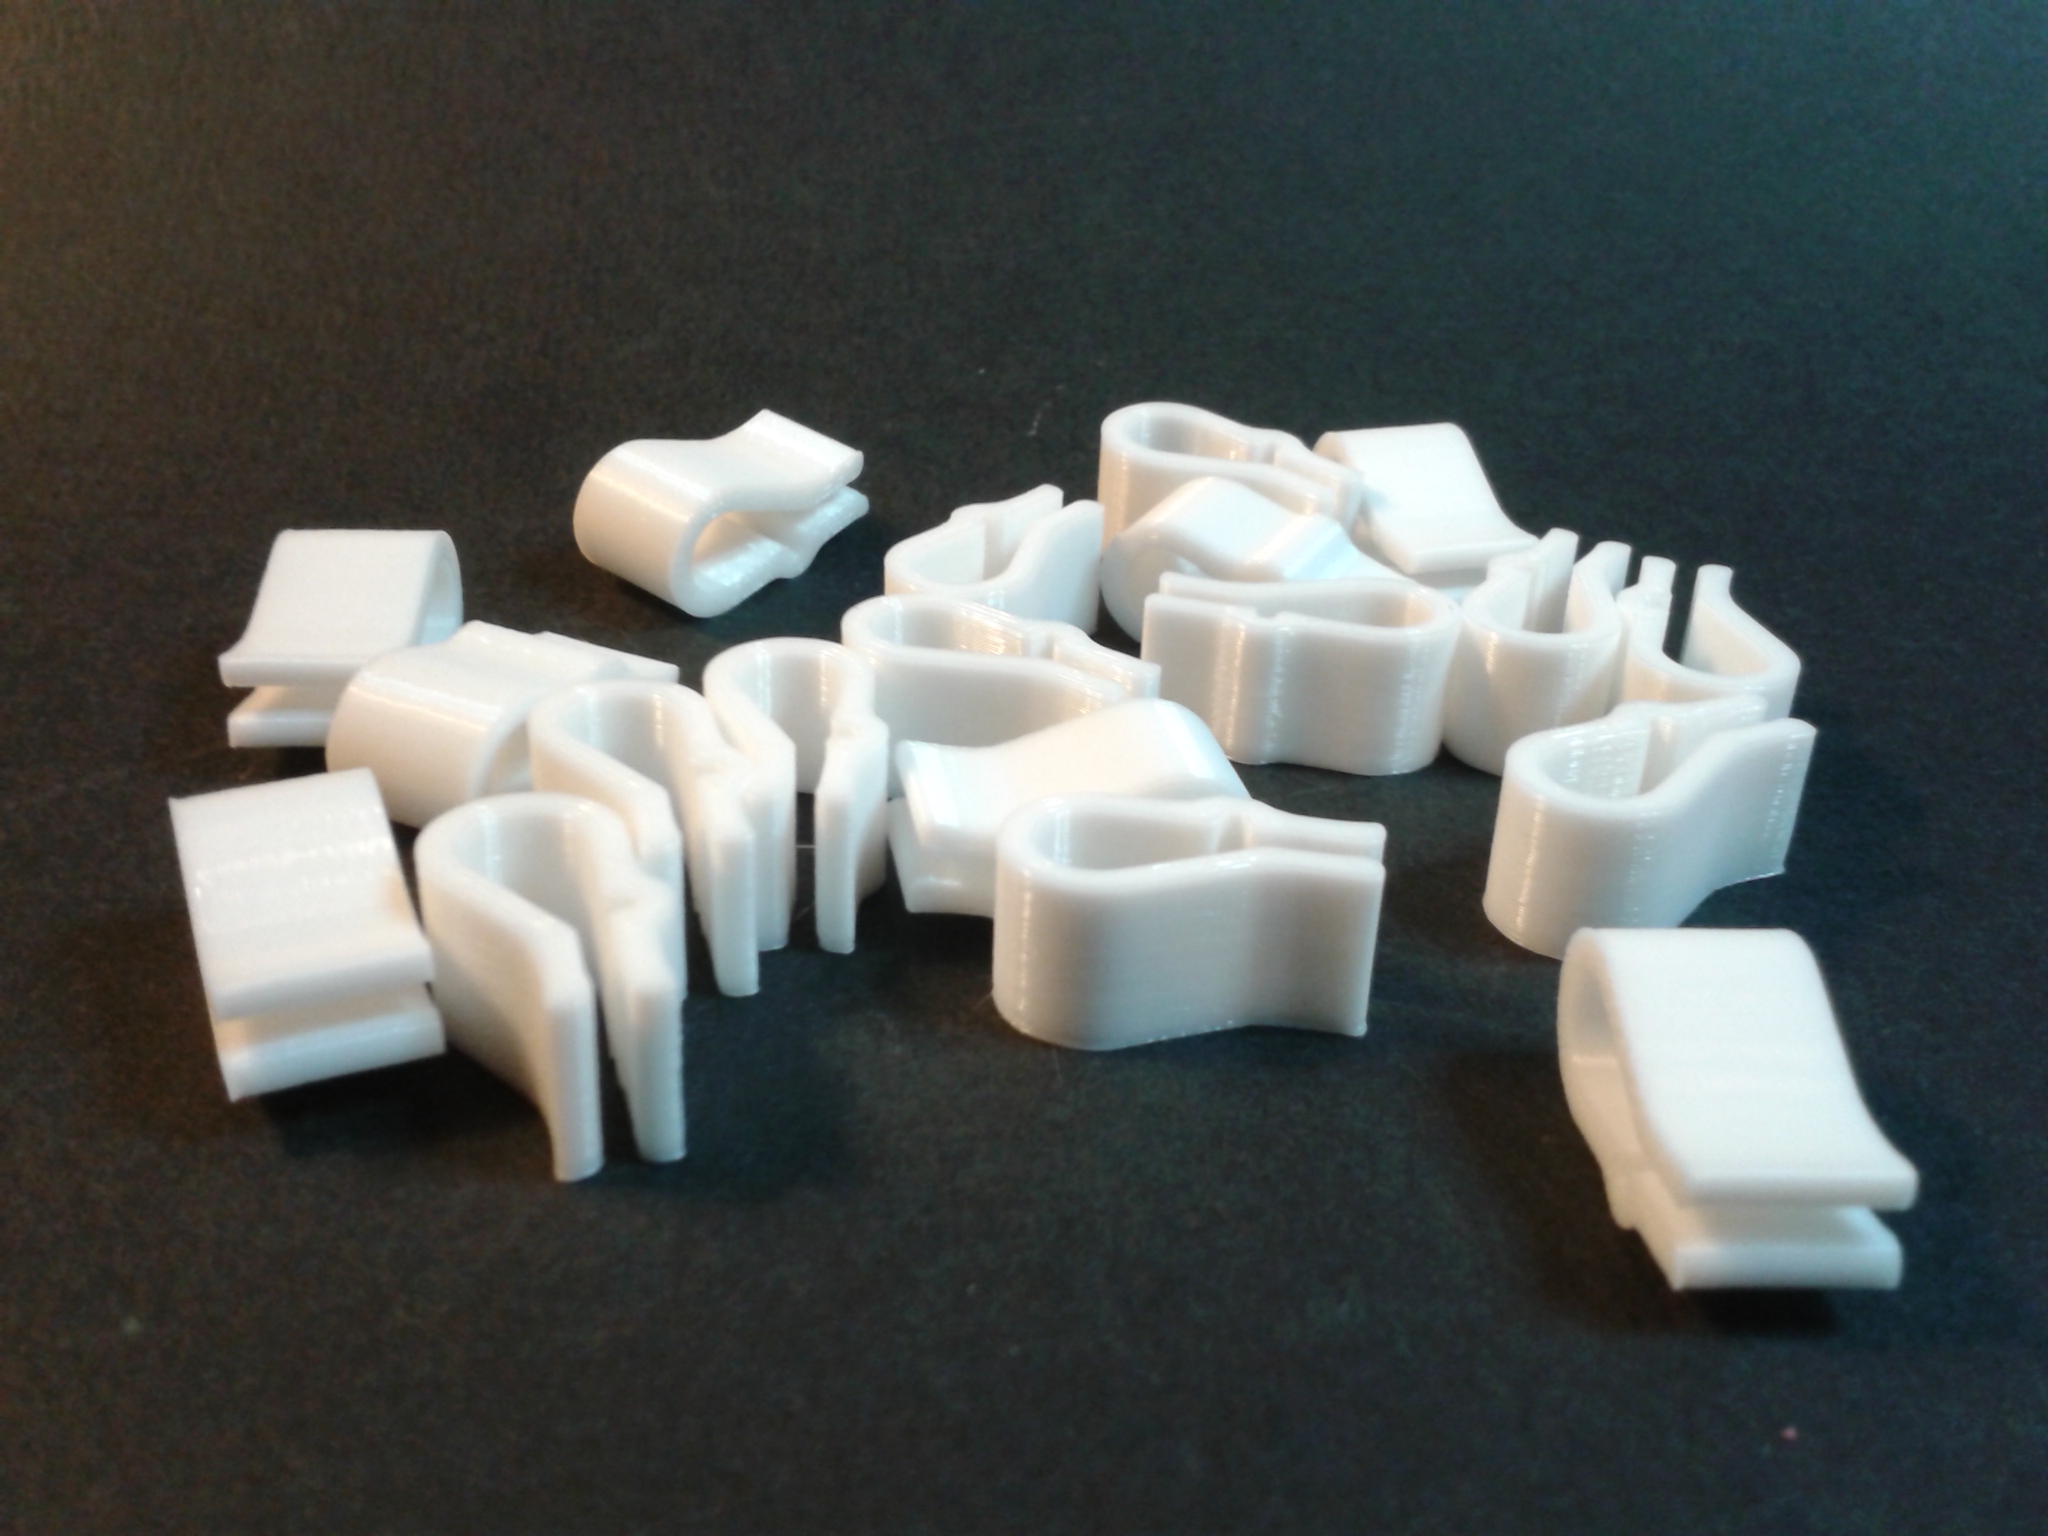
Impression en PETG
Profil matériau “CR-PETG_1.75” dans Creality Print avec une vitesse volumétrique maximale de 9.00 mm³/s et une qualité d’impression “Normal” (0.20mm).
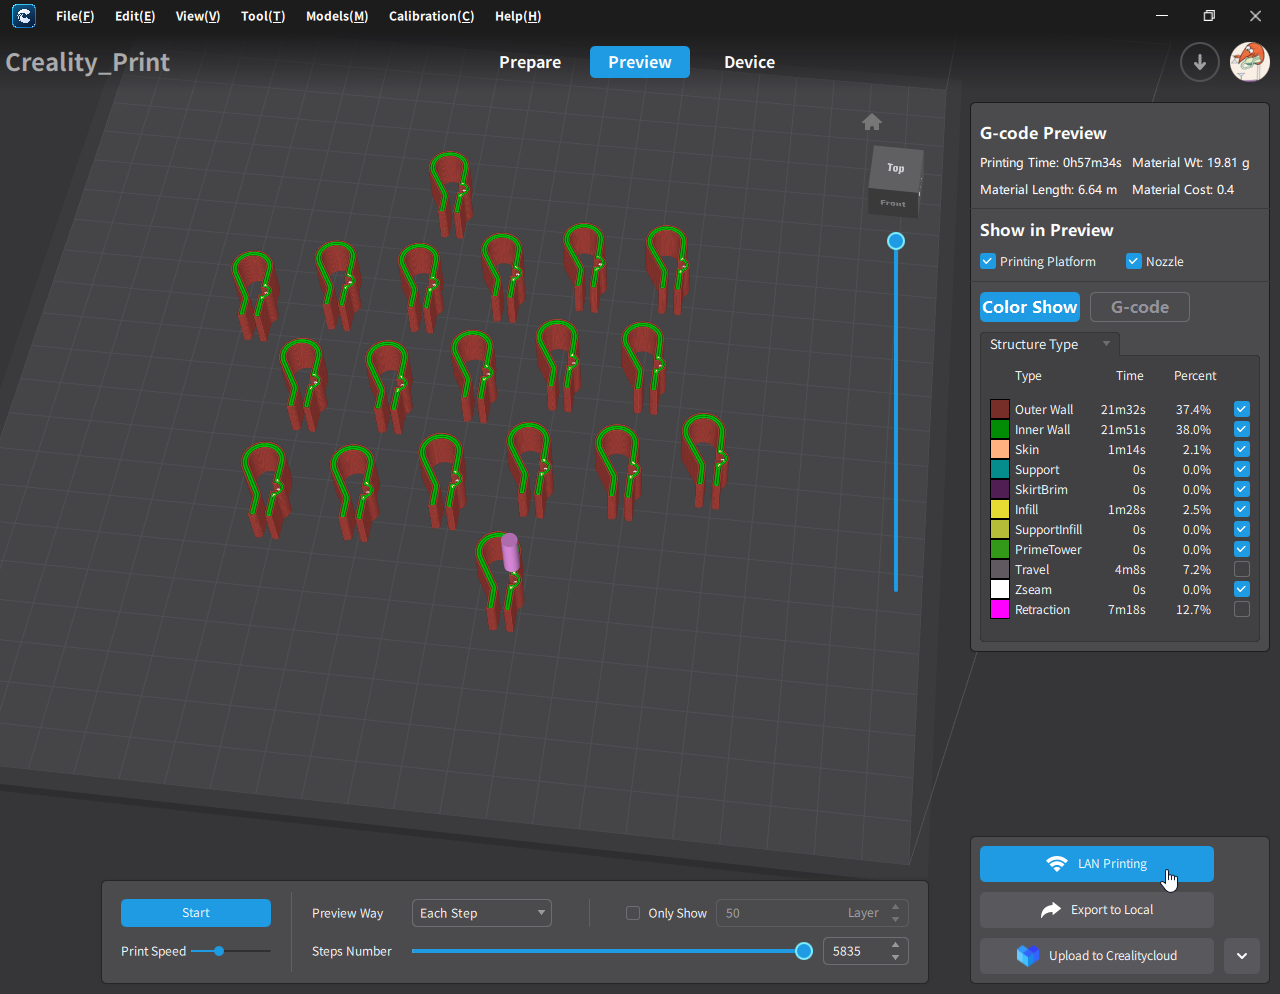
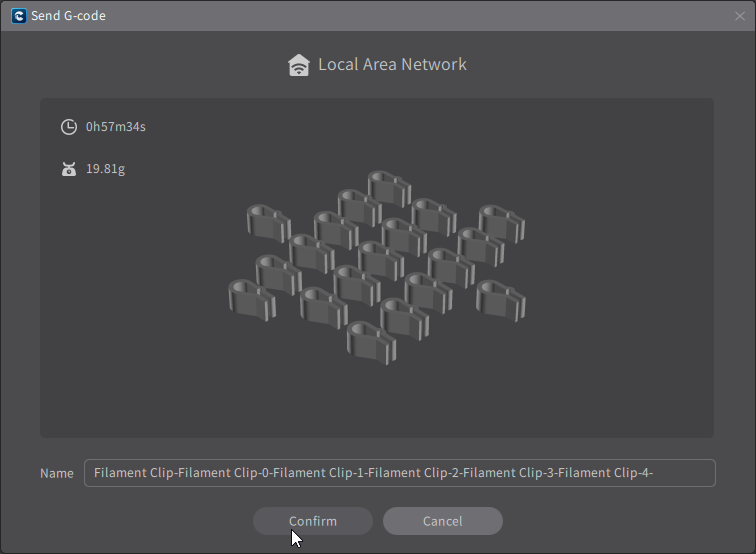
“Filament Clip” de “3DP”.
19 exemplaires d’un coup sur le même plateau pour seulement 1h00 d’impression.
Filament CR-PETG blanc Creality.

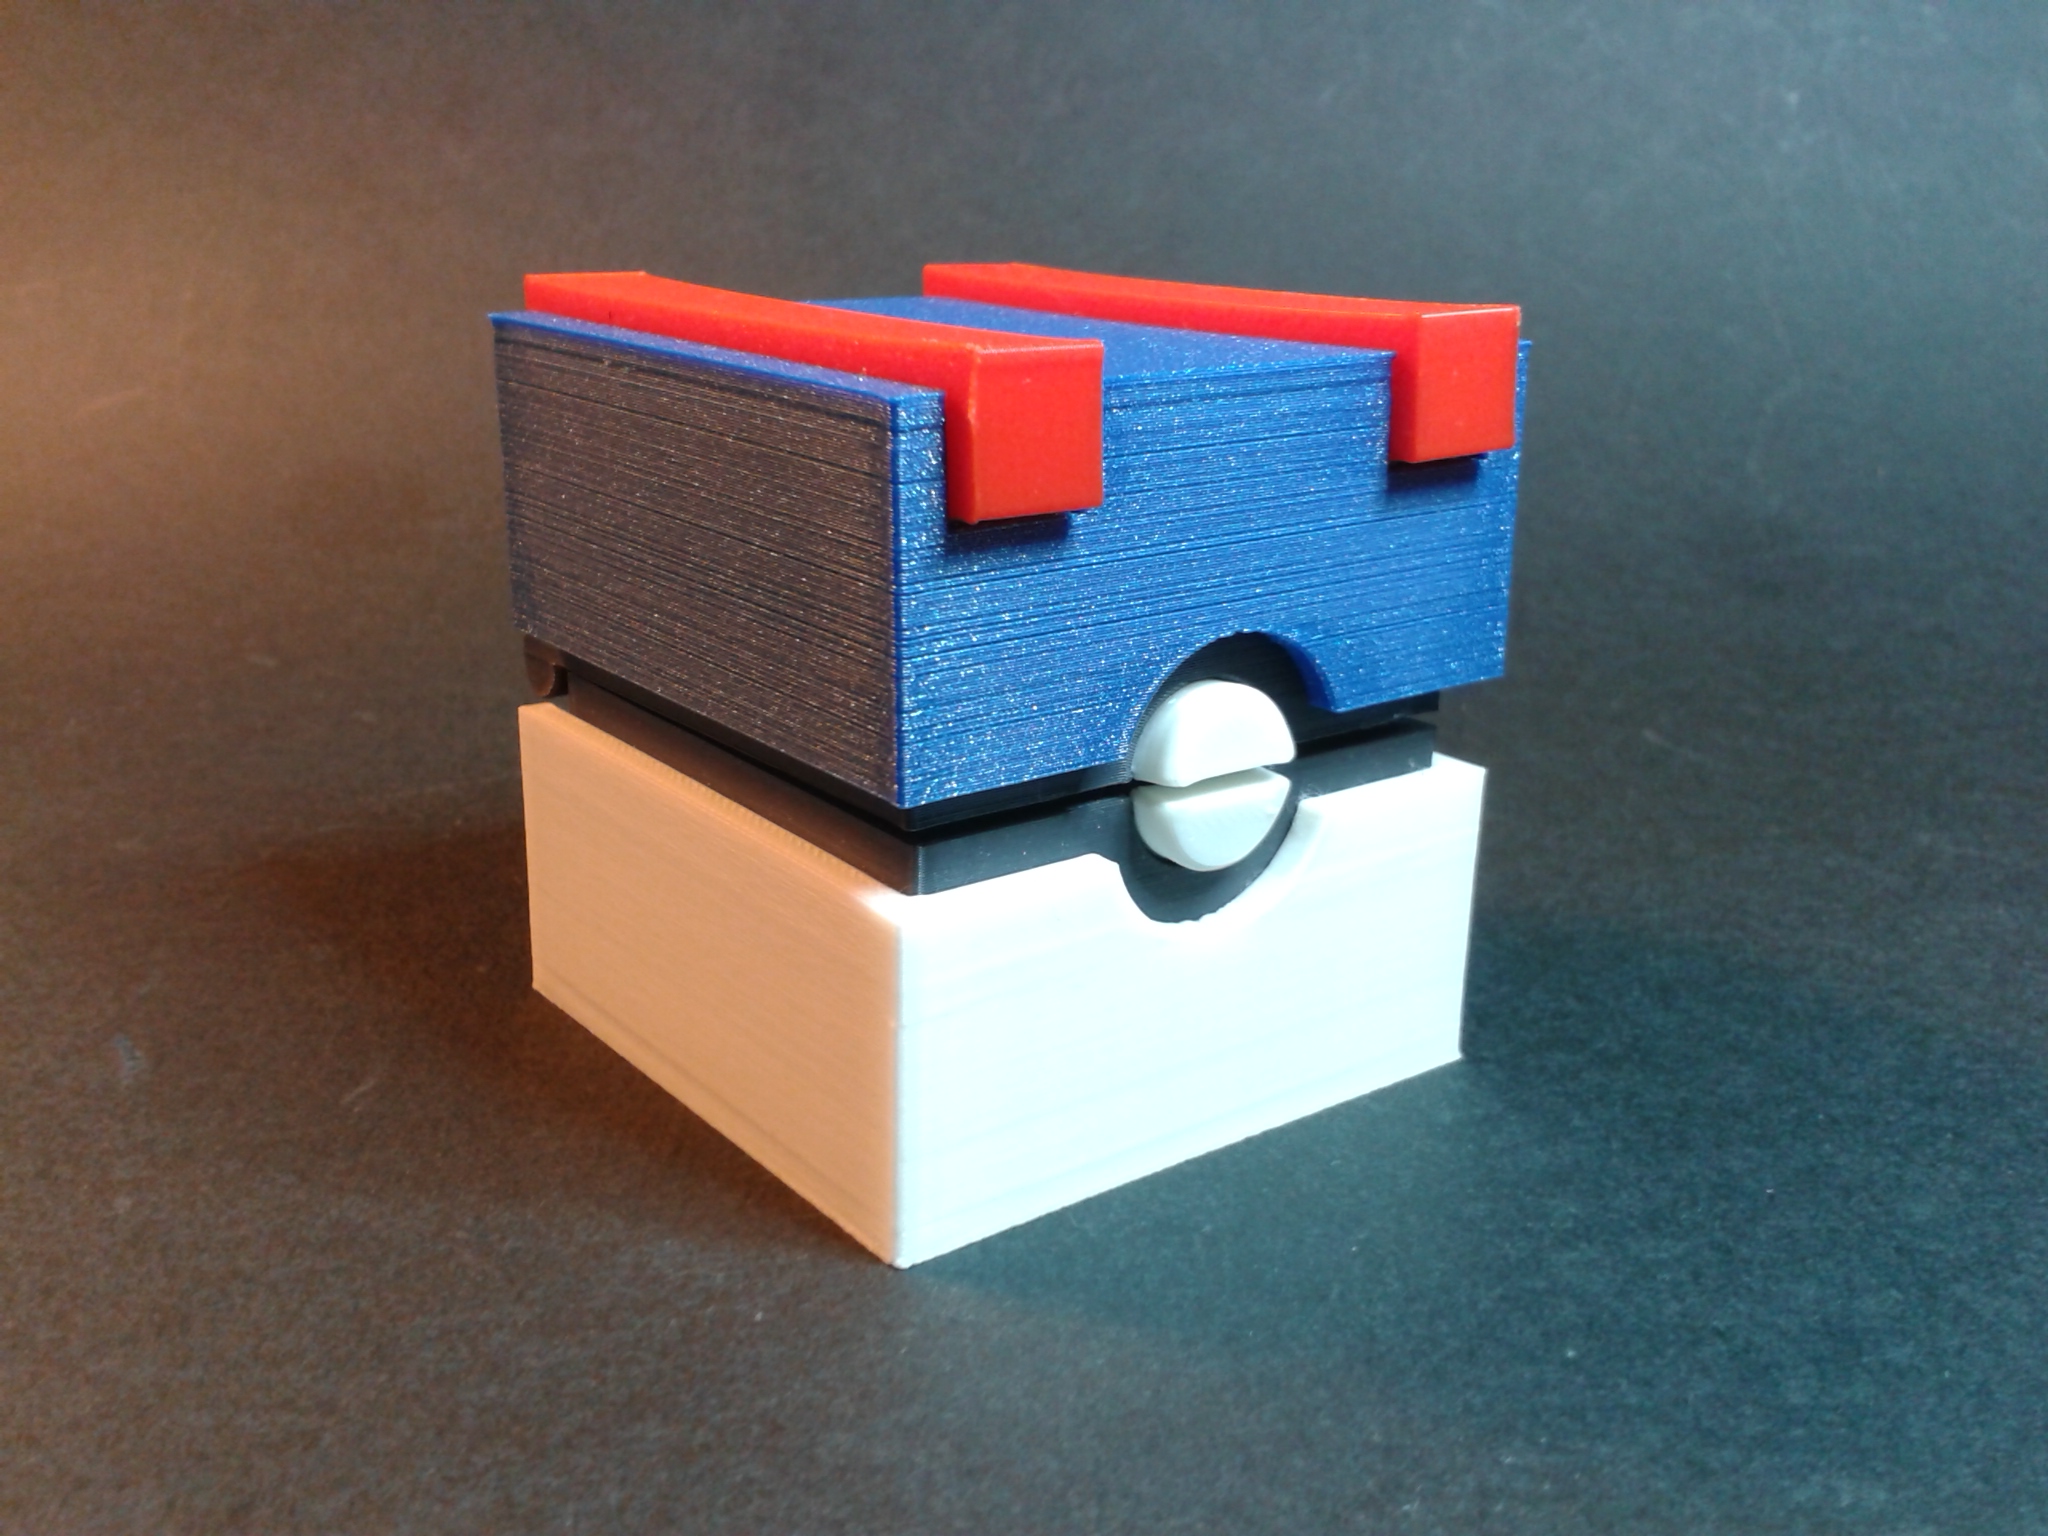
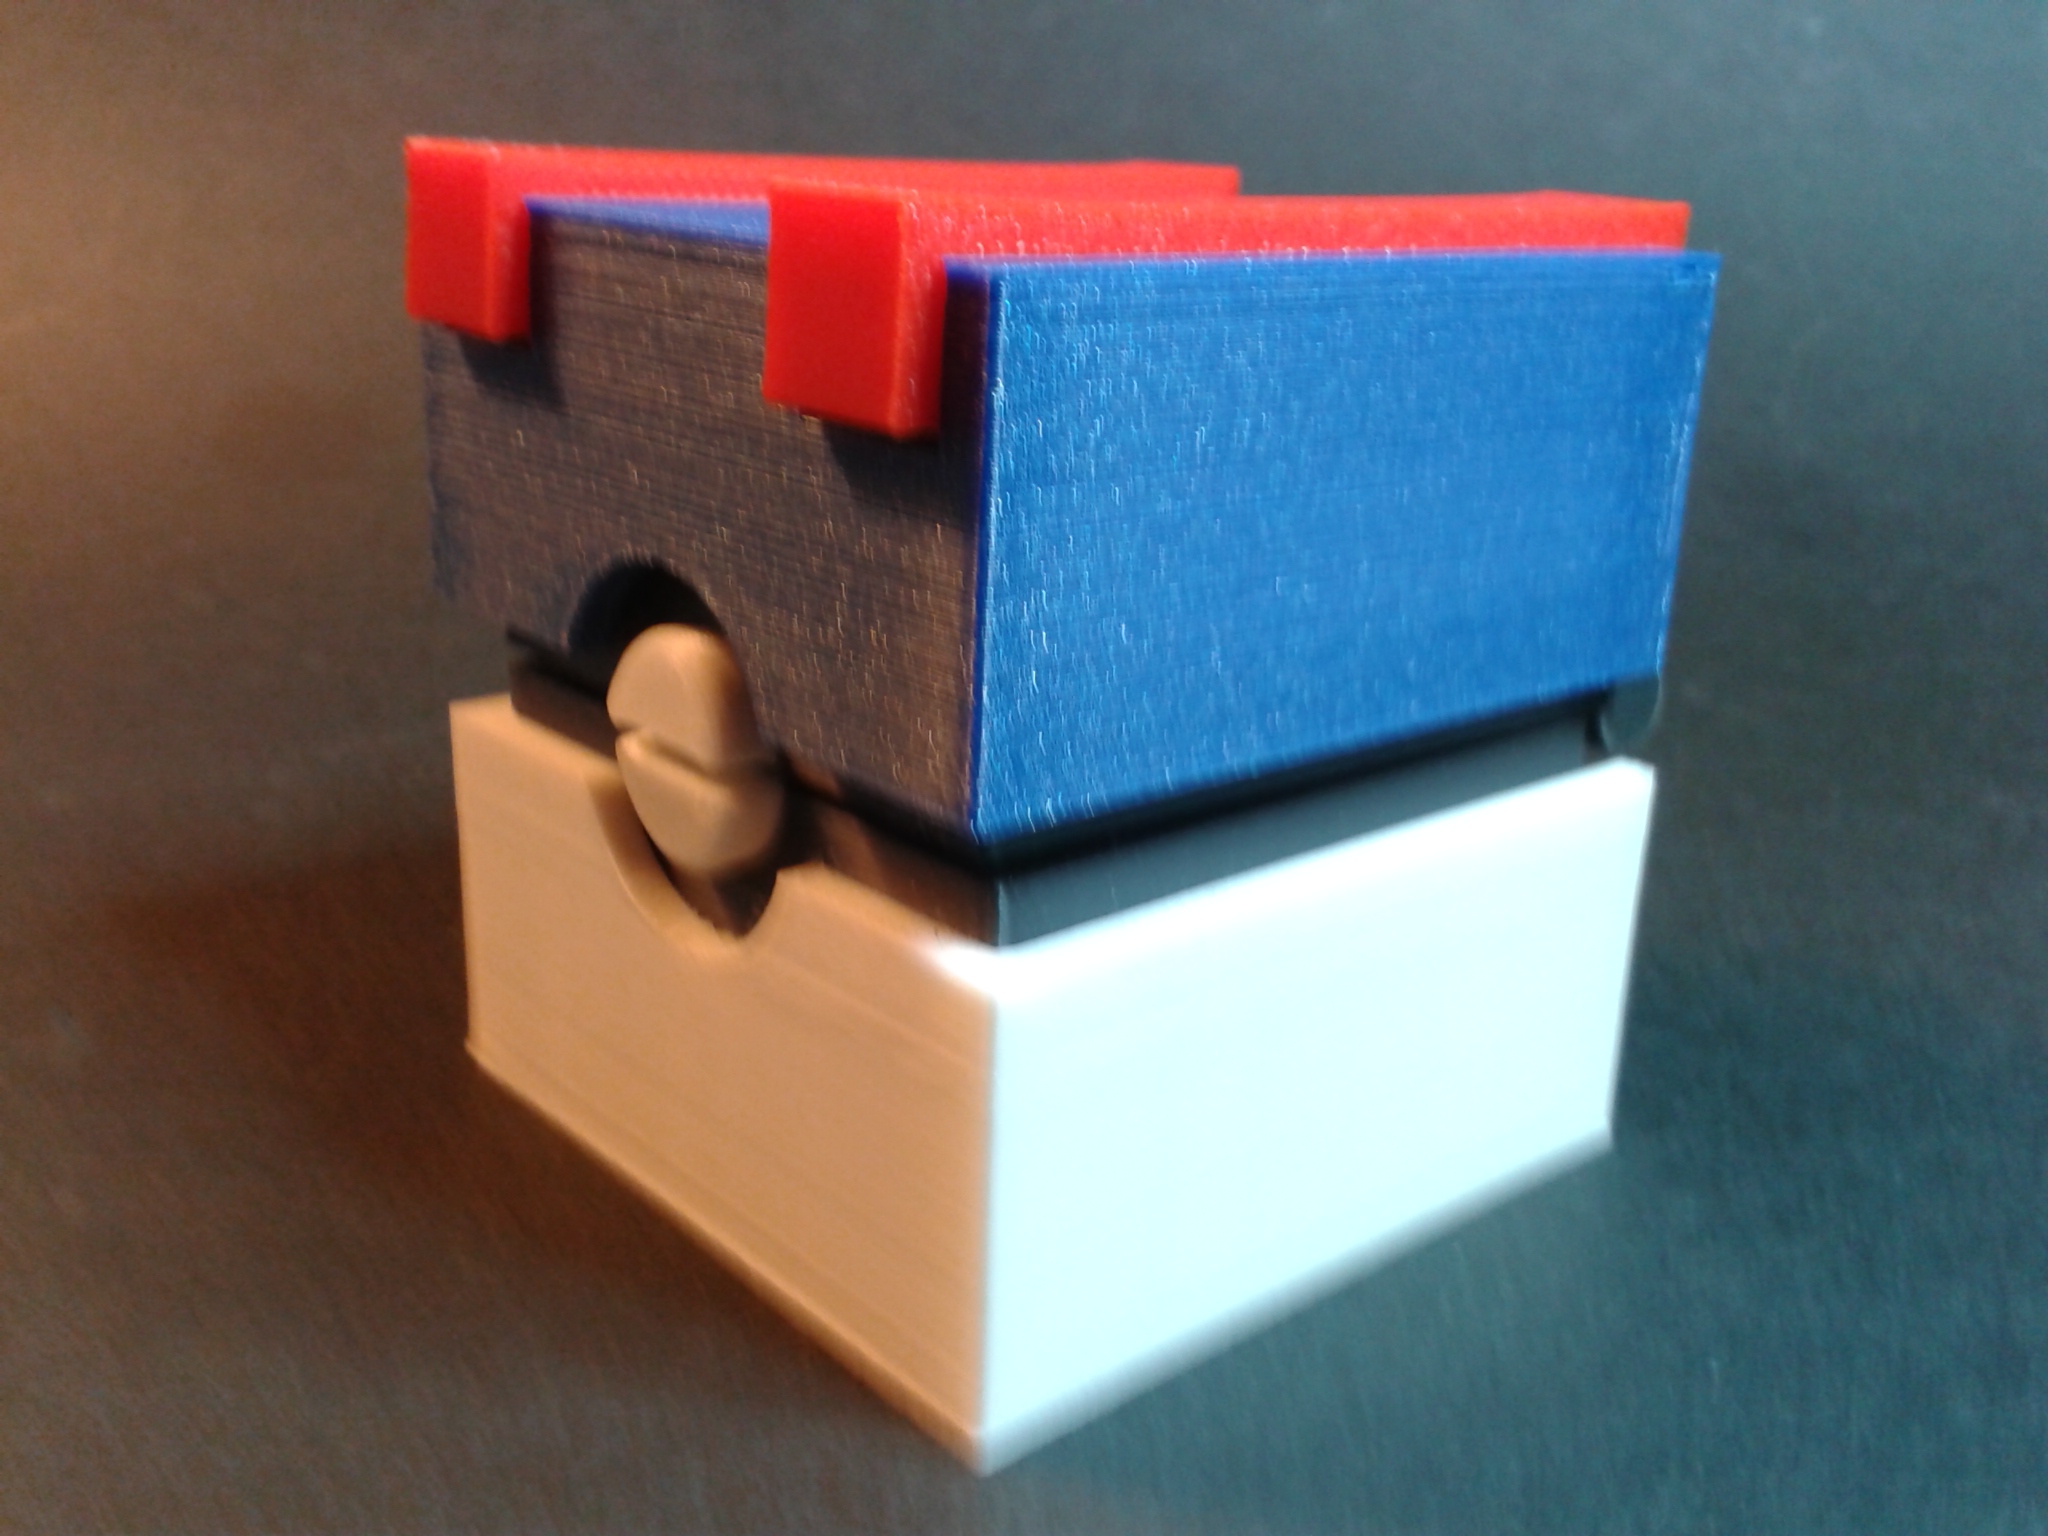
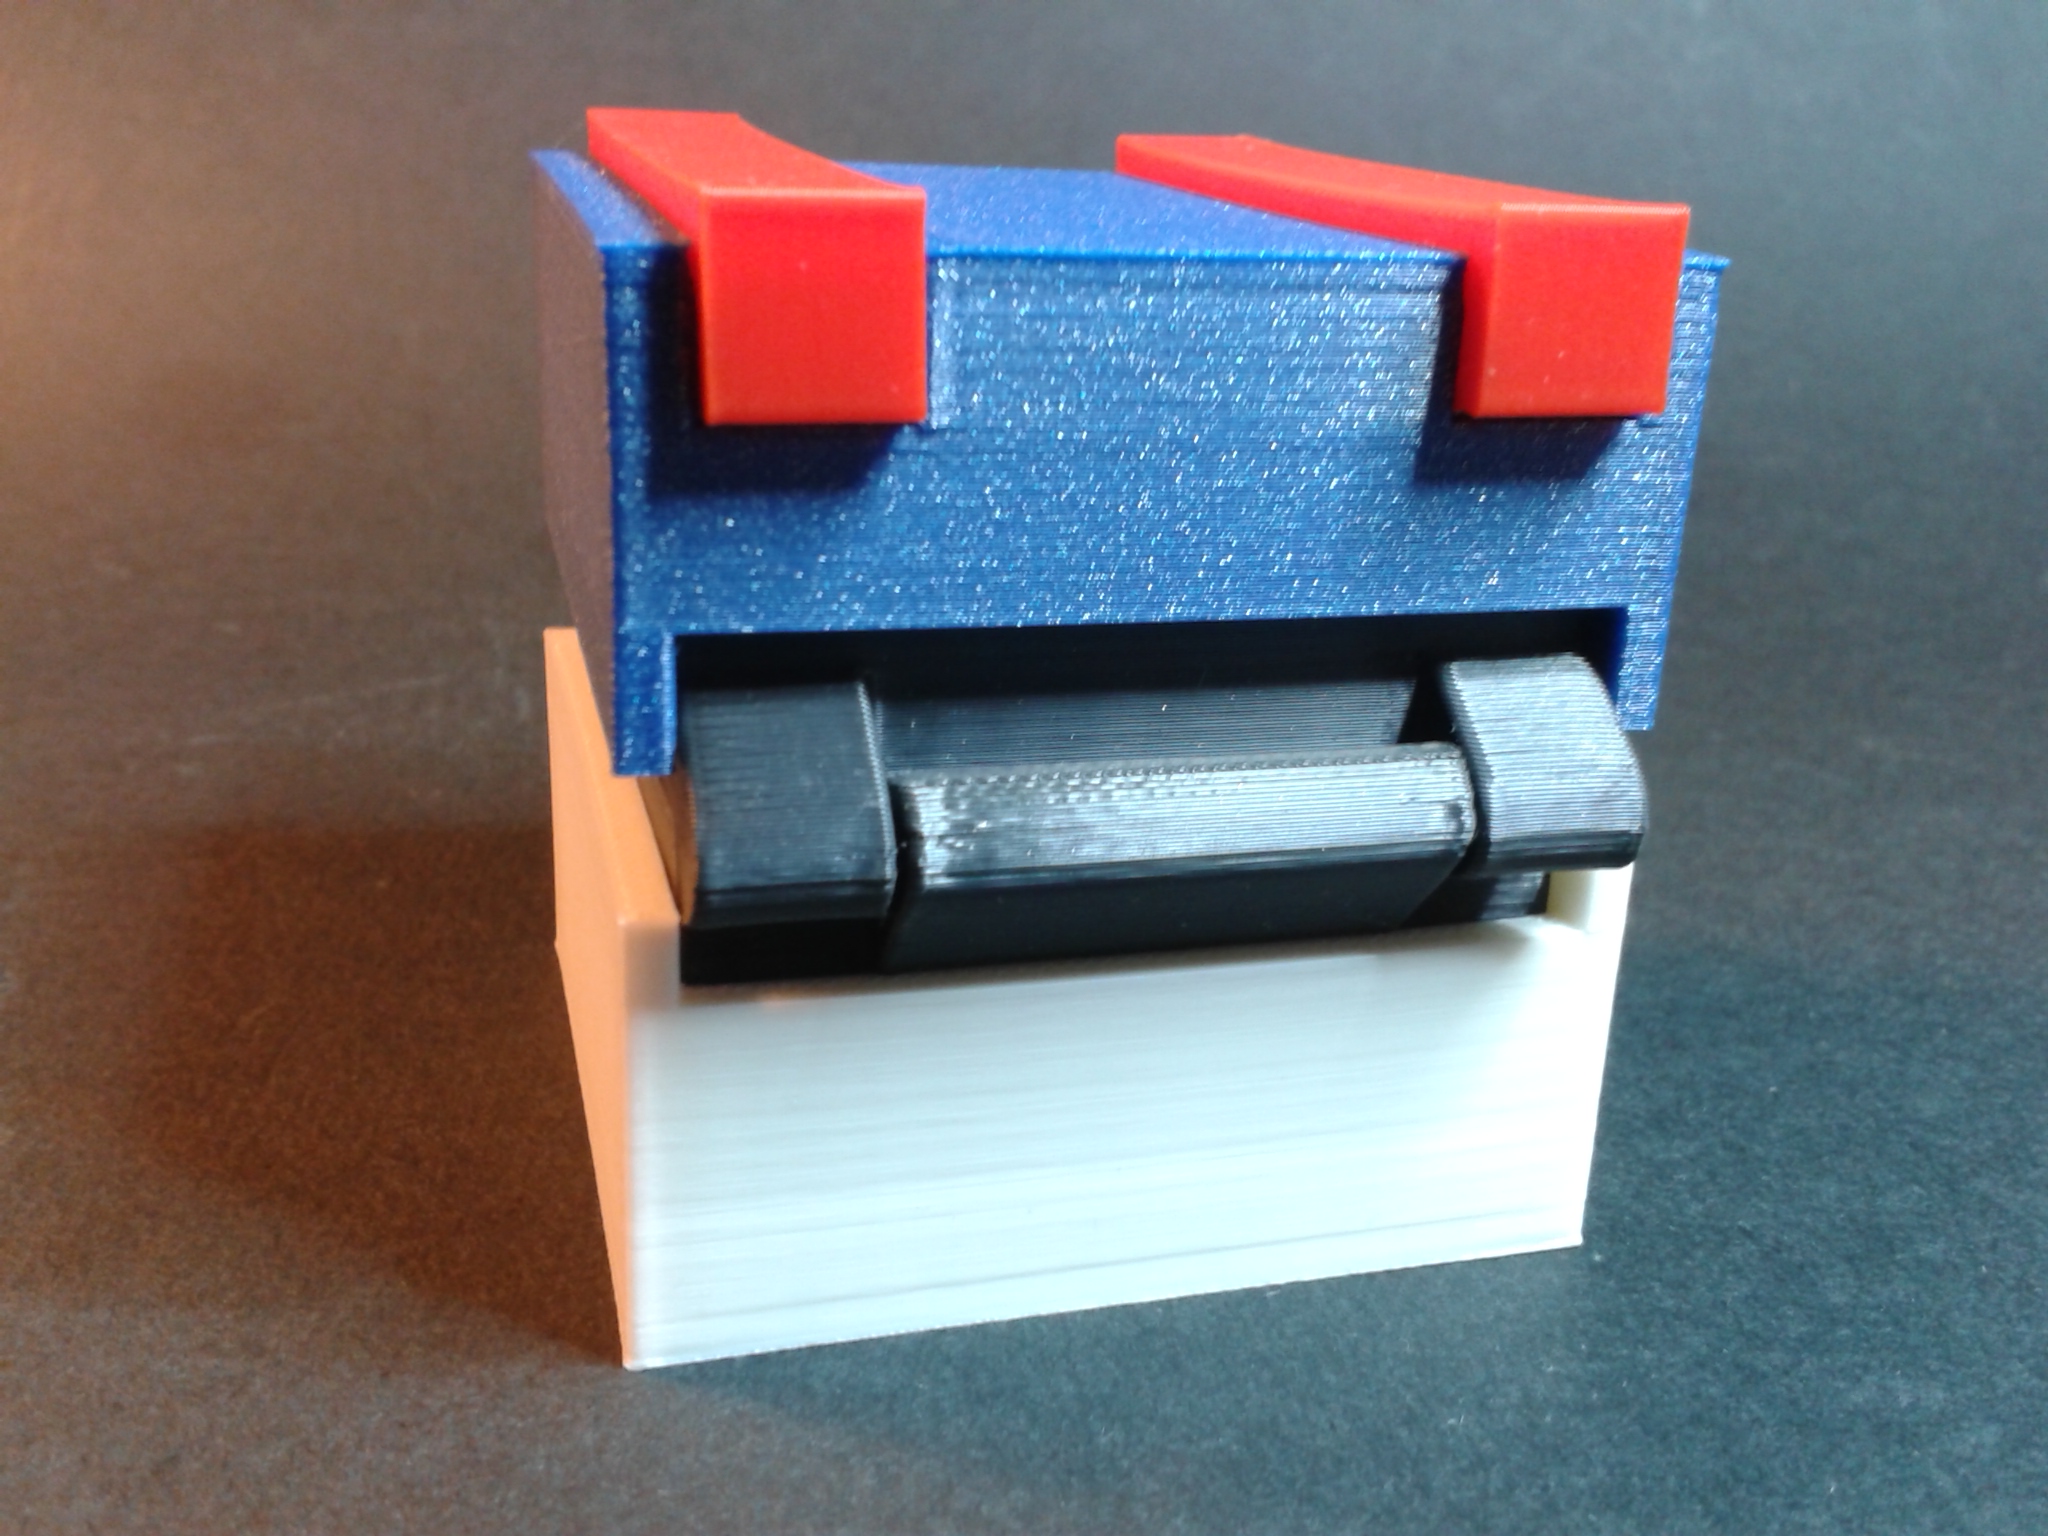
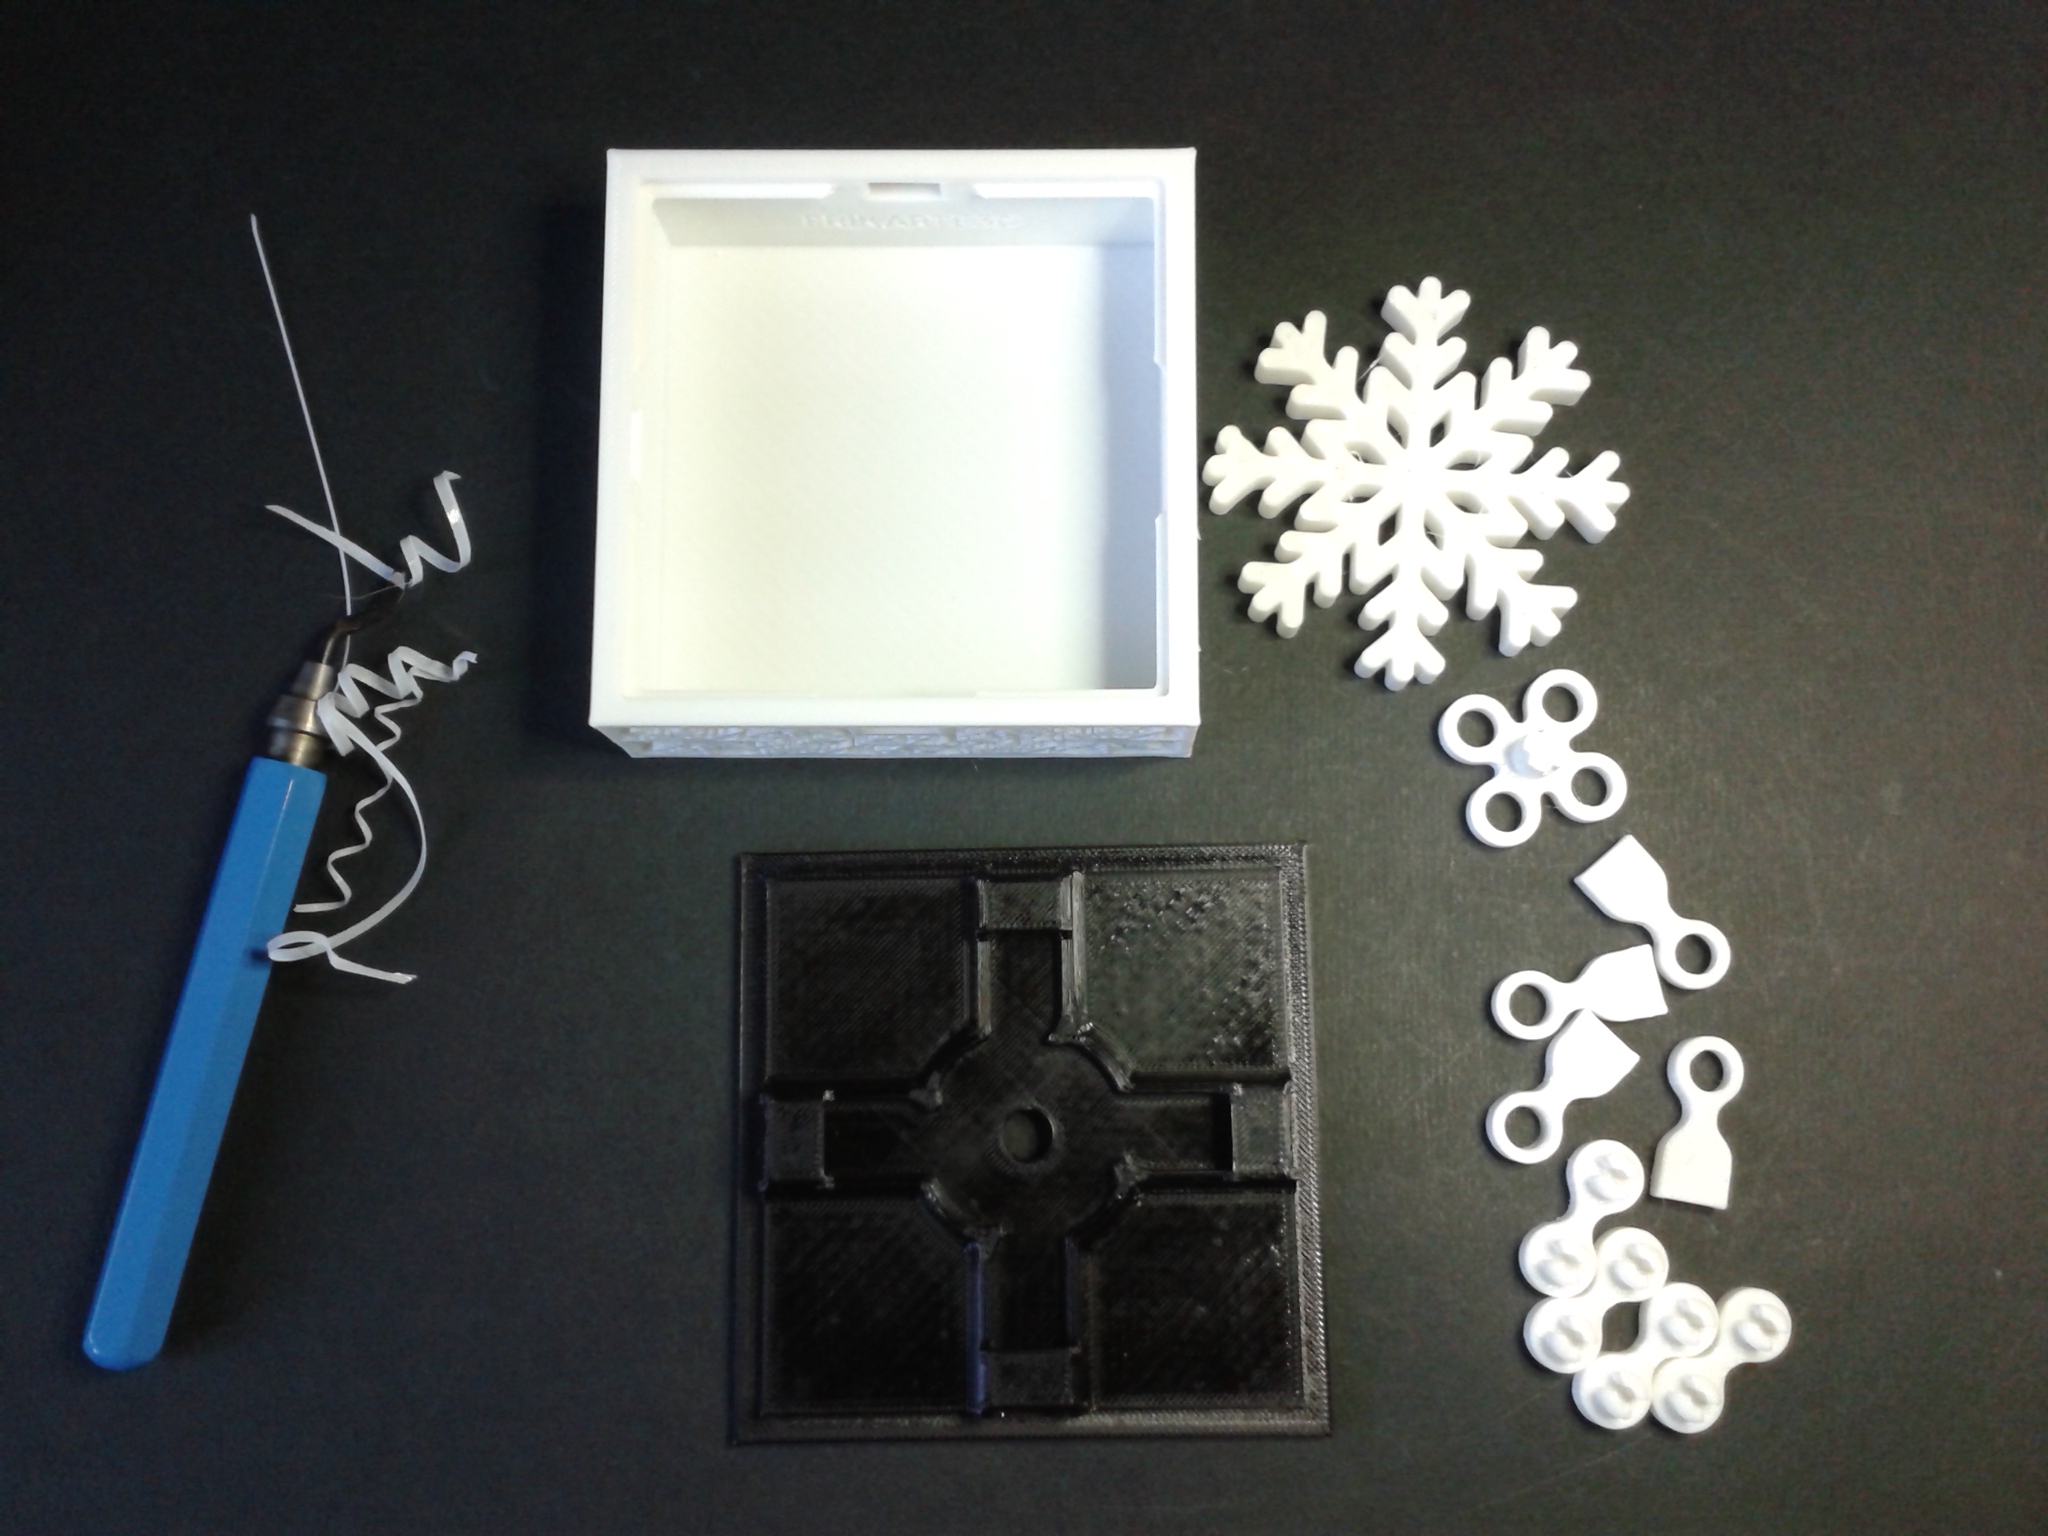
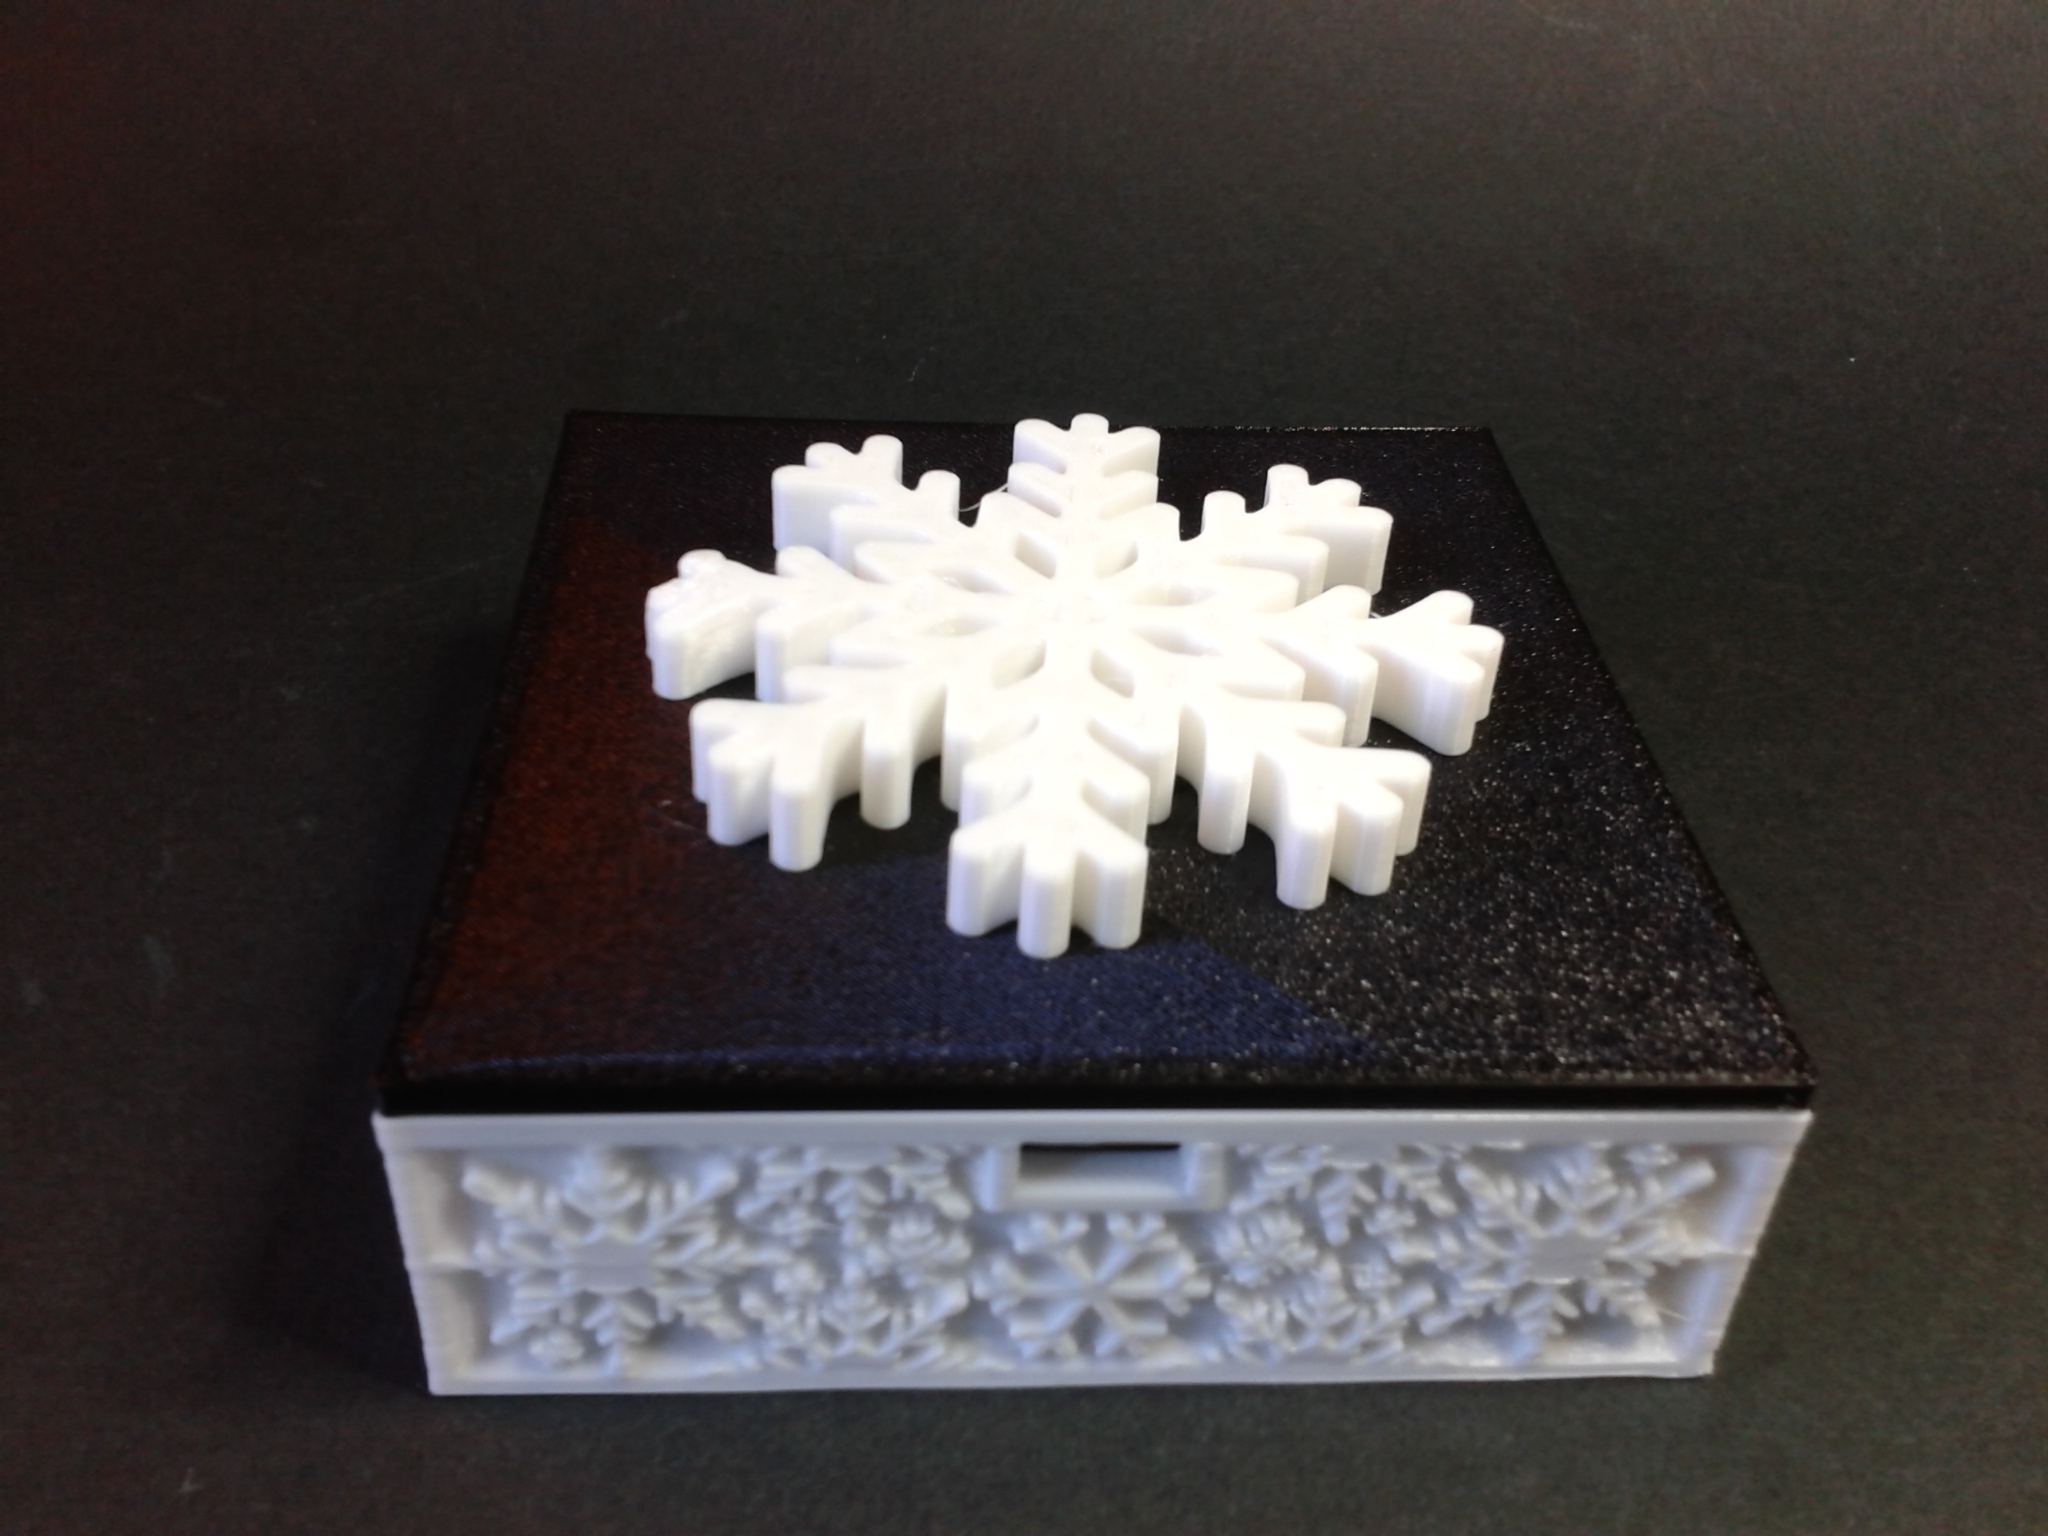
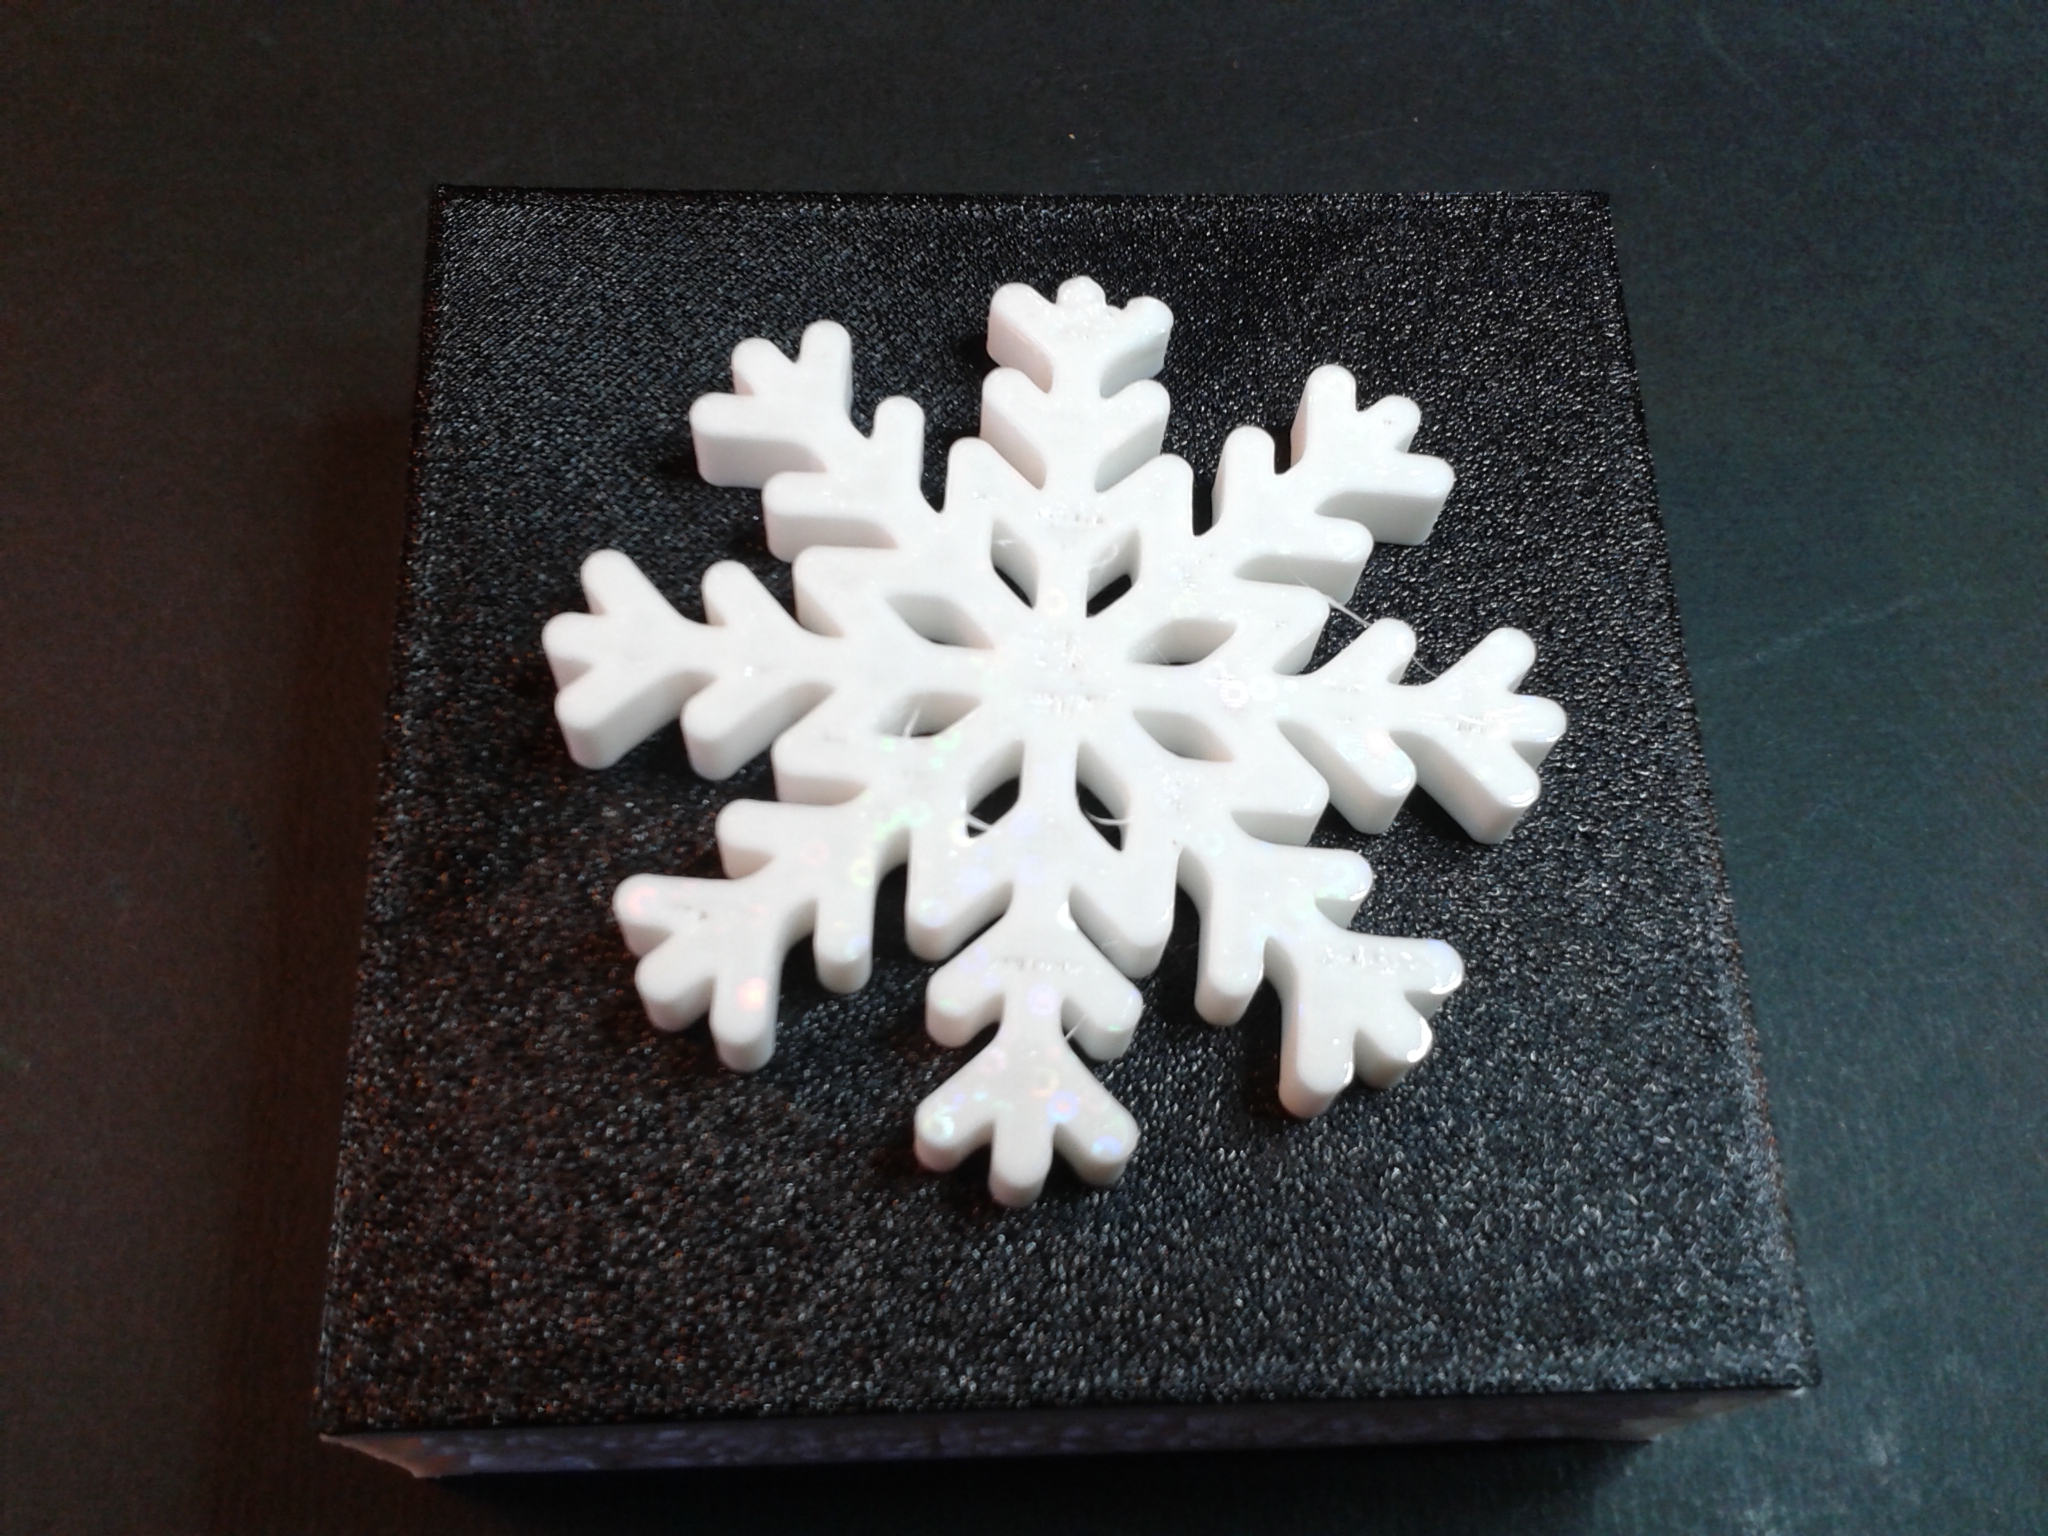
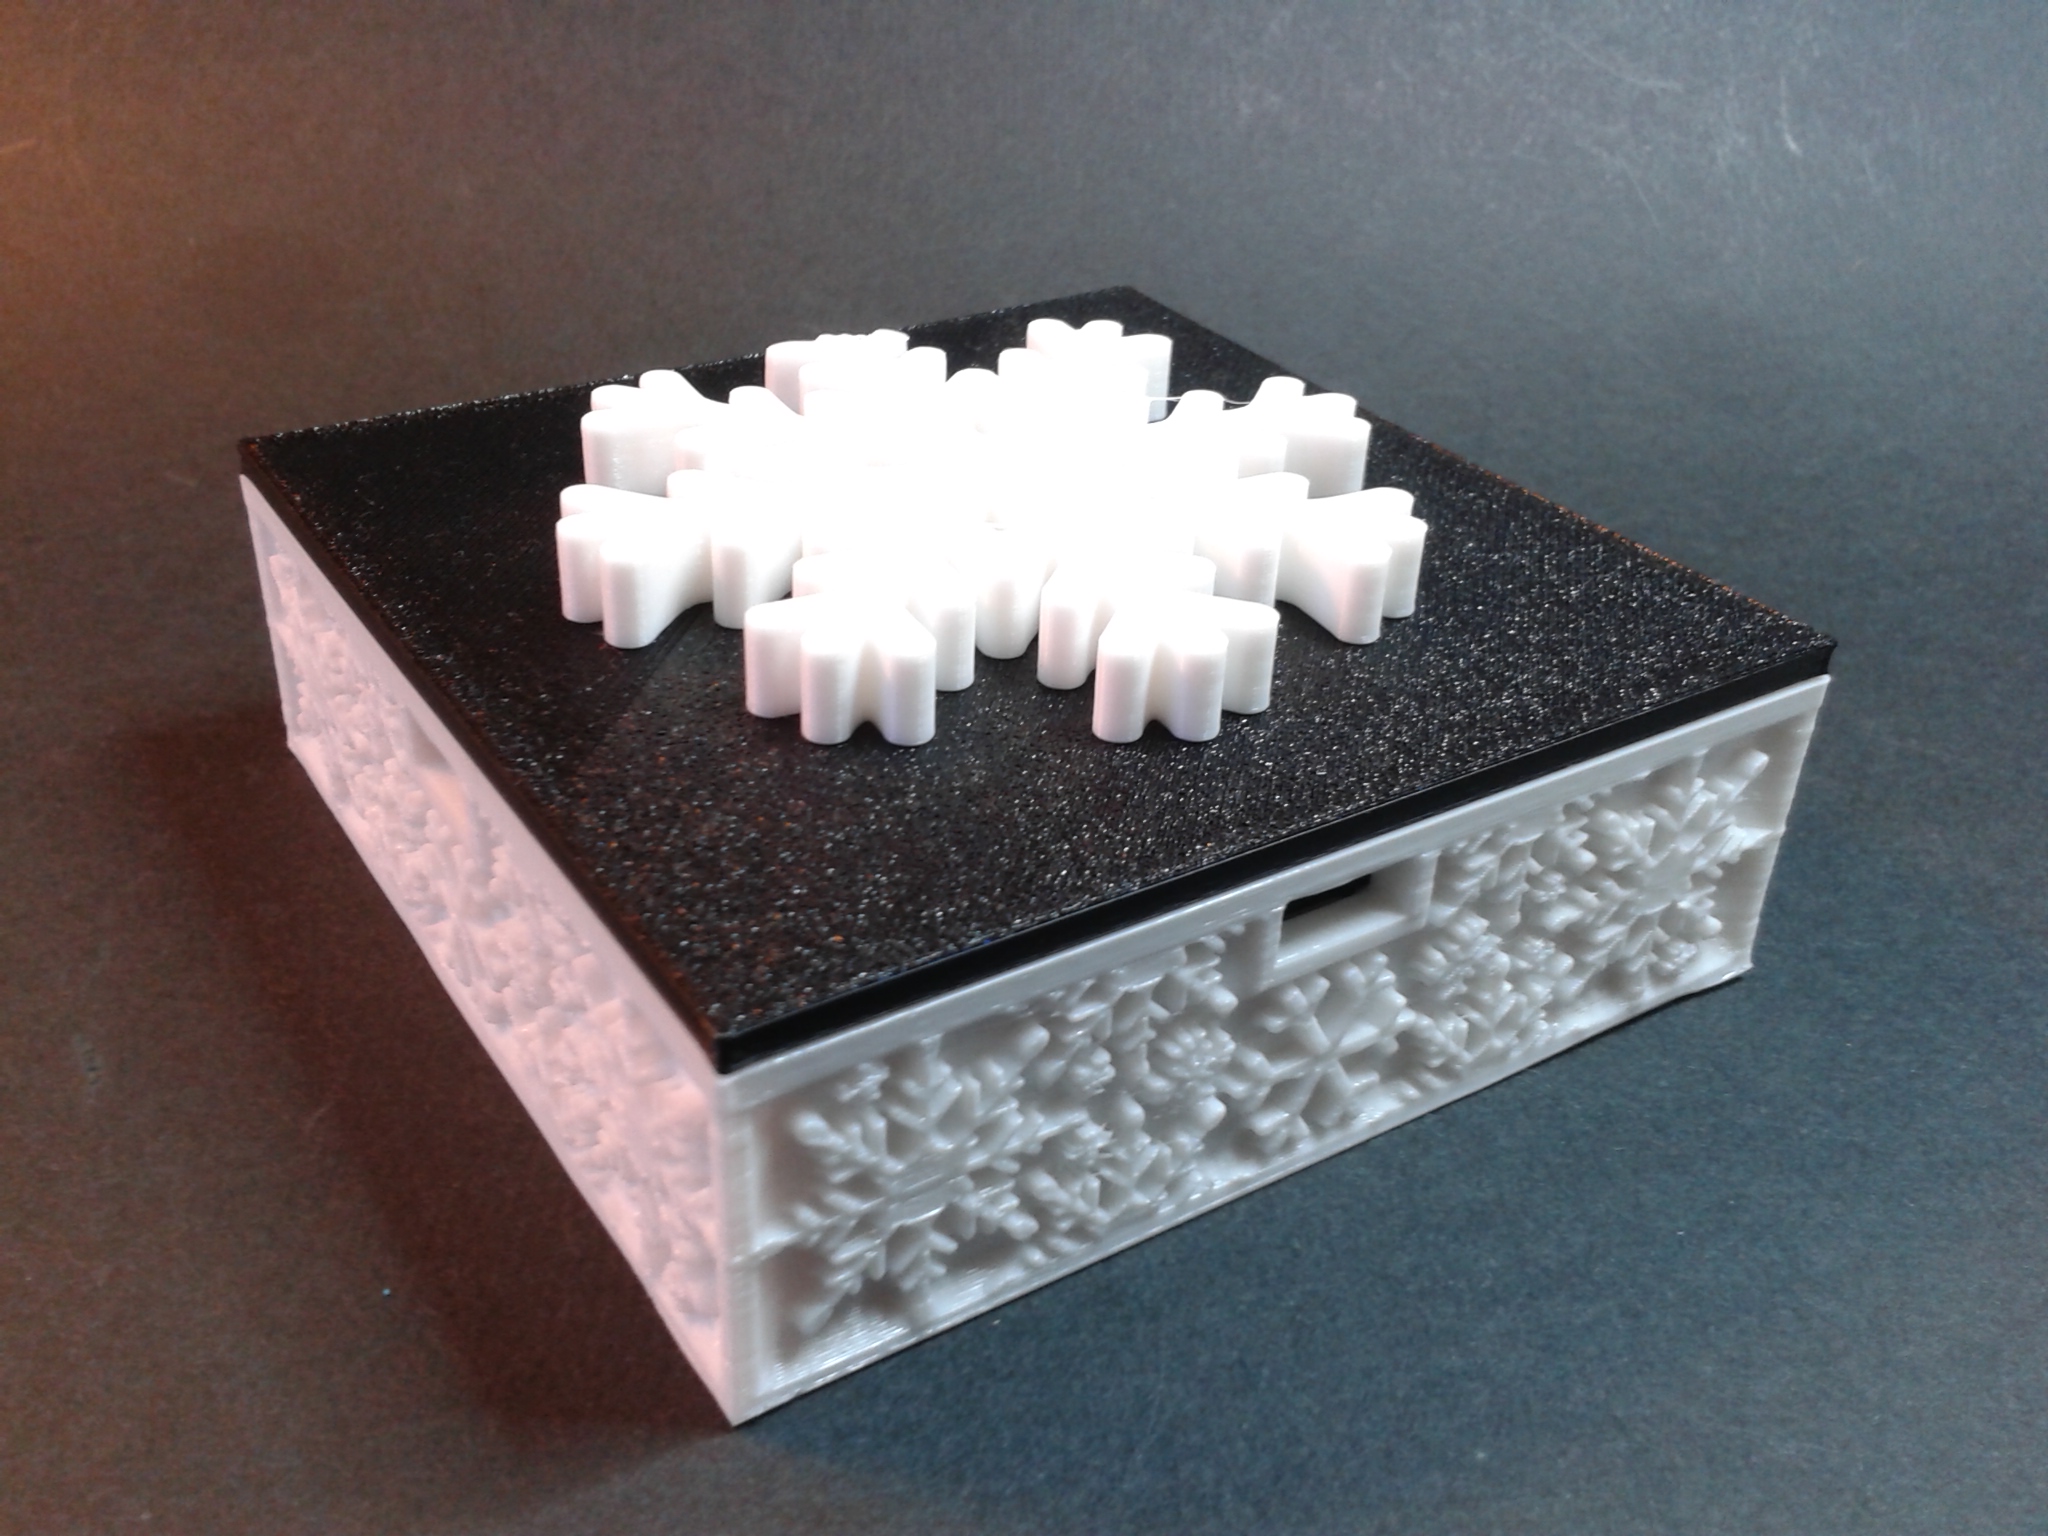
“Snowflake Mechanical Box” de “Frikarte3D”.
J’ai imprimé le flocon sur un plateau flexible “PEY circle” et je n’ai pas réussi a obtenir une couche initiale parfaite, faut d’adhérence (le PETG à cette vitesse d’impression adhère difficilement à la surface PEY). Donc, ne pas tenir compte de la qualité d’impression du flocon ni de la surface du couvercle car j’ai réajusté le Z-Offset en cours d’impression de la couche initiale (Z-Offset que j’avais modifié dans mes essais avec le plateau PEY).
Lire le test du plateau PEYEnviron 5h57 d’impression au total.
Filaments : PETG noir Sunlu, CR PETG blanc Creality.

Améliorations et upgrades
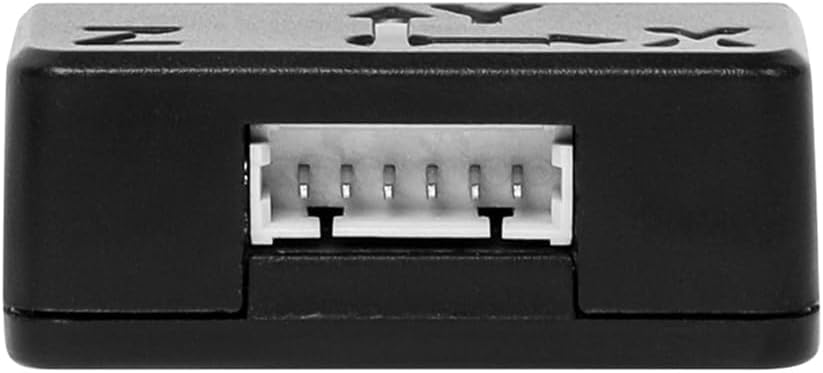
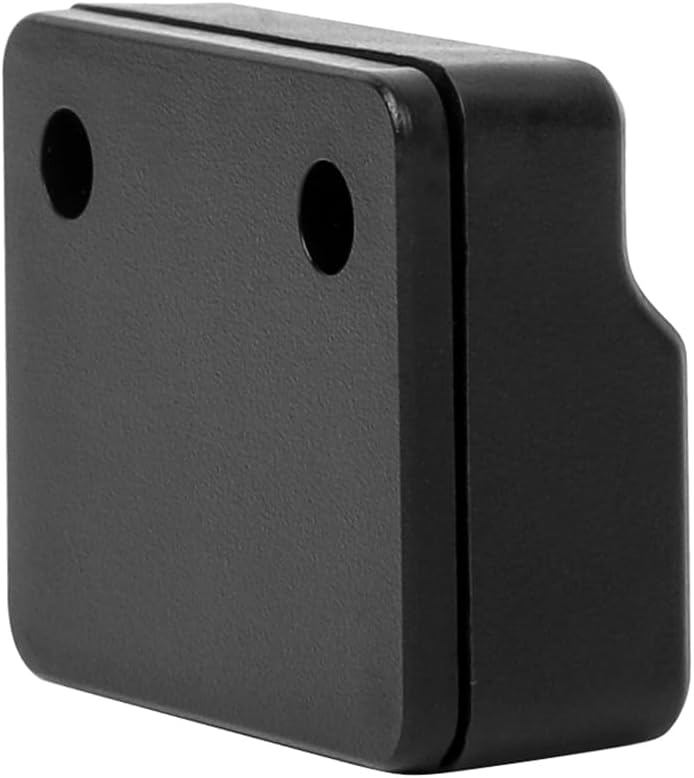
D’après la fiche produit de la Ender-3 V3 KE, Creality propose en option, un “Vibration Compensation Sensor”, un capteur de compensation de vibrations ADXL345 pour permettre d’ajuster les valeurs pré-enregistrées dans le firmware par Creality. Je n’ai, pour le moment, pas trouvé de lien officiel d’achat avec du stock. Attention, le capteur ne peut pas être connecté avec le même câble utilisé pour le brancher via un port PS/2 sur un Sonic Pad mais il se connecte via un port USB Type-C a l’arrière de l’écran Nebula Pad.
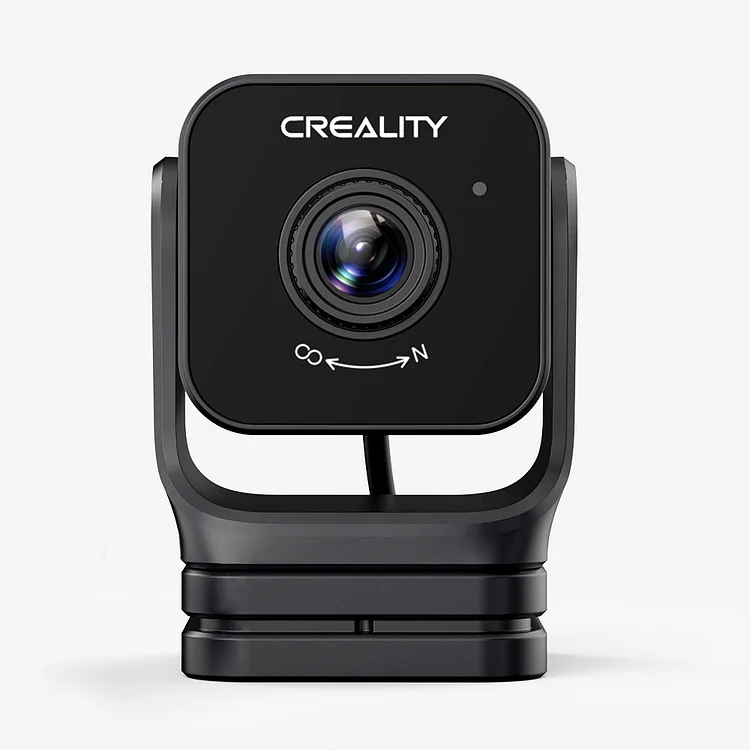
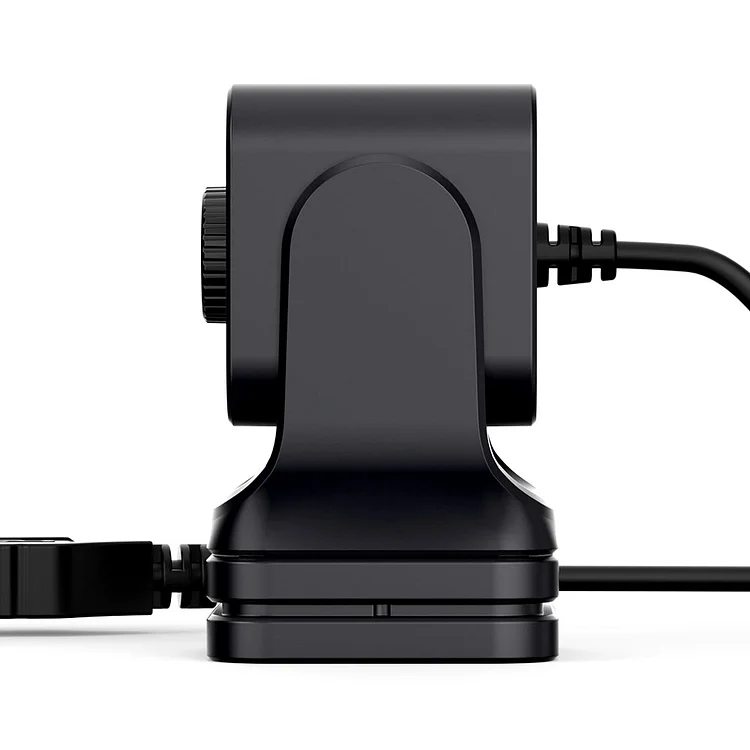
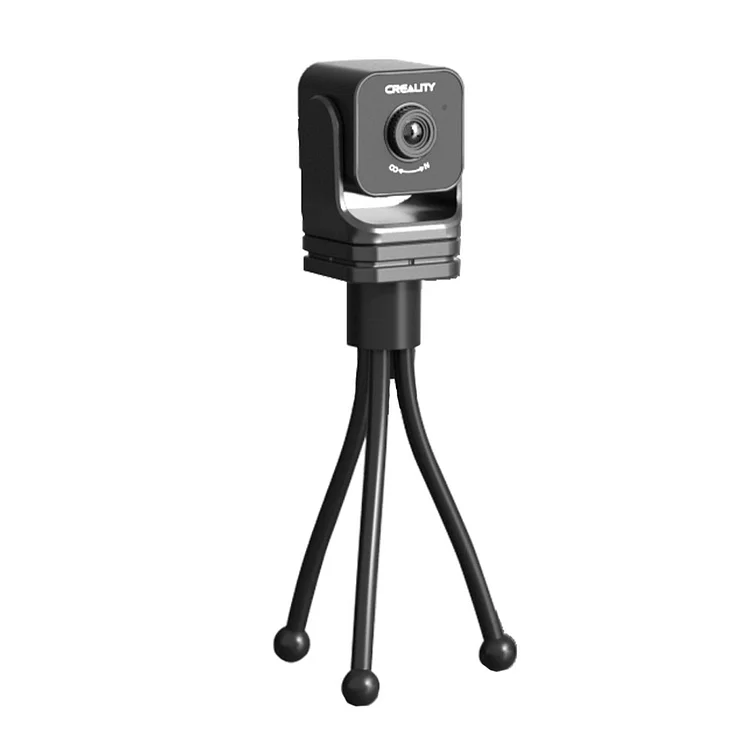
Creality propose aussi la “Nebula Camera“, une caméra USB avec vision de nuit, pour surveiller et réaliser des vidéos timelapse des impressions. A vérifier si la détection des anomalies de type spaghettis lors des impressions requiert un compte Creality Cloud Premium.
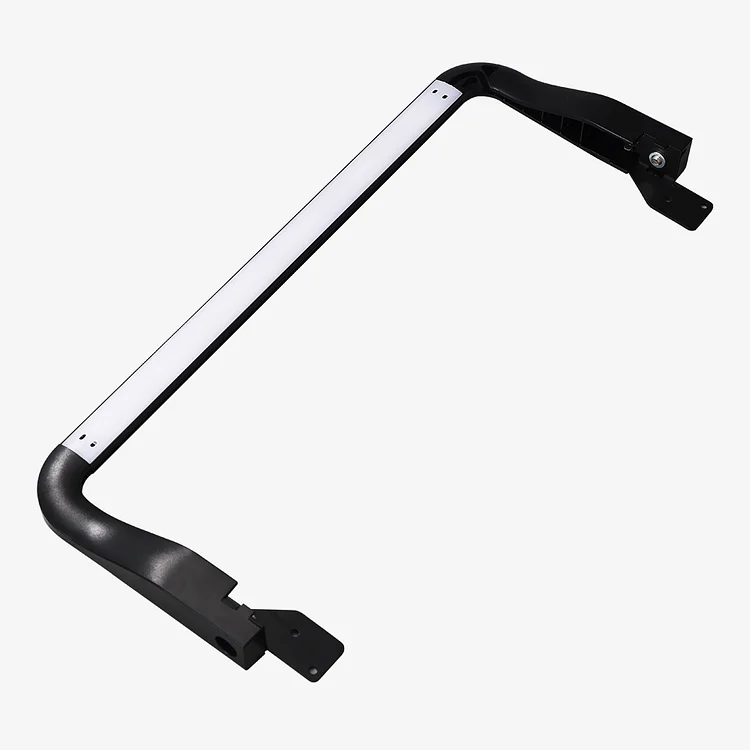
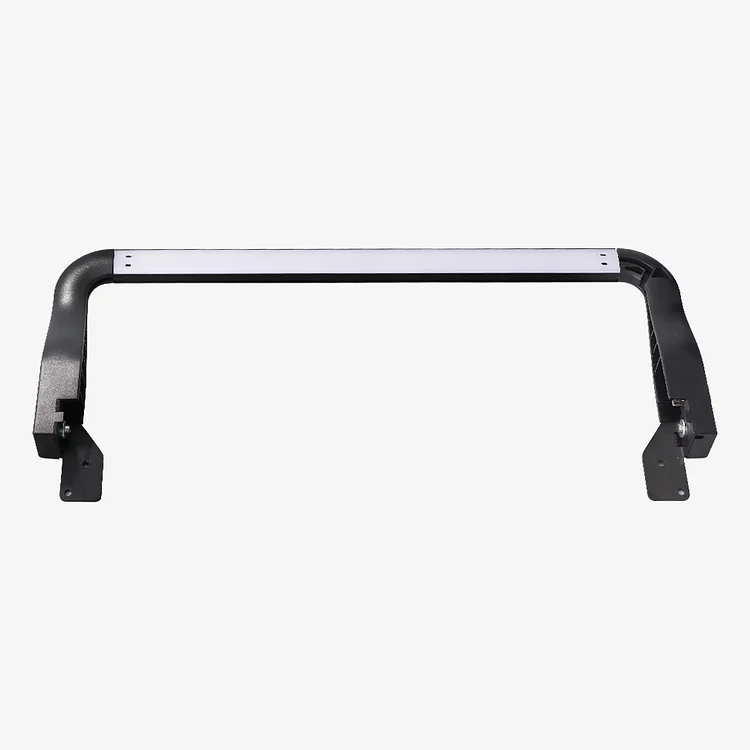
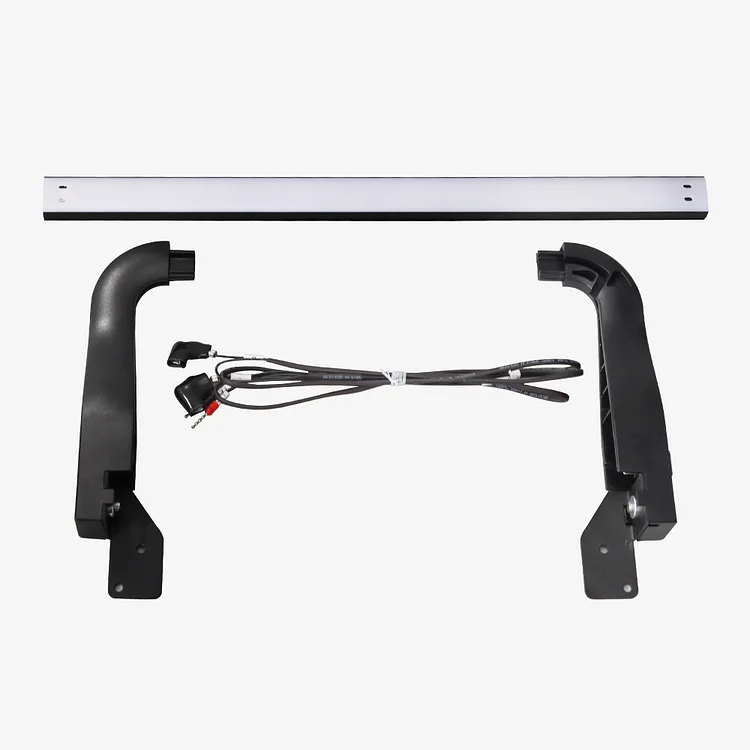
Il est aussi possible d’installer un éclairage LED “Ender-3 V3 KE/SE LED Light Bar” (fiche produit).
Elle se connecte directement sur le bloc d’alimentation et dispose d’un interrupteur manuel. A voir si on peut allumer / éteindre la lumière par l’écran Nebula Pad et à distance depuis un ordinateur.
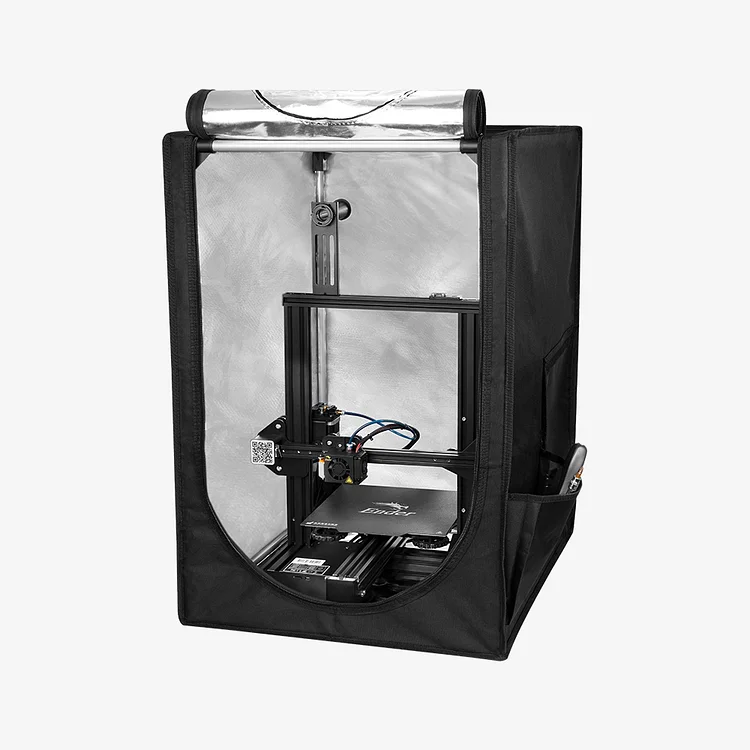
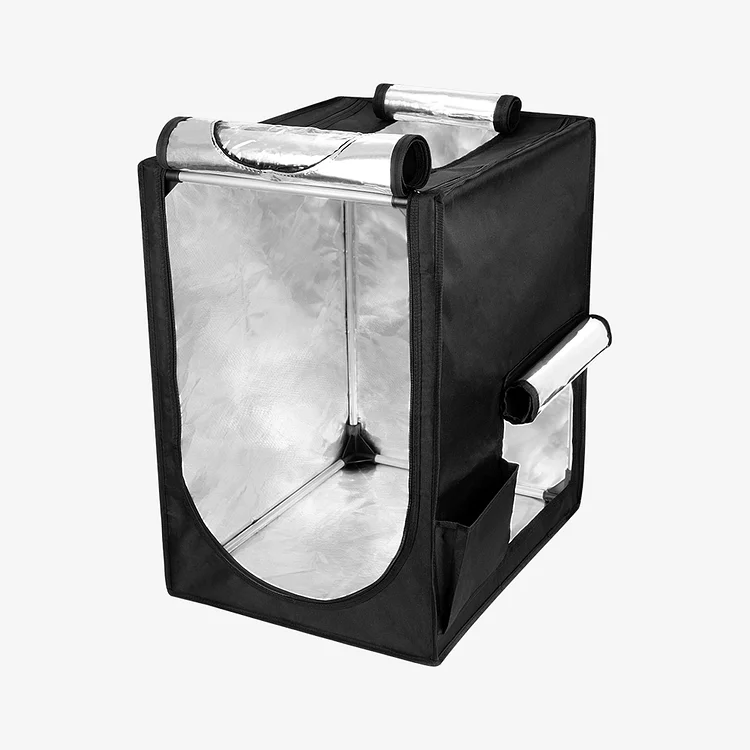
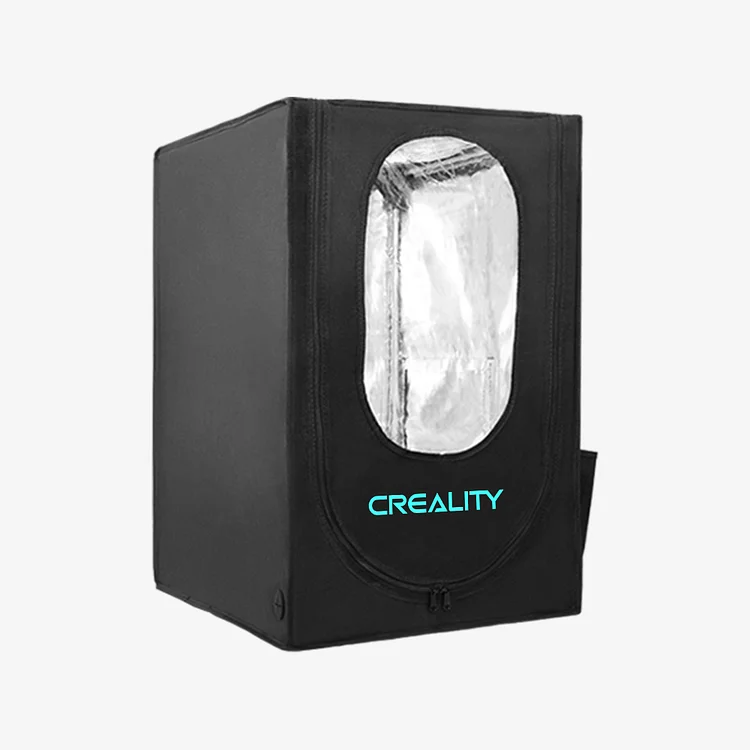
Comme le heatbreak est un brise-chaleur bi-métallique (alliages de cuivre et de titane), on peut même envisager la possibilité d’imprimer de l’ABS et autres matériaux plus exigeants comme de l’ASA. Pour cela, une enceinte de protection comme l’enclosure Creality ou un modèle fait maison, seront cependant nécessaires.
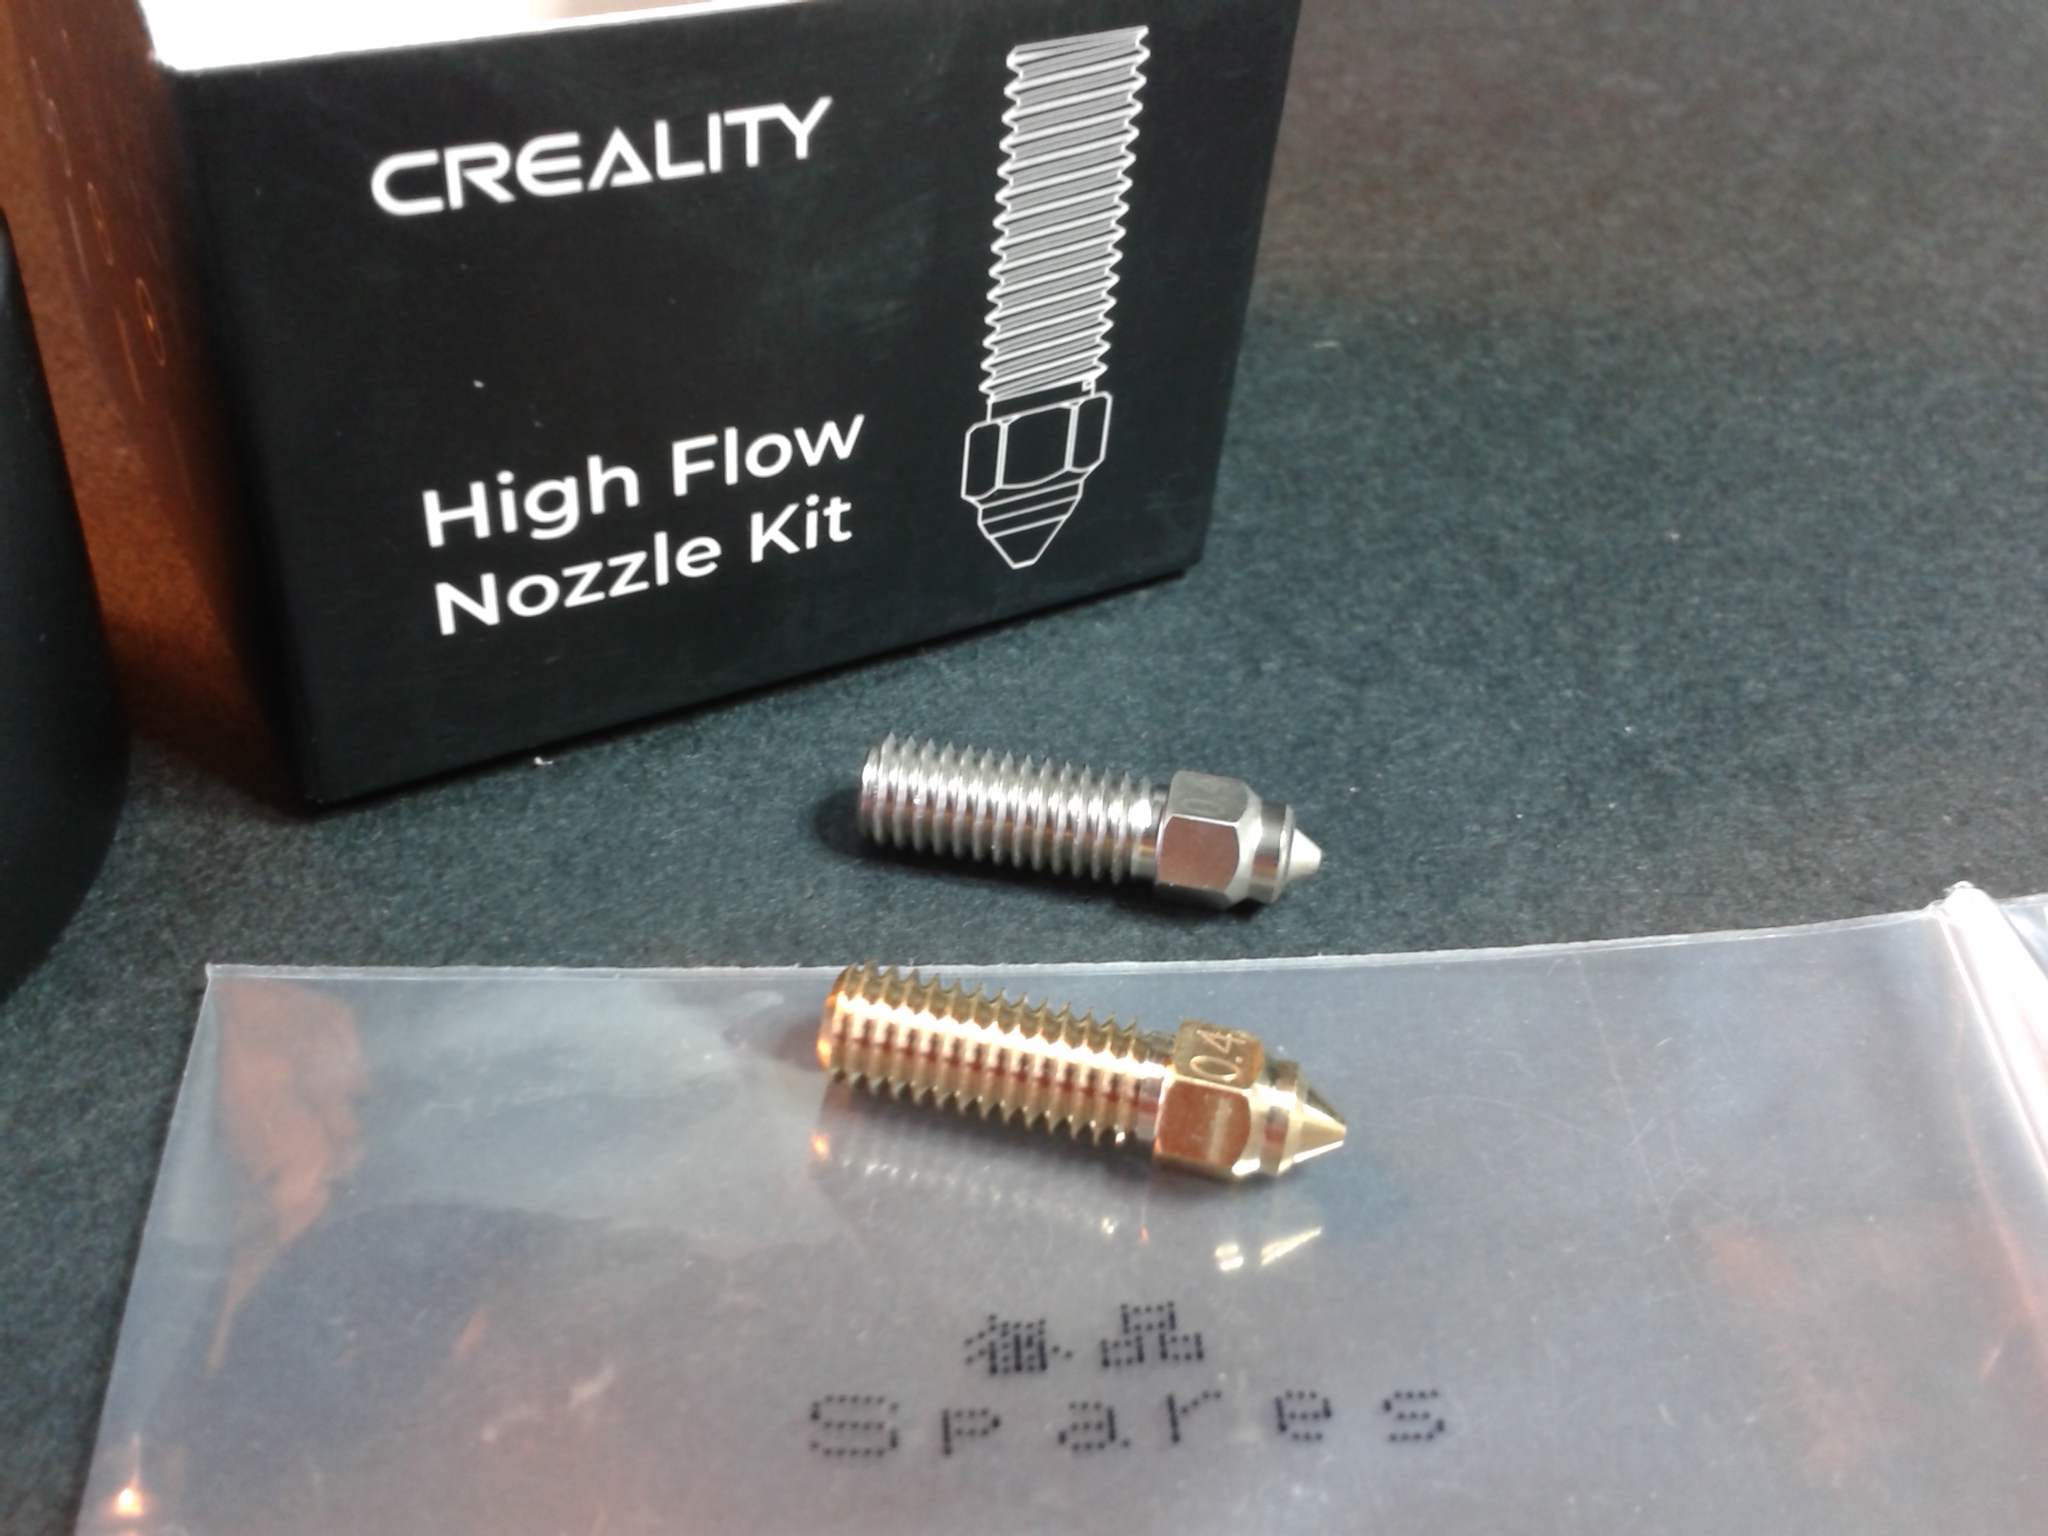
Même si Creality livre une buse de rechange en laiton dans le kit de la Ender3 V3 KE, j’ai profité de mes “Cuvacoins” accumulés sur mon compte Creality Cloud pour prendre un lot de buses (K1 Max High Flow Nozzle Kit Bimetallic Material) en alliage de cuivre, pour également disposer d’un diamètre de 0.6 et 0.8 mm.


Notes et conclusion
Qualité d'impression - 9
Fiabilité - 9
Logiciel - 8.5
Utilisation - 9.5
Rapport qualité / prix - 10
9.2
/10
- Facile à assembler
- Simple à mettre en fonction grâce au leveling et mesure automatiques du Z-Offset
- Capteur de fin de filament
- Reprise sur coupure de courant possible (plateau "PC" recommandé)
- Plaque flexible texturé "PEI" qui libère facilement l'impression quand revenu à température ambiante
- Les profils de matériaux dans Creality Print
- Gestion du g-code M600 par le firmware pour demander un changement de filament durant une impression
- Code source du firmware disponible sur GitHub
- La connectivité Wi-Fi
- Bonne qualité et vitesse d'impression
- Communauté active sur Facebook et SAV constructeur réactif
- Le porte-bobine sur le portique augmente les effets de résonance et les oscillations
- Pas de capteur de résonance fourni par défaut
- Pas de gestion du g-code M300 pour les bip sonores
bonjour,
super explication.
seule problème je n’arrive pas a trouver mon imprimante sur creality print et du coup à part le bateau je ne peux rien faire.
pouvez vous m’aider à trouver comment installer mon imprimante sur l’application de l’ordinateur svp
Bonjour,
La Ender 3 V3 KE est listée dans Creality Print depuis sa sortie. Vous pouvez télécharger la dernière mise à jour de Creality Print pour vous assurer d’avoir la version la plus à jour du logiciel et du profil d’impression.
Très bon article, merci. Je pense que je vais craquer pour une Ender 3 V3 KE. Sur ma machine actuelle, une Ender 3 (tout court), j’ai installé (avec un petit adaptateur) un endoscope pour surveiller précisément l’extrusion. Savez-vous si tel montage est possible sur cette machine Ender 3 V3 KE ?